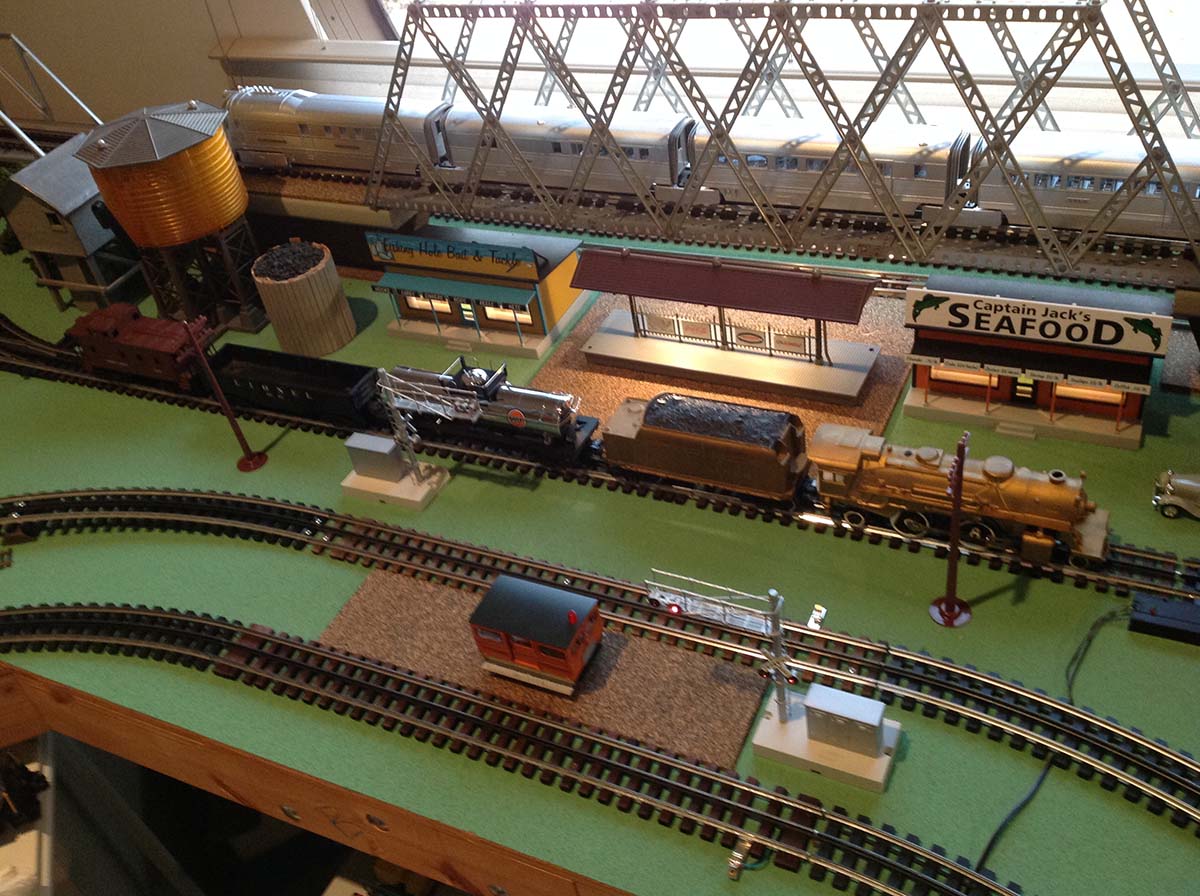
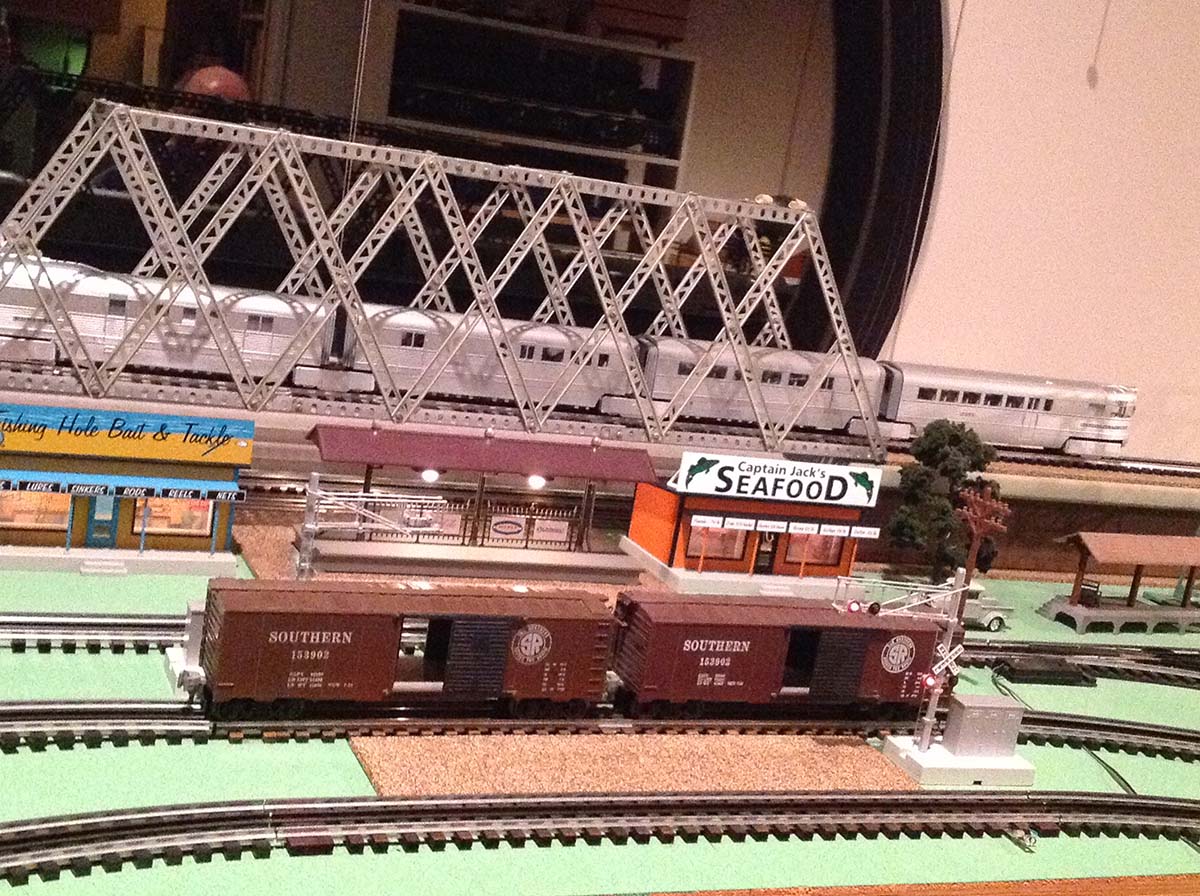
“Hi Al … just wanted to add some further comments on my Dog-bone layout … it was constructed of 2 x 4 wood framing with 3/8″ plywood table top surface …
the entire surface was covered with 3/16 ‘ cork (roadbed material) and painted green …
all Gargraves track was used with 054 and 042 curves … all switches are 042 …
the layout not highly detailed but meant to give the visual illusion of detail …
refined detailing can be added but right now I am just into running the trains …
the most complete layout I have ever had and still a work in progress …
will further advise on this layout and follow up on a layout I started a few years ago but had to temporarily abandon to finish off some attic space …
Bob … German TN … USA”
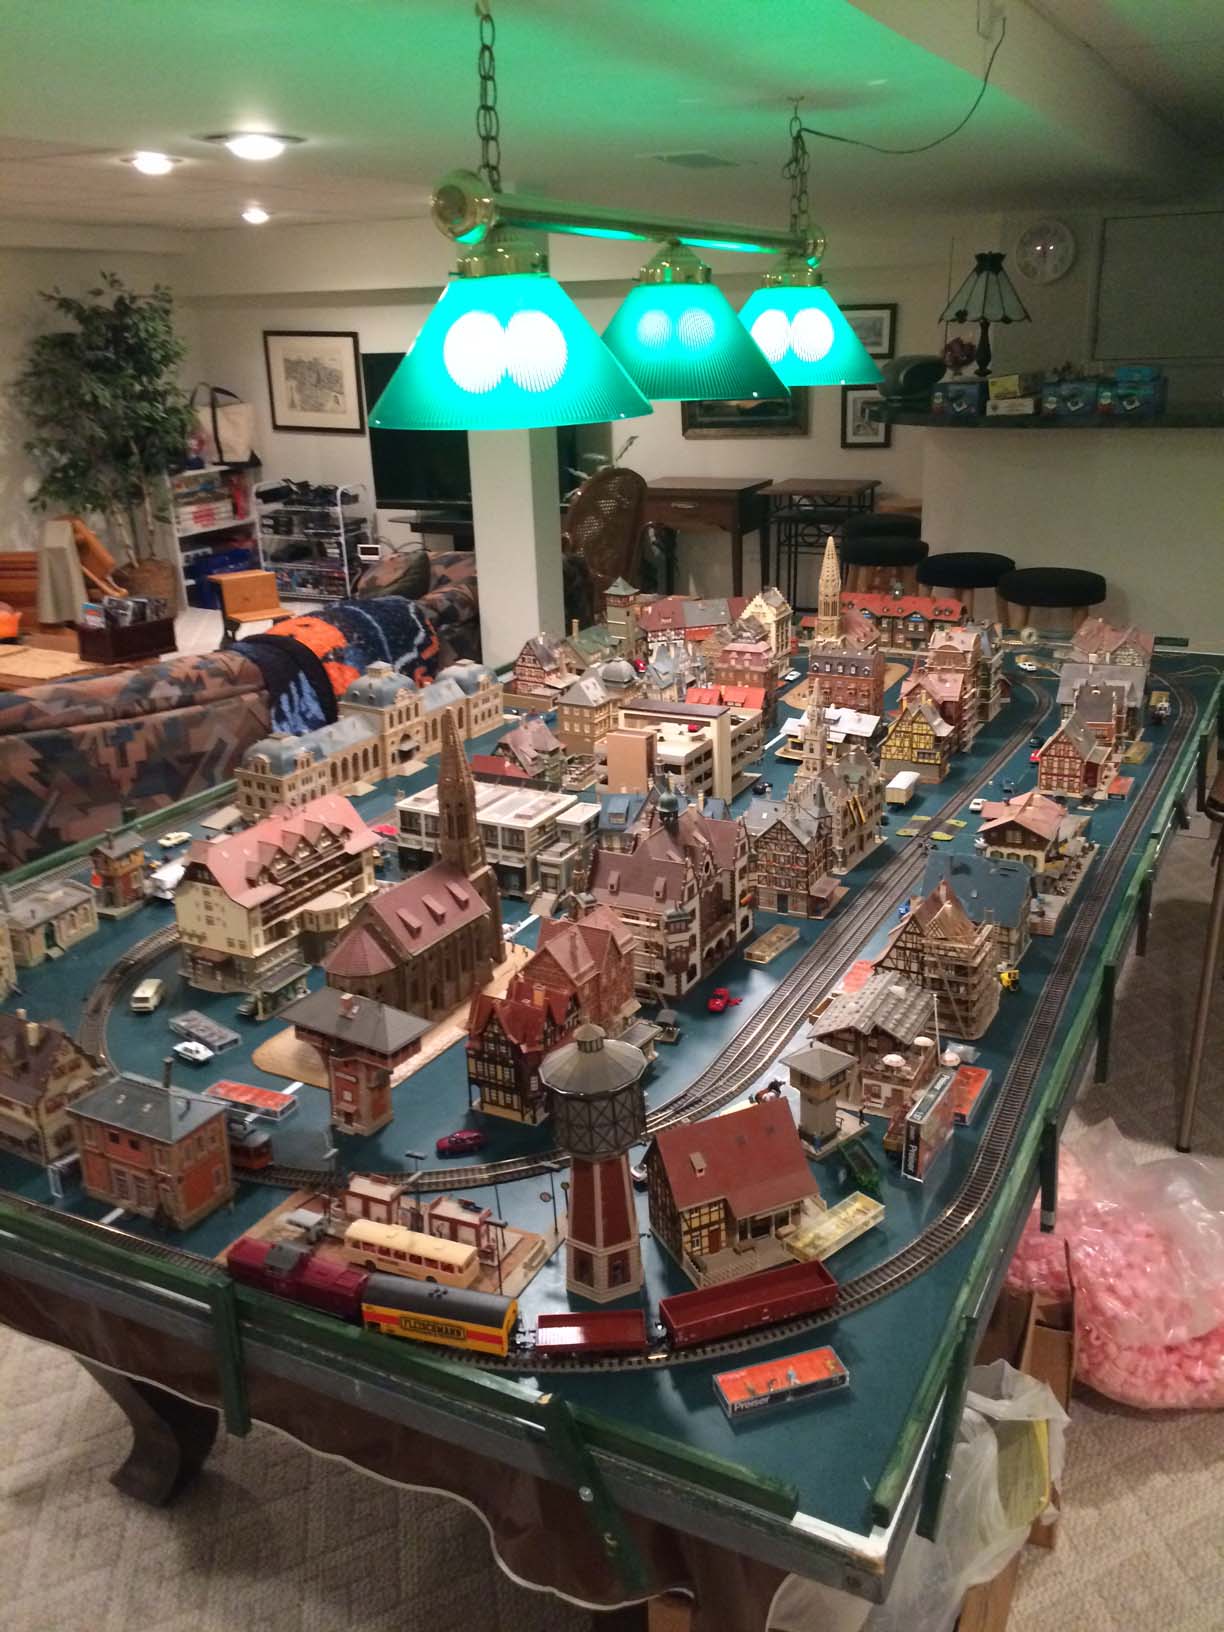
“Hello Al,
I appreciate your emails and all the information.
Over the past 35 years I have built almost 100 of these Buildings & accessories…..about 60 in this 4 x 8 layout.
Someday I hope to do a more detailed layout.
Best Regards
John”
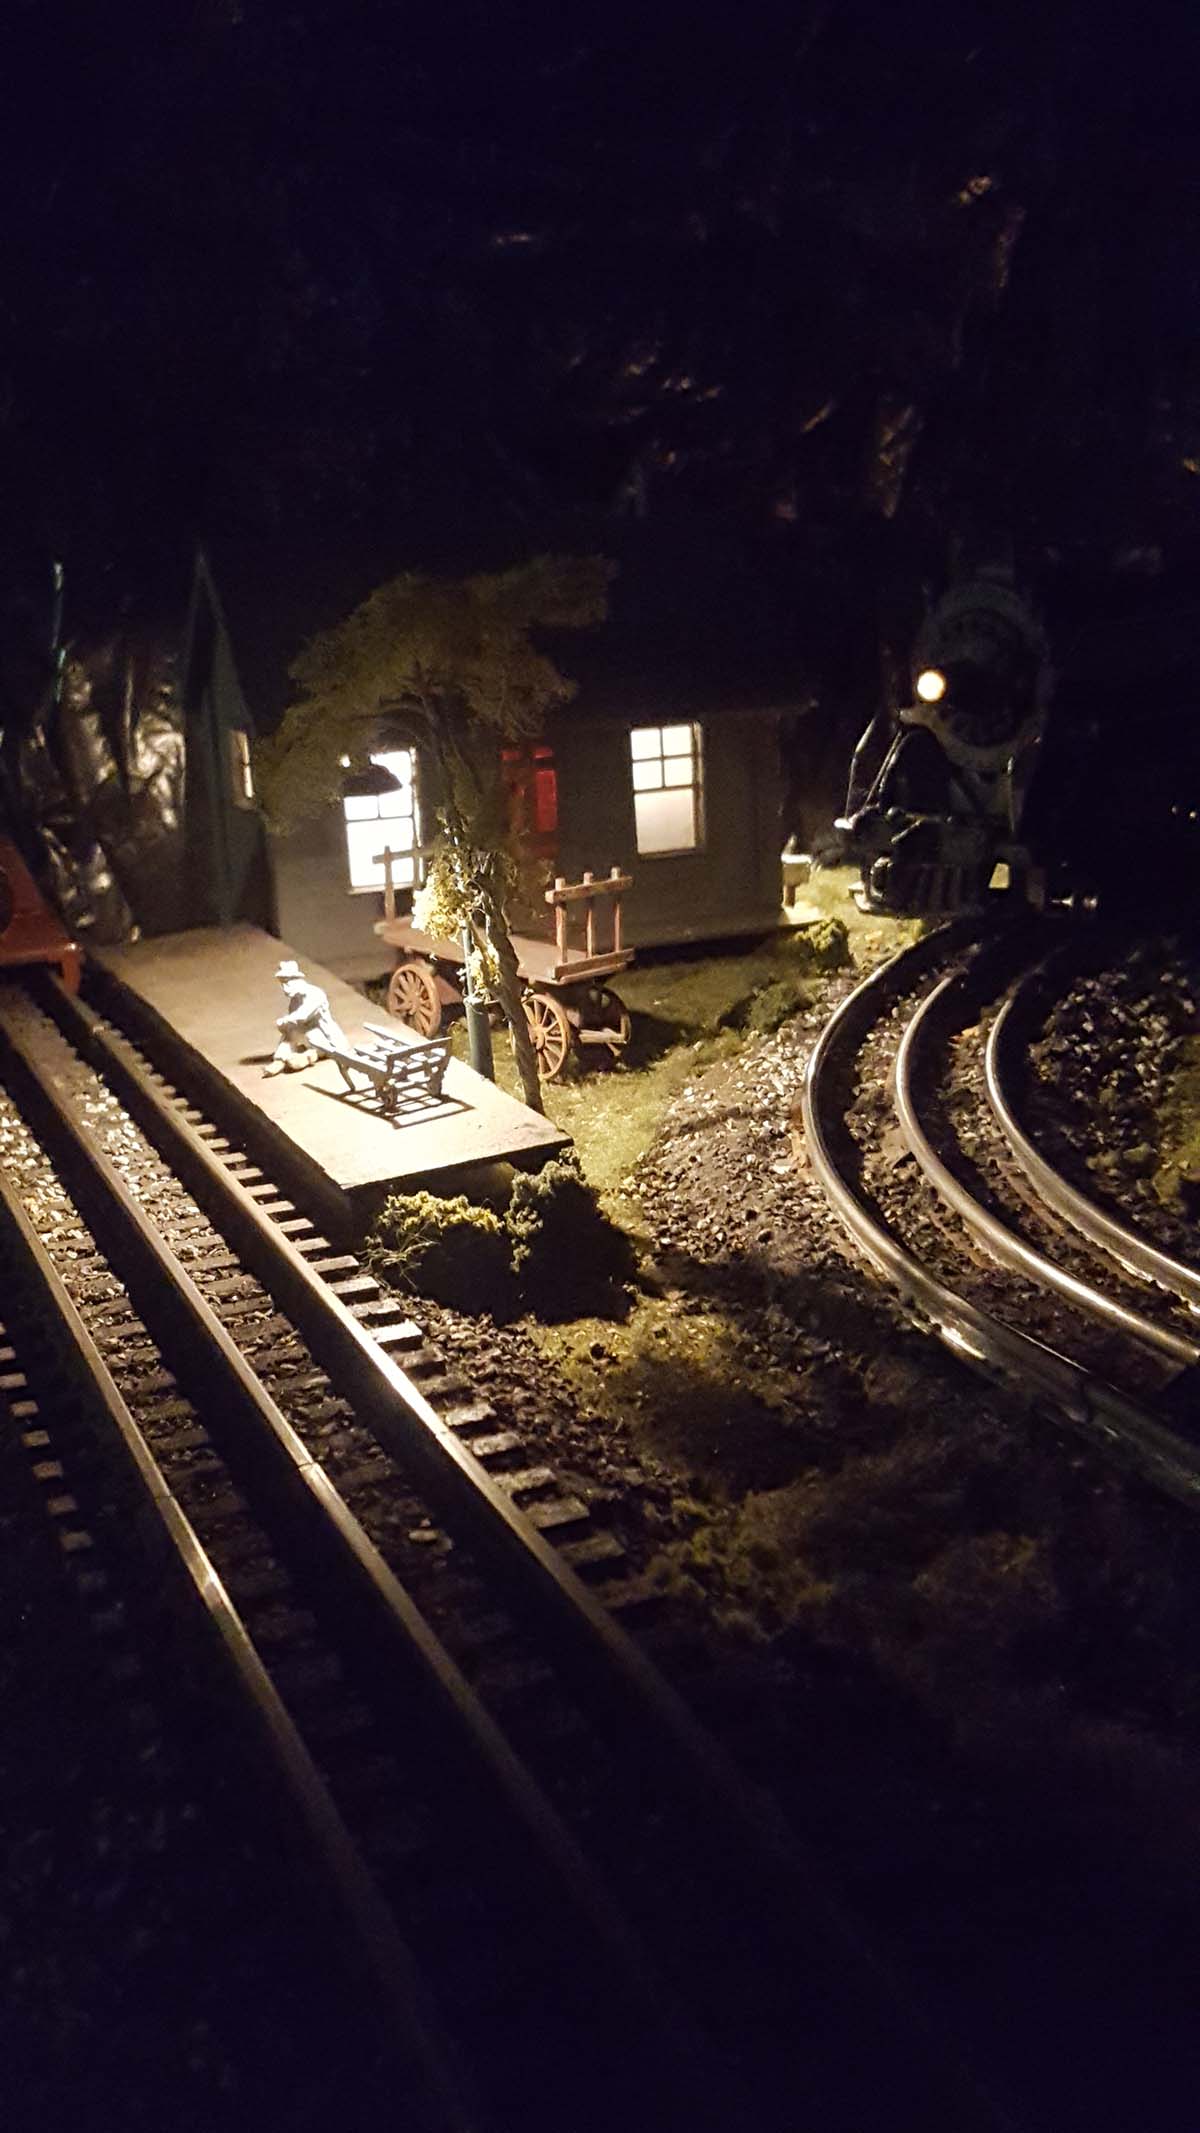
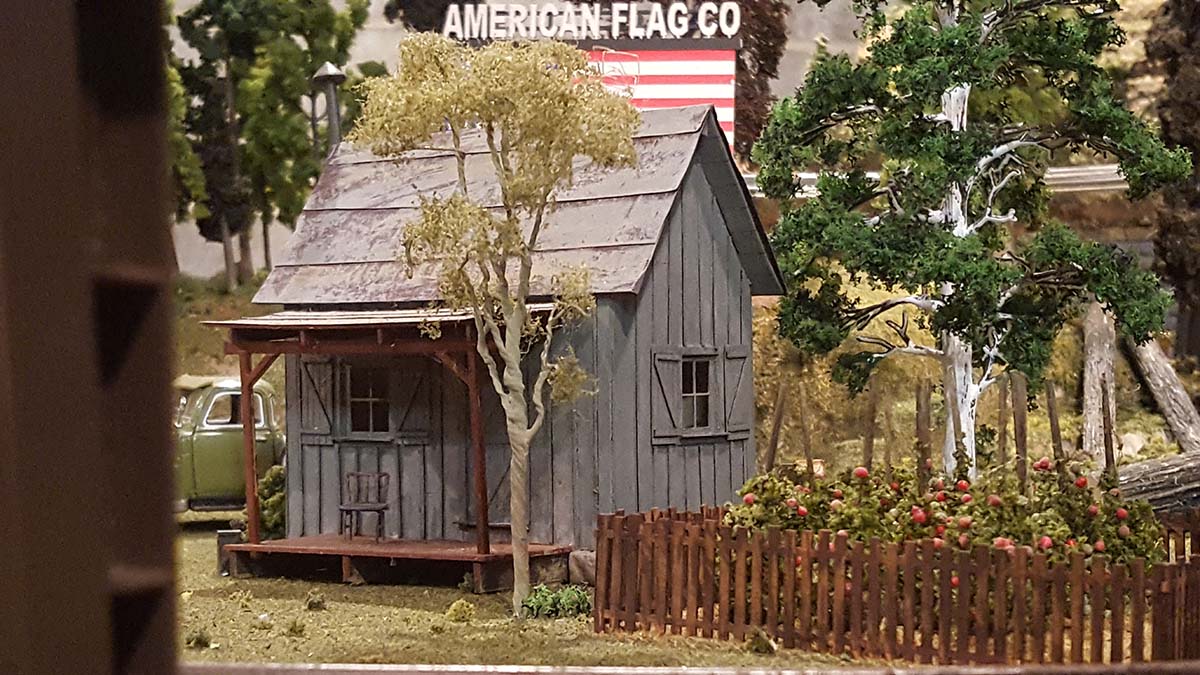
“All some very simple images.
The partial American flag image was from the American Flag Company that was destroyed when a pipe burst right over the layout.
I scratch built the depot station building as well as the loading dock. The cars and barrels have been rusted out.
Enjoy
George”
Now on to Dave:
“Hi Al,
just uploaded this video showing new sidings added to my layout (which is something we always need) but also showing a couple of good tips.
One is some wire connectors, found cheap on Facebook, but no screws so very easy to use, also becasuse my old soldering station broke, I purchased a new cheap one and found it did a very good job.
It has all the bells and whistles, on off switches and temperature gauge, came in a bag with soldering wire, electrical wire and few extras, all for about £16 ($20), nice to find a bargain these days.
Regards
Dave”
A big thanks to Bob, John, George and Dave.
That’s all for today folks, please do keep em coming because it is jolly quiet this end.
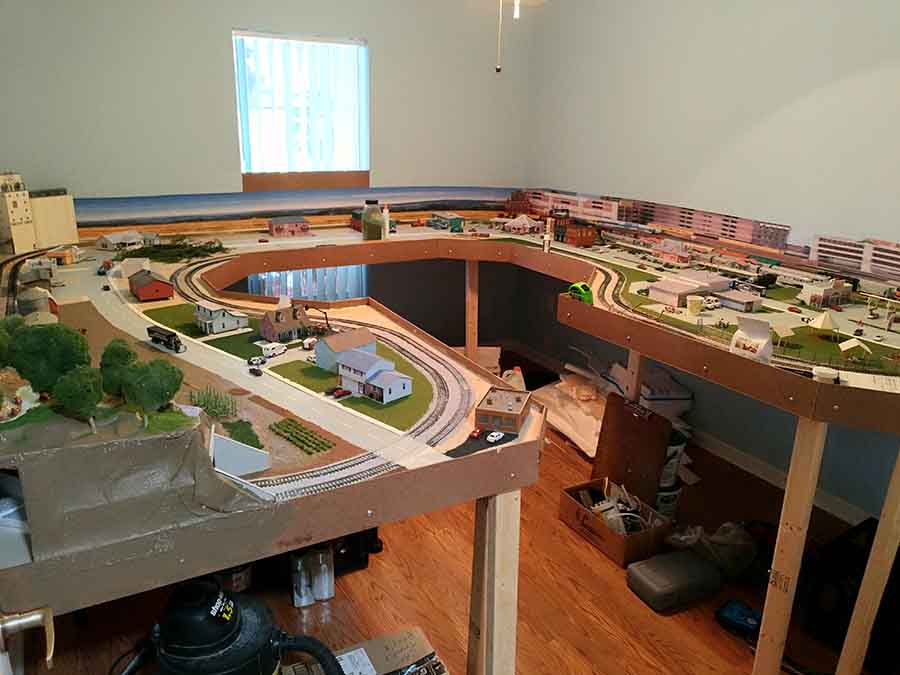
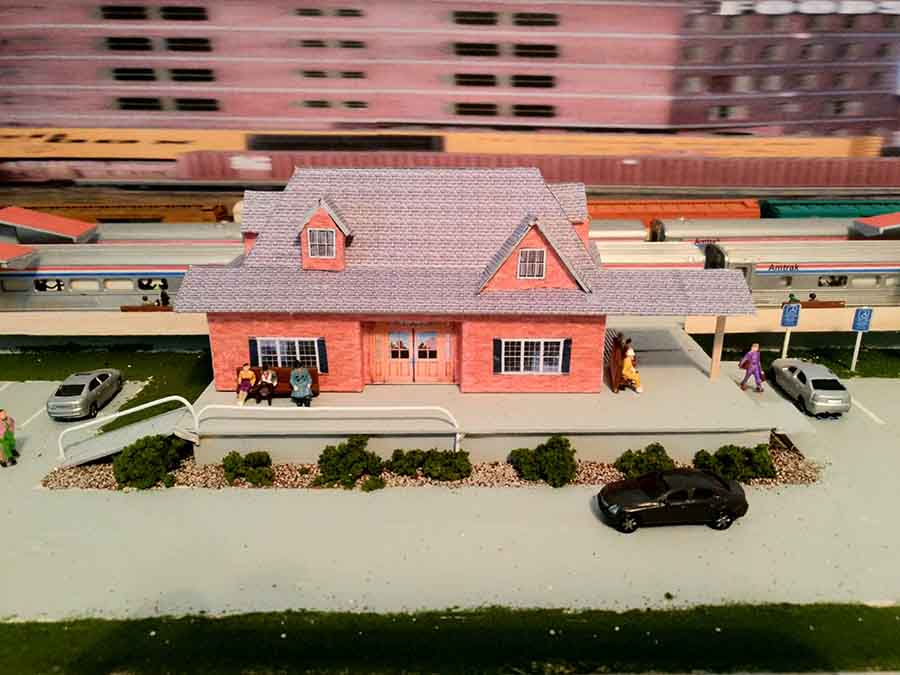
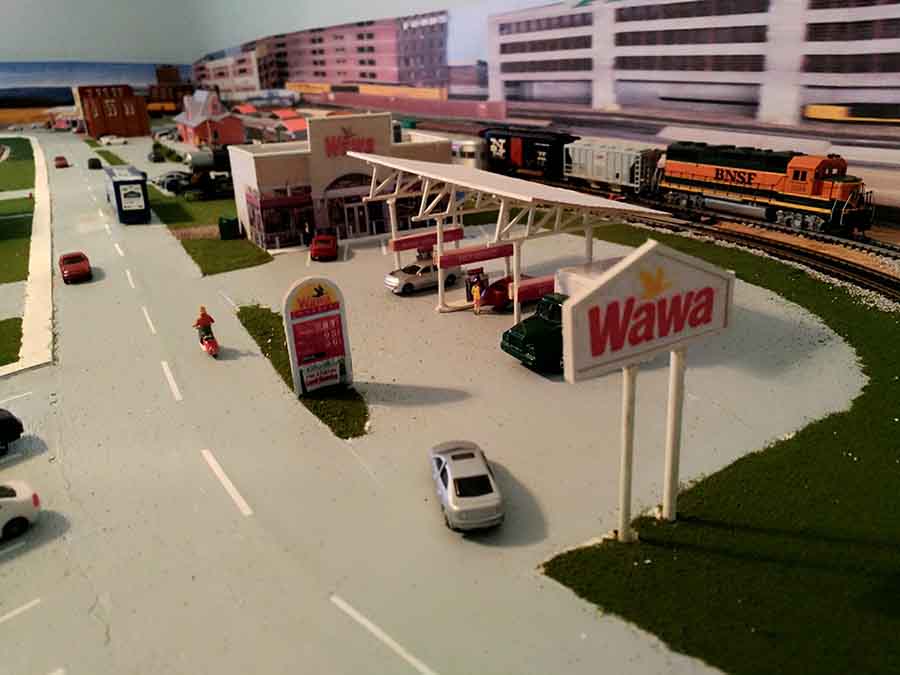
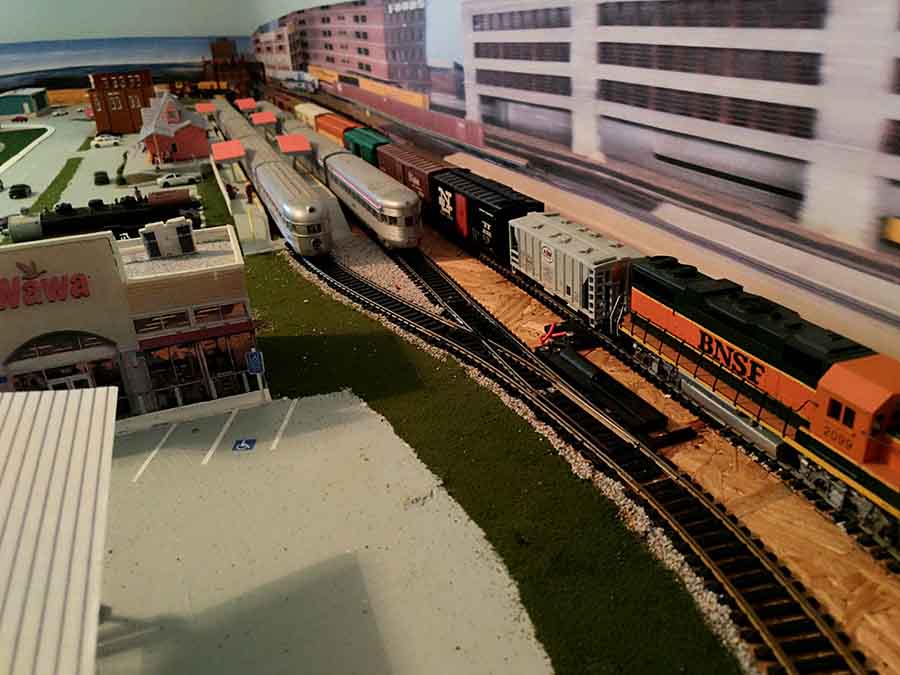
“Hi, several years ago i sent pix of my old layout, I have since moved and building a new HO layout here in Florida. I have less than two months into it so here’s some early pix.
All the buildings you see except for the one with the shops below and apts on top I built myself using balsa wood and pix taken from the internet via google images.
The roadway is convex using wall compound spread with a 3 inch blade. I still have to add an oil streak down the lanes.
The background views were taken from the internet and expanded using print shop as a banner.
The train station I built is in the middle of two 3ft passenger platforms.
I would estimate that after just 2 months work i’m about 20% along. Hundreds of trees to be added and more people. Street lights and telephone poles will be added soon.
System runs on dcc with Bachmann locos.
I will send more as it progresses!
Joe”
Now on to Andrew:
“Hi Al,
Thank you to all your readers and to you for sharing good ideas.
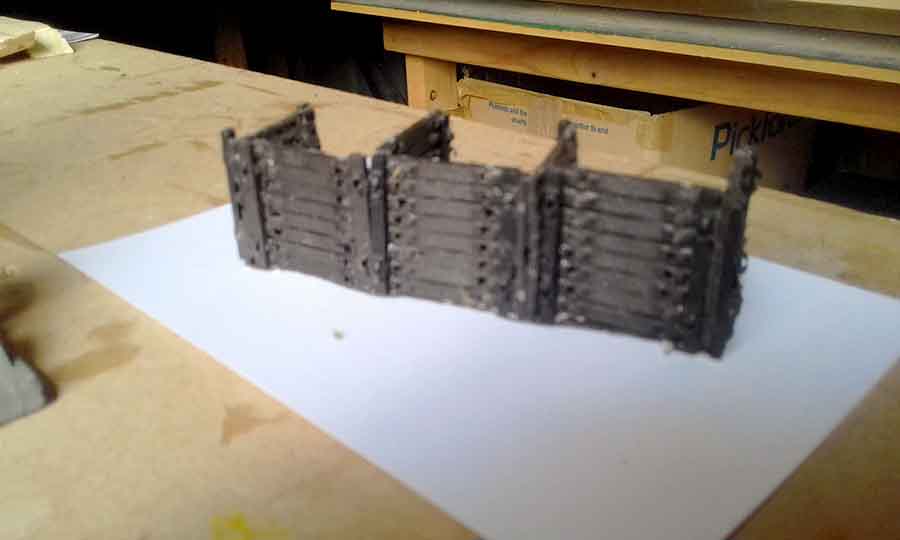
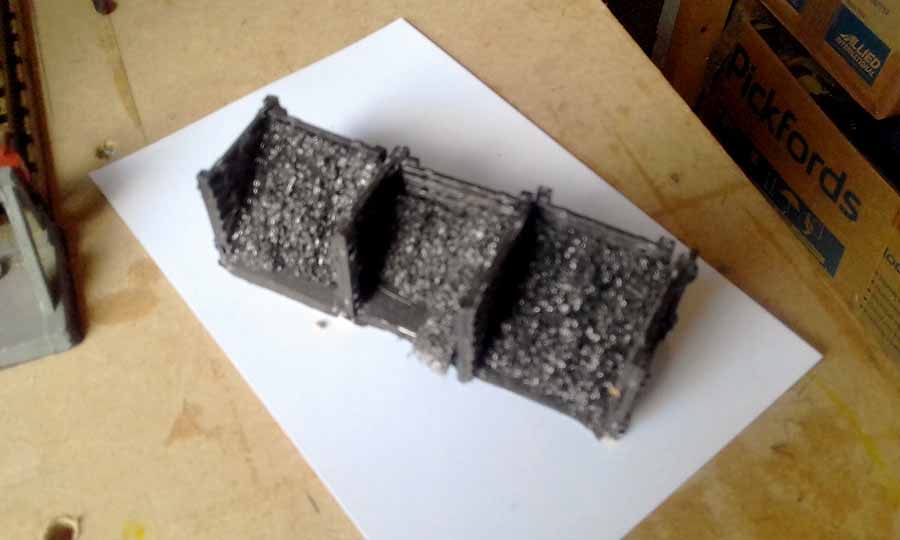
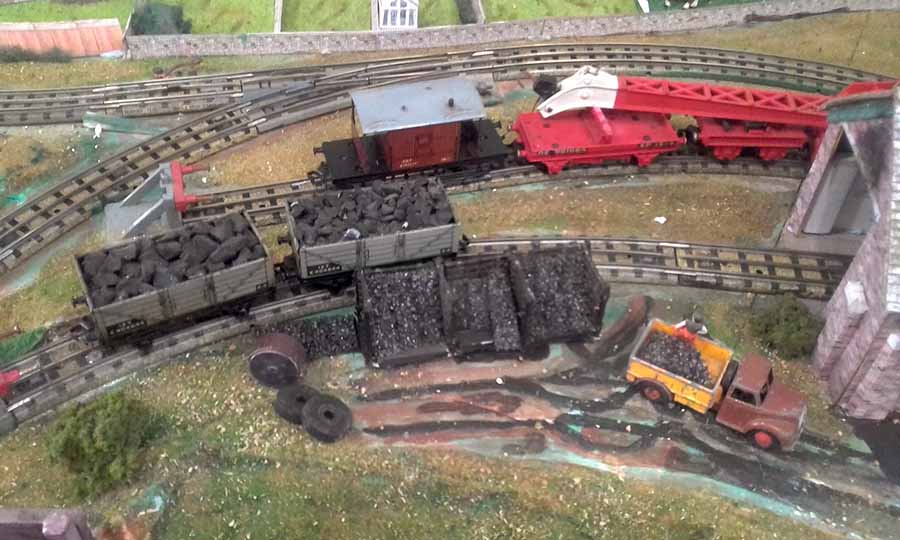
I saw your recent post from Roberto with recycled tracks rails as a cargo for his wagons. Attached are some photos of my use for the spare sleepers. I made coal bunkers with the redundant sleepers and coal from the foam that protected my last computer. Coal in the trucks is random lumps off the sole of old flip-flops (thongs in Australia)
Best wishes to you and all your readers
Andrew
Andrew”
Now on to Alan. And I have to say, I agree with him. Why just dump your unused cars and locos in a box?
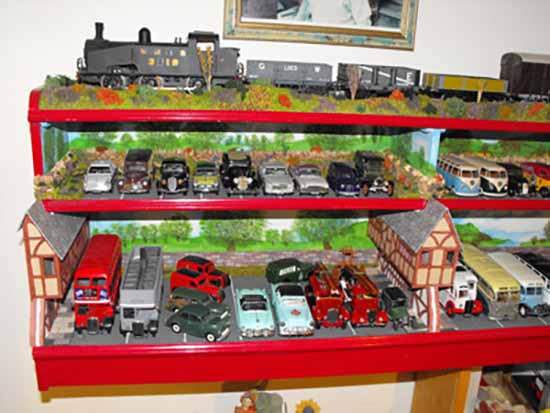
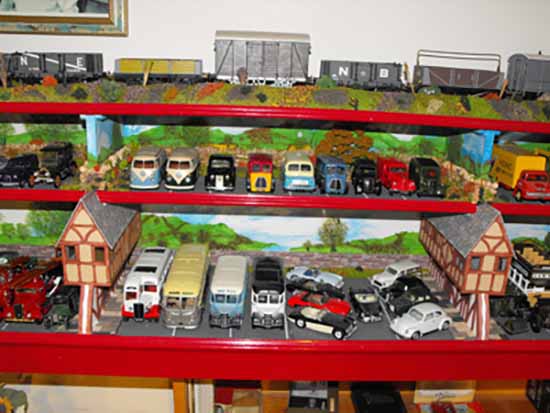
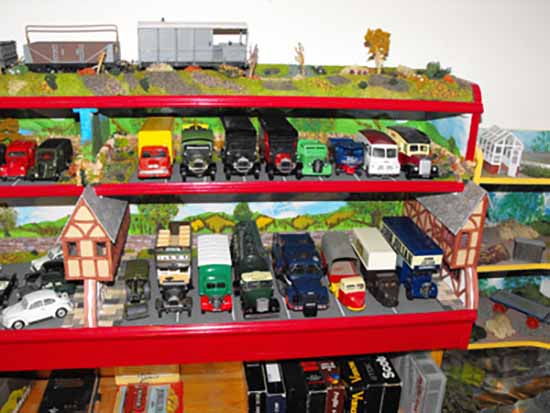
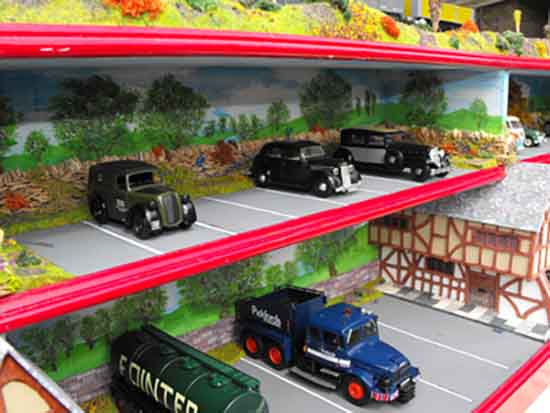
“Hi Alistair, I just thought that you may like to see the sought of thing that an odd mind like mine can come up with.
I wanted a storage shelf for my ‘O’ gauge vehicles and this was the start of “Justash Elf Village”, I could’nt see the point of plian shelves would appreciate all comments good or bad as we can always learn.
There are more photo’s of this and ‘Tramps End’ if you wish to see them.
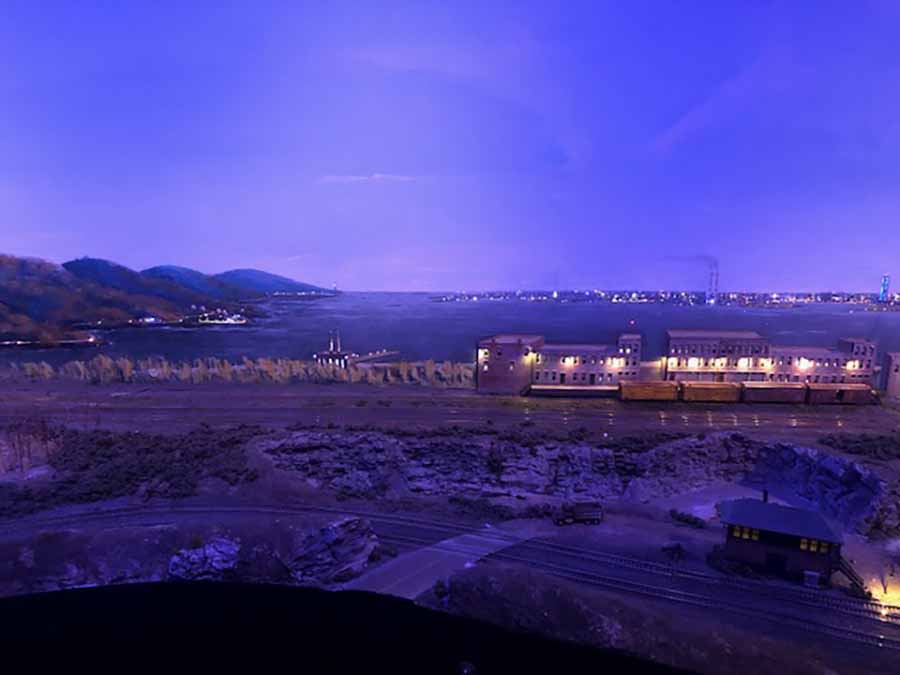
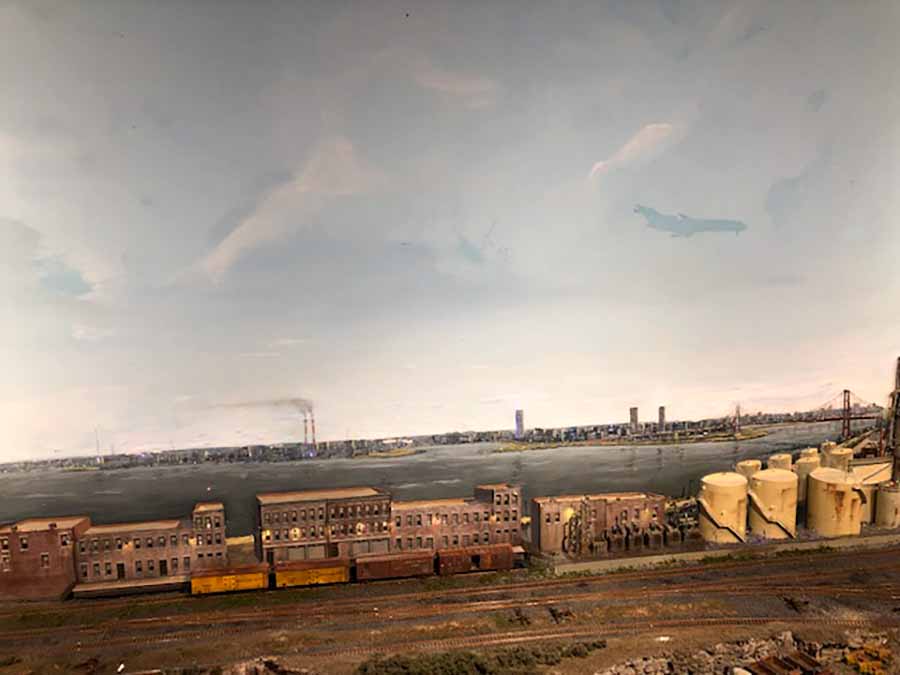
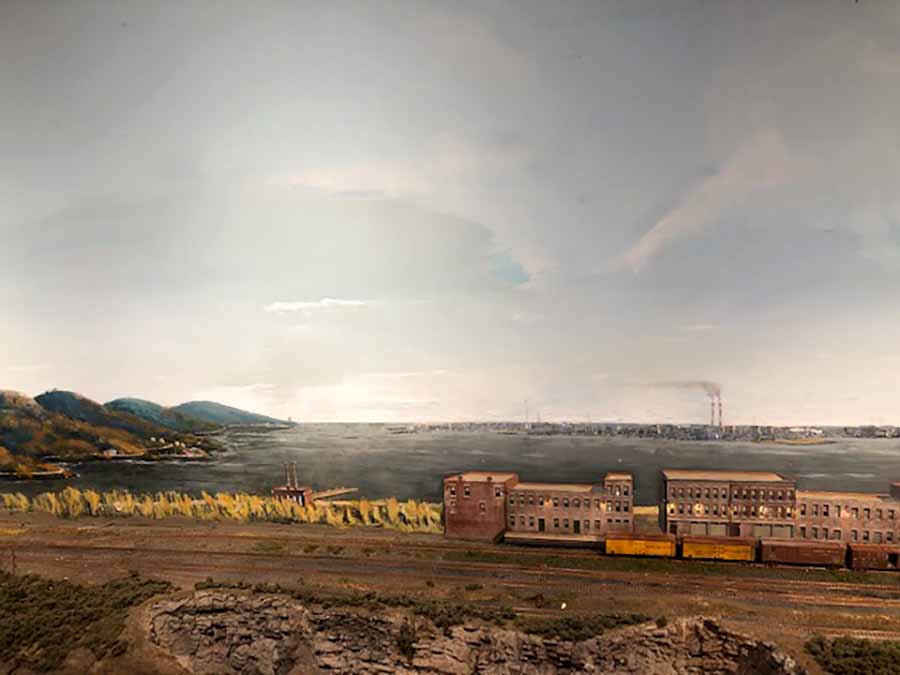
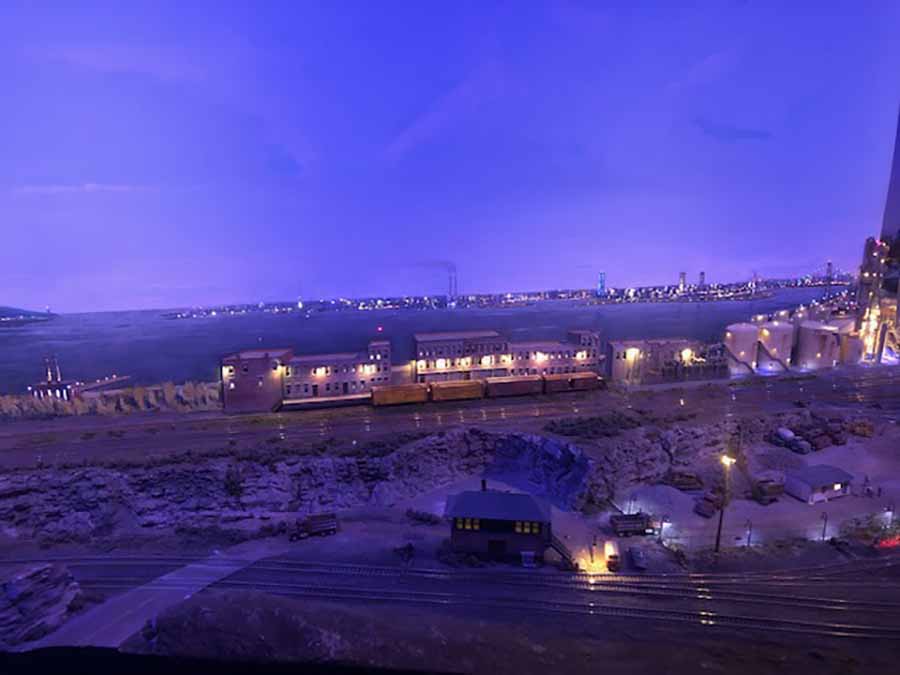
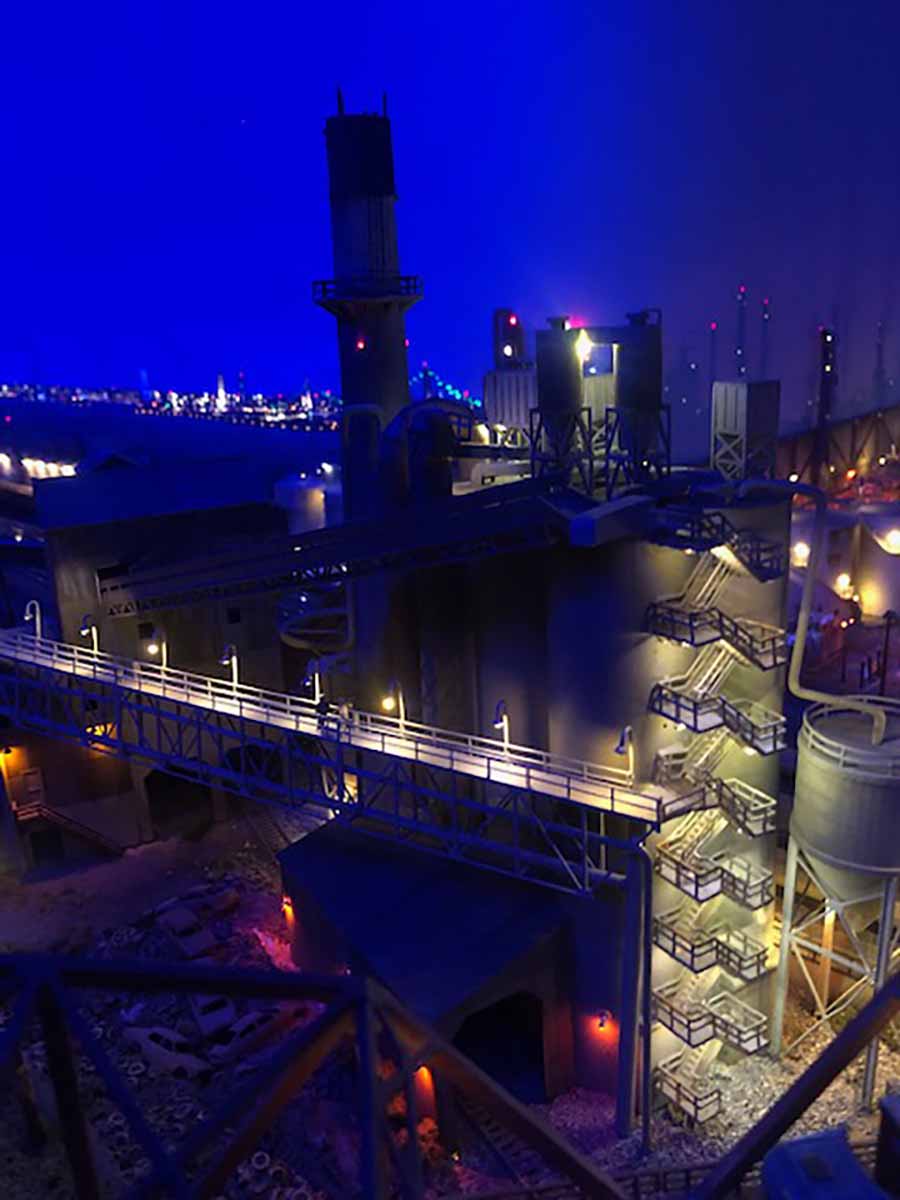
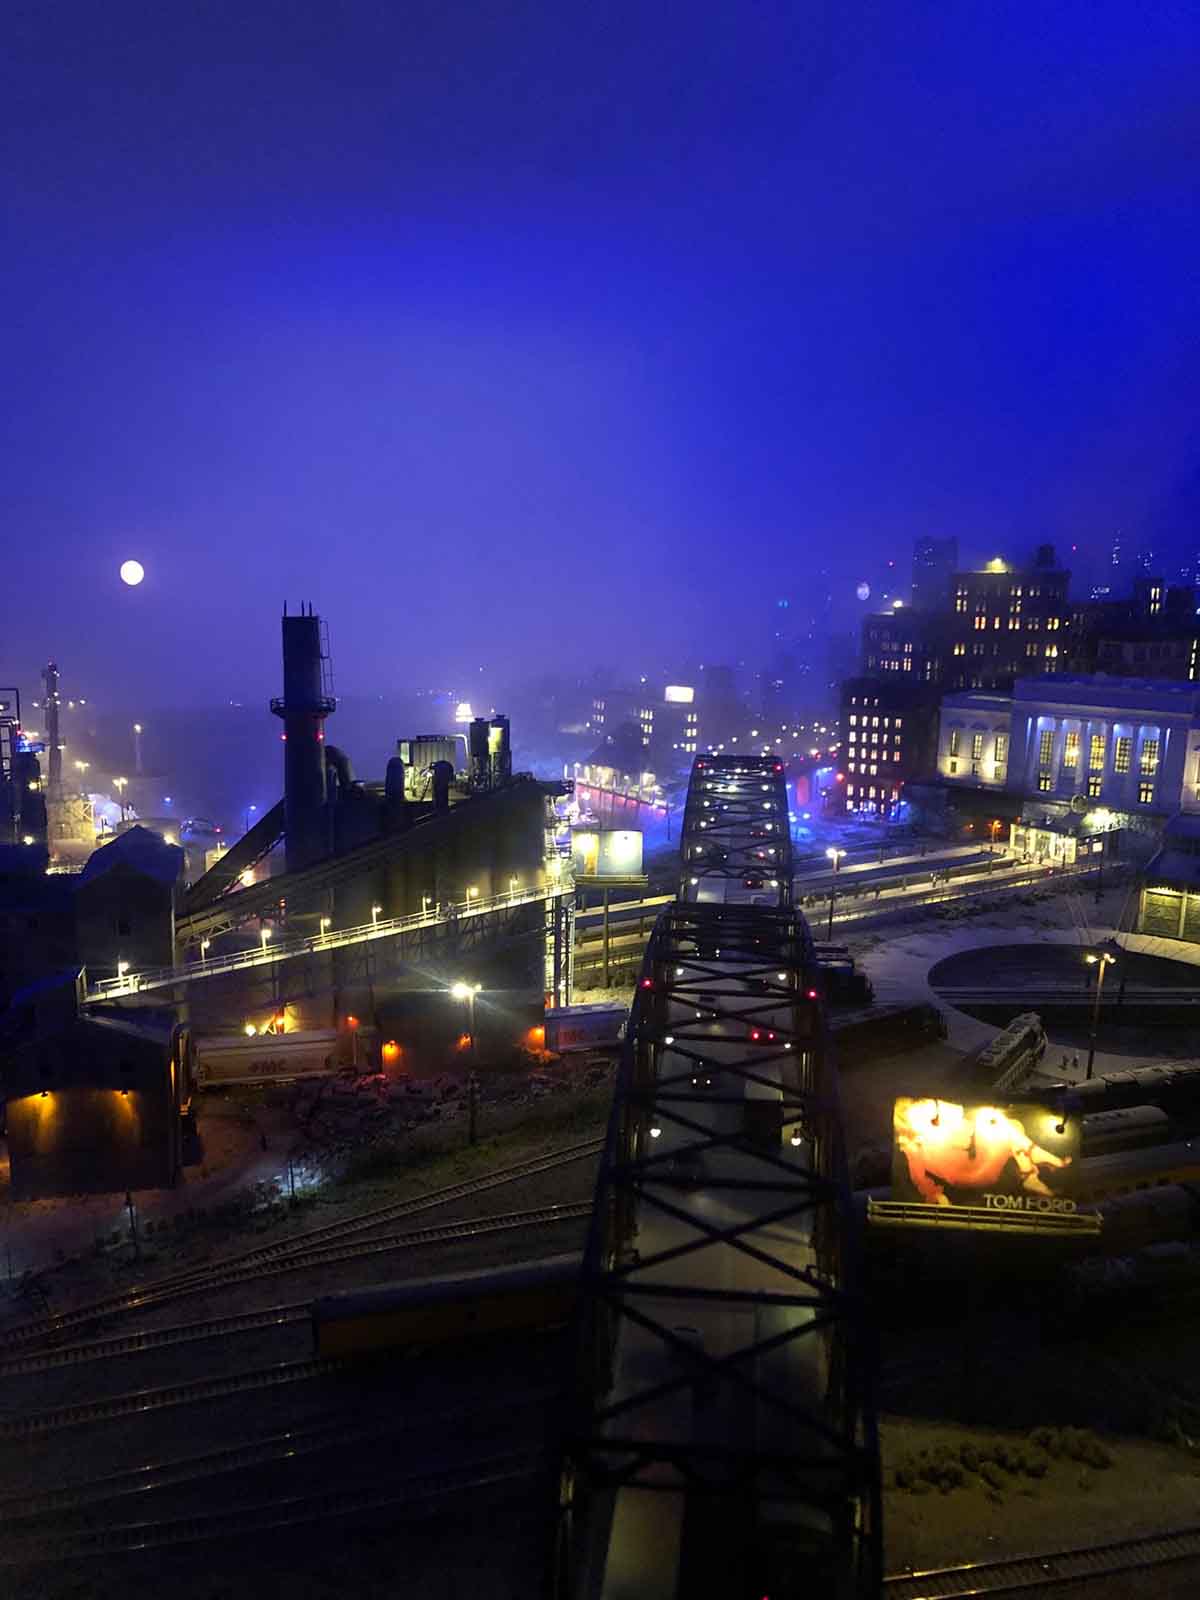
Fred’s been back with his stunning model railroad LED lights:
“Hi Al –
It’s been a while, but this latest backdrop – in the center of my layout has taken almost a year to prepare and install.
It’s another plexiglass backdrop – 10” by 6’ which received a coat of black paint on the front side, then white gesso, in preparation for painting of water, city, and coastline mountains in acrylic.
I back lit it, in varying degrees of specificity, with most lights placed after I had painted it and could tell where to place lights.
Thus backlit, it was suitable for scratching out the building fenestration with tip of xacto knife to display lit windows.
The traffic lights, anti-collision lights, rooftop lights, bell buoys, auto headlights, factory strobe lights, coastal village lights are all fashioned from Evans Designs’ (Oregon) Pico or “Z” scale micro LEDs.
These are .65 mm wide, by .4mm high. Tiny but very bright. The 14” leads are no thicker than human hair, and difficult to work with or solder.
Then I glue with Cyoacrilinate (Sp?) glue a suitable segment of fiber optic thread (ranging from .25mm to .7mm depending on the effect) to poke through holes drilled where I wanted lights in the plexi backdrop.
Making these light sources takes forever, but like all things is much quicker when you manufacture a bunch at once. I would typically sit down with three dozen LEDs, a bunch of precut fibre optic threads about 3/4 inch long, a tiny cup with some fresh crazy glue in the bottom, and a can of spray accelerator beside me.
Taking a new LED in one hand, isolate the proper side of the light (back side, if you can see it, is slightly blue, and shows the solder connections.) give a quick spray on the light, then with other hand dunk the fibre thread in glue.
Then, channeling all of your remaining possible vision, stick the end of the thread to face of the light. Don’t breathe! Wait a good five seconds and start to relax your thread holding fingers to see if it’s fast. If it is, you’re almost there…
Now taking a glue detailer wire that I forgot to describe, just dive into the cup again and fetch a tiny drop to circumscribe the junction of the FO thread and the face of the LED.
Spray it again and you have one of Fred’s unpatented “LED/Fibreoptic mosquito lights” for your train layout.
When you have a bunch made, twist them together for convenience at spraying with black paint and for visual location on your bench.
If you can’t get this to work for you, no one will hold it against you if you throw your favorite anvil through the shop wall. I’ve come close!
(I used .060 inch plexi this time, but discovered to my frustration that to properly backlight a reasonable string of buildings, I needed to glue thicker plexi to the back, sanded on both sides to diffuse light.
I have found that I can get away (despite all the advice) without resistors, as long as I run them off Woodland Scenics “Just Plug” hub and four dimmer switch distribution modules. (Other areas of the layout have been working fine for over seven years now.
The only thing is that you have to segregate the circuits by color, or weird things happen. This makes for wiring problems – you should put all the static red A/C lights on one circuit, but if there are towers, smokestack lights, hi-rise buildings, etc. across the six foot width of the panel, then you wind up having to string these lights from four or five modules.
By ganging up similar lights ( usually white lights can be “ganged” up to a dozen or more this way before the brightness is compromised. Be careful with insulation – one short will trip the breaker on that “Just Plug” dimmer circuit, killing them all, (or worse yet, blinking!)
When placing different colored lights through some backlit plexi, first I paint the inside of the holes, and especially the lights – with their short little fiber optic noses (they wind up looking like big mosquitos before installation) with black spray paint. THIS IS VERY IMPORTANT, otherwise different color light will spill into adjacent parts of the backdrop.
Threading the light through the hole, I put a drop of crazy glue on the backside, pulling it quickly with the fibre optic thread, gently, until it’s snug against the back of panel, and then I give it a brief spray of glue accelerator. With my light in place, I snip off the thread on the finish side of the backdrop. LIGHT WILL ONLY EMIT FROM THE TIP OF THE THREAD.
That the fibre optic thread might protrude a fraction of a mm beyond the face of the backdrop actually turns out to be a help, because after painting or touching up a bit you can still spot where the light is.
When you’re all done, you can either snip a little closer, or carefully sand off the tip. I use women’s fingernail emery boards.
To adjust the light level in each light, you can either dim it from the module, or taking a tiny piece of wire, dip the tip in black paint and juuussst touch the end of the fibre optic thread. (Takes hours!)
Anyhow, using this technique, (and maybe five or six hundred LED micro lights and thirty lighting modules for this part only, I have built a model railroad LED lights backdrop that looks a lot like the Hudson or East River in NYC, I think. I still have a lot of finish painting to do, but now I’m going to make a cold martini and admire my new urban microworld.
Sorry for the “stream of consciousness” writing style, but I’m hoping some of your readers will be able to figure out enough to try it and maybe even tell me some things I haven’t learned the hard way!
Fred”
A huge thanks to Fred for sharing his latest pics, and how he makes his stunning lighting.
His model railroad LED lights really do have to be seen to be believed.