Bill’s been back in touch with his O/On30 train layout – and my word, it’s a stunner:
“Hello Al and fellow modelers!
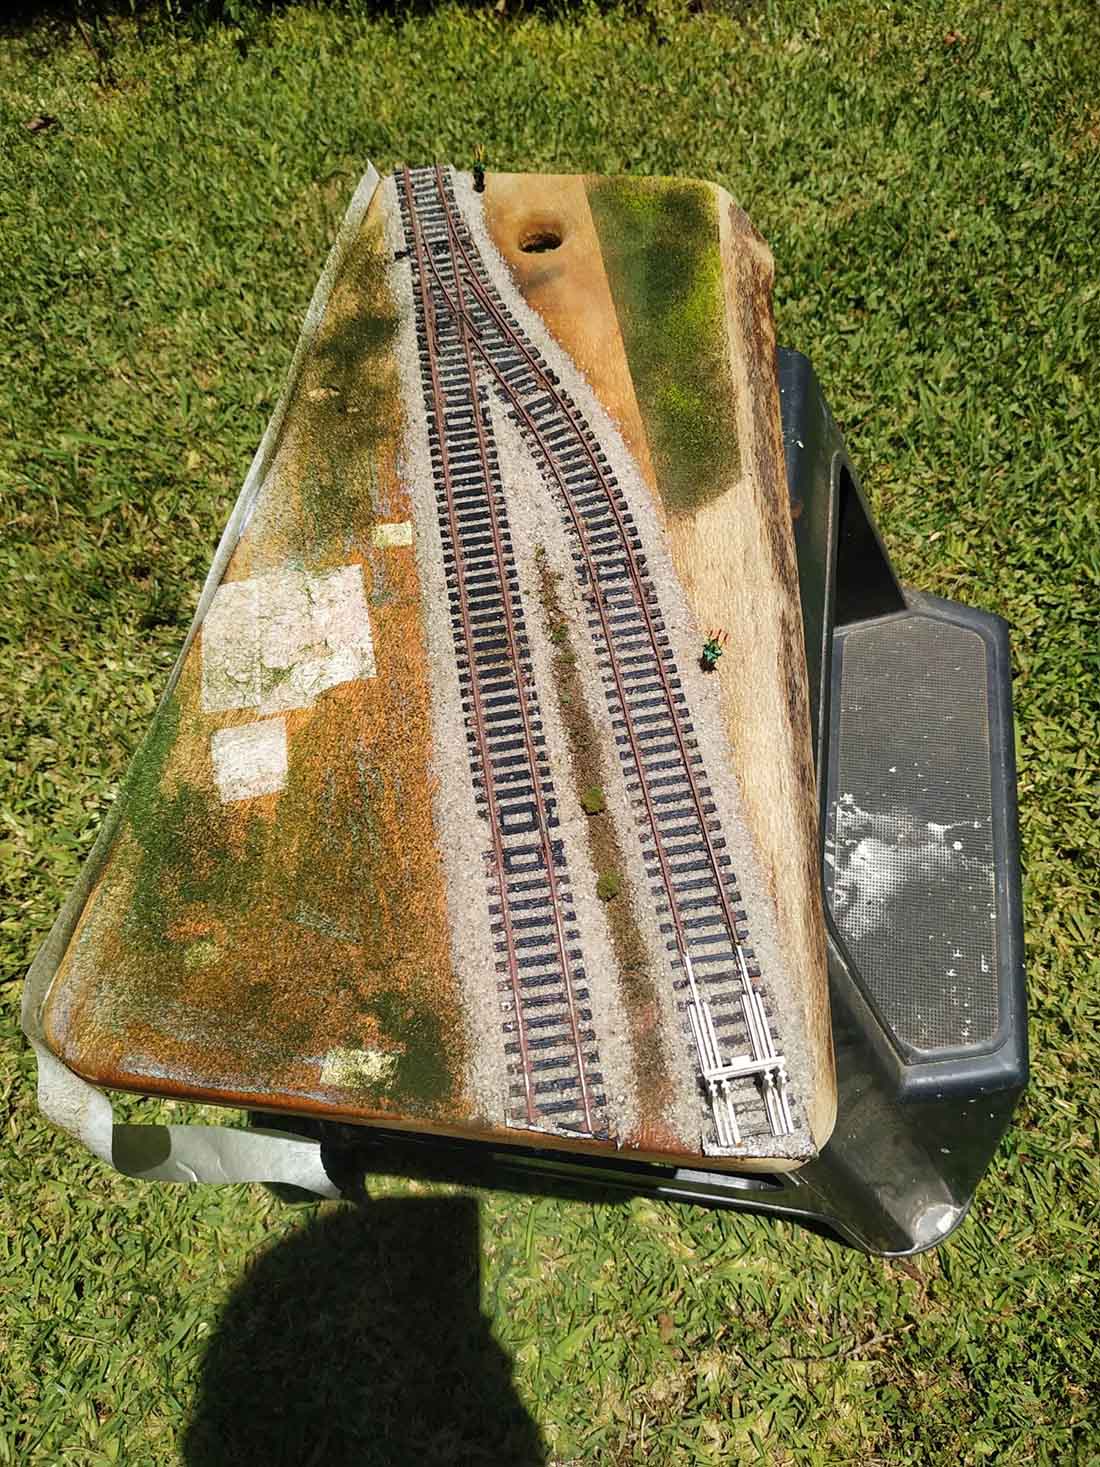
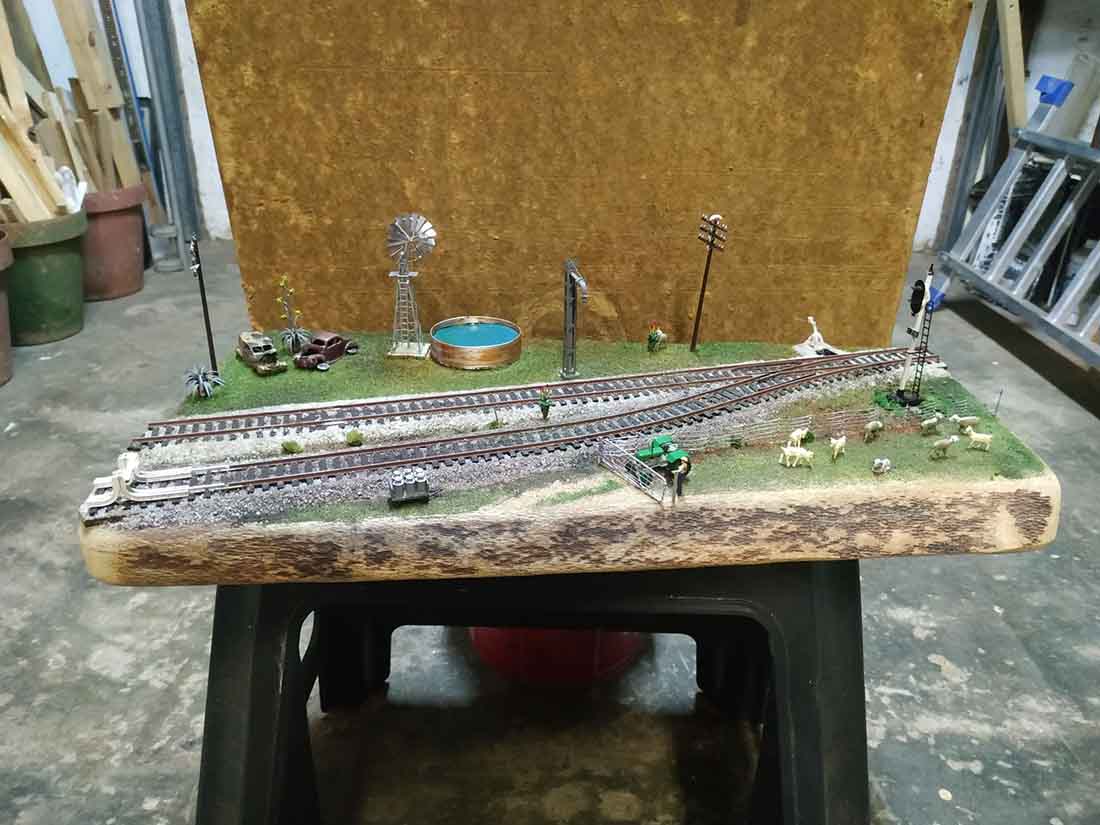
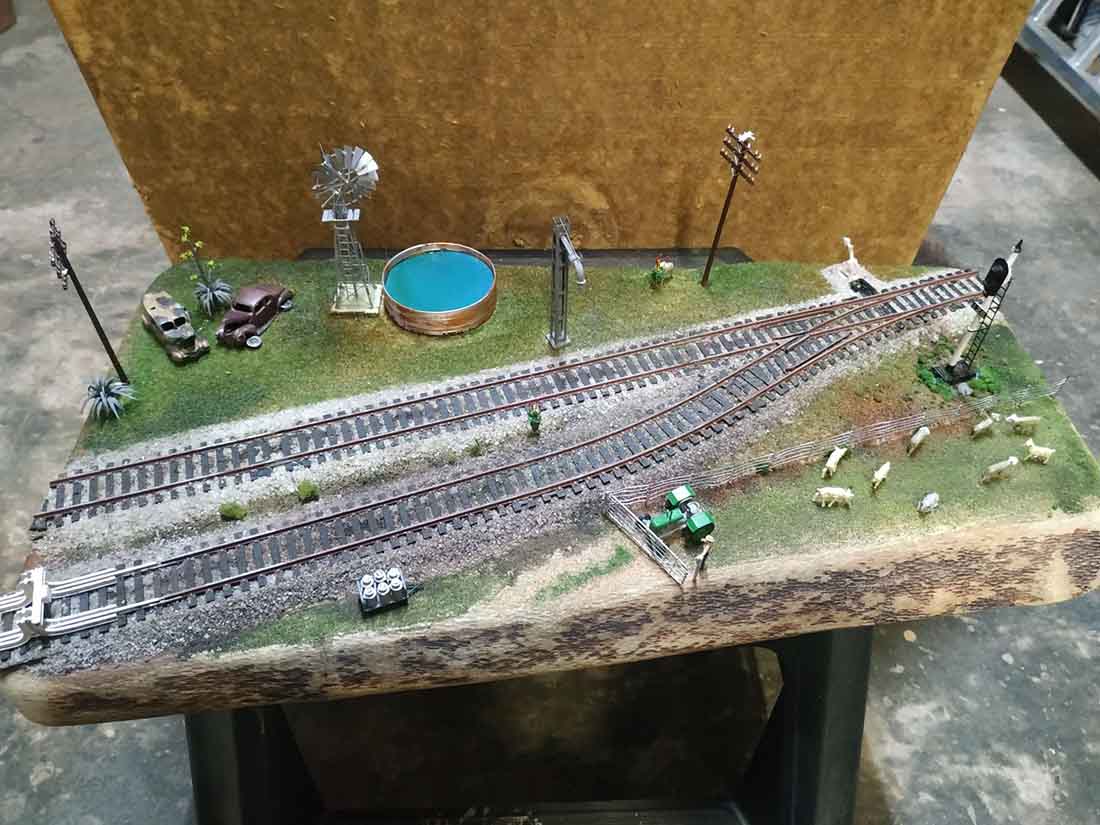
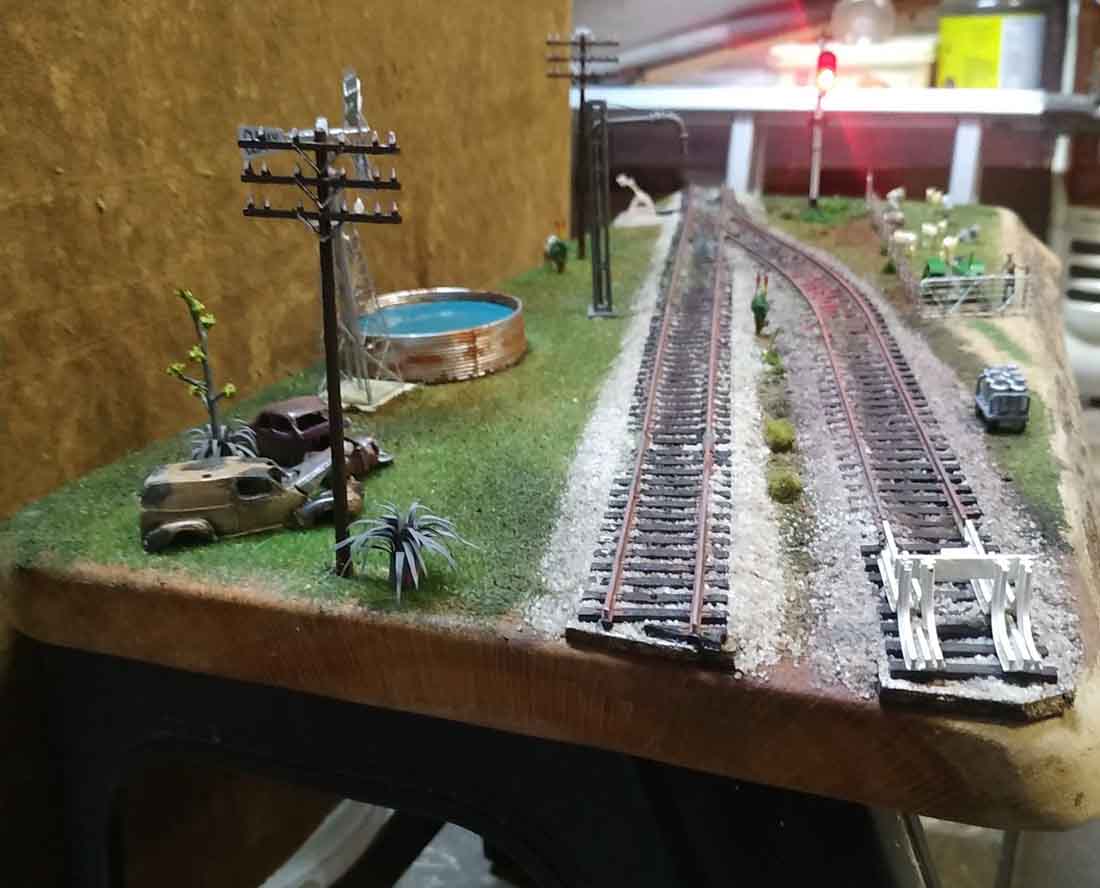
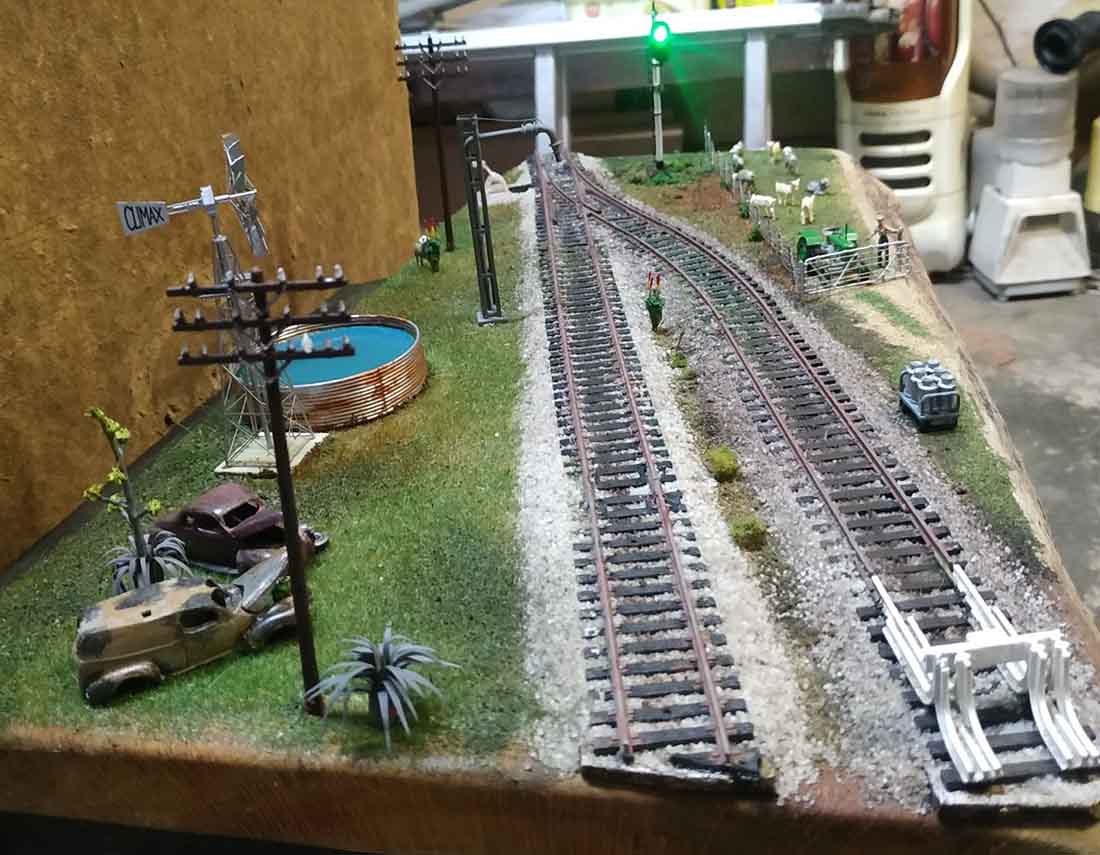
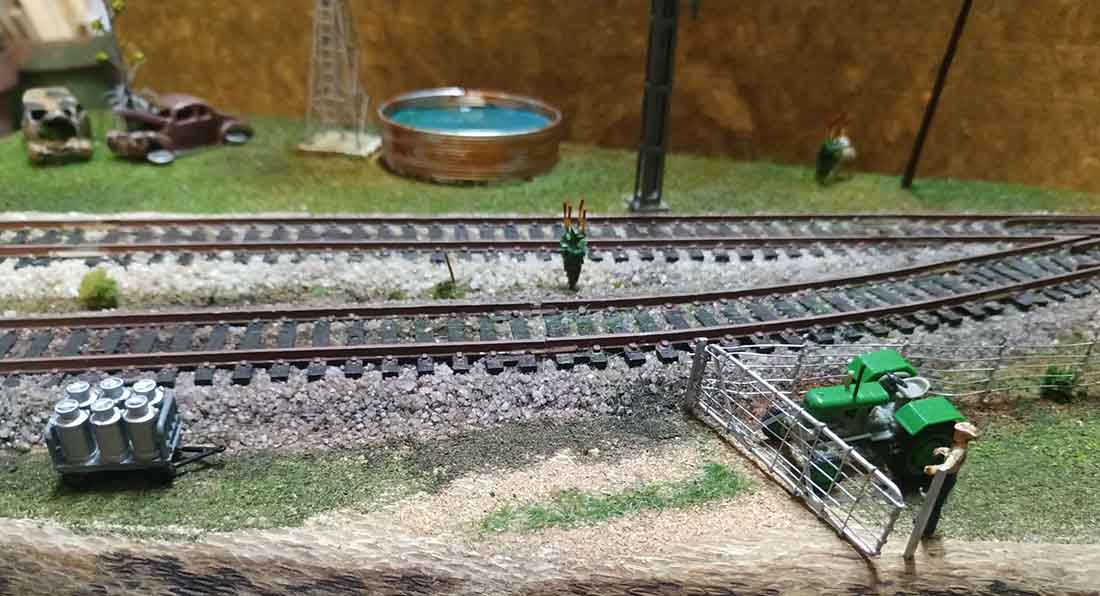
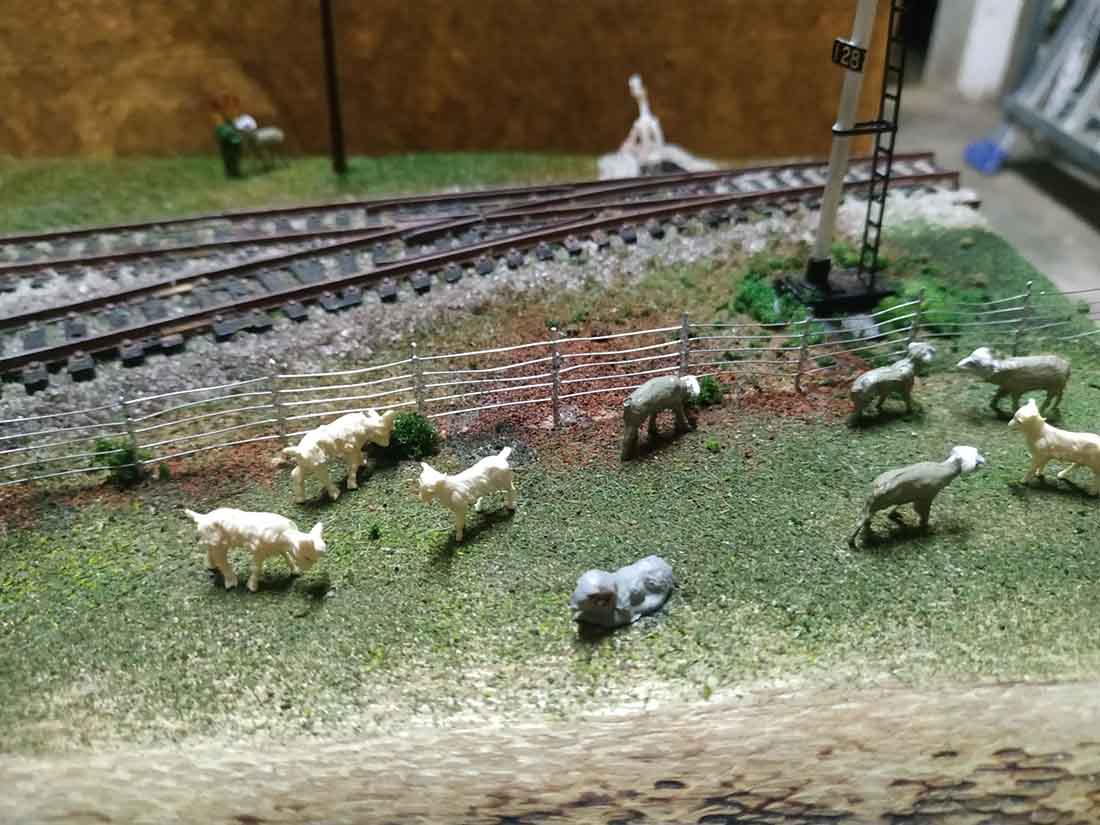
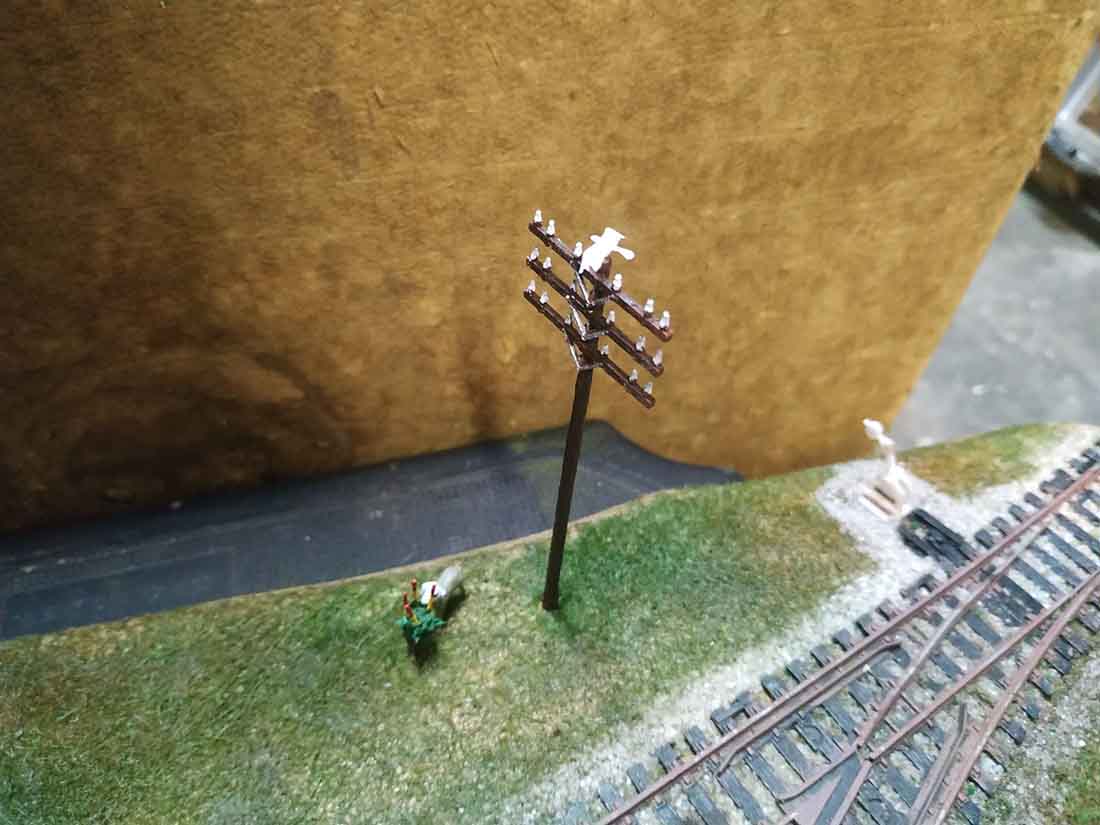
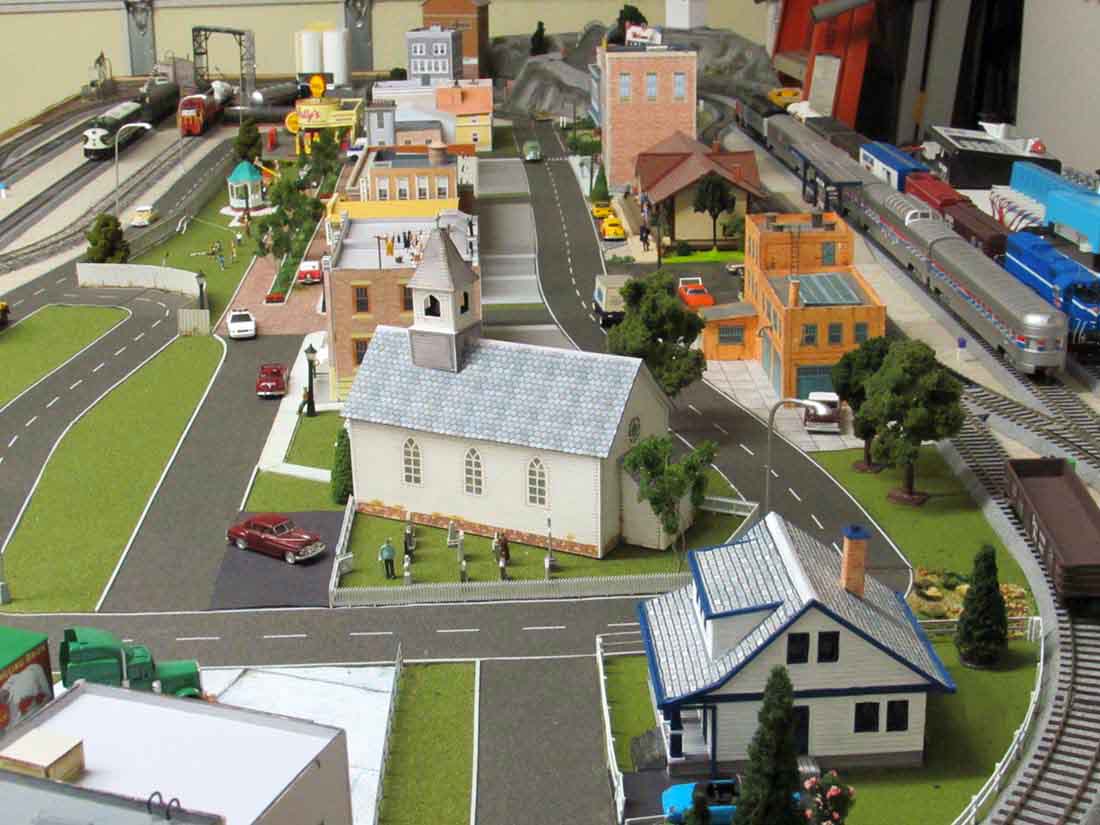
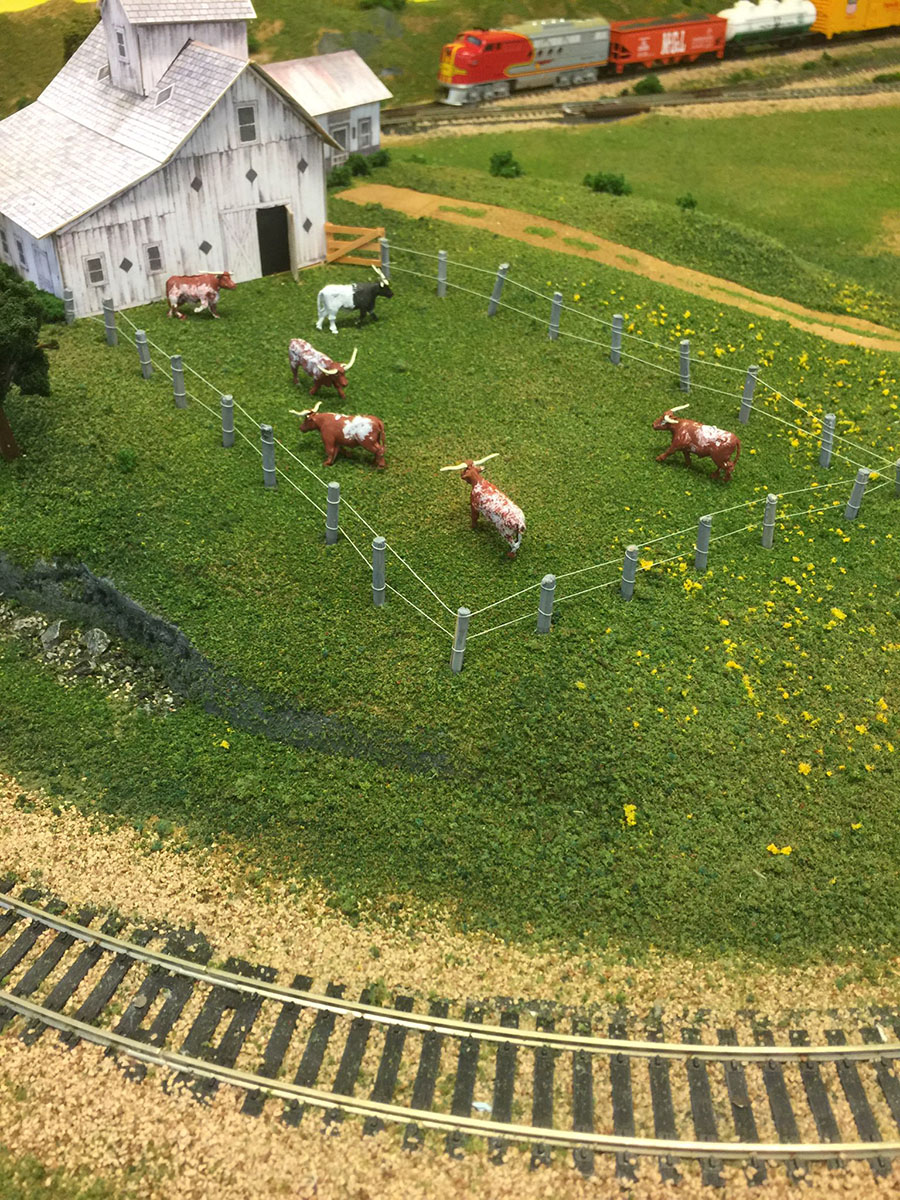
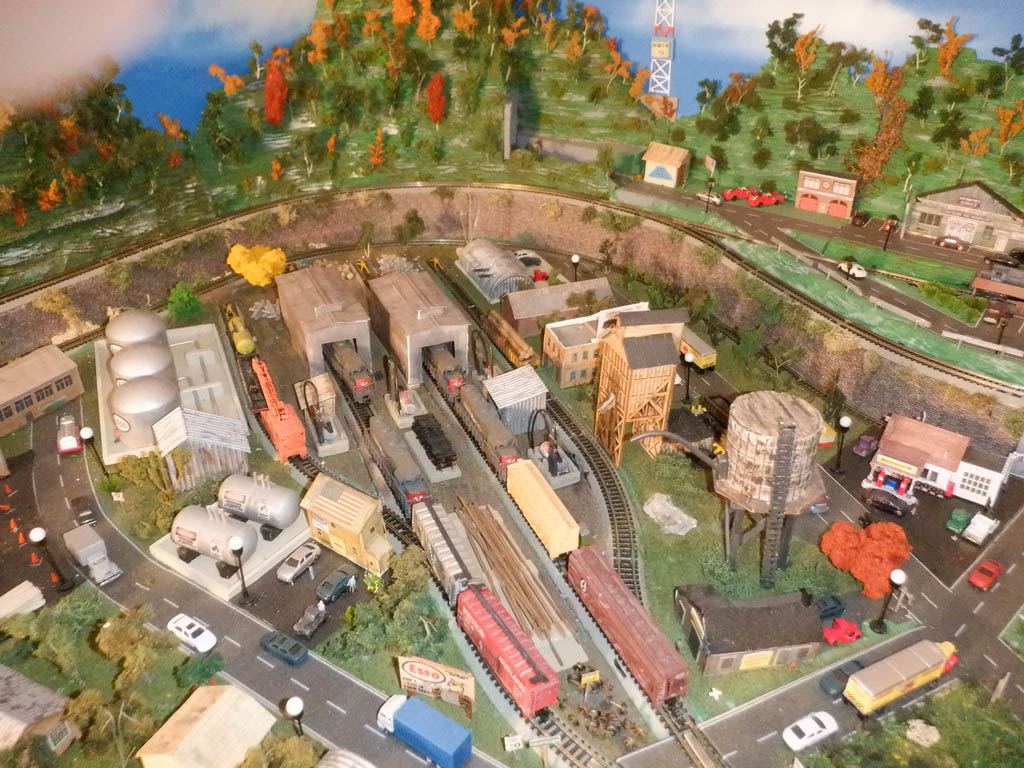
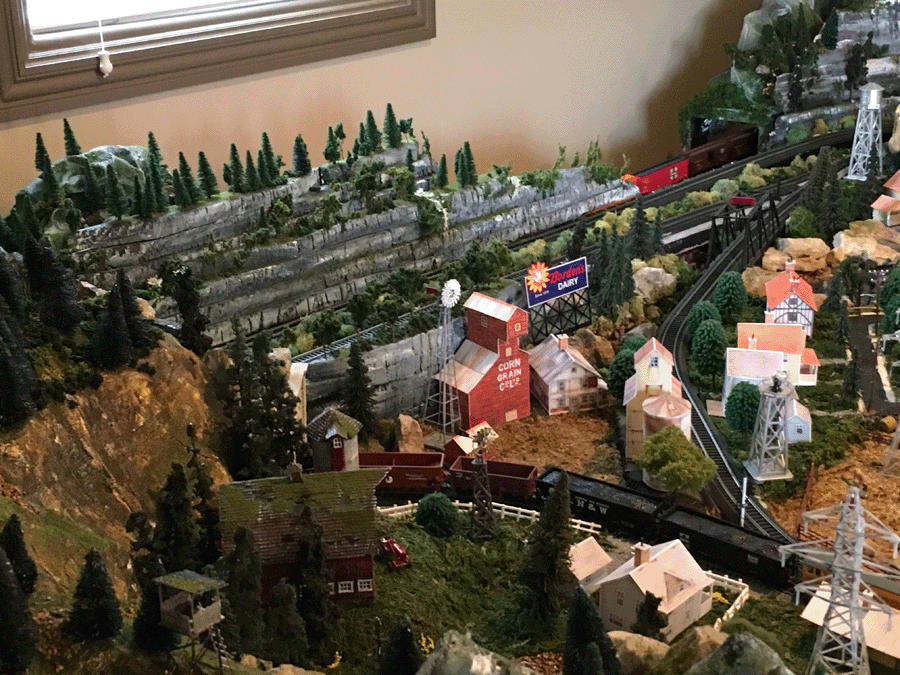
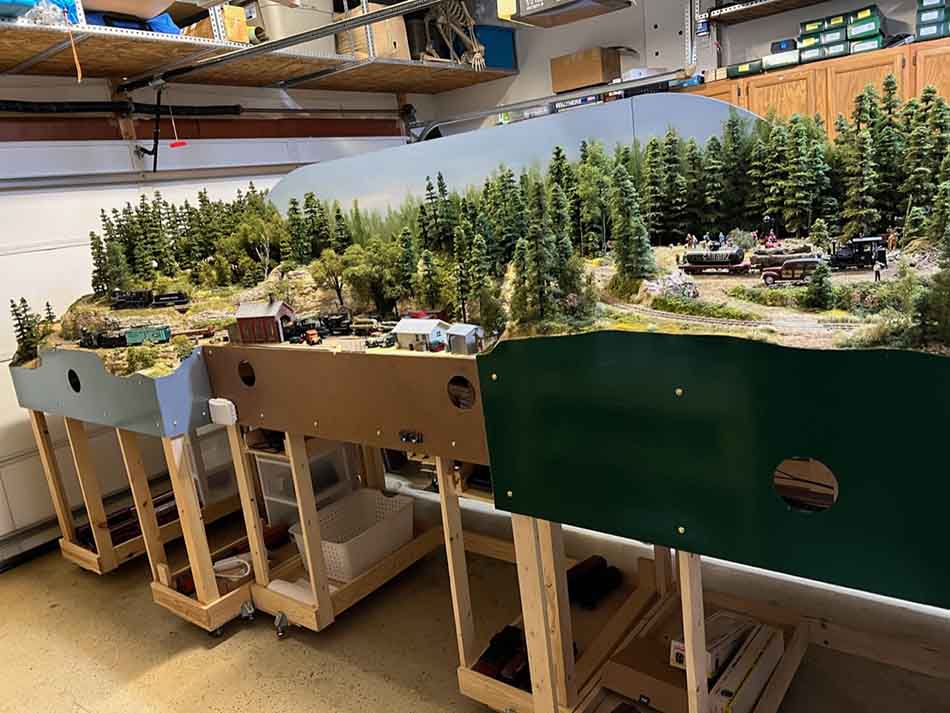
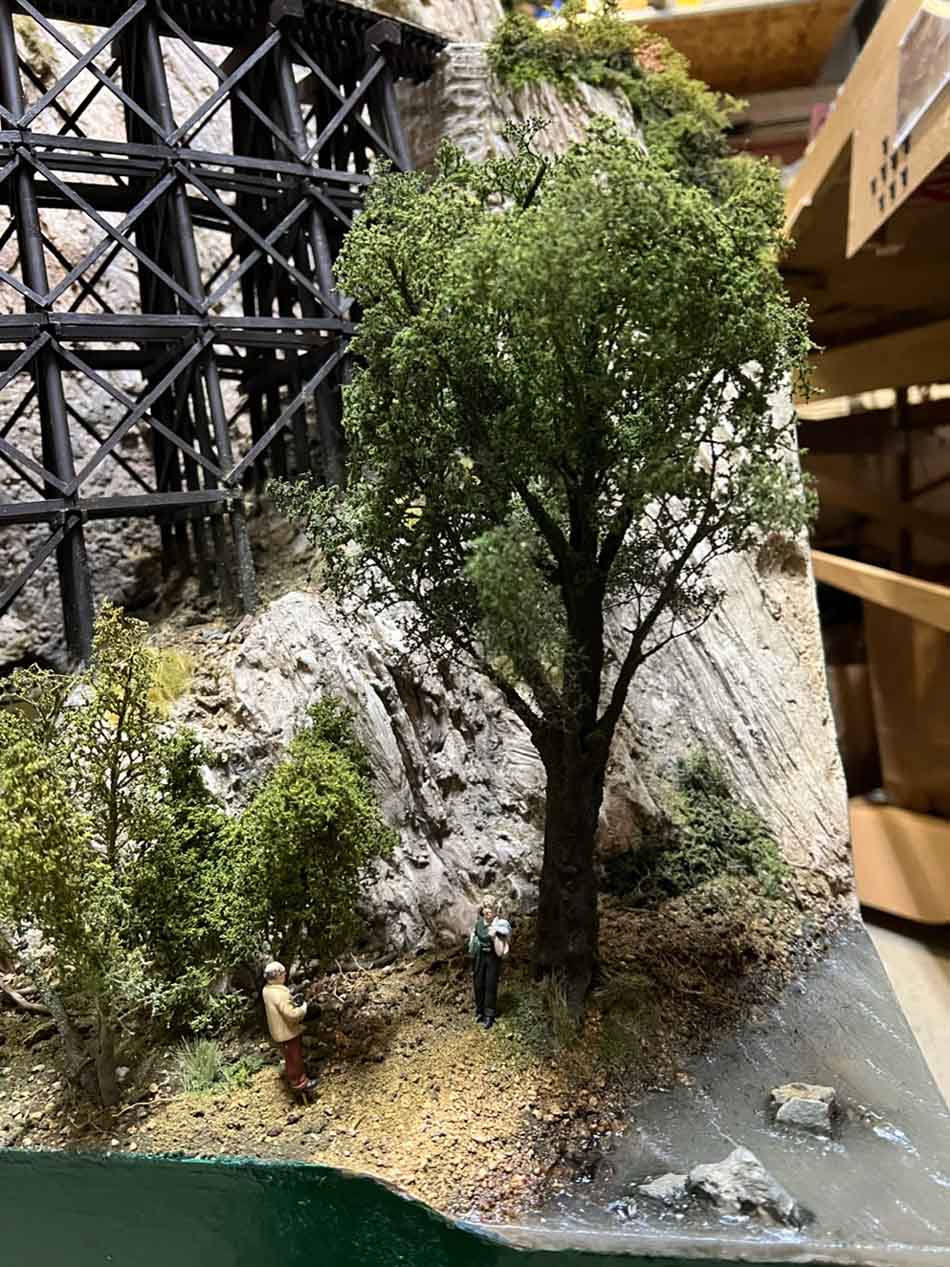
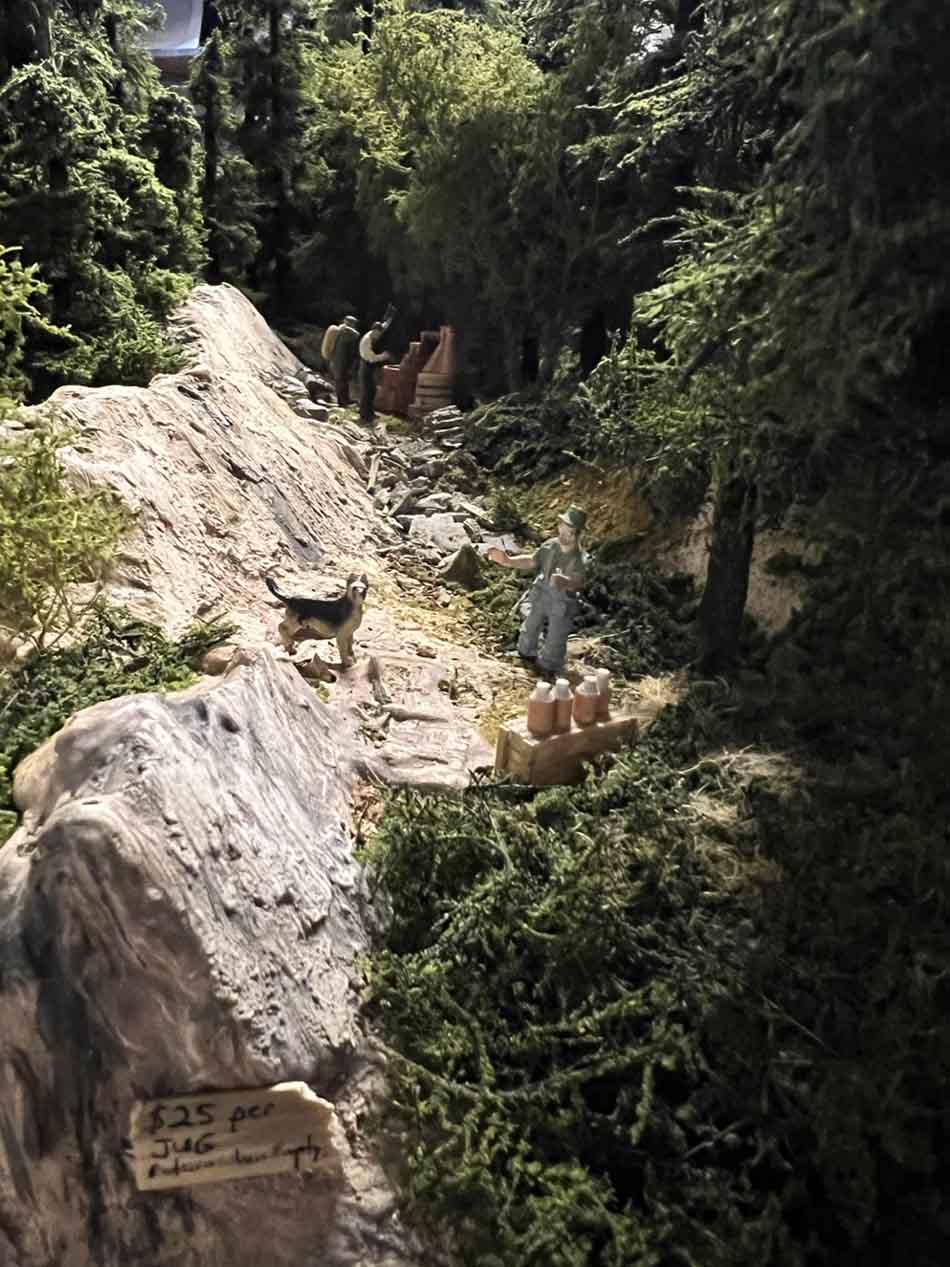
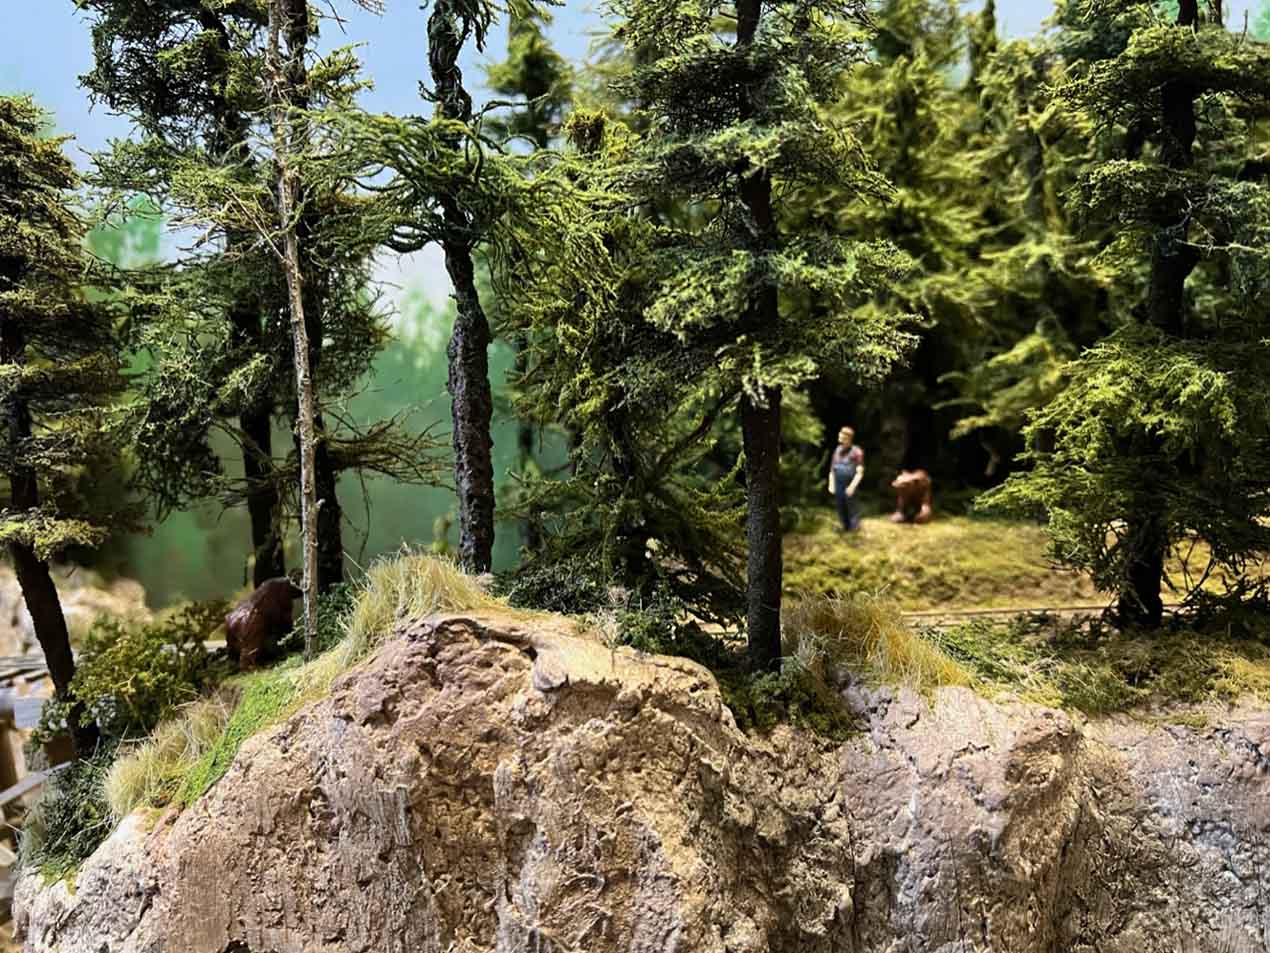
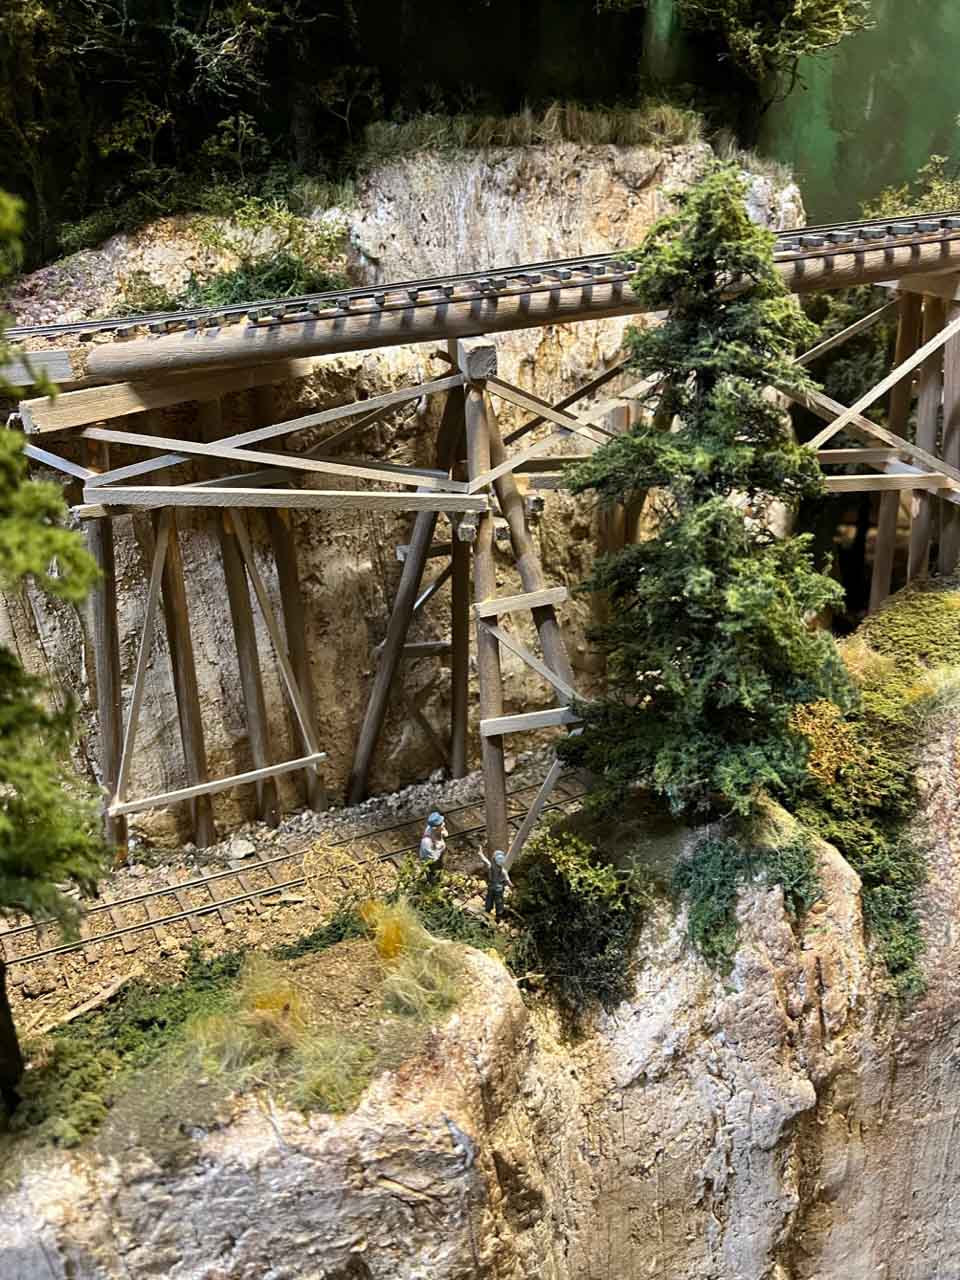
Been a while since I sent in an update on how my O/On30 is progressing. I still have scenery and some buildings to make for it but major areas are complete.
In fact it was far enough along that I displayed it at a local model railroad show in Richmond Virginia this January.
This layout I have built for the purpose of talking it to shows and hopefully spark enthusiasm for model railroading in future generations.
I still have a year or more before I retire or at least soft retire (do something I want to do for work lol) so this first show was a test to see if the layout would transport well and more important if I enjoyed doing it.
Thankfully the answer to both is yes.
The layout moved well and worked like a charm at the show and I loved every minute of the show.
I was blessed to see the kids faces light up as they watched the trains run. I had added port holes in some of the facia so I could get my hands in if needed but those turned out to be the perfect height for little ones to peer into the layout and see the trains blast by them lol.
The smiles on their faces made it all worthwhile.
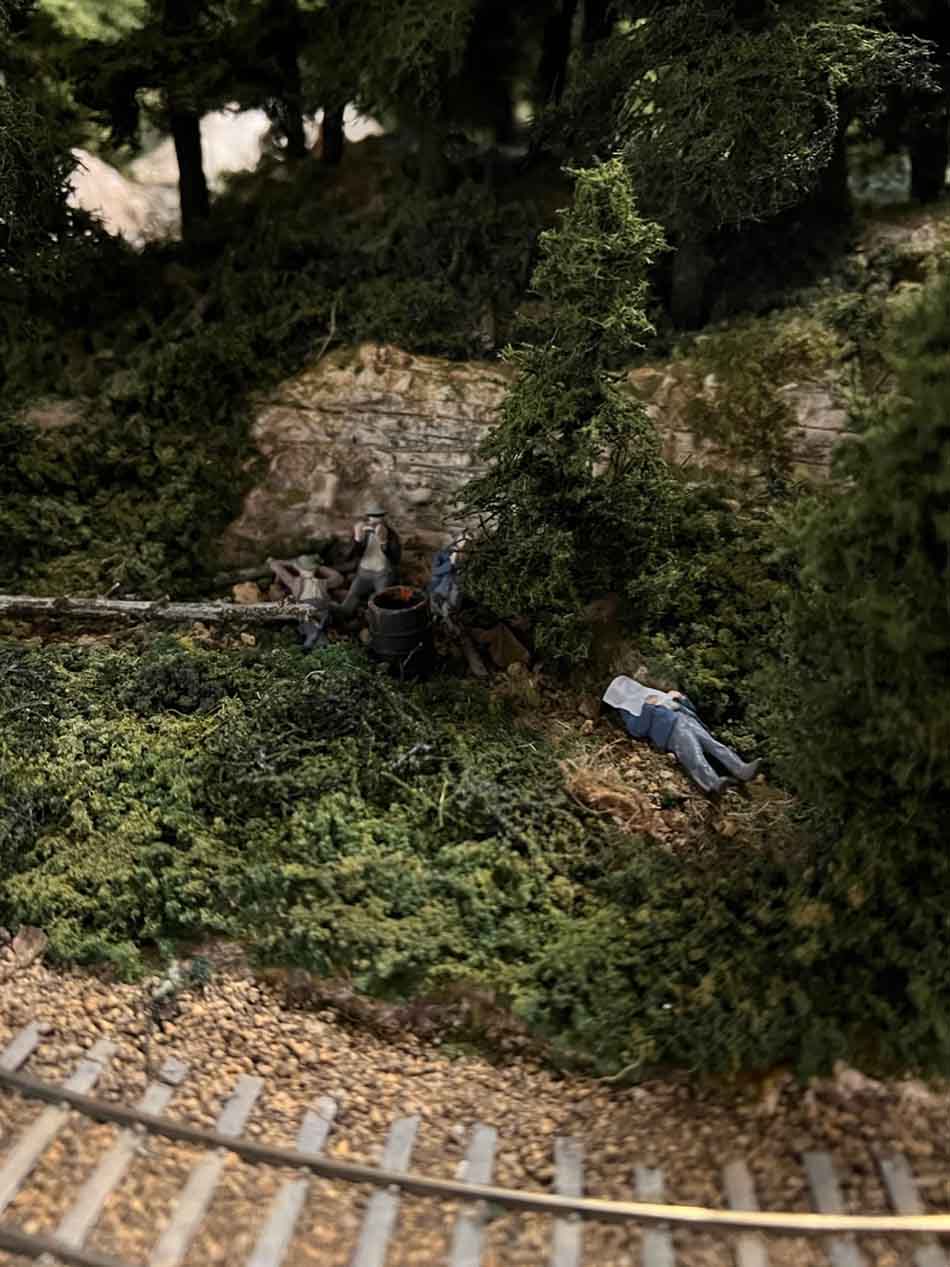
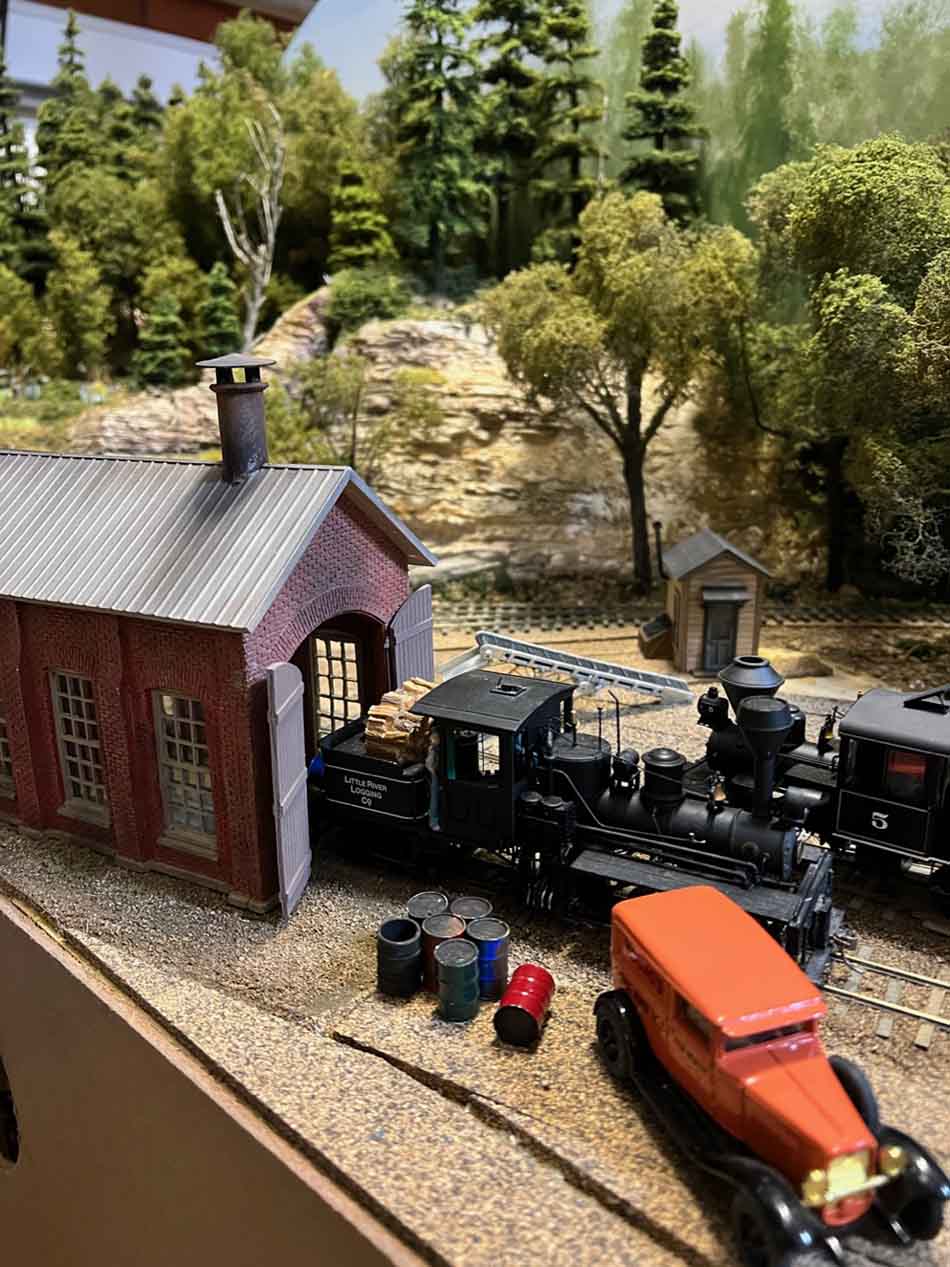
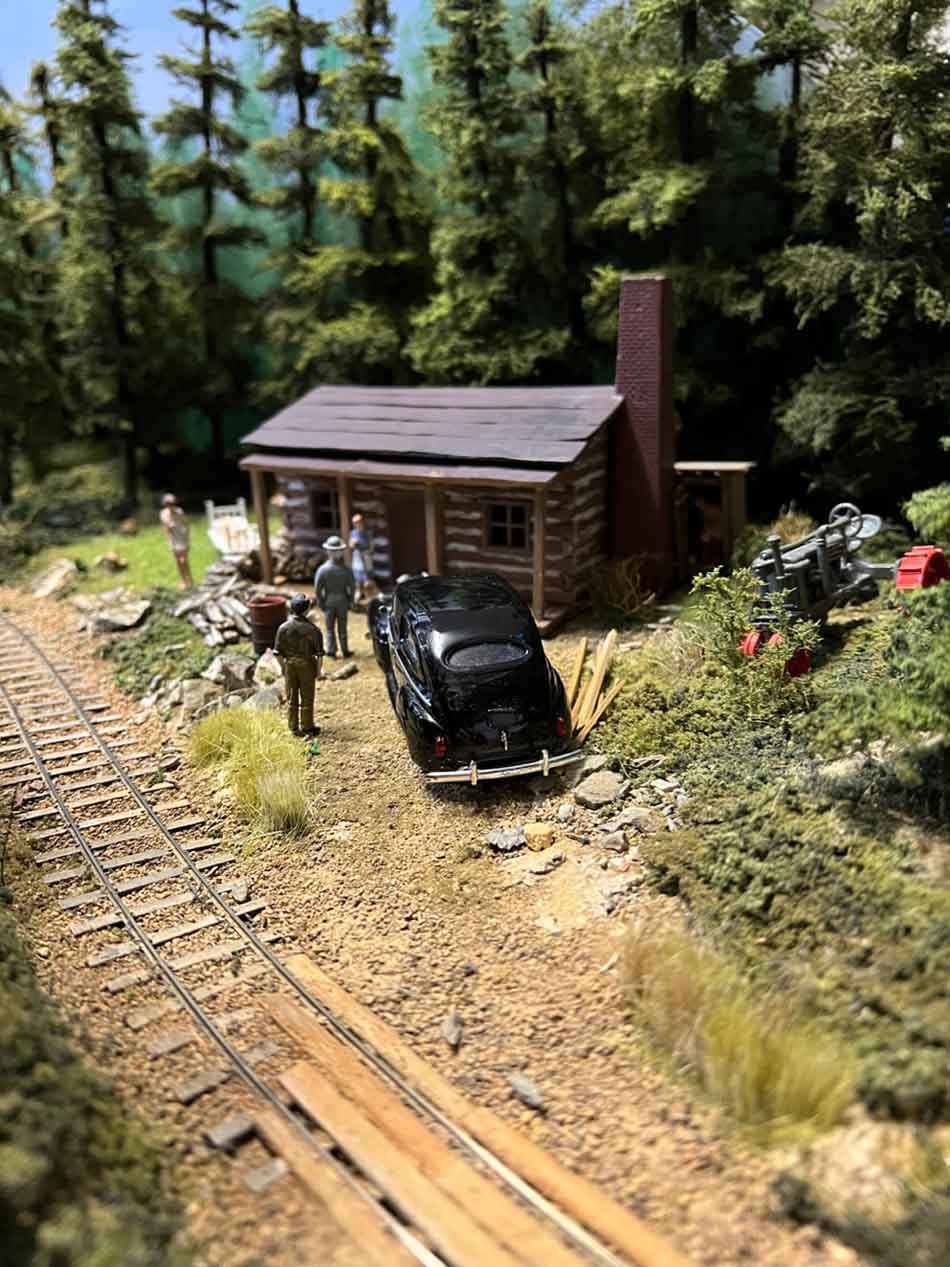
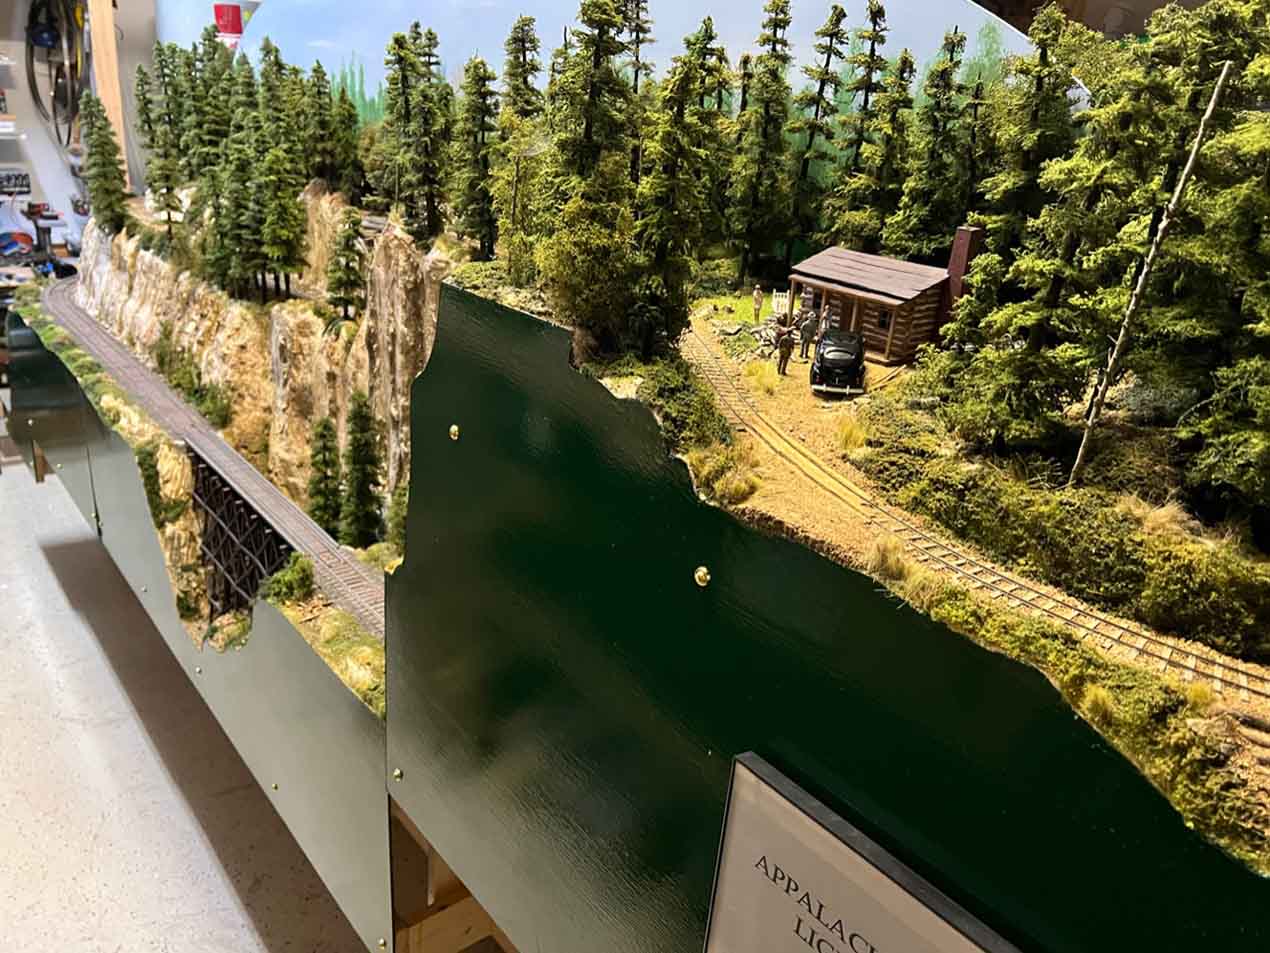
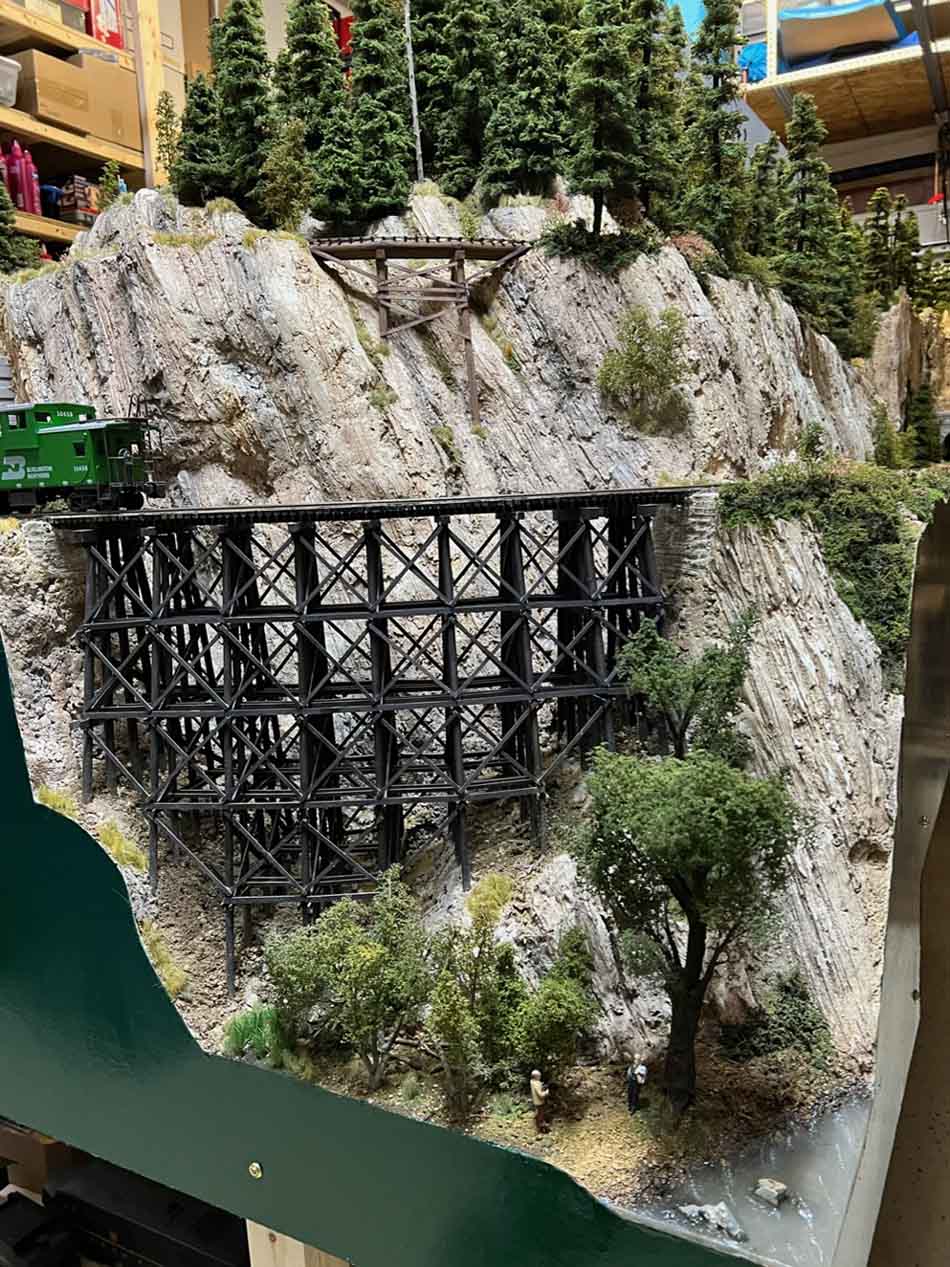
I’ve added some pictures of various scenes on the layout. As noted I still have a ways to go but I’m getting there.
I’ve also added a video that shows what was needed to get it to the show, the show and then some afterthoughts once I hit back home.
You will note in the video I talked about engines that bite the dust while running. Be happy to know I have them resurrected already and have added more to more engine roster.
Happy modeling all!
Bill in Virginia”
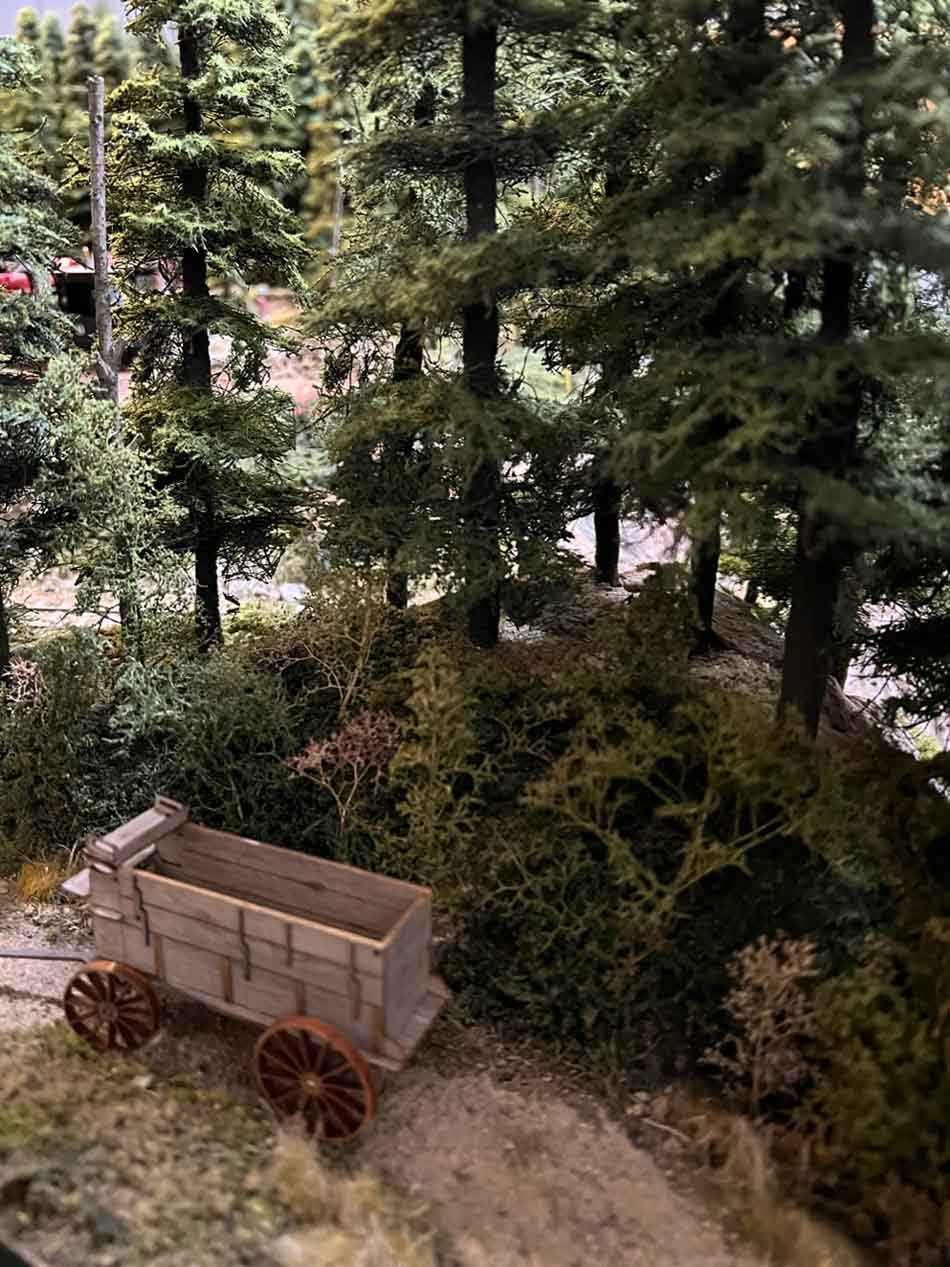
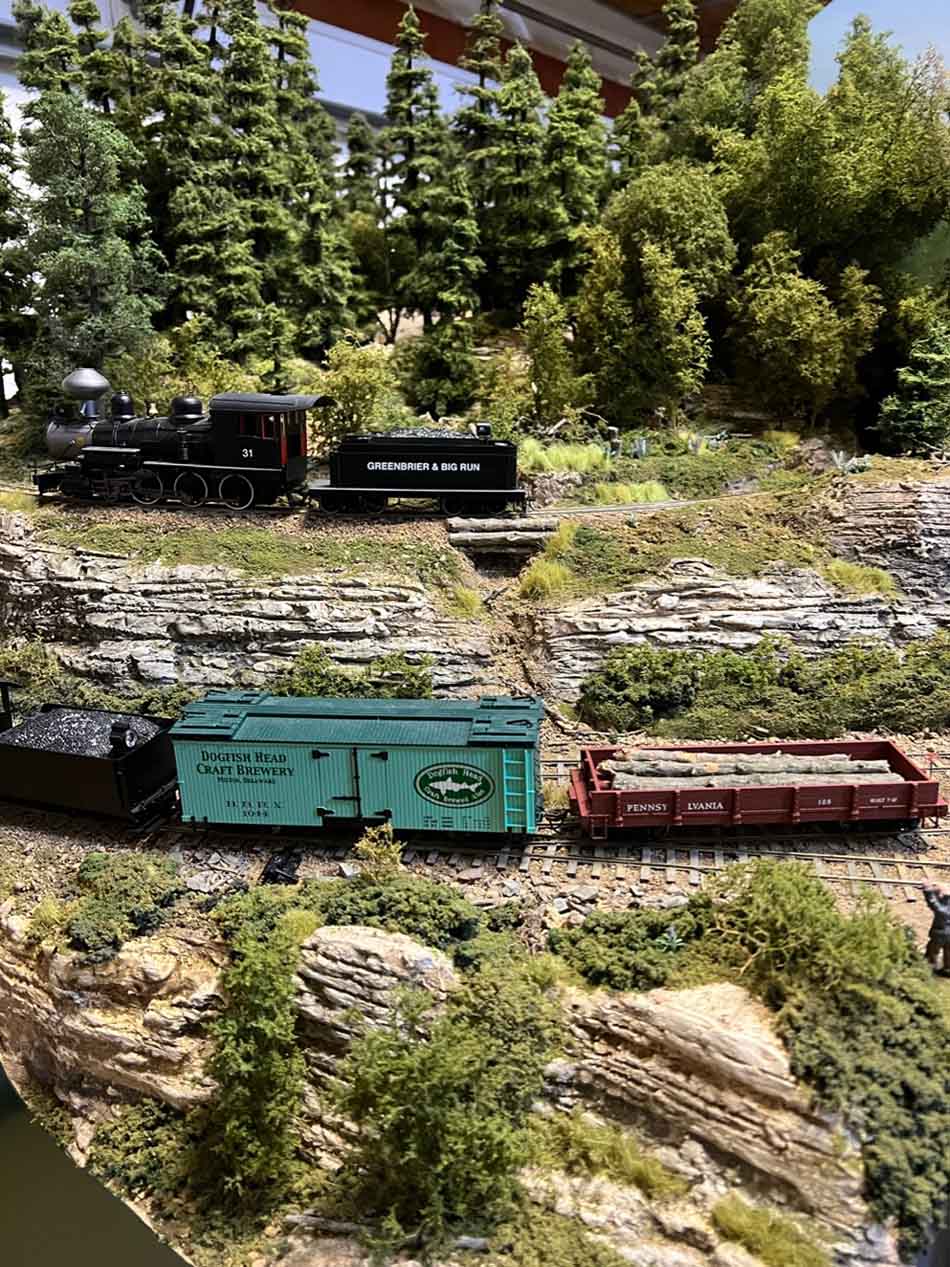
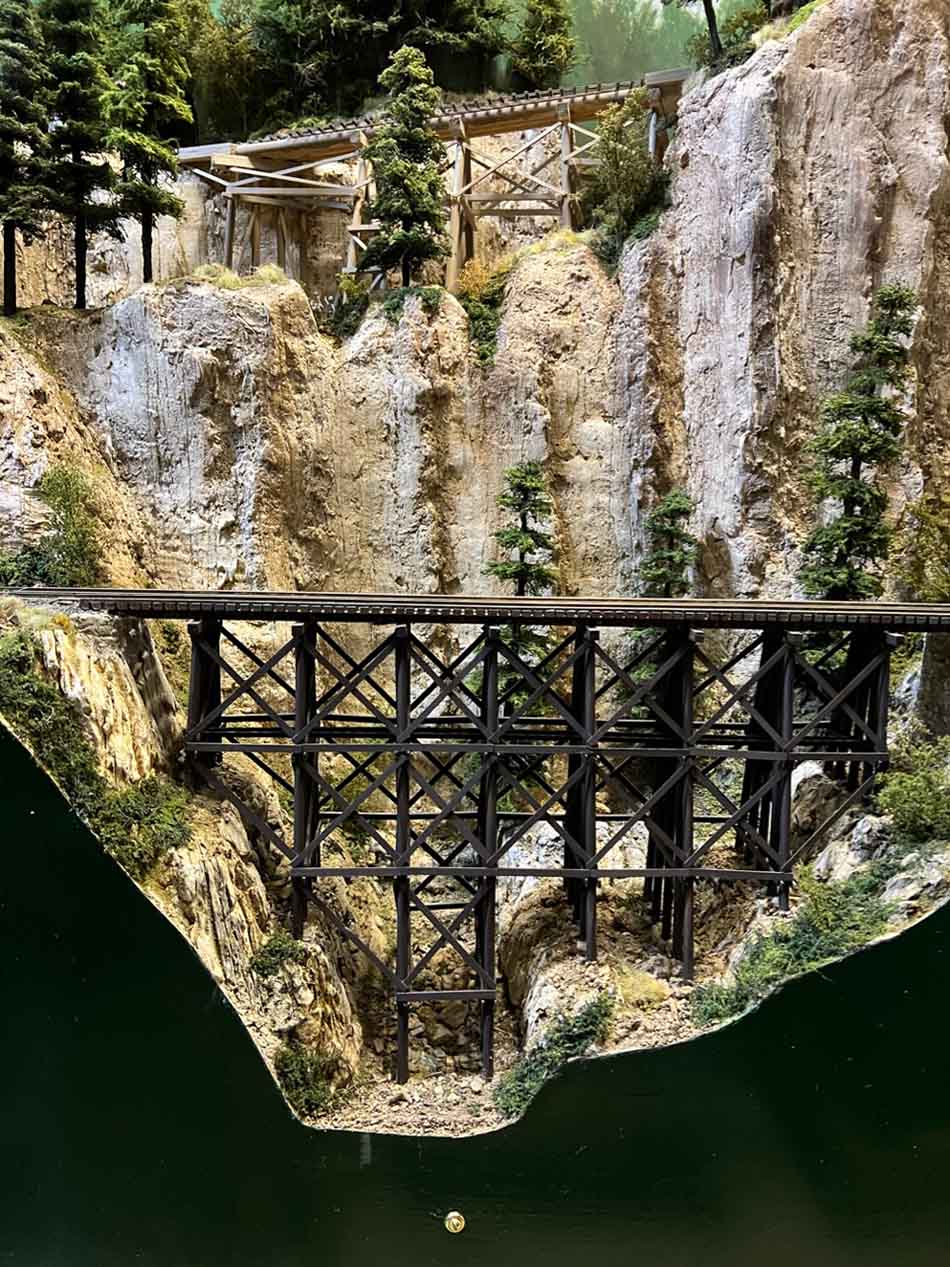
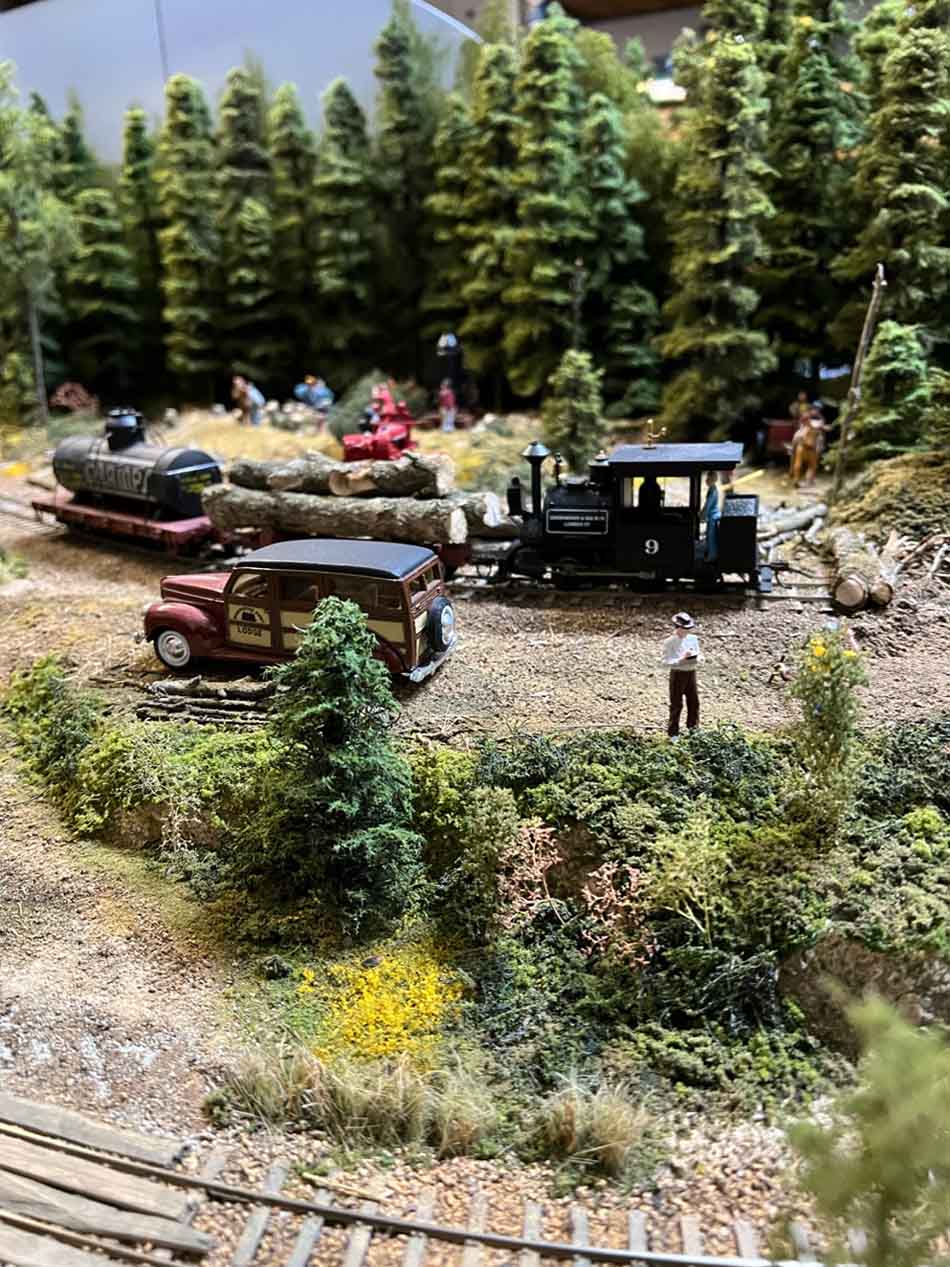
A huge big thanks to Bill for sharing his On30 train layout progress – an absolutely stunning layout.
If you’d like to see his last On30 layout post, it’s here.
I have to say, if this doesn’t inspire the young folk to take up this fine hobby, nothing will.
Hope you enjoyed it as much as me.
It also made me think I’ve overlooked somebody, when it comes to the Hall of Fame. So later today, I’ll share who the new and latest member is.
Lastly, time’s nearly run out on the silly deal for the Beginner’s Guide, the three new buildings, and the new track plan PDF.
At the moment, it’s only $9 – saving you a whopping $47.
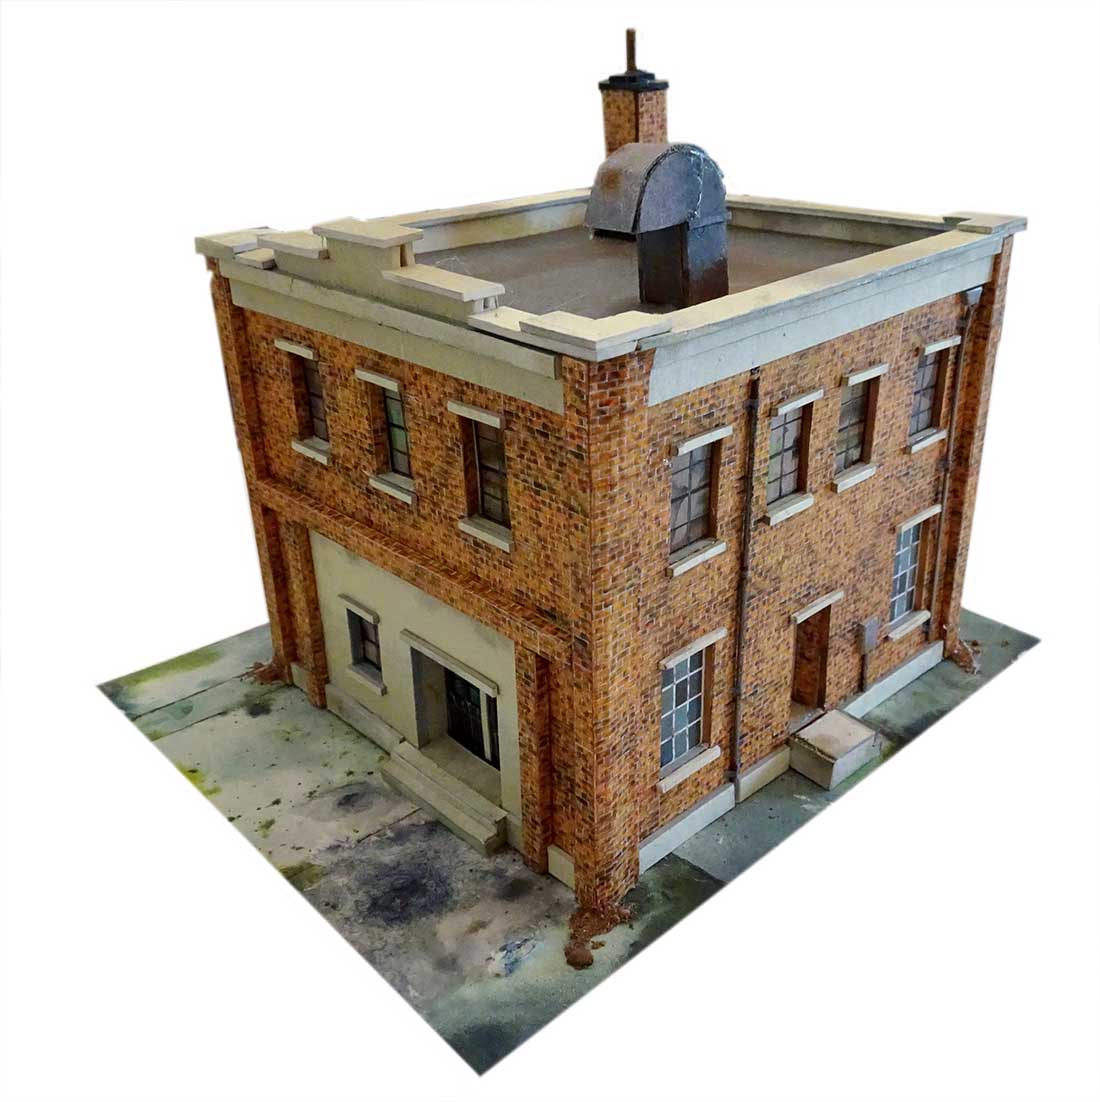
There are 3 new buildings and 1 new track plan PDF in the latest sale – you can grab them all for just $9.
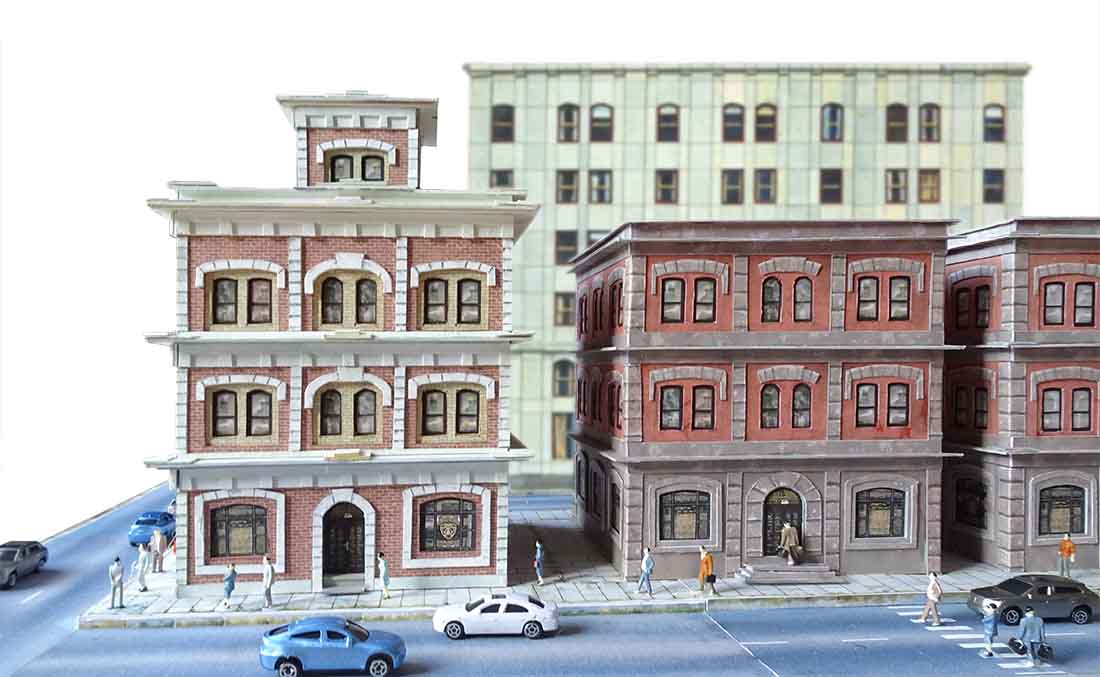
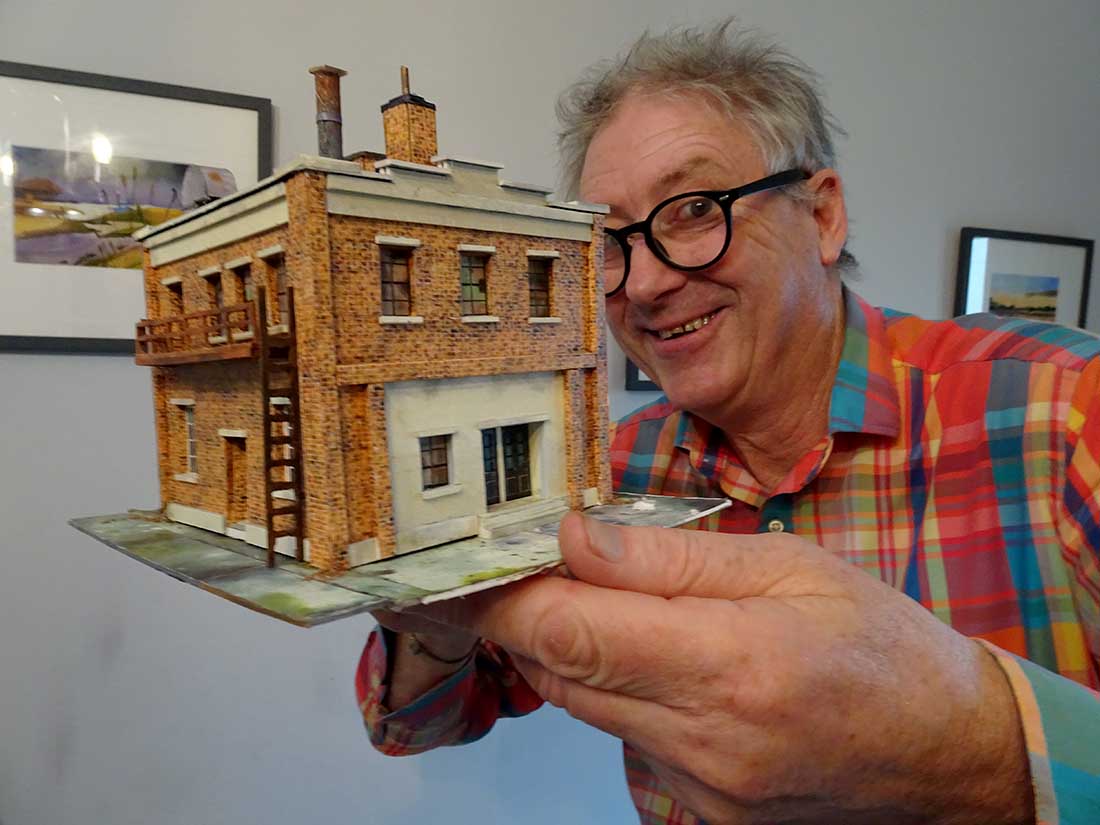
Here’s John, showing what they look like.
If you are unfamiliar with the printable buildings, you just download them and stick them together:
Here are the three new buildings:
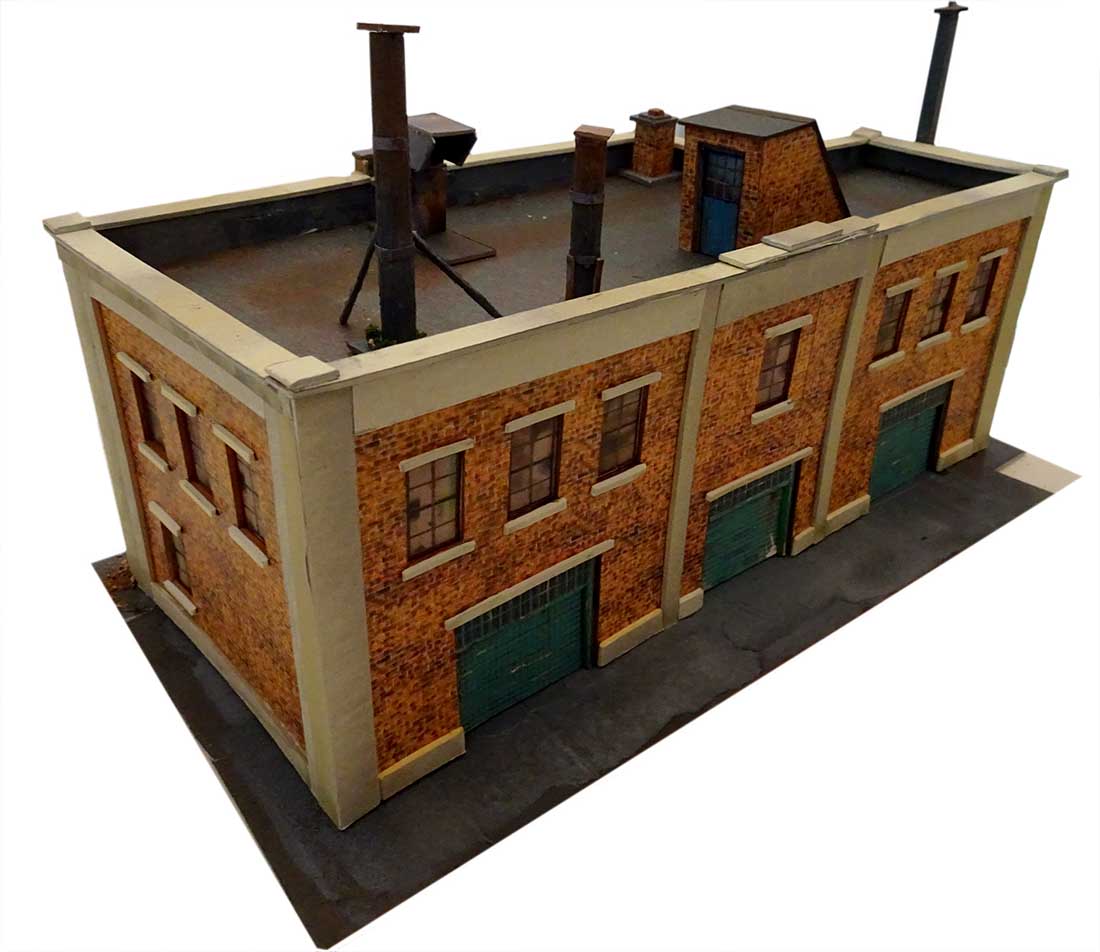
All the buildings are HO scale. Just reduce the print size to 54% for N scale.
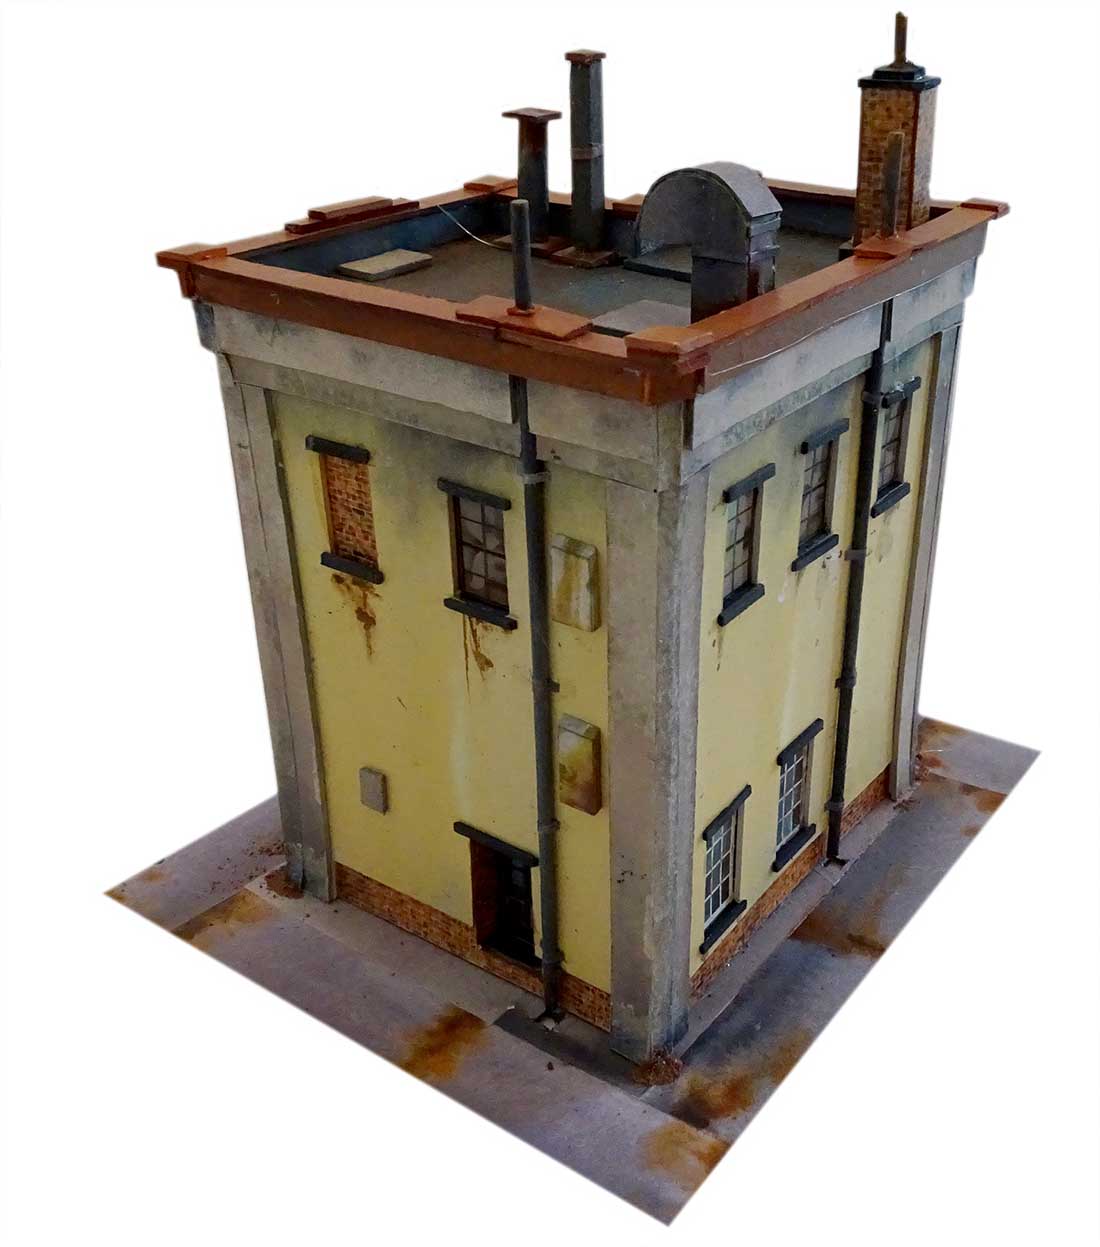
You can print as many as the buildings as you like.
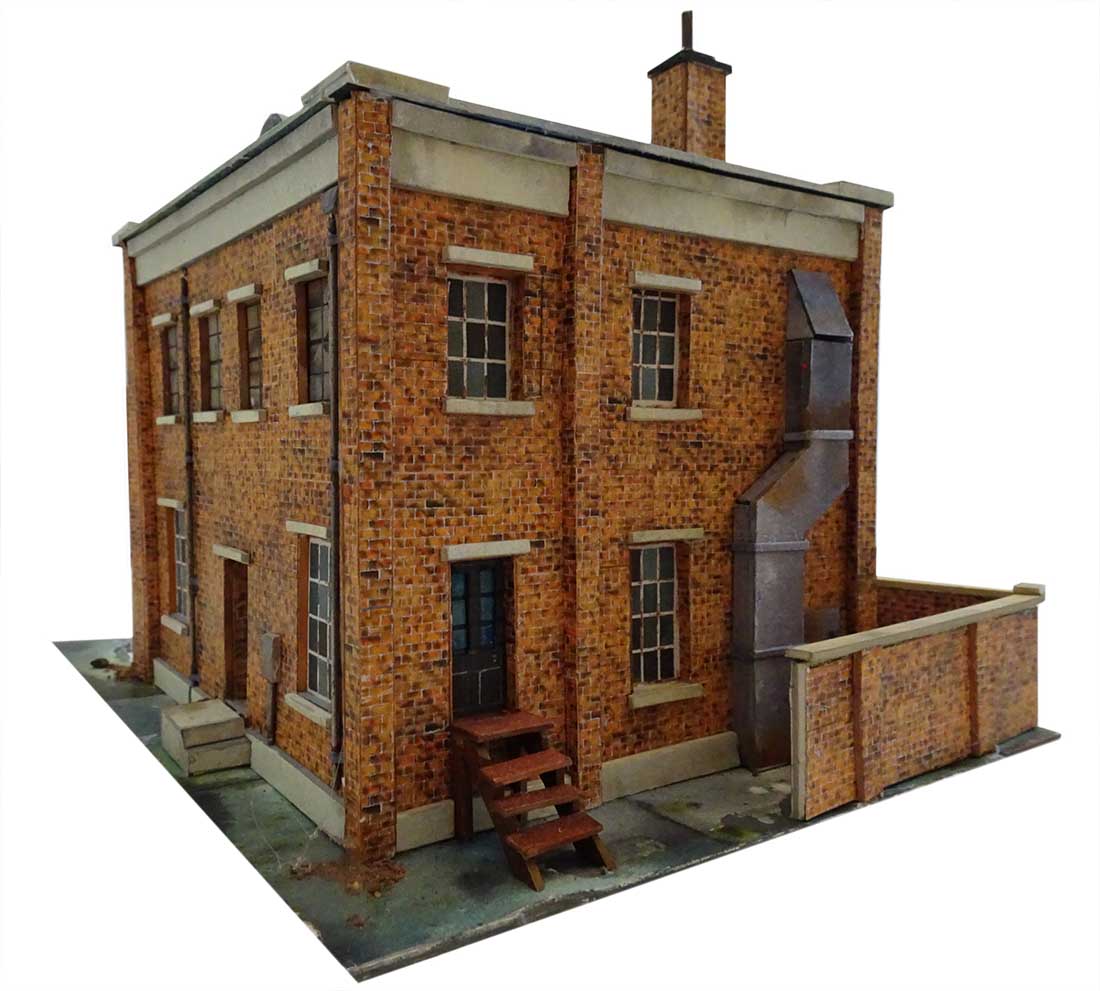
When you mix and match the buildings, you can get some really nice effects.
And best of all, you can get these three new buildings – and the latest track plan PDF – for just $9 over the next few days.
Volume 3 of the track plans is made up of another 20 track plans – all new, and featured on the blog, with the links to the posts.
If you’ve enjoyed the blog over the last few months or years, please do help it out and grab the new buildings and track plans.
To keep things simple, I have bundled the new buildings and new track plans PDF with the Beginner’s Guide, so even if you’ve already got the Beginner’s guide (I know many of you have), grabbing it again gets you the new buildings and the track plans.
It just makes it loads easier for me to do it this way.
And of course, if you’re new to the blog, and you’ve not got the Beginner’s Guide and all the bonuses, now’s the ideal time to grab it.
You’re saving $20 on the Beginner’s guide, and $27 on the new buildings, and $10 on the latest track plan PDF.
That’s a whopping $57 saving, and you’ll be directly supporting the blog too.
So there’s big savings to be had, and you’ll also be helping to keep the show on the road too.

Don’t forget, there’s a 60 day money back guarantee on all of the products – the buildings and everything else – so you really have nothing to lose.
You can grab the new buildings and the new track plans PDF here.
Best
Al
PS HO scale train layouts here if that’s your thing.