Jerry has been in touch with his thoughts on Wiring DC and DCC:
“I had not thought much about ‘difficulties” in wiring a model train layout until I read one of your recent publications.
Comments made to answer the question posed kind of developed into DC versus DCC.
A few comments did provide some advice as to wiring but no one bothered to provide any wiring diagrams for the questioner.
Wiring a model train layout can be a real challenge or it can be relatively easy. Ask yourself the question: what type of train operations do I want to do?
For me having a train go round and round on a loop seams rather boring, but very easy wiring.
My first layout I built was about 1956. It was a 4 ft x 8 ft piece of plywood and a oval track. Since then I have constructed a number of layouts.
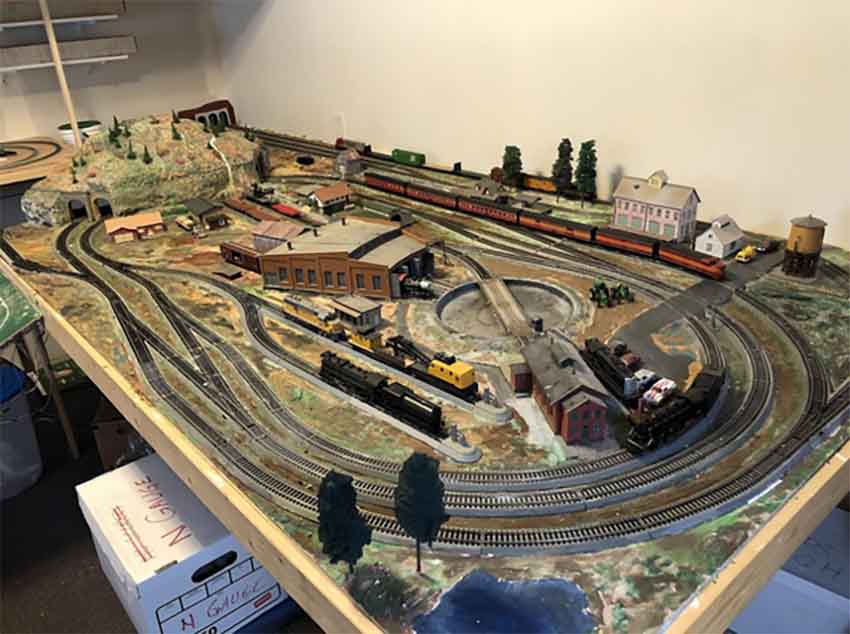
When we moved to Utah, USA, a few years ago, we found that our home would not accommodate a train play area. So we purchased a 12 ft x 16 ft shed, Grandpa’s Train Room.
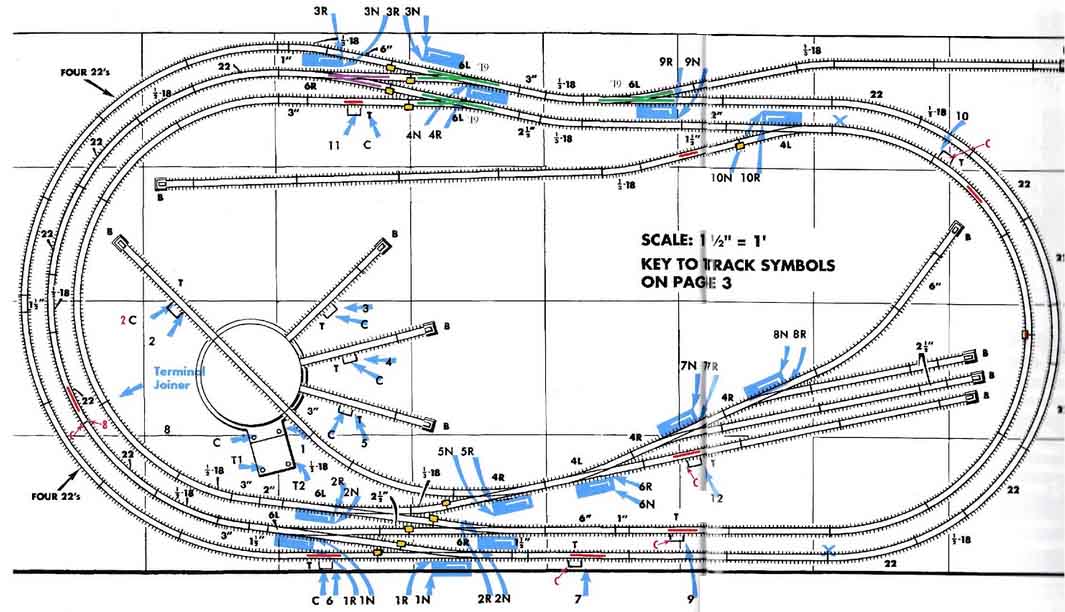
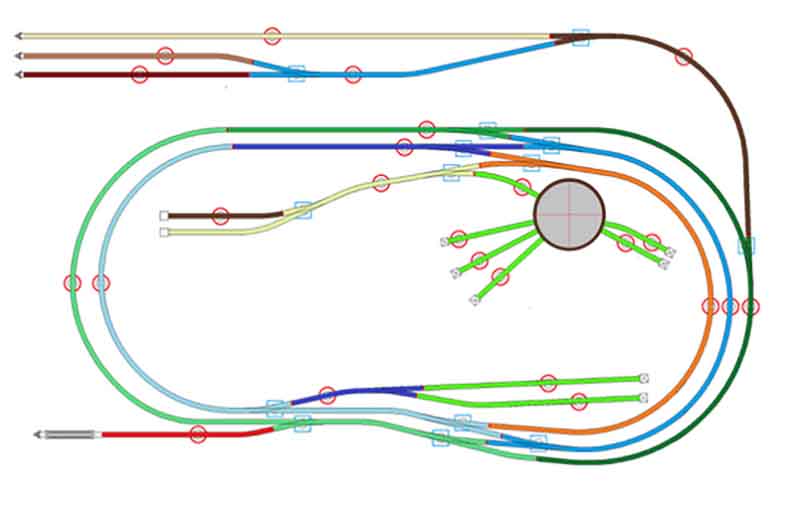
Like I said, having a train just go around a loop did not seem like a great challenge. So I chose the Atlas “Great Eastern Trunk” layout [with modifications] for my layout
I can run both DC and DCC on the layout. Electricity is electricity, whether DC or AC.
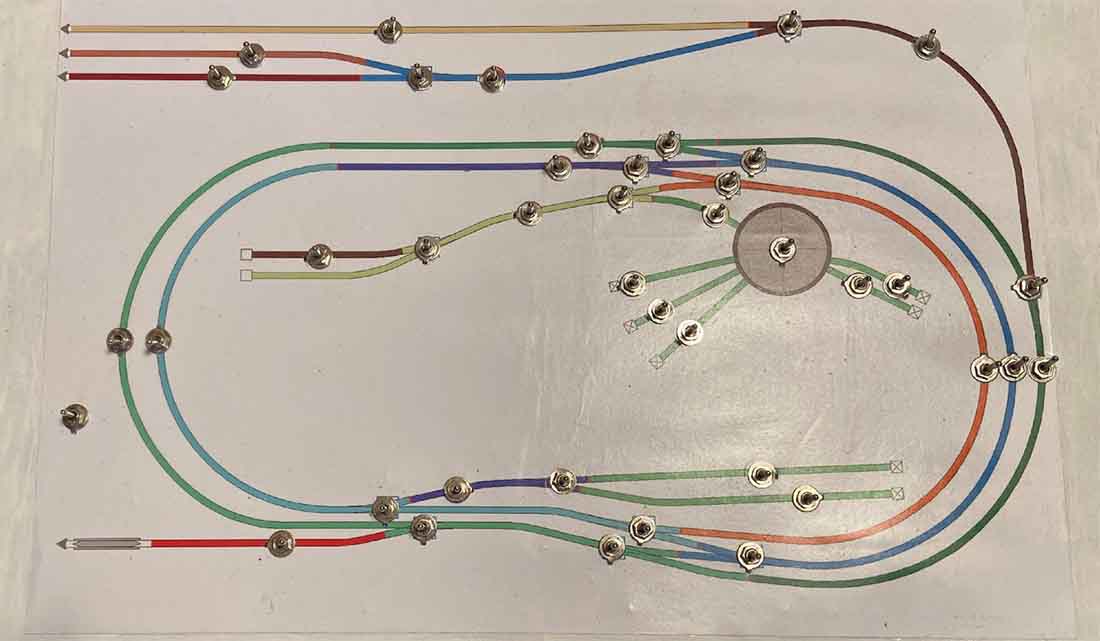
The layout as wired has 15 sections of track operated by DPDT [double pole double throw] center off switches.
There are 15 turnouts operated by SPST center off switches.
Also, since the turnouts are AC operated I have inserted one DPDT center off momentary switch (So anytime I use a turnout switch I don’t accidentally leave it on which could burn out the turnout mechanism).
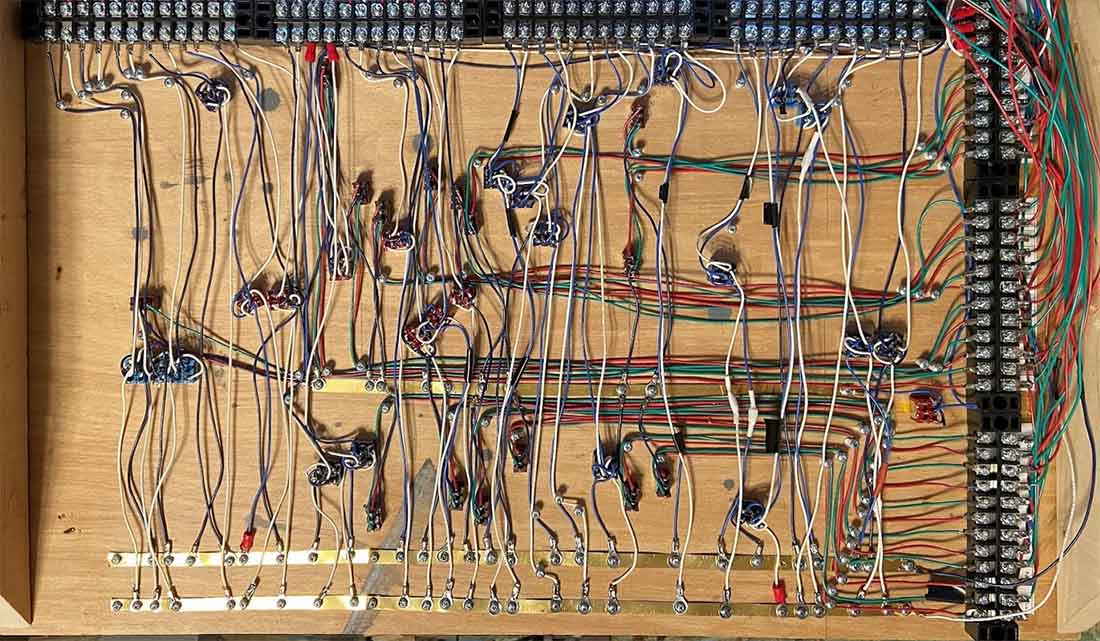
This is the under side of the control panel.
Now I can run either [but not both] DC and DCC. I just have to remember to switch the track switches [all] to either clockwise or counter-clockwise position.
I do not operate the turnouts by my DCC controller only use the SPST switches [+ momentary switch.]
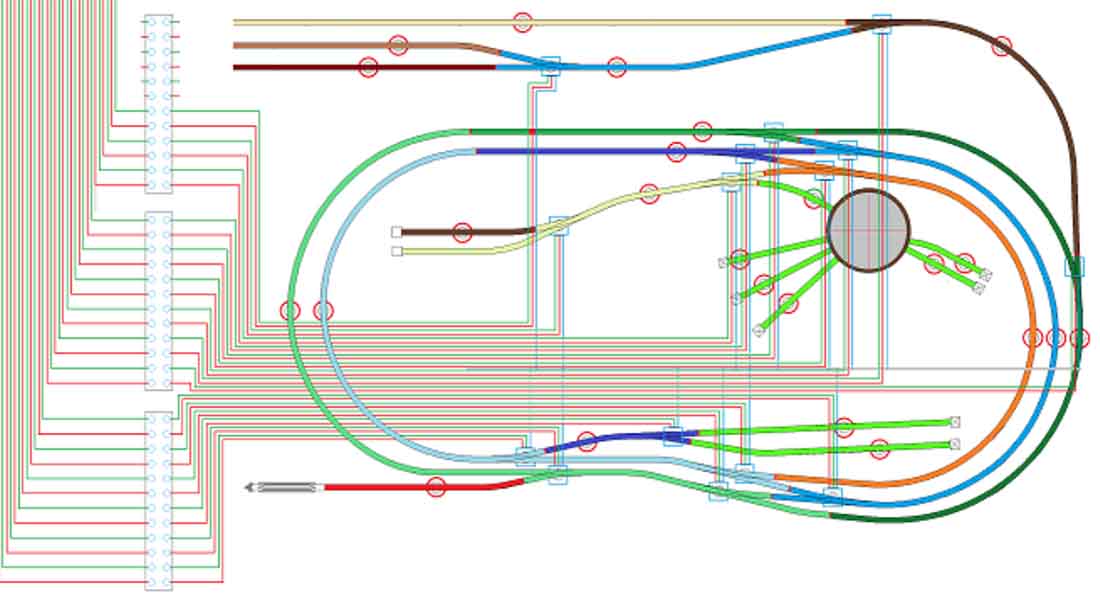
Below is the turnout switch wiring.
I hope this helps with wiring issues.
Jerry”
I’m not sure which post on wiring Jerry means, but it could be this one:
John’s been in touch with his HO scale track layout.
I really enjoyed his narrative – I’m sure many of you will be nodding your heads in agreement:
“Hi Alastair,
I’ve subscribed to your daily emails for a few years now and finally have gotten the courage to submit something for your site. Hopefully you can use it.
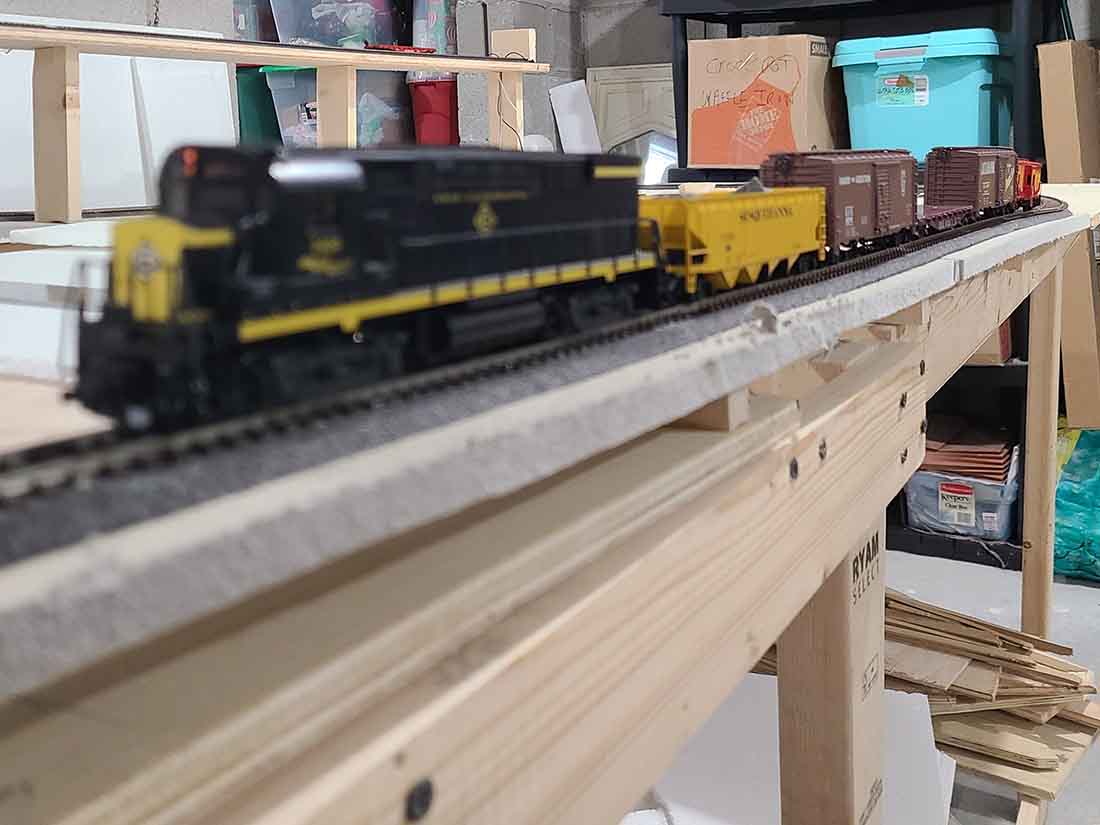
I am in the fairly early stages of building my HO layout but thought I would share some info/photos of where I am some 20 months into the process.
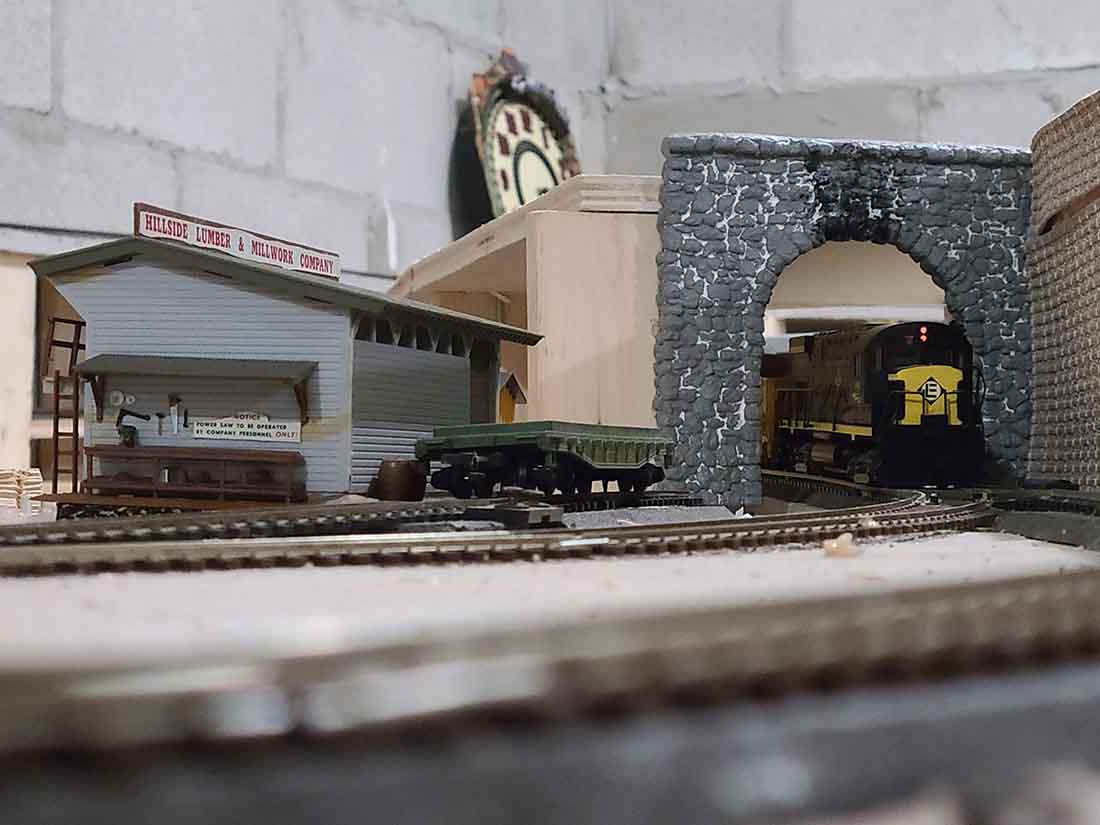
My railroad, the M&K Division of the Erie-Lackawanna Railroad, is an approximate 10′ x’15’ representation of a fictional division of the E-L located in the northern New Jersey-Pennsylvania-New York area.
It features a point-to-point main line (still under construction) and a branchline.
The branchline can function as a point-to-point via two connections to the mainline when I want to “operate” it, or as a large, self-contained loop to run trains for visitors.
I named the M&K in memory of the two people who were instrumental in developing my interest in model trains — my father-in-law, Joe Mandrick, and my dad, Otto Kampfe.
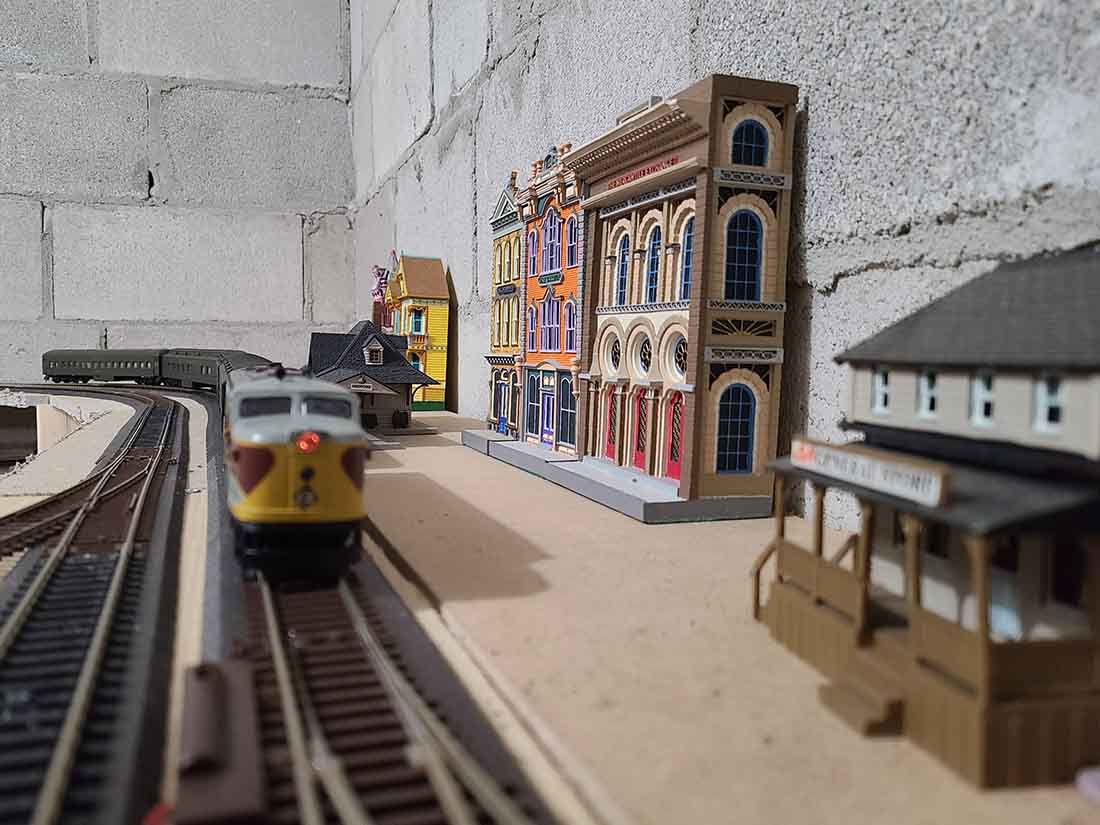
At this point, there are/will be 10 cities, towns and other points of interest on the layout.
With the exception of Hoboken, NJ, the actual eastern terminus of the E-L, and a 2-track hidden staging area representing Scranton, PA/Chicago at the other end of the main line, the rest are named after family members and places that are meaningful to me.
There will be a small amusement park with an operating carousel and ferris wheel, and a gazebo where there will be concerts for visitors. The carousel and ferris wheel kits are still in their boxes.
I began the planning process for the M&K shortly after my retirement in late October 2020. Although I had helped out my late father-in-law with his layout, a 4’x12′ oval, this was my first attempt at building my own.
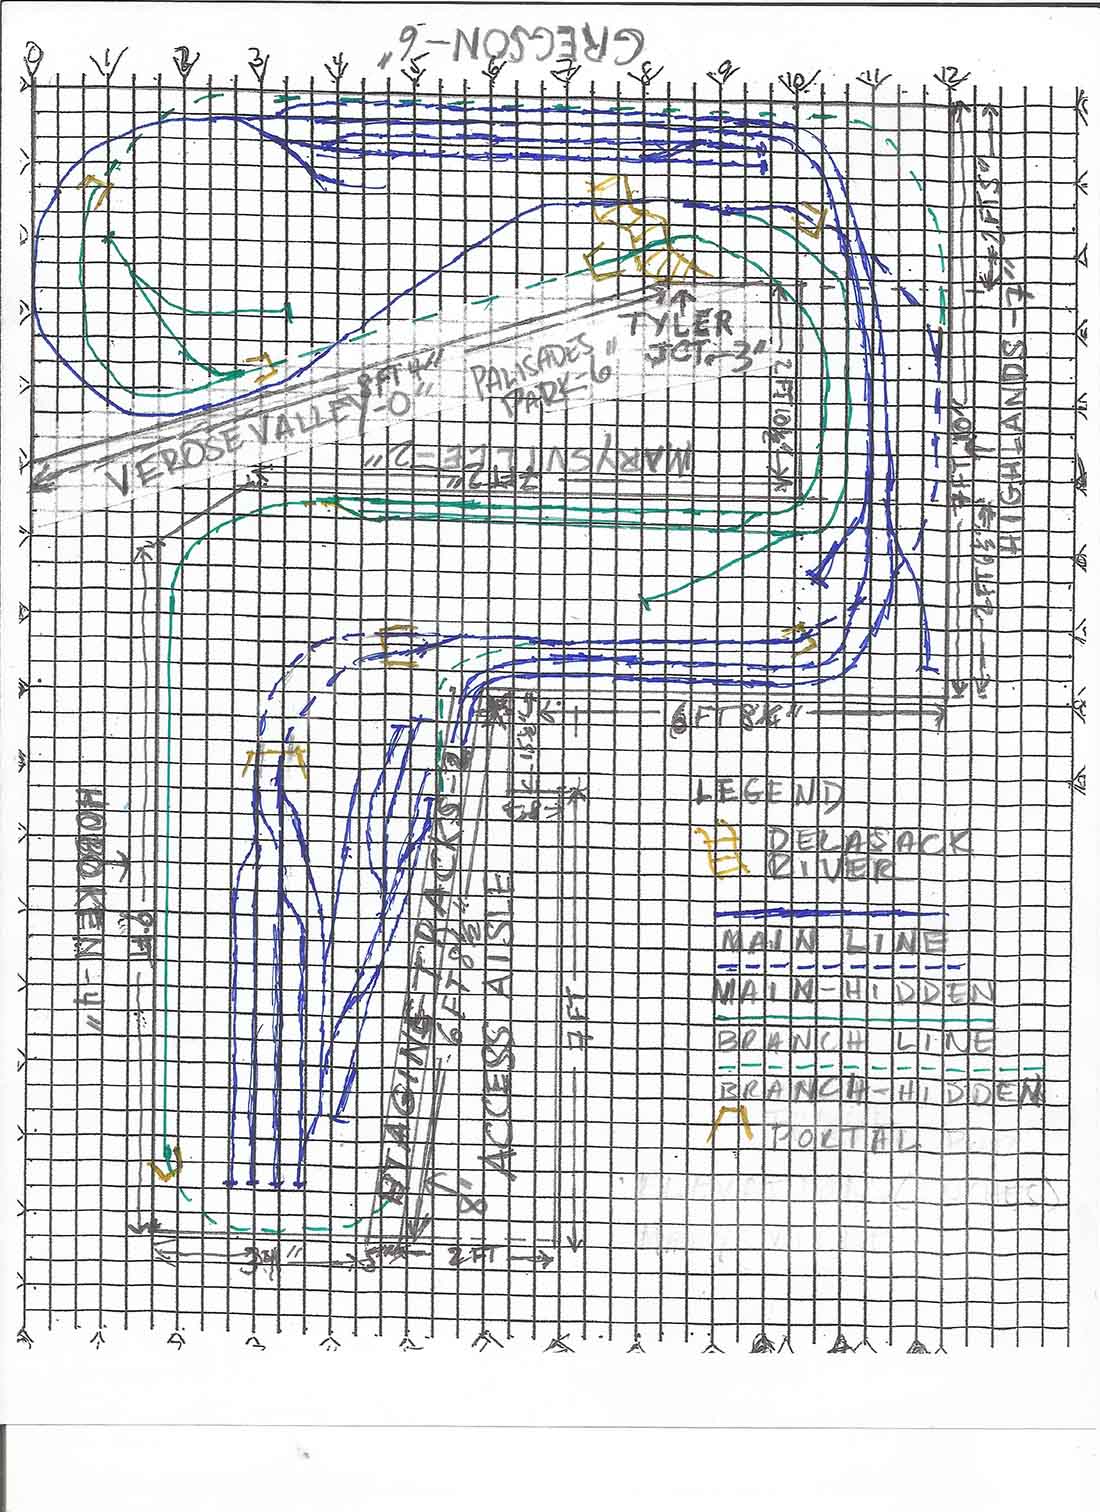
I devised a track plan over that first post-retirement winter that was in the shape of a question mark, which was inadvertently appropriate given my lack of layout building experience.
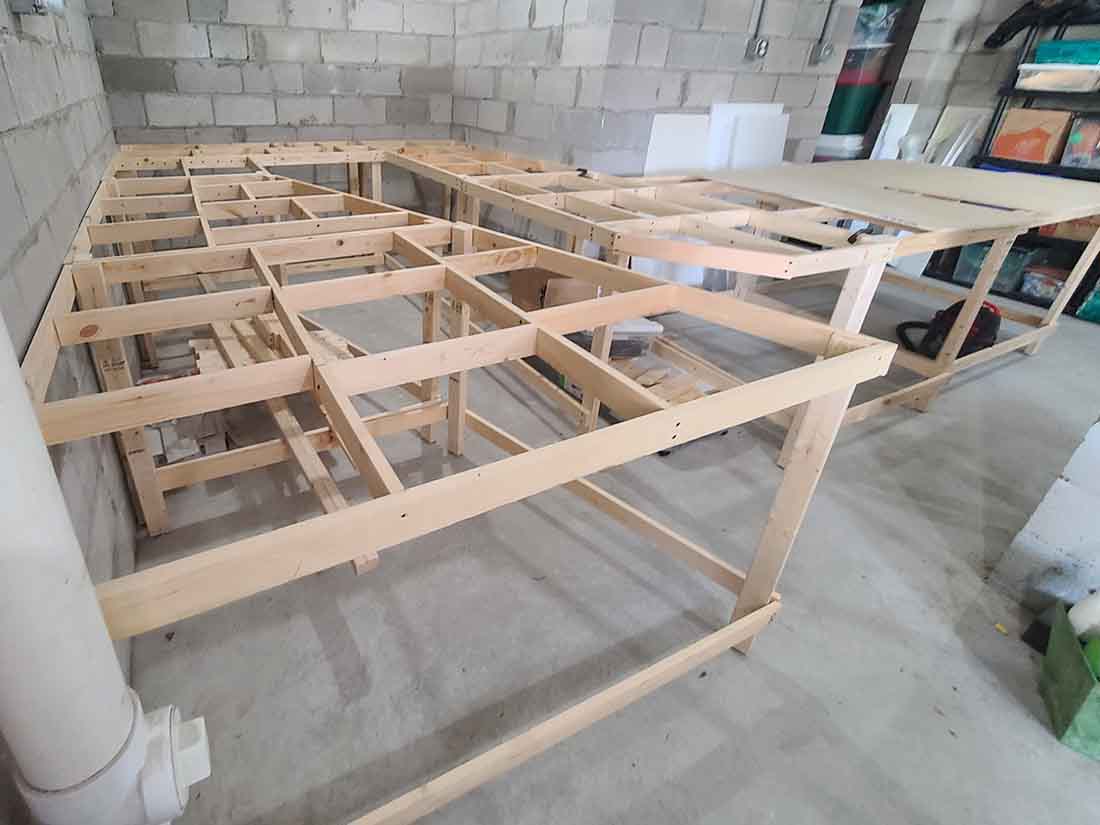
Construction on the benchwork began in early March 2021.The layout is a series of 7 smaller tables that were built using 1x3s for the frames and interior support braces, and 1x2s for the legs, which have adjustable feet. I also used 1x3s as leg braces.
The benchwork is 3 feet above the floor, which these days probably is a bit low. But I wanted to be able to stretch to reach the back corners of the layout..
I am far from being an even remotely accomplished carpenter. I watched some YouTube videos to get an idea of the basics of building benchwork and took it from there. All in all, it’s quite sturdy.
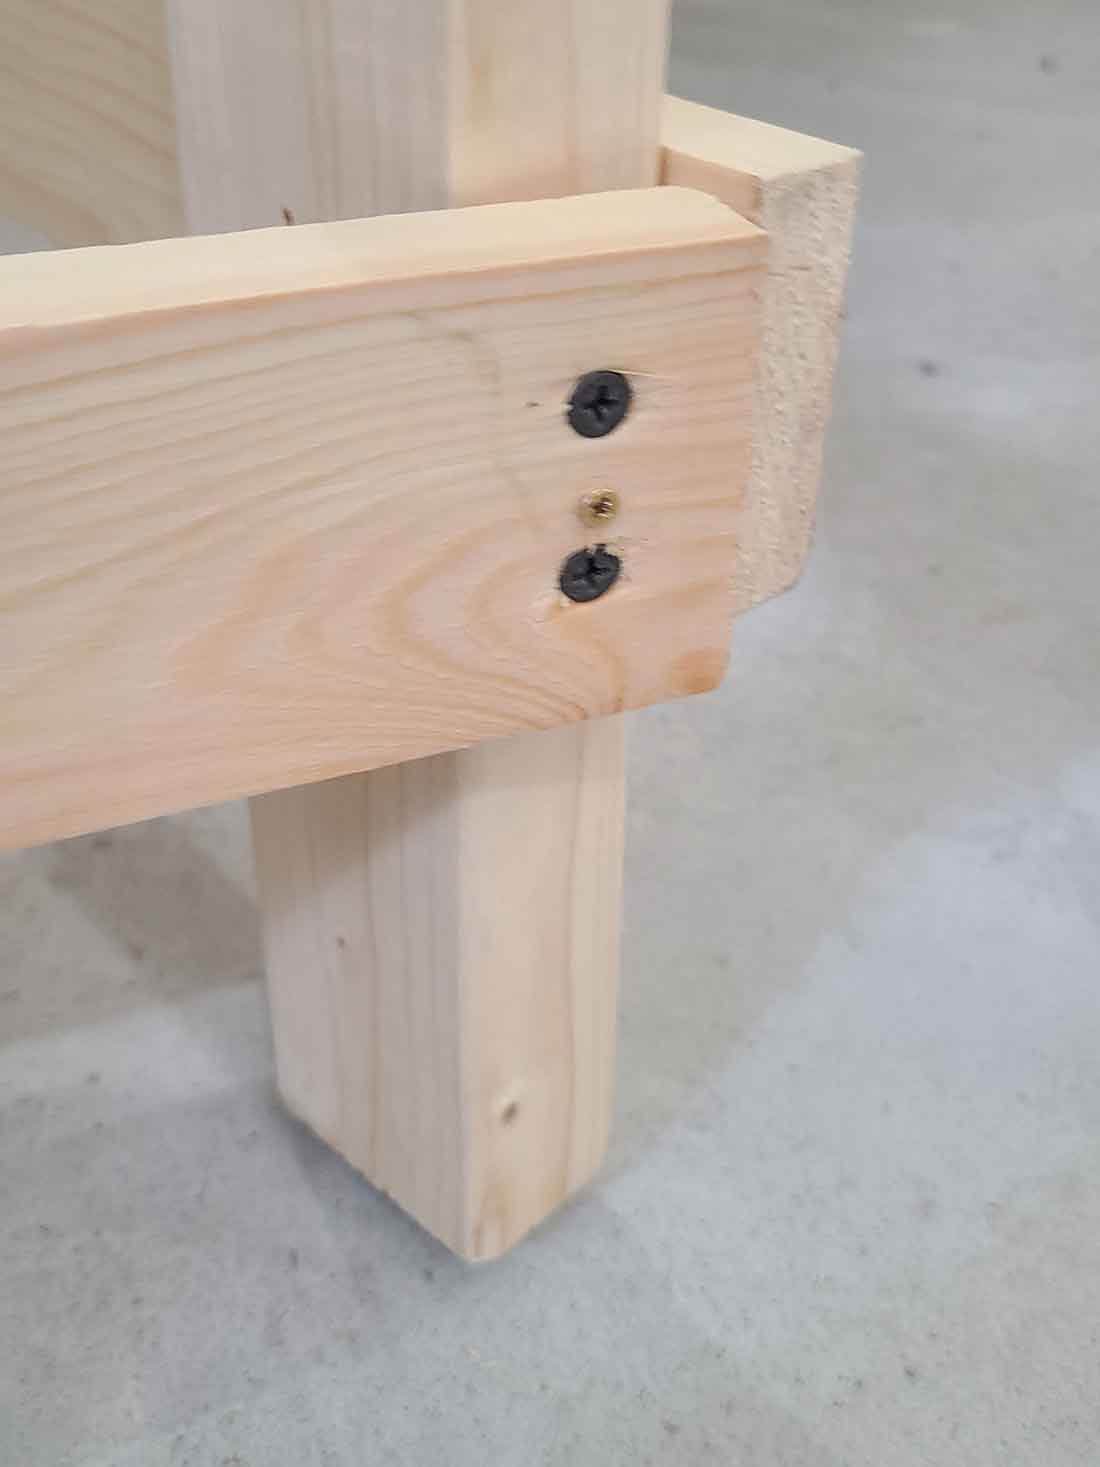
The benchwork was completed in late August 2021. I marked the milestone by inserting a “golden screw” (as opposed to a “golden spike”) in the area where the last screw was set into the benchwork.
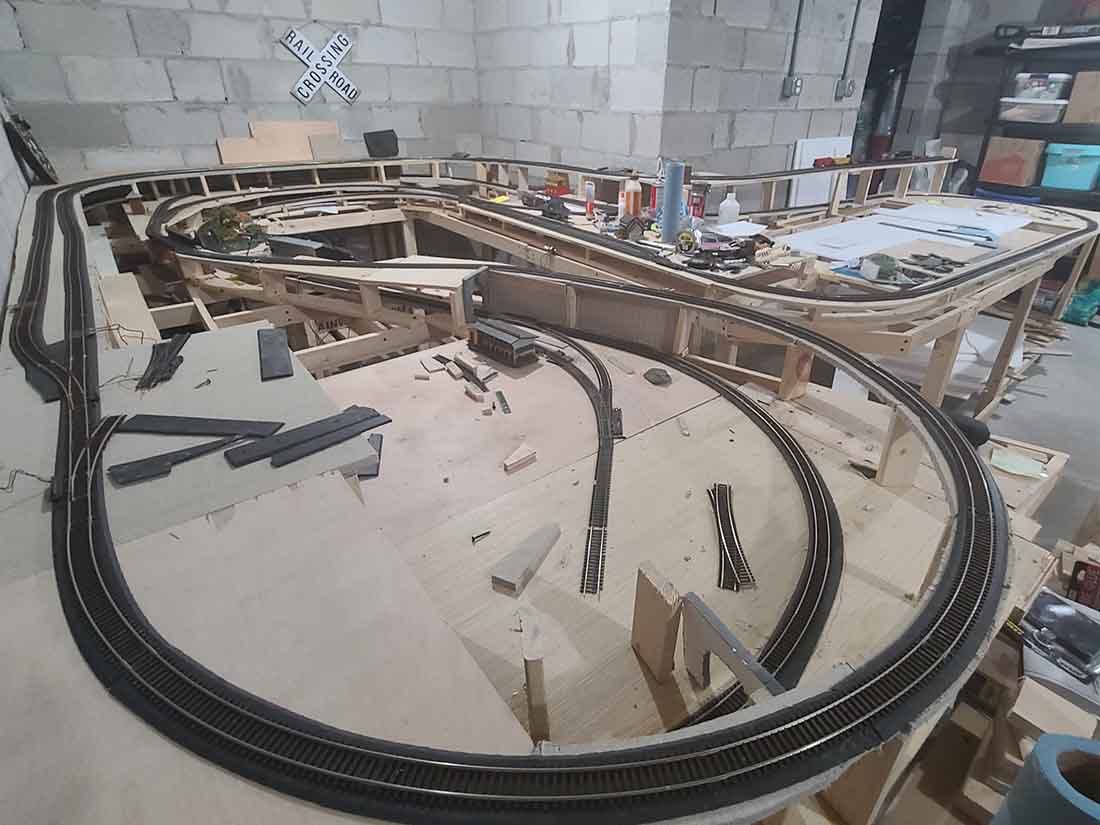
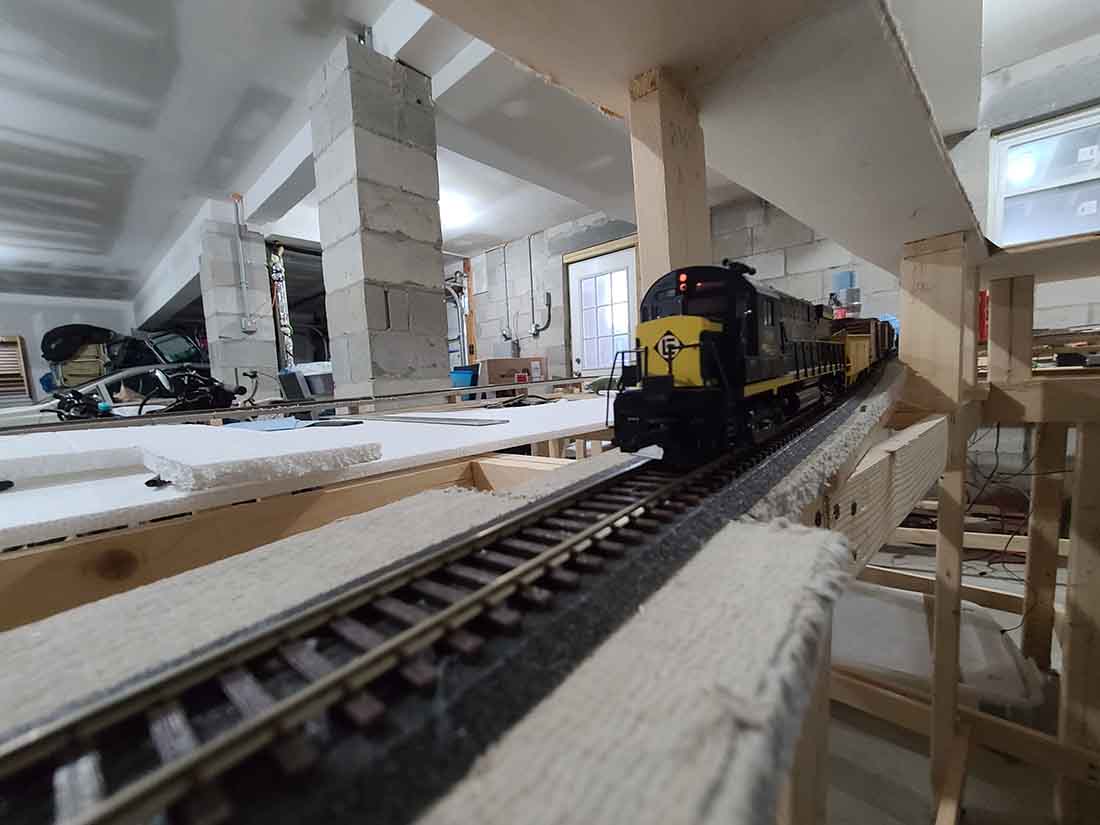
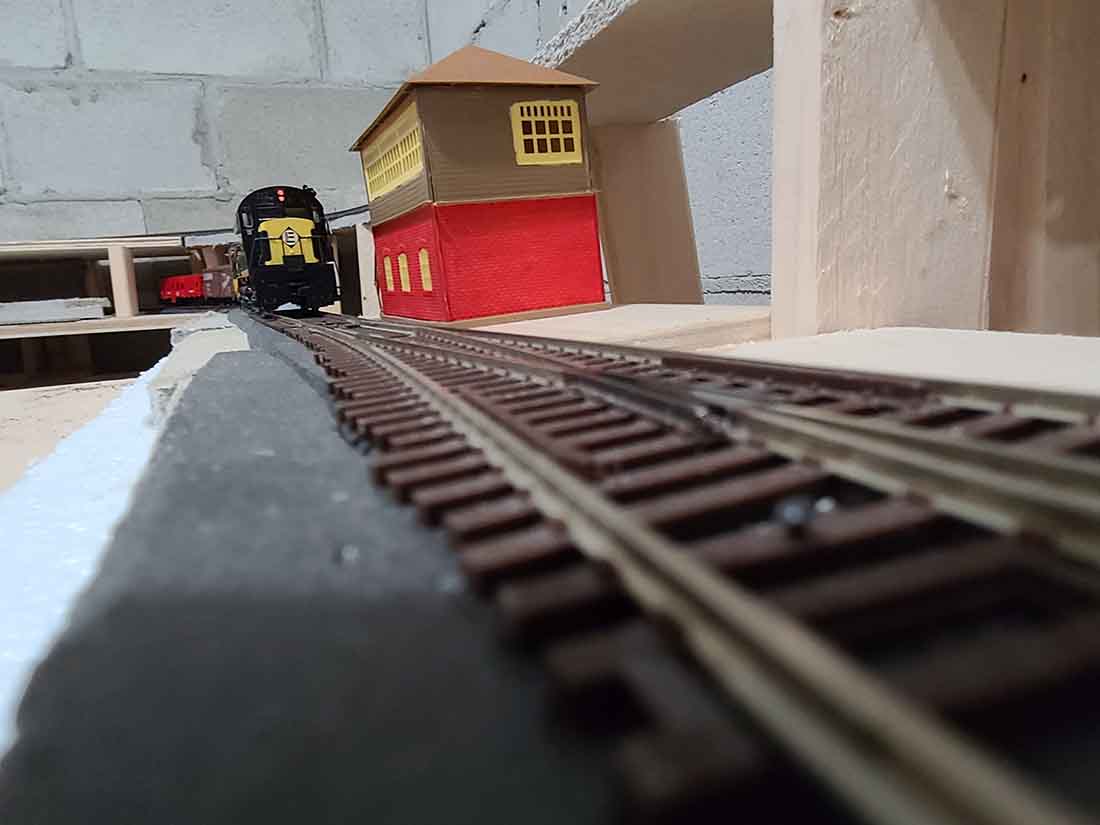
While the construction of the benchwork was easier than I anticipated, the laying of track has not been. The track plan is ambitious — probably overly so for a beginner — with several elevation changes as the track climbs to 8 inches above the benchwork at the hidden staging yard.
I have used 1″x3″ piers cut to varying lengths that are set on 1/2″ or 3/4″ thick bases. The piers support 1/2″ sub-roadbed between 3″ and 8″ wide. I started out using 1/2″ plywood for the sub-roadbed but, on the advice of a local model train store owner, have switched to using Homasote in most cases. It’s just much easier to drive track nails into the Homasote.
I have had to make several changes during the track laying process. Whoever coined the phrase “life is full of compromises” must have been a model railroader.
I’ve made many with regards to curve radii, grade, track routing, etc. Grades were my biggest issue.
In many instances, I made them too steep. For example, I had to rip out a long section of track and rebuild it complete with new piers and sub-roadbed after encountering many problems when trying to run test trains through the area. That set me back a good month or so.
There were other instances where I had to rip-and-replace on a smaller scale to rework the track grade, as well. I now seem to have it correct. I’ve adhered as close as possible to a 1″ gain in altitude for every 4 feet of track.
I also did not follow the expert advice I found online with regards to electrical power blocks. The general rule of thumb cited by most was to space blocks about 6 feet apart. I thought that was excessive. I set up blocks that were much further apart and the result was either a noticeable slowdown by locomotives or complete stalls.
Luckily for me, I am using terminal tracks to supply track power — sorry, soldering is just not my thing at this point — so I installed a few more of them at strategic points along the rights-of-way and operations are significantly better.
As of now, I am going the DC route to power the layout. My locomotive fleet is entirely DC and the M&K treasury just cannot sustain the conversion to DCC.
Capital construction costs related to the purchase of lumber, track, turnouts, etc. have been much higher than anticipated thanks to COVID-related inflation and supply chain issues. Which brings me to some advice to model railroaders who are about to take the plunge like I did and build a layout: make sure that the size of your layout matches the size of your budget!
All of the wiring I’ve done is temporary. This allowed me to run test trains on the layout to test electrical performance and find trouble spots where trains might derail, uncouple, or “bottom out” due to grades that are too steep as I progressed with the track laying phase.
I still do have 2 major pieces to build: Hoboken with a scaled down passenger terminal and yard; and the fictional city of Gregson, which will house the division’s main freight yard. Those items likely will have to wait until the spring.
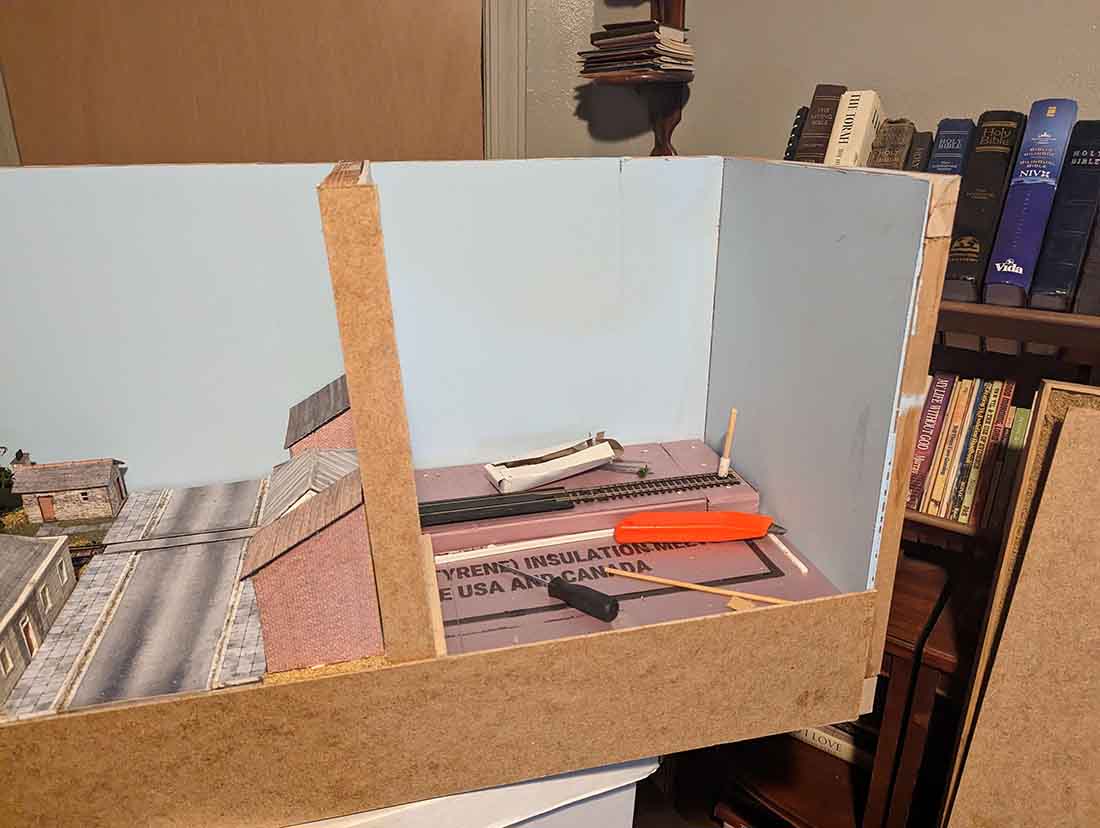
Over the winter, I will build a control panel for the layout where I will locate switches for 2-cab power supply to the blocks along the main and branch lines and a few switches to remotely operate inaccessible turnouts.
Most turnouts, though, are easily accessible and, at least for now, I will throw them by hand. I just completed the table on which the control panel will sit. It is wide enough to accommodate 2 “engineers” sitting side-by-side. The remainder of the construction of the control panel and resultant permanent wiring should keep me busy over the winter.
Another project for this winter is to get moving on scenery.
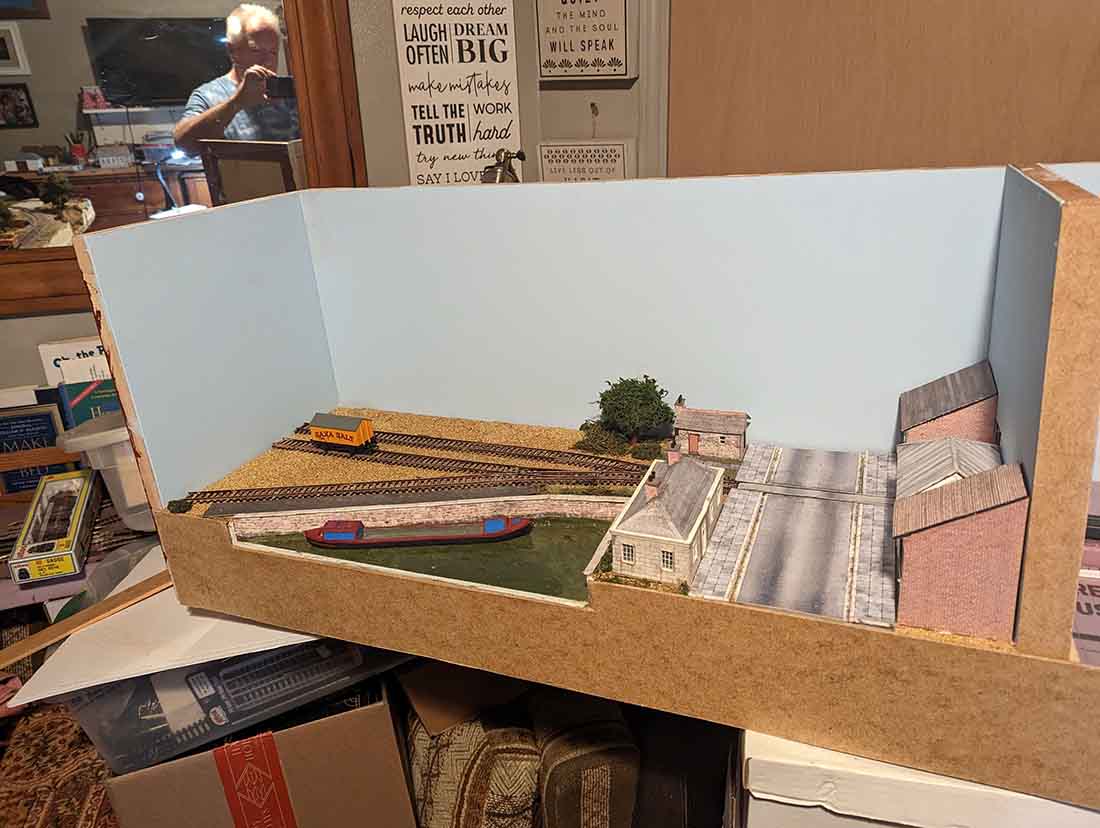
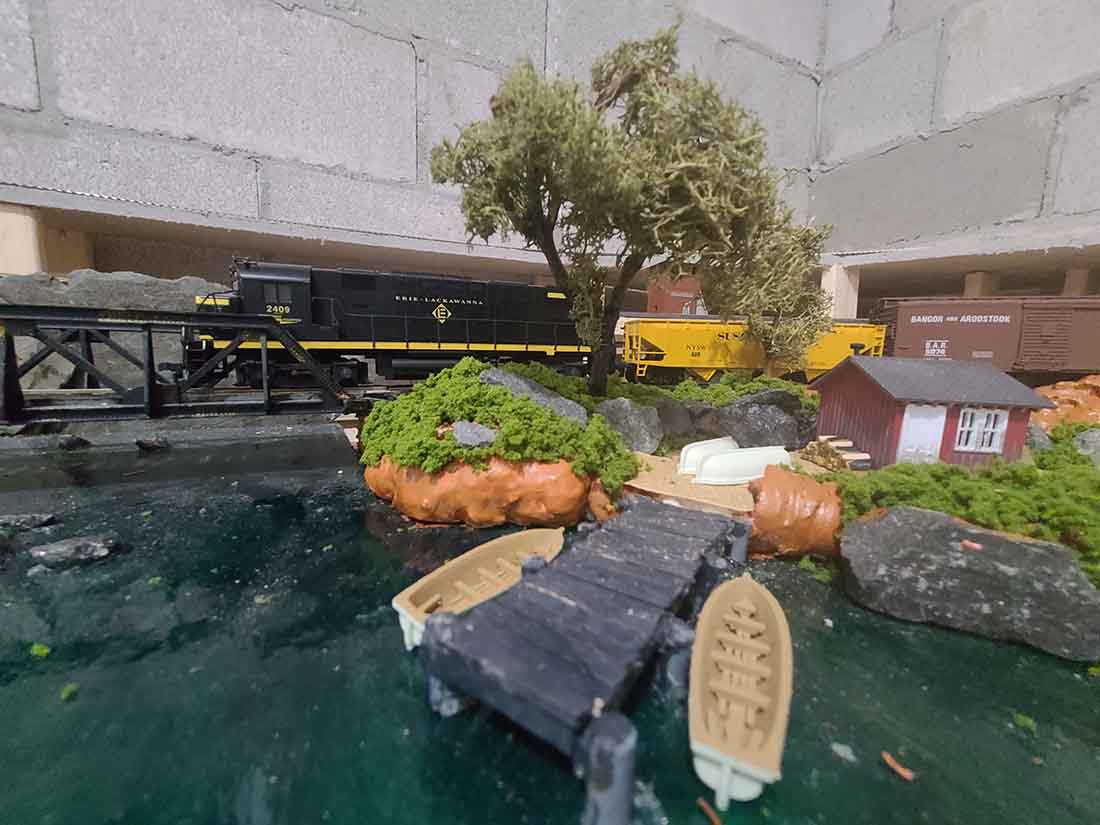
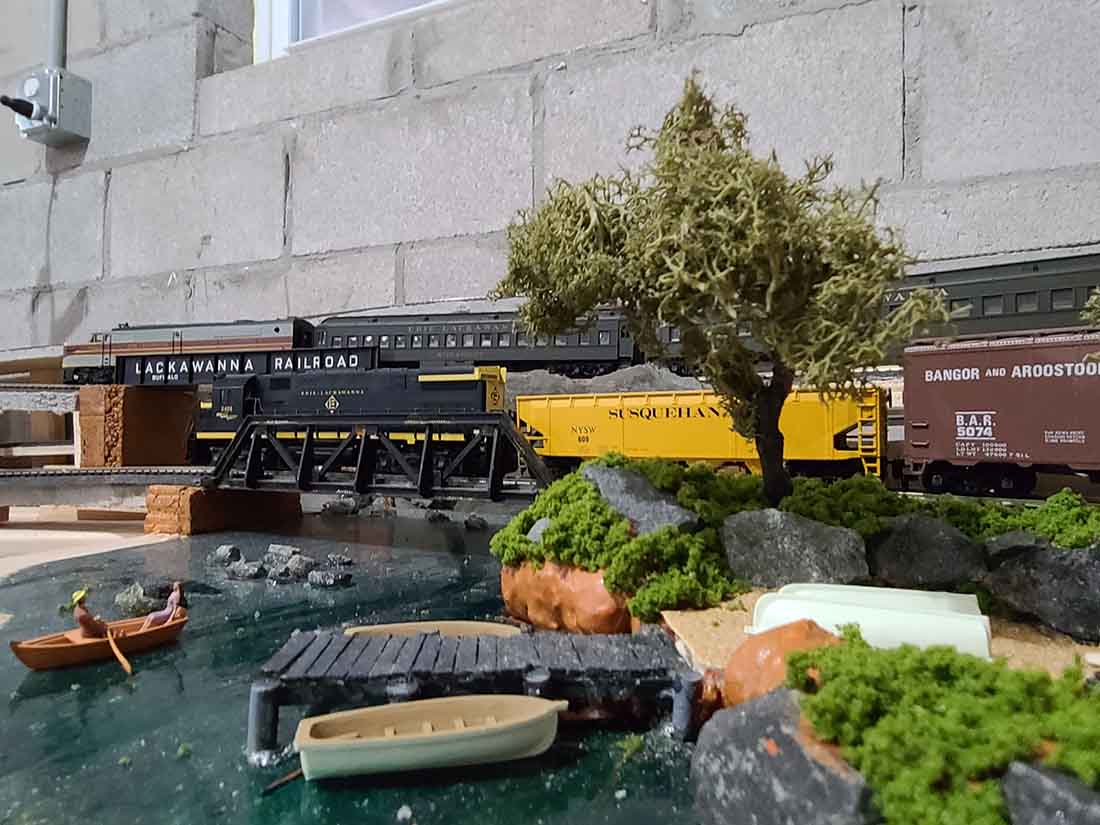
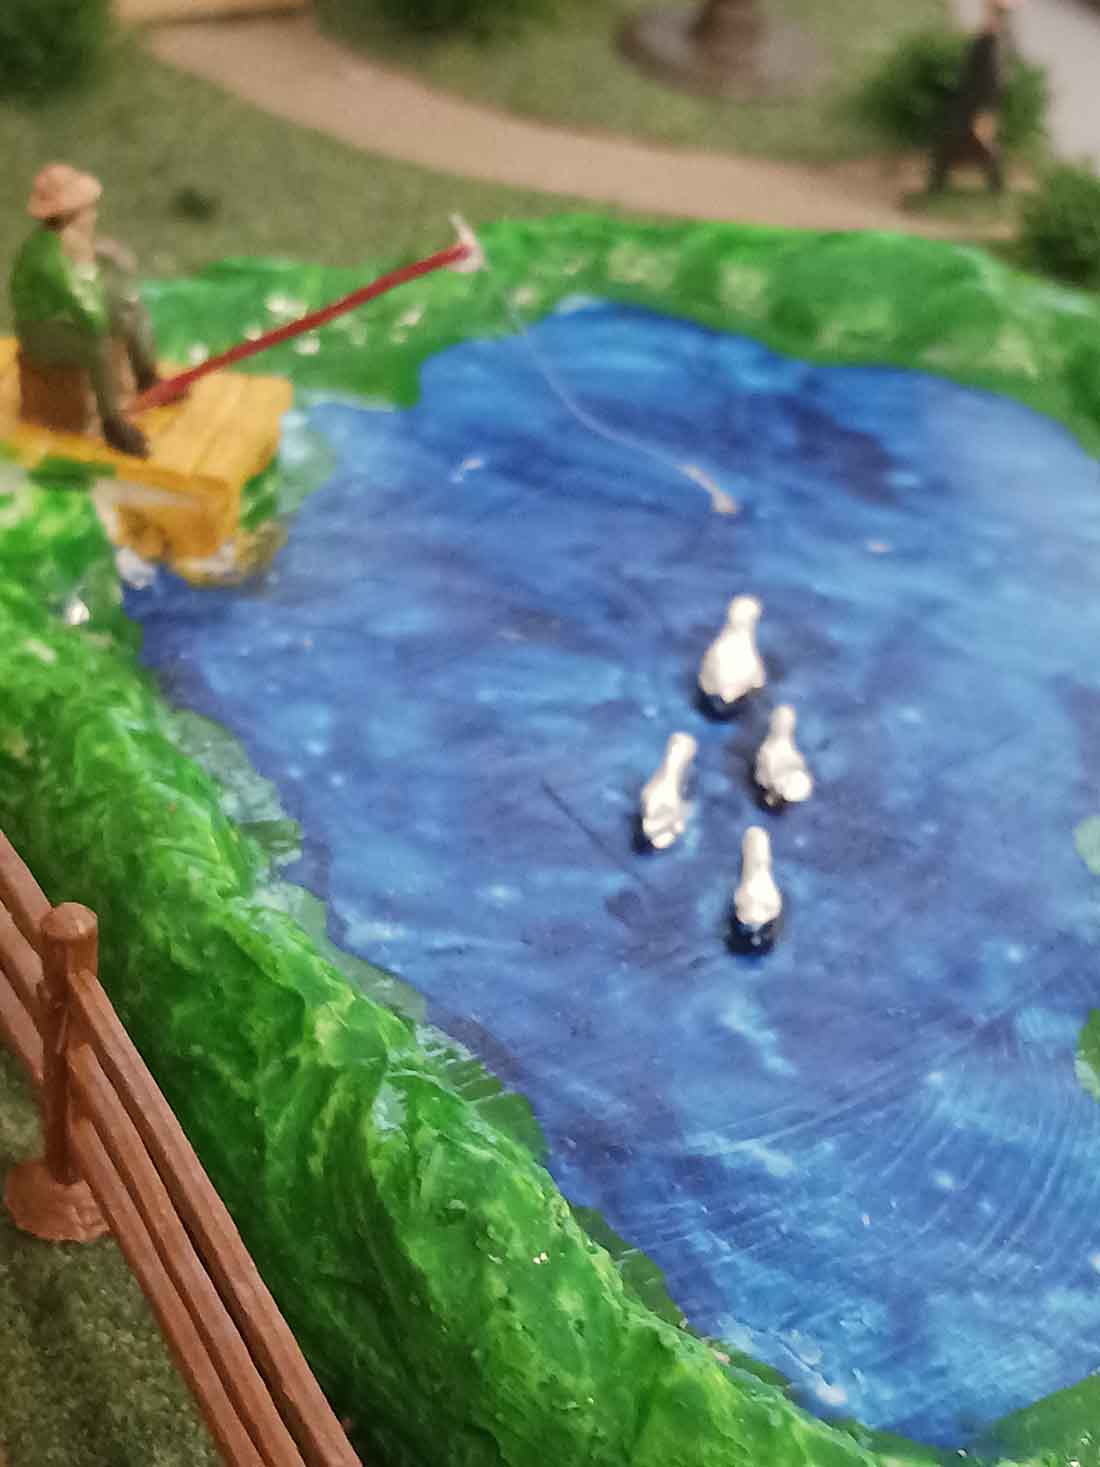
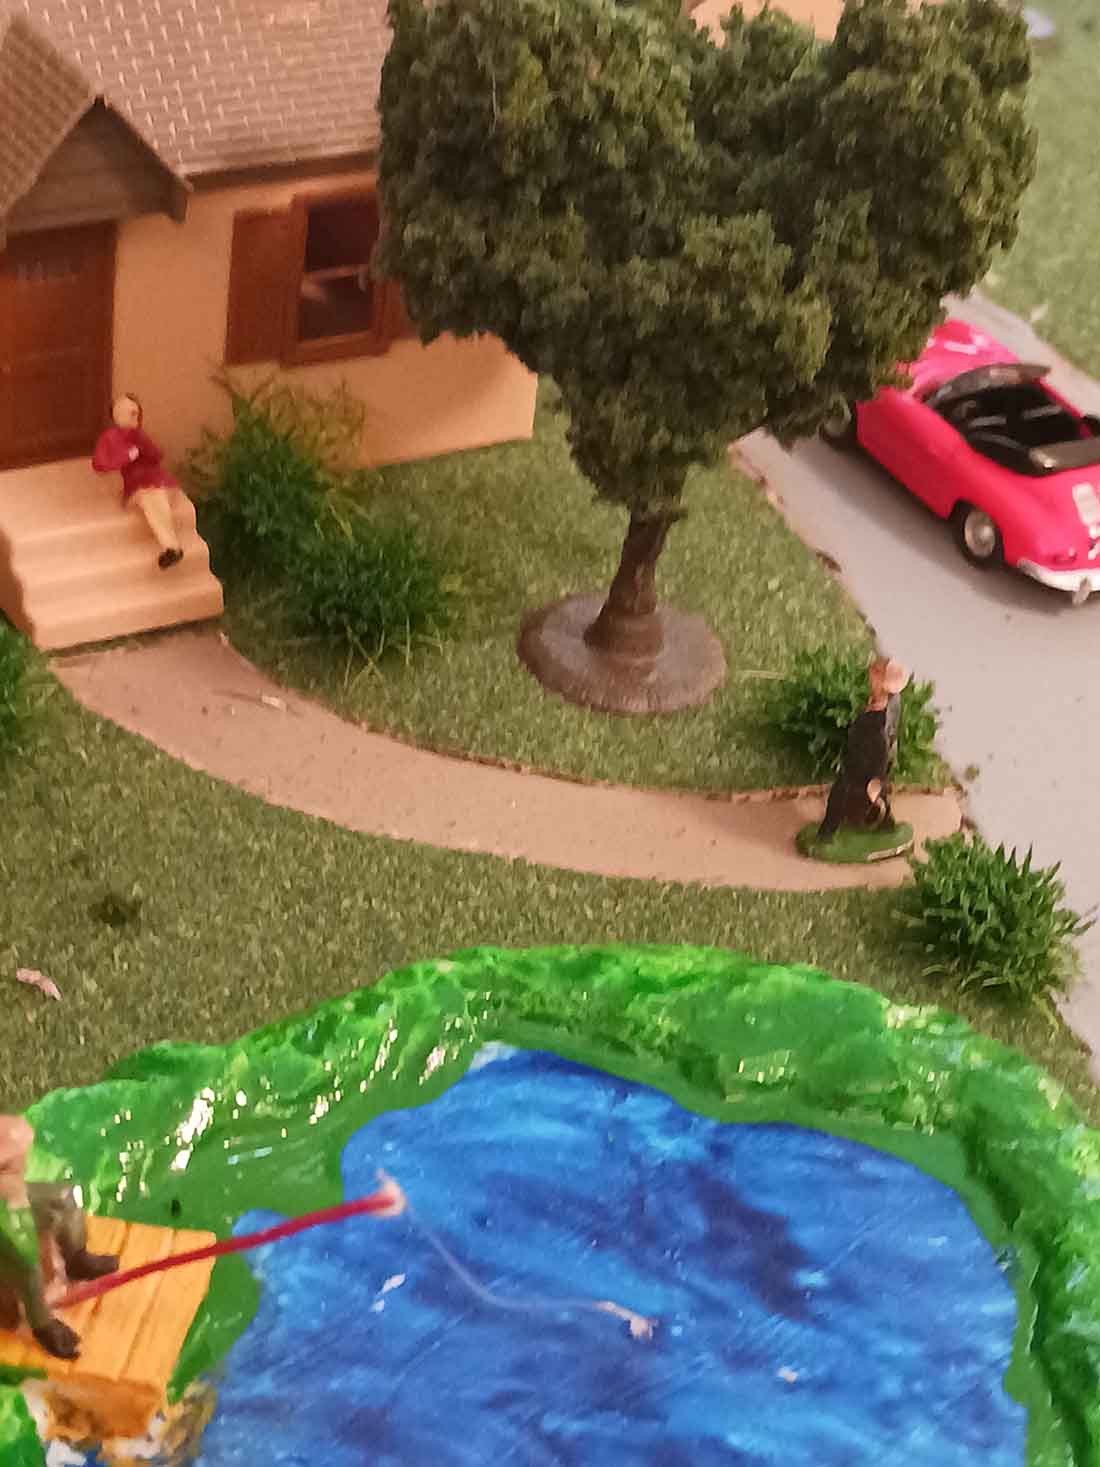
I have done a lot of work on an area named “Joe’s Landing,” where folks can rent rowboats to cruise on the “Delasack River.”
The Delasack name is a combination of the names of 2 prominent rivers the E-L crossed back in the day — the Delaware and the Hackensack.
Joe’s Landing features a scratchbuilt dock, a Woodland Scenics work shed (which serves as the rental office) and rowboats. The river itself is several layers of acrylic paint (brown, green and blue) topped with several coats of clear acrylic varnish. I learned this technique from a YouTube video produced by 2 modelers from the UK.
For the hills surrounding the property, I experimented by using spray foam insulation, an idea I gleaned from Alastair’s Beginner’s Guide.
I painted the insulation brown and am now in the process of adding ground cover to the hills.
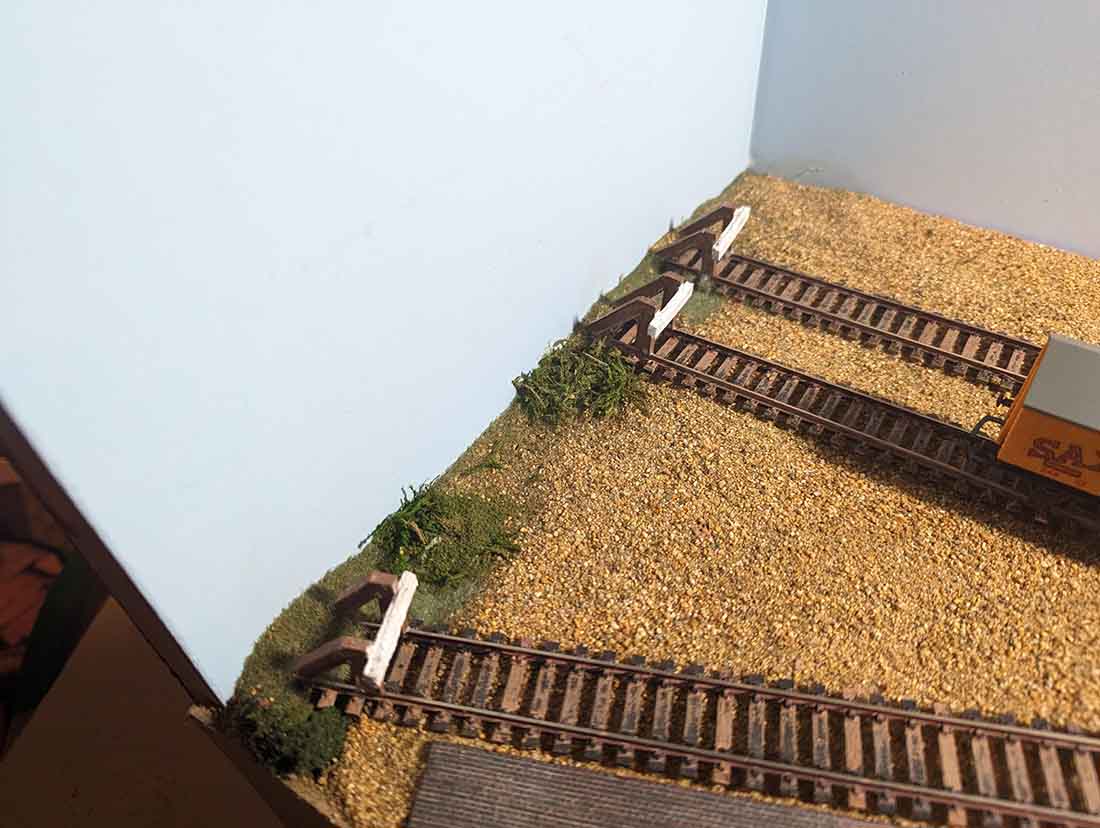
Hopefully this works well enough for me to use it throughout the layout. The real-life area in the vicinity of Hoboken is punctuated by igneous rock bluffs, called the Palisades.
I am attempting to represent these for a stretch of the layout between the Delasack River and the town of Marysville using discarded pieces of slate roofing that I have found in my yard. We will see how that works out.
I have experienced plenty of highs and lows since taking on this project. There have been times when I considered scrapping the whole thing and, instead, using the tables to accommodate a layout of Lionel trains that I have inherited or accumulated over the years.
I’m sure I am not the first model railroader to want to throw in the towel. But, thankfully, those were relatively fleeting moments and I have moved forward, all-in.
Hopefully I will have an update on my progress on the M&K later this year.
Jersey Shore John”
Golden Spike!
A huge big thank you to Jersey Shore John for sharing his HO scale. If you want to fast forward to his next missive, it’s here: Erie Lackawanna model railroad.
I liked his narrative just as much as his pics – there are some pearls of wisdom in it.
I think at some point, everybody feels like throwing in the towel, or starting from scratch again. It’s all part of the journey. I’d really love to hear your thoughts on it, please do comment below.
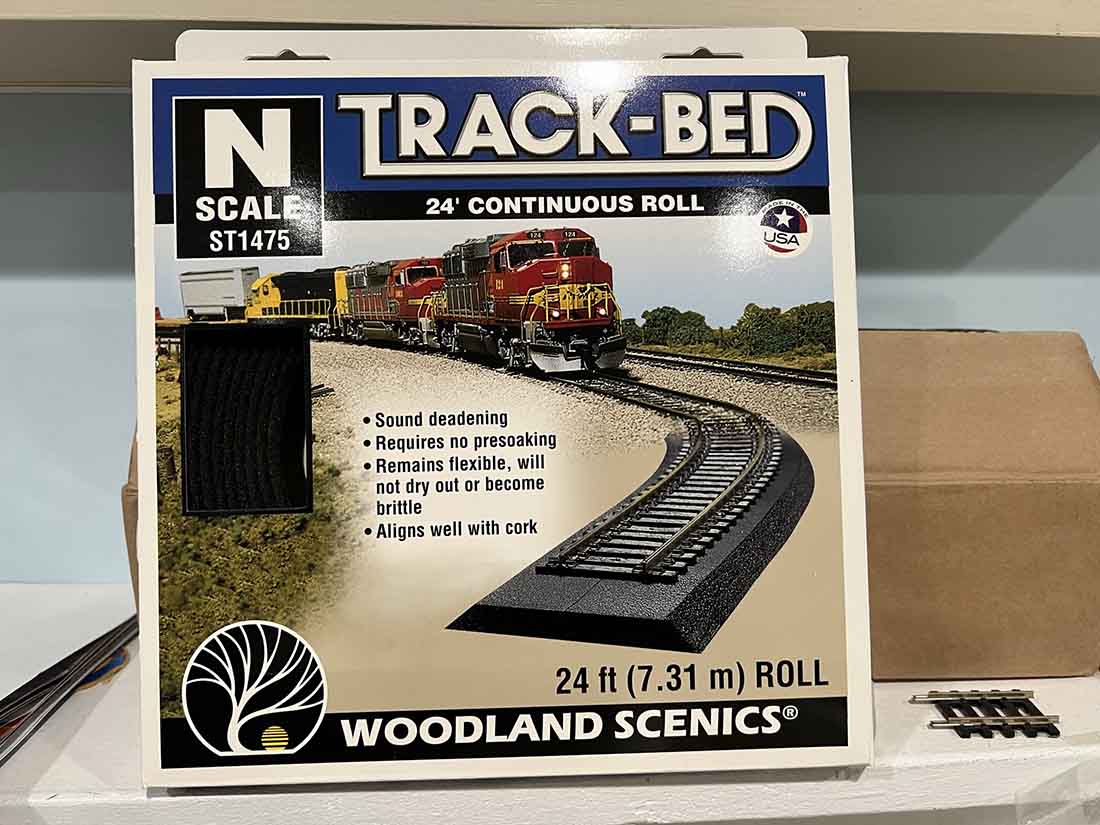
This time he talks us through using Woodland Scenics foam track bed, and why he does it:
“Hi Al,
This is video 2 of my 3-part series on building a simple and inexpensive layout for running trains. I am working on part three now and it should be ready for you soon.
These instructive videos are meant for the novice who would like to have a little layout but does not really know for sure how to proceed.
Over the years I have developed several methods that have proved themselves to be very reliable, easy, and relatively inexpensive. I would like to pass them on to the new guys and girls so they won’t have any excuse left not to start their own layout.
If a layout such as this is started it will build the skills needed to create more complex layouts and track plans later on if one wants to go on from here. Practice is what raises skill and knowledge levels after all.
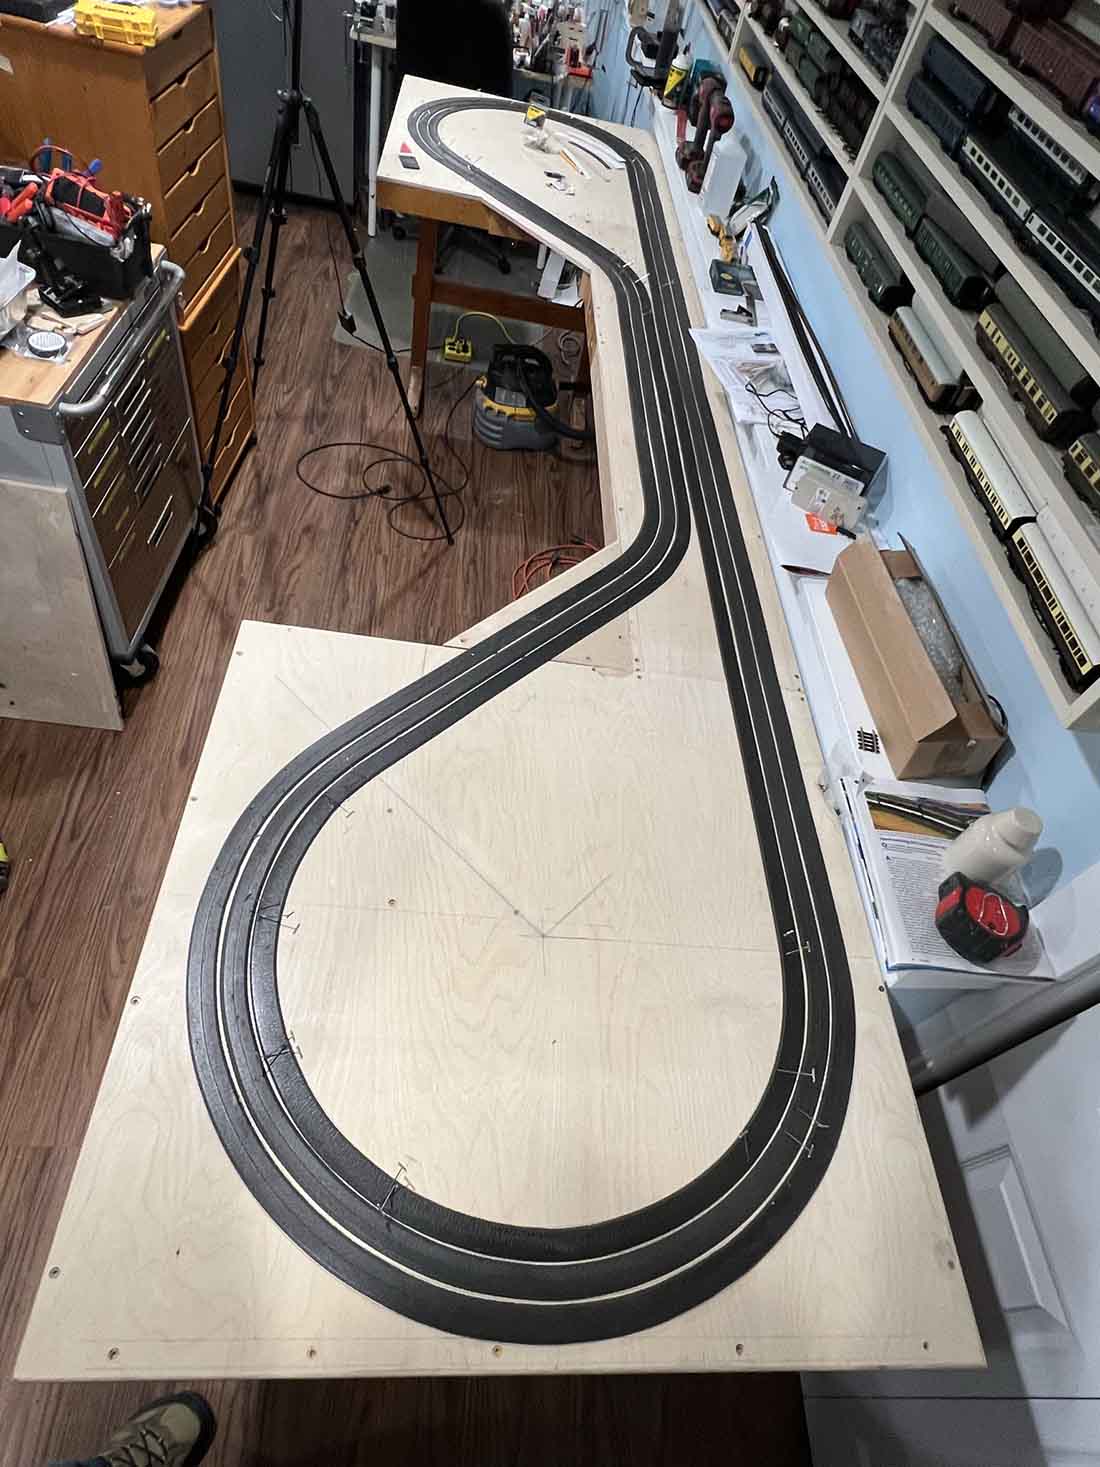
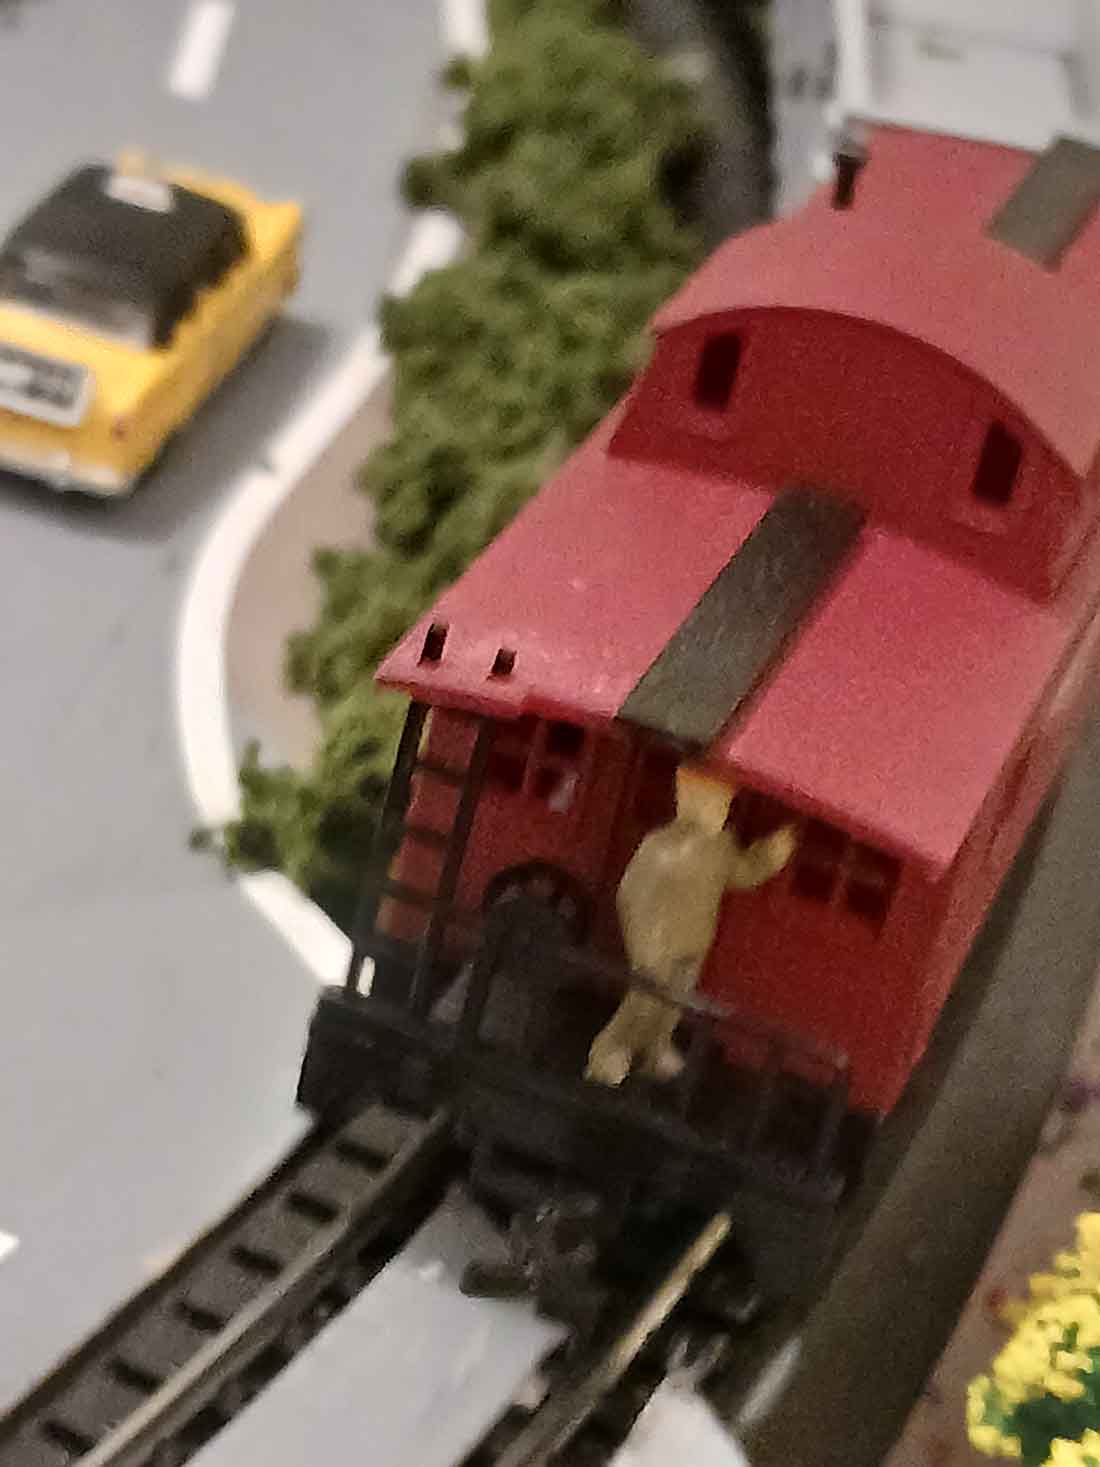
As I said before on the earlier n scale layout submission after I sold my Colorado and North Western layout (CONW), I found myself with a considerable collection of (1:160) N scale engines and rolling stock but I had no place to run them. This little compact layout will solve that problem and allow me to run my little gems again.
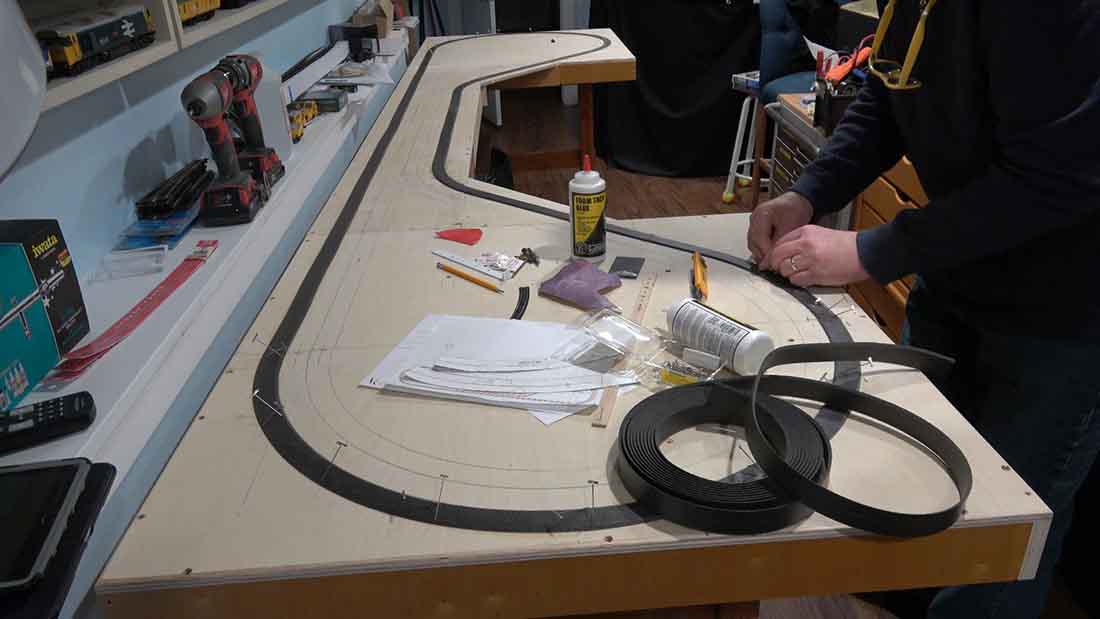
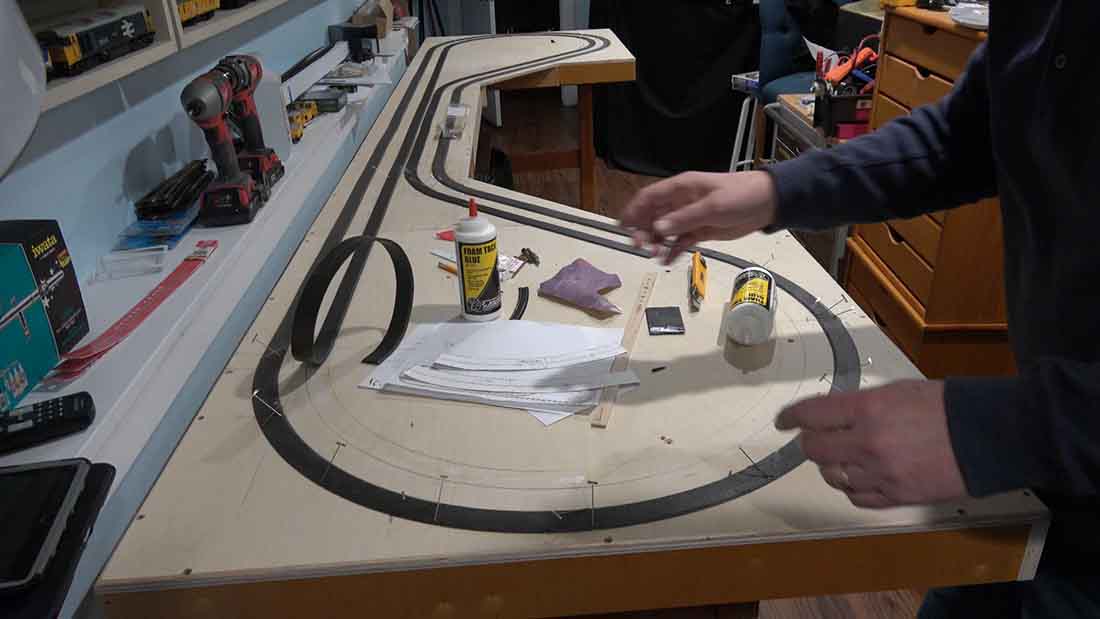
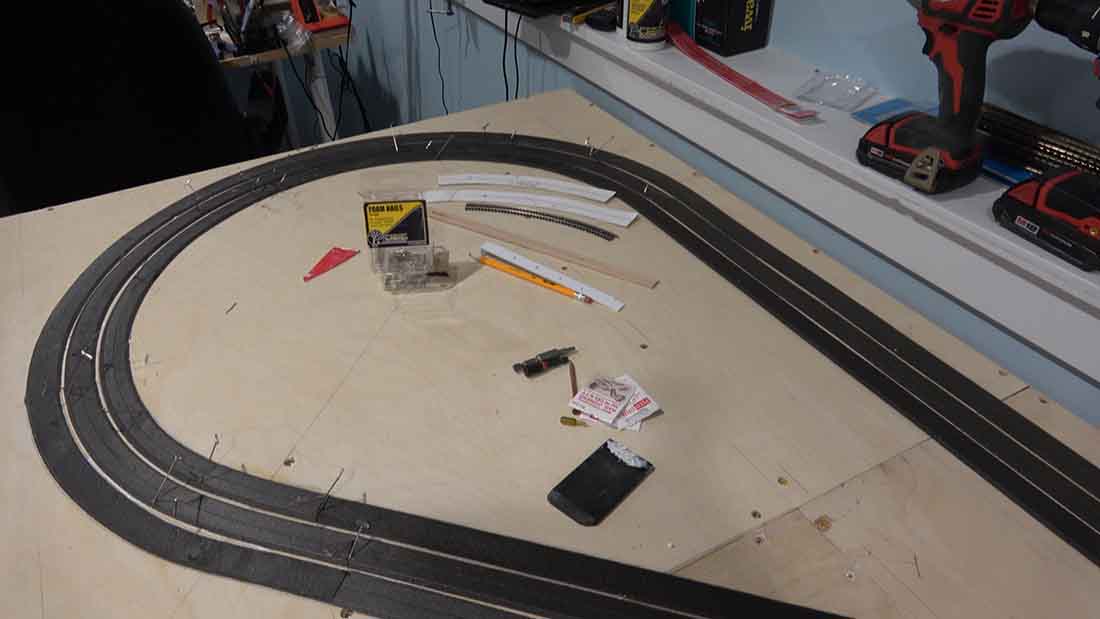
The video below is about how I glued down the Woodland Scenics foam track bed underlayment. It takes about 3 minutes to watch and took me an hour to glue down.
I like the foam track bed because, (A), it is fast and easy, (B) It provides an acoustic barrier between your board and the track. Without this sonic barrier, the sound of the trains is transmitted into the board where it reverberates and makes it sound like the trains are running across a cello top or guitar top.
I prefer to only hear the sound of the wheels running on the rails. (C) Many people use cork which is fairly cheap, but many times must be cut to the correct width and is not as flexible as foam.
(D) In addition to this, it is not as good of an acoustic isolator as foam. I will usually take more effective, faster, and better over cheap, slow, and ineffective any time.
I am so appreciative of all you do for the modeling community around the world.