Brian’s been in touch again, with his tips on realistic model water.
But first, a quick update from Rick (his last post is here).
“Al,
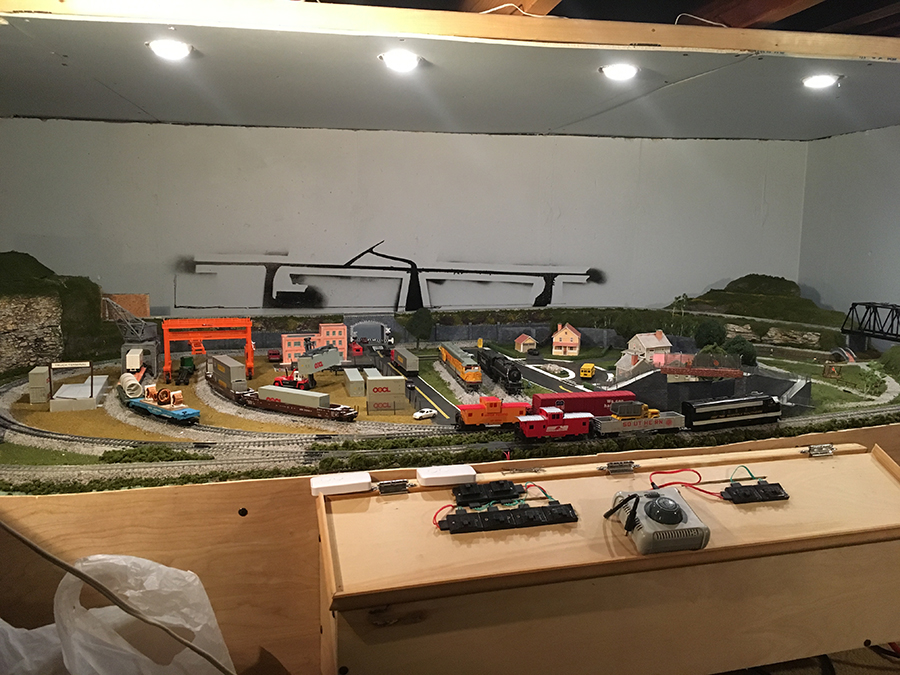
Attached are some update pictures on the expansion of Grand Junction.
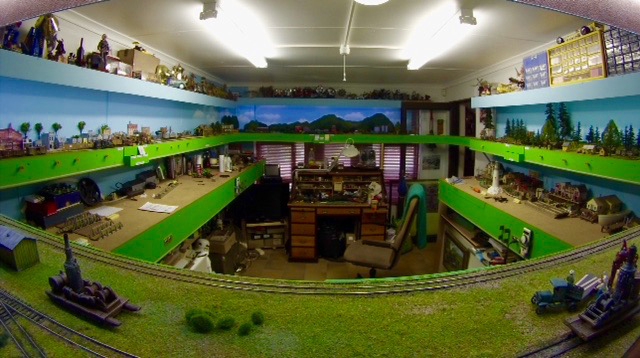
The first picture is the original 8’ x 4’ setup.
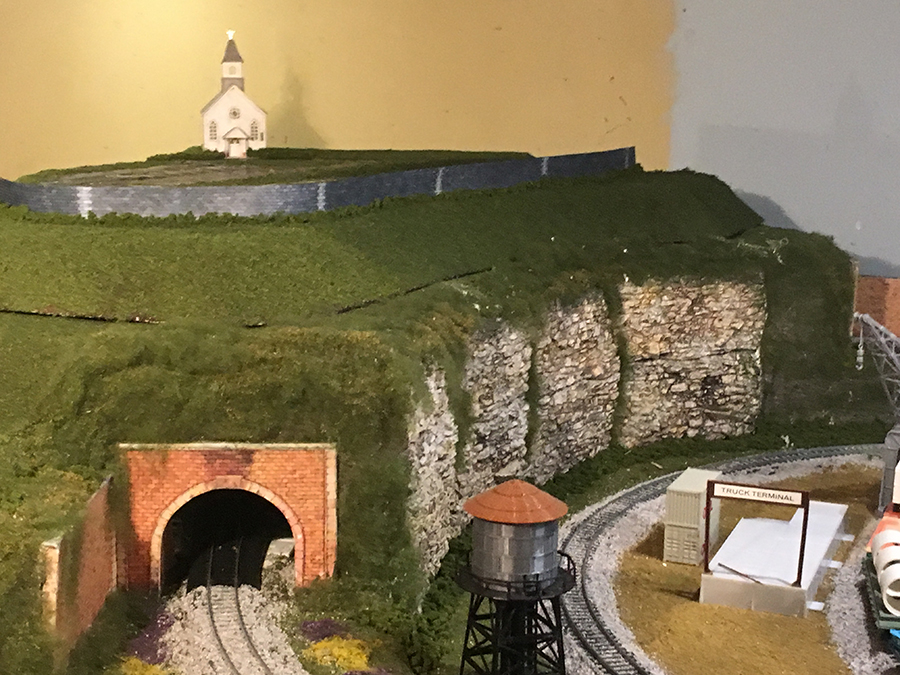
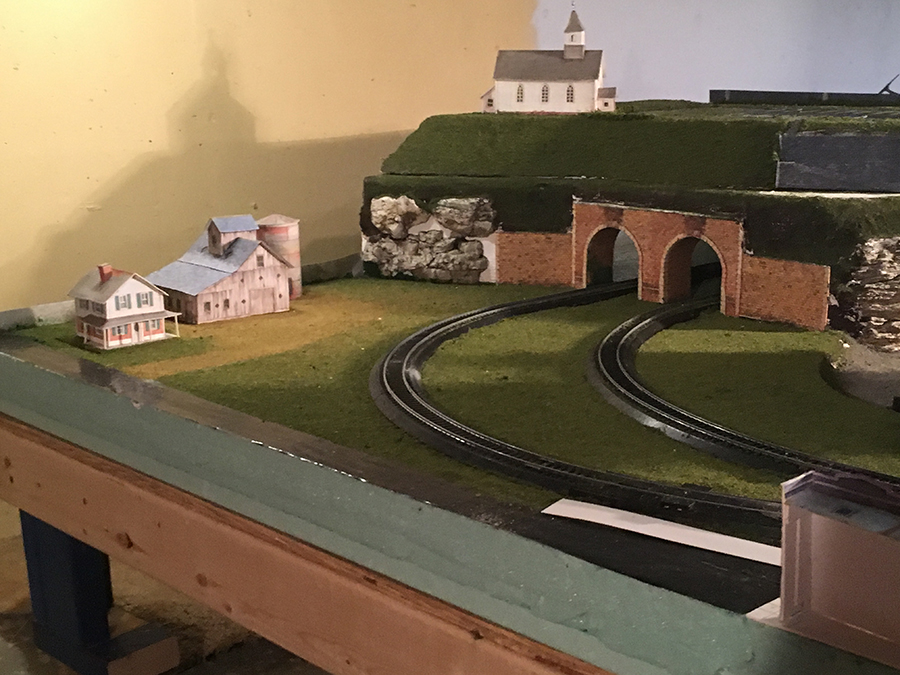
I added another 8’ x 4’ section to form an L-shaped layout in my 40” crawl space. I expanded the tunnel on the left to create a triangle of track under what is now a hillside church scene that will eventually have a wedding in progress. The entire hilltop comes off in case of train derailment.
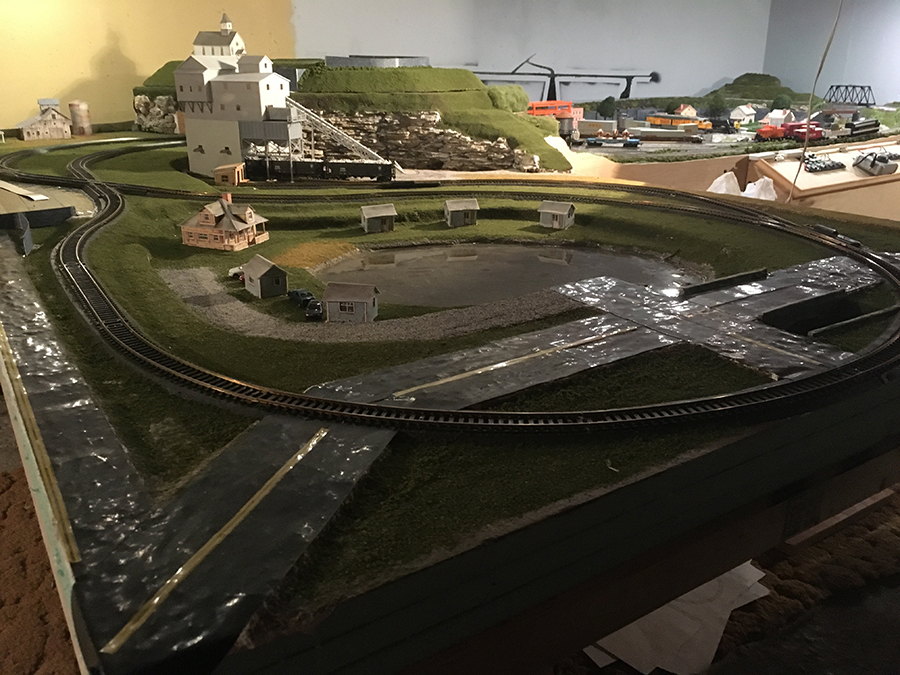
On the new expansion is a gravel construction site, a camp around a lake with several cabins for rent as well as a farm in the back behind the gravel site and the town. The entire setup is on wheels so I can get around the back of the layout for repairs and maintenance.
The landscaping (mostly trees) is next on the punch list and we still need to ballast the new track and start adding people around the lake, the town and gravel site. As you can see, other than the gravel building and the water tower on the original layout, I’ve made good use of your printout buildings.
As always, thanks for posting these updates as I look forward to what the community is up to!
Rick”
Now on to Brian – his last post is here.
“Hi Alistair,
A few guys were concerned/apprehensive/disillusioned by Woodland scenics realistic water. I have used this product many times on various layouts, both mine and others and have never had any problems with the product.
Read and follow the instructions to the ‘T’ and no problem. It is all about preparation to get a good end result.
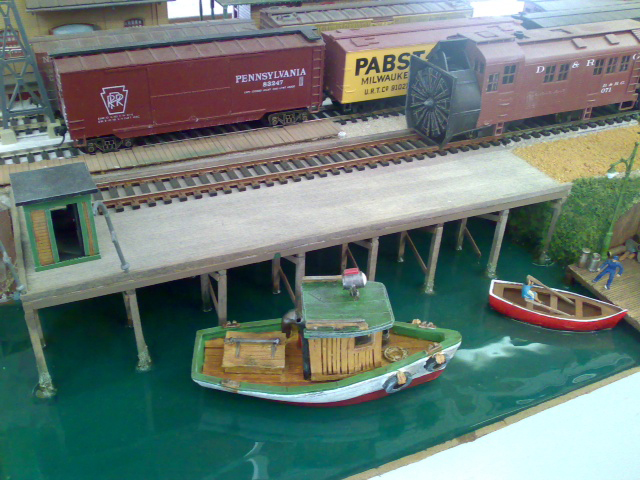
Below is a photo of the last harbor area that I built (about 14 inches by 12 inches with two layers of 3mm thick each, (Separate pours 24 hours apart). I did mix in a few drops of 100% acrylic paint to tint the clear water.
I had no air bubbles, shrinkage or any other problems.
To those who asked (in the previous post about my harbor “diorama”), it is not a diorama but a working harbor with industries that need goods delivered as well as goods collected on part of my layout. It is at the end section on my lower shelf of the layout as seen in the bottom right hand side below where the lighthouse is. This photo was taken before I started working on the harbor.
I hope this explanation helps to understand what my layout is all about.
All the best
Brian”
A huge thanks to Rick and to Brian for sharing his realistic model water.
It really is wonderful to see your layouts progress over the weeks and months.
What I love most about it, is nobody is in a particular hurry. You’re all just having fun at your own pace, and that’s what it’s all about.
And if you want to start having your own fun, the Beginner’s Guide is here.
Best
Al
PS Latest ebay cheat sheet here. Had a look yet?


Great job.i Luke the details you have added. The church on the hill top is nicely done. Thankyou for sharing
It’s wonderful that Woodland Scenics water product has performed satisfactorily for you. However, my experience was maddeningly disastrous, with numerous large bubbles outgassing some six months or so after curing, requiring a complete re-build of the entire water feature using an alternative, 2-part product.
i have used Realistic water for streams. It is flexible and you can use this to your advantage. For steep sloped streams, I first layout the stream on .020 styrene. Rimg the outline with DAP 230 clear.Let dry. Paint the bottom.Add rocks. sand, twigs, etc. Let dry. Pour the water and let dry. You can use a knife the cut the final shape. To the surface add waves, rapids. Place it on the layout at any slope. It is flexible enough that you could have a roller coaster effect
Have been a card modeler for some time. Also interested in Modell RR. Have your beginners guide. Could I get a sample of one of your models. I would like to see the quality of the model before I order. Also do you have the % reductions to print in HO, N, Z scales. Thank you.
Ron
Nice layout Rick, keep up the great work.
In reference to Woodland Scenics water, both of the water features in the pictures above came out as expected the first time without incident. I used the Muddy Water tint as that is what we have in Illinois and they worked as advertised on two separate orders and applications. Following the directions to a tea is important to success.