Bill’s been back in touch with his 4×8 HO scale switch track – his last post is here.
“Hi Al
I so continue to enjoy your newsletter and all the wonderful people that share our hobby.
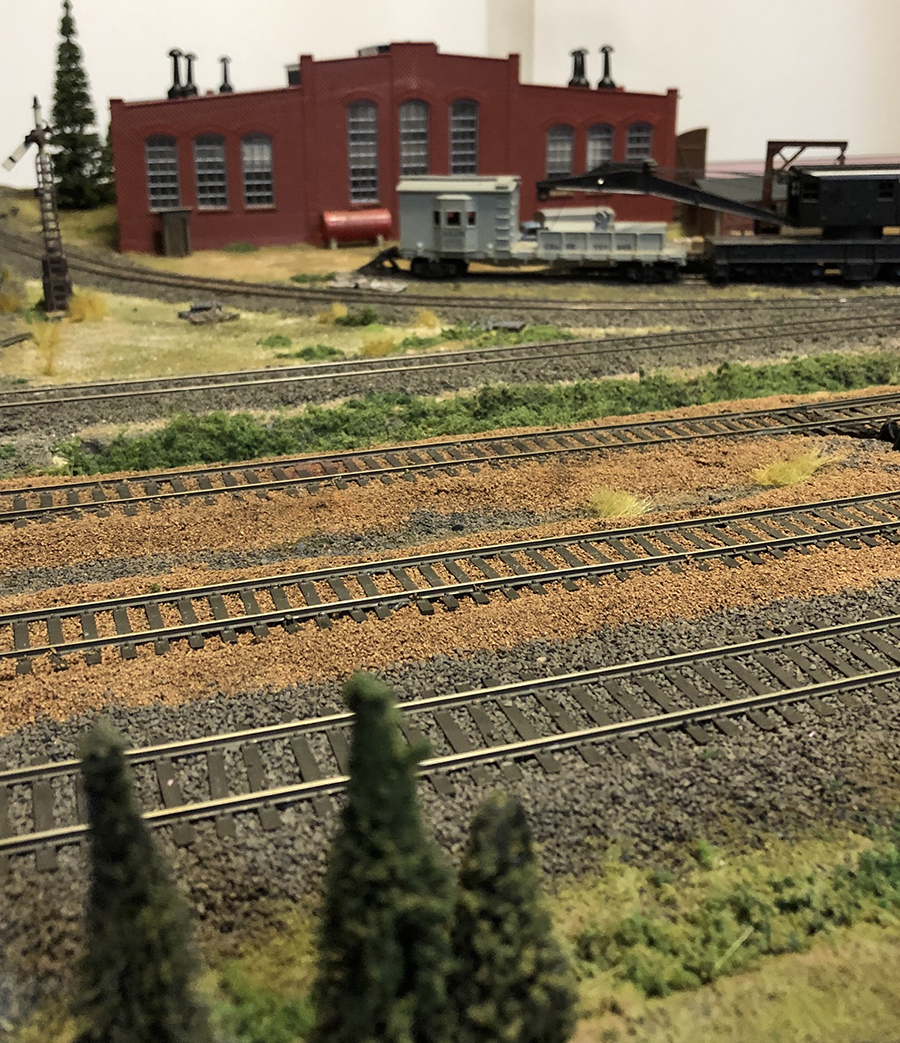
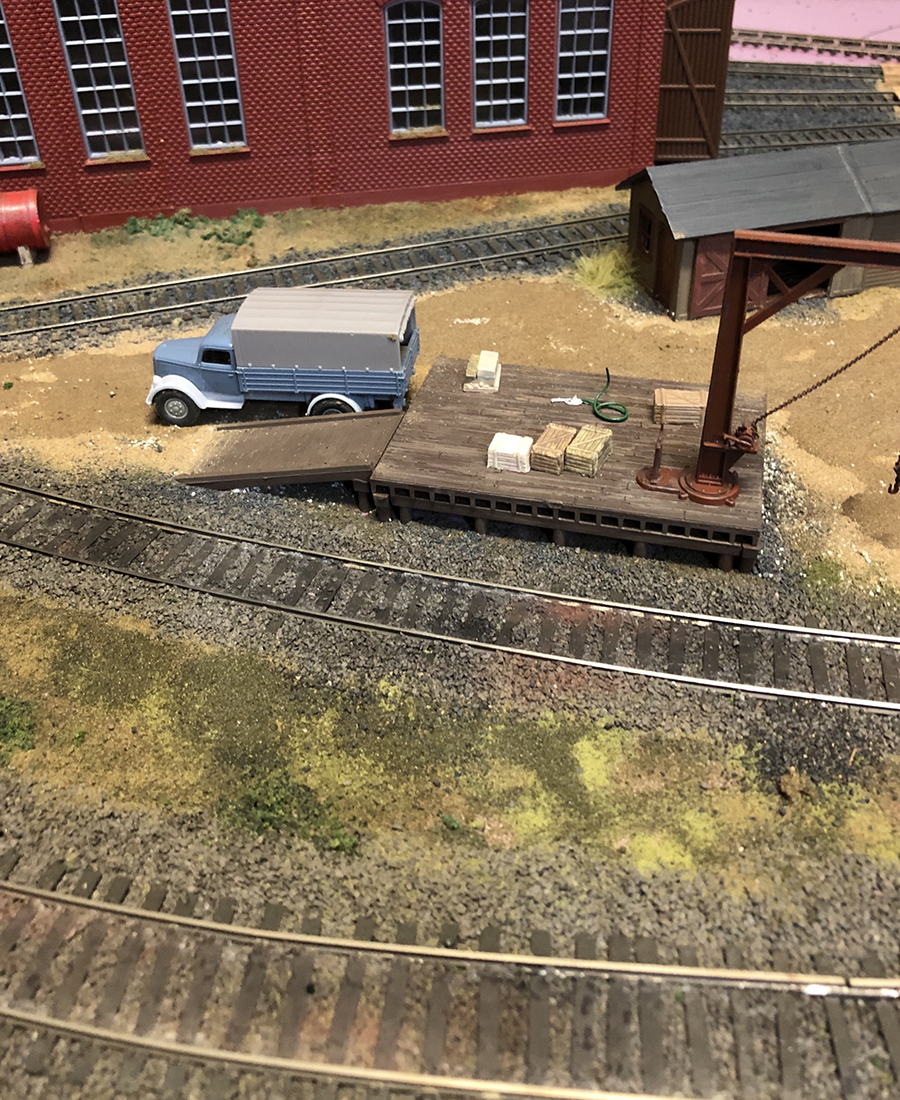
I am making some progress on my switching layout. More ballast down and more scenery added. Still a longggggg way to go but I think that is what is fun is enjoying the labor of love we each put into our layouts. I’ve attached a few pictures showing progress and a video link walking through where I am at on the project and what is coming.
Thanks!
Bill in Virginia”
And now we leave Bill’s HO scale switch track, on to something that always makes me smile: grim determination and ingenuity:
“Hi Al
Thanks for the e-mails.
I am building a layout around the walls of my garage and as I want to be able to get a car in and out some kind of removable section across the door was needed.
I have solved this by making a drop-down flap each side and having a removable leg section at the end of each flap.
The legs have ledges facing inwards which support bridge sections (one made up from three 3-arch viaducts, a river bridge and a single arch and the other consisting of a Suspension Bridge – all Triang-Hornby).
The suspension bridge will be extended by the addition of a second river bridge as it is a little short. I’m not sure what the justification might be for such a combination of bridges but I had them available so will worry about that later!
The bridge sections are held in place by coach bolts and the rails joined by sliding fishplates to align them. I will add a jump lead with a plug and socket under the boards rather than rely on the fishplates to conduct the power.
As there is very little clearance between the base of the bridge section and the car boot, I a) take great care when fitting/removing them, b) usually have a large sheet of foam over the top of the boot and c) have kept the depth of the bridge board to a minimum by using metal shelving racks along the side rather than conventional wooden bracing.
Where the flaps hinge down the rails have small lengths of brass tube fixed to each rail end with a slightly longer section of brass rod which is a tight fit pushed through to keep the rails aligned.
I have glued using epoxy rather than soldered, mainly because it was easier with the track across the hinged joint being on an angle and a curve – not ideal but needs must! This isn’t the neatest bit of work I’ve done, but it works and is in the fiddle yard section of the layout.
If I need to do the same on a scenic section I will be a bit less slapdash! I laid the track right across the gap and once the glue had dried used a razor saw to cut through the rails and the brass tubing. Some slight distorting of the tube resulted but a quick clean up with a suitable sized drill in a pin vice sorted that out.
Jumper leads are soldered to the tracks either side of the hinged joint and pass below the baseboard.
The bridge sections are stored by simply laying them on brackets fixed to the legs under the fiddle yard section of the layout.
Hope that is useful to someone.
Regards
Steve
Lincs, UK”
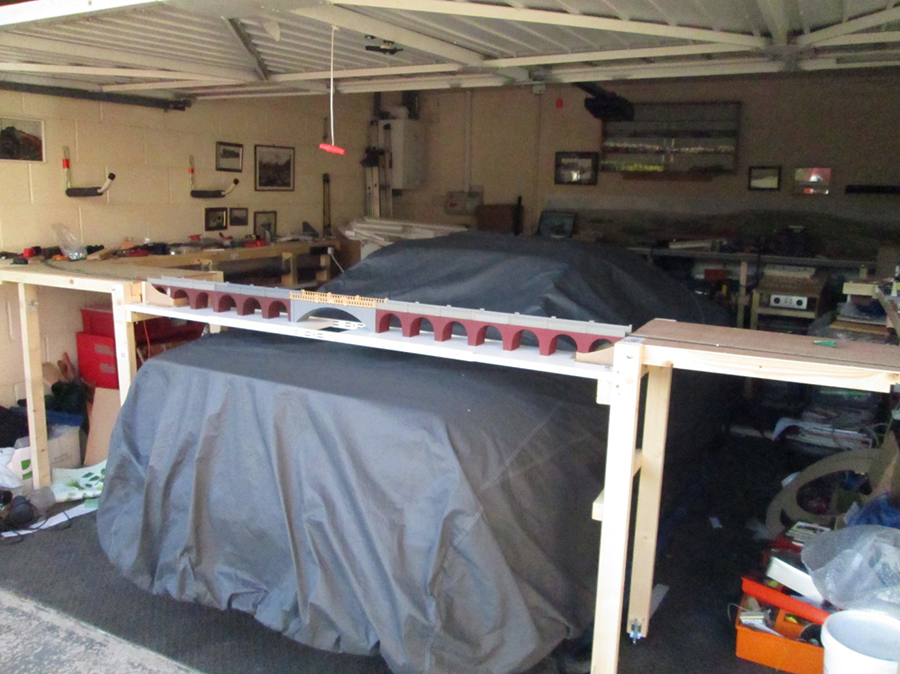
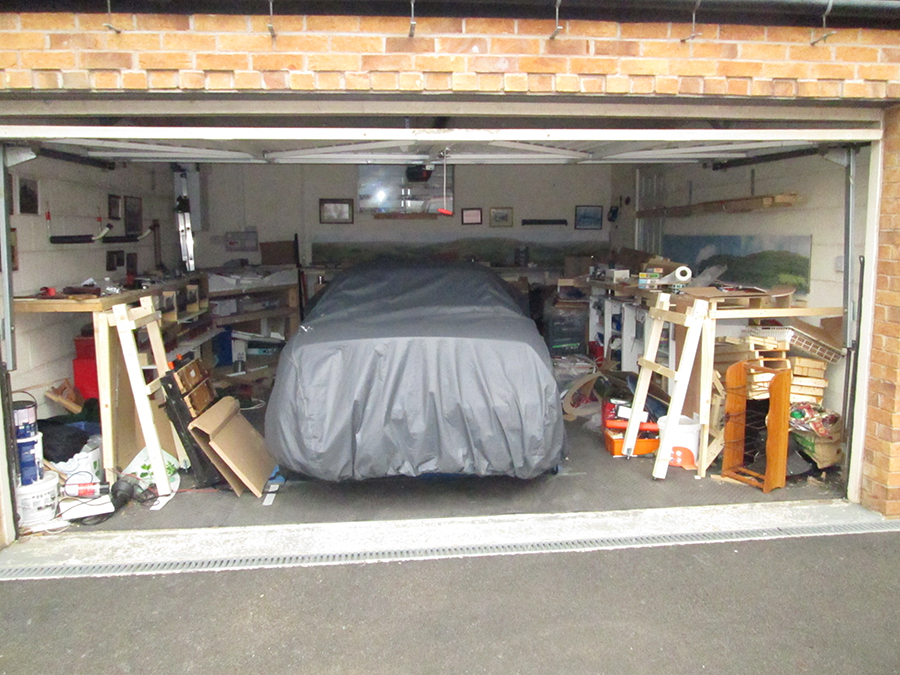
One of the bridge sections in place with the car in the garage. It is (just) possible to get at all of the baseboards even with the garage door shut.
Flaps at each side folded down and bridge sections removed. The leg sections are just leaned against the lowered flaps. As you can see, tidiness is not something which comes naturally to me – plus the layout is very much a work in progress. Accurate parking is needed to allow both flaps to swing up – I have marked the garage floor with white tape to help with this and a small baulk of timber at the rear of the garage acts as a gentle reminder to stop.
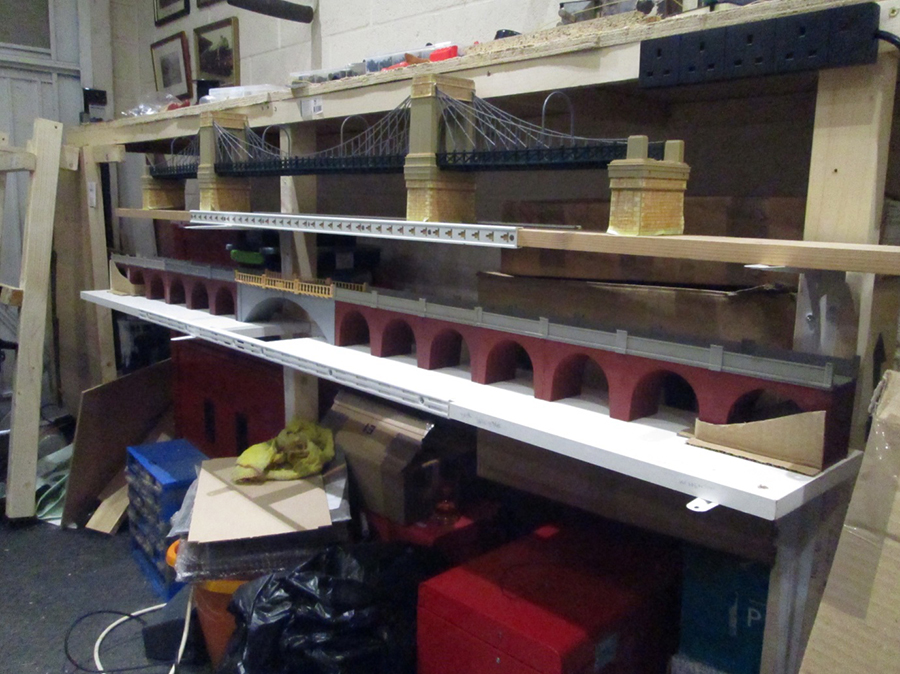
The suspension bridge board on its storage brackets showing how metal shelf “ladders” have been used to brace the board. Like the rest of the layout, there is no scenery yet of either of the bridge boards. Suspension bridges carrying railways were rare in real life but I like the model!

One of the flaps folded down with the leg section propped against it.
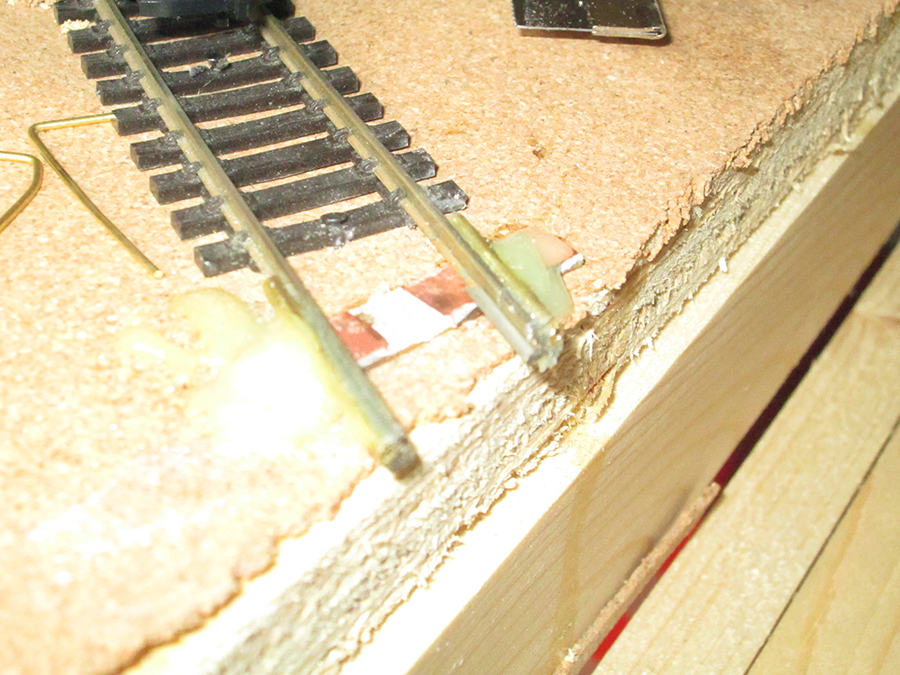
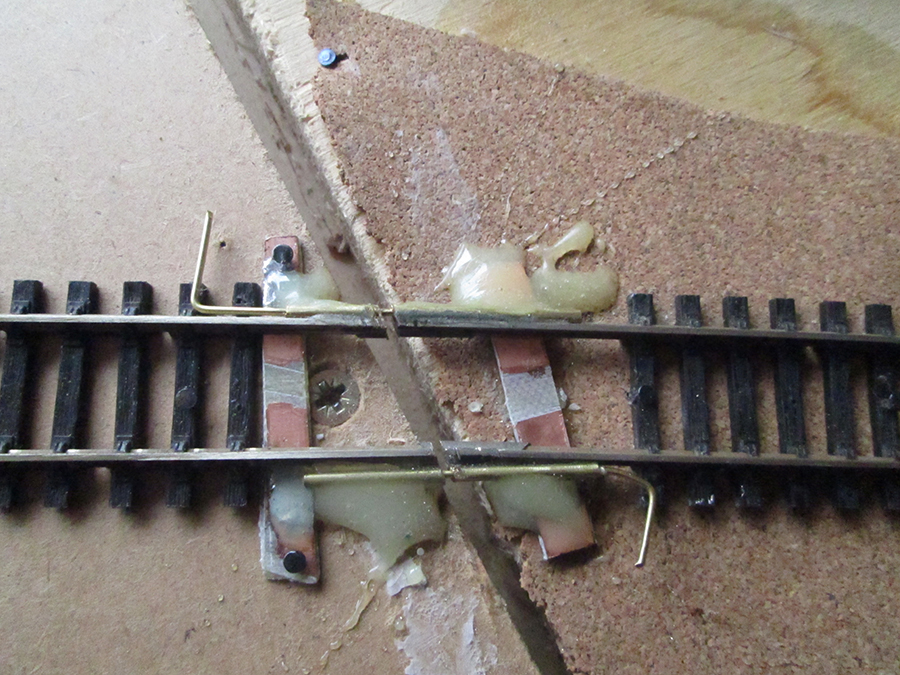
How brass tube and rod has been used to align tracks across the hinged section.

Both bridge boards stored.
A huge thanks to Bill for sharing his HO scale switch track, and to Steve for showing us nothing can get int the way of a layout with a little thinking.
I know I’ve said it before, but I do love seeing all the different things that pop up in my inbox. Please do keep ’em coming.
That’s all for today folks.
Please do keep ’em coming.
And if today is the day you get started on your layout, the Beginner’s Guide is here.
Best
Al
PS More HO scale train layouts here if that’s your thing.
Need buildings for your layout? Have a look at the Silly Discount bundle.

Great layout, I really like your asphalt shingle ballast and your painting/weathering of your structures. If DCC I’d really like to know what you use to control your turnouts. Keep up the great work, sure looks awesome!
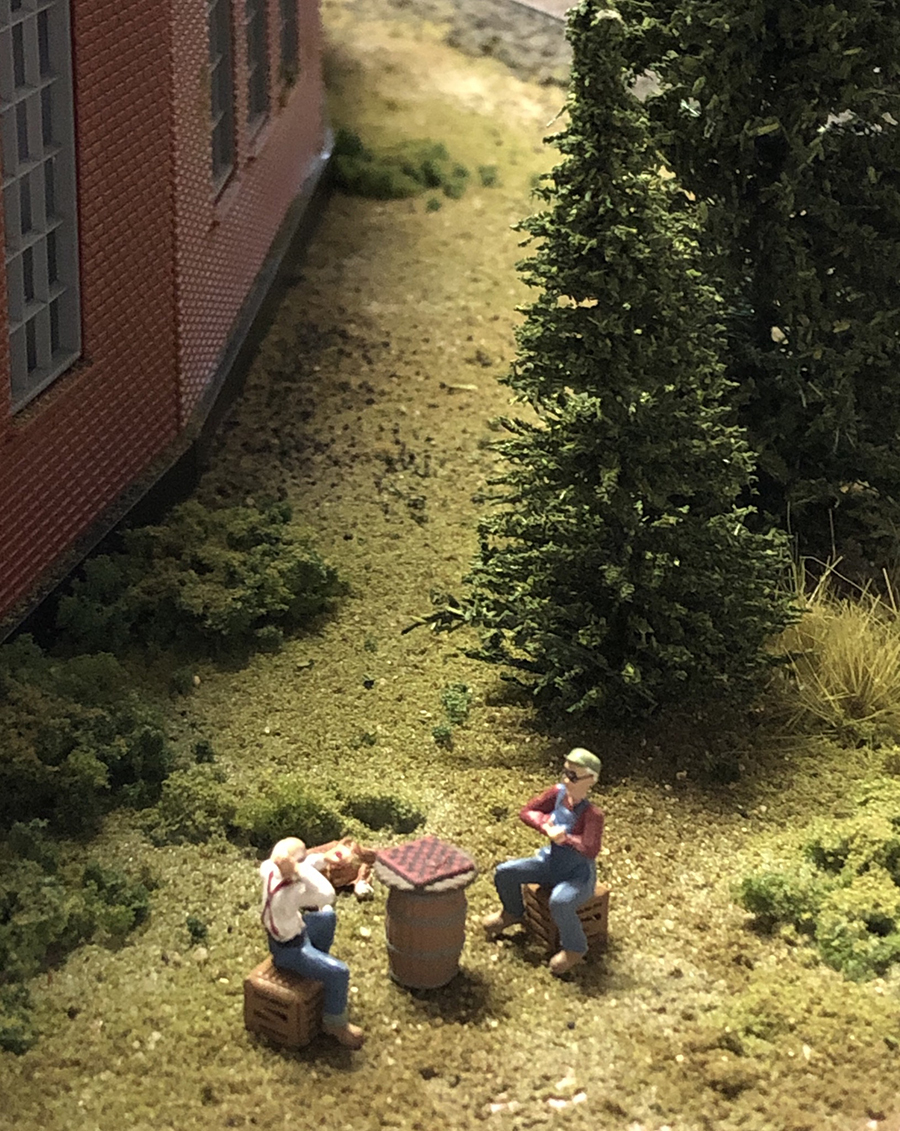
Great detail…… I love the guys with the checkers….. I have to add that. Nice job with the switches………
Gary M
Audio VERY LOW all I heard was “thanks for watching bye, bye” Bob
Love the checker game!
Bill,
Very nice work! The detailing looks great and realistic!
Jerry in Colorado
Steve—I got a little confused in your explanation of making the removal bridge, but you enclosed enough pictures to make it understandable. Thank you there’s some good ideas there!
Good luck on the project
Terry
USA
Just a great post today Alistair. Both these guys are doing a great job.
Steve, your viaduct section is very reminiscent of the South Wales Railway approach to Gloucester, where there is a long, low run of arches across the flood plain but a larger bridge crossing the channel of the River Severn to allow for barges navigating underneath, so plenty of justification, looks great.
Rod
Steve, I love your ideas, they made me give my garage a second look! The bridges are a unique way too allow access for your auto. It’s your world, but the “engineer” in the previous days replies would be appalled at your bridge choices. Innovative solution!!!
ANDY FL USA
Steve – fantastic way to bridge the gap (pun intended). If I could talk my wife into allocating space and park as you have done I’d build what you did. Super nice! Bill in Virgina
The viaduct with the wide river arch reminds me of the viaduct across the Rier Mersey on the Styal Loop between Gatley and East Didsbury which I used to travel past several times a week (it’s parallel to the A34). Sadly the trees between the road and the railway have grown up a lot since then so it’s no longer easily visible from the road.
could some one tell me the minim radius for a AC4400 ? and a big boy ?
Bill you are the BEST..
Steve, where there is a will there is a way. You have proved it. A garage layout still with room for a car. By the way dangerous Dave has had suspension bridges on his layout as long as I can remember.
Looks very good. Very NICE track work.
Al,
I do not have a layout now but when I was in high school in the middle 50’s I started a 4X8 foot HO layout. It never got a good start but I had some track down and a tunnel and had a train running. Then girls, cars, military marriage and family came along and the train was forgotten. I now have rekindled the idea of another layout but the absence of a local shop within about 100 miles with train stuff has stopped me. Anyway I have stumbled across an interesting web site that I found interesting and thought your following might be interested in. It is the Union Pacific Bailey Yardi in North Platt, Nebraska. It is a live cam in the Golden Spike Tower That shows different areas of the yard in real time on a rotating basis on the west cam and a constant view on the east cam. The web site is:
https://goldenspiketower.com/bailey-yard/live-cam/.
I have been a reader of your blog for about a year and it has inspired me to start another layout. I have purchased your how to do book and printable buildings, Keep up your good work. You are a blessing to the hobby.
David Lester
Paulden, Arizona
very nice setup. always cover your car, never know when there will be a derailment, jusy kidding. nice checker game. my friend put a chess game on his, too small for me.
Great looking layout Bill, lots of scenery.
Nice work Bill, good idea for bridging the car. Ive got a similar issue in my attic to gain access to tank and cylinders etc. this a good method especially the aligning of the tracks which had left me 🤔
Well done thank you
Steve: amazing to see your car in the middle of your great layout. A suggestion: my dad hung a tennis ball in his garage to center his car and tell him when to stop. Worked great. Cheers.
Nice looking layout Bill nice job on the scenery! Steve nothing like cars and trains WTG
To Bill (and Jon),
It seems that I like to complicate things. Our previous garage was a little tight, so I re-invented the device at airports that guides planes to their parking spots. I used a square metal can with a light bulb inside. I cut slots in the bottom and inserted plexigas below the bulb. Where the plexiglas stuck through the can, the backs were cut at an angle and painted silver. The front piece of plexiglas was green and the back one red. If you were parking correctly, you only saw green. If you were off to either side, you saw red. A small laser pointer aimed at the dash told you to stop. It was turned on and off with the light of the door opener.
Tom in MIssissippi