“Hi there, we have been able to repair damage that the mover did to our set.
I have been sitting around in the wheel chair doing some extra stuff to the set while Jason is away working, but now everything has to stop once again as what was to be our long term house turns out not to be.
We don’t know if we have to move again or not so again we have a darn hold up on doing our layout
Talk to you soon.
Keep smiling.
Heather & Jason”
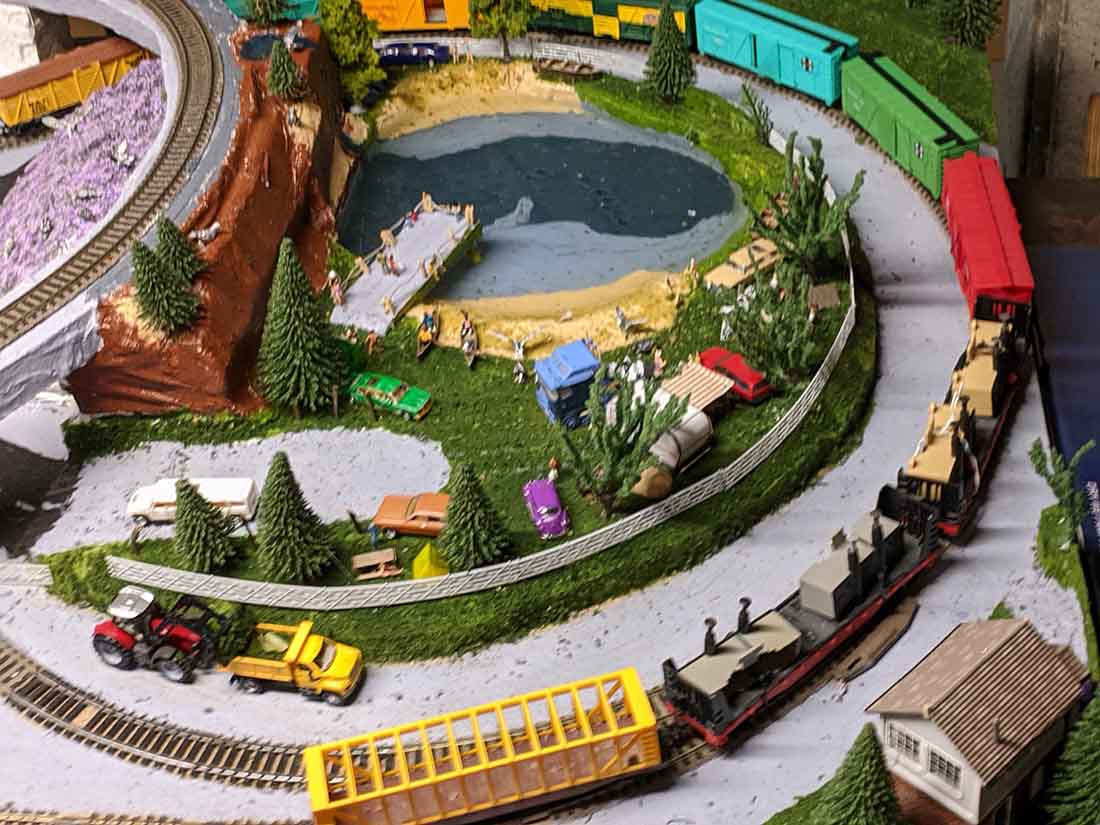
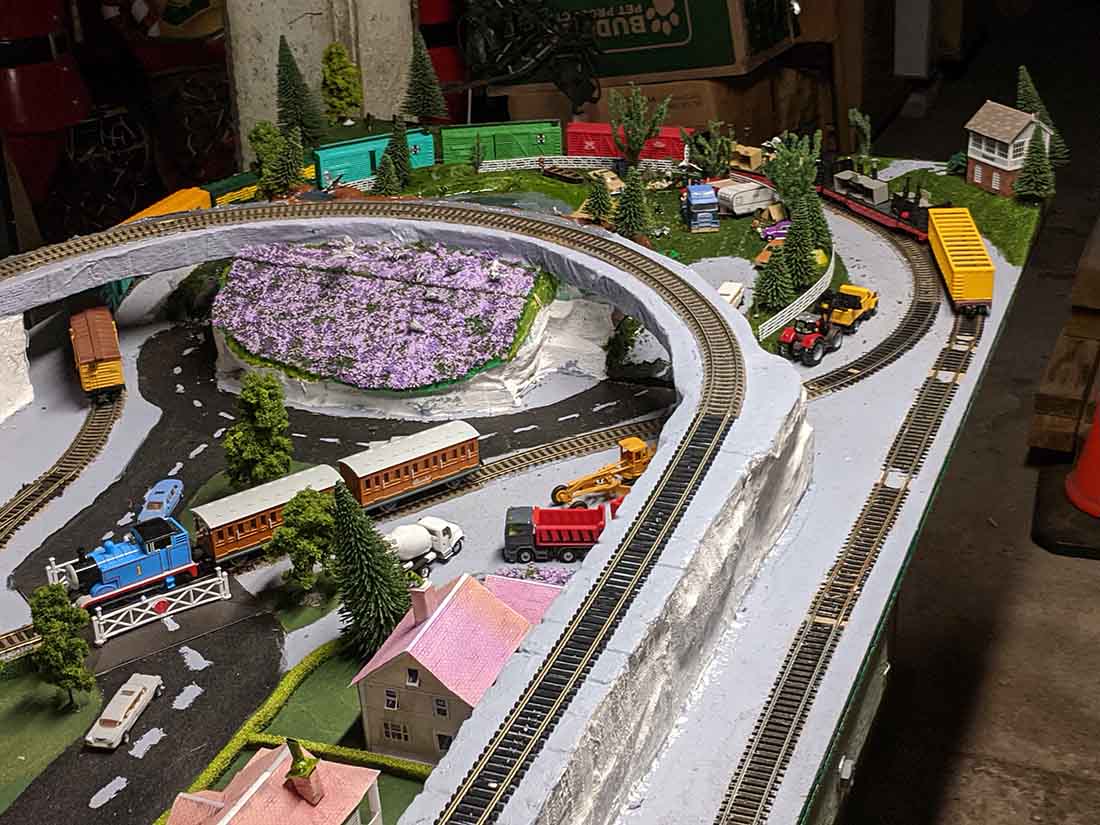
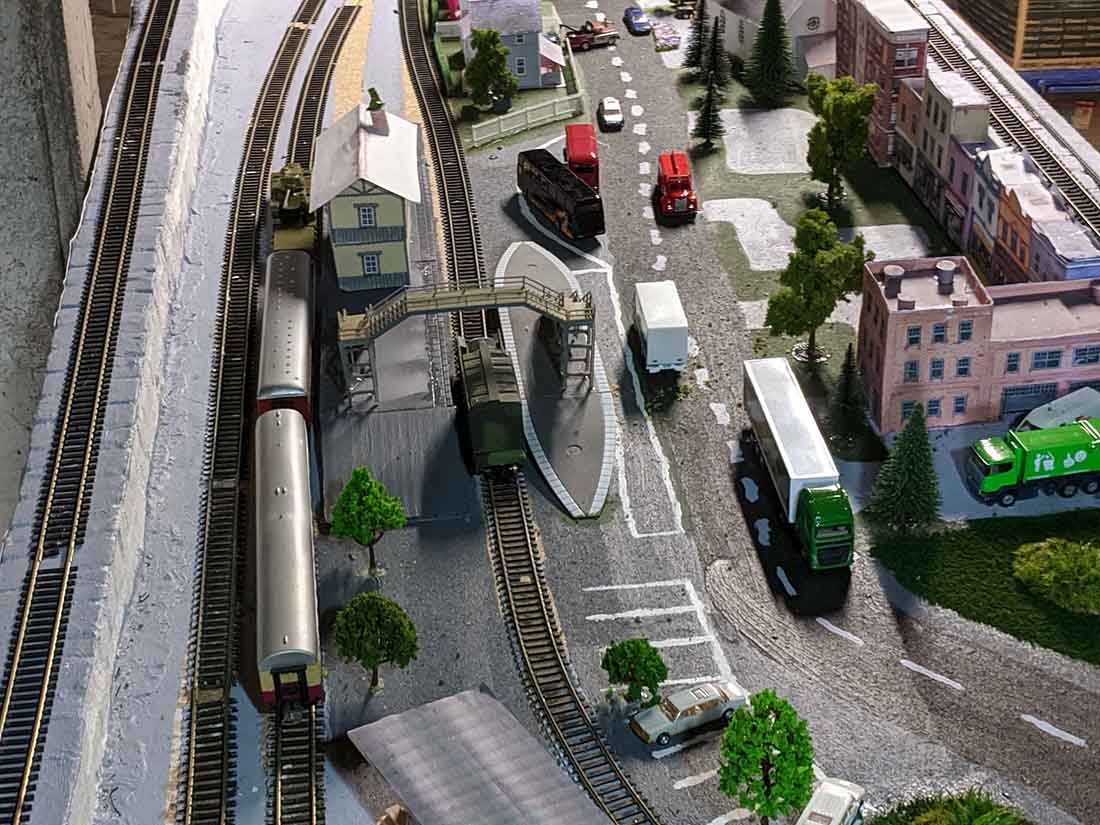
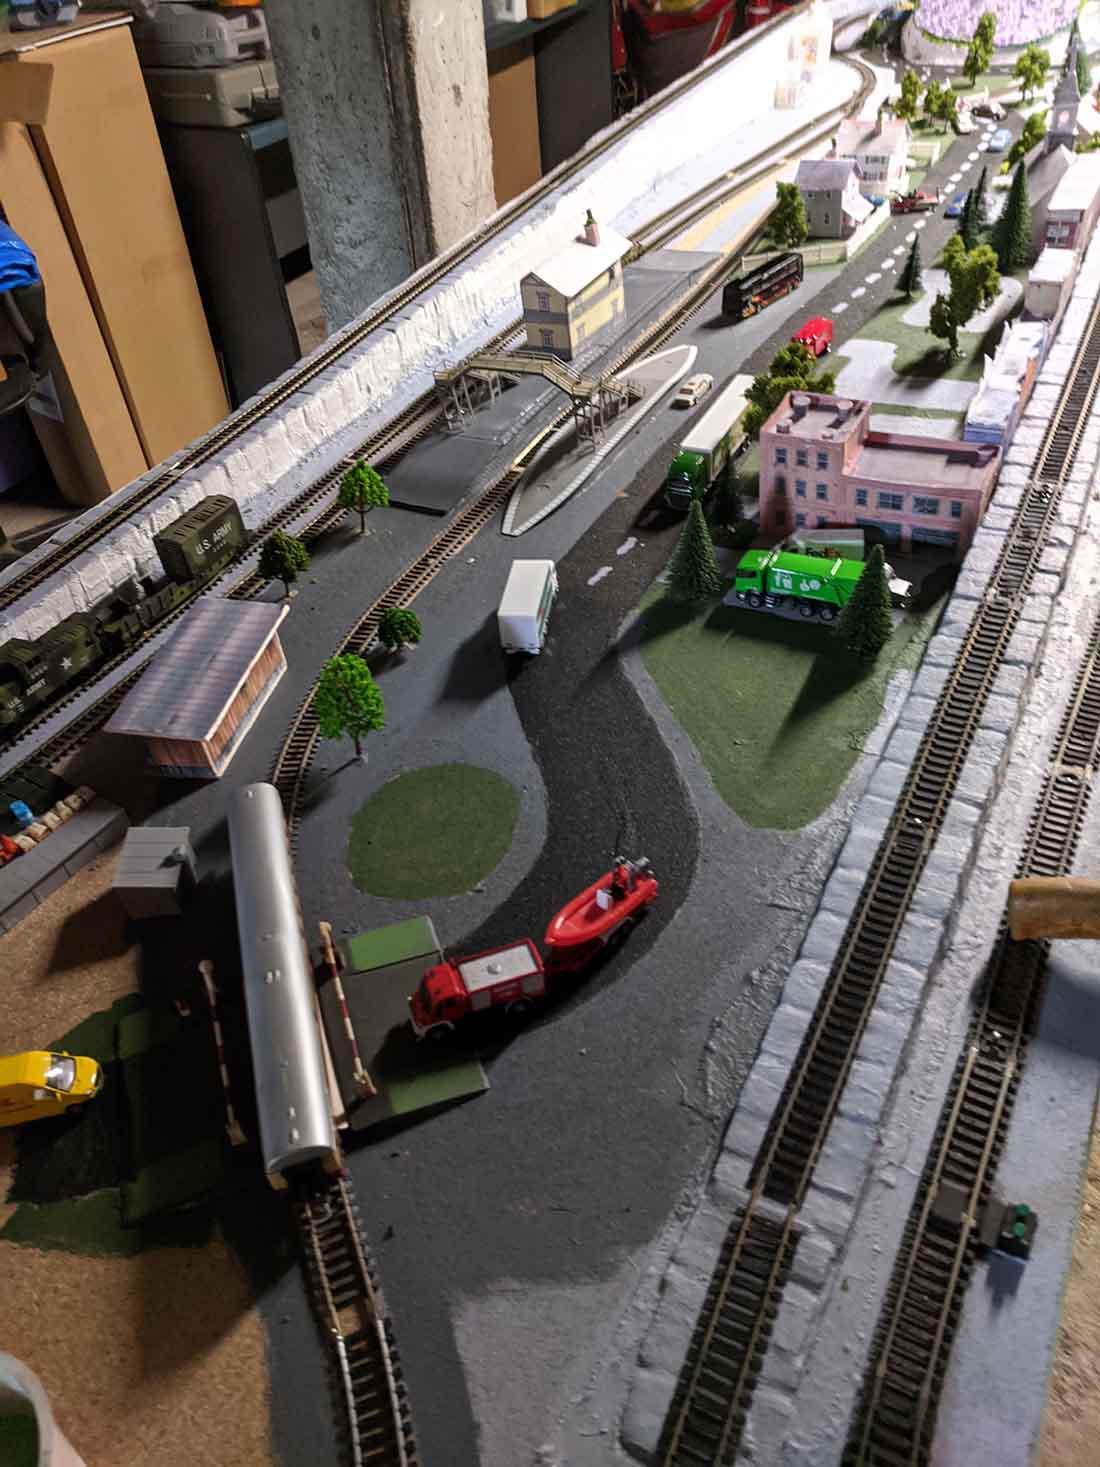
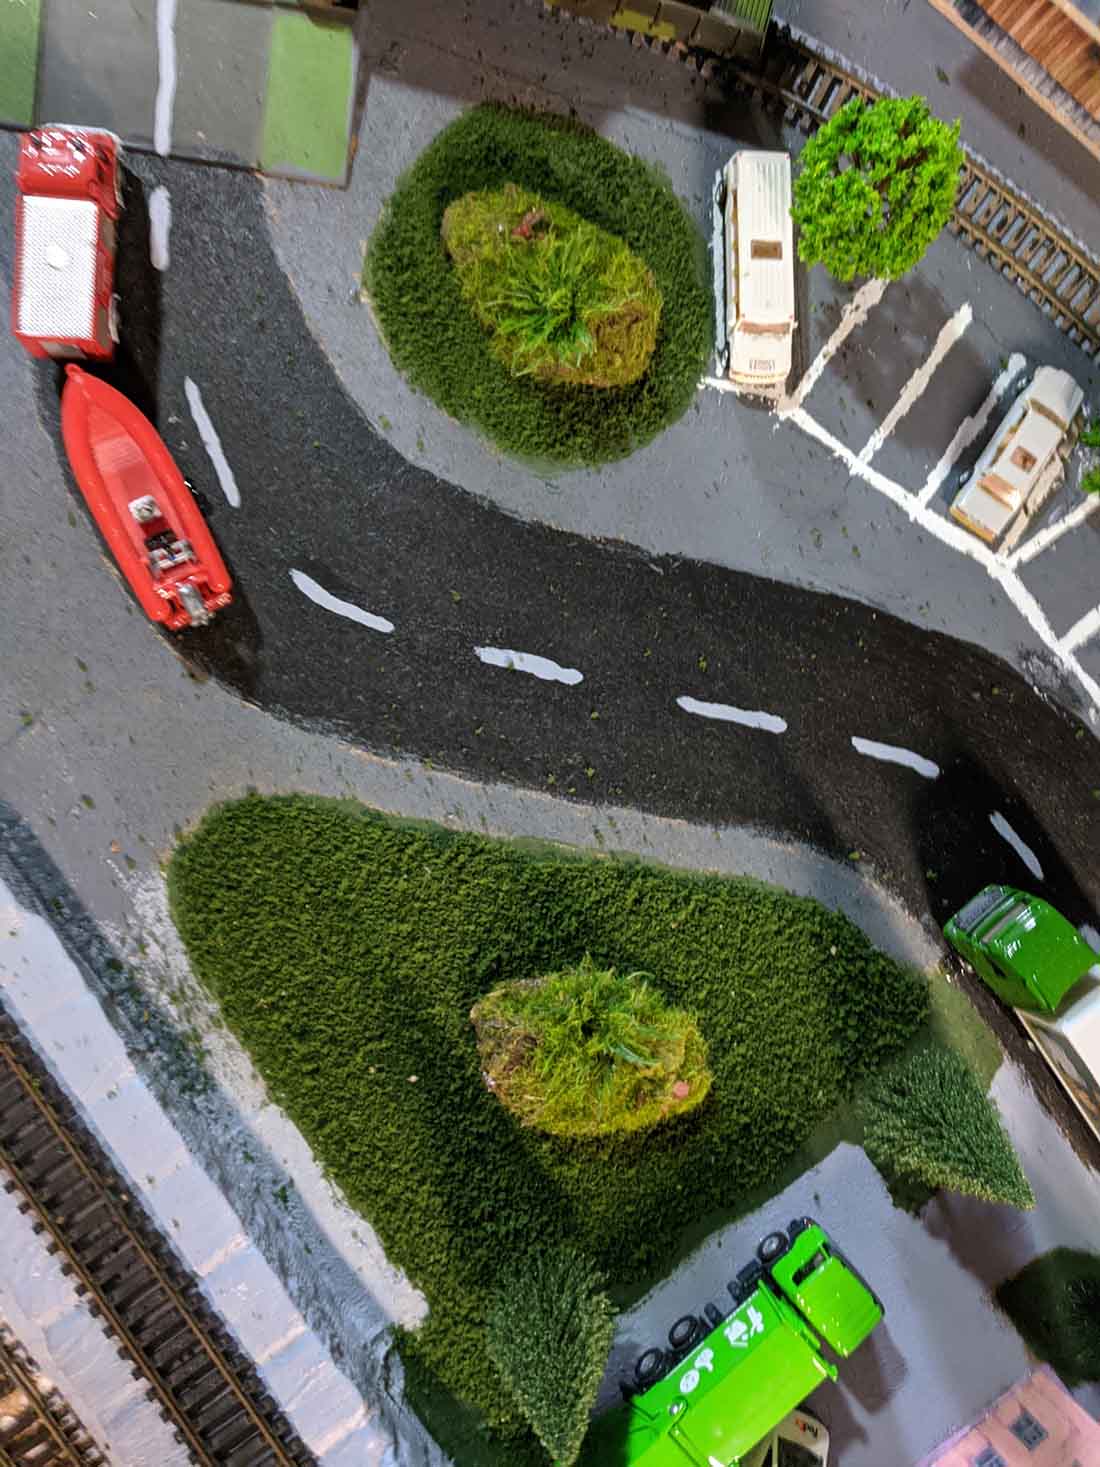
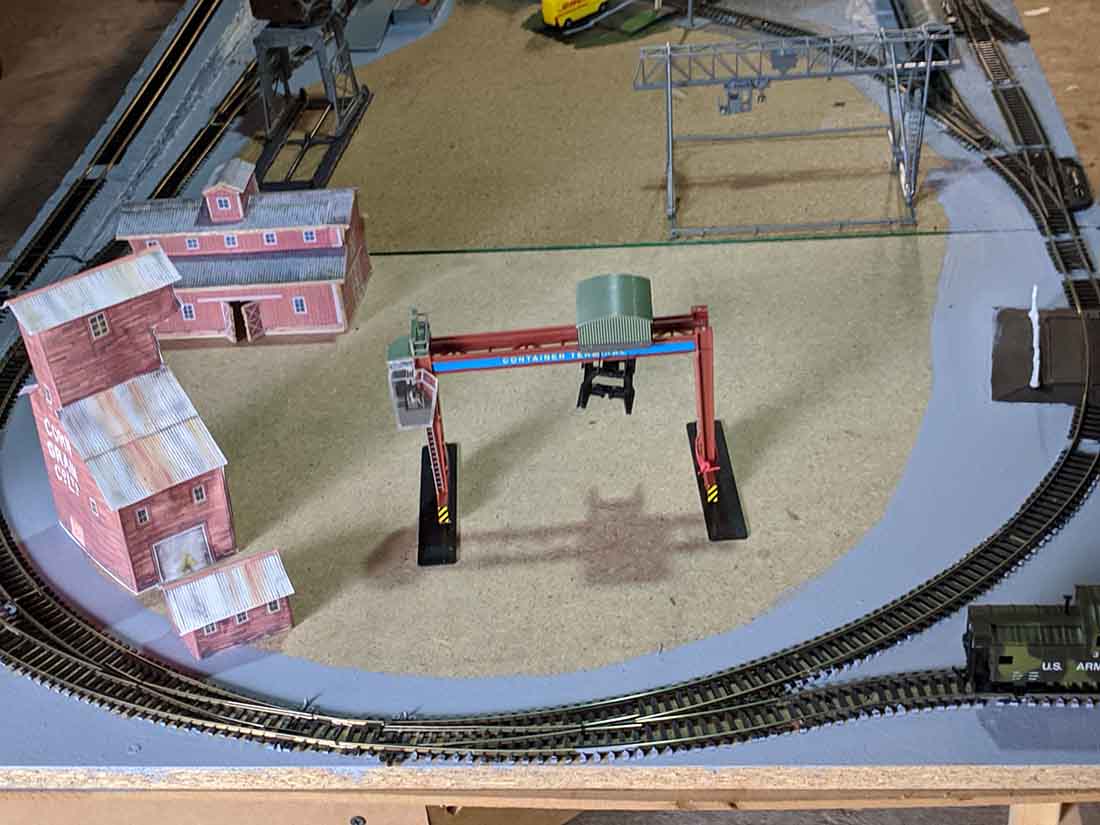
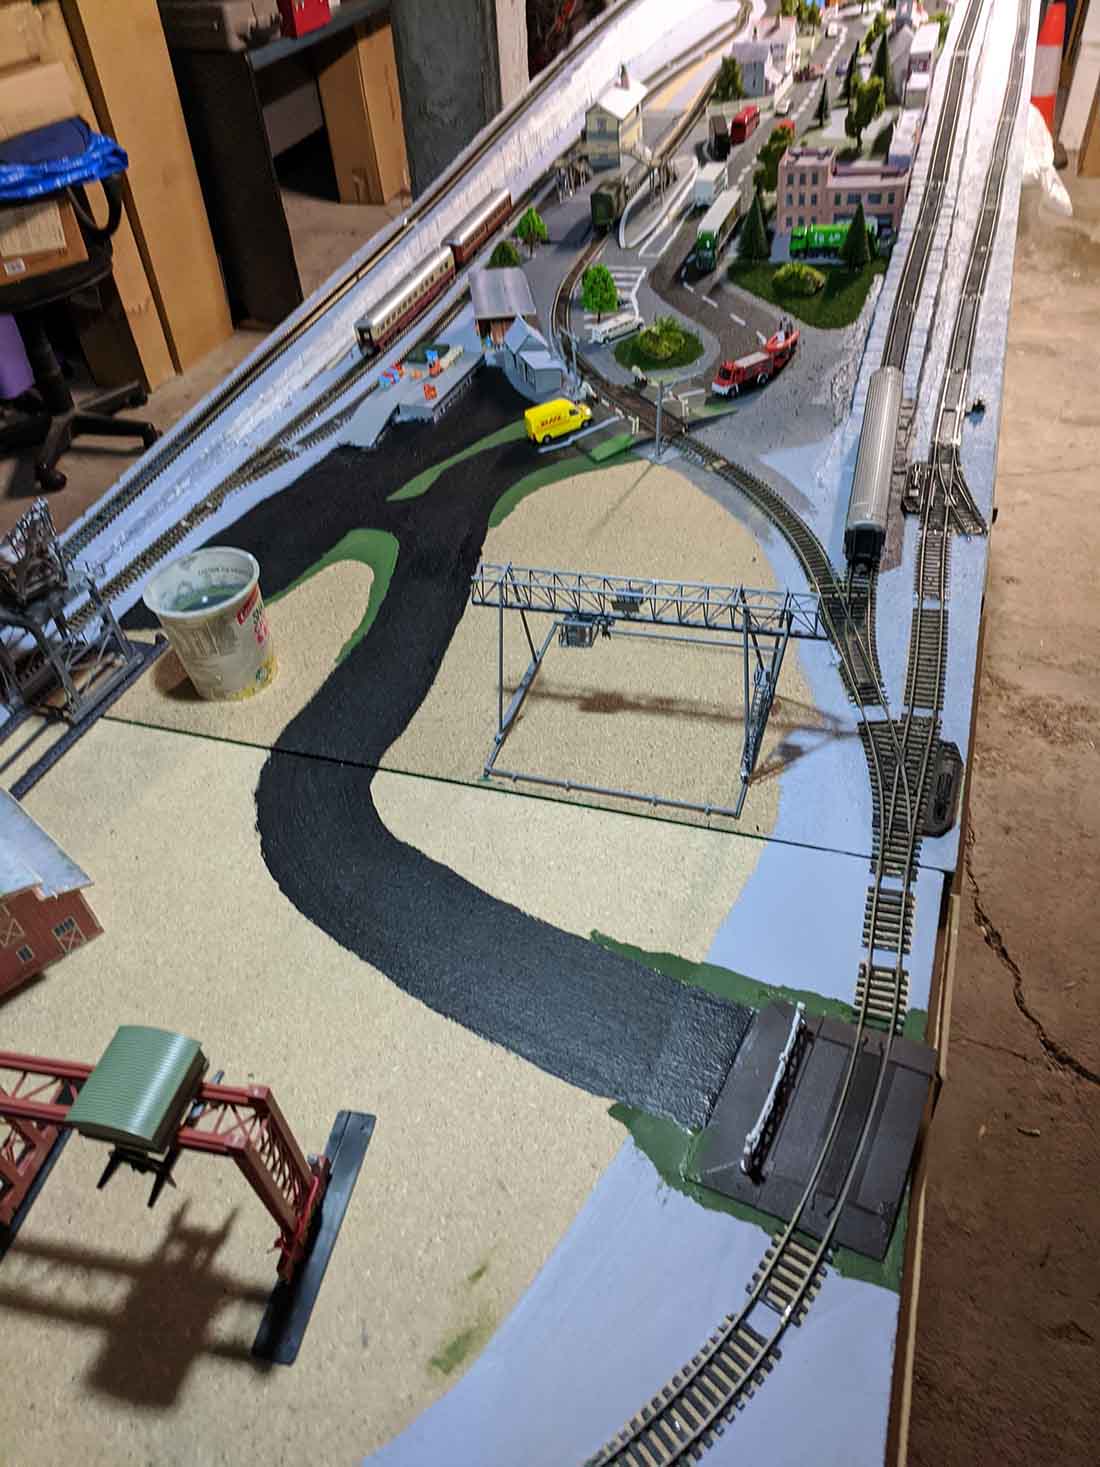
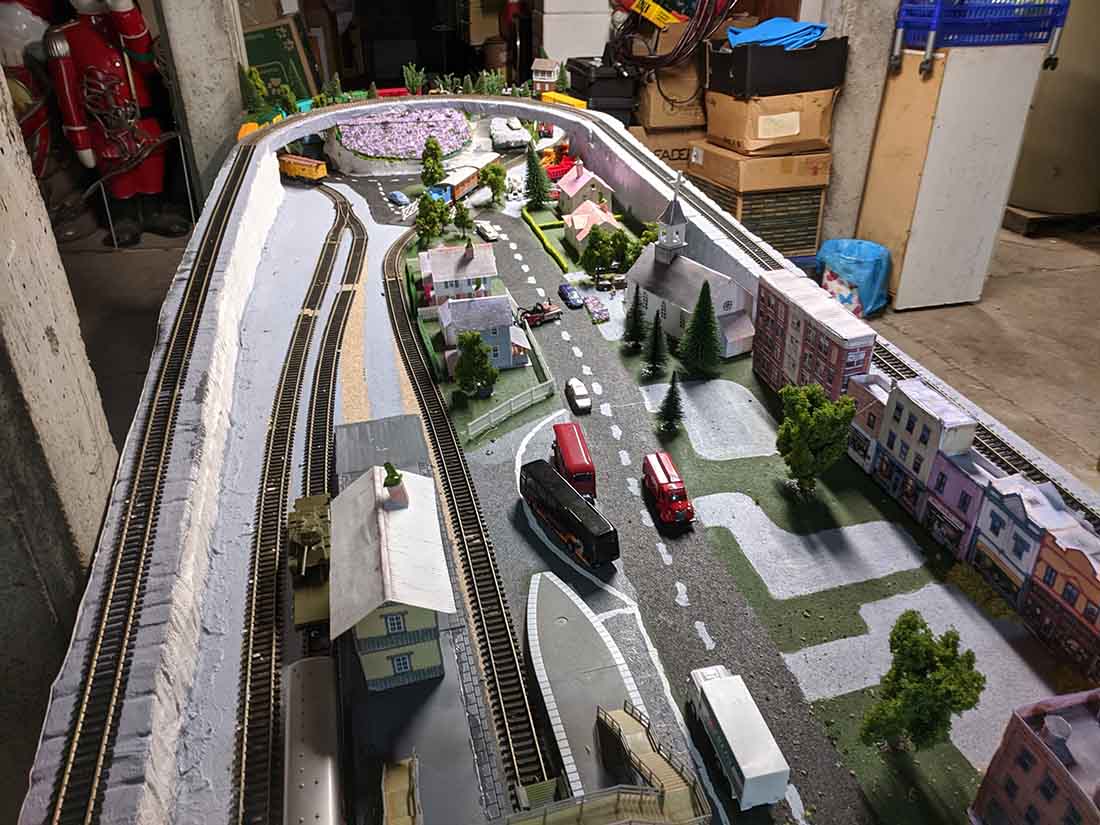
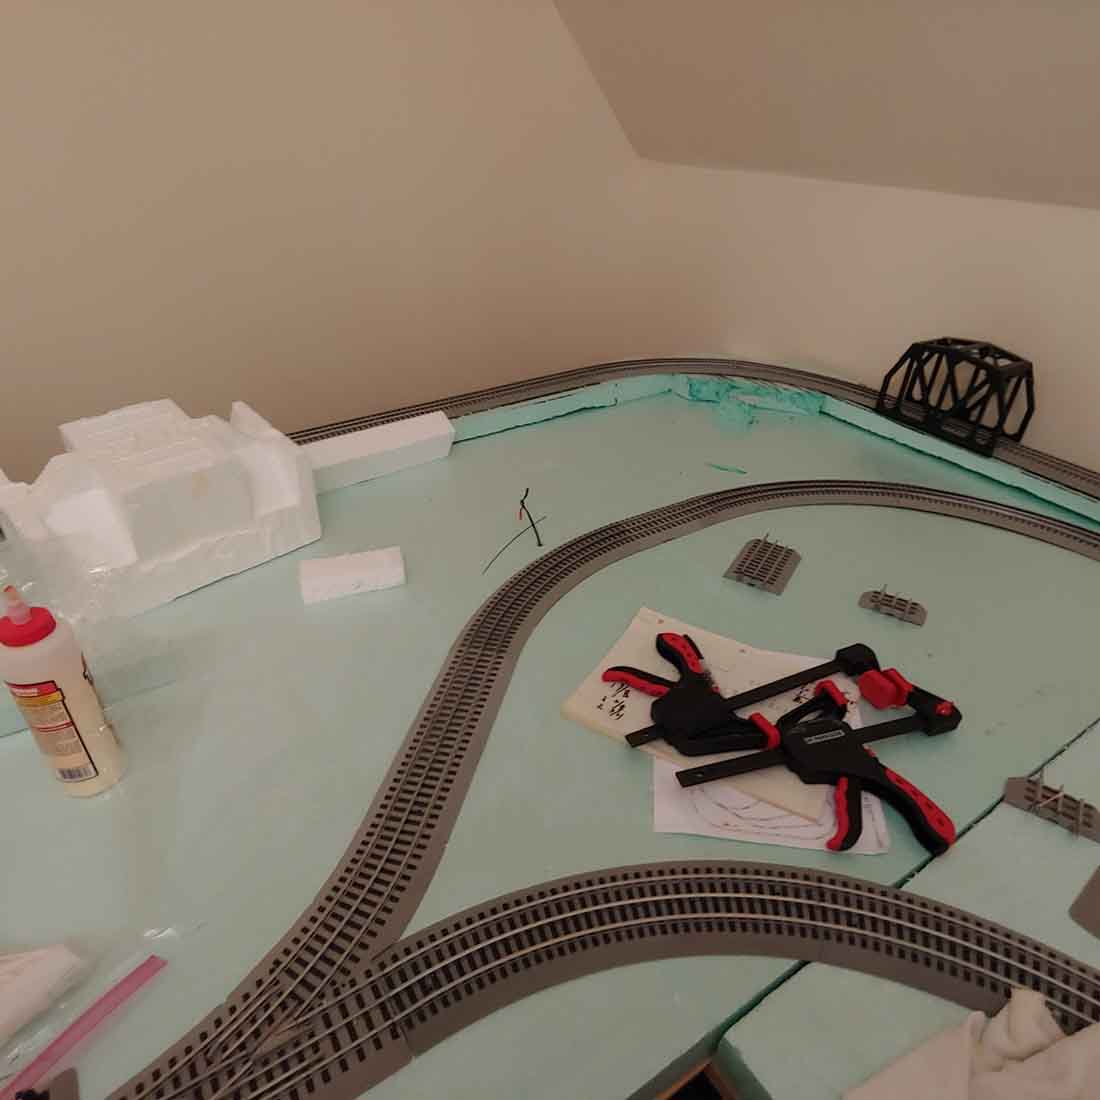
I do enjoy seeing the organised chaos of a half built layout. They all look so wild before they take shape and morph into a sedate scene, which gives endless satisfaction. And fun.
You can see Heather and Jason have been busy with some of the print out scenery too, which is always good to see.
Looks like they are having fun with their HO scale double loop and that’s what it’s all about.
Kevin’s taken the plunge with his O scale 7×11 – have a look:
“Al:
Your blog is wonderful inspiration. Thought I might share some progress on my O scale layout.
We got a lionel tree set when I was about 10 or 11 – set it up for years until I went to college and family moved – losing the set in the process.
Maybe 10 years later I did a HO set on a 4×8 – no fixed buildings just a train at Christmas. Something I could do with my son. Eventually that set was given away prior to an overseas move.
Then about 10 years or so ago my wife bought me another Lionel set that became a Christmas fixture with added expansion packs. But kids are gone and it wasn’t as much fun, or as easy, to crawl under the tree.
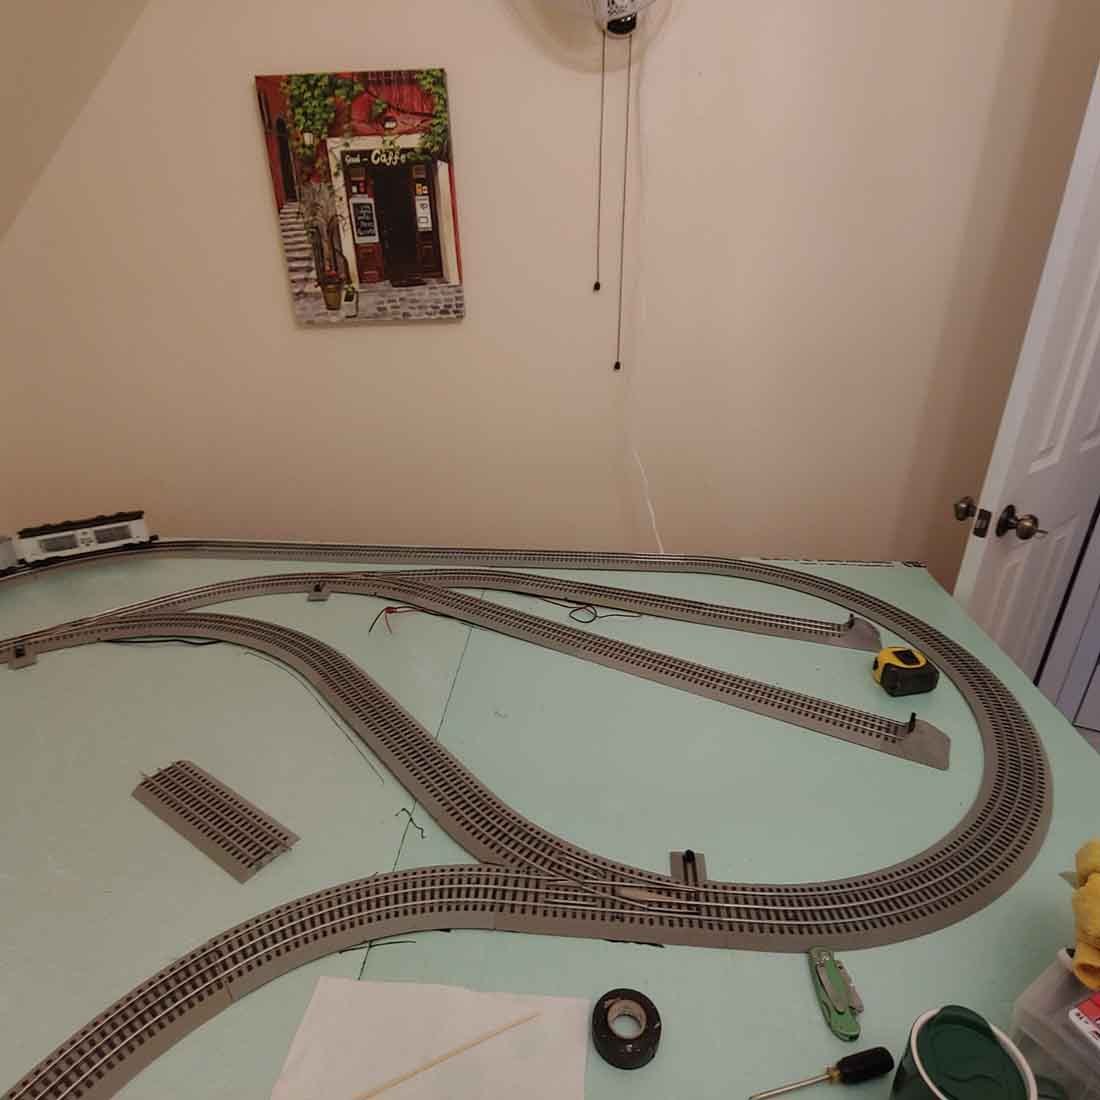
Last year we moved to NC, and the house had a really ugly 9×13 closet. After cleaning up the room, I got permission to make it a train room (granddaughter visit pending). And off I went.
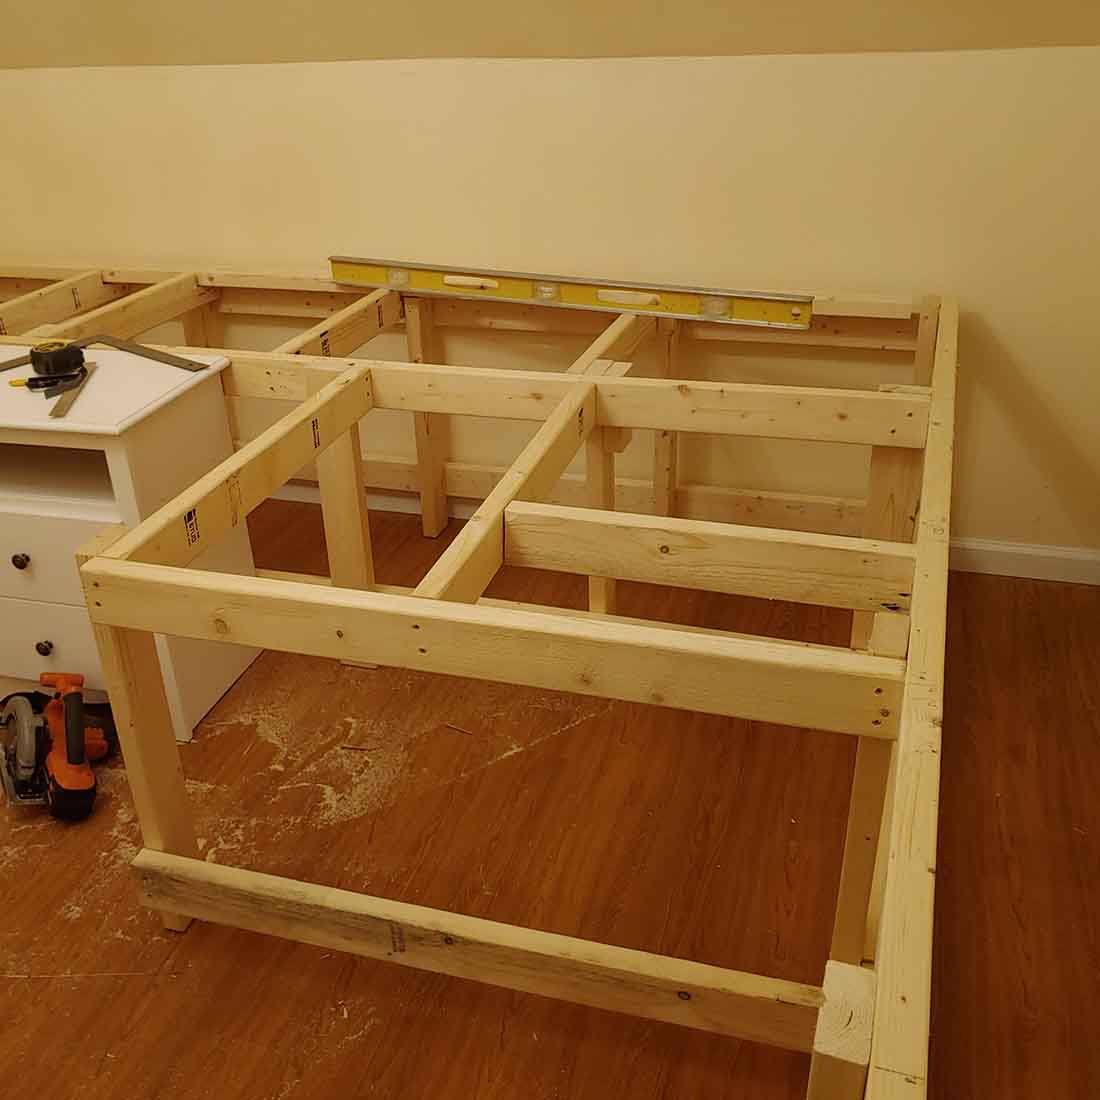
There was a post a few weeks back from a reader who wasn’t sure if he would do O scale, and was hesitant to start due to a lack of carpentry skills. I get it. I thought I had it all figured out. The height is perfect (floor was flat) but it isn’t perfectly square. Fortunately I planned for 3 inches or so of overhang which covers the inadvertent trapezoid.
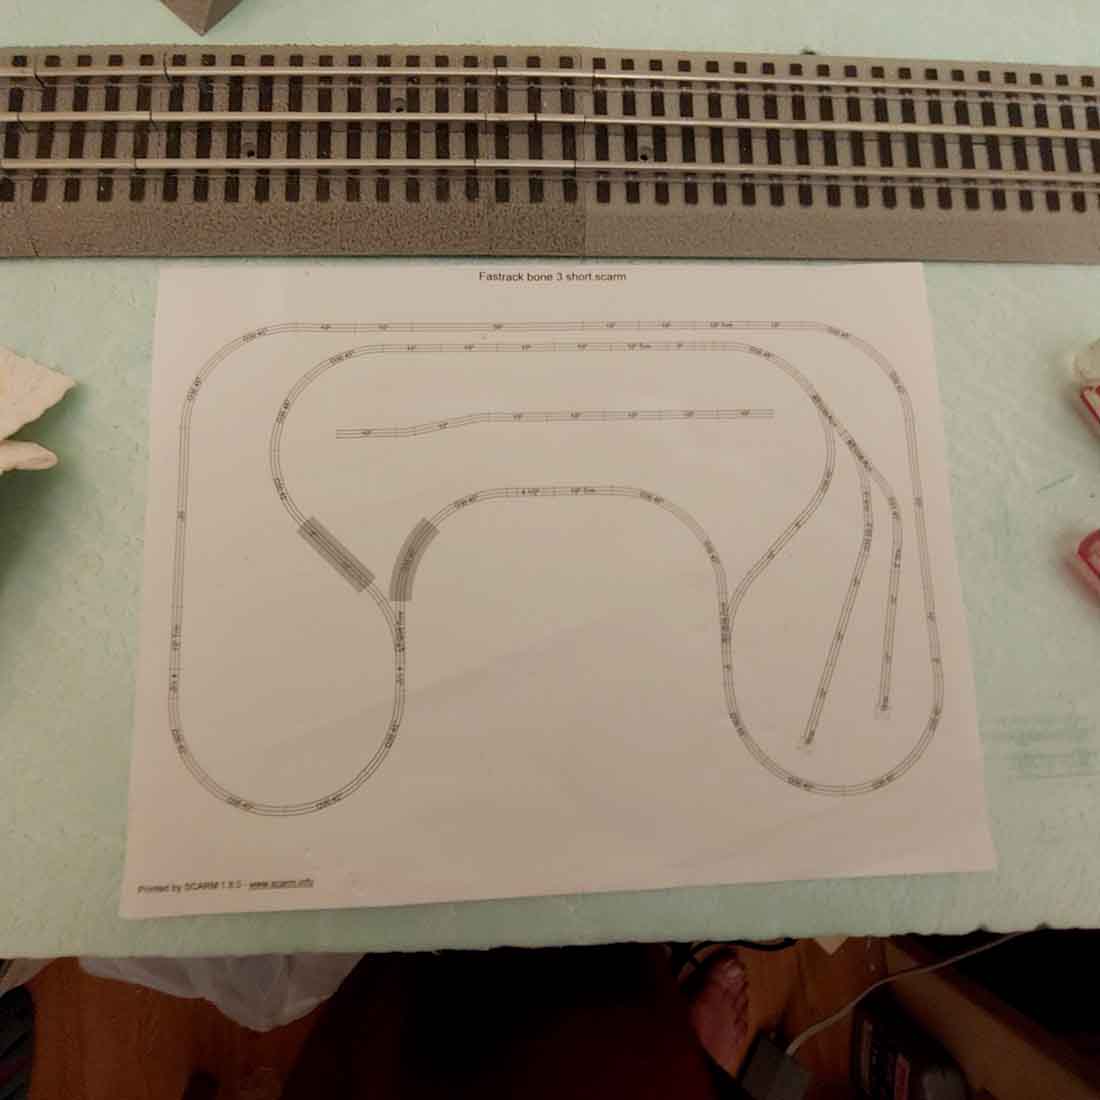
I thought of S scale, but had lots of O equipment and track so just stayed with it. Going smaller was out due to hand tremors. I used SCARM to layout the track. I would have liked to use Ross track because it looks great, but couldn’t get a layout I liked enough to fit my space. I would have liked to go larger than 0-36 curves, too, but again space was a problem.
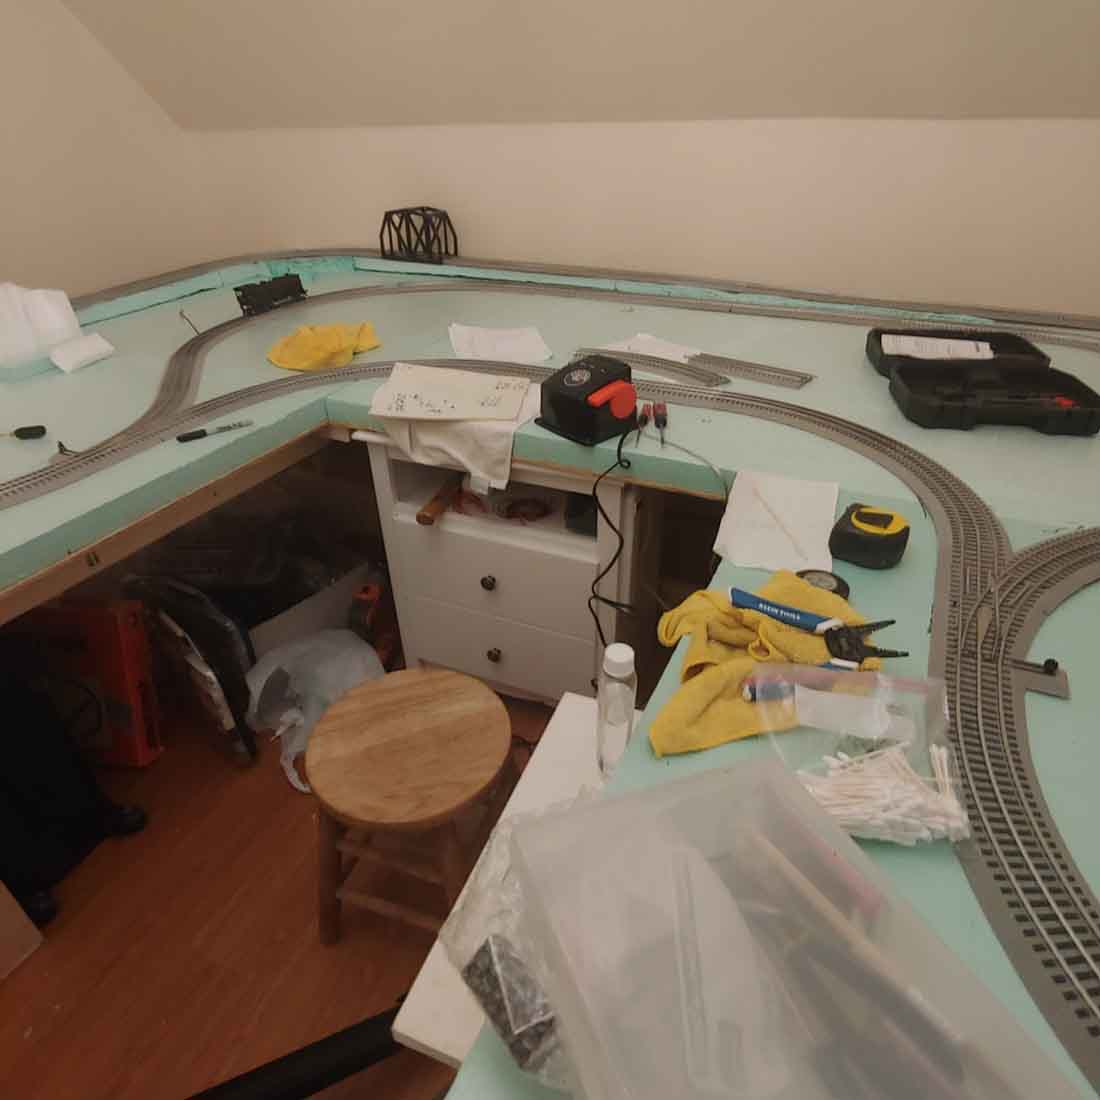
I built the frame out of 2x4s – it is solid as a rock. I could have gotten by with 2x3s or 2x2s, the cost difference wasn’t that great. I went rather low – about 29 inches – because I had a stool and because I used an old TV stand and a corner stand from a thrift shop as supports – gave me some cabinet storage.
If I want to I can always add another platform later, too. I mounted the 3/8 inch plywood to hinges, so I could lift it up for wiring. I do have 2 feet clear on 2 sides, and have felt sliders under the legs so I can push it around a bit to improve access.
I wanted to get a 2 inch hill on the left side, but test runs show that my slopes are a bit too steep at 2.5%, so I need to drop it down a bit. I have a hot knife which should make it easier to cut.
I haven’t named the RR yet and it doesn’t represent a specific time period – though I am partial to 40s/50s.
My collection is more about family and places we’ve lived or been. More playful than detailed model. I haven’t figured out if I should do plaster cloth or drywall mud or ??? for landscape .
The left side will be Southwestern US – like red rocks in southern Utah. That way I can do a dry wash (maybe water later) under the bridge and another truss bridge and don’t need as many trees.
The right side will be more industrial. The center will be a town – with a trolley line. I now have a couple of used plastic buildings that I need to paint – but intend to putter with scratch building (buildings are so expensive).
So far my biggest challenge might be using old Lionel stuff – without the modern plugs. I need to figure out wiring for both configurations, I guess. BUt that’s the fun with a O scale 7×11.
Kevin”
A big thanks to Kevin for sharing his O scale 7×11.
I really do enjoy seeing your ‘starts’. They are interesting, and more importantly, I know they help others make their start too.
That’s why for my latest silly sale, rather than just launch the latest scratch kit, I’ve bundled it with the Beginner’s Guide.
That way, there should be a few more making a start soon!
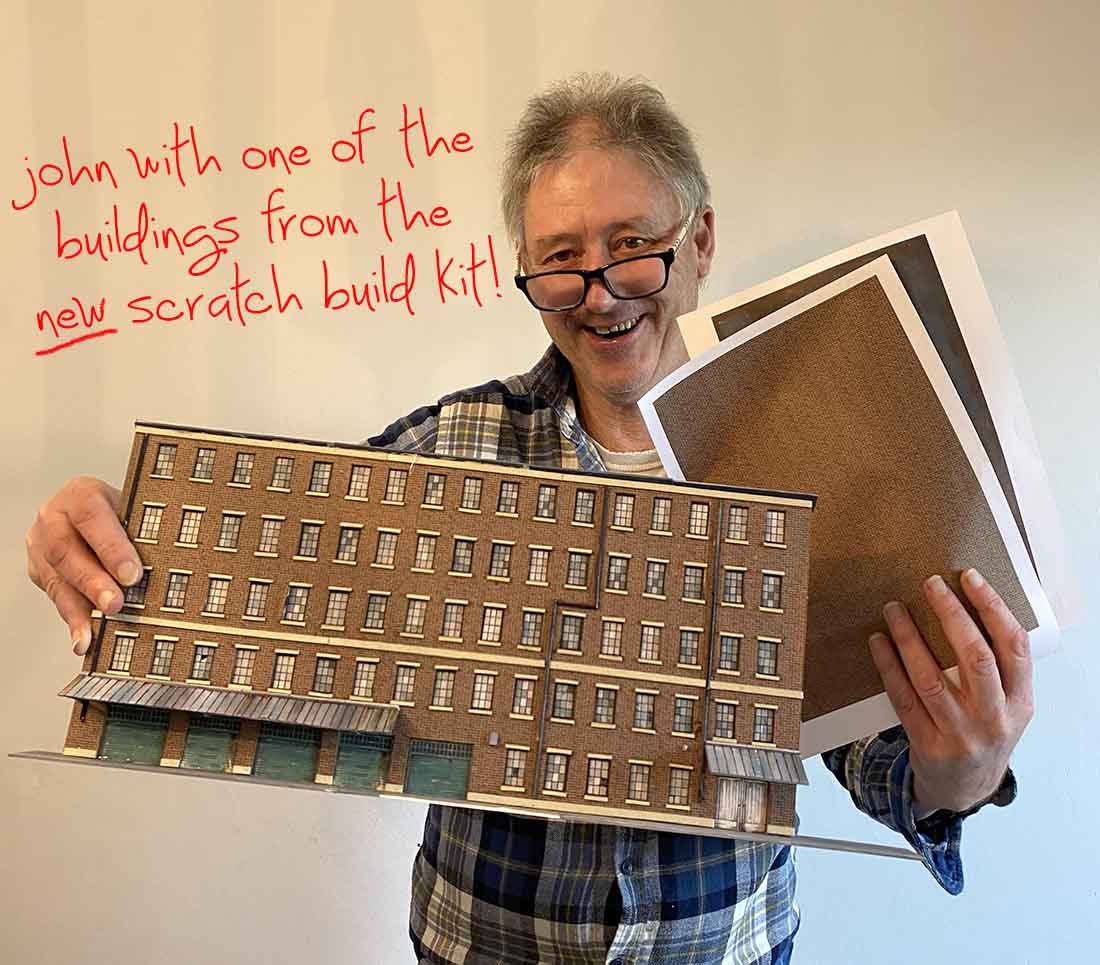
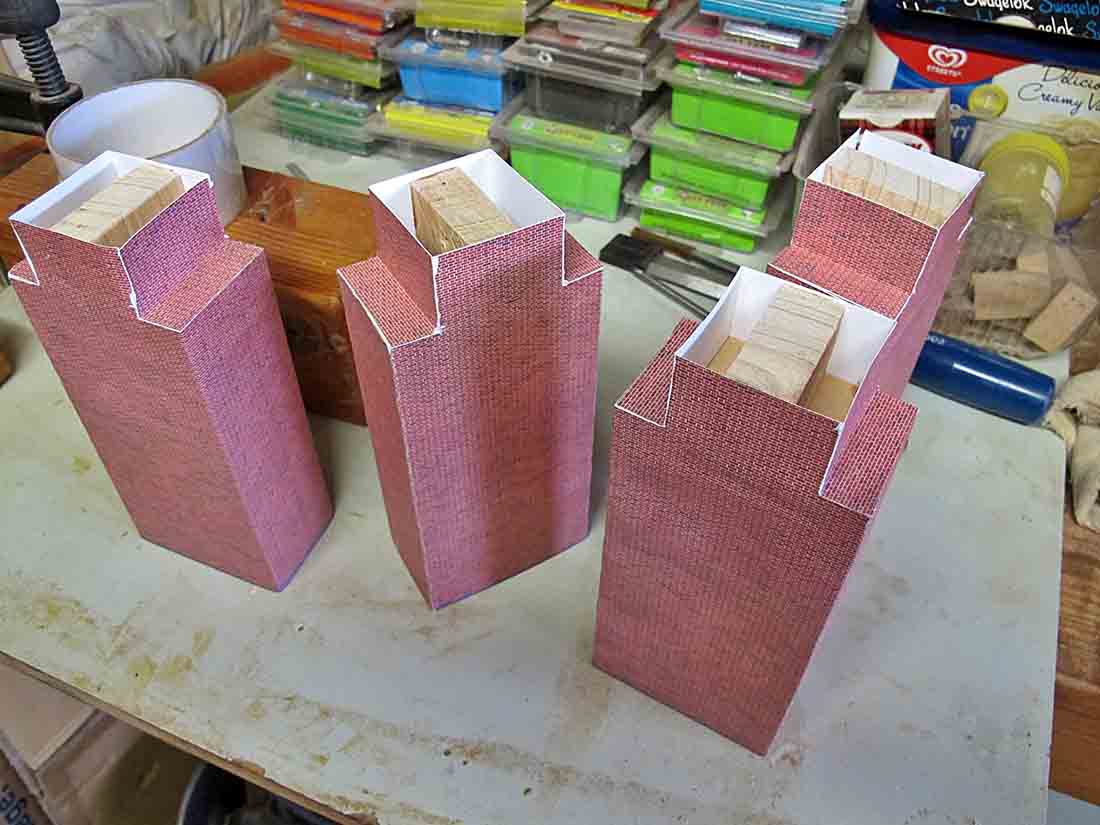
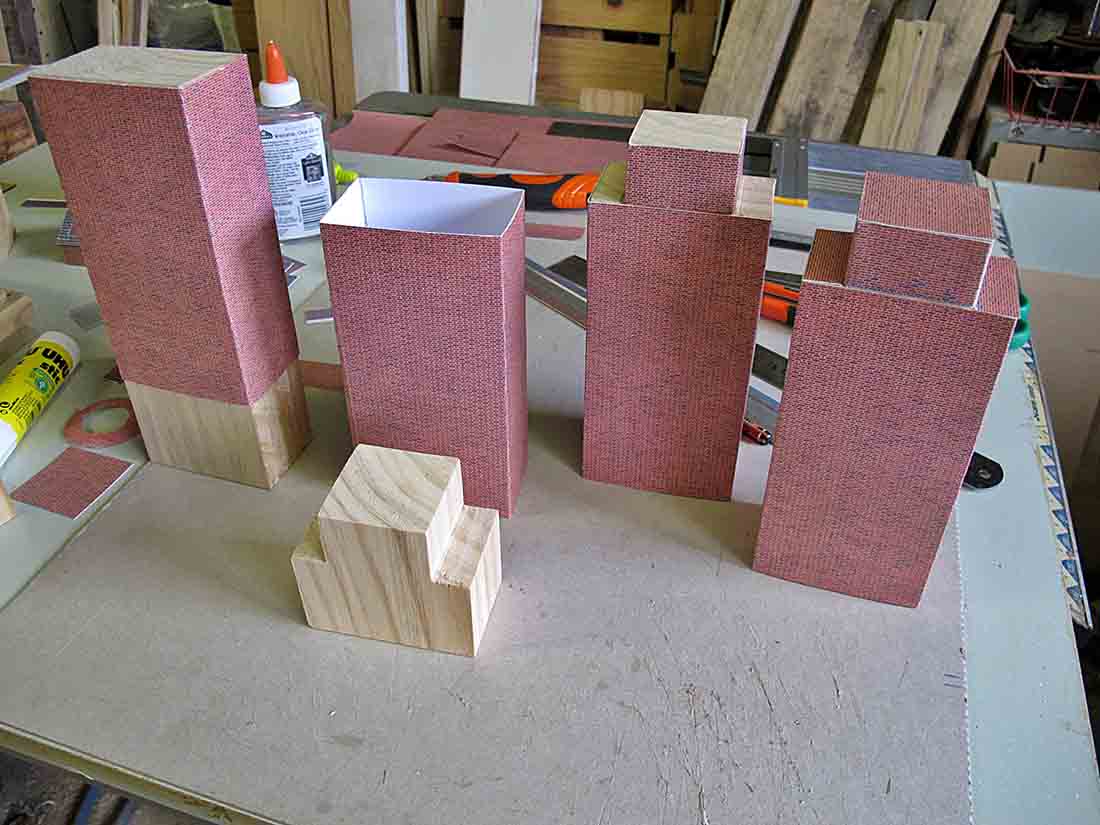
Here’s John with a few of the models you can make with the latest scratch kit:
I know lots of you have already bought the guide and are only buying it for the prints, and that’s fine.
After all, you can’t go wrong for just $9 can you.
There’s seems to be a little confusion about what you get. So just to clarify:
$9 gets you the Beginner’s Guide, scratch kit 1 and the new scratch kit 2 as well as the other bonus buildings.
PS Don’t worry if you’ve already got the Beginner’s Guide, I know a lot of you are just buying for the prints and that’s fine.
I’ve bundled them with the Beginner’s Guide so hopefully one or two of you will start that diorama, or design a track plan, or start laying track… you get the idea.
And here’s John explaining some other stuff about the kits:
Barry’s been in touch with his model railway power station scratch build:
“Hi Alistair,
As an avid reader of your e-mails, I thought it was about time I added some material.
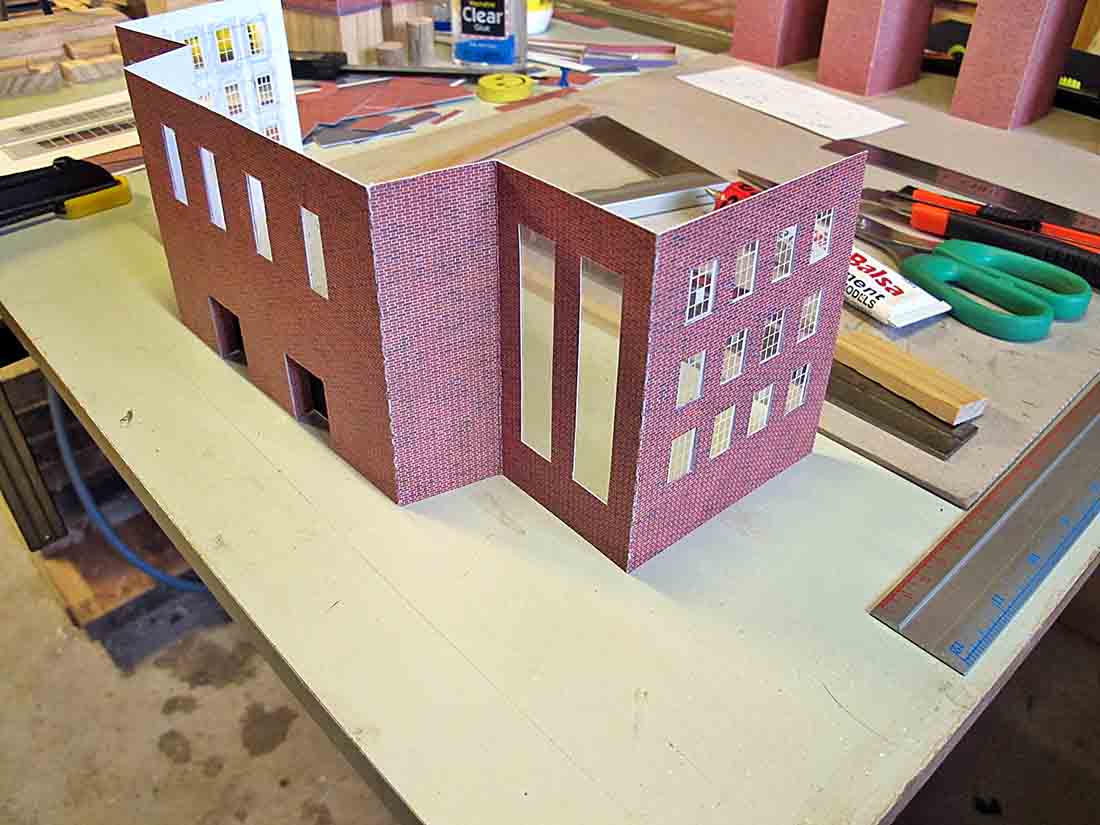
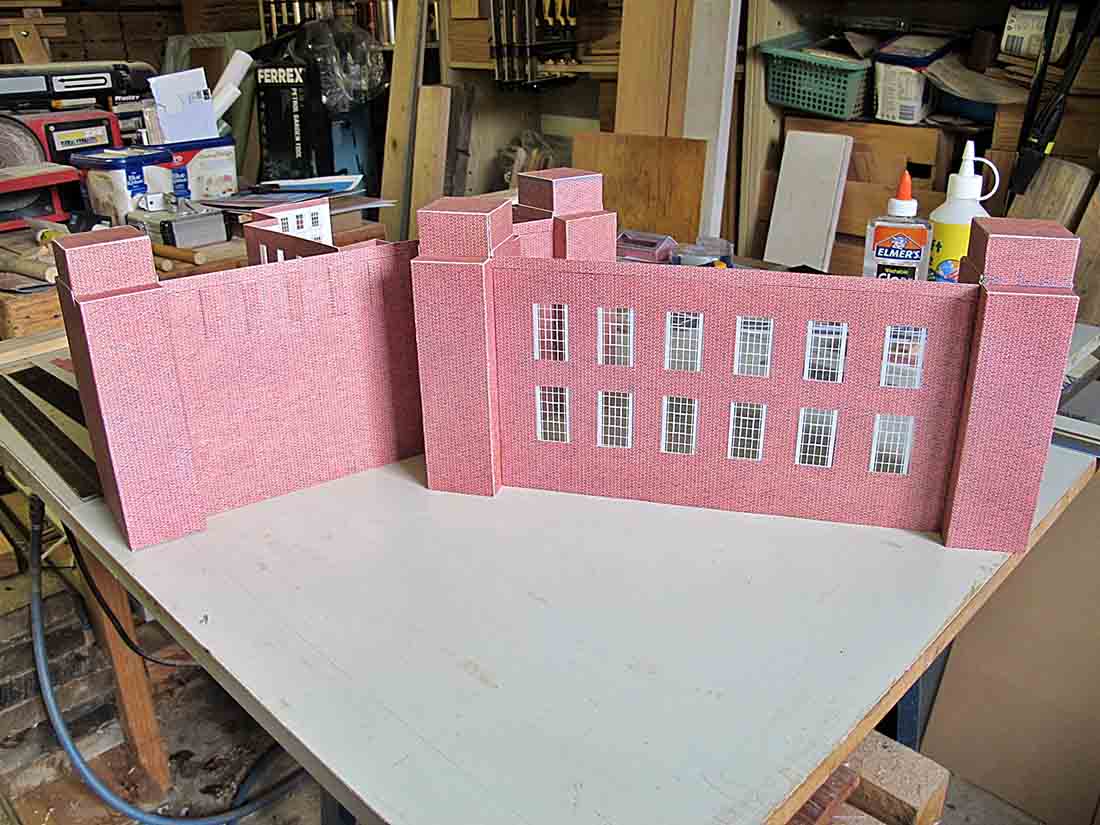
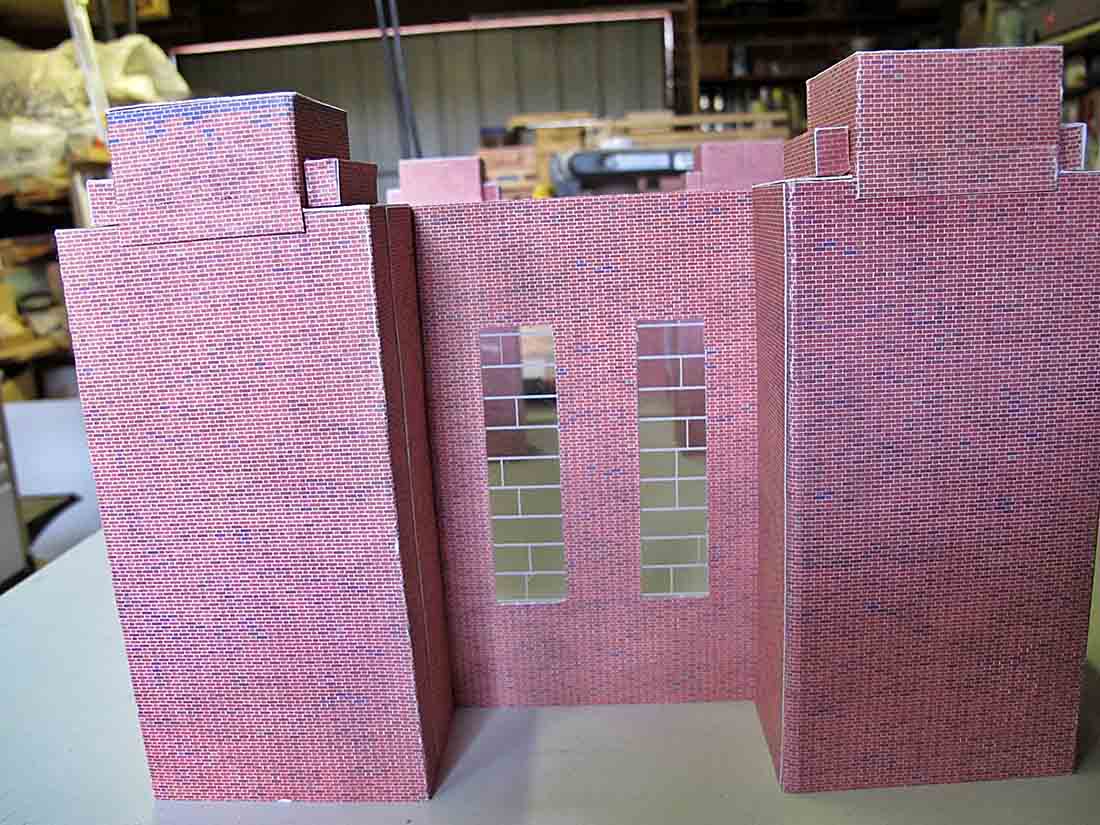
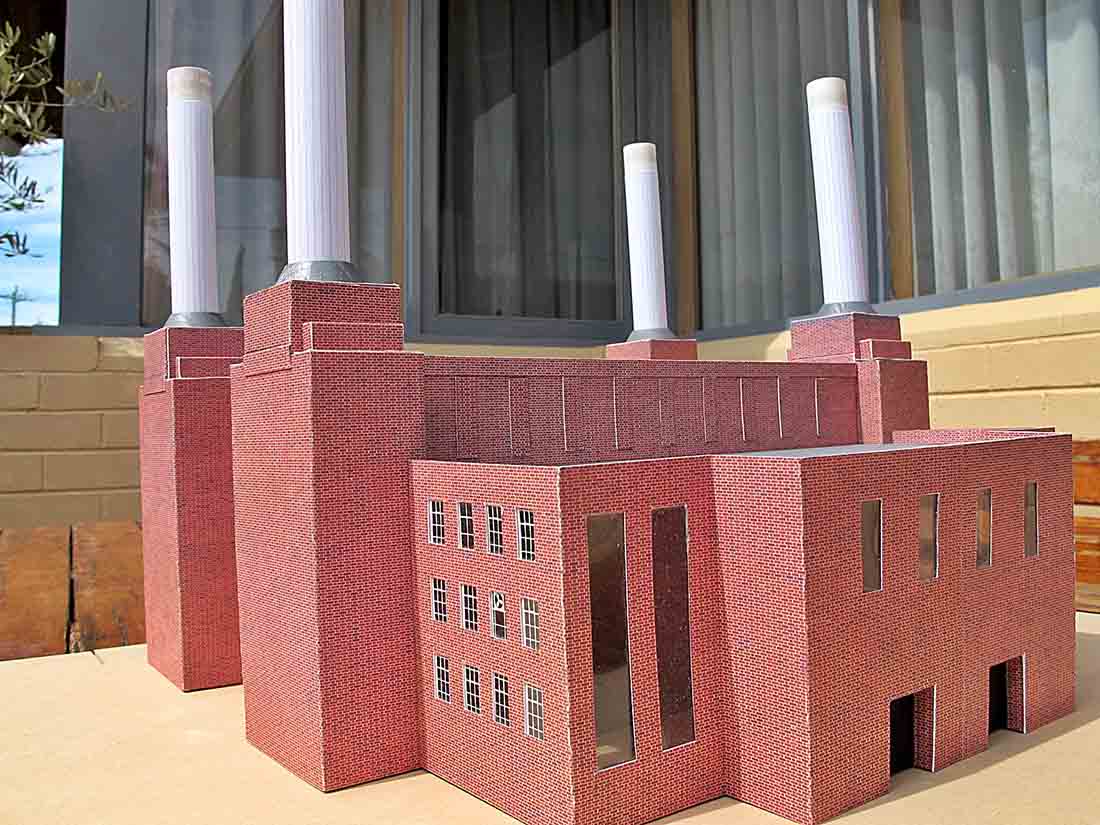
I have a high detailed sub station with transmission towers but nothing to feed it power, so I decided to build a power station, and what more iconic than the Battersea power station.
Couldn’t find any suitable kits, so I decided to scratch build one.
I got hold of a set of the original plans and proceeded to scale them.
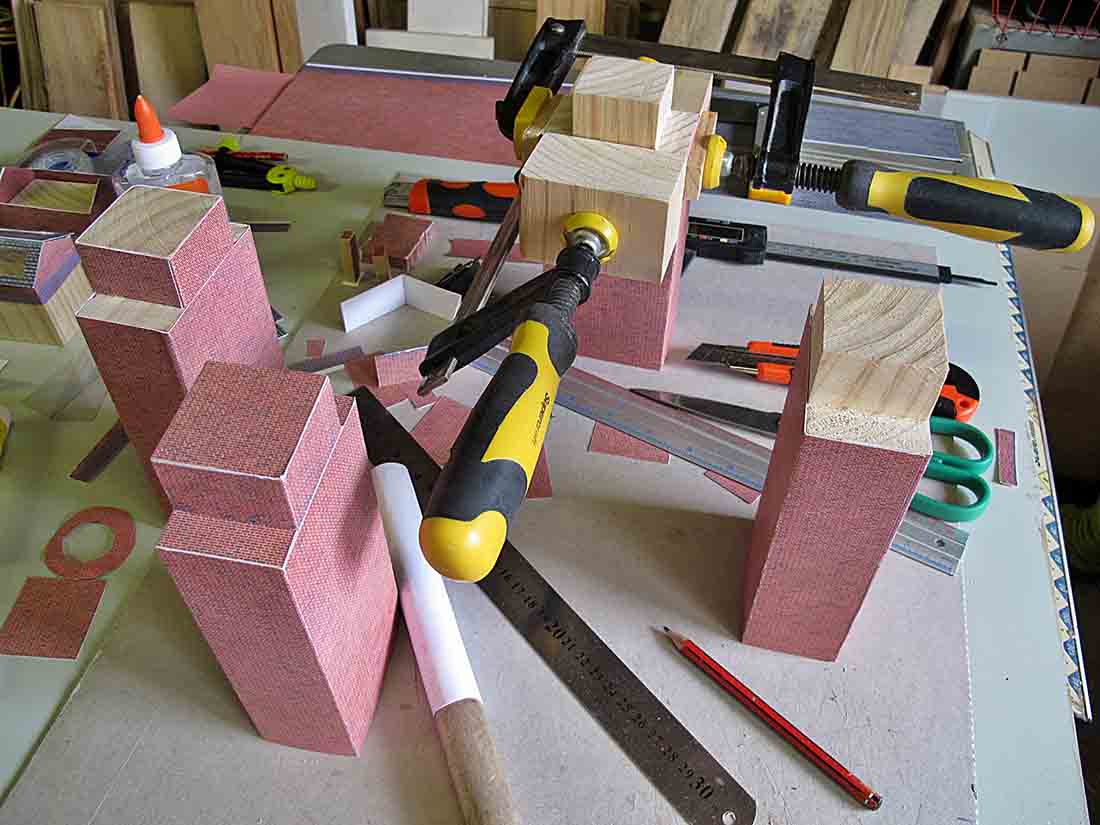
After wasting a couple of days building the towers, I realised they they were way too flimsy even with reinforcing, so second attempt I used stiffer brick card and machined timber formers for the top of the towers to save all the cutting.
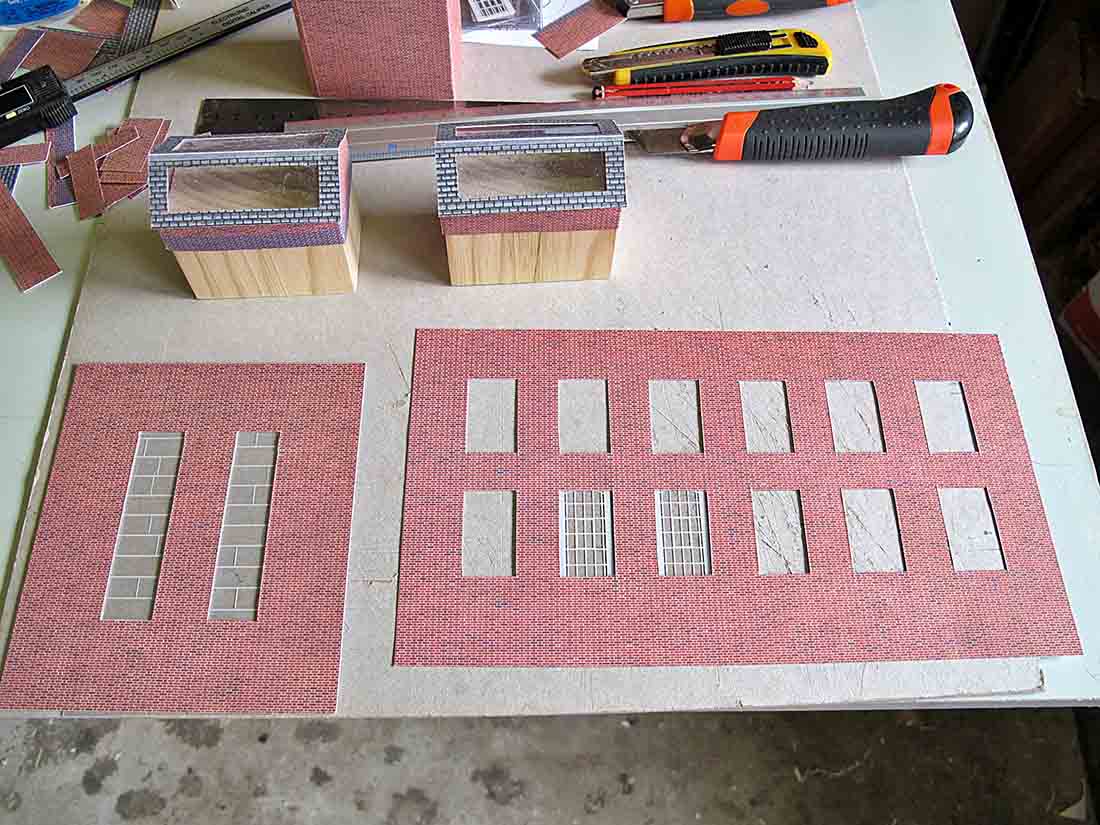
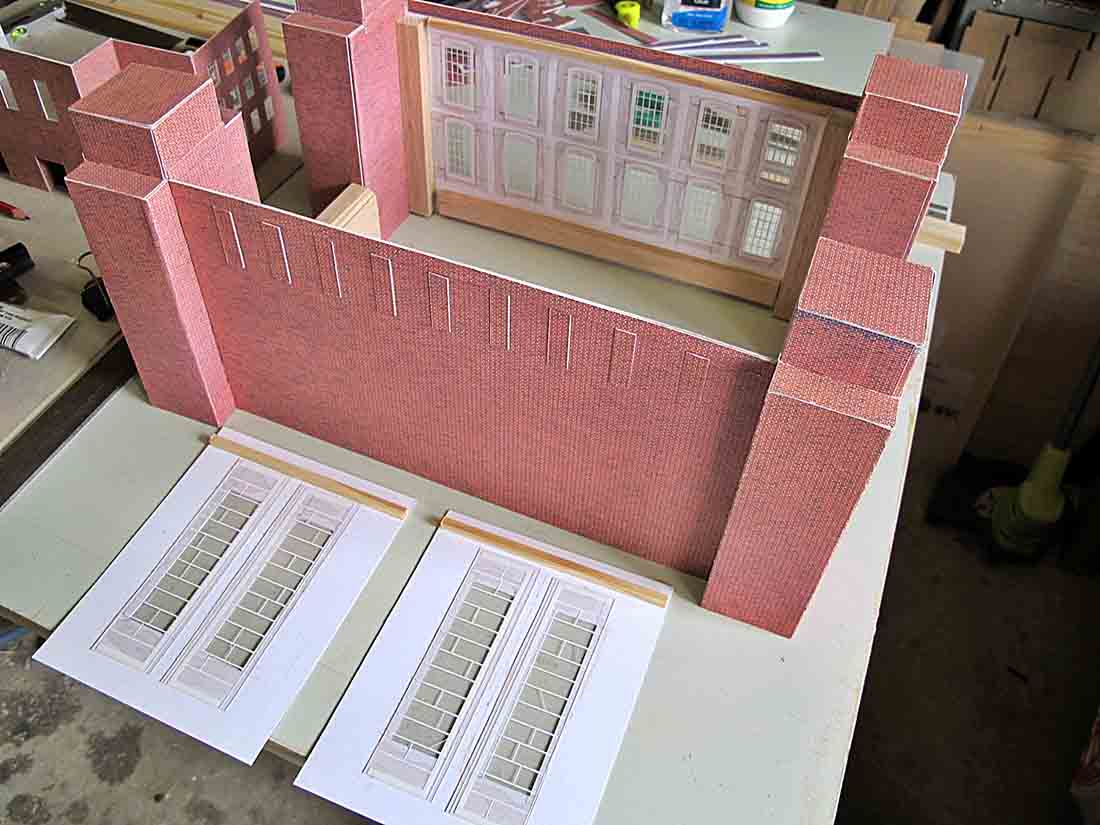
Then I started of the laborious task for marking the windows and cutting them out.
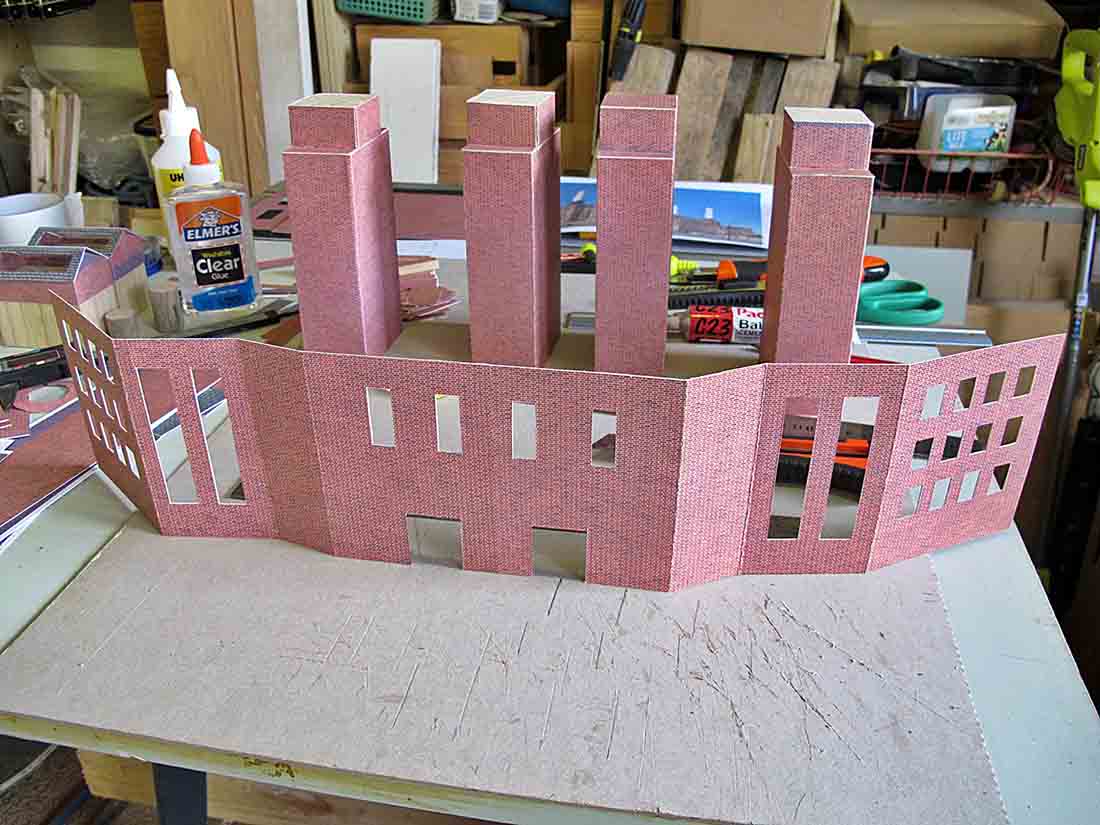
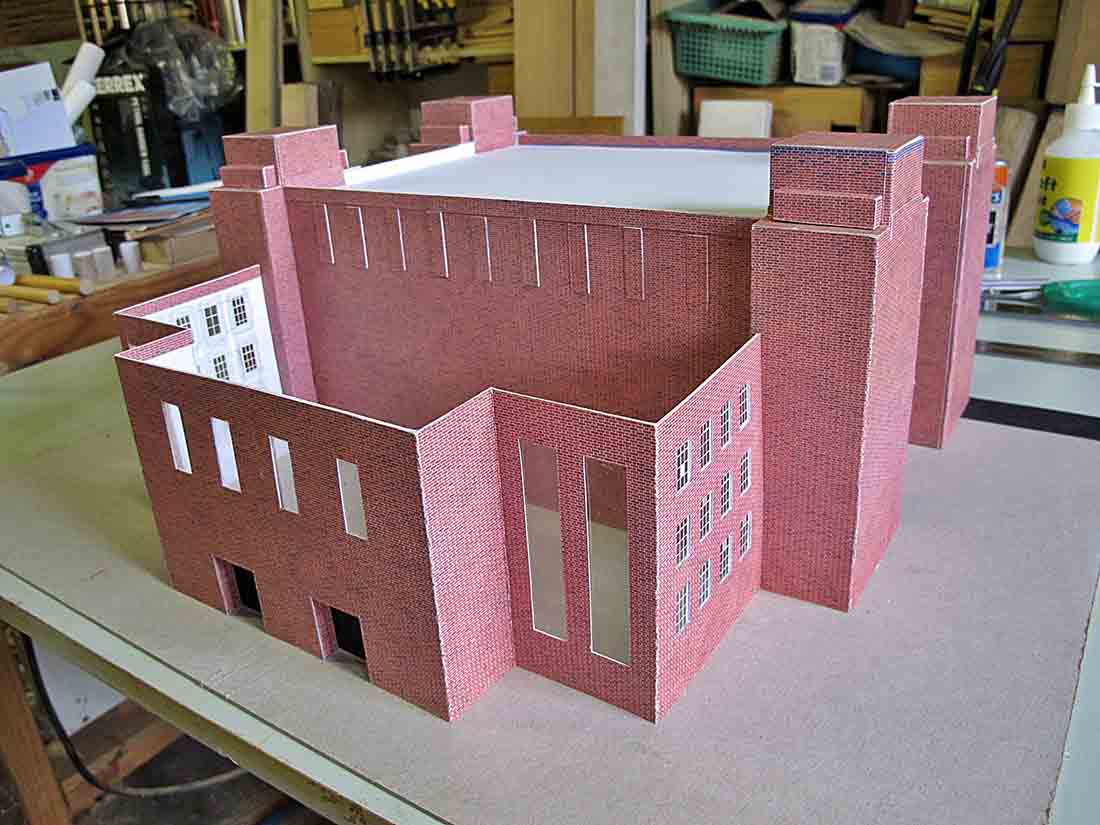
Then it came to glazing them all with some nice windows I managed to scam off Metcalfe Models. Dressing the top of the towers and gluing the front and rear walls to the towers. Then came to side walls completing the main building.
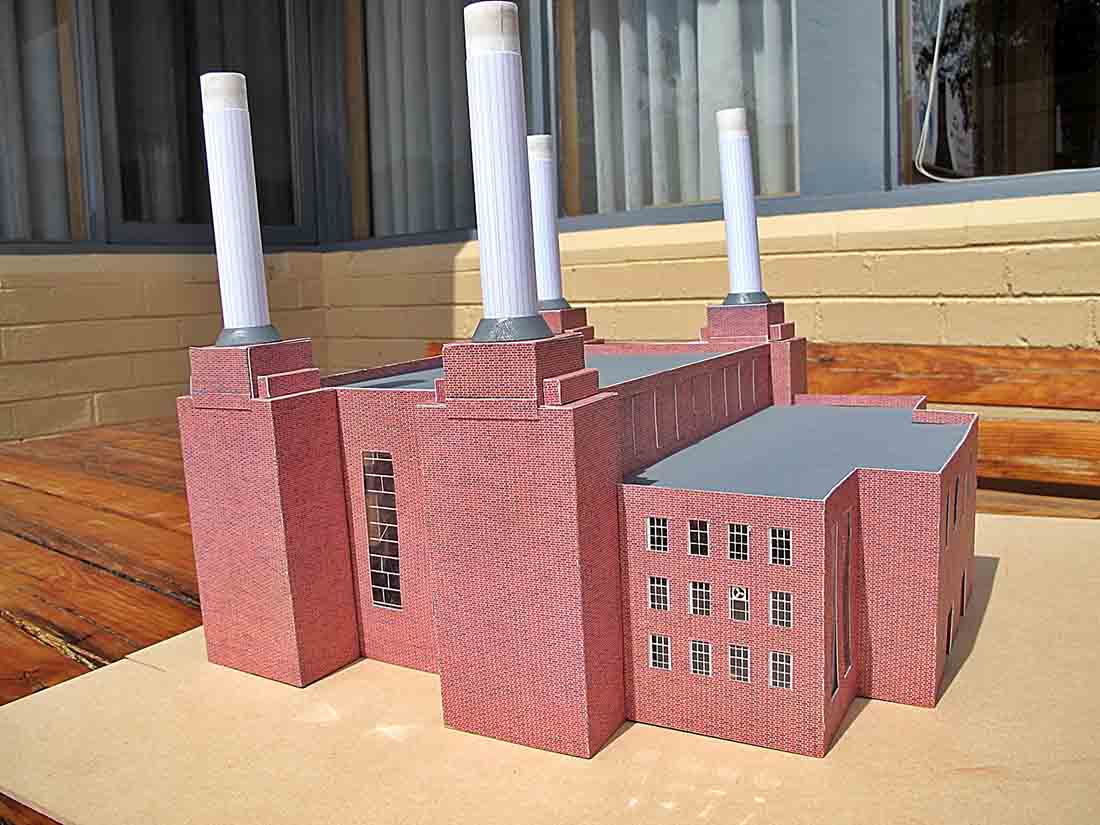
For the smoke stacks I used a suitable wooded dowel and tightly would and glued regular reflex paper.
I then found a suitable striped cement pattern on the web and printed that and glued onto the paper tube. Next I had to figure out how to make the conical bases for the chimneys. I tried making the out of stiff card, but a dismal failure, I really needed a lathe, so I went and bought one! I had all my old lathe tools from my engineering days, so turning them was easy.
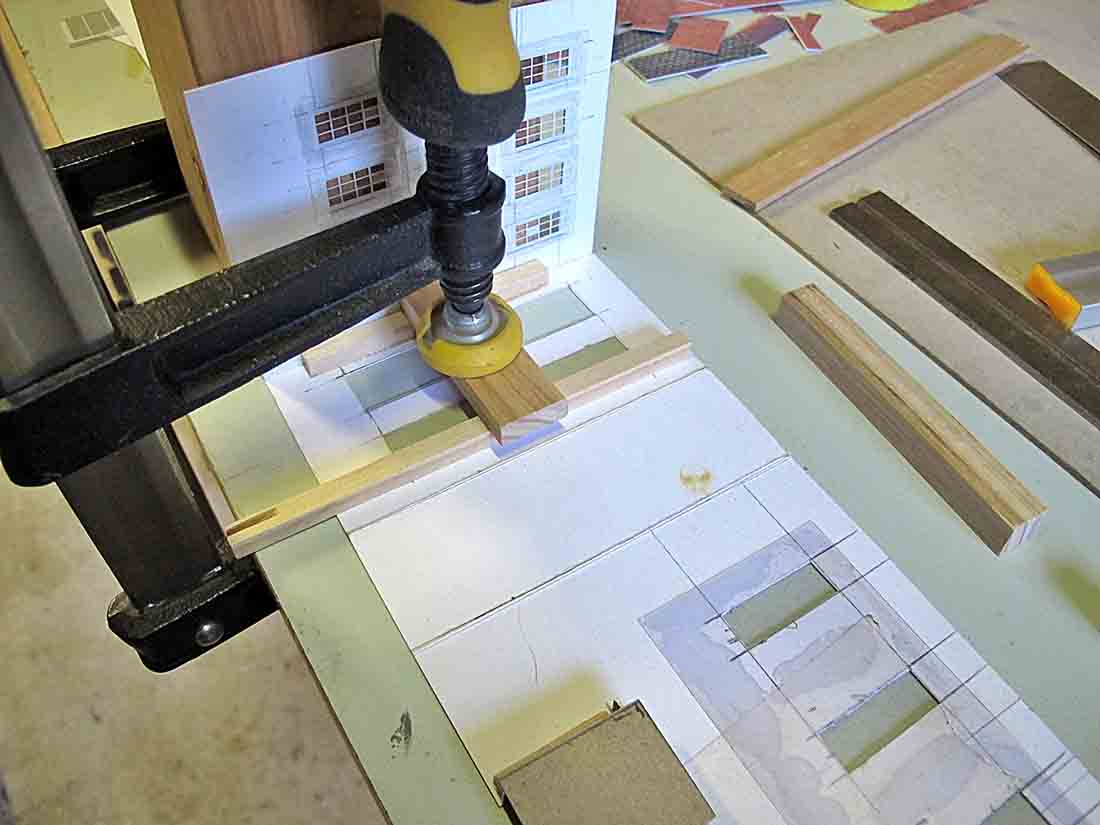
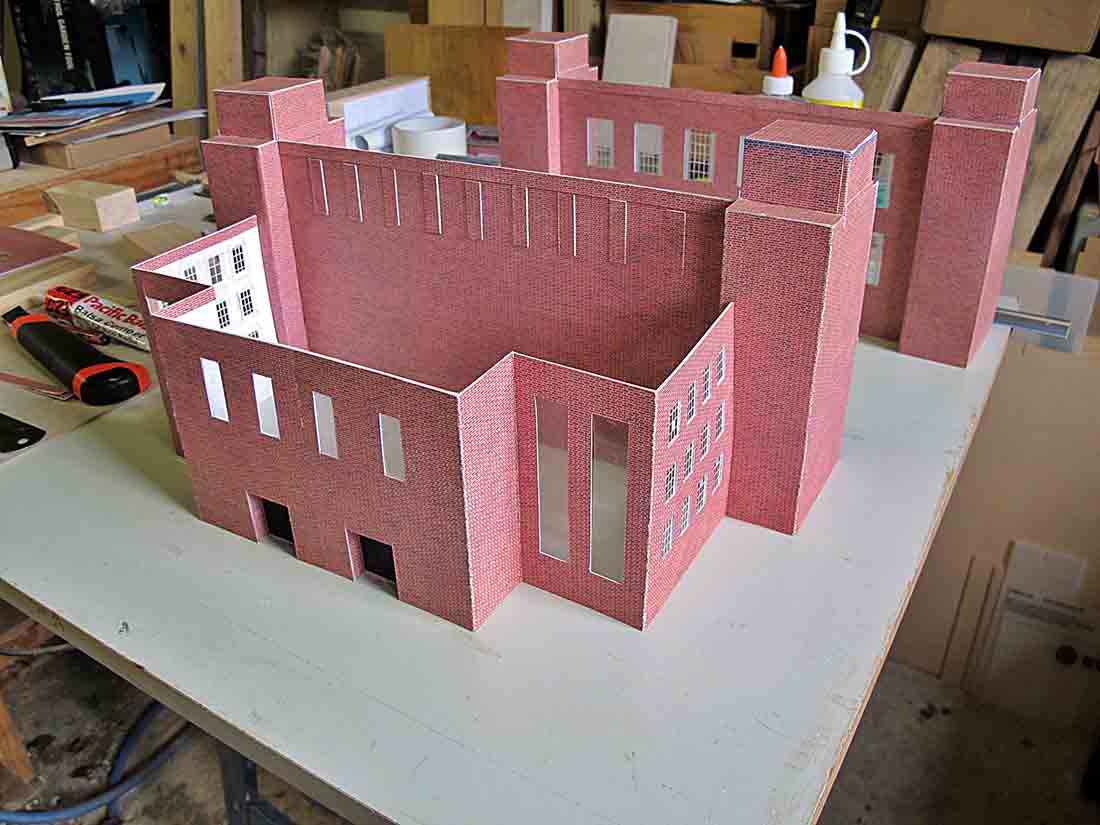
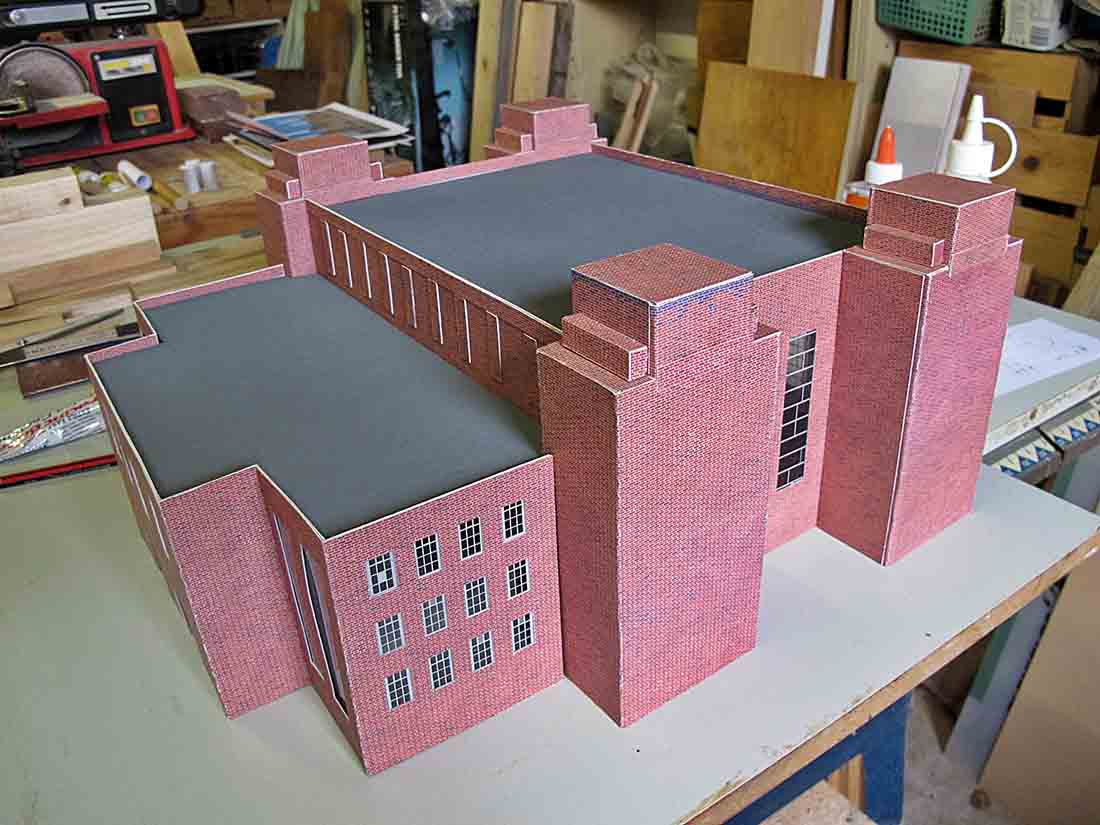
Next was the final assembly and all went well. You can see all the progress photos in the photos along with the final finished model. It just needs some weathering on some of the edges.
It’s a large model, but pretty well to scale, and 400mm wide and over 400mm deep.
Just waiting on a couple of Heng Long smoke generators to connect to tubes going up the chimneys.
Enjoy the photos.
Regards
Barry”
A huge thanks to Barry – can’t wait to see the weatherd version of his model railway power station.
It’s wonderful seeing what you all get up to and how you overcome the issues of your layouts.