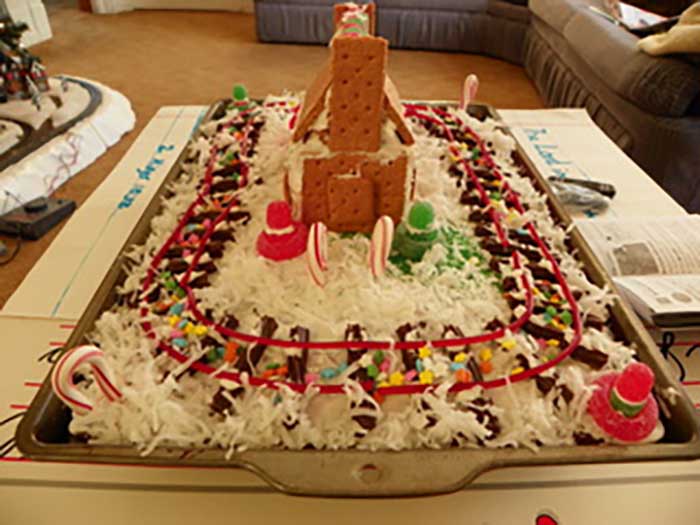
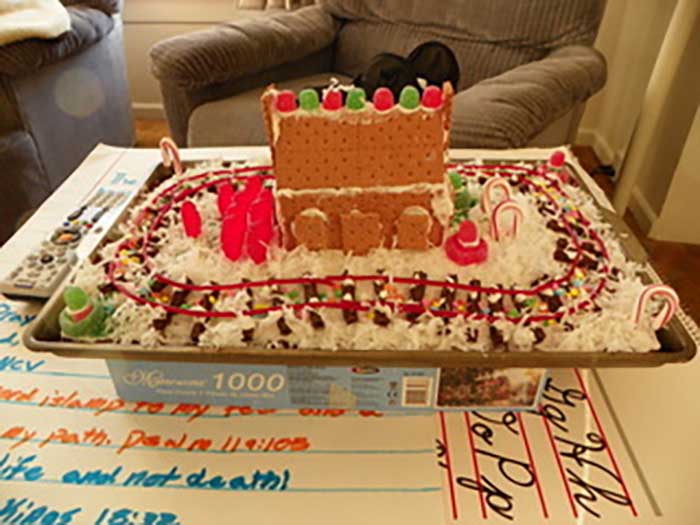
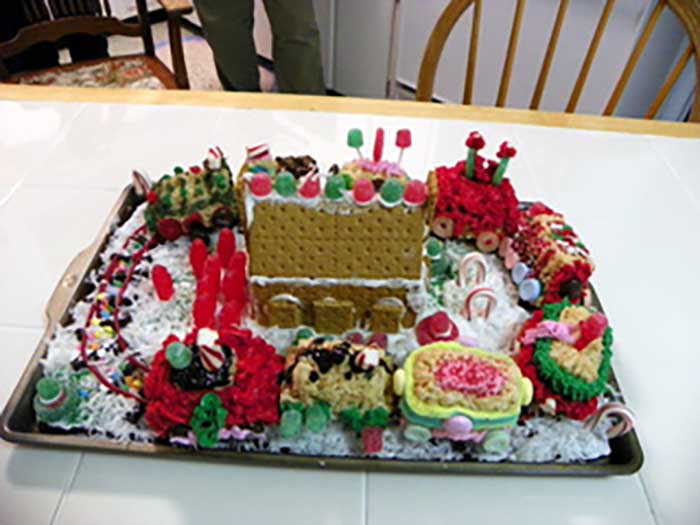
Dan’s been in touch with his Christmas train display.
And Dick shares a bit of fun too:
“Al,
I began getting things together for a G scale train setup for a city conservatory. I formed a small crew of 4 to get the job done.
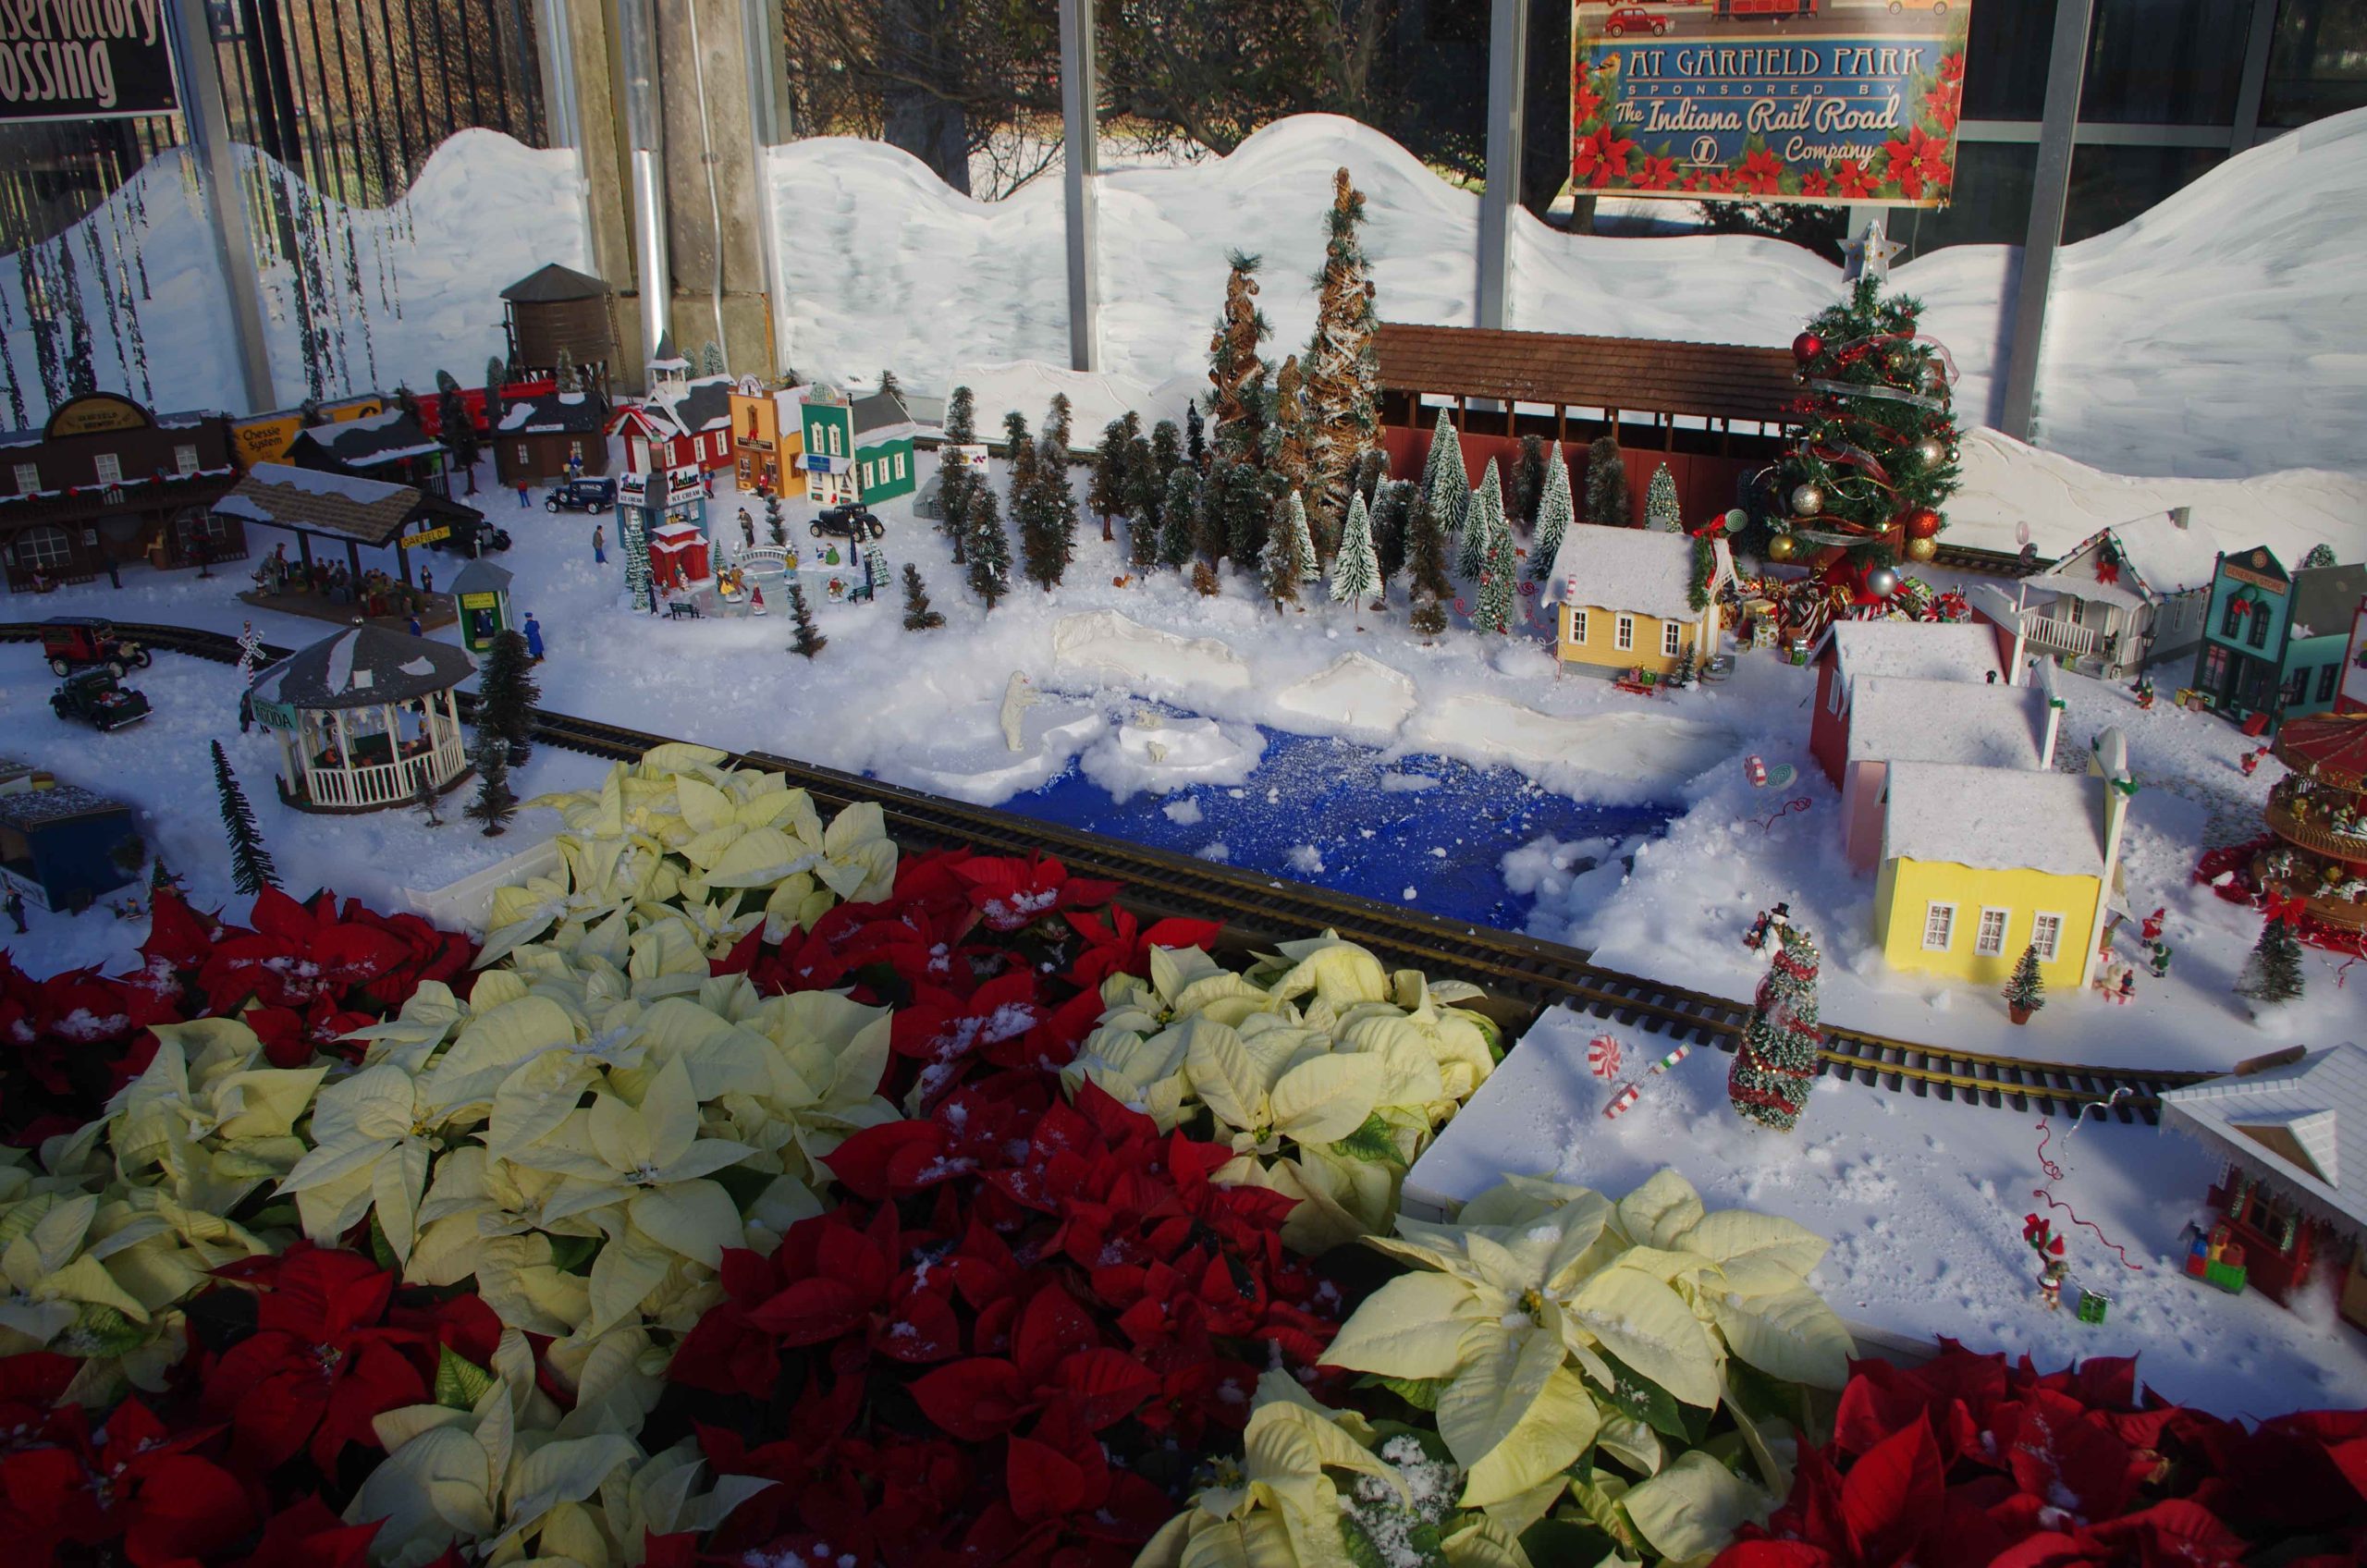
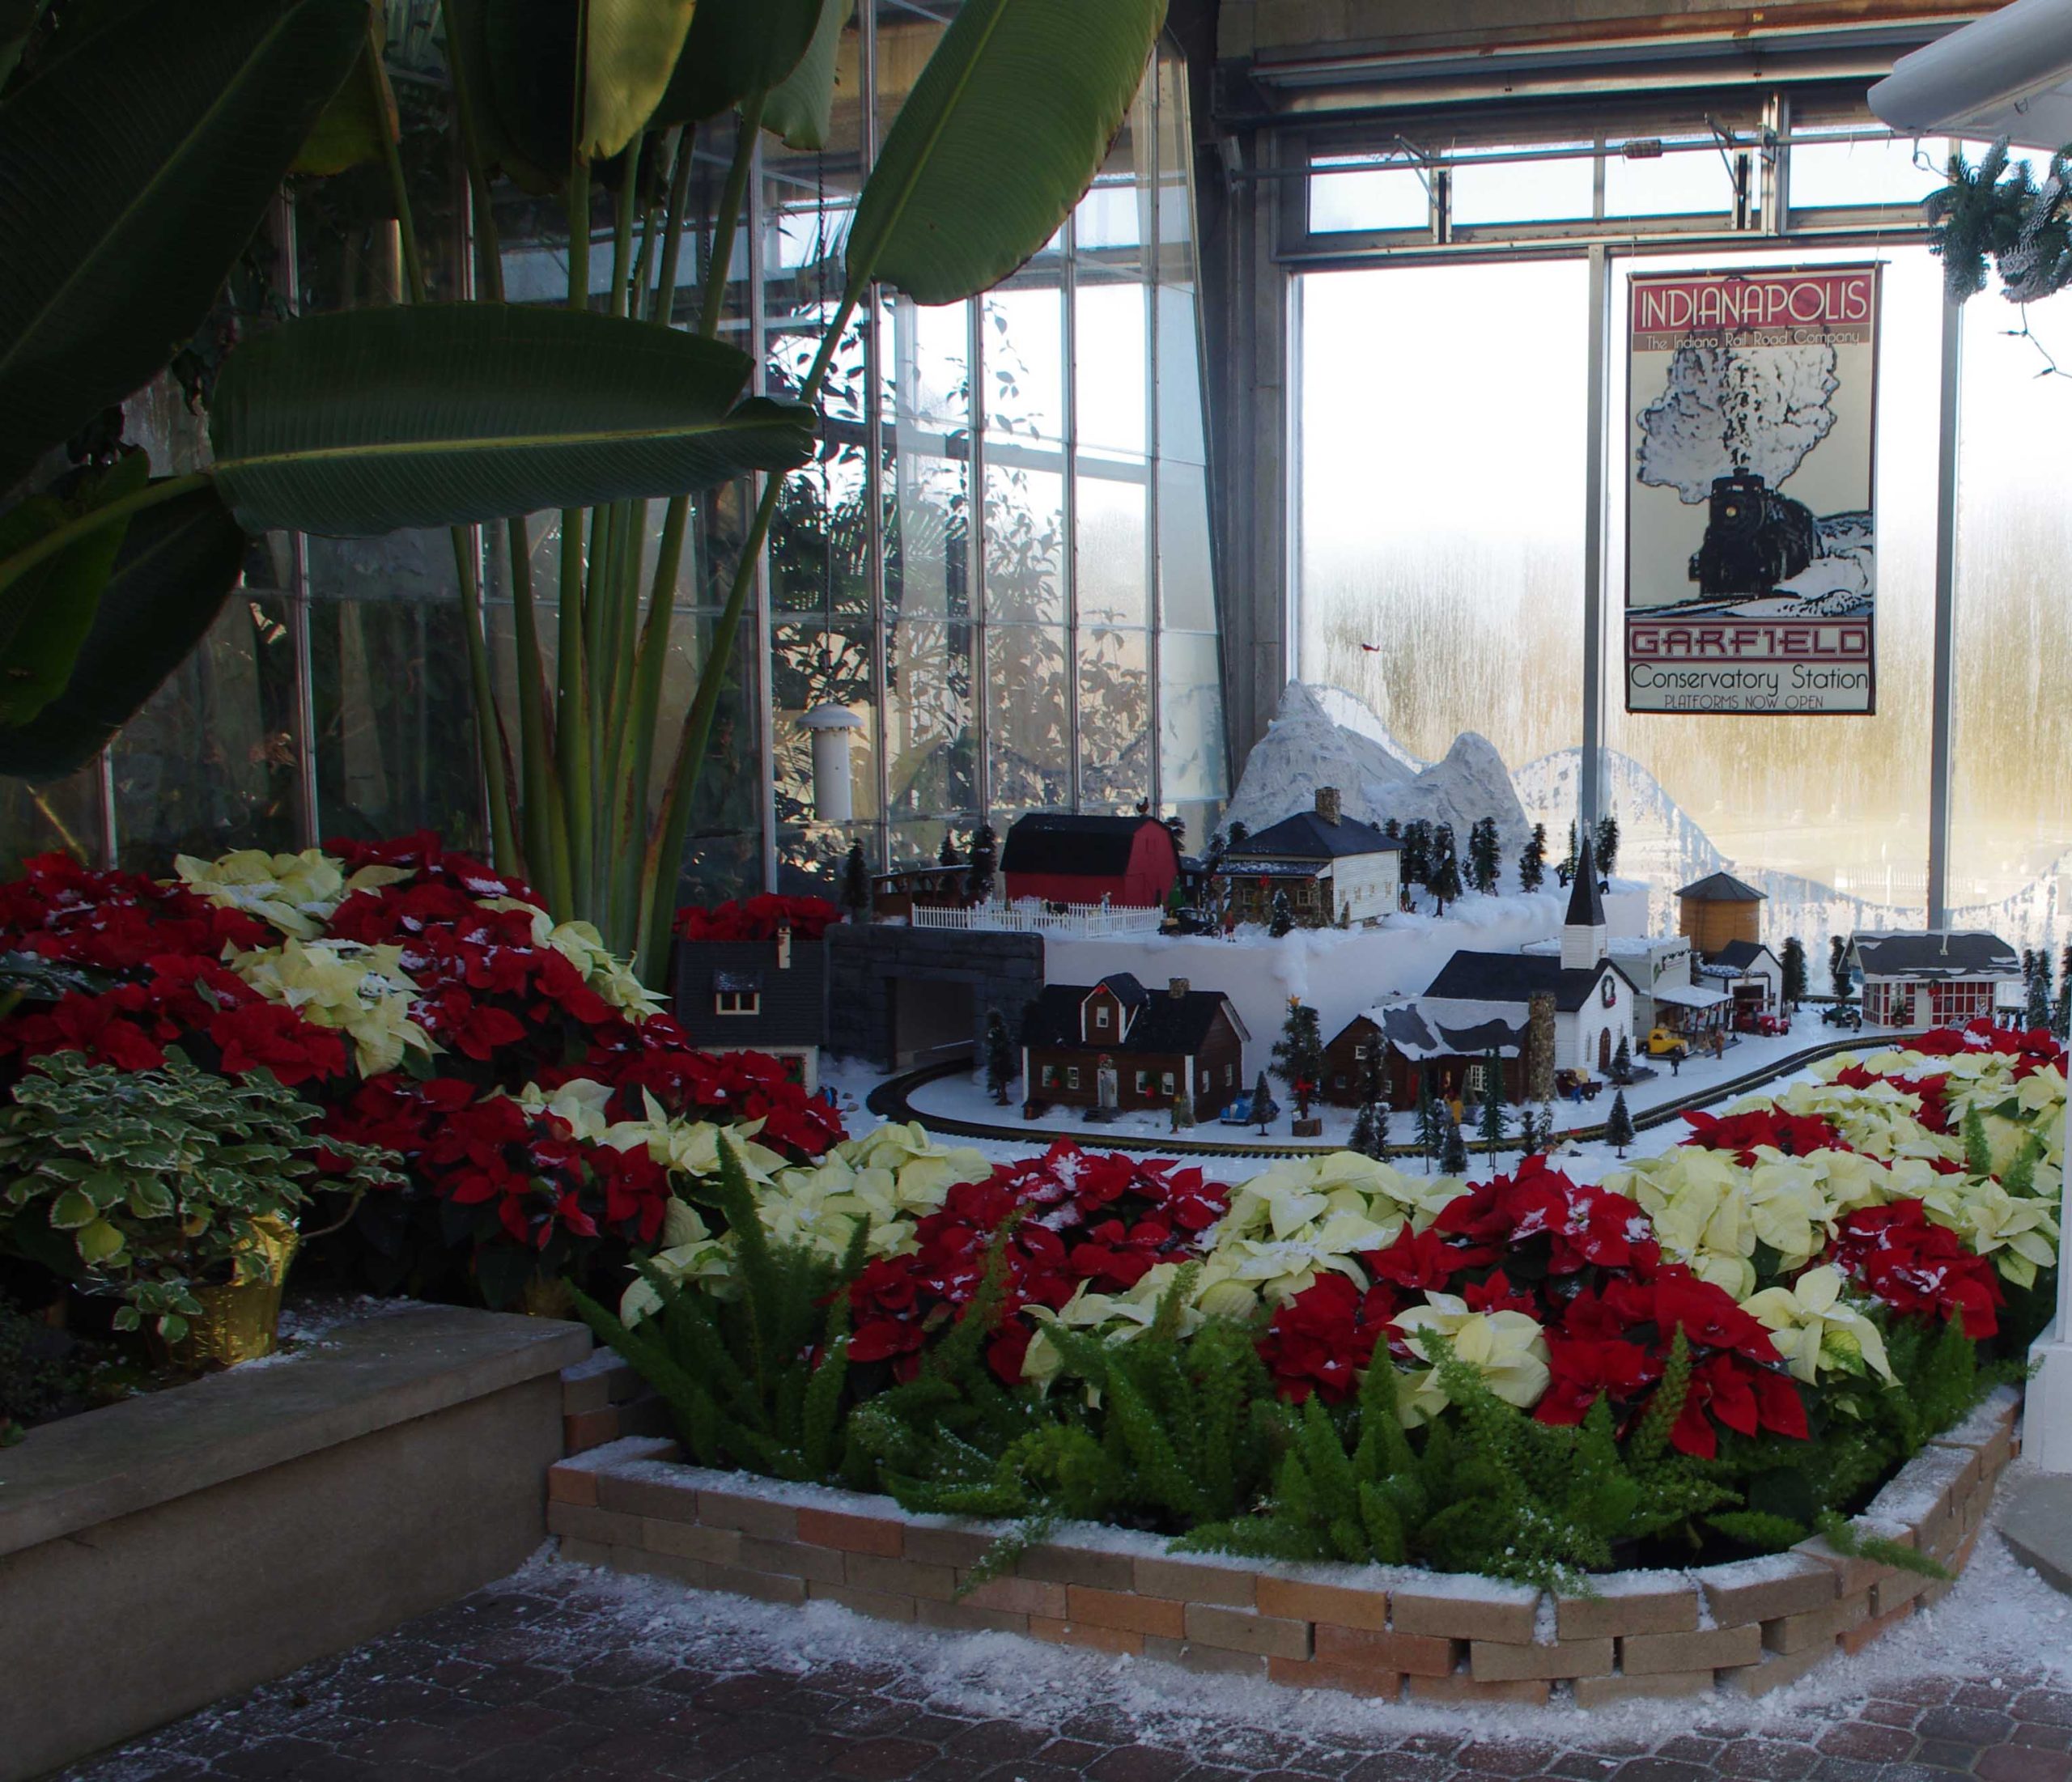
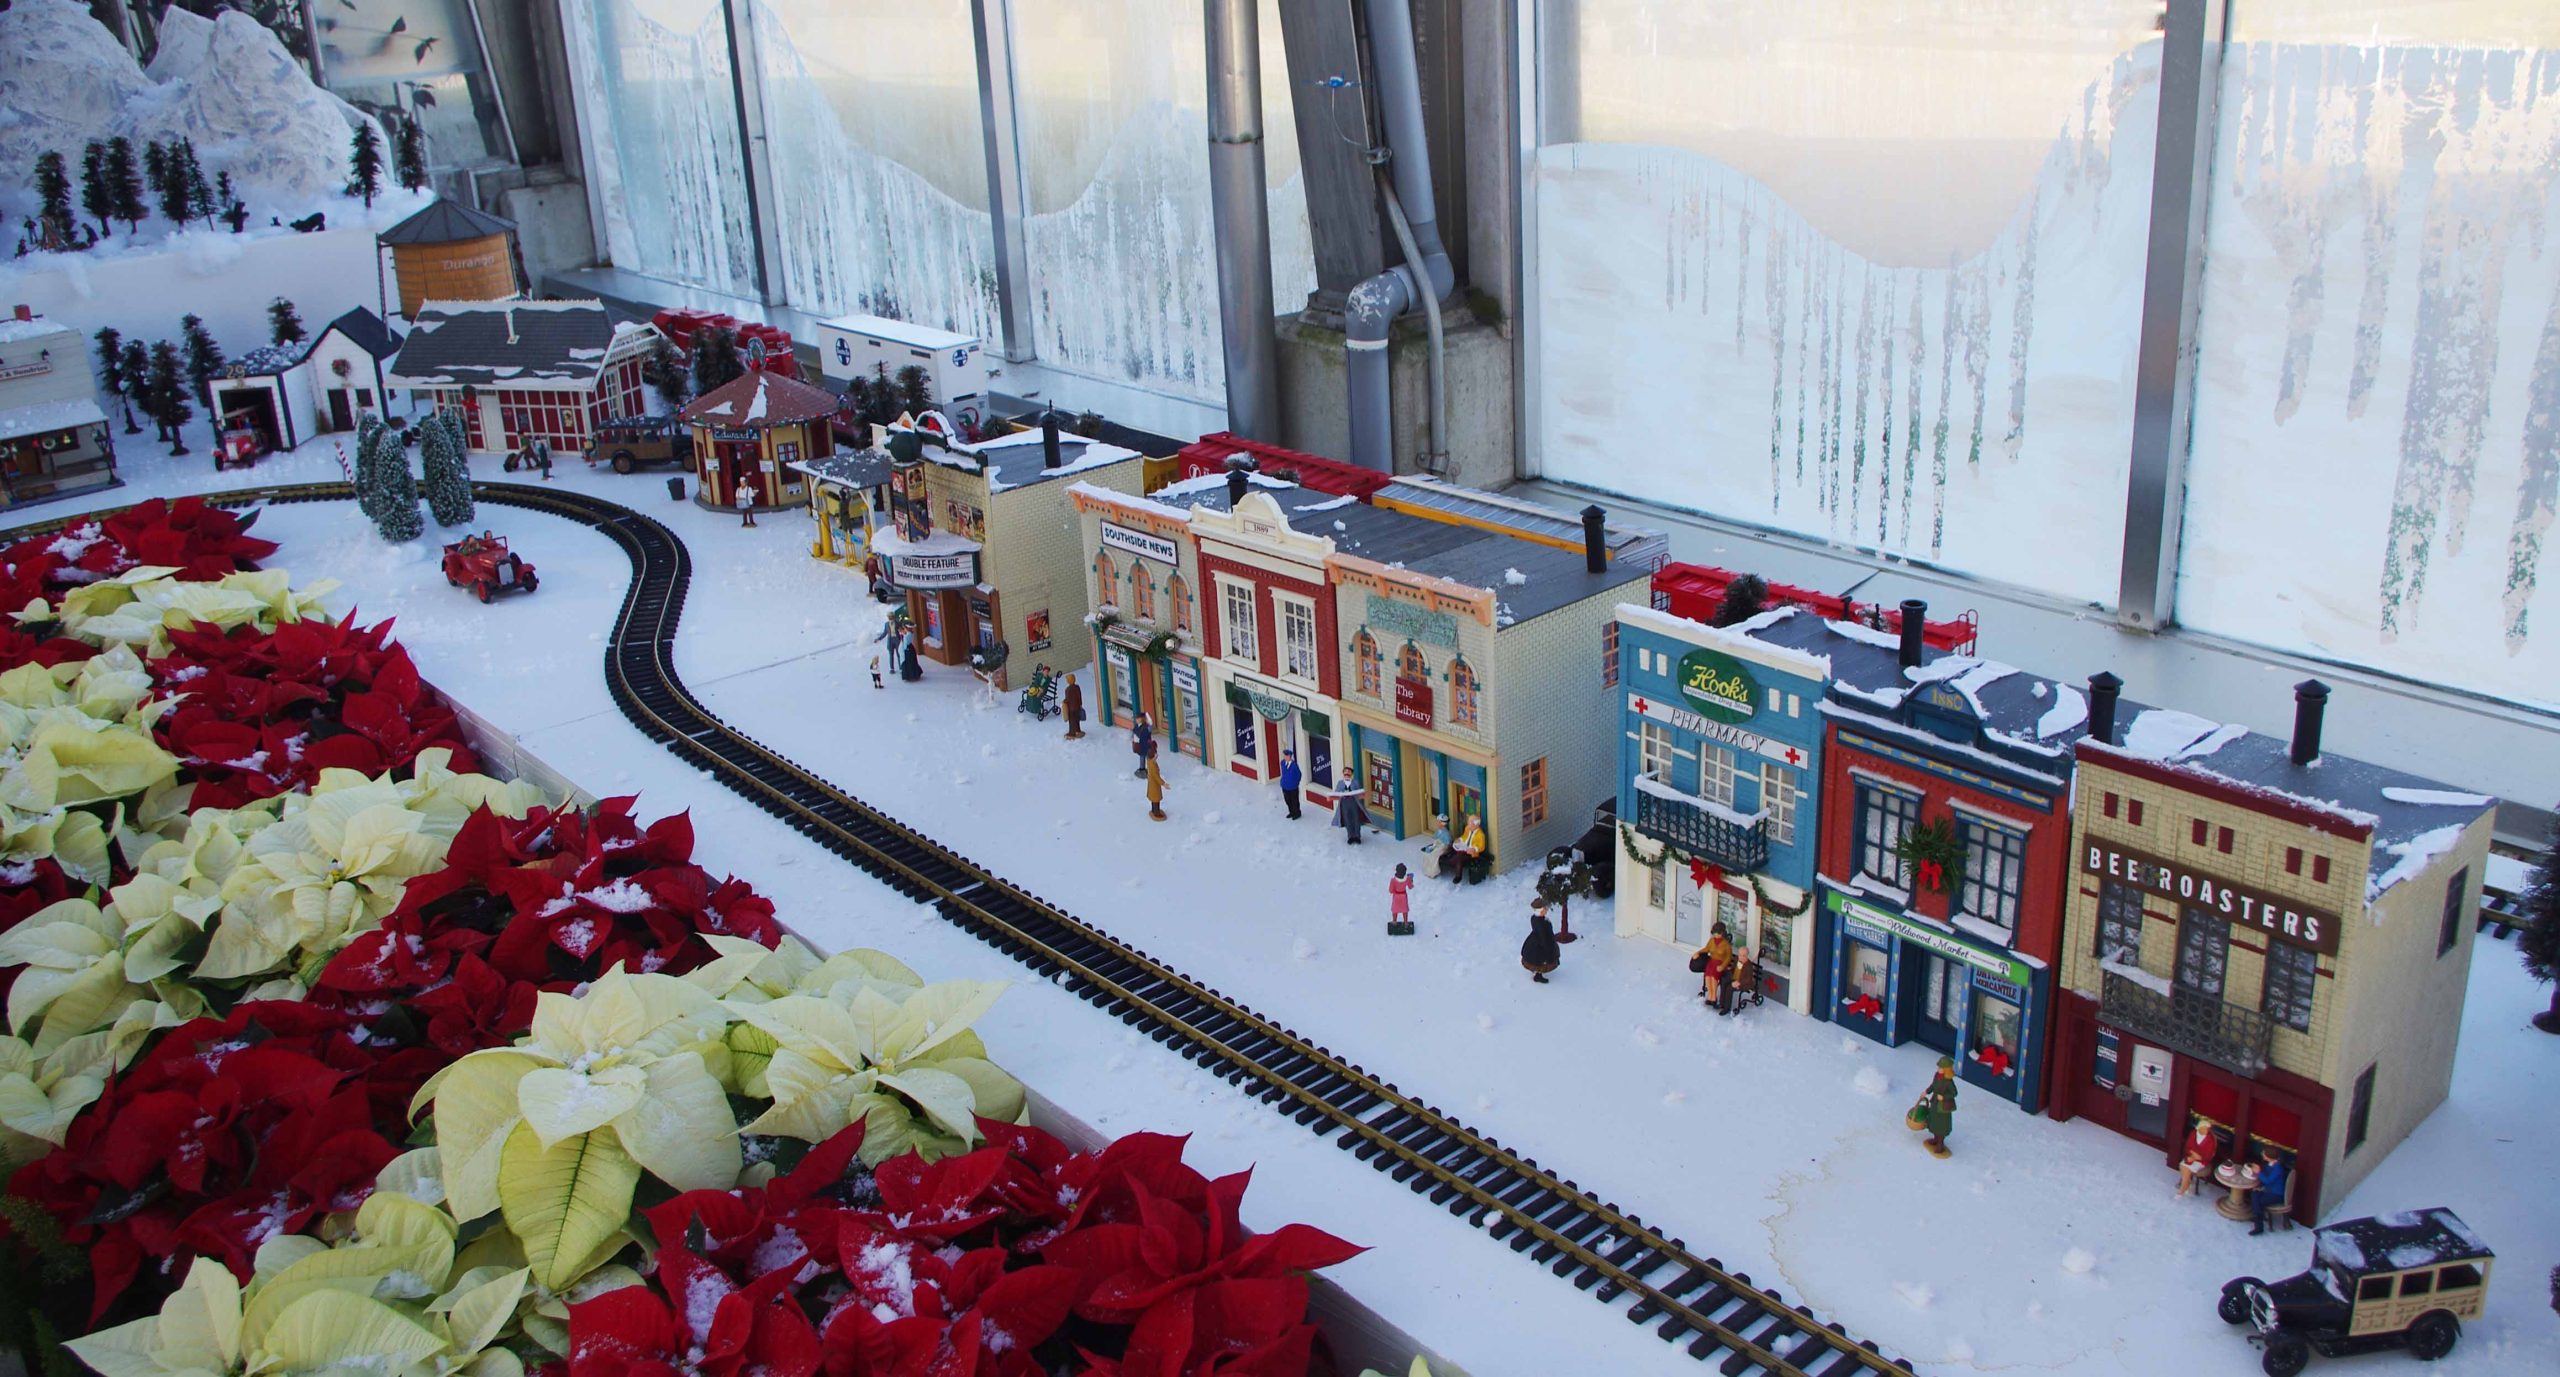
We get the annual train setup running. Get the locos and rolling stock ready to go. Then the conservatory crew does all the setup with at least a hundred Poinsettias and village plus a train around a tree.
It is joint effort and the conservatory crew also puts lights in the plants photos also inclined.
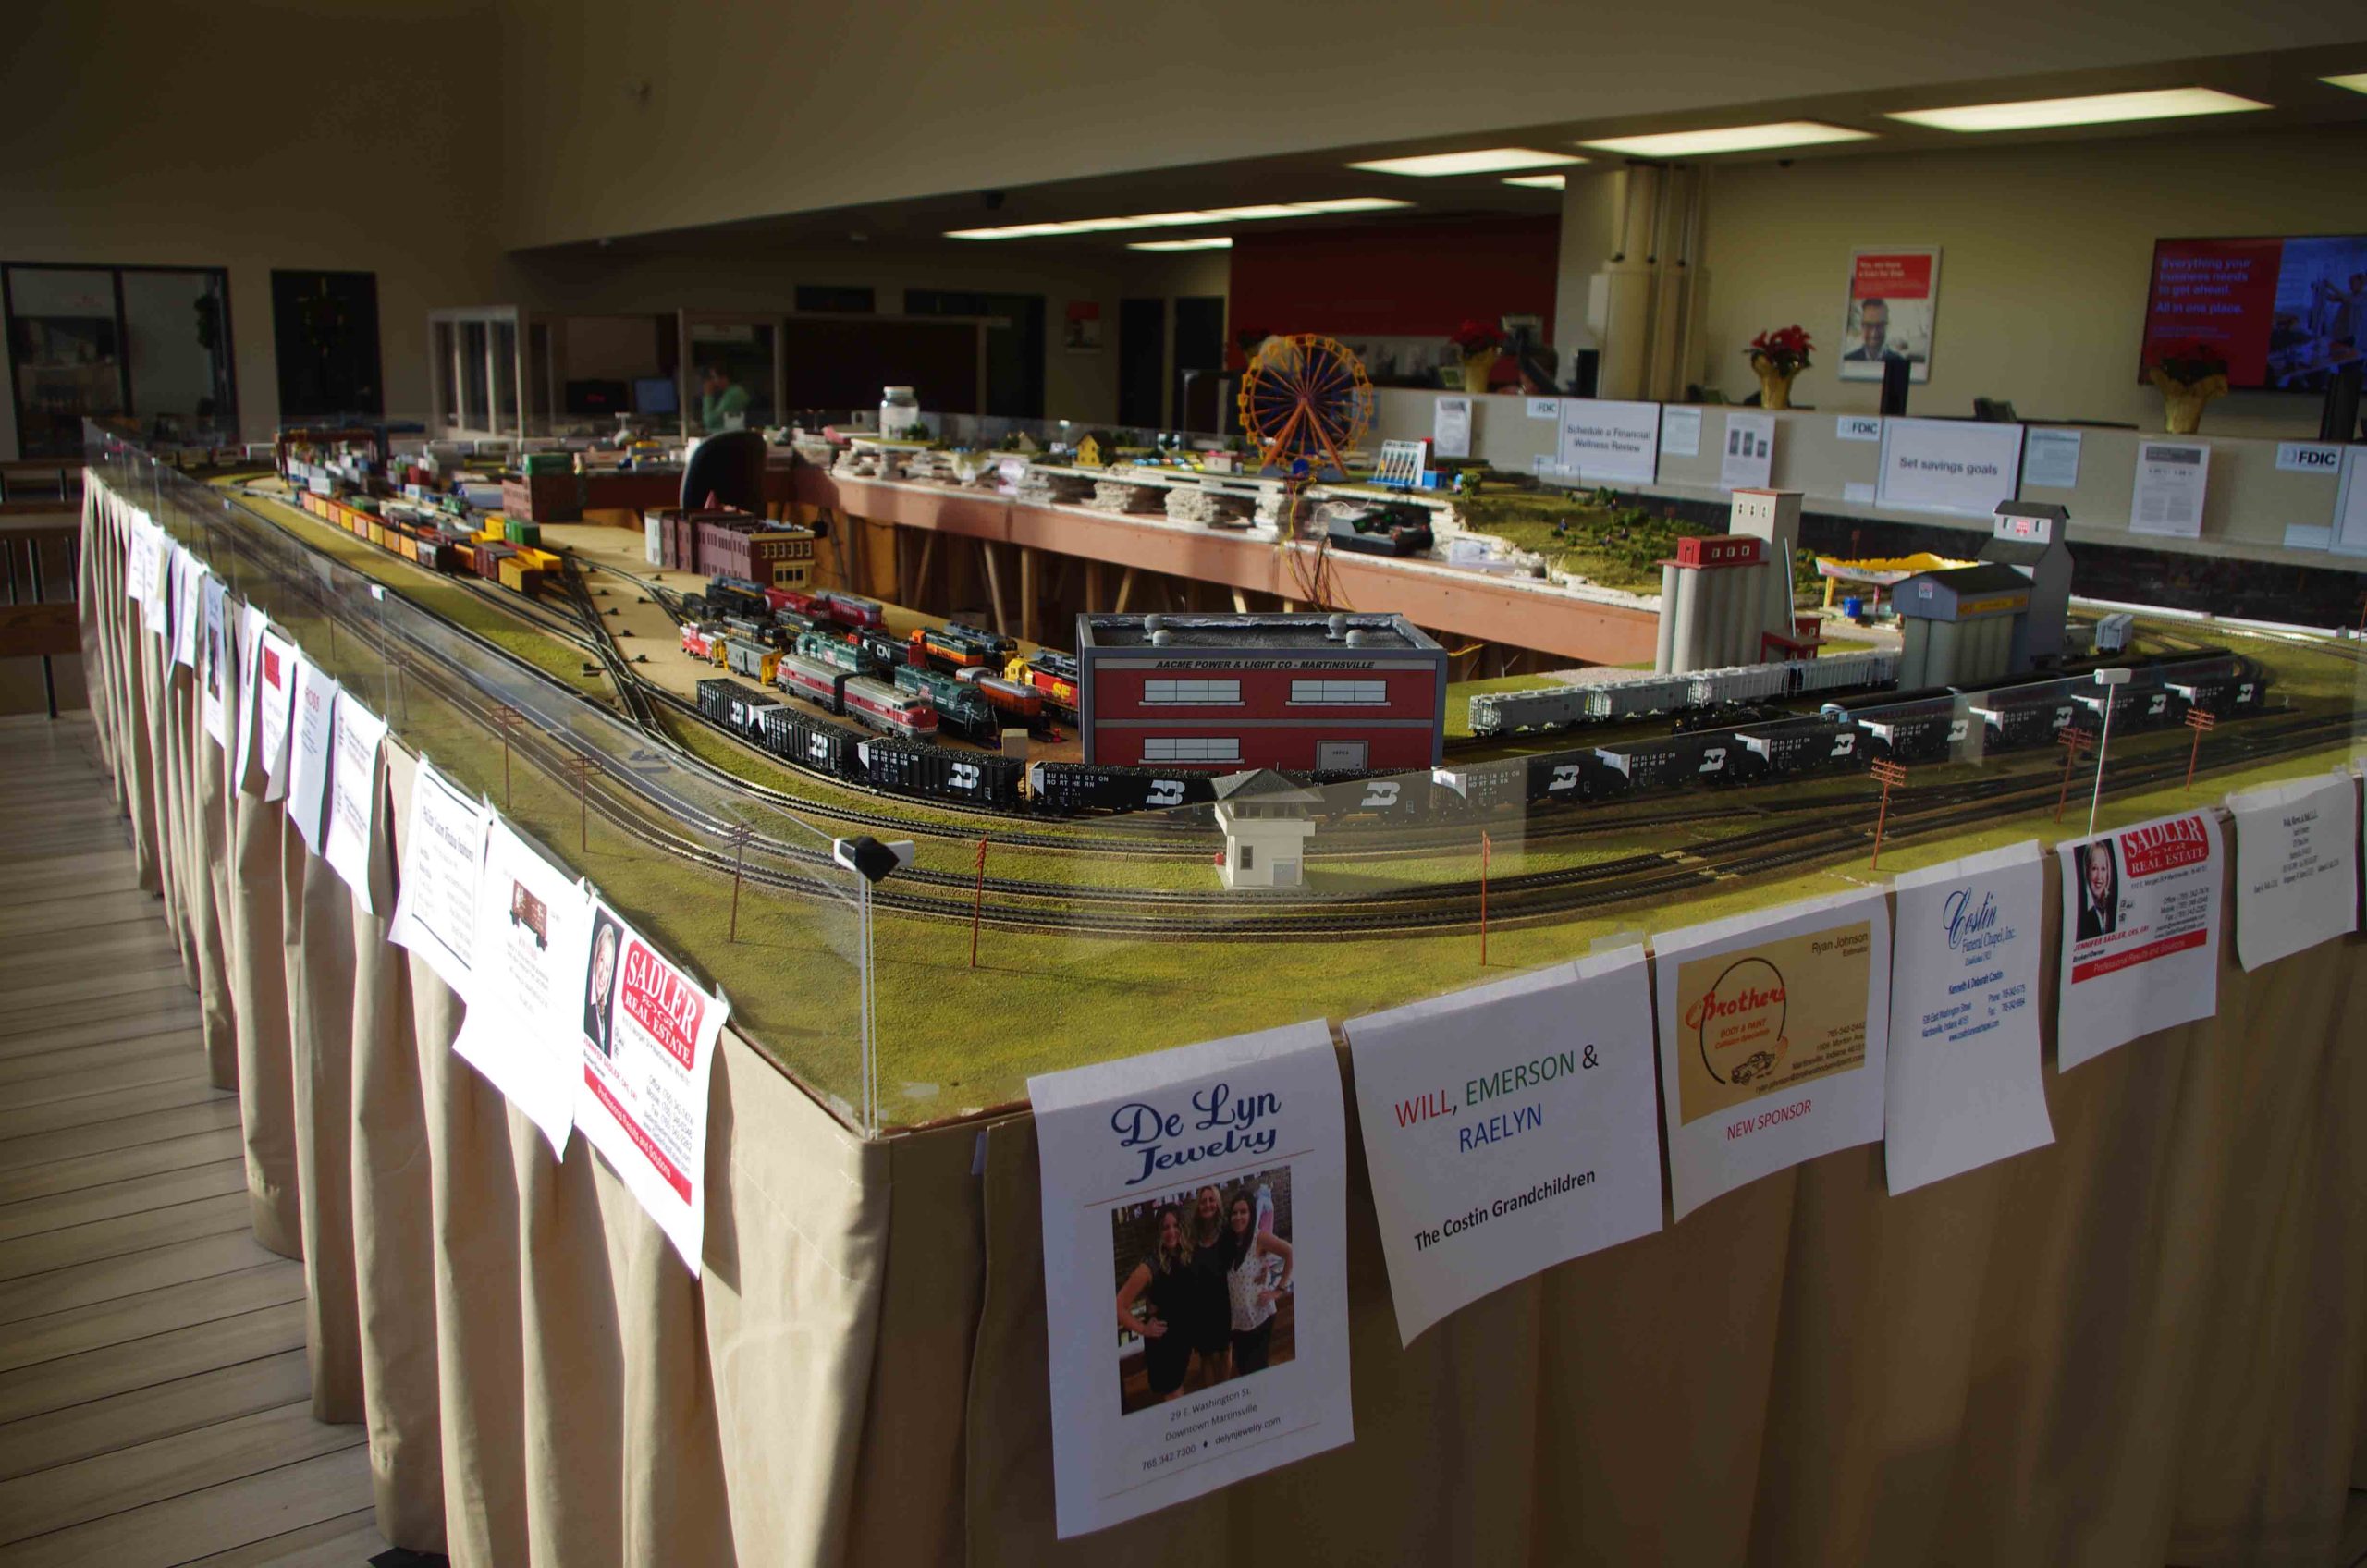
Next My model railroad club helps setup a display at a local bank. I have been getting everything ready for several weeks.
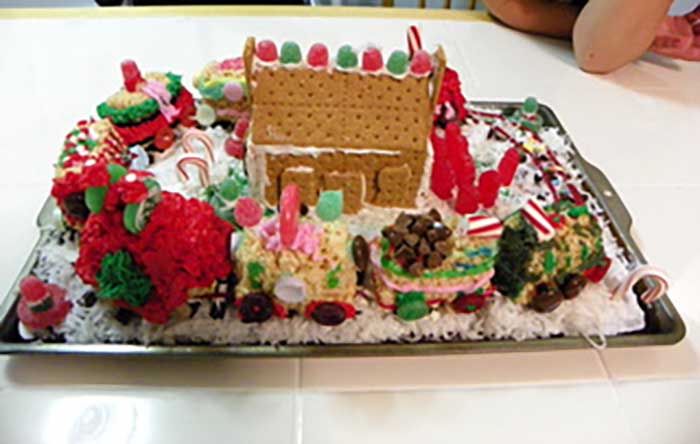
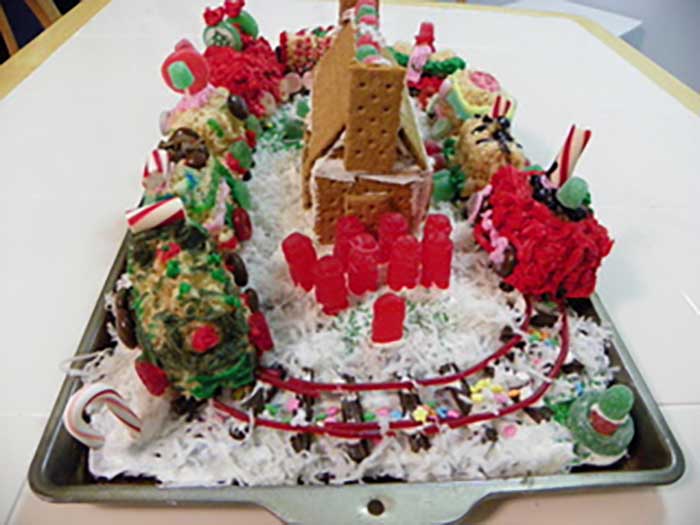
The train around the tree.
Part of the set up.
More of the setup.
This is a large part of the village.
The lights on the plants.
The bank display.
I am at the bank the entire moth of December running the trains and talking to folks visiting the display. It is a banker’s hour day all month. This will be my 34 consecutive year.
I have had parents bring small children and then the children bring their children and now grand children are coming.
I talk trains and I have helped many get started in model trains and I also help solve model train problems.
Dean’s been in touch with a missive on the program he uses for a model train simulator:
“Al, greetings from Dean in New Mexico.
I’ve been spending a bit of time on the computer program, SCARM (“Simple Computer Aided Railway Modeller”), which you may remember I’m using to design my layouts.
They have a free version which has all the capabilities of the paid version except it’s limited to 100 items (track sections, cars, buildings). I soon outgrew the free version and bought the paid ($45).
Recently, I’ve gone back to test out an extension for this program, “Model Train Simulator”, which allows you to set up trains, run, them, operate switches, etc. It is very powerful and a good way to check out your layout designs or just play with your trains.
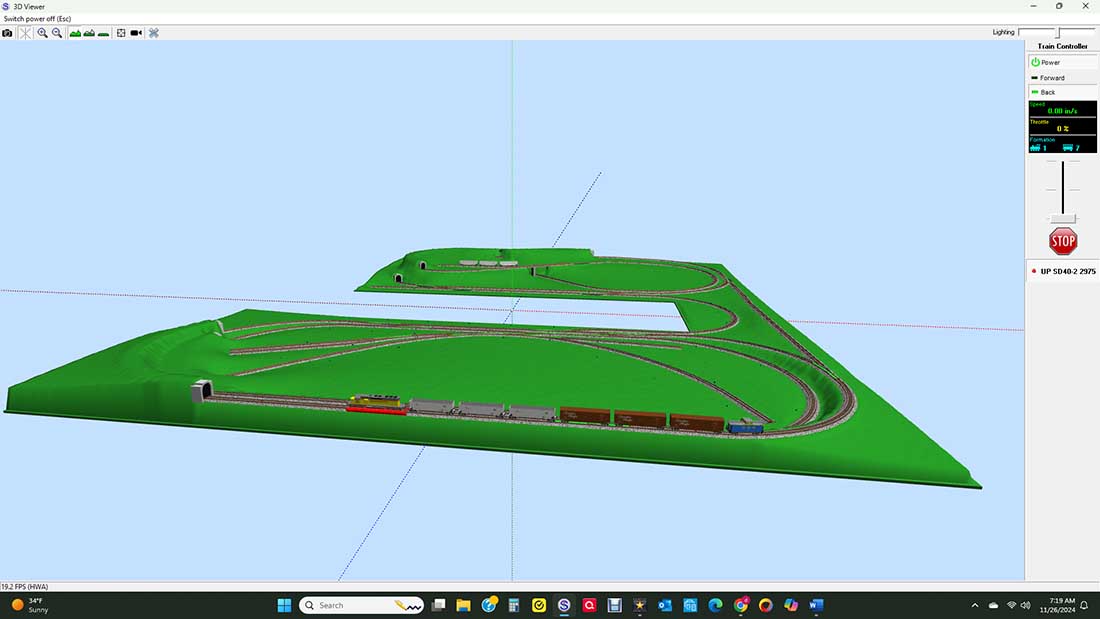
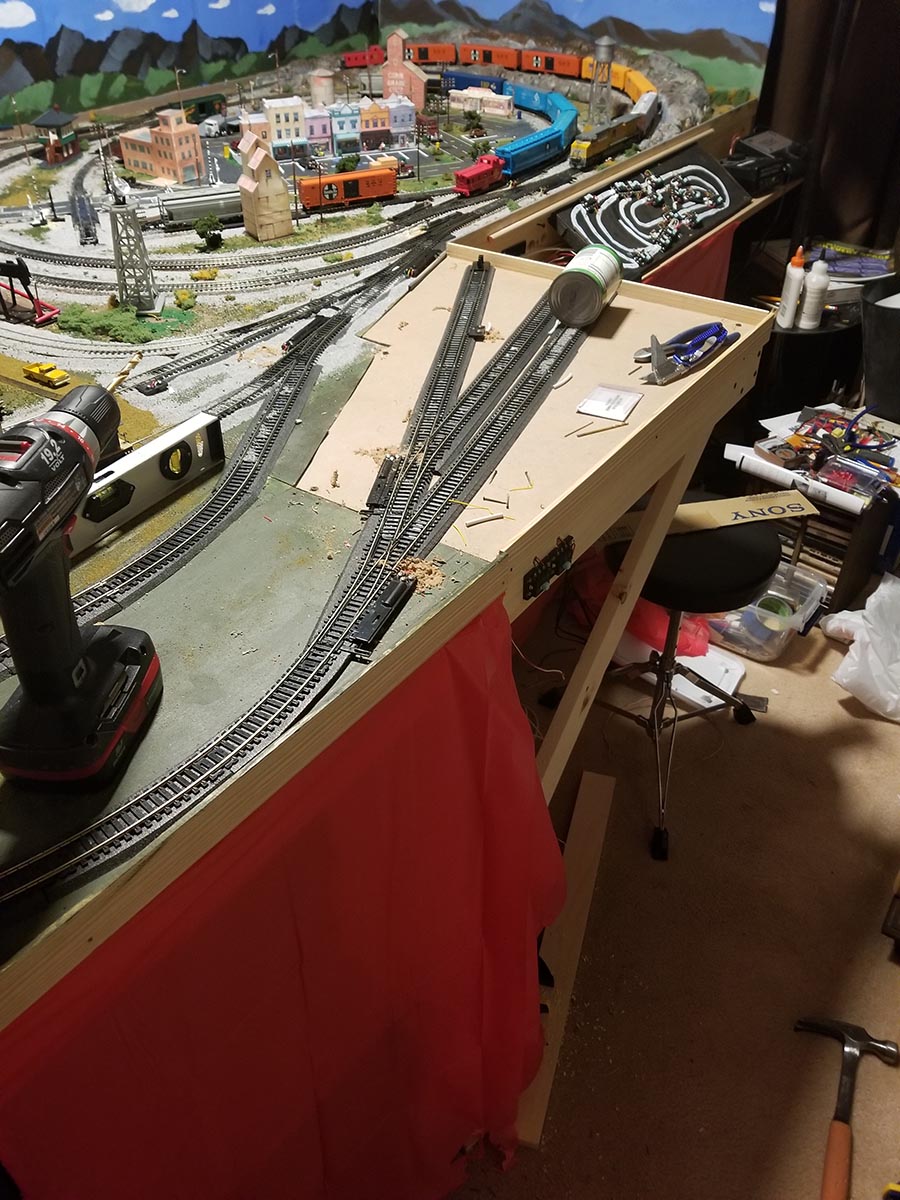
Below is a SCARM drawing for my double layout which I’ve talked about. It combines the two smaller layouts that are mostly built. I’m working on this larger layout now and will keep you posted.
One of the very powerful features of this SCARM program is the ability to see your layout in 3D. You can easily move it around with your mouse.
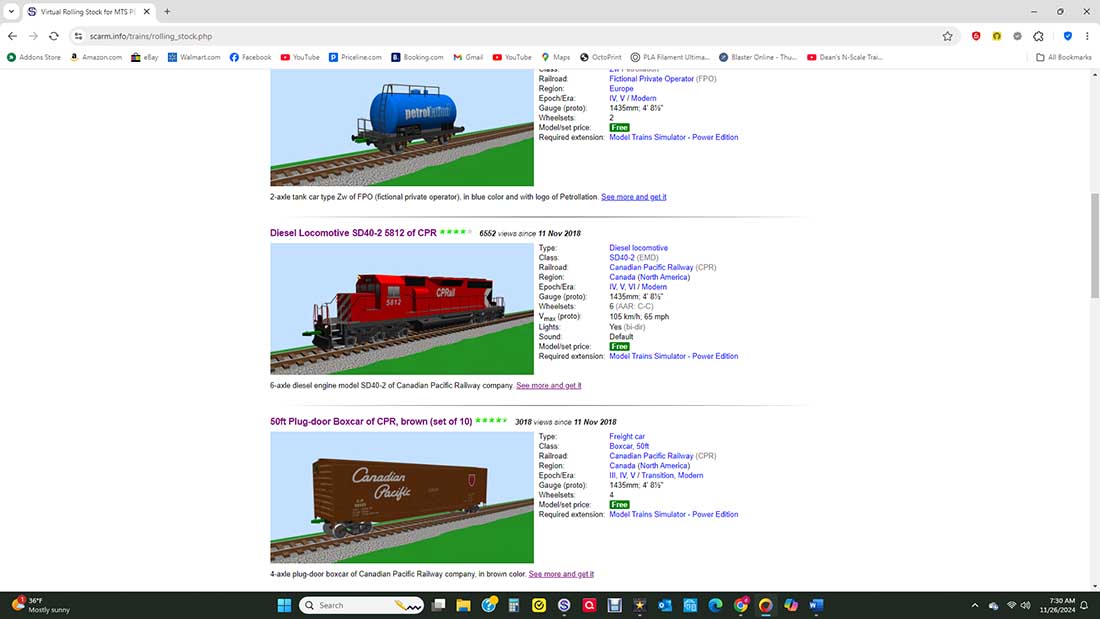
The program extension “Model Train Simulator” (free or $29 for the full version) that allows you to set up and run a train or trains on your layout. With the free version you can download a limited number of cars and locos, but that’s not the case with the paid. They have many cars and locos you can download, most from England and Germany. See the photo below for examples.
I downloaded several cars and a loco from the list which is shown here. Most are “no name”.
So, here’s an example: I placed three boxcars, three gondolas, a caboose and loco to play with for switching exercises.
It’s difficult to show results with just photos, but here are several photos of how the 3-D rendering looks:
You can see the train running around with switching and uncoupling on my video here:
One thing that I realized is that a part of my layout (shown in the photo below in red) looks like an Inglenook puzzle. All I have to do is limit the size of the four sidings, and I can run the puzzle, either in the software (easy) or on the actual layout (more difficult).
Cheers, Al, for keeping this website going
Dean”
A big thanks to Dean for sharing his model train simulator video.
Tony’s been in touch with his Book nook diorama – based on Earl’s Court station:
“Hi Alastair –
Here is a write-up about a diorama I recently completed.
A few years ago, my sister asked me to make her a “book nook”. I said sure – then I went to look up what a “book nook” was!
It turned out to be a kind of diorama bookend – right up my alley.
Today there are a lot of book nook kits available, but at the time all the examples I found were scratch built.
Many were of a fantasy nature and there were also a lot of London alleyway scenes. The former didn’t attract me but the latter certainly did.
My thinking quickly evolved into some type of train component. Then it hit me. Years ago, I had purchased a couple of the excellent 00 EFE underground cars. My pie in the sky plan then was to build a model of Paddington Station, including the underground below. That was my 40-year-old thinking. My now 70-year-old brain realized that it will never happen – but here was a chance for a scaled down version.
I searched around for a practical underground station to build and settled on Earl’s Court Station. I wanted to model the mid-1960s and the station today is still the same as it was then. It has an interesting style that I was looking for.
My idea was to model the station above and below and I thought that the build would be fairly simple. It wasn’t. I would actually be building two dioramas and I started with the idea that I could print a photo of the station above- then detail it and I could find a tube of the proper size- probably a plastic pipe- to model the underground part. After a number of starts and stops, I couldn’t get either to work.
For the above ground station, I couldn’t get the detail I wanted. Then one day I was dismantling an old diorama based on a Heljan engine shed and realized that it contained many of the components I needed for a kit-bash (mainly the arched windows). All the components, of course had to be cut and rearranged, and some modified.
For the underground tunnel, I could not find a pipe of the diameter I needed, and I finally settled on a cardboard form for pouring concrete. It was not the exact diameter either, but I could cut the cardboard and adjust the diameter.
In the end, this was the most complicated diorama I have built and it took- off and on- several years. A third part of the build that I started and stopped more than once was the lighting- a very important part of the model- it would need to all light up.
Rather than bore you with any more details, here are photos- somewhat in order- of the build.
Book nook diorama:
A few quick notes.
The lighting needed to be battery powered, as a plug-in on a bookcase would be problematic.
Inexpensive Christmas lights from Walmart turned out to work well, although it was not as easy as I had hoped (nothing was!). Lots of trial and error.
The strings had too many lights (nowhere to hide the extras) and I had to cut them. Certain lengths would work and certain lengths wouldn’t and some splices would work and others wouldn’t – I have no idea why (I have a feeling this group is going to tell me why!).
In the end, I used 2 strings and 2 battery holders (I probably bought 10 strings, somewhat negating the “inexpensive” part!). Stringing them through the different areas was quite a challenge.
The interiors of the bus and tube car are lighted and fully detailed- a lot of work. These are not very visible on the finished product. I enjoyed the process anyway and everyone who details and lights building interiors knows the feeling.
My son Mark had the idea to make the interior of the end shop visible- great idea. He also suggested book cover material for the sides which looks great, but does not show much when installed.
This was overall a difficult project but the results are pretty satisfying. That said- I’d never try it again!
As always- many thanks to Alastair for the amazing job he does for all of us!
Tony”
A huge big thanks to Tony for sharing his book nook diorama (you may remember this one too: Model train diorama.
I have to say, I didn’t know what a book nook was, but now I do, I really want to build one. They look great fun.
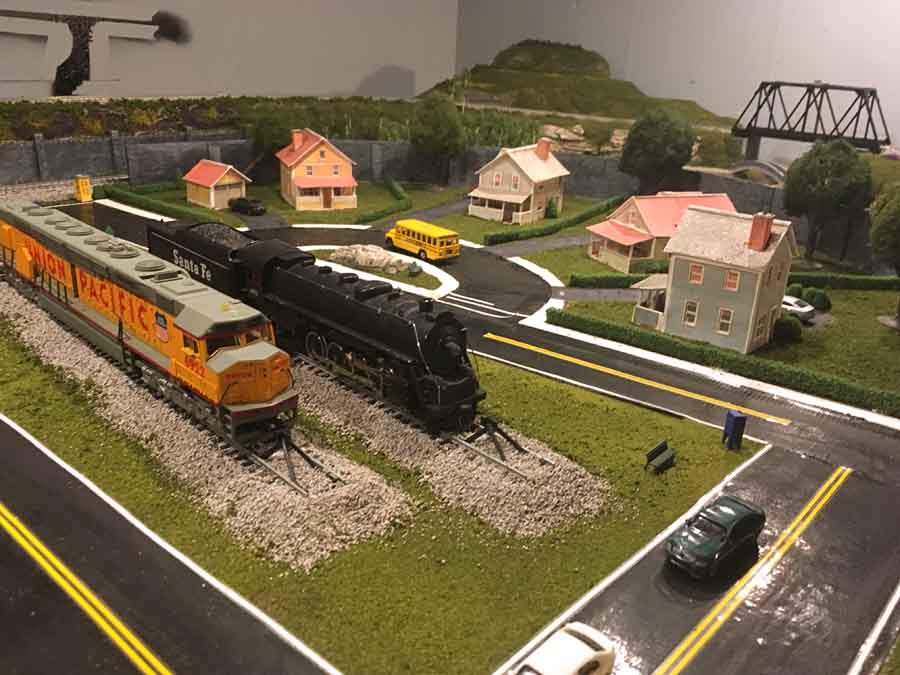
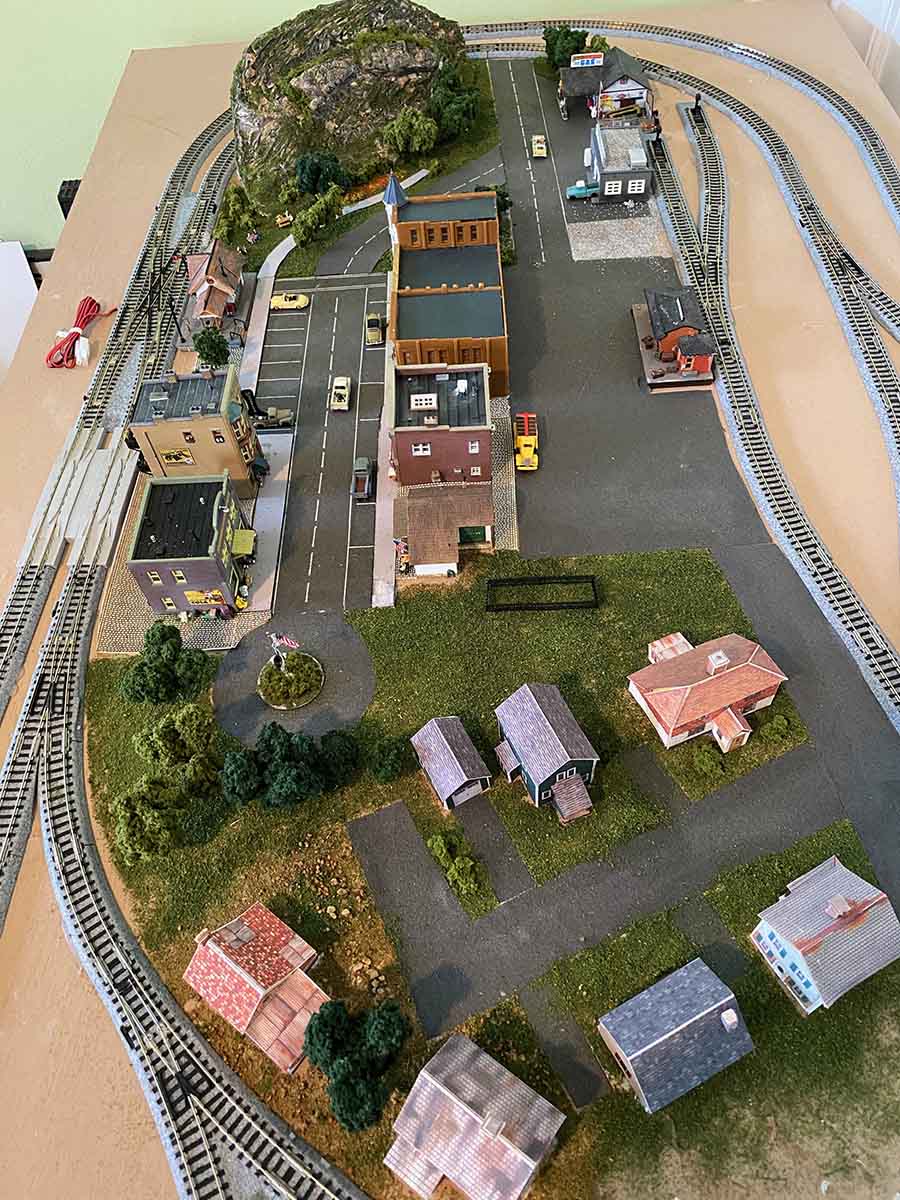
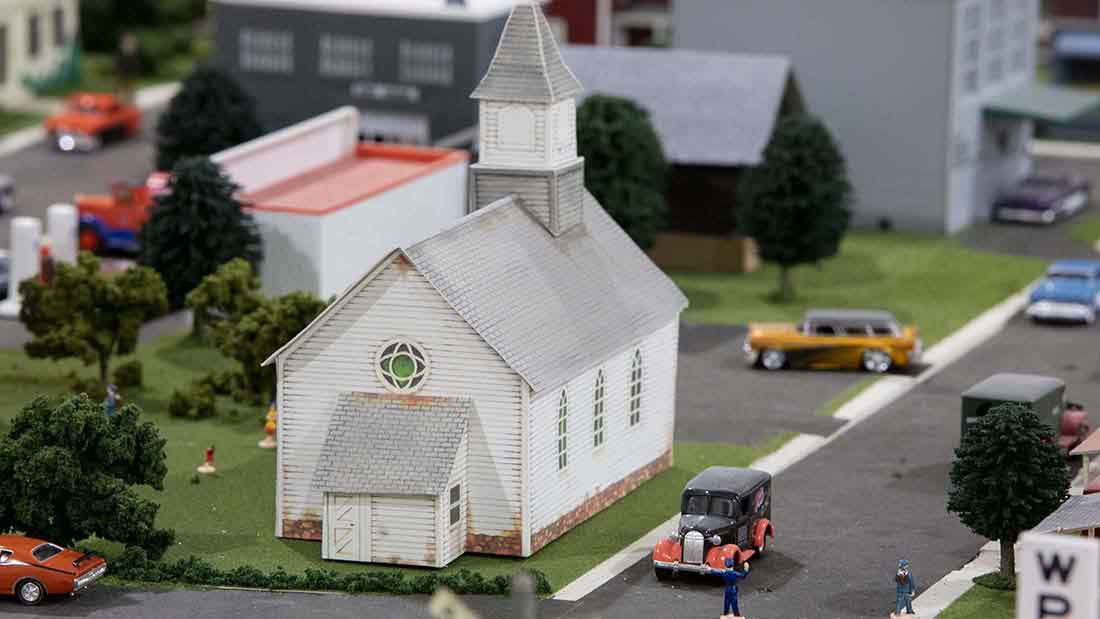
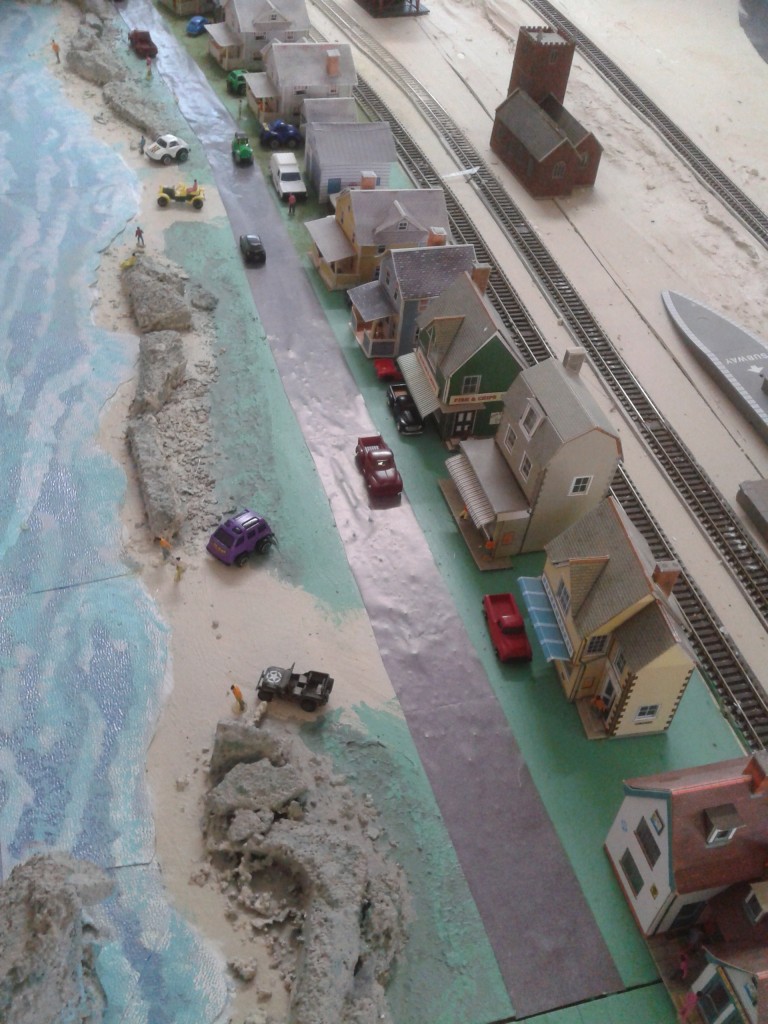
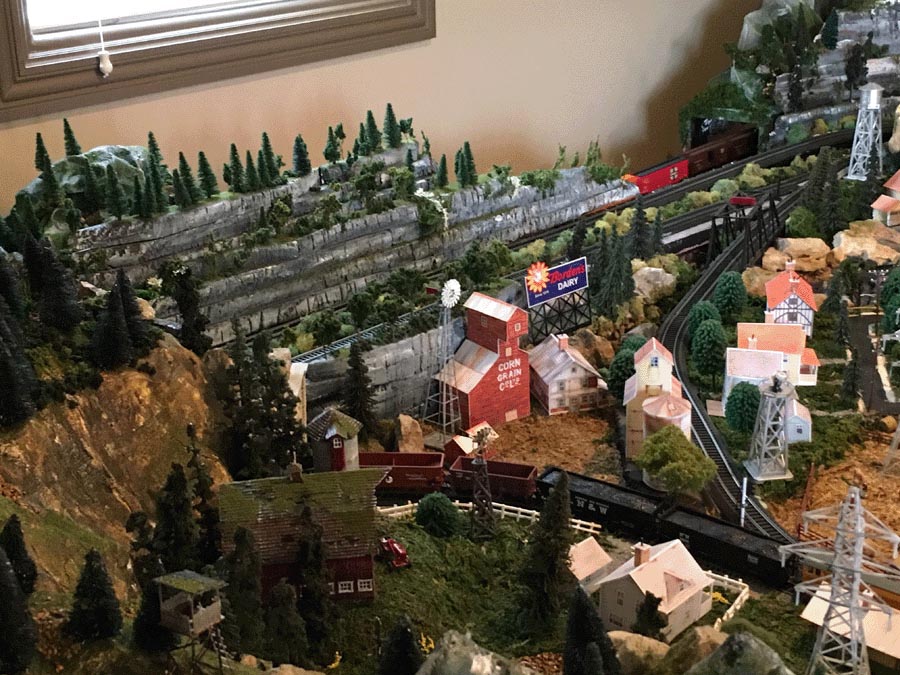
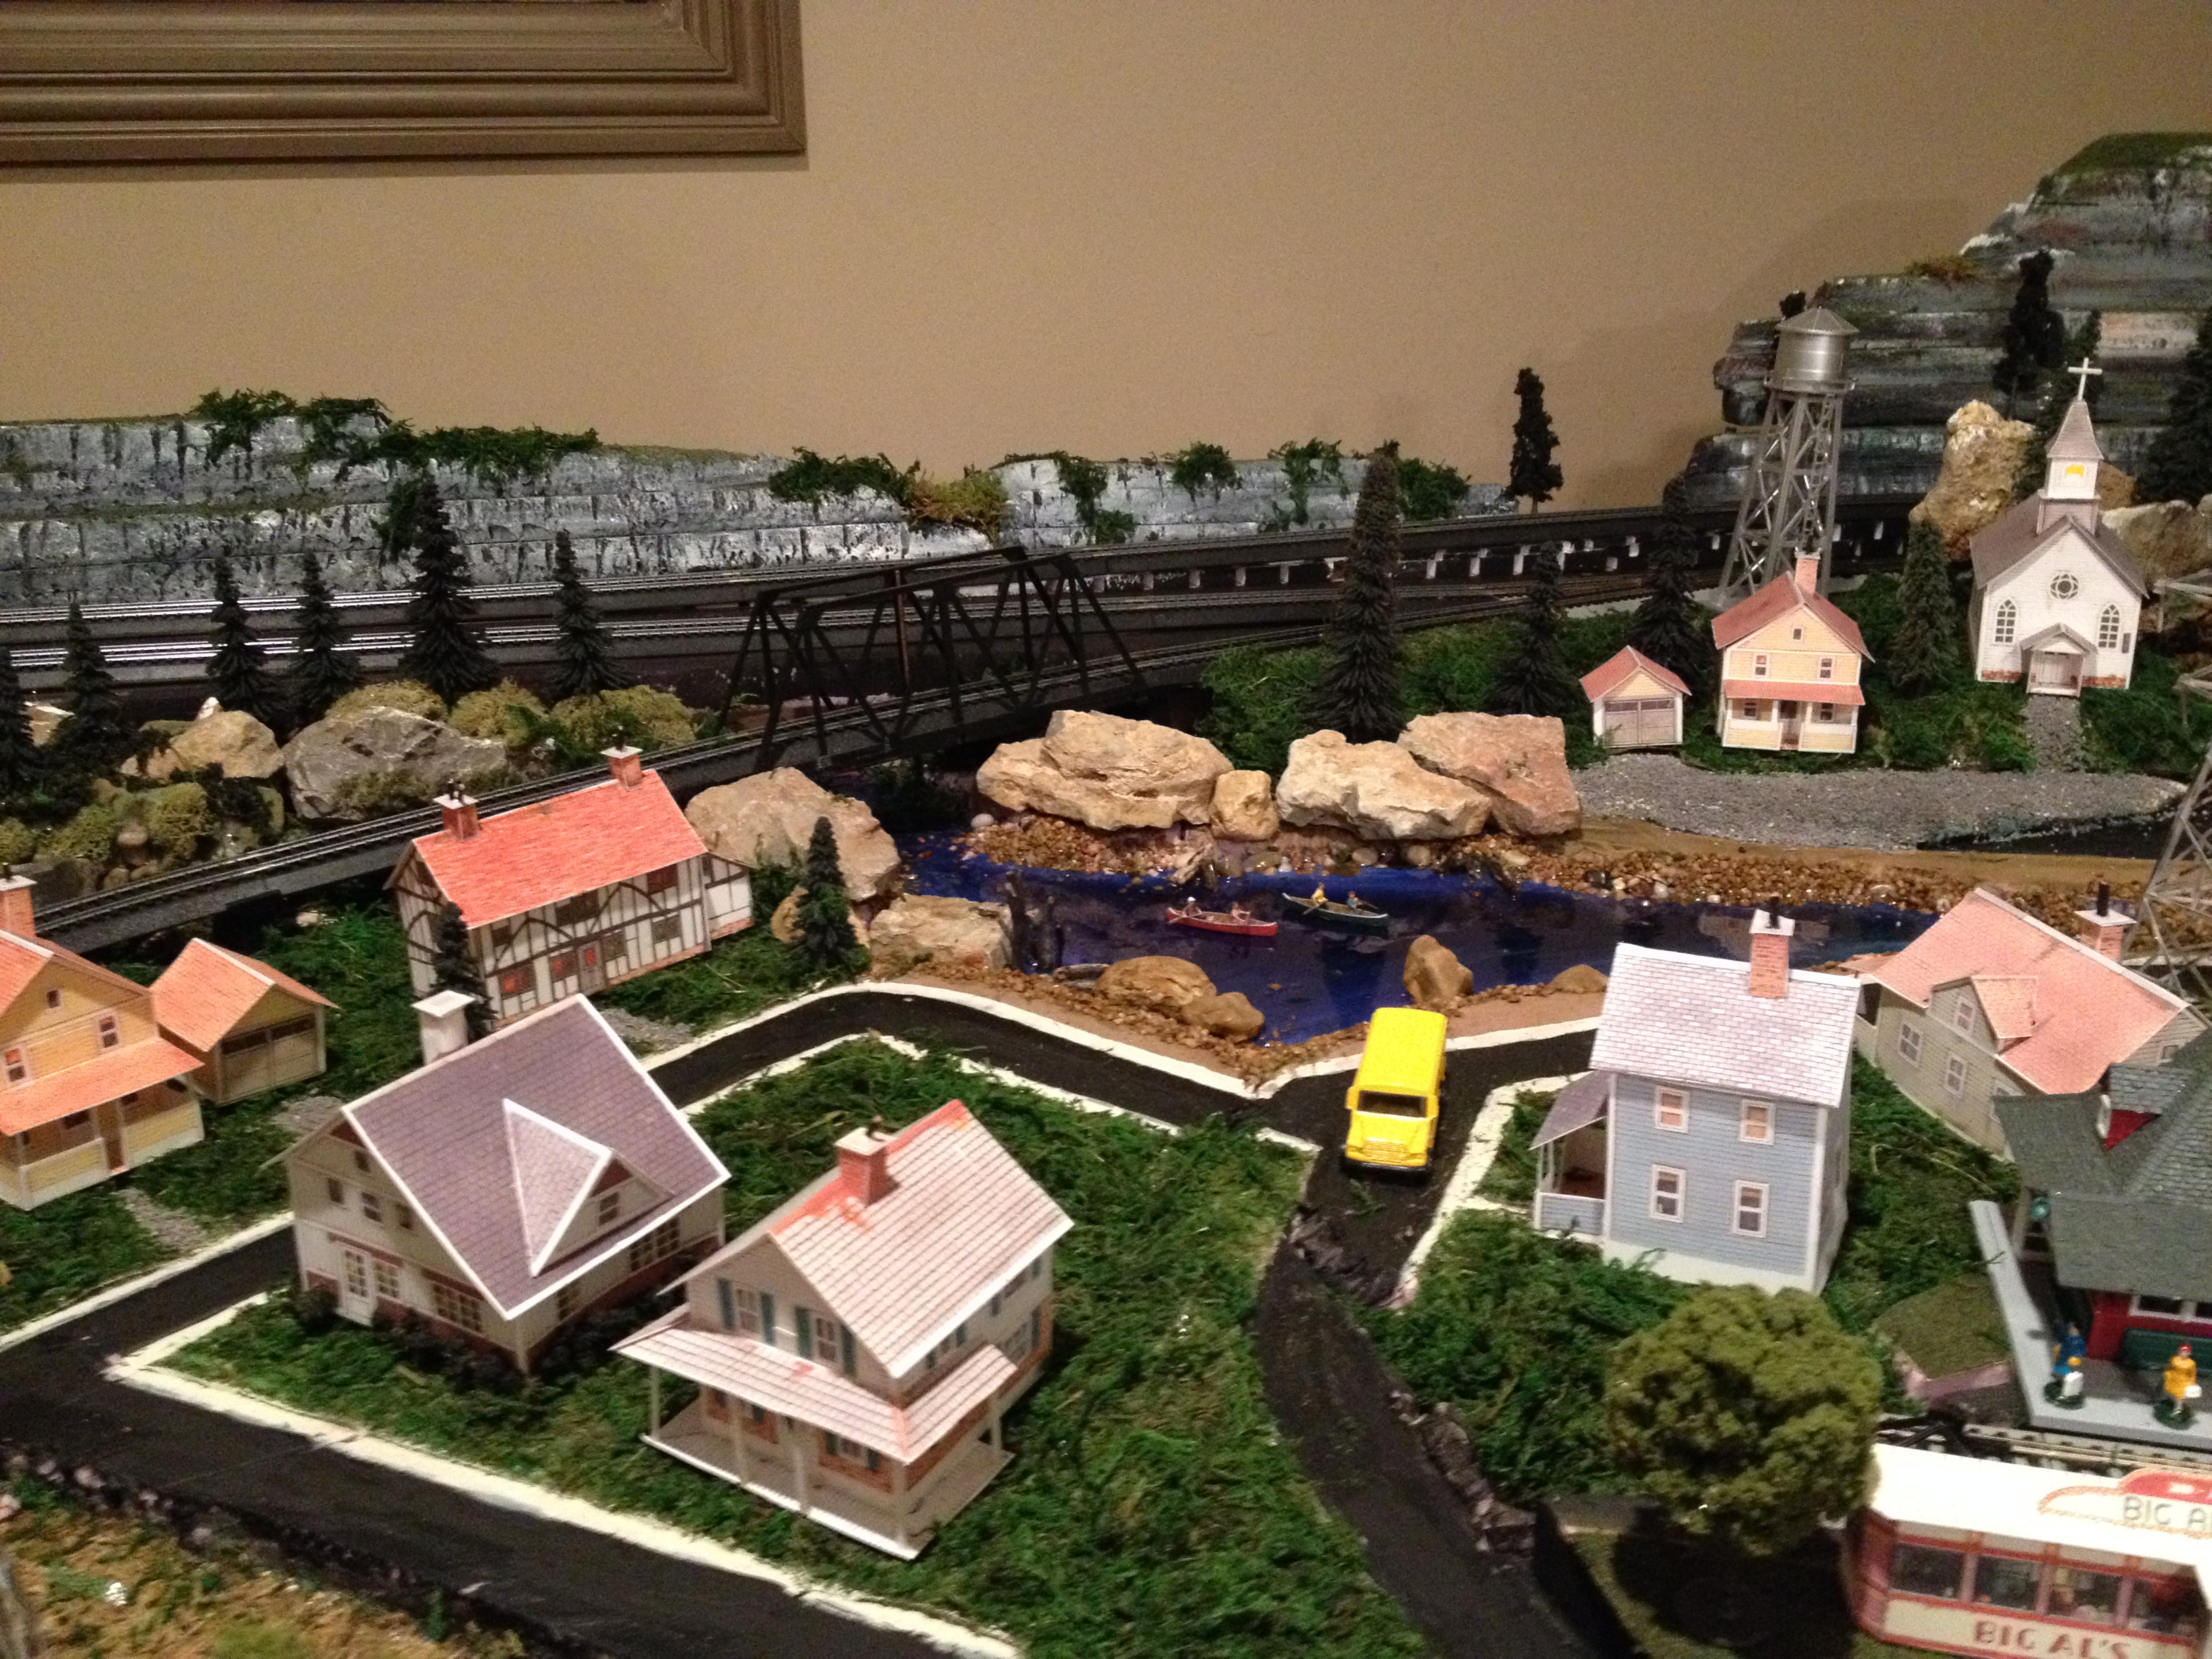
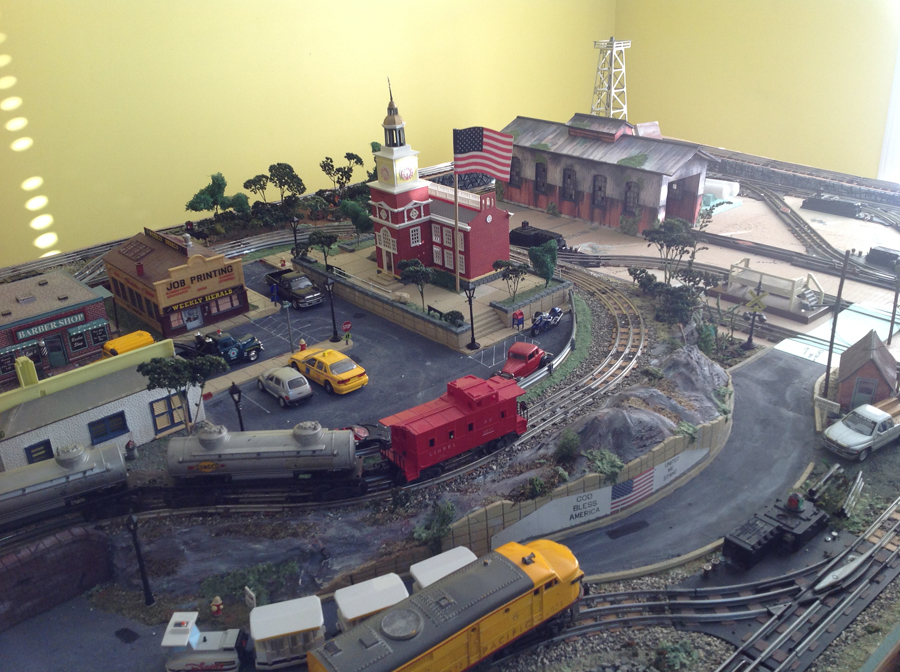
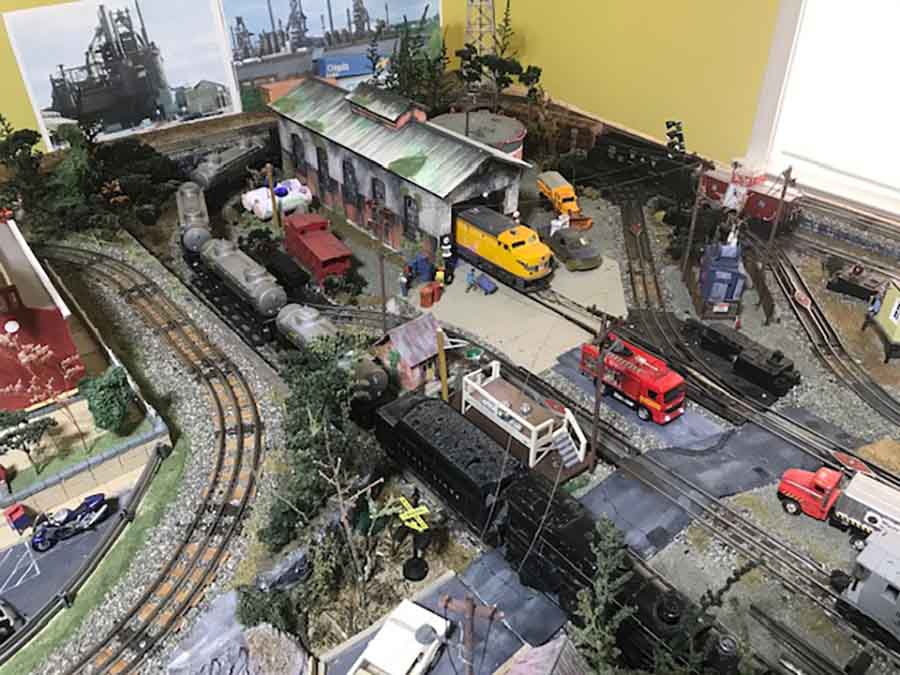
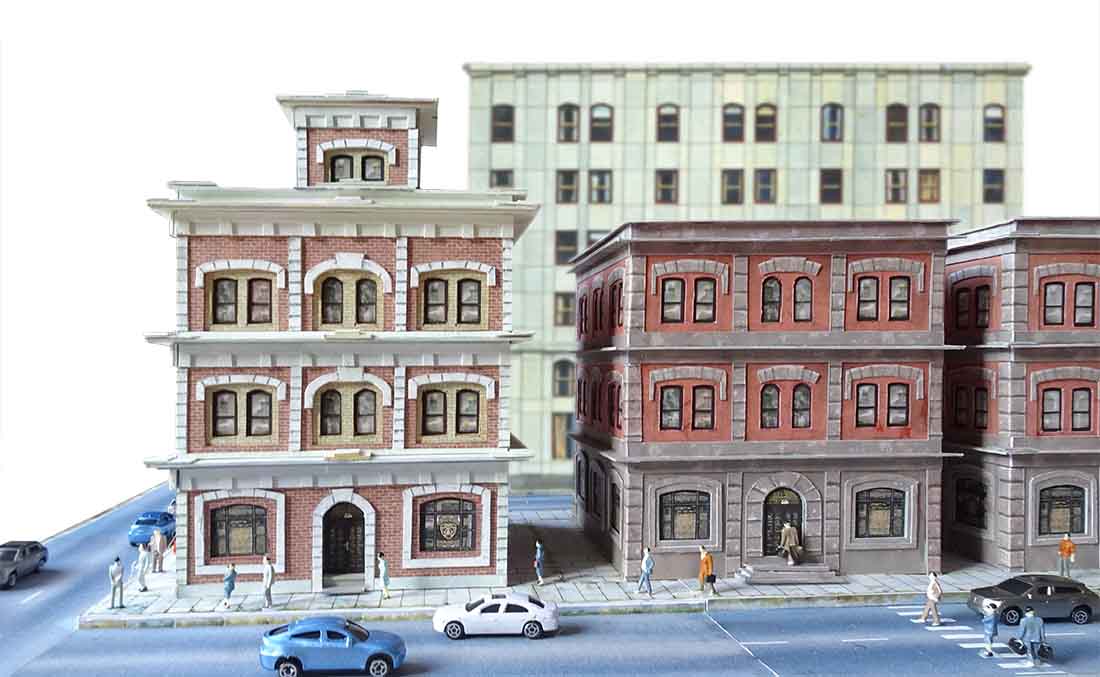
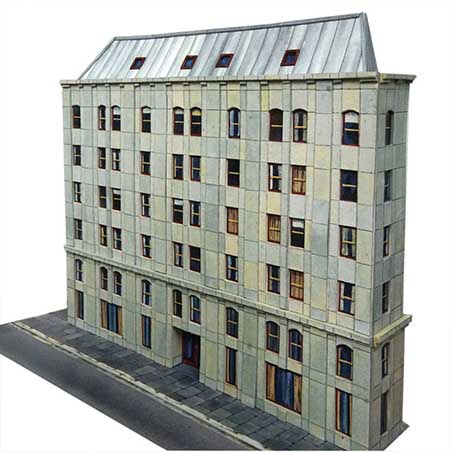
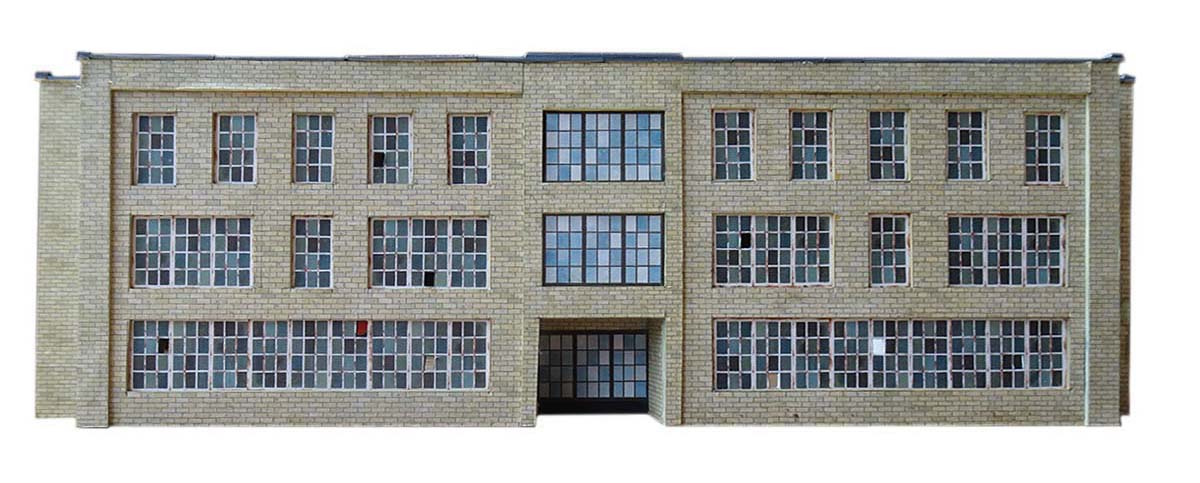
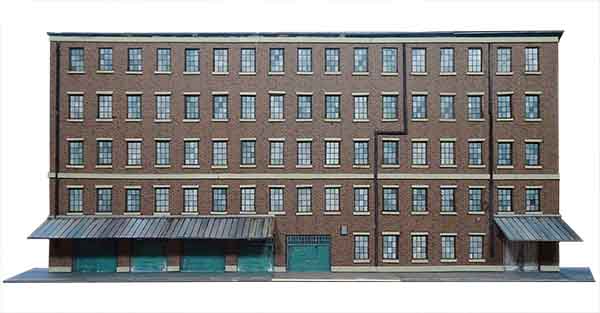
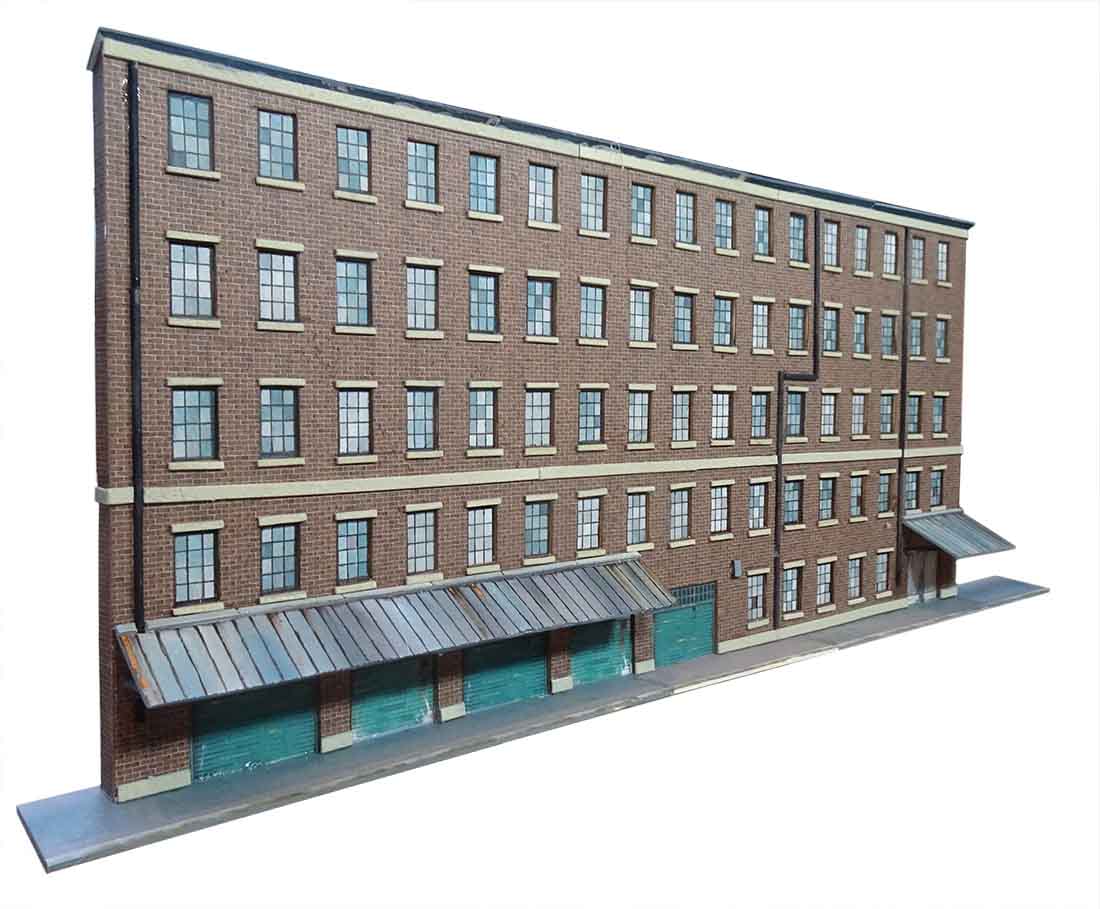
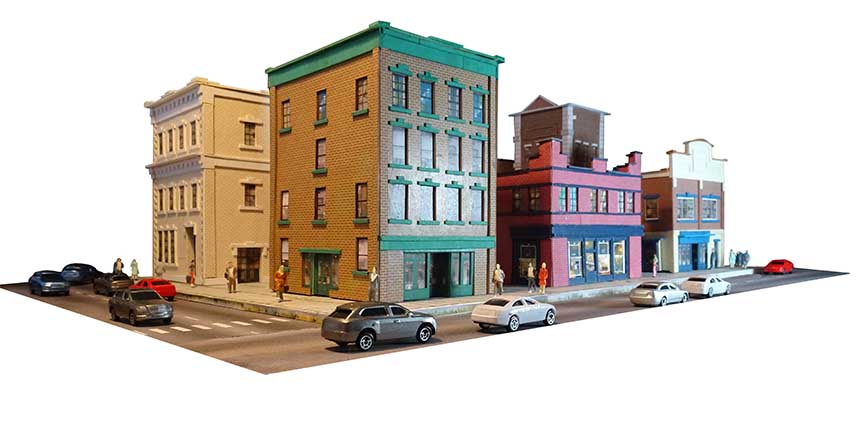
Next up, seeing as it’s nearly the last day day for the silly sale, I thought it would be fun to show you just some more scenes made from the printable scenery in the silly sale.
I’ve never given away so much for so little – just $9.
Are you really going to miss out on this crazy offer?
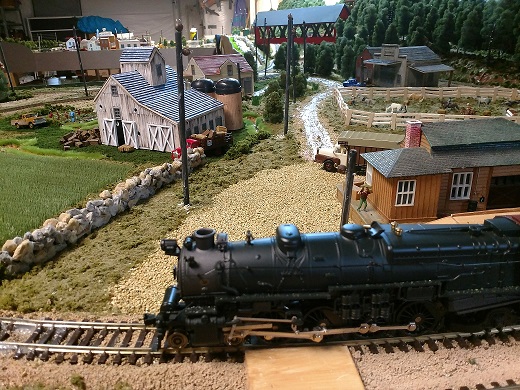
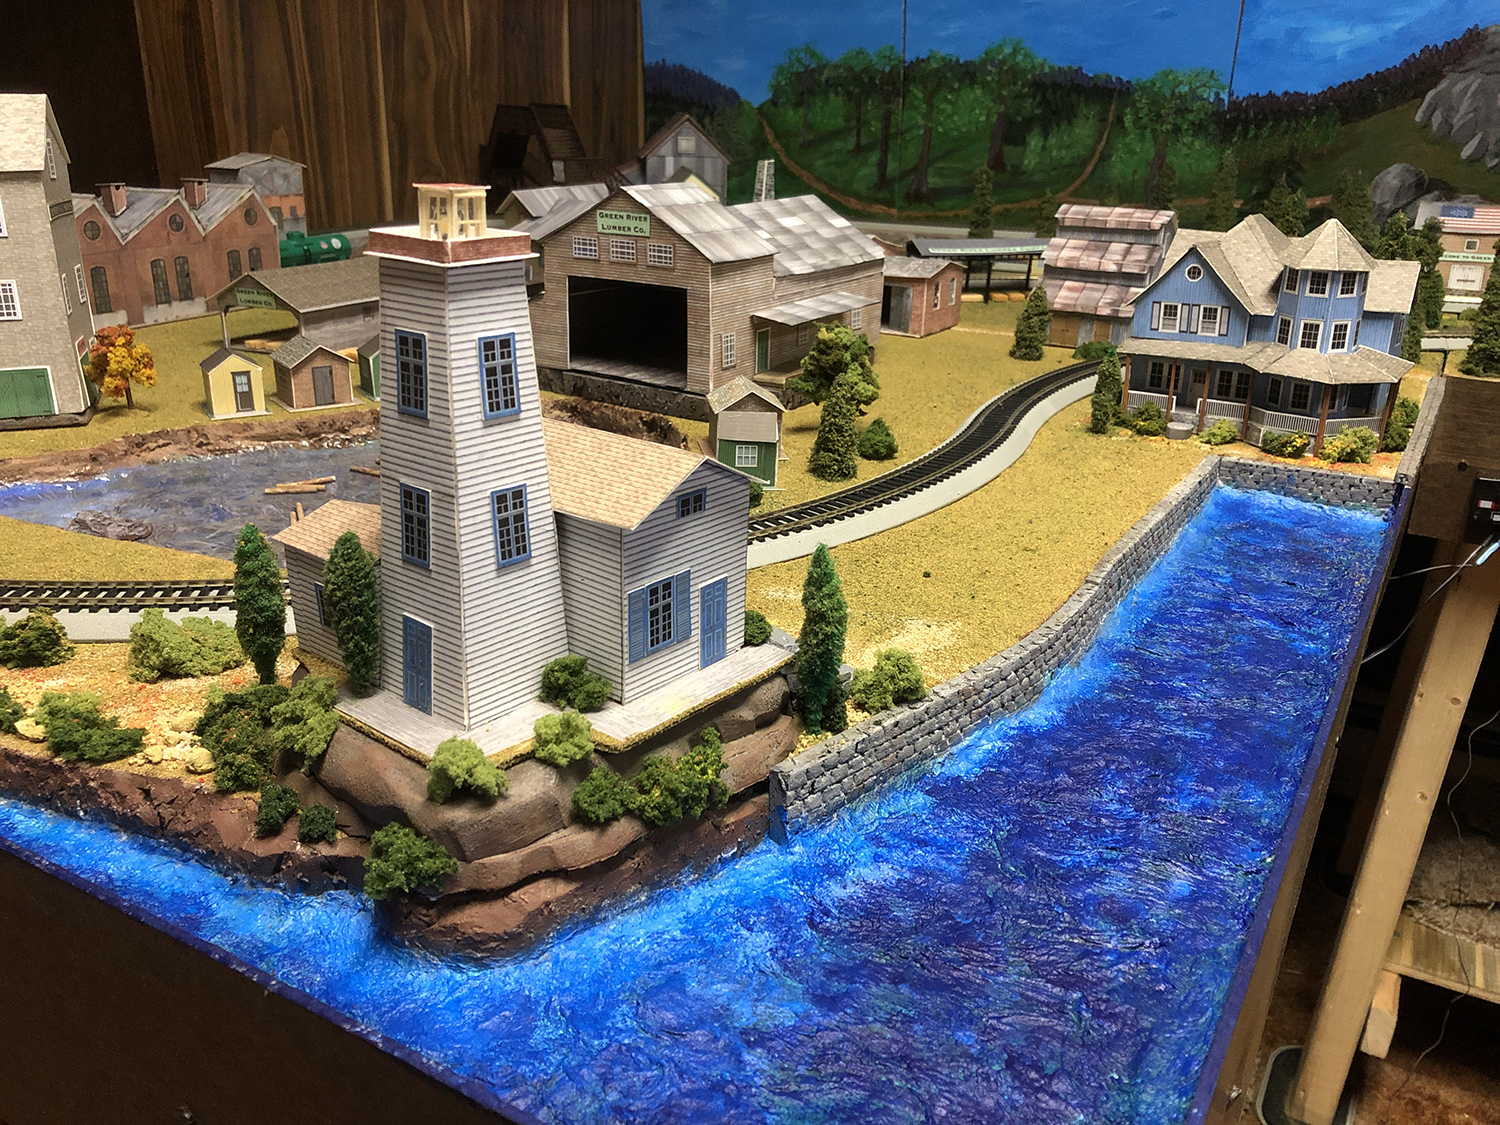
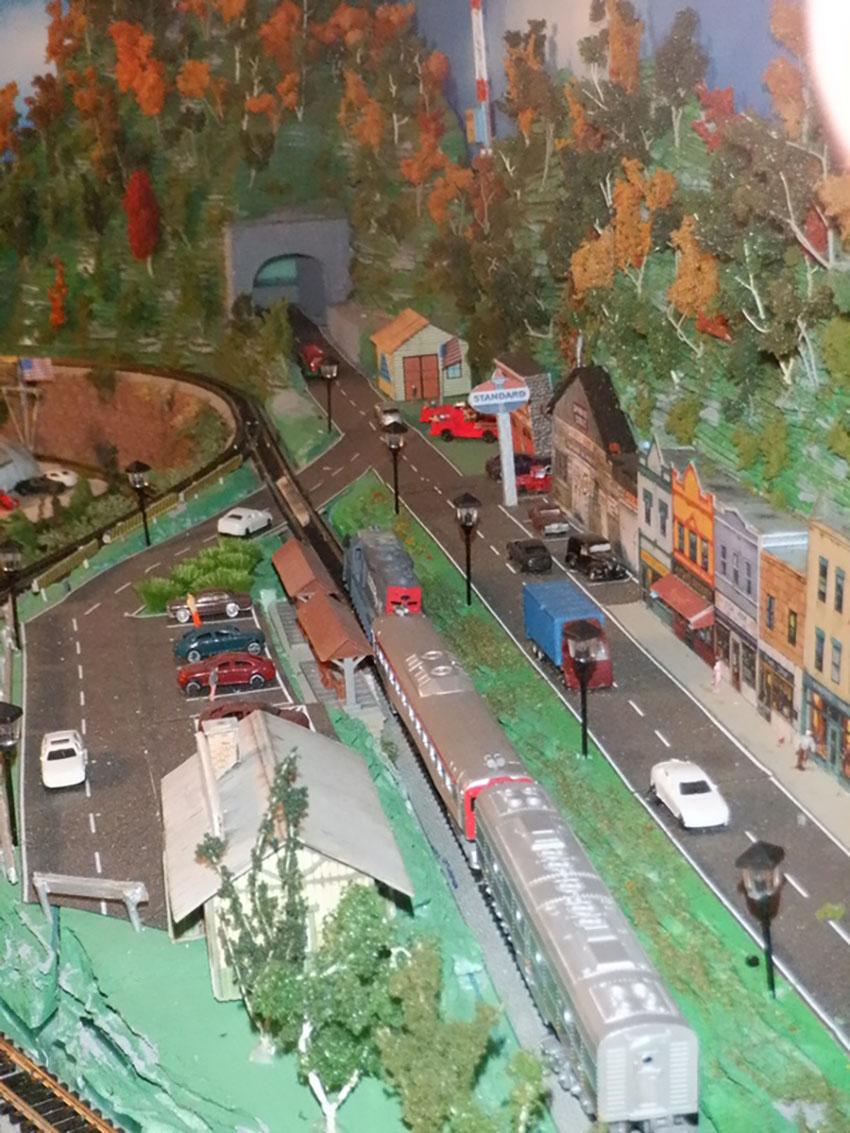
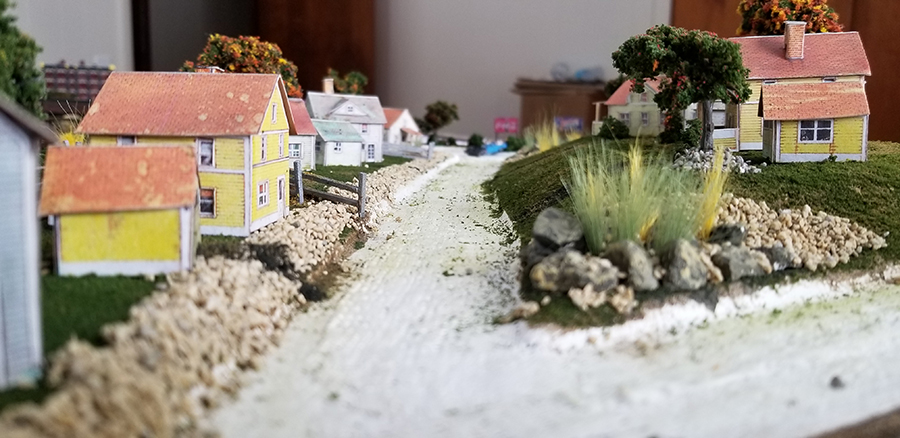
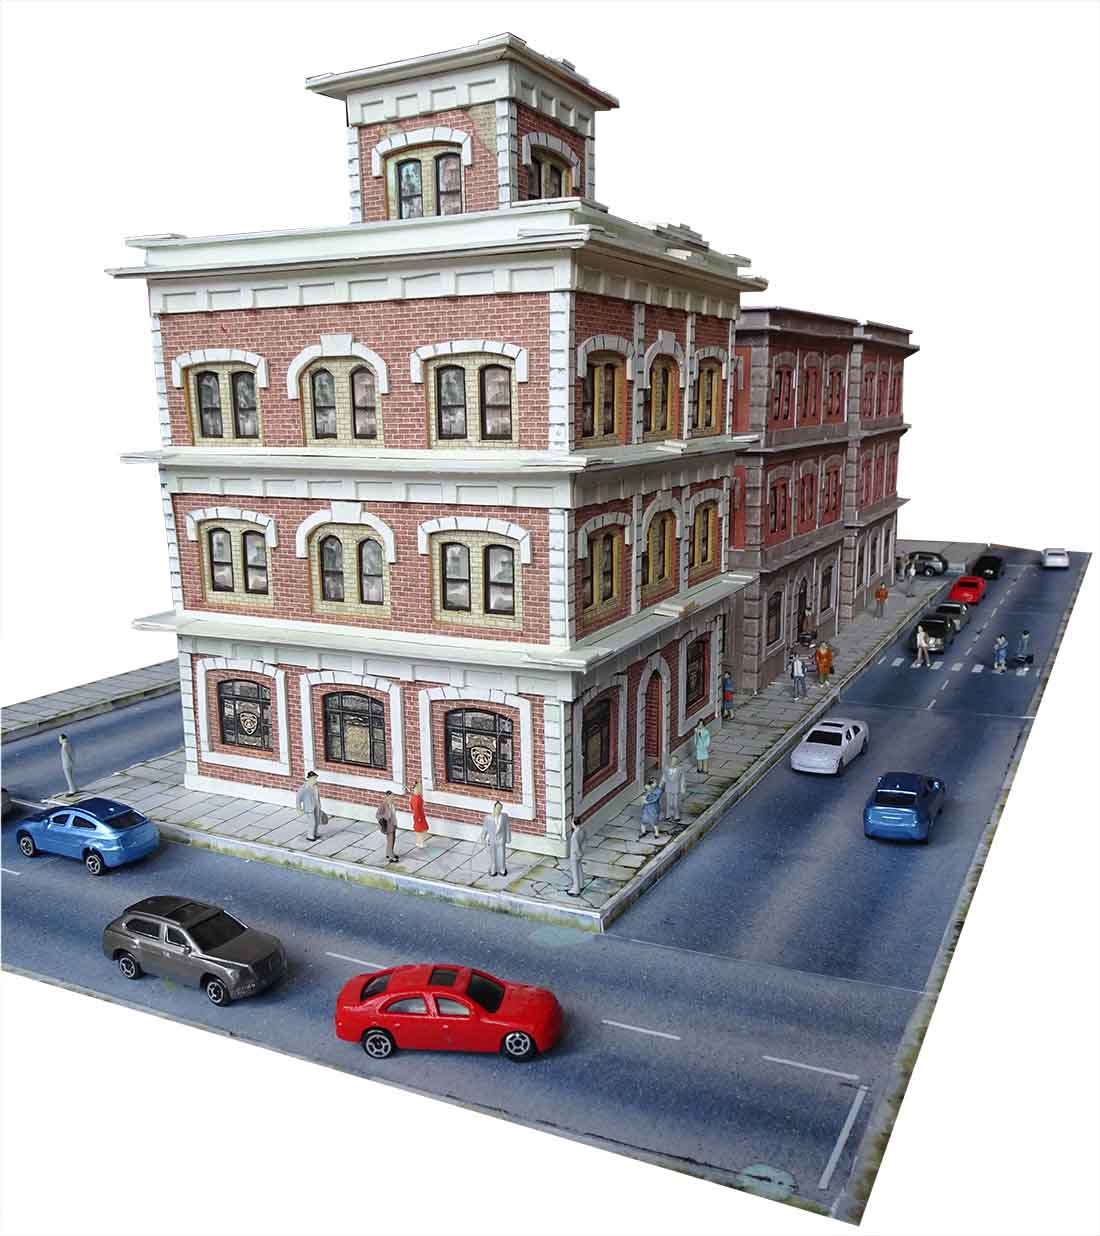
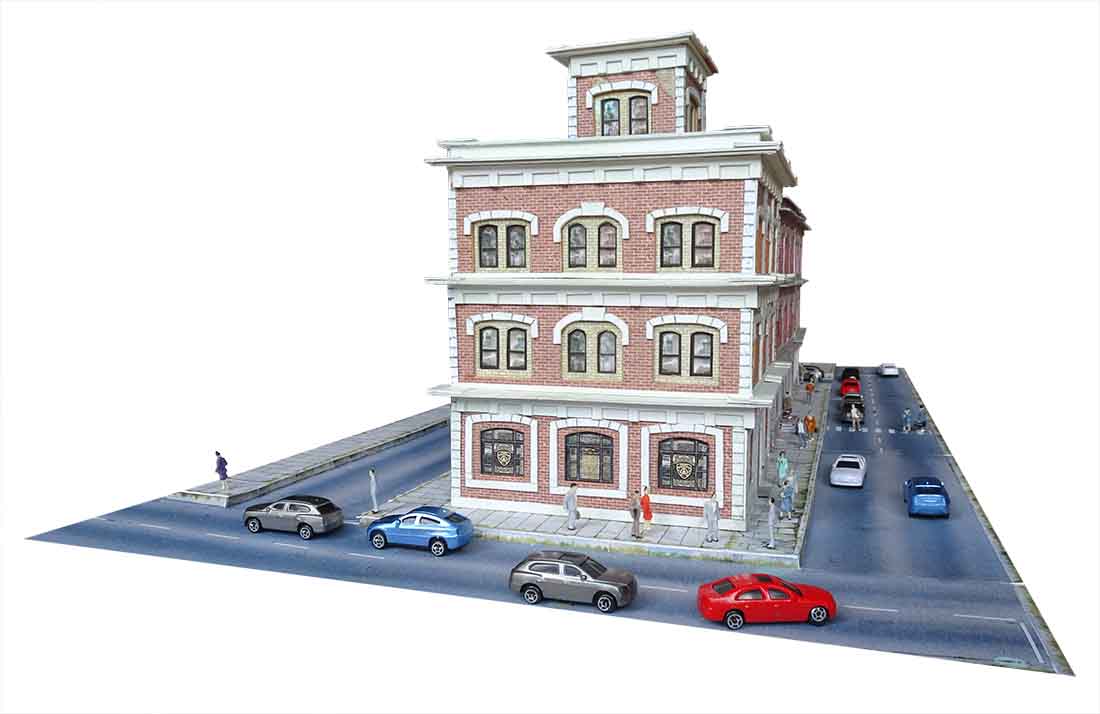
Here are some of the buildings on your layouts:
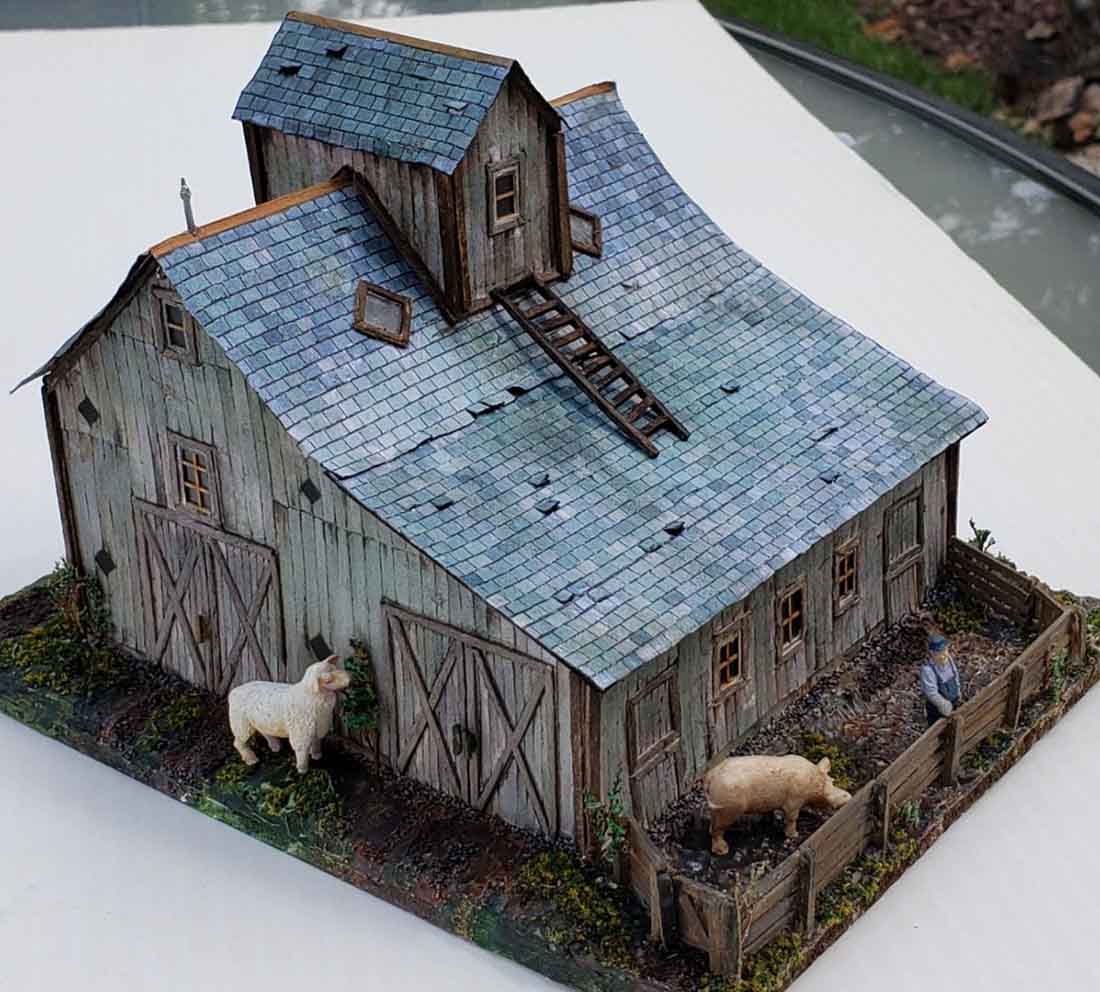
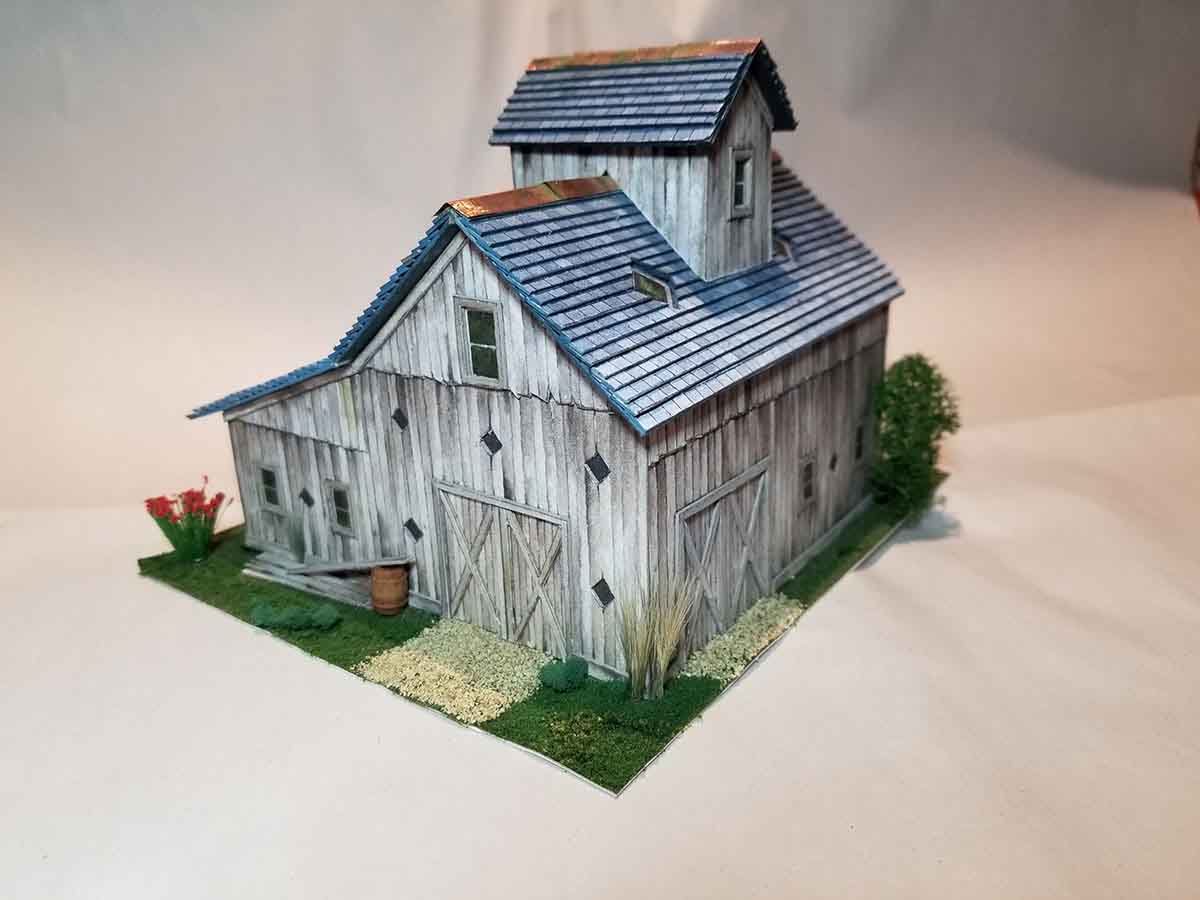
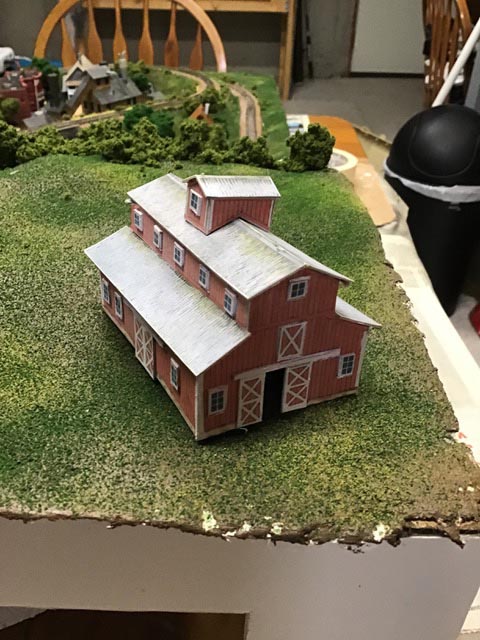
“Al, like you I have been retired for some time now.
I have gone back to my American Flyer, s Guage boyhood train.
I have had “n guage, HO, G scale”, and this American Flyer has been the most fun of all. I guess it takes me back to my parents basement where my 4 x 8 foot layout was back in the early 50’s.
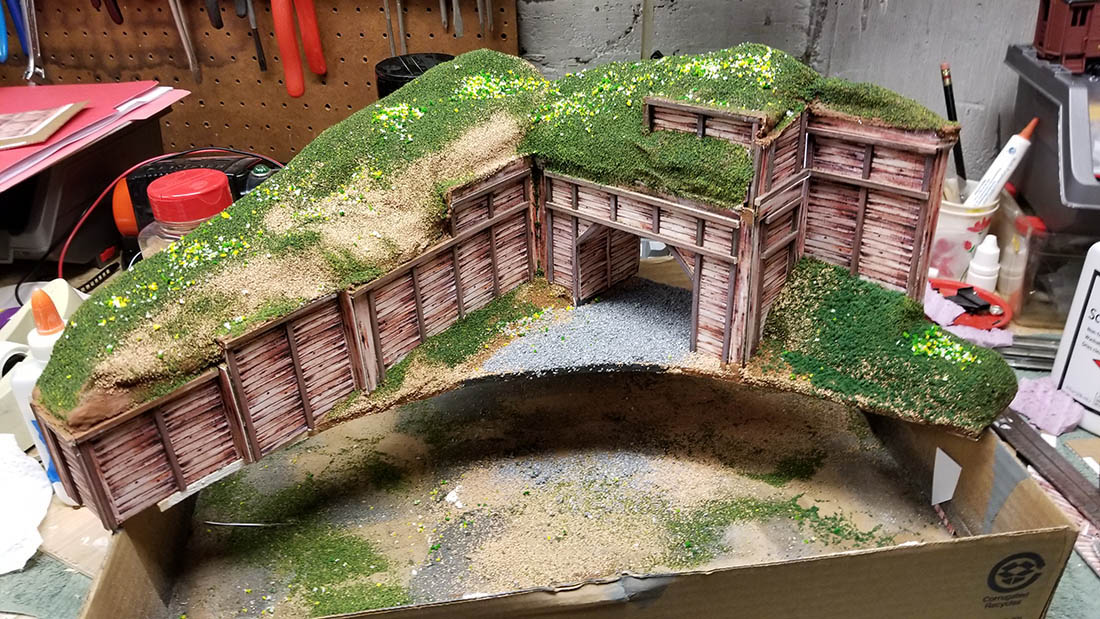
I resized your wonderful old barn and had so much fun building it. Here are some pics. Hope everyone enjoys it as much as I have.
Jerry from Illinois, USA.”
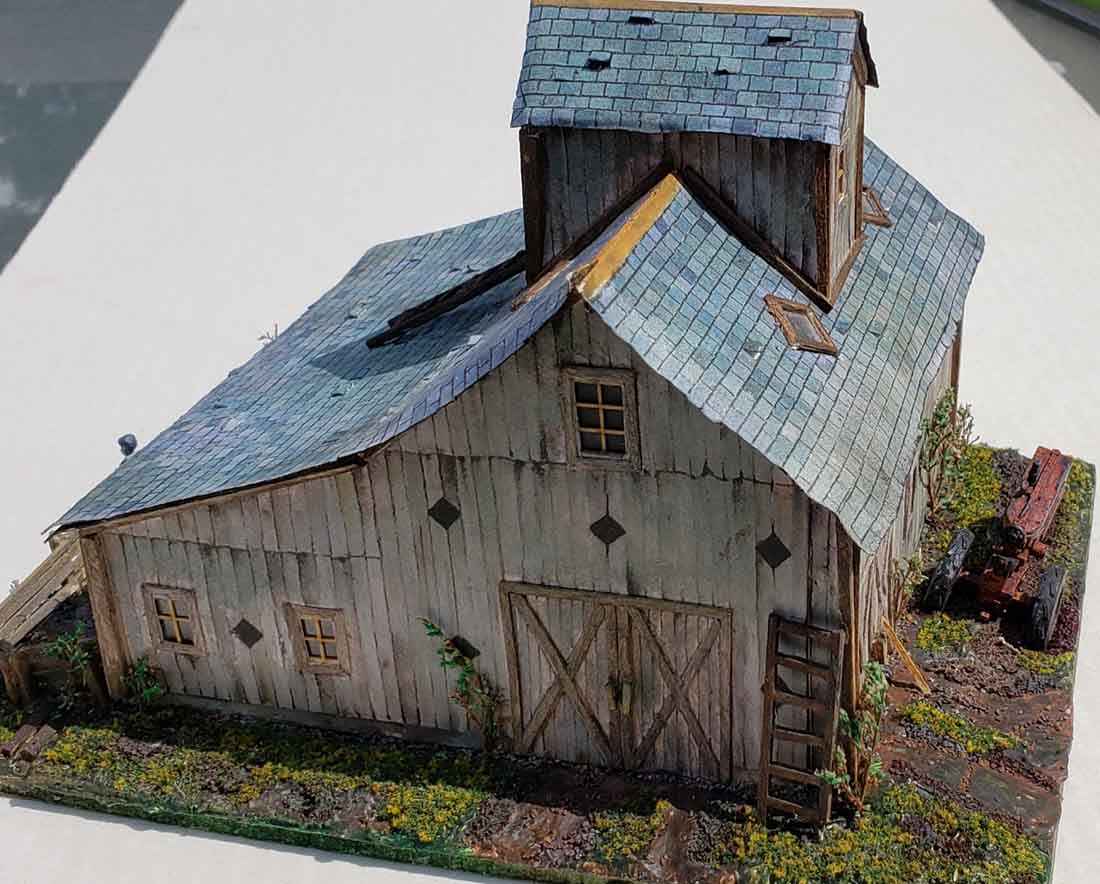
“Al,
Great project and a lot of fun. The barn is on it’s way to the Railroad Club.
Charles”
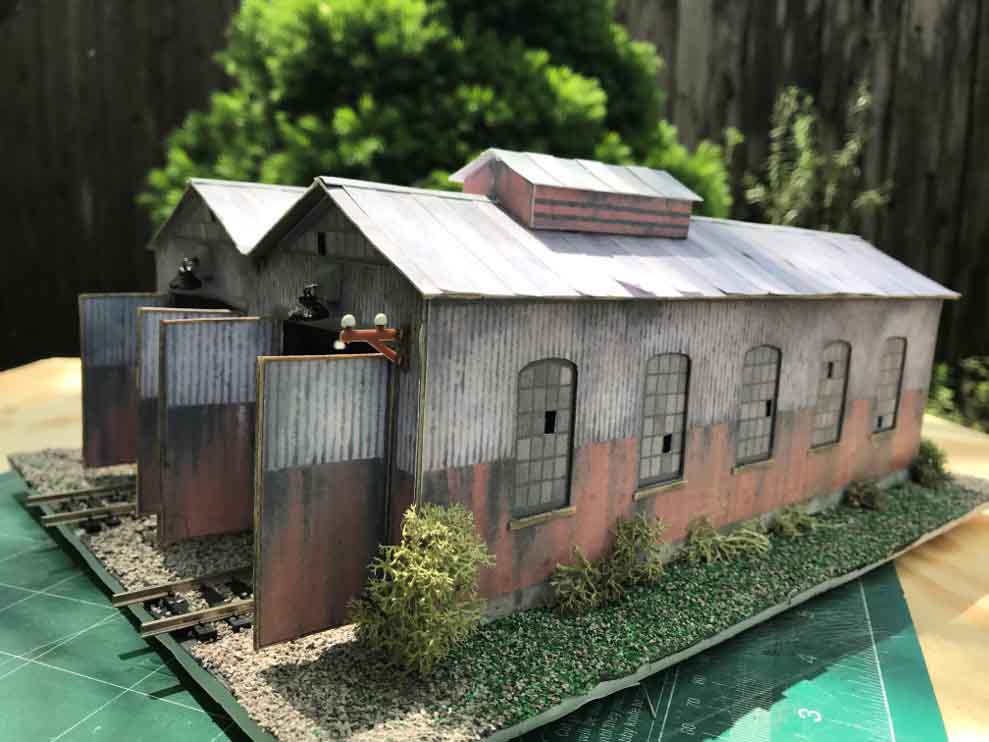
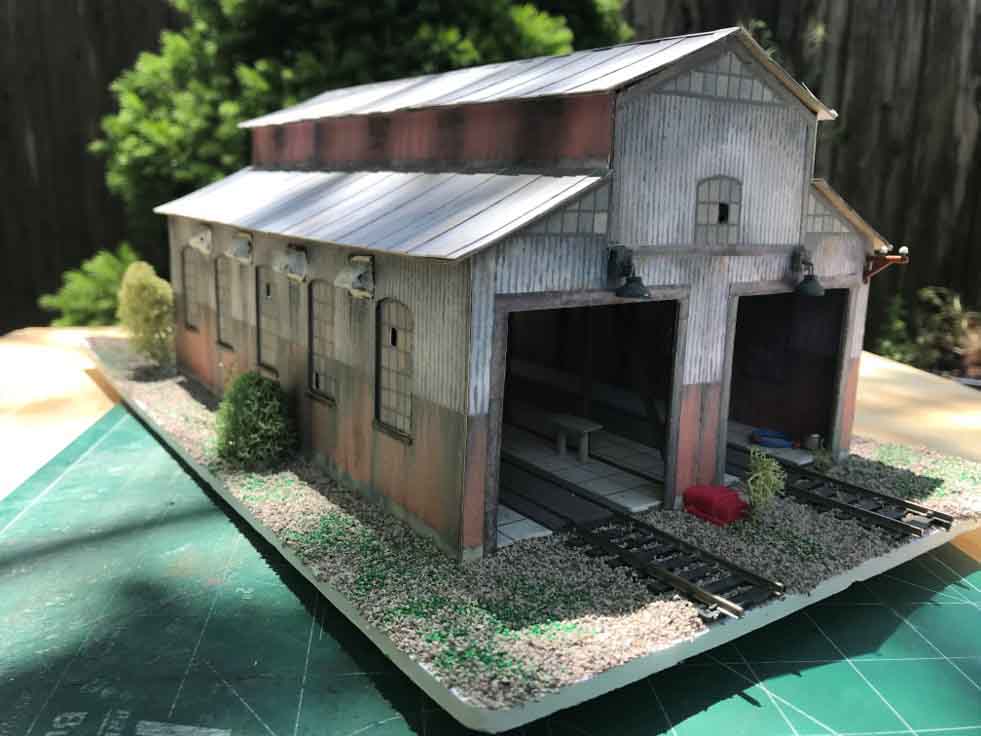
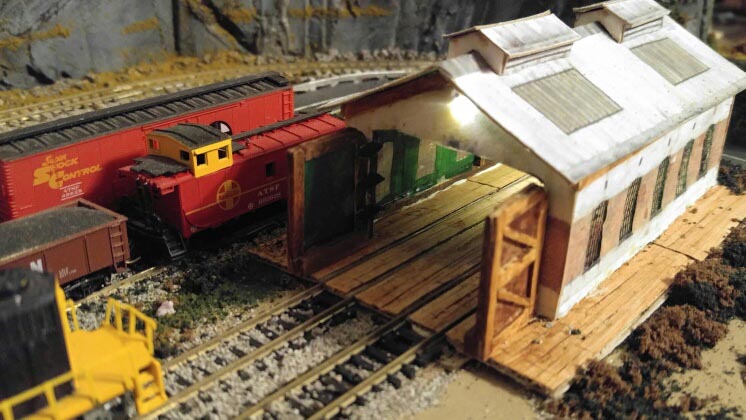
“Al
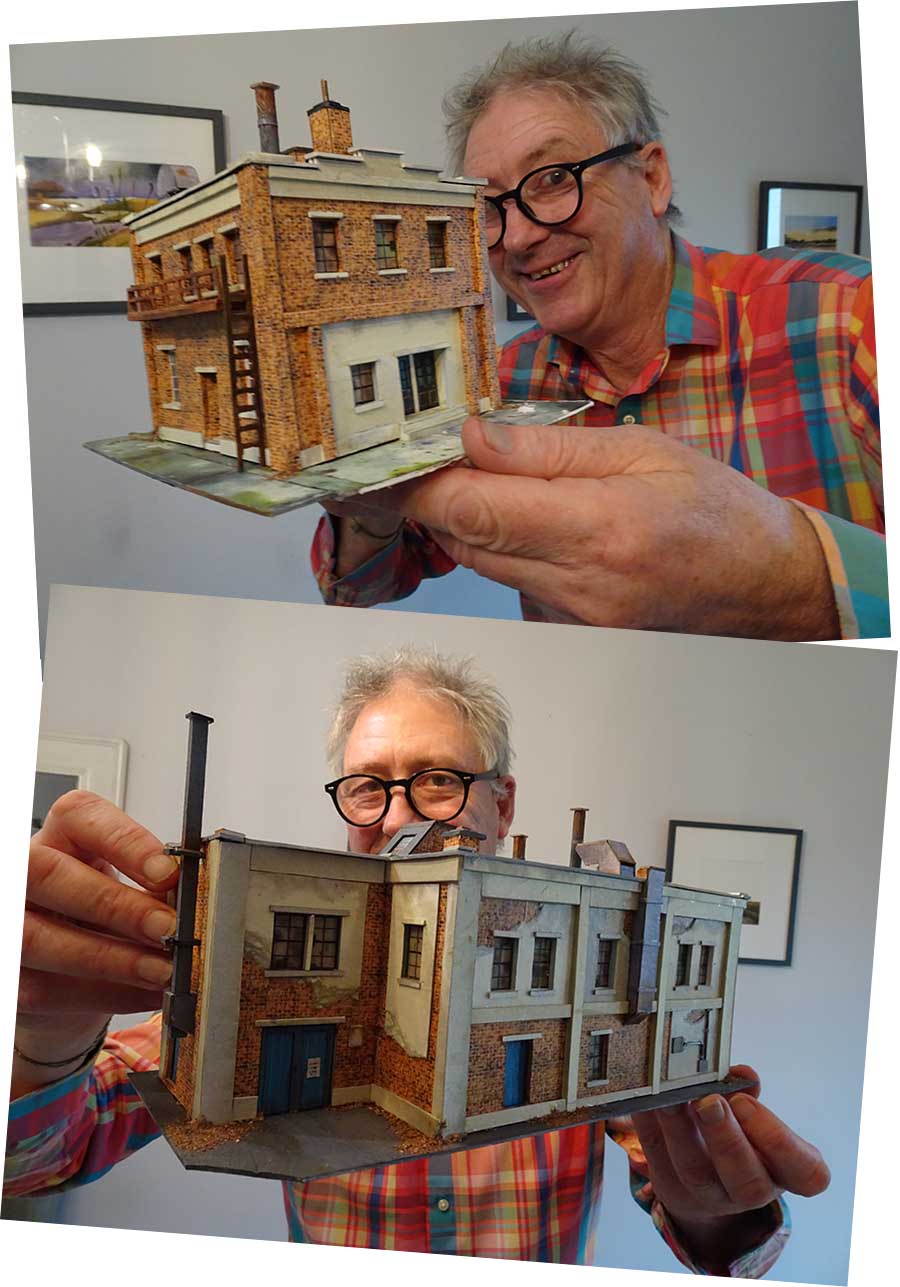
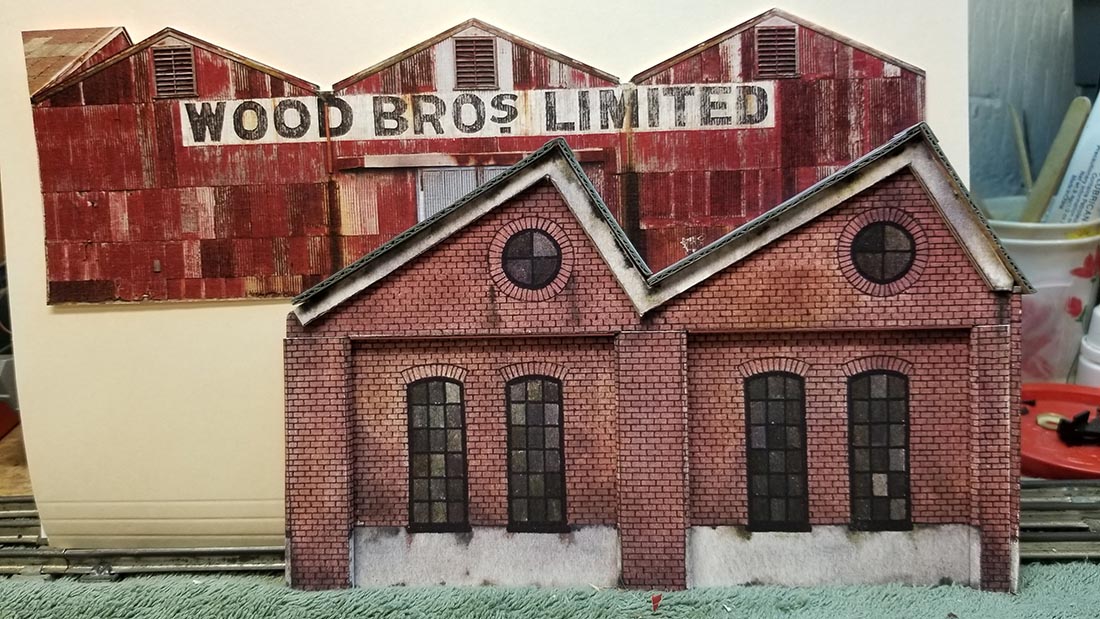
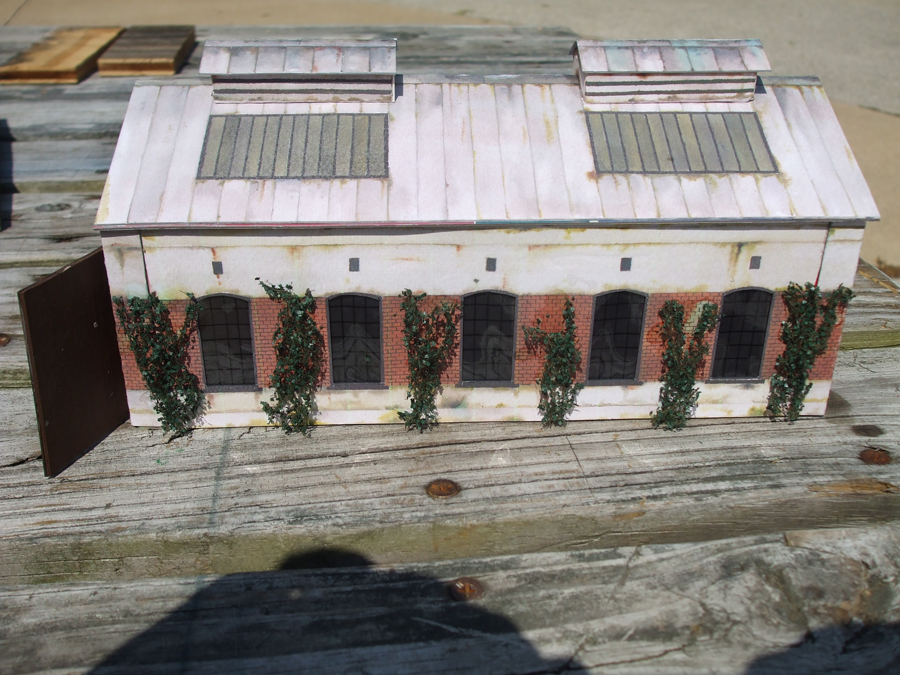
I have enjoyed your site for a long time, since I have retired had to find something to fill the spare time, I purchased one of your bundles and printed out one of the Engine sheds among many others.
I have created my own version of the Engine shed as shown in the pictures.
Side walls have ventilation fan vents.
I have dreamed to set up a model railroad layout for a long time and when I started to make it a reality one thing came up after another, like kids, education, weddings and now I have time and room to finish the dream, but not much of a budget.
Best to all talented people like Hall of Fame Dave, talented hobbyists and their many beautiful layouts.
Ryszard”
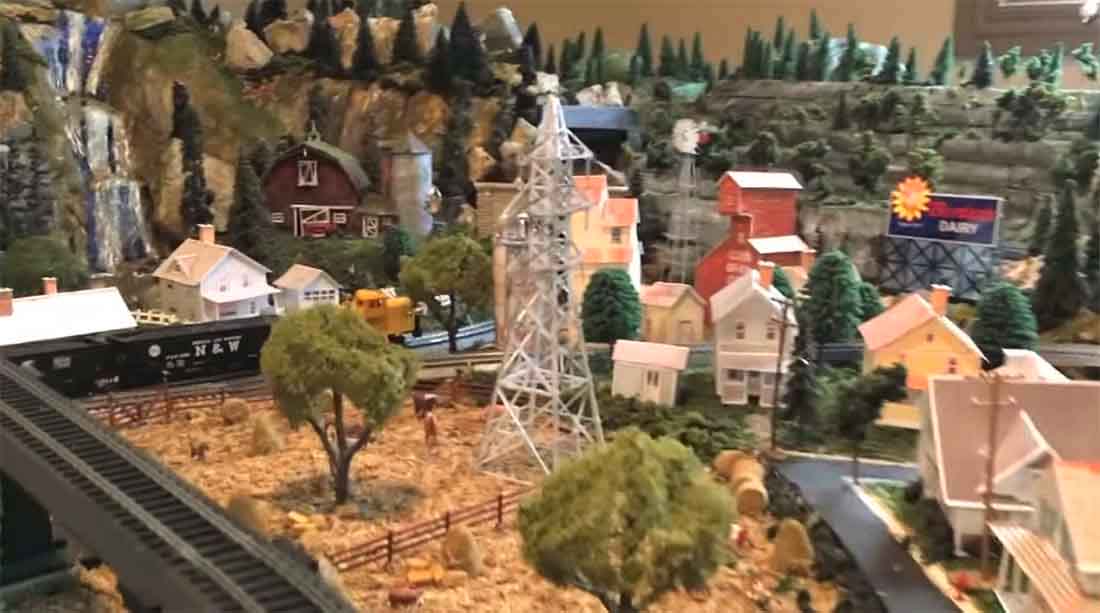
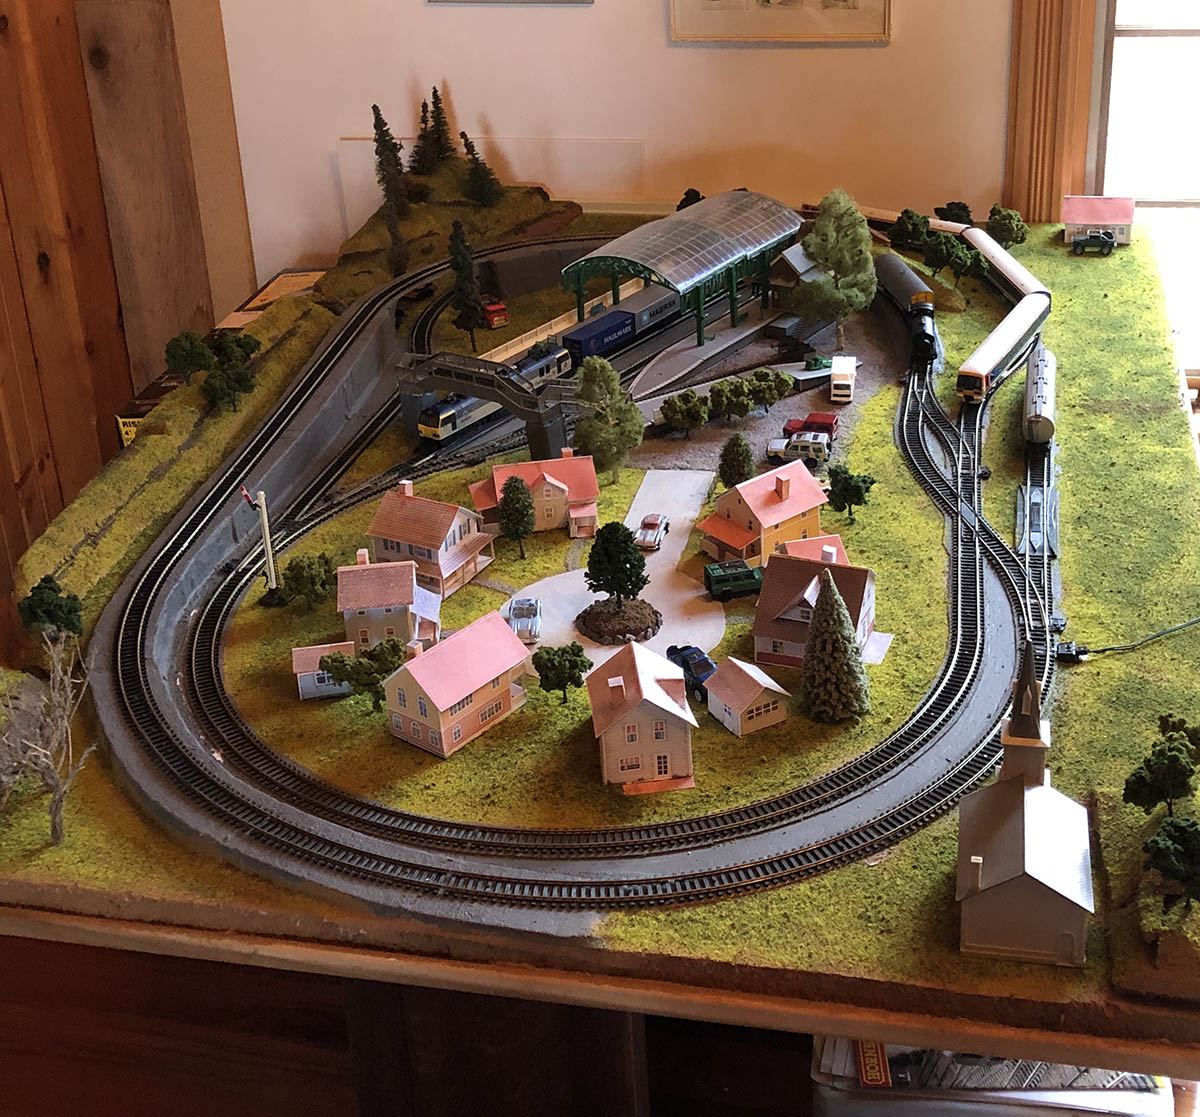
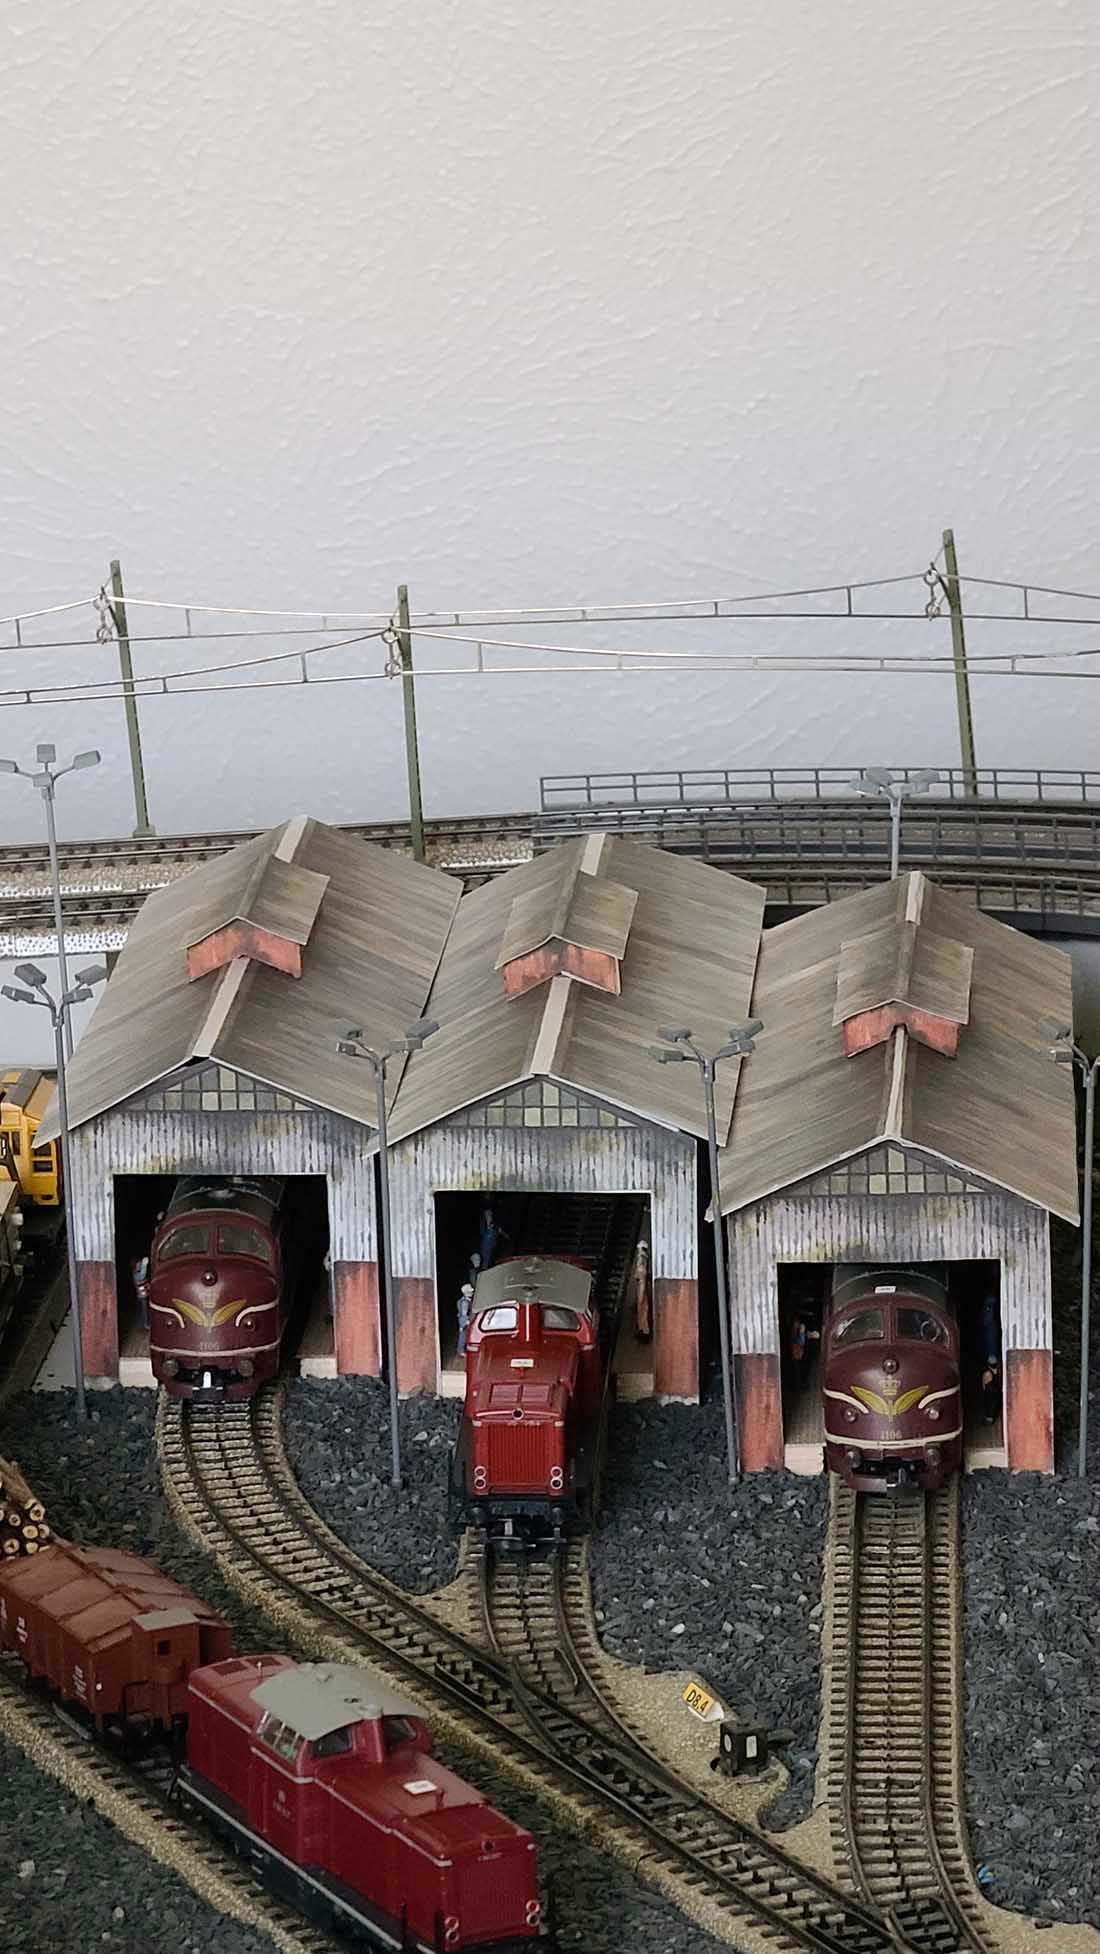
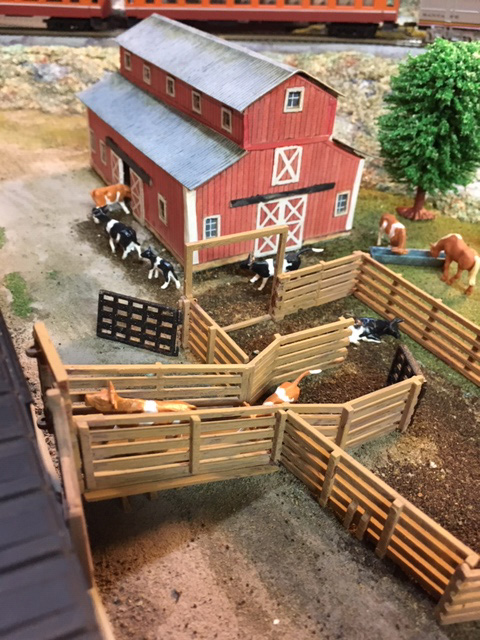
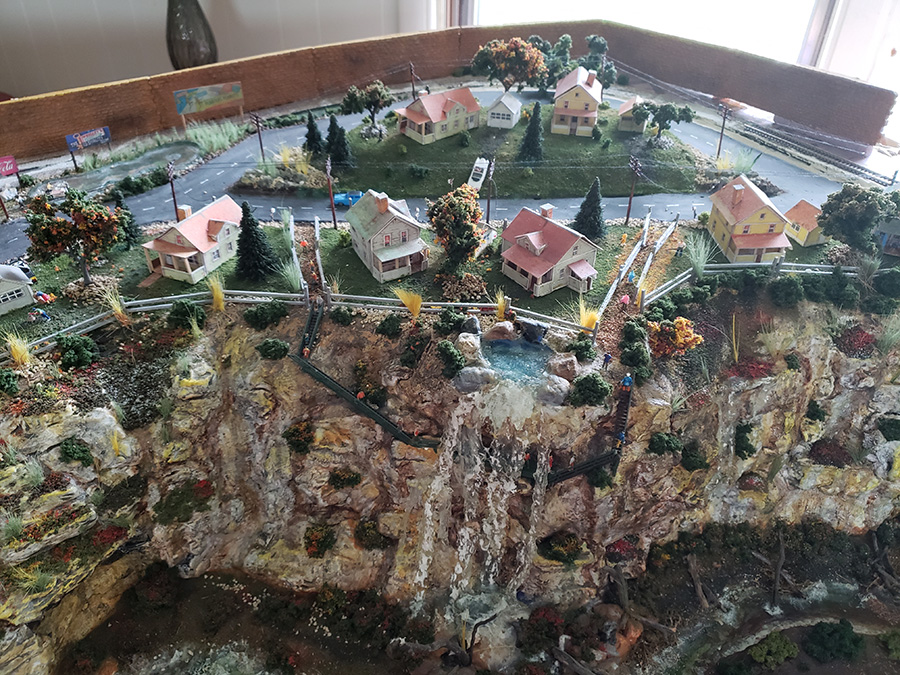
And of course, there’s lots of the printable buildings on your layouts.
Here some pictures of them:
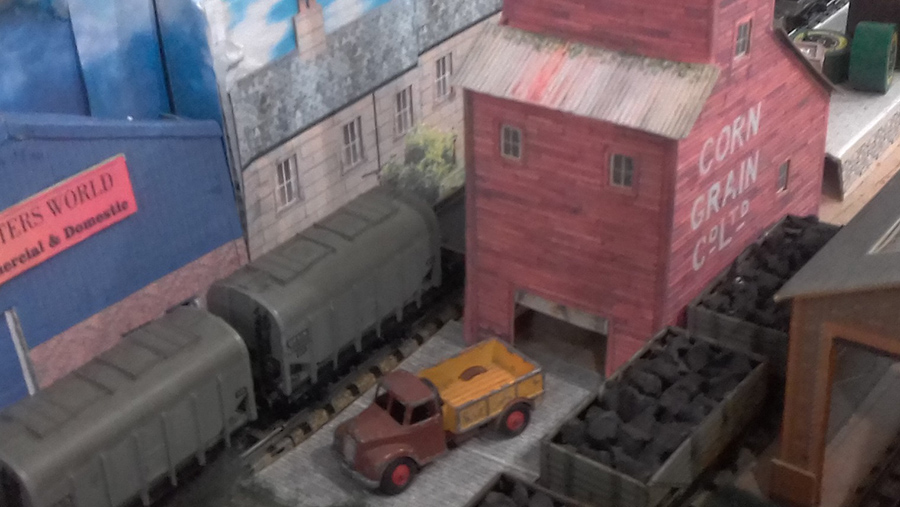
Mike has used a lot of the houses and grain elevators (not featured in the bundle – just using a print out example).
But don’t forget – it’s not just the printable buildings you get – it’s the Beginner’s Guide too:
Of course, I’m biased so here’s what others say about it:
“Al,
I really like the Beginner’s Guide. As a true beginner it helped me quite a bit. The Guide answered questions I didn’t know enough to ask.
I haven’t gotten to the building prints yet, still working on my terrain.
Bruce”
“Hi Alistair,
Your print out building kits have saved me hundreds of dollars on buildings and they provide the unique option of being able to customize the builds most any way I desire.
Until I came across your kits, I was very limited on what I could add to my planned N-scale layout. Commercial building kits are way too expensive for a retired person’s budget.
I now have the ability to not only build nice scenes, they don’t require weathering. Something I’m not terribly adept at accomplishing. Also, as a 70 year old kid, working in N-scale can be challenging for clumsy arthritic fingers. Your kits eliminate most of those issues. All I need is a sharp blade, scissors, glue and my imagination.
Also, your beginner’s guide is invaluable. I’m a retired network systems architect, so tech is not scary to me yet surfing the web for information can be tedious. I was a pre-teen the last time I played with model trains, and a lot has changed in the hobby since the early 60’s. You’ve solved all of that by providing one source for virtually all my basic needs, plus your daily email blog covers it all. What an incredible resource you are to this hobby.
Thanks for doing all of what you do.
Best Regards,
Ken”
“Hi Al
I really enjoyed the beginner’s guide book. I’m new to the train world. I have just retired and trying to make an attempt to start a hobbie with HO scale trains. You and your followers have encouraged me for the last two year’s. I Thankyou and your followers for sharing their train world
Sam”
Of course, I’m very biased, but I think the Beginner’s Guide and all these printable buildings bundled free are a real steal – just $9 for the next day or so.
I think Ken’s quote above puts it best:
“Your print out building kits have saved me hundreds of dollars on buildings and they provide the unique option of being able to customize the builds most any way I desire.”
You get 25 printable buildings with the Beginner’s Guide (although with a bit of imagination you can make, many, many more).
You’ll see these buildings sell in the store for $9 each or more.
And the Beginner’s Guide sells for $27.
So you are saving a massive $342 on this deal.
You’re also getting the track plans PDF too.
What’s more, have a look at throught the store and you can see it’s a real, genuine, saving.
But please bear in mind, this silly sale is only for a few days, and then it’s all goes back to normal.
I do like to think that when I have a sale it’s genuine, and there is real value.
So if you fancy this bargain before it disappears like a shadow in the night, grab it right now.
Or, I know some of you good people just buy it to support the site. God bless each and every one of you.
Whatever your reasons, the Beginner’s Guide for $9 and the free printable buildings make it easy for you to make that all important start.
And that, my friends, is what it’s all about. Making that start.