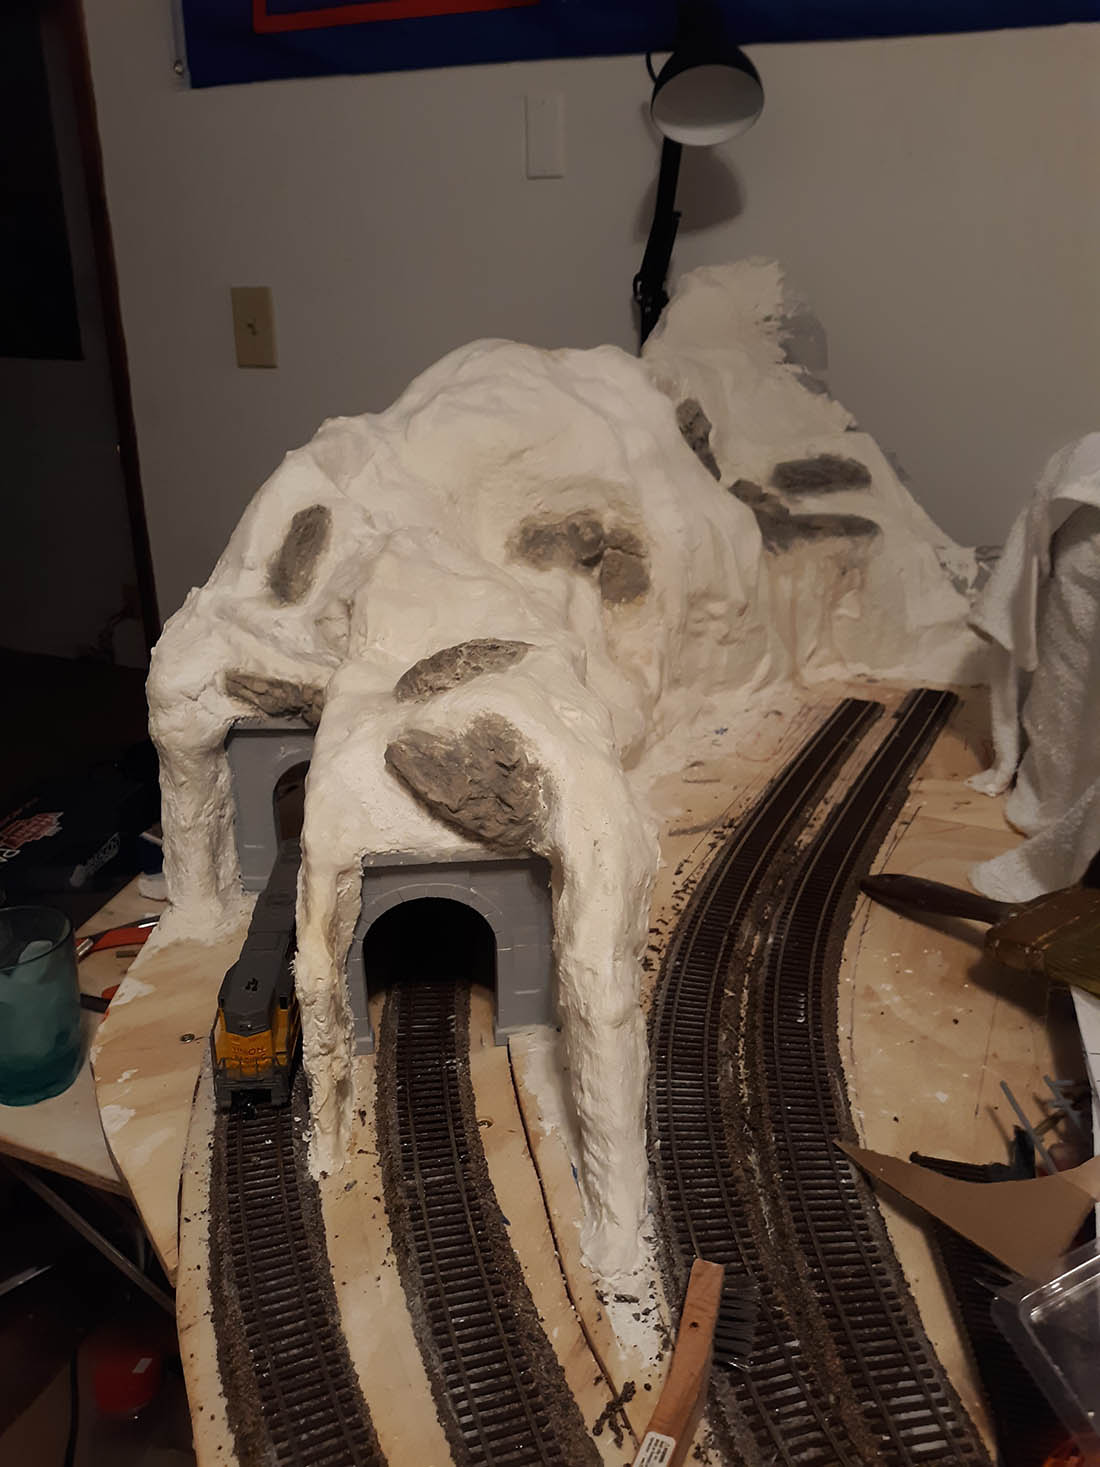
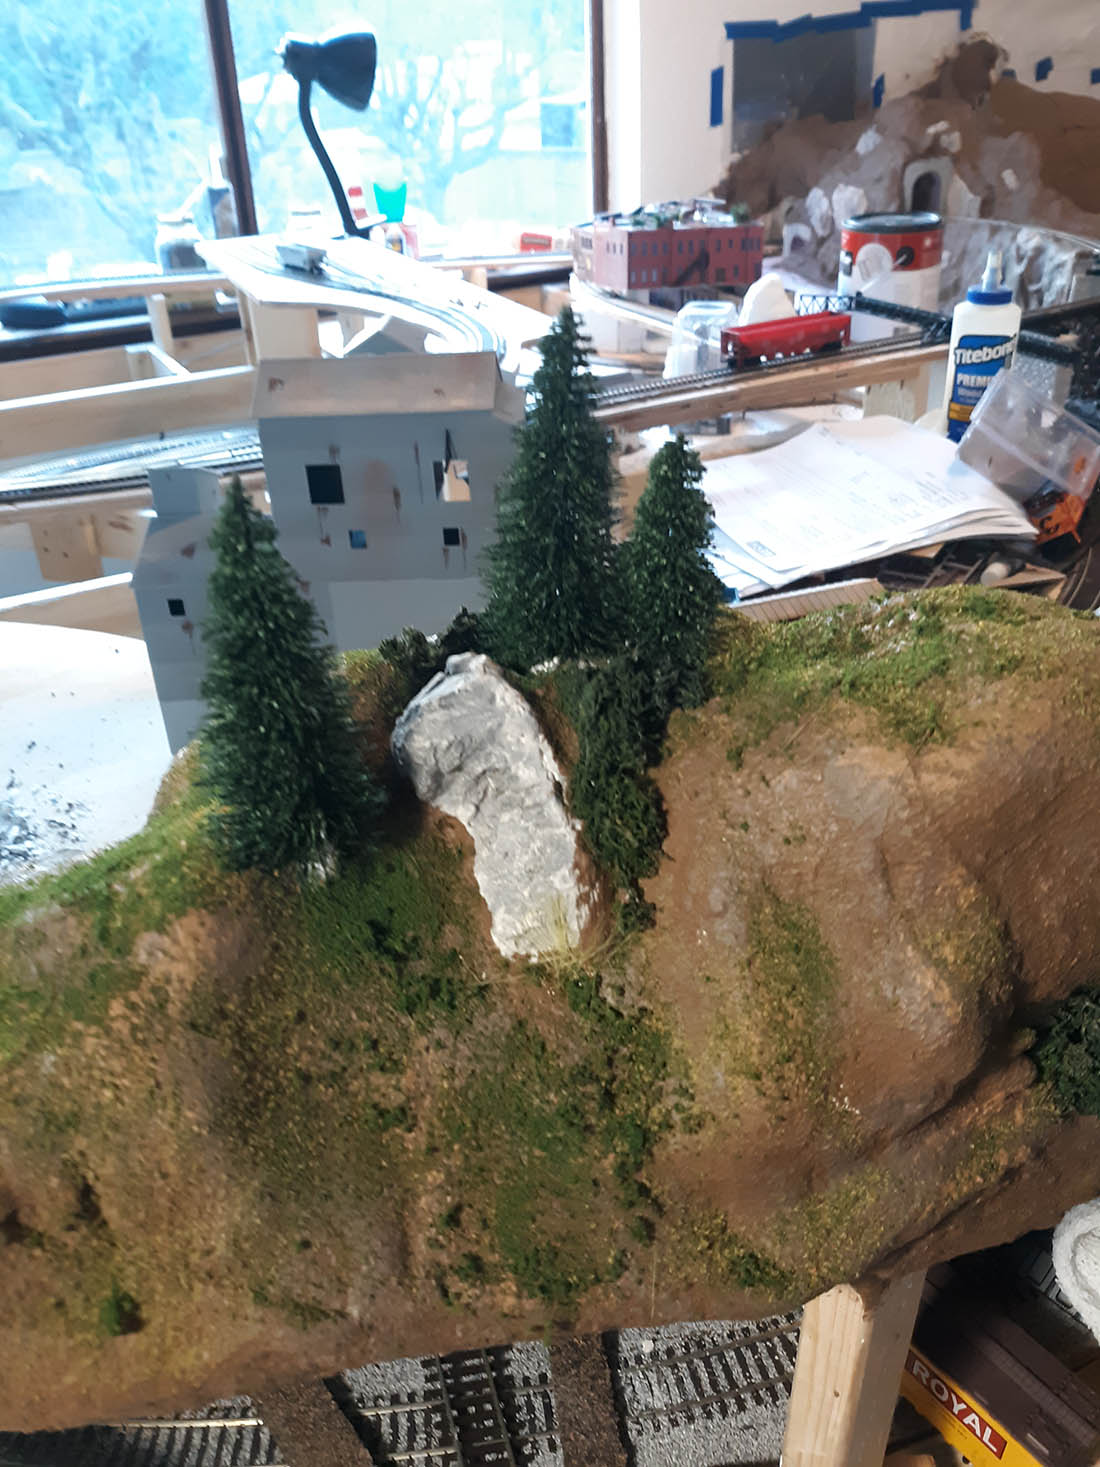
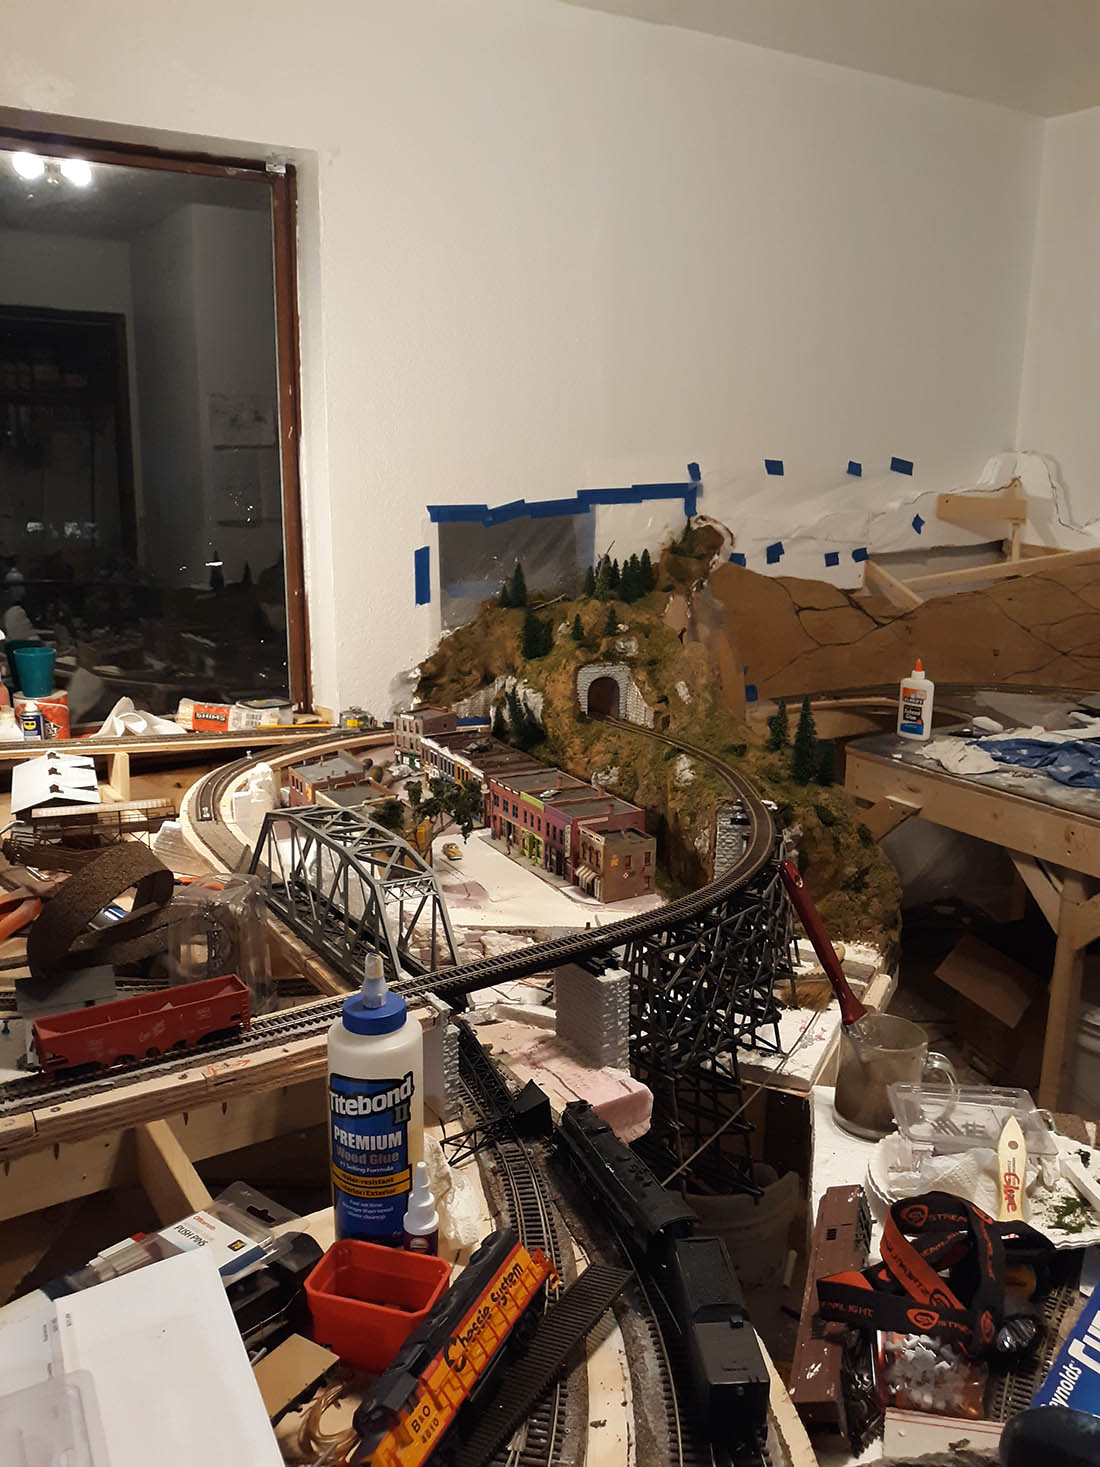
I am trying to get something that looks like it might be finished.
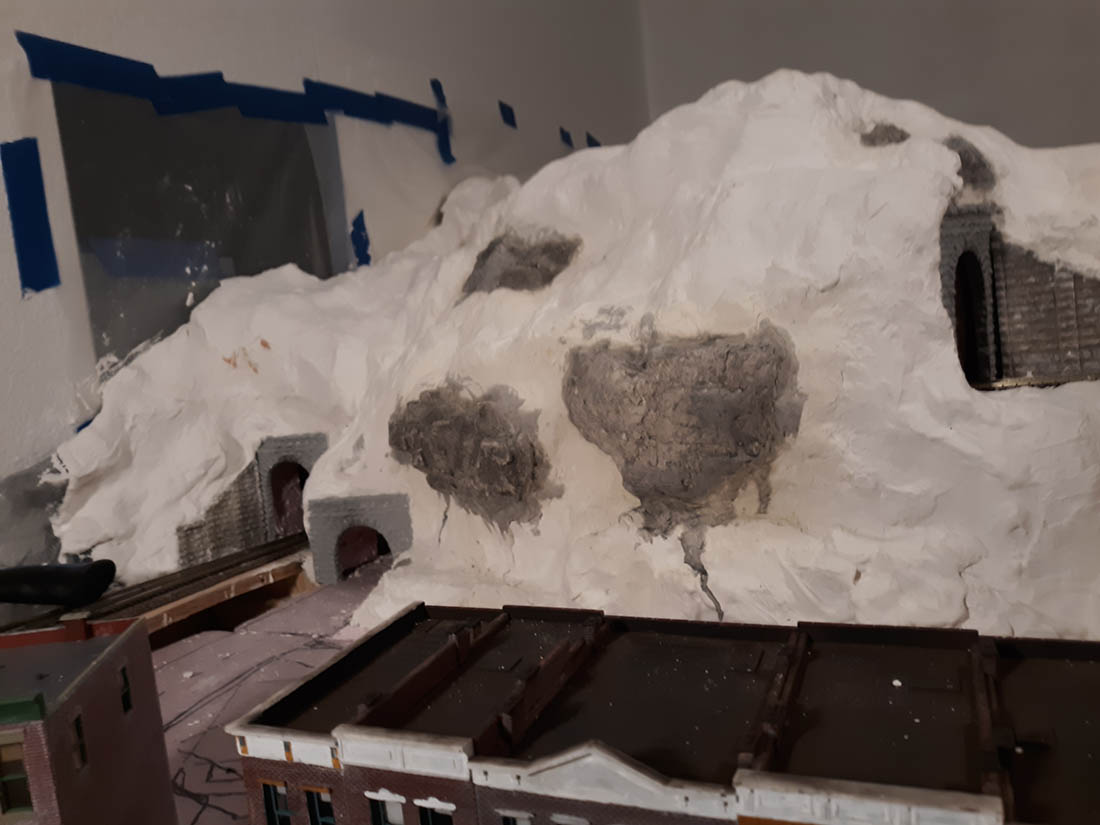
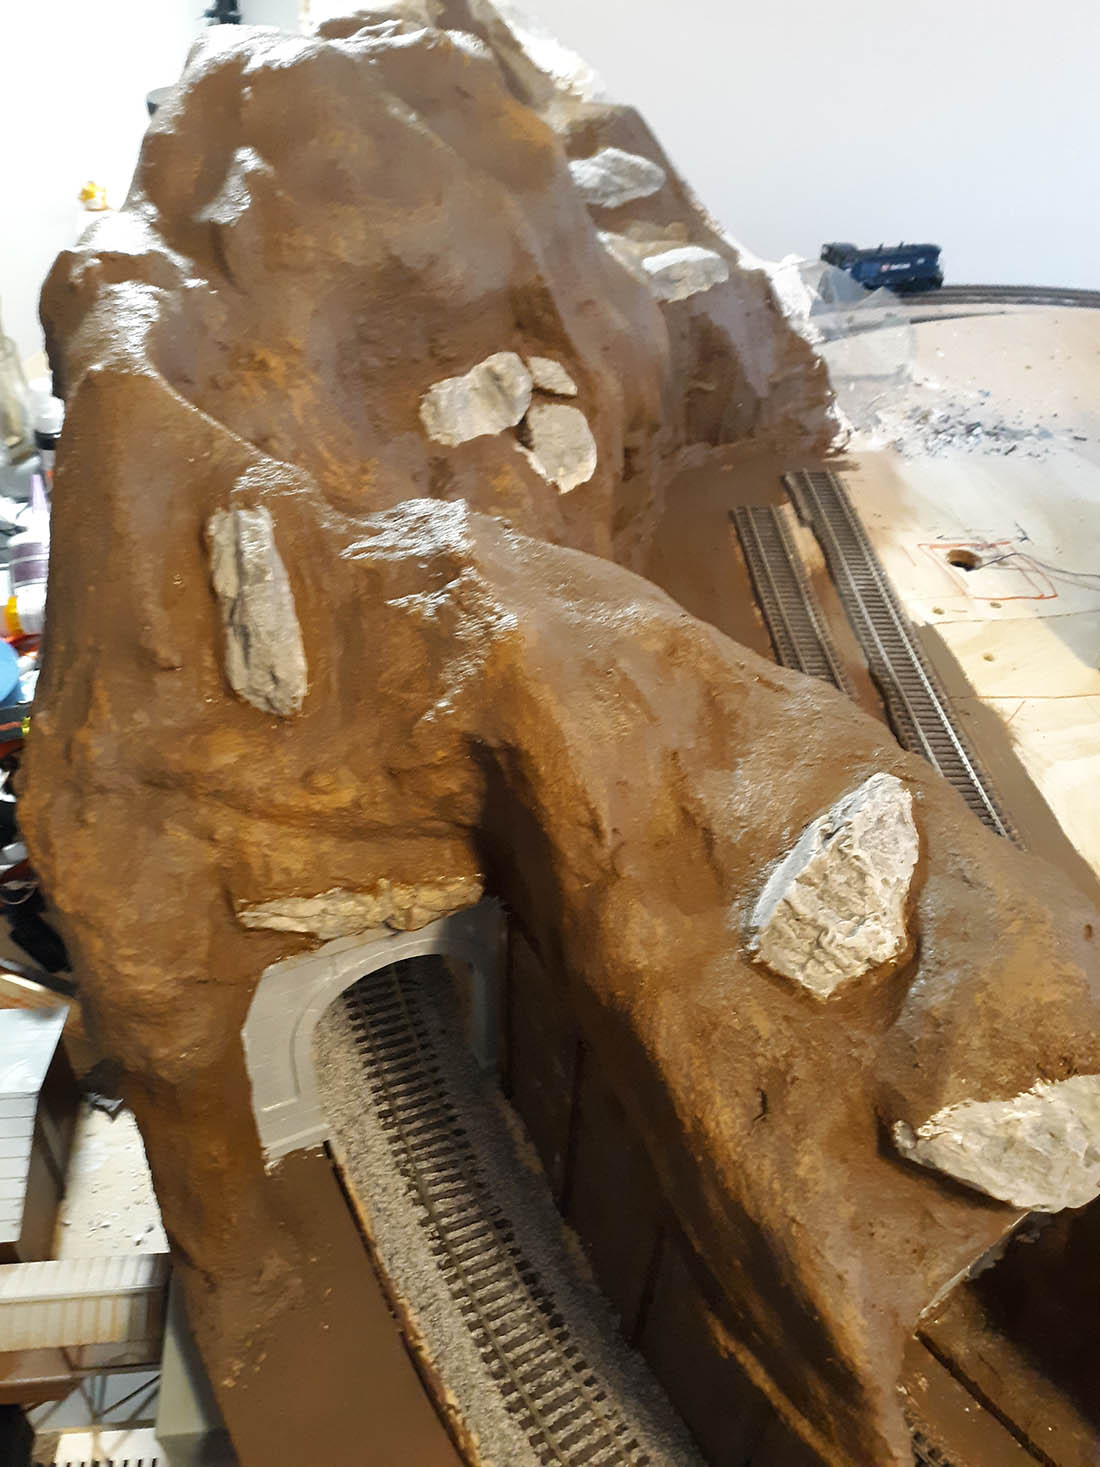
I have three different colors on my hills. So far it seams that its going to work.
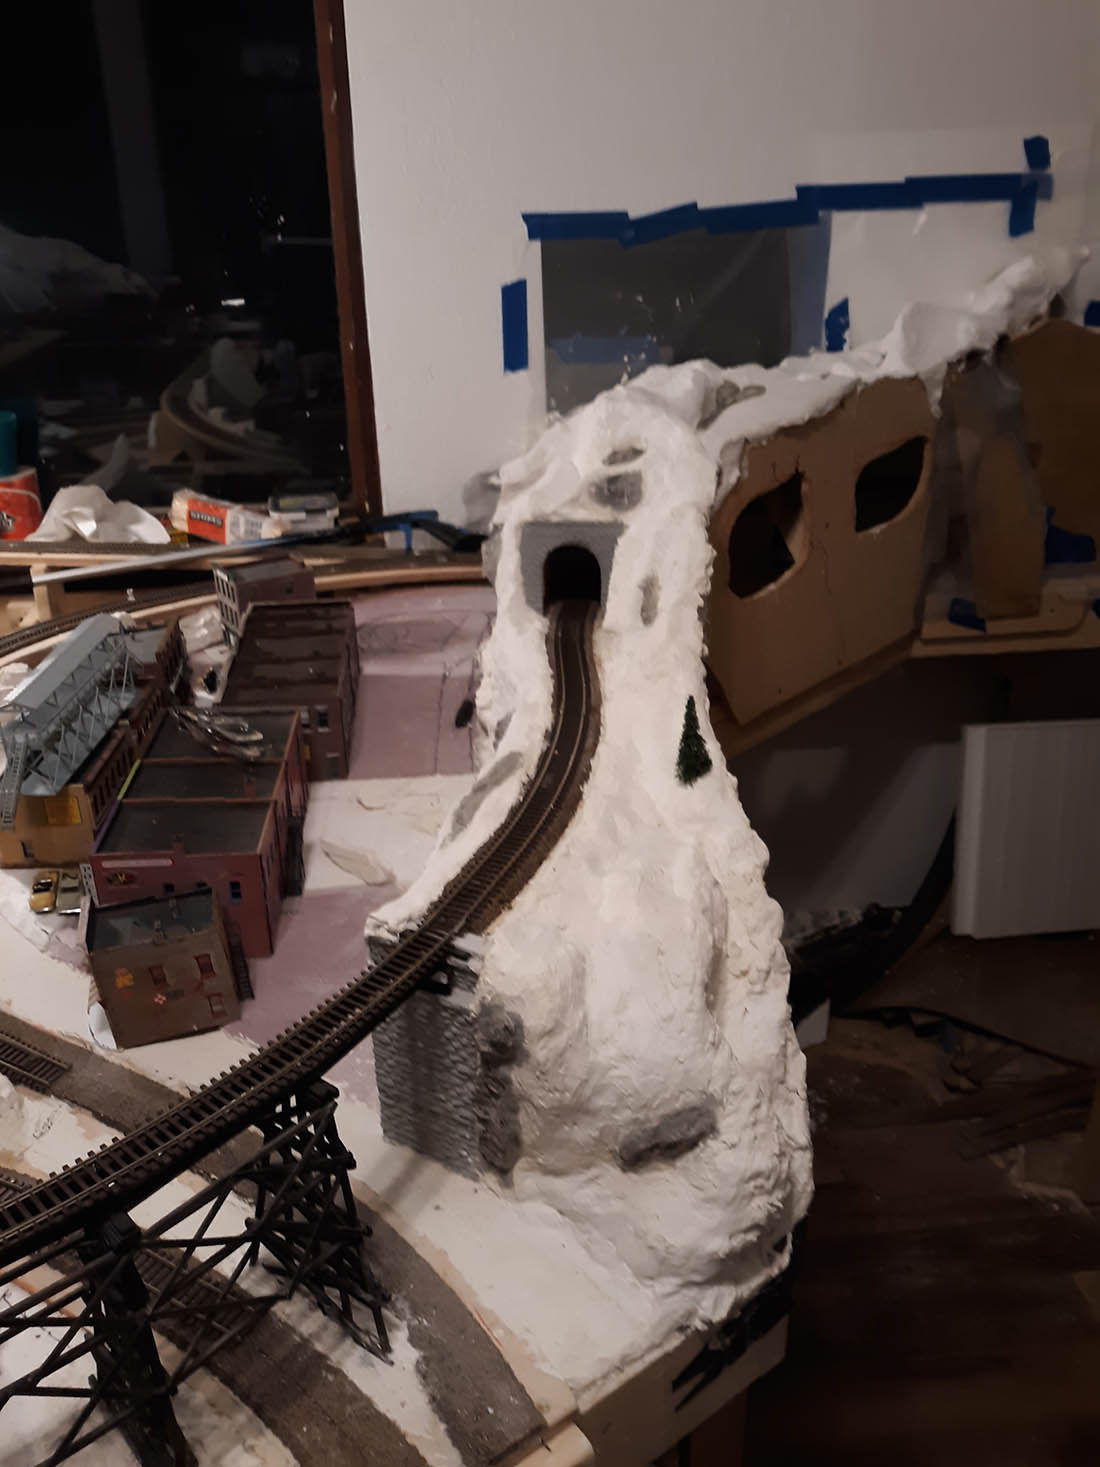
I still need to see if static grass can work on the hills. I am kind of pushing myself. I am leaving the middle of April for a 4 mo. road trip on my Harley trike.
While I am gone nothing will be done on the layout.
Except for ballasting the track I think this part of the hillside is just done? Right, sounds good.
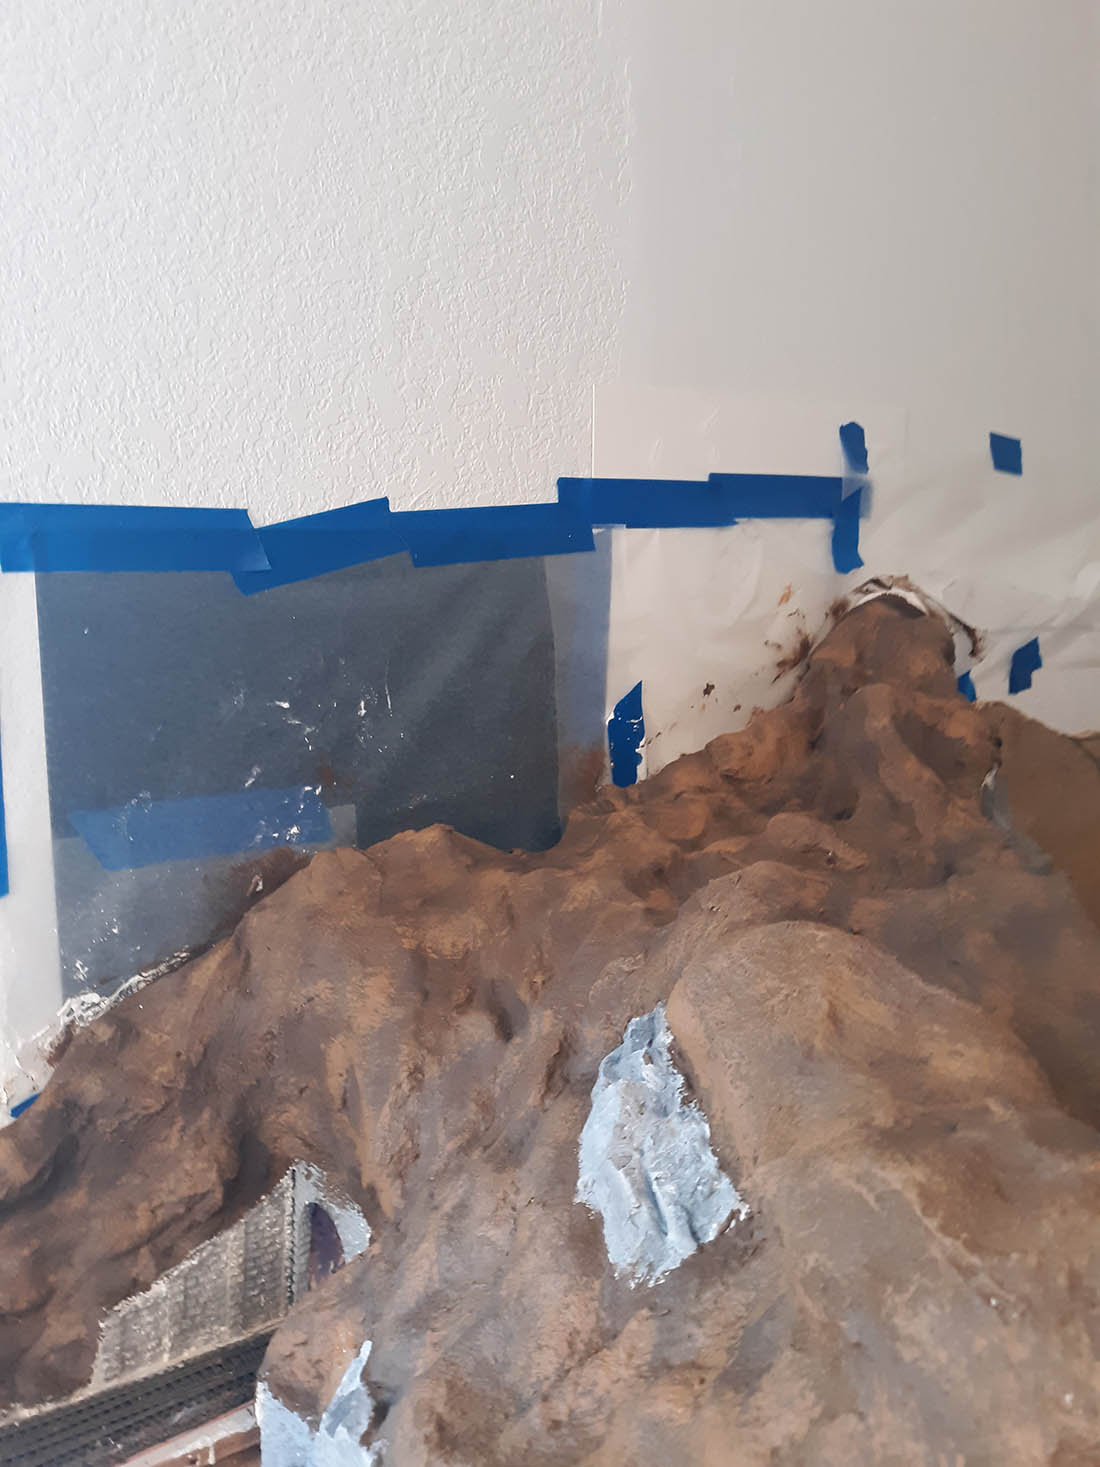
I guess its right, your layout is never done. I have just finished some of the mountains, and now I am tearing up track and roadbed.
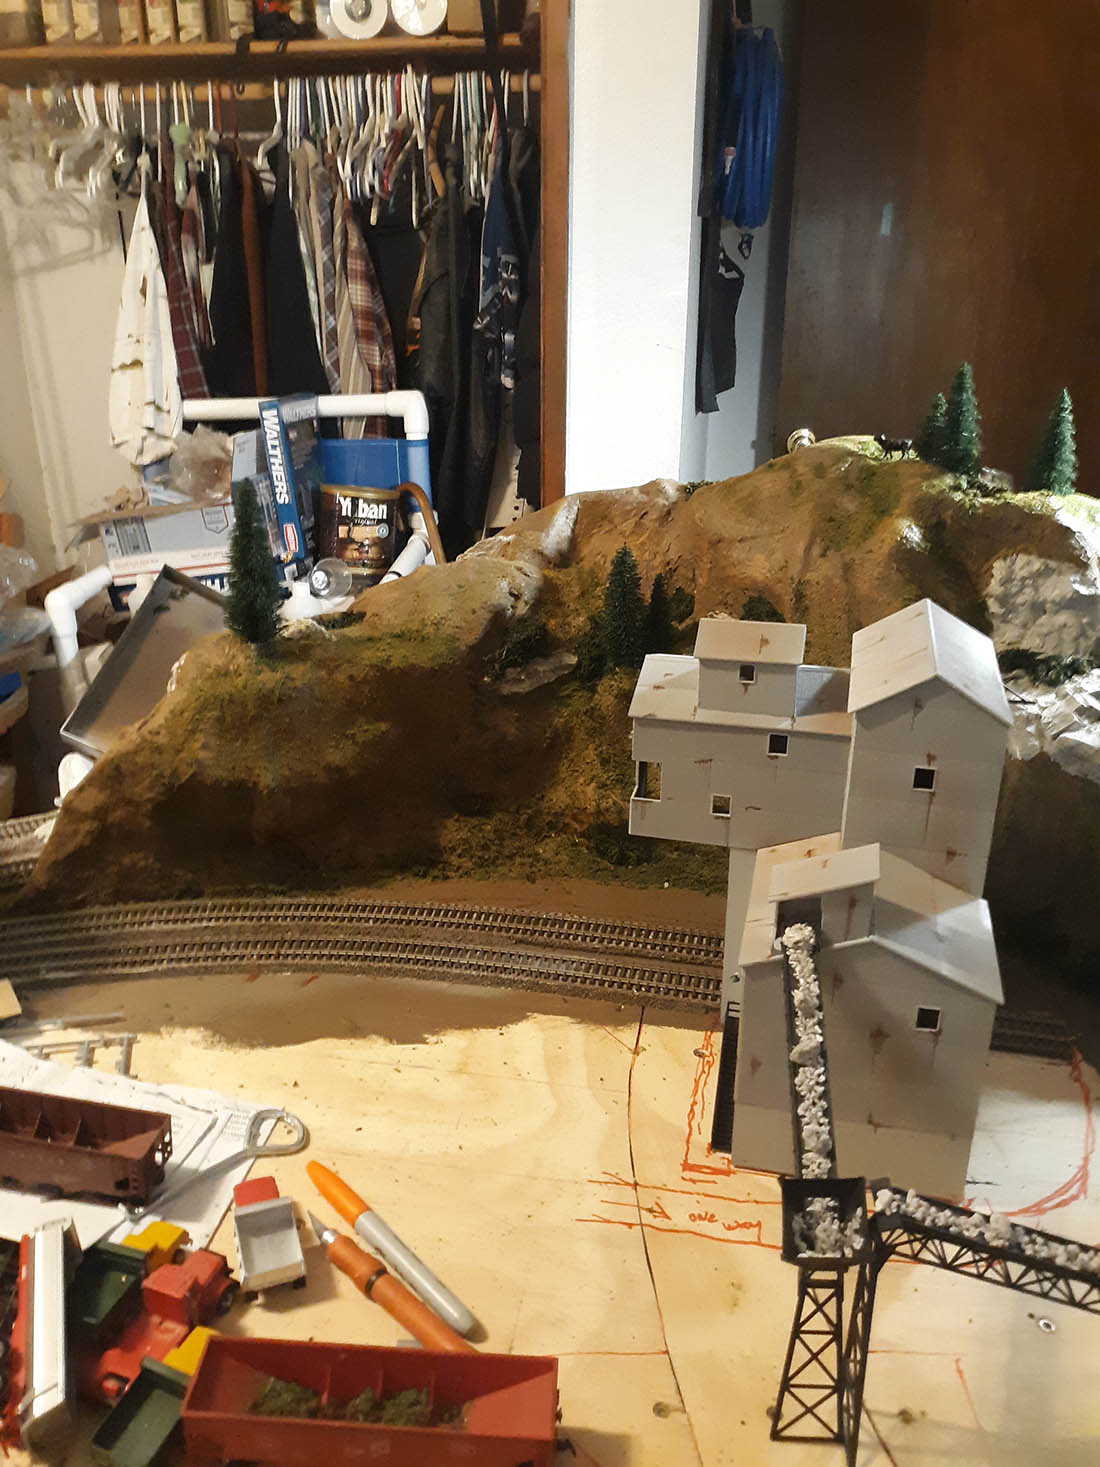
I widened one leg of my coal mine, then started tearing up the roadbed for the icehouse.
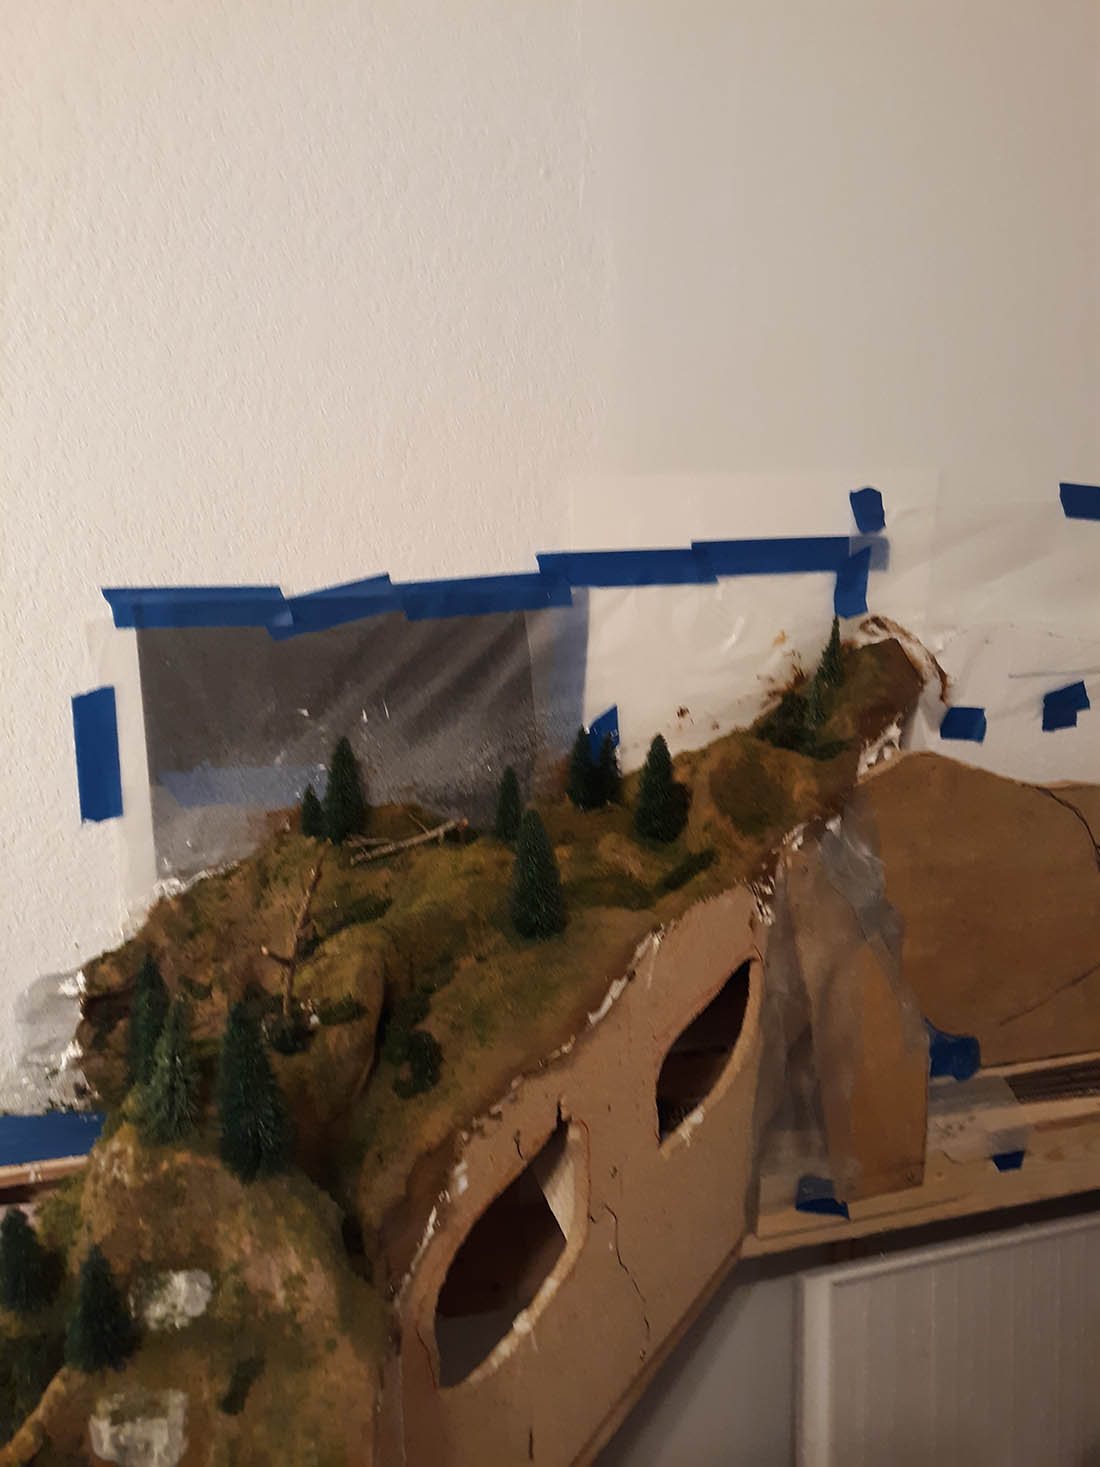
I have cut about 1 1/2 in’s off the bottom of the icehouse. When I but it togeather, this thing was huge. Far too much ice for this layout.
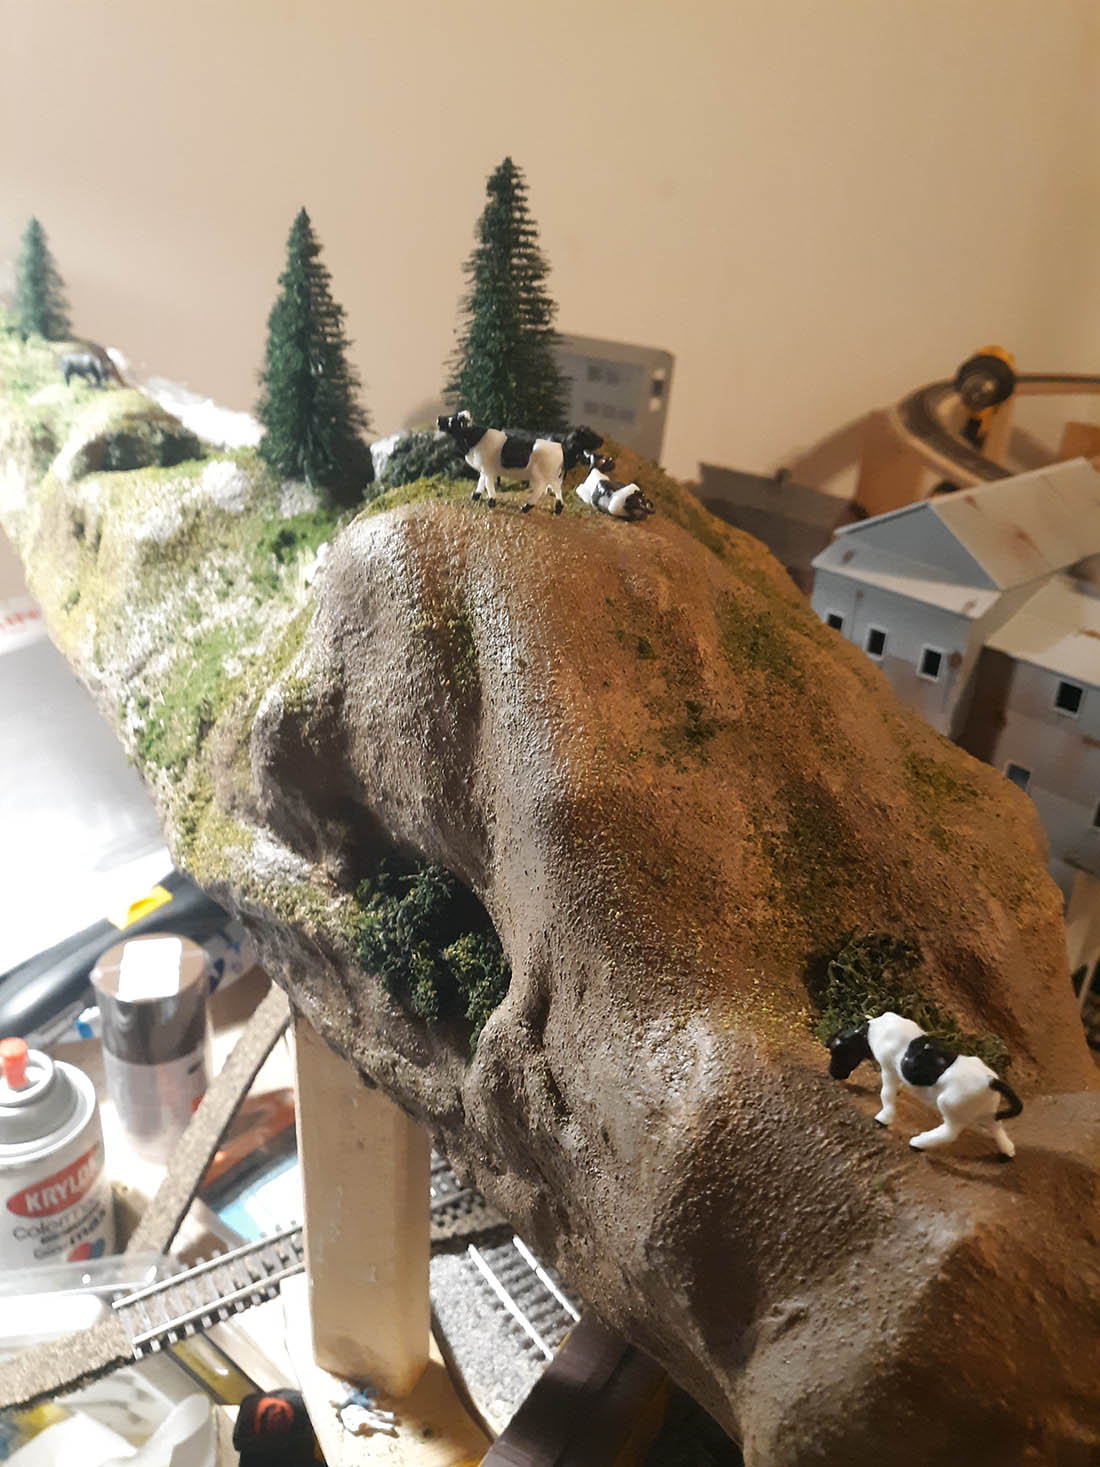
Now I have added a office at one end, shortened the ice loading platform, added a couple of doors. Making a cattle holding pen with ramps. This is needed for the new beef packing co. that is in 1/2 of the ice house, plus lots of cows. Just for fun of it this is what we call free range cows!
Wayne”
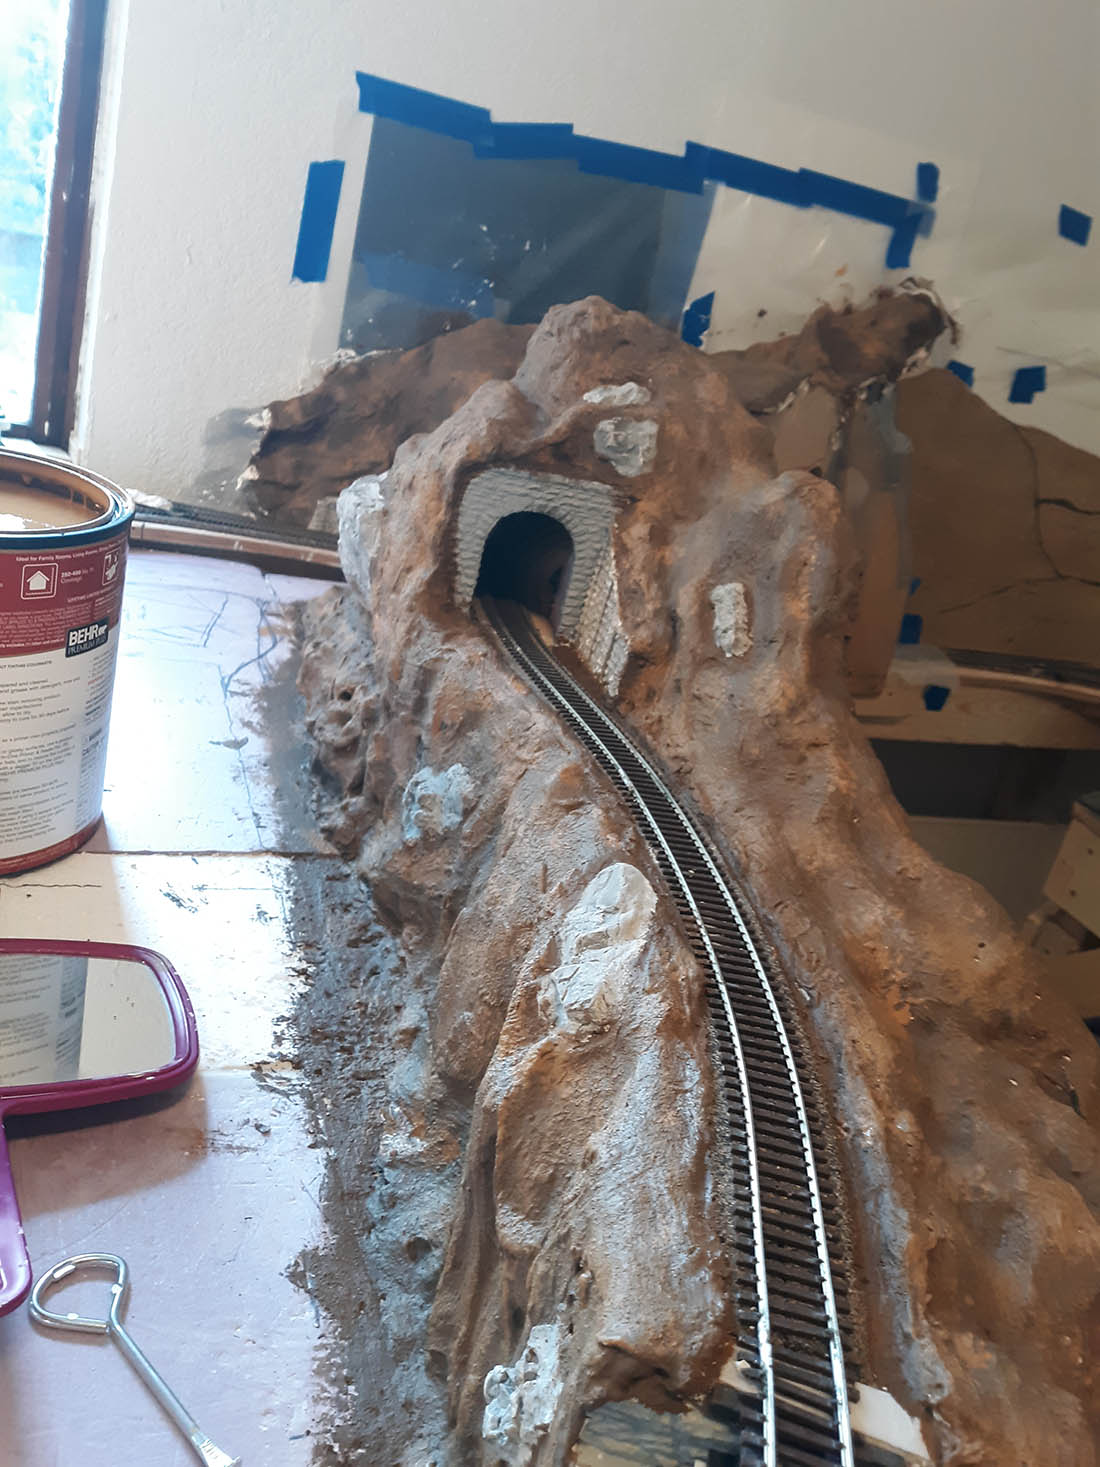
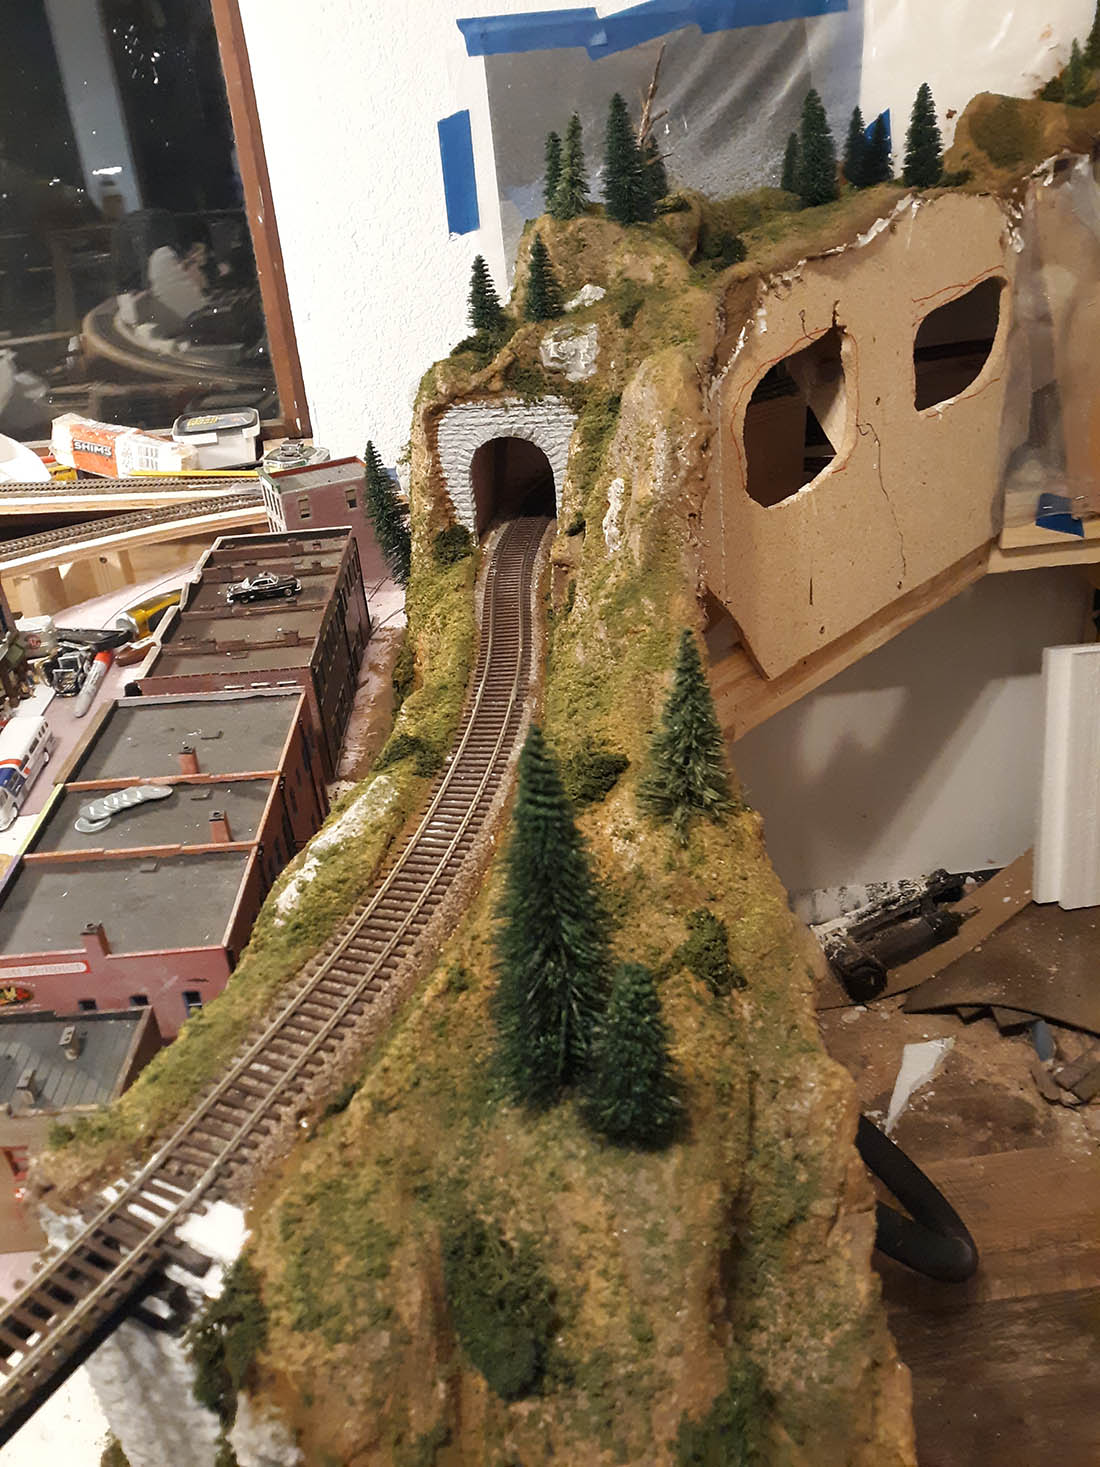
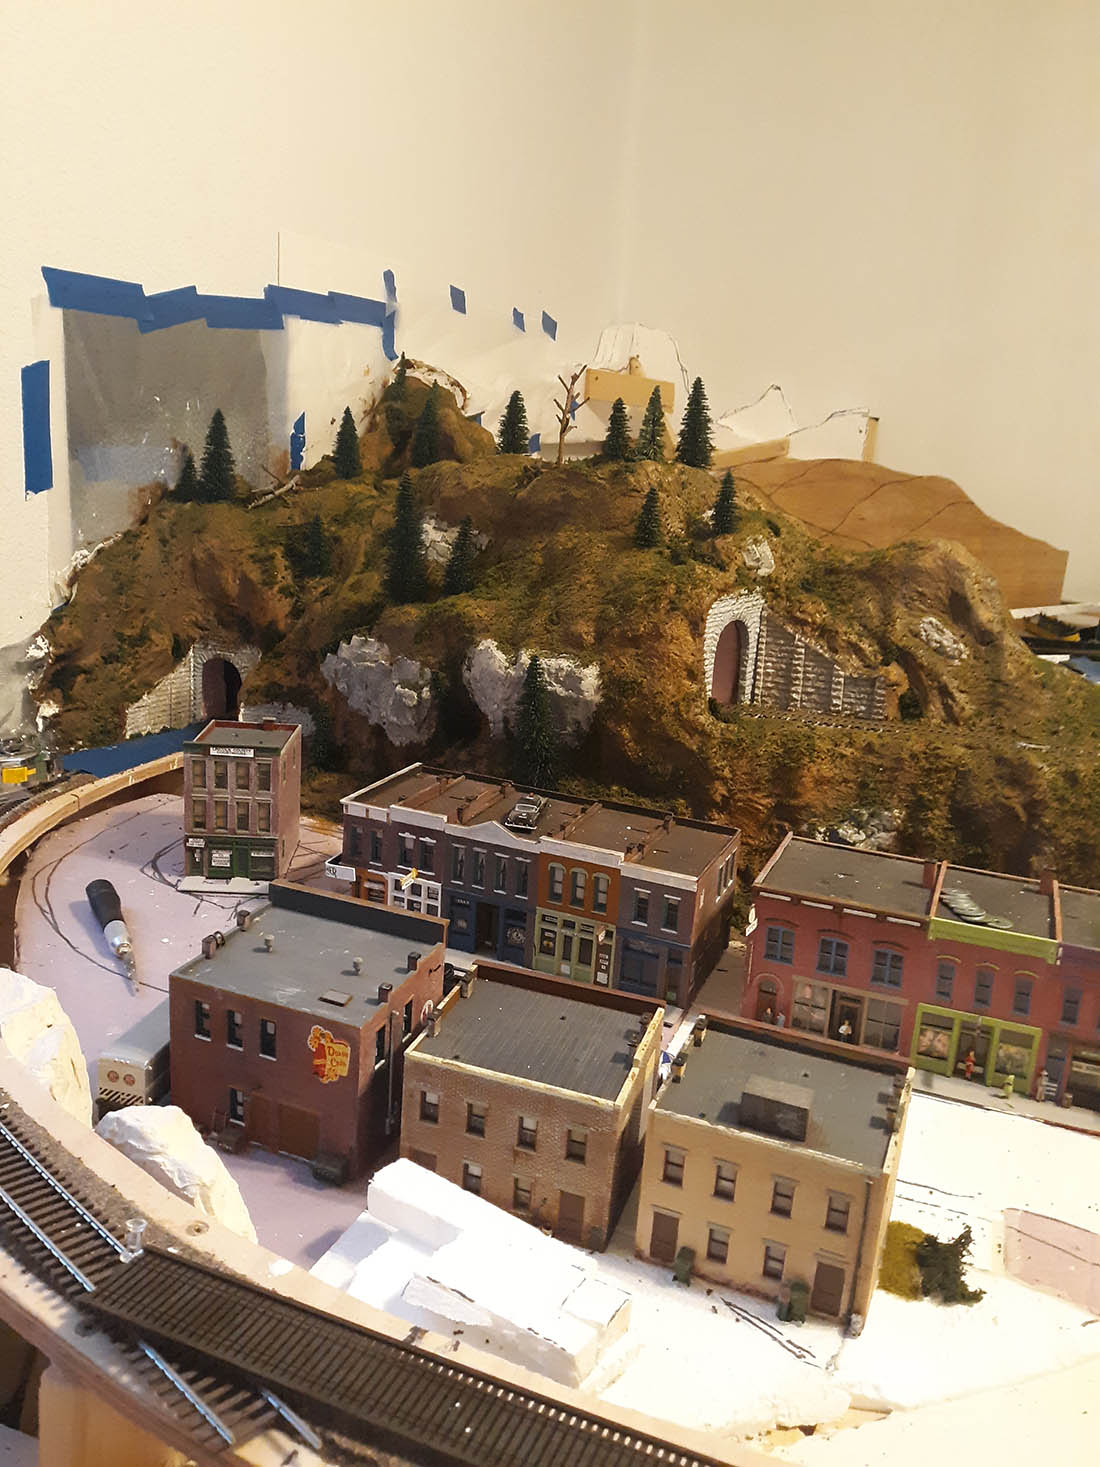
A huge thanks to Wayne for sharing his HO scale tunnels – if you look at his earlier posts, you can see just how busy he has been, and what a project it is.
Can’t wait until the next update!
That’s all for today folks.
Please do keep ’em coming.
And don’t forget the Beginner’s Guide is here if you want to start on your layout – don’t let the start stop you!
Peter’s been in touch with his Noch Baden Baden layout.
“Hi Al
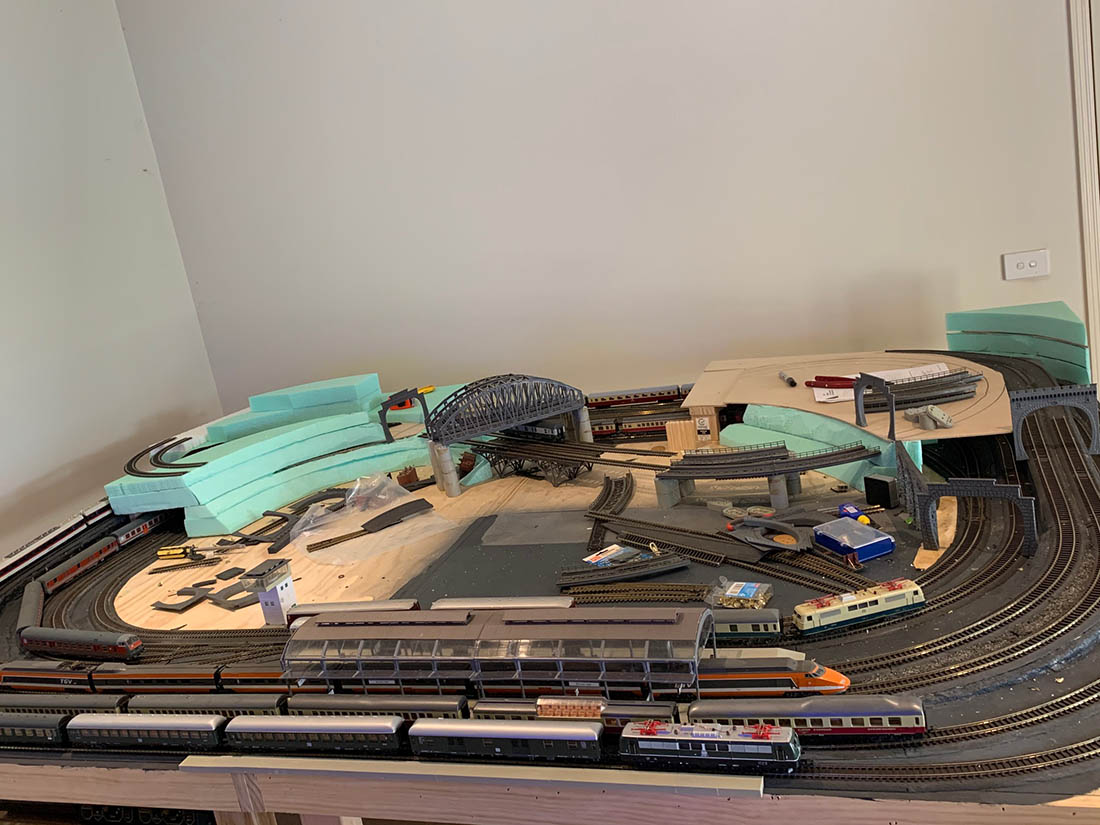
Thought I would give a quick update to my layout.
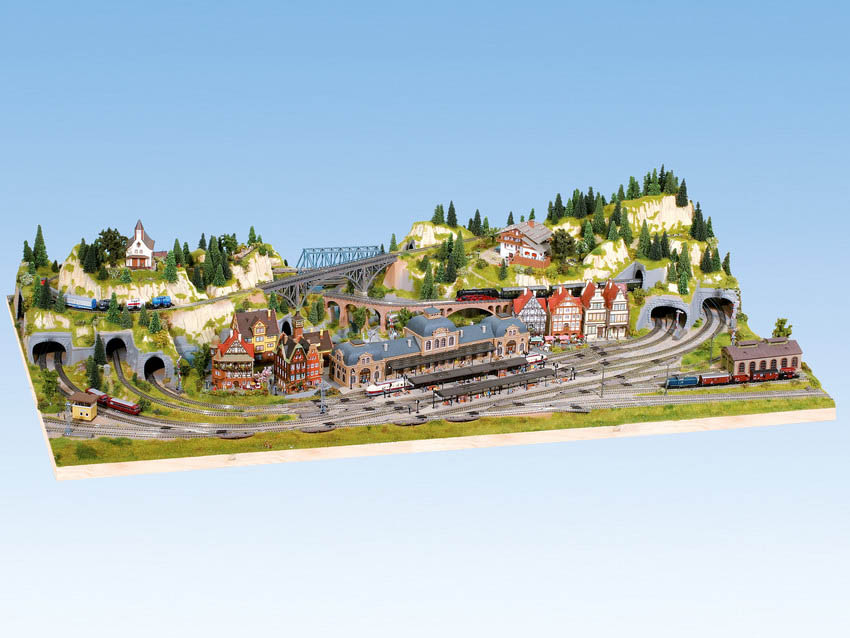
Still very much work in progress but thanks to the suggestions from your readers I am trying to attempt my version of Noch’s Baden-Baden layout (below).
I still need to purchase some extra ramps and finish building the mountains, but as you can see there will be a dual figure 8 track crossing the three mountains, with 3 double bridges (the 2 you can see plus 1 at the back of the layout).
Here’s Noch’s version below:
Peter”
A big thanks to Pete – I’m always banging on about making a start, and Pete looks like he’s jumped in with both feet. Can’t wait to see an update on his Noch Baden Baden layout.
And now on to Ray, who has sent in the latest video of his layout:
“Hi Al,
Just a follow up from my last email.
I’ve created a new video which shows a majority of my layout. Running three CSX locomotives.
Thanks for all you do.
Best,
Ray
Massachusetts, USA”
Now we have a question, from Peter.
It’s also the very reason I started the forum.
Although Steve’s question is quite technical, in the forum, anything goes – from complete beginner questions, to very specific questions like Steve’s.
If you want to make that start, you really can ask about anything you like on the forum.
What’s more, as you’ve seen from the comments on the blog, we’re a friendly bunch, so please don’t be shy about asking.
Ask and get started!
Anyhow, back to Steve. Who can help?
“Hi Al
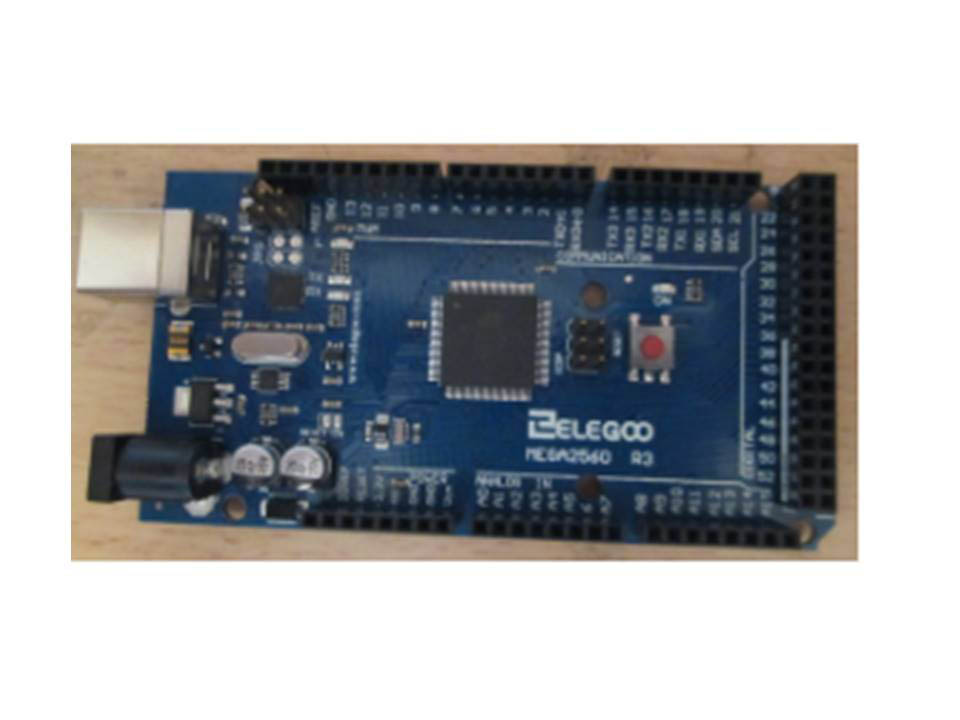
I wonder whether anyone out there is able to answer a couple of questions I have about using an Arduino?
It’s a microcontroller that you can program to work servos, motors, LEDs and so on. I am quite new to them myself (I first heard about them from a post on your site). I’m fine with the programming, it’s wiring the components that I’m having problems with.
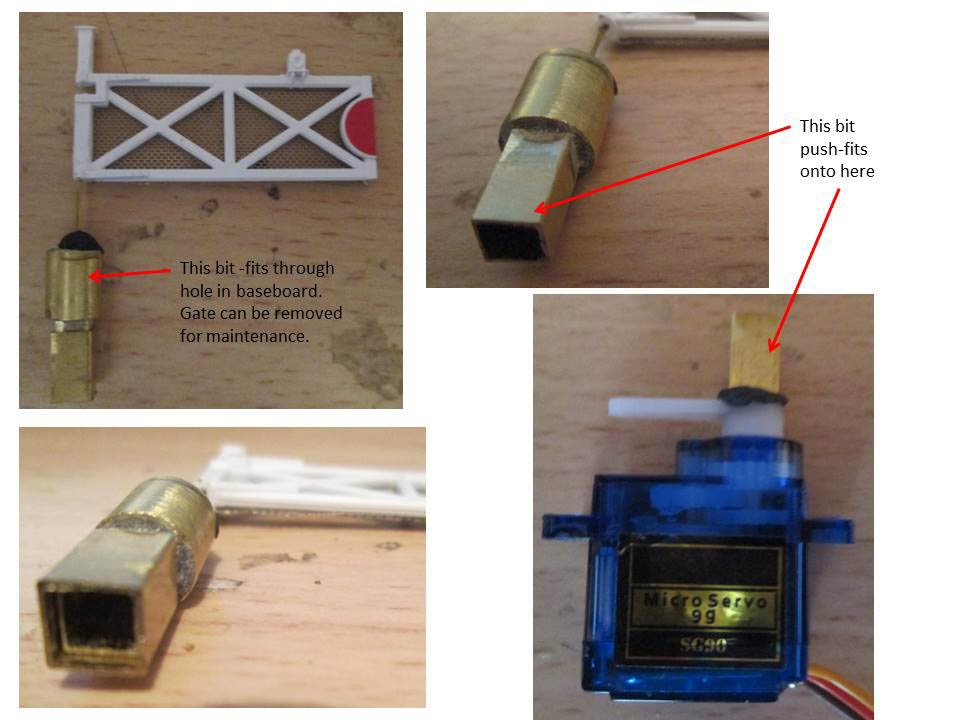
I am building a working level crossing, the older type used in the UK with gates rather than barriers. Each of the four gates is moved through 90 degrees by a servo. So far, so good, I have wired the servos up to the Arduino and written the code to make the gates open or close when I click a button on a remote control.
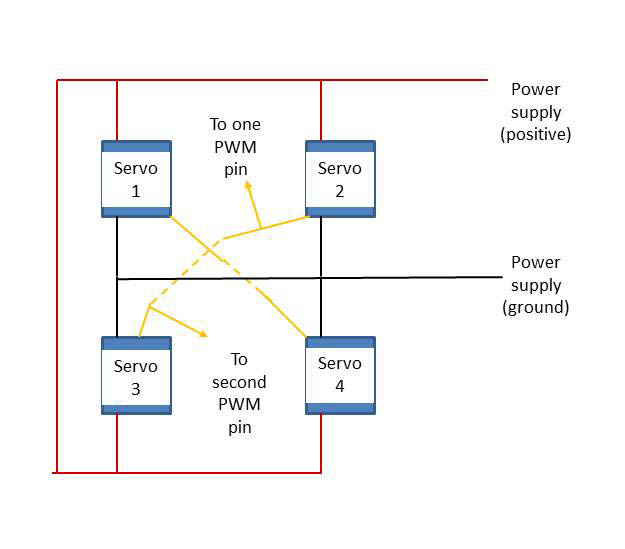
Each servo is connected to one of the Arduino’s output signal pins. At present that uses 4 of the pins, but as two of the servos move clockwise and two move counter-clockwise I think I can just use 2 pins instead of 4, with each of those pins sending the control signal to 2 servos. My first question is have I got that right?
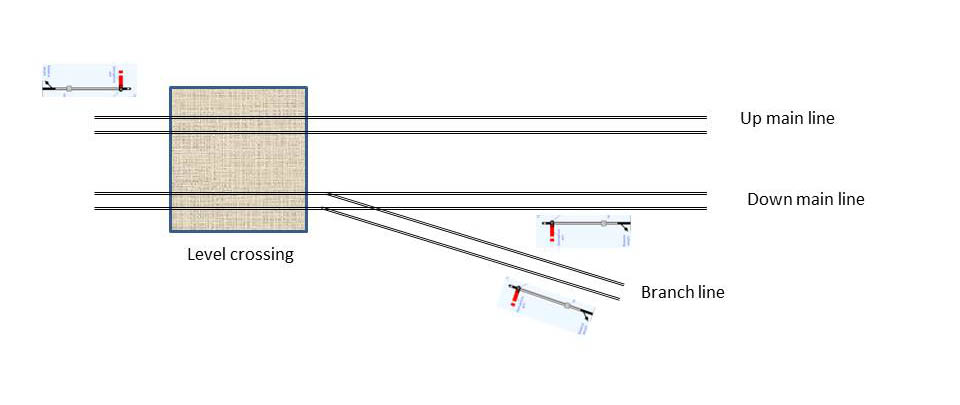
I have three semaphore signals (Up, Down and a single line branch joining the Down line) guarding the level crossing, which I want to control from the same Arduino board using stepper motors rather than servos, so that I can program in a nice subtle “bounce” when the signal arm falls to danger. Each stepper motor needs to be attached to FOUR signal pins, plus the separate power supply, and I want to be able to work the signals one at a time rather than simultaneously.
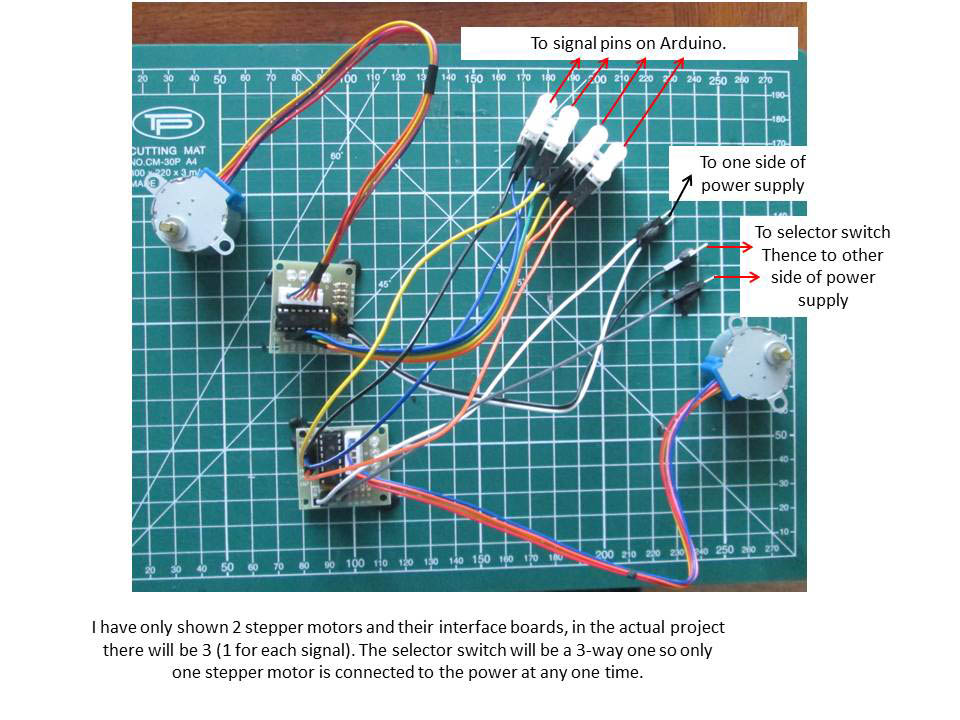
Now, here’s my second question. Can I wire the four signal leads from all of the stepper motors together and use something like a relay wired into the power or ground wires of the motors to select the appropriate signal stepper motor for operation? Otherwise I will be running out of Arduino signal pins (2 or 4 for the gate servos, 1 more for the branch point servo, 1 for the infra-red sensor for the remote control and 12 for the three stepper motors).
Thanks in advance
Steve, Lincs, UK”
If anyone can help Steve, please do leave a comment below.
Now on to something completely different.
It’s an email I get sent often. It’s old, but gold. It did make me chuckle the first time I saw it.
Here you go:
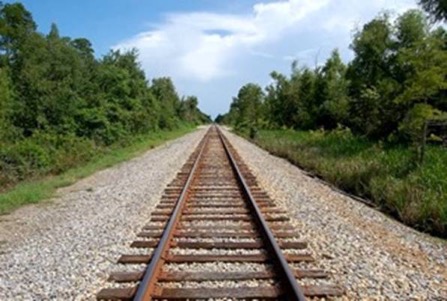
The U.S. Standard railroad gauge (distance between the rails) is 4 feet, 8.5 inches.
That’s an exceedingly odd number.
Why was that gauge used?
Because that’s the way they built them in England, and English expatriates designed the U.S. Railroads.
Why did the English build them like that?
Because the first rail lines were built by the same people who built the pre-railroad tramways, and that’s the gauge they used.
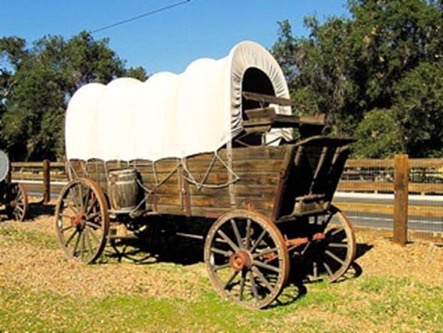
Why did ‘they’ use that gauge then?
Because the people who built the tramways used the same jigs and tools that they had used for building wagons, which used that wheel spacing.
Why did the wagons have that peculiar wheel spacing?
Well, if they tried to use any other spacing, the wagon wheels would break on some of the old, long distance roads in England, because that’s the spacing of the wheel ruts.
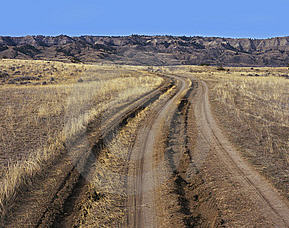
So, who built those old rutted roads?
Imperial Rome built the first long distance roads in Europe (including England) for their legions. Those roads have been used ever since.
And the ruts in the roads?
Roman war chariots formed the initial ruts,which everyone else had to match for fear of destroying their wagon wheels.
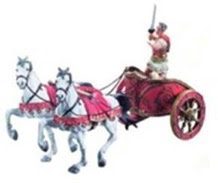
Since the chariots were made for Imperial Rome, they were all alike in the matter of wheel spacing.
Therefore, the United States standard railroad gauge of 4 feet, 8.5 inches is derived from the original specifications for an Imperial Roman war chariot.
In other words, bureaucracies live forever .
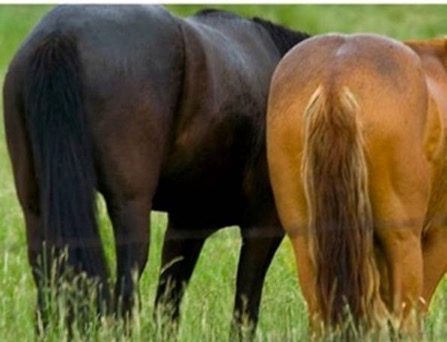
So the next time you are handed a specification, procedure, or process, and wonder, “What horse’s ass came up with this?”, you may be exactly right.
Imperial Roman army chariots were made just wide enough to accommodate the rear ends of two war horses.
Now, the twist to the story:
When you see a Space Shuttle sitting on its launch pad, you will notice that there are two big booster rockets attached to the sides of the main fuel tank.
These are solid rocket boosters, or SRBs. The SRBs are made by Thiokol at their factory in Utah.
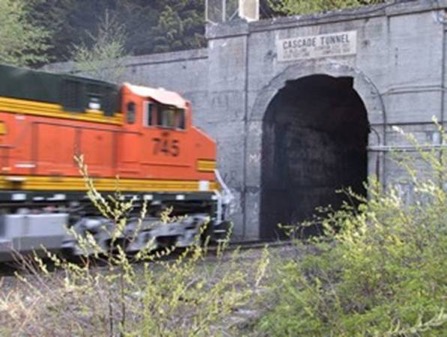
The engineers who designed the SRBs would have preferred to make them a bit larger, but the SRBs had to be shipped by train from the factory to the launch site.
The railroad line from the factory happens to run through a tunnel in the mountains and the SRBs had to fit through that tunnel.
The tunnel is slightly wider than the railroad track, and the railroad track, as you now know, is about as wide as two horses’ behinds.
So, a major Space Shuttle design feature of what was arguably the world’s most advanced transportation system was determined over two thousand years ago by the width of a horse’s ass.”
That’s all for today folks. Please do keep ’em coming.
If you missed Mal’s first post on how to stop derailments, it’s right here.
Now for part two:
“Following on from the first article which discussed the importance of track gauge and the correct relationship of the wheels to the track gauge.
One of the questions that arose was “if my train will go round many times without de-railing why does it then suddenly de-rail? And how can I stop derailments like this?”
That is a really good question and of course it is undoubtedly the thing that frustrates us modellers the most.
Just when you think everything is OK the train then seems to randomly jump off the track for no reason! We have all been there!
Well firstly, it clearly isn’t for no reason. There has to be a reason or it wouldn’t have done it.
As a reminder from part one, wheels too narrow may collide with check rails or point switch blades and wheels too wide may drift over the frog or outside of the far rail.
In either instance there are two positions the wheels can take up at their extreme of travel. Either hard up against the near rail or hard up against the far rail.
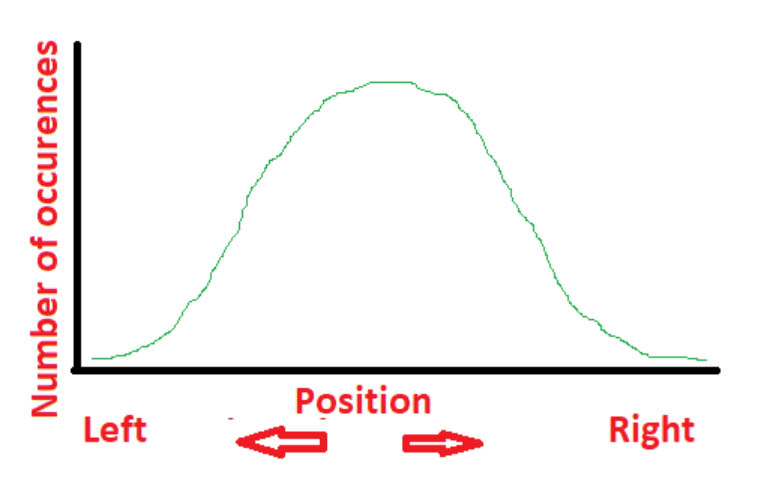
Both of these are the extremes of travel, the majority of the time they should sit exactly half-way between the two extremes. (warning! Warning! some maths coming up!).
The situation is governed by “standard Distribution” which applies to most things in the analogue world. Some of you may be familiar with the “Bell Curve” graph of standard distribution. It looks like this.
So for wheels that are not grossly out of gauge, you can see that they spend a lot of their time sitting somewhere between the two extremes. Hence, you don’t see the derailment all the time. This Assumes that no other factors come into play, that the track is perfectly level and perfectly straight! But the real world is not like this is it?
There are, however, other factors that affect the position of the wheels in relation to the rails. That skews the graph and leads to more regular derailments.
Perhaps a look at how a railway wheel should work will help will help us stop derailments.
The theory of the railway wheel:
Unlike a cars wheel the surface of the railway wheel is not flat/square to the ground. We all know that it is sloping. Why? What is the reason behind this?
Try this experiment for yourselves:-
Take a cylinder of some kind (a beer can will do just nicely! Be sure to empty it first!) Now take two broom poles and lay them out on the floor (like they were rails).
Place the beer can on the “rails” and push it along the “rails”. Chances are it didn’t get to the far end without wandering off to the left or right.
You would have to be very lucky if it started and ended exactly dead centre. This is because there is no force acting on the flat surface of the can to steer it, there is no stability in the system.
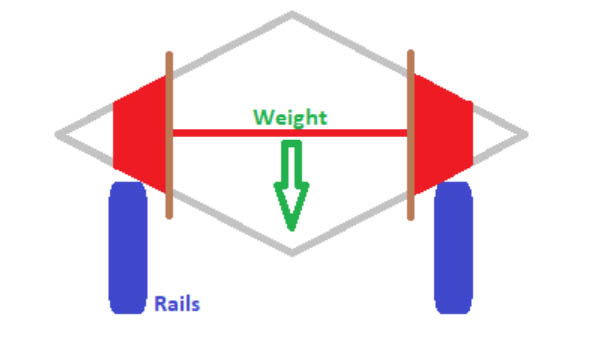
What you need is a double cone (see below) to stop derailments.
This now has stability and will self-correct if knocked off course and will try to sit perfectly in the middle at all times.
Now the eagle-eyed will have realised that we don’t need a solid cone in order to achieve this effect.
The pointy bits are relatively superfluous and the great lump in the middle is just wasted material. So we can cut bits off this cone and thin down the middle whilst still maintaining the shape, till it looks like this:
The original cone is in grey, and the brown additions are the flanges of the wheel which limit the amount of travel the cone (wheels) can make left or right in the diagram. We have, in actual fact produced a trains wheel and explained why it is the shape it is. Cone shaped!
The purpose of this shape is for the wheel to ride exactly between the two rails and without the flanges touching the rails at all! Now it is important that you remember this last fact. The flanges should not touch the rails at all. In this perfect position a de-railment is highly unlikely to occur.
In the real world, the track is slightly banked in curves (this is called superelevation) so that the forces all balance back out when the train negotiates the curve at the design speed for the track.
The design speed is the speed assumed by the engineers to be the optimum speed trains will negotiate the curve. If the train travels at that speed then the picture above will apply. Neither flange will be touching any rails and the wheels will sit perfectly balanced between the two rails.
If the train goes too slow the wheels will drift downhill towards the inside rail and the inside flange will be the only thing stopping them from falling off the track.
Now hands up anyone who has ever heard a freight train squealing away as it slowly rounds a curve? This is because it is going slower than the design speed of the curve which was probably set for a faster passenger service.
What if the train exceeds the design speed? i.e. goes too fast? Well, the whole train will ride up towards the outside rail and it is the outside wheel flange that will be forced to prevent the train just leaving the tracks to the outside of the curve.
To assist with keeping the wheels on the track engineers sometimes include a check rail on the inside rail to catch the flat back of the inside wheels flange. Thus, trains going too fast around a curve squeal too!
So in short, flange squeal is a bad sign. It means that the wheels are not in their intended balanced position exactly half-way between the rails.
All very interesting, but what has this got to do with my model railway Mal? I hear you all say!
Well most model railways break most of the rules when it comes to curves. Let’s look at these and why they may cause your de-railments, and more importantly, how you can stop derailments.
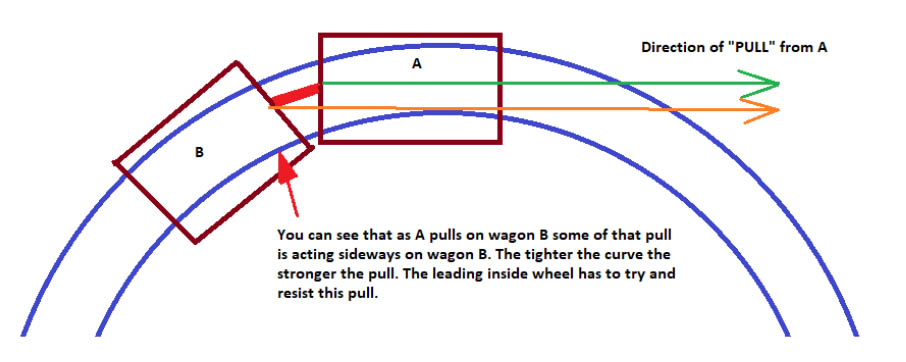
i) Most model railways the curves are unrealistically tight compared to real world railways.
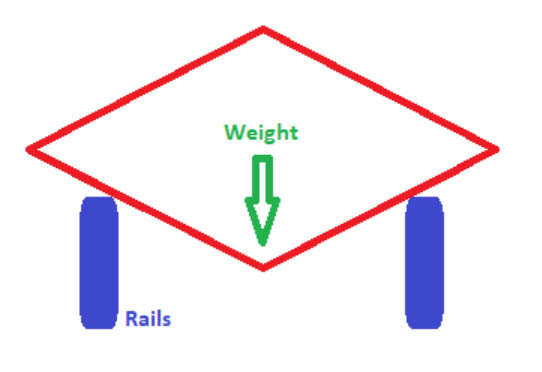
If the curve is tight it means that the preceding wagon is having to pull sideways on the wagon that is following it – in order to get it to follow. That sideways load pulls the wagon to the inside of the curve.
Thus, the flanges are likely hard up against the rail, just desperate to jump over and de-rail towards the inside. All it then requires is either a sudden jolt or a slight dip in the track to allow the tiny little flange to escape over the top. (see the diagram)
There are a few things we can do to help this situation.
a) Design the layout with the widest radius curves you can possibly get away with. Make this your focus when designing and then fit everything else in after getting all the curves as wide as possible.
b) be very careful laying the track. Don’t have dips or rises in either rail. Keep them parallel/level.
c) don’t put light weight wagons in front of heavier ones. The loaded/heavy vehicles at the back resist being pulled along. When it gets to curves they act like brakes. The loco pulls at the front and the train stretches out. In fact it tries it’s best to straighten into a straight line. The casualty is the light wagon which literally gets pulled up and over the inner rail.
ii) Most model railways do not implement transition curves, where the straights gradually transition into the curve (following a set mathematical model which I won’t go in to here but if anyone wants to know how then let Al know and I will oblige). Instead, we expect our wagons to go instantly from straight to a constant radius!
a) Plan for transition curves. Don’t just expect your train to jump from straight to curved track instantly. After all, if the real thing did that most of the passengers would exit via the windows!
b) If you absolutely have to use set-track, and go from straight to curved, then choose the widest radius possible. Give it a fighting chance!
iii) Most model railways lay their track flat on the curves (no superelevation)
OK I am not even going to risk getting the wrath of either side here!
Some modellers swear by level track in the curves. Some prefer superelevation.
I have both! Superelevation on the mainlines where the speeds are generally higher and flat in the sidings and off scene.
Guess where I get most of my de-railments? Yup! On the flat stuff!
iv) Most modellers who do superelevation don’t scale it for the weight and speeds involved they copy the real railway and physics just doesn’t work like that!
The amount of bank required in the rail is governed by the same principles that govern the amount of bank that an aircraft needs in order to complete a turn at any given speed around a given radius. I should know being an Airline Captain!
It is, therefore, quite simple to determine the amount of bank that would be required for an object to traverse around a railway track of a given radius at a given speed. The maths is hard but the answer is “hardly any!” Almost imperceptible. The 2mm or so that looks right in relation to the real world is way too much for a model. 1mm will suffice and will impose less load on the inside flanges.
Hands up! I did 2mm and on my superelevated sections certain trains can de-rail if they go too SLOW! They pull off the inside rail. My own fault, I will know better for next time!
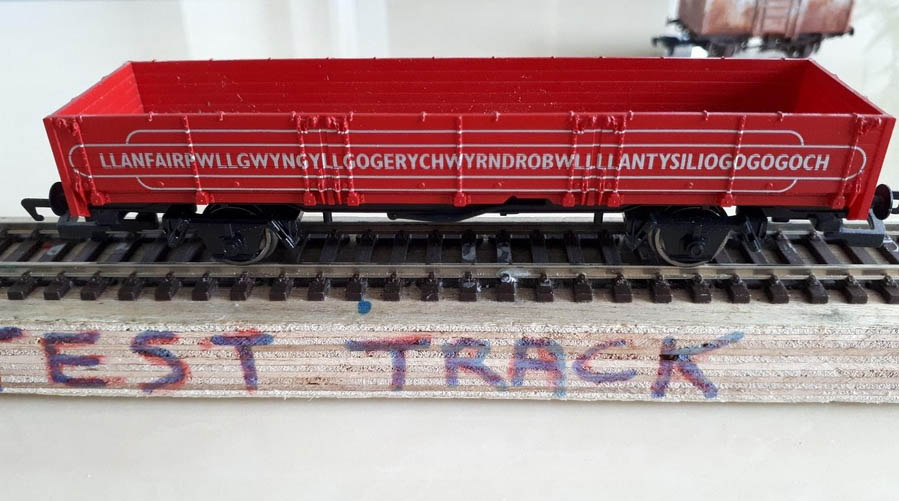
v) Freeplay in the axles of the wagons/coaches.
Look at the little experiment below using one of my mid-sized wagons. I chose this one as it is easy to refer to by name! (altogether now – it’s Mal’s Llanfairpwllgwyngyllgogerychwyrndrobwllllantysiliogogogoch wagon – you have to hand it to the Welsh, they sure know how to keep it short and snappy!)
We can see the effect of the free play in the axle boxes and the effect of the tolerance between the scale wheels and the scale track.
I set up this little jig to highlight the problem. It’s a very helpful way to stop derailments.
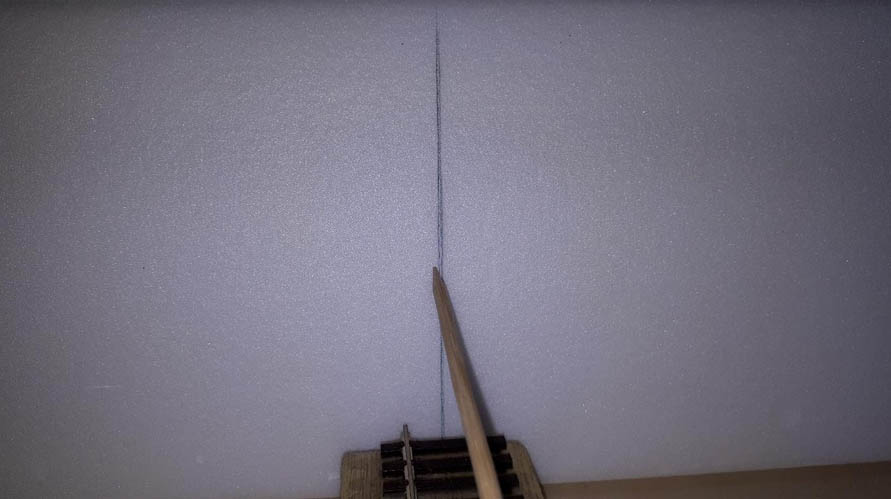
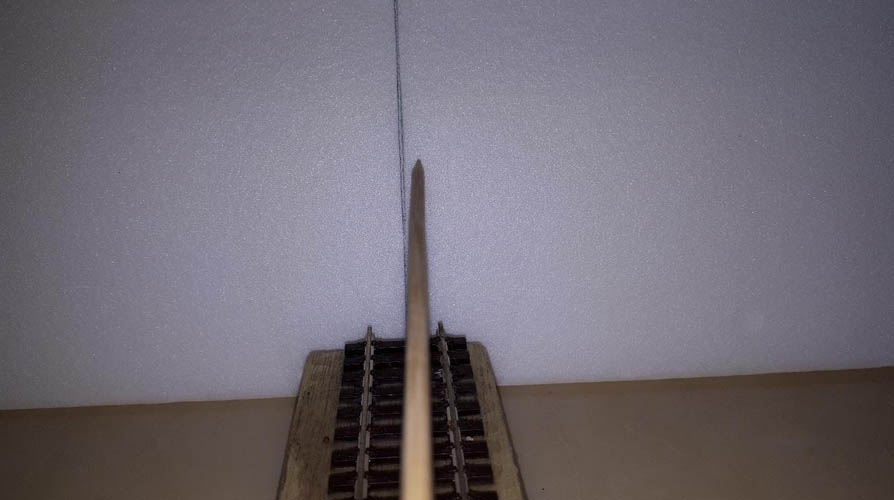
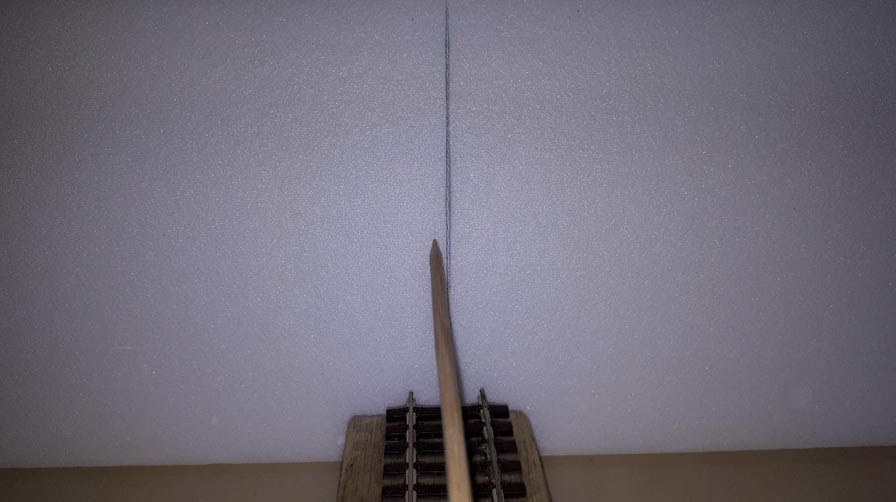
And we can see what the situation looks like in the centrally riding position in the picture below
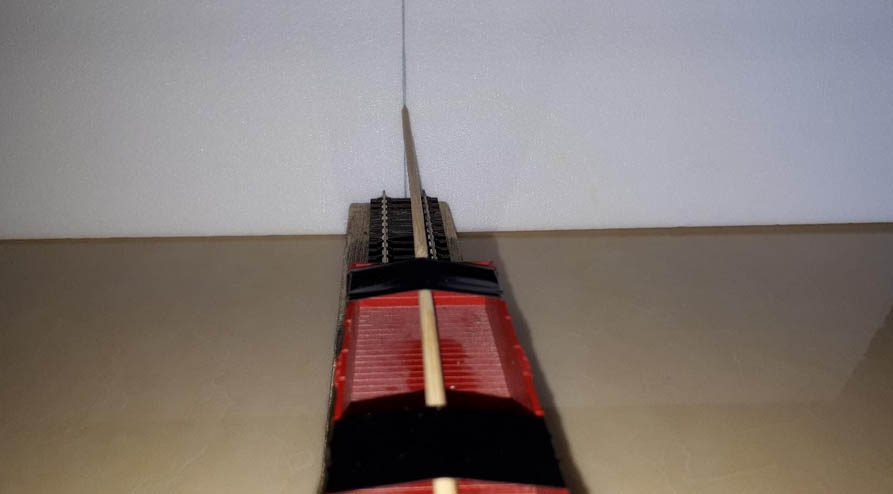
Now for the variations:-
a) Pushed all the way to the near rail
b) Pushed all the way to far rail
c) rotated clockwise as far as it will go
d) rotated ant-clockwise as far as it will go
You can see that this presents a huge variation in the possible alignment of the wagon at any point on the track. Such “sloppiness” would condemn this wagon on a real railway to the scrap yard, yet this is brand new on my railway.
Now let us look at what happens when we “reverse” a train of wagons and how this variation can play out to cause derailments.
You can clearly see how the vectors are out of alignment and how much sideways and twisting forces are being applied to each wagon in this set.
By the time we get up to ten wagons there is next to no chance that this train is going to go smoothly in reverse! That is the sad reality for me, this set of wagons is particularly difficult to shunt in reverse.
It has a great tendency to twist and concertina itself off the track. It only serves to remind me how bad I am at making wagon kits!!!
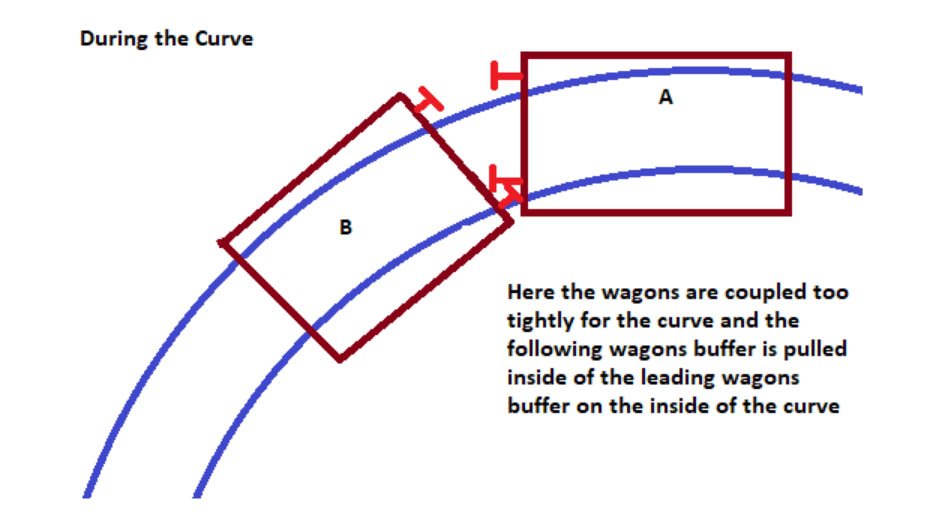
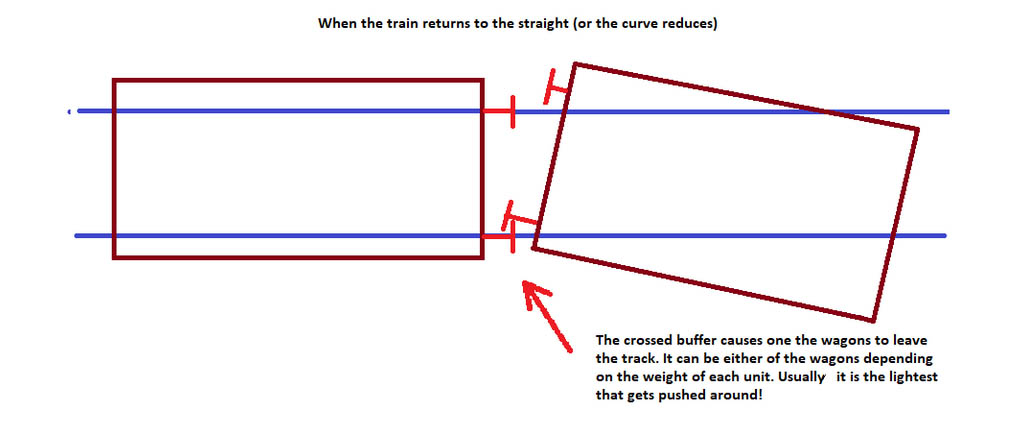
BUFFER LOCK
Buffer lock is when the buffers of one car get behind the faces of the buffers of the next car whilst going round a bend. Then when the train arrives on the straight one car literally pushes the other sideways off the track. As below.
The cures are either:-
i) use longer couplings so the buffers don’t sit so close together
ii) Increase the radius of you curves.
INCLINES!
Remember, the locomotive is pulling on one end of the train, the weight of the train is acting like a brake. Therefore, the tendency is to stretch the train out as far as it will go.
When the loco goes forward you see each coupling stretched to it’s maximum before pulling on the next wagon etc. etc.
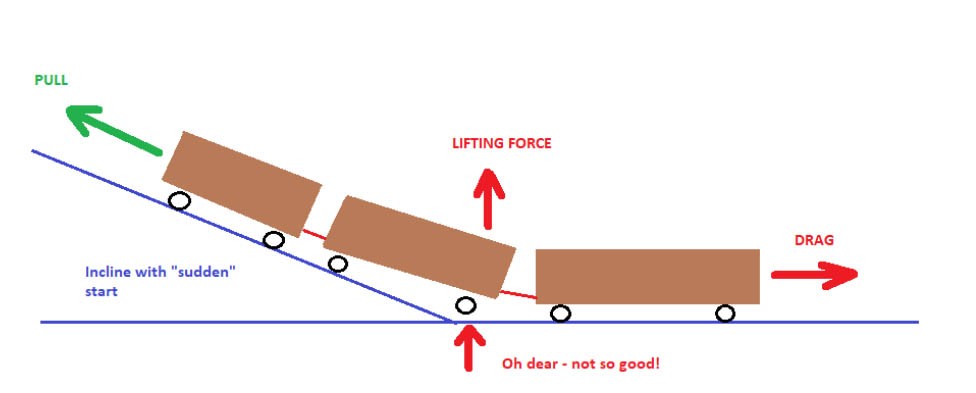
So the train wants to form a straight line between two points, and then you go and introduce an incline! This is what is happening at the start of the incline.
You can see that the train is struggling to maintain its weight on the track at the abrupt start of the incline. If you add an incline into a curve then you have pretty much written de-railments in to the fabric of your layout.
If you really must go up hill you need to do it as gently as possible forming a very shallow curve into the slope and certainly not jumping straight to the final gradient. Avoid starting the incline near a curve. You want the whole train on the slope before you attempt to round a curve.
And finally… (or is it? You decide!)
One of the comments on part one raised a really good point about how we lay the track in the first place to stop derailments. I glue mine down with instant carpet adhesive.
I spray the area, leave for two minutes till tacky and then carefully press the track onto the glue. I find this is extremely useful when laying flexible track as you can create and maintain complex curves quite easily (e.g. Transition curves)
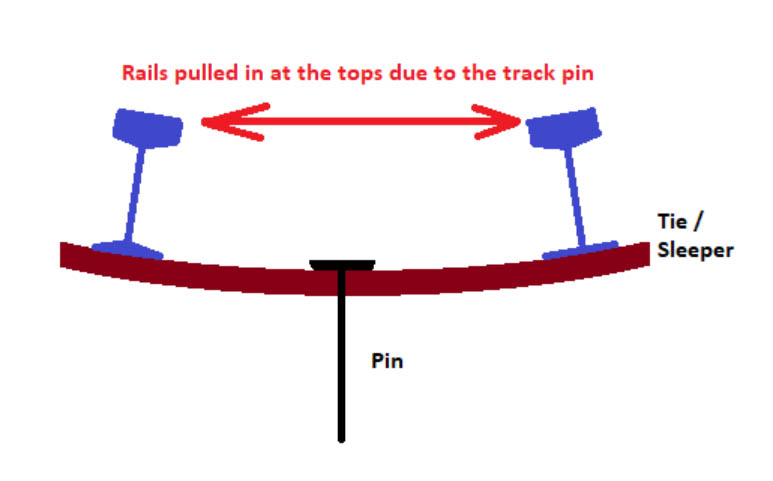
However, for those who pin the track down, you may very well be introducing an error in the track gauge by being over enthusiastic with the persuading stick! (hammer for the purists)
If you drive the pin in too far you risk bending the tie/sleeper which in turn rotates the rails inwards making de-railing much more likely.
The advice given was to pin the ties / sleepers at their ends. This will help minimise the bowing effect but remember, if you are too enthusiastic with that you will bend the rails outwards!
The secret is taking care and only drive the pin in sufficiently to hold the track in position, you are pinning down model railway track – it is not a structural member of your house!
Well that’s the thoughts of Chairman Mal for part two of how to stop derailments!
I hope this has provided the information required for you to figure out which of the laws of physics are making your trains jump the tracks and even if you can’t cure them on this layout, at least you know what to avoid when you make that start on your next one.
I’m off to try and fix my Class 45 which keeps exiting stage left on the curve out of the station…it’s a constant battle…
Happy modelling everyone.
Mal
North Wales”
A huge thanks to Mal for a wonderful explanation on how to stop derailments. It’s a subject that drives us all mad at some point.
Please do leave a comment below if it’s been helpful.
That’s all for today folks.
Please do keep ’em coming.
And don’t forget, the Beginner’s Guide is here if you want to get going on your very own layout. Don’t let the start stop you…
Best
Al
PS If you missed part one how to stop derailments, it’s right here.