“Several recent articles have discussed the building of kit buildings, and scratch building. There’s another option I use for most of my industrial facilities, and that’s kit-bashing.
It’s fun to imagine the end result, and fit something into a logical group of added walls and buildings.
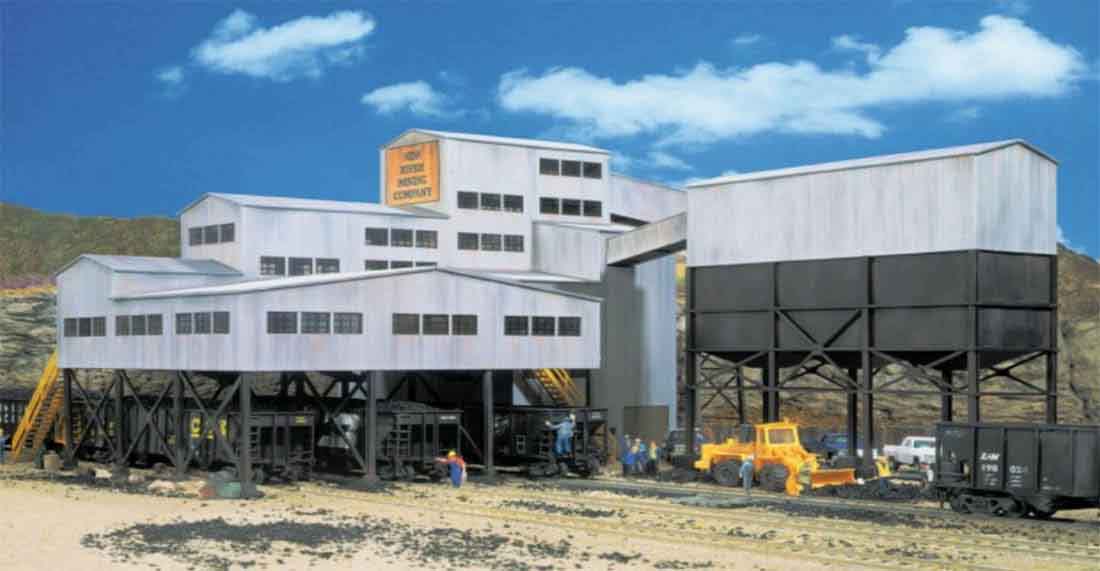
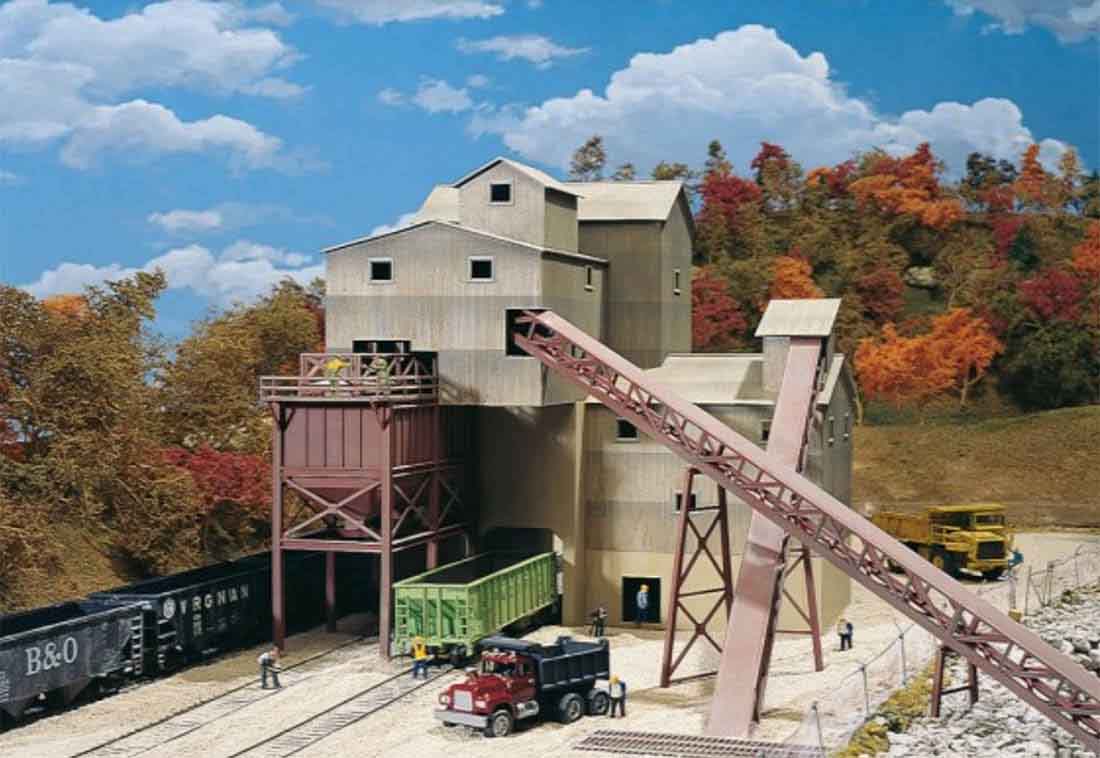
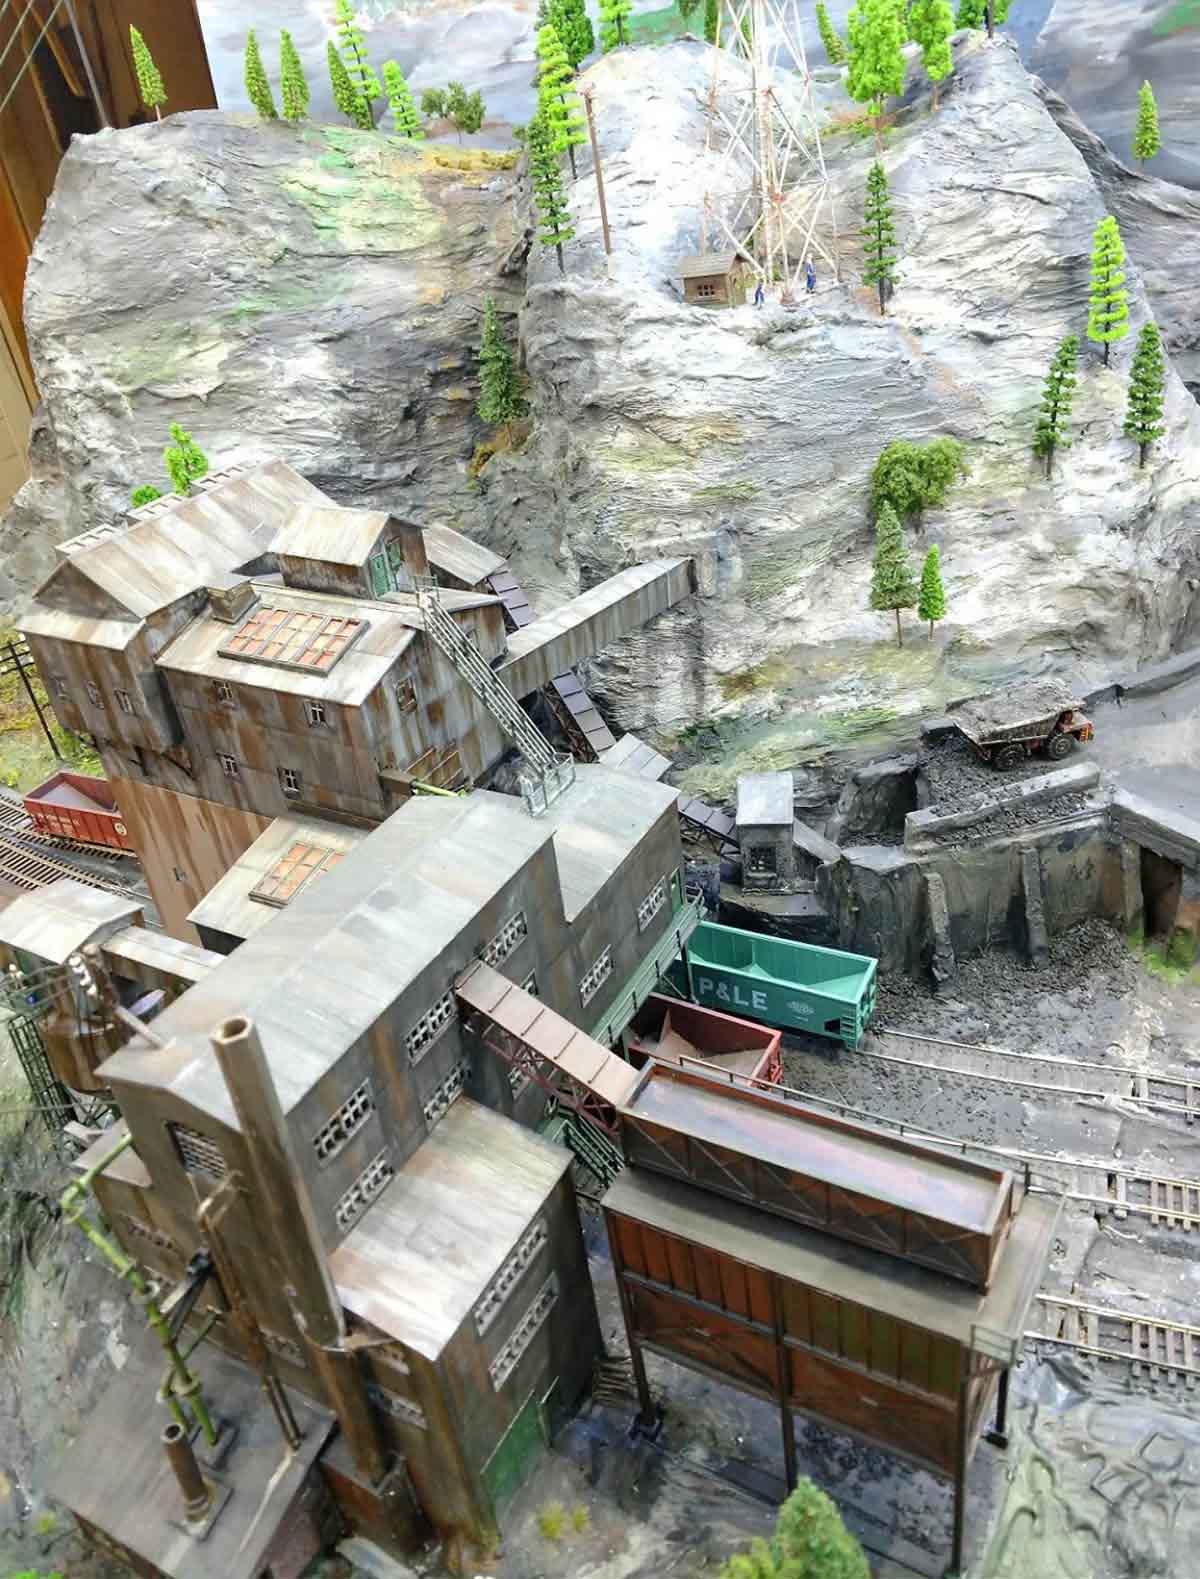
The first pictures are a couple of good, medium sized industries, only slightly related, the Walthers New River Mine, and the Glacier Gravel kits. One good point was that both had corrugated siding for some of their buildings, the gravel pit also had some conveyors that went well with moving coal around.
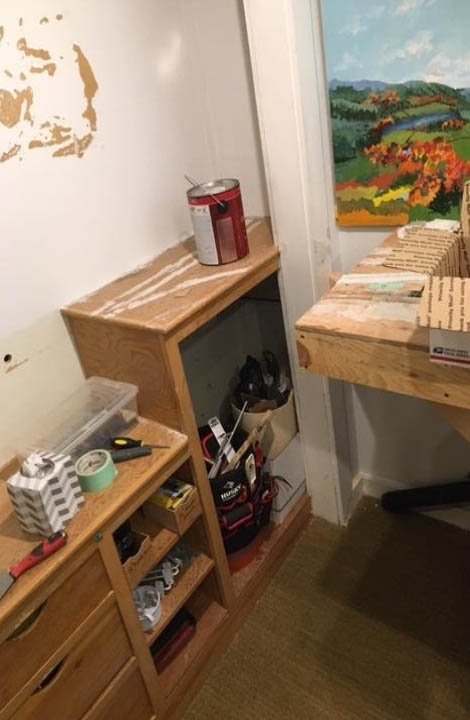
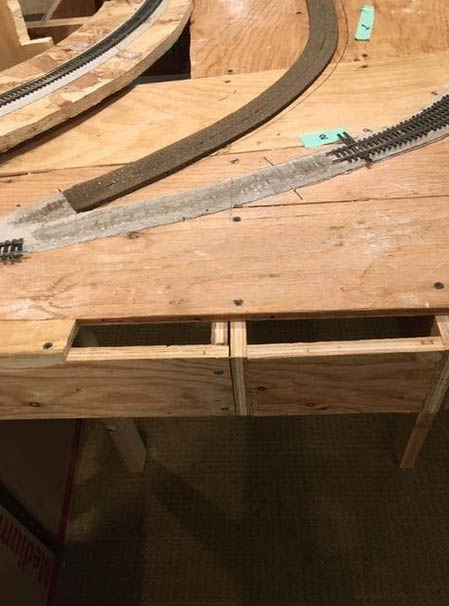
In order to aid in moving the module, and to assure the tracks that run under would not be prone to derailments, I decided to build them on a solid plywood base.
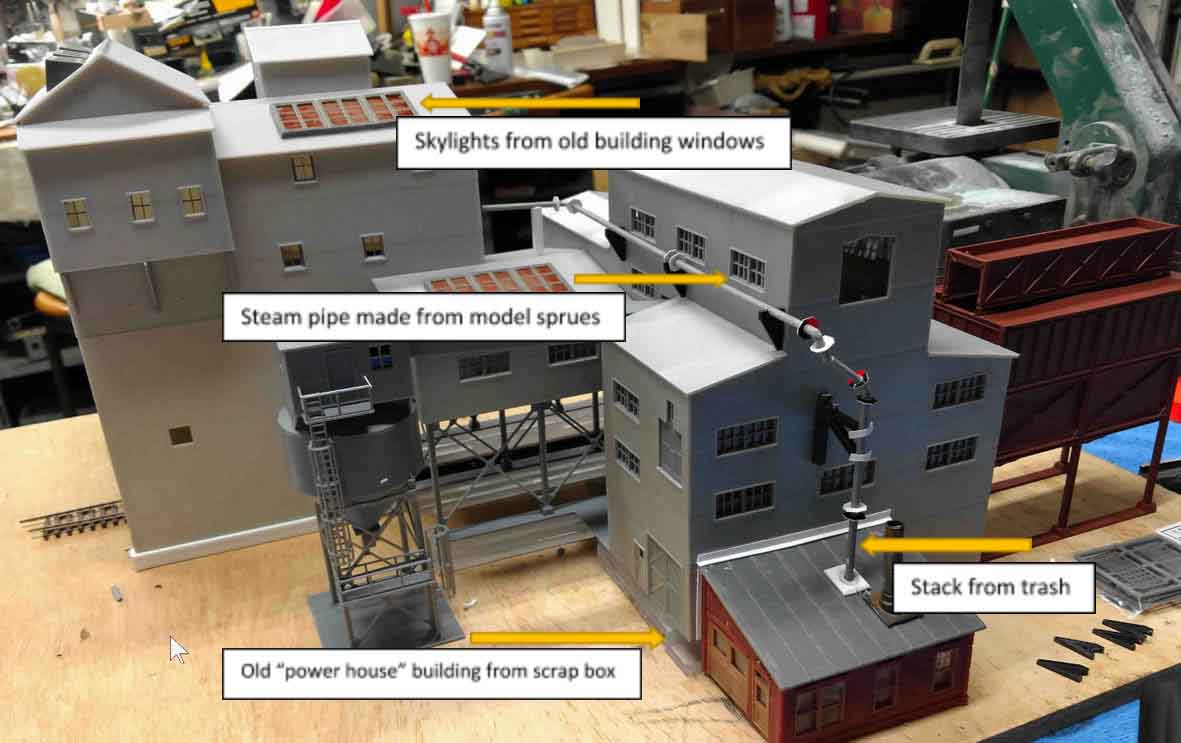
As this and all my models moved along, I started asking questions, like would they need a powerhouse? A source of compressed air and steam? Why would they run these inside an industrial building? Would they need light? Maybe skylights? Would there be walkways to connect the roofs of the buildings? How about electrical power?
The answers to these questions then became the “add-ons” to the base building. I also found the clearance height of the gravel pit tracks was less than the coal mine, so those parts of the building were raised and while I was at it decided to raise the clearance for the tracks for the coal mine.
I also re-arranged the various out-buildings, and connected them with walkways, pipes and ladders.
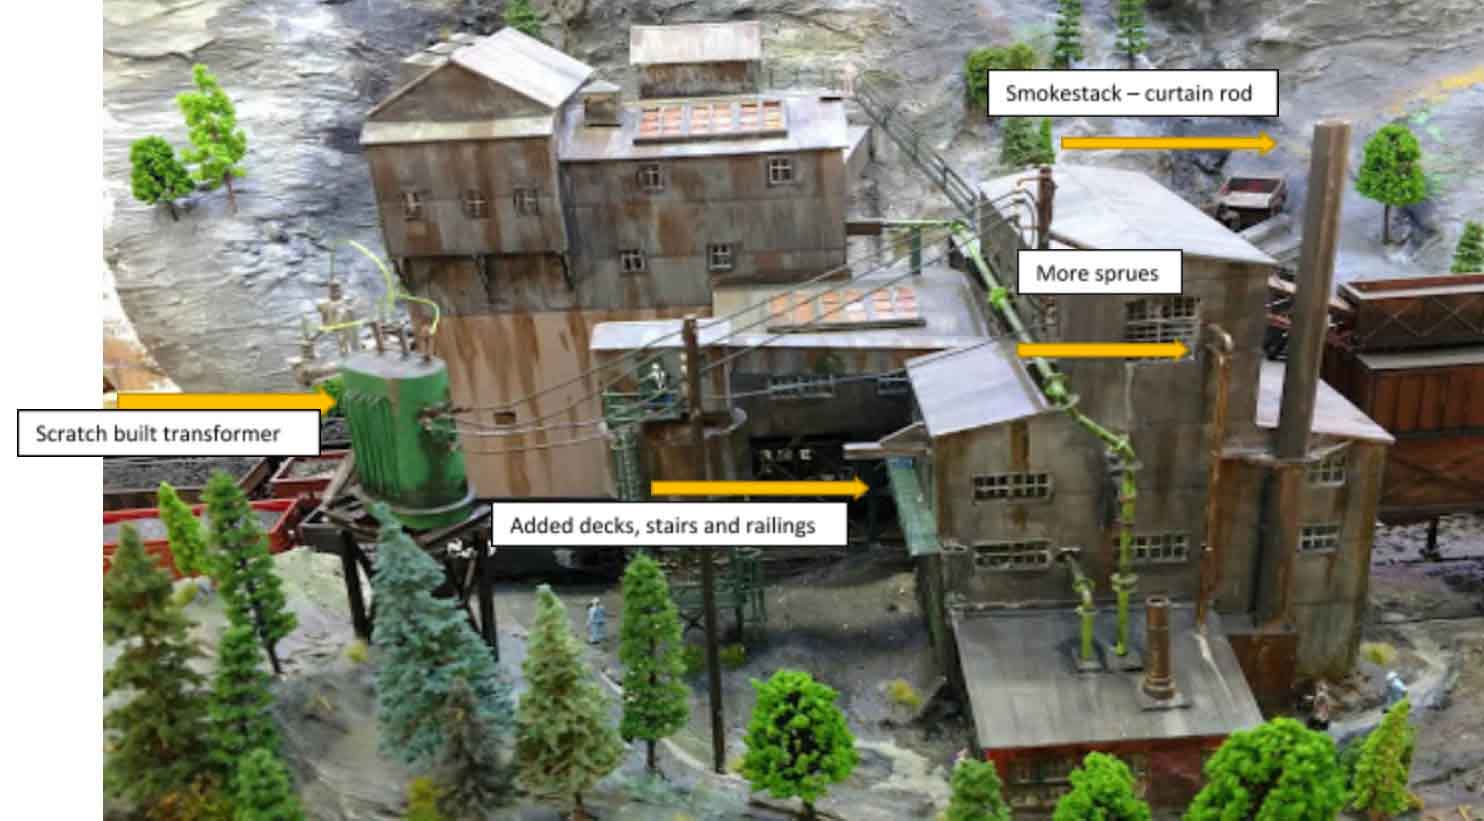
To explain my arrows, pipes and air lines are made from the sprues that the pieces of model kits come on. After a few kits there are plenty left and they are different sizes. I bend them by heating over a soldering pencil, flanges and valves are styrene discs cut out by a paper punch.
The transformer was an old pill bottle, and wiring is thick thread, painted for stiffness once glued to the insulators.
When I think the model is done, I paint it to look like it was built in the Jurassic period…OK, maybe not quite that old, but 30, 40 years old. Coal mining is a tough, dirty, and normally short-lived industry, as the mines play out on a few years, so building maintenance is not a top priority. I always add lots of “rust” to the sides.
Many fine modelers use airbrush to paint and weather, I use artist brush’s, dry brush, and acrylics. I have used chalk powder but find it’s hard to get the look I want, and spraying to set the powder often changes what I thought I had.
These are the box front pictures of the 2 model kits to be “bashed”:
Picture below is the combined kits before painting
I suggest to all our modeling friends, try kit-bashing. It’s fun, and opens up many possibilities that solve clearance and other problems, like, what can I do with that corner? I know, build a triangle shaped building by kit bashing some side walls of a barn!
Take care and as always keep modeling!
John from Baltimore”
A huge thanks to John for sharing his kit build, or is it kit bash? It’s fab to read his thought process – no wonder his layout looks so good.
That’s all for today folks.
Please do keep ’em coming.
And if you want to stop dreaming and start doing, just like John did, the Beginner’s Guide is here.
Norm’s been in touch with a very unusual take on a HO scale modular layout.
The great thing about a modular layout is you can move it should you need to – most people never give any thought to this.
But what about taking apart a layout – even a modular one?
Norm shares some advice.
“Alastair..
I read the blog every day. I’m sure there are thousands of readers that get a lot out of it like me.
One theme you see most modelers focusing on is the BUILDING of a layout. Well I’ve got a different sort of job ahead of me for the next few weeks. I have to take the layout apart.
Thankfully, it was never fully operational after I started doing the scenery, (or else I’d be heartbroken) but it did run at one point.
Very few of those articles are written about the process of taking the modules apart in the event of a move.
I started building my layout more than two years ago. I was inspired by some of the history of railroads in the area.
I, with the help of several of my Berkshire Model Railroad Club friends, had made quite a bit of progress over the many months of building my first layout.
Then my wife and I decided to “downsize” and move. This is where we will put to test the concept of “modular benchwork.” Luckily, I had not completed the scenery or any of the turnout control systems, but this report will still be useful in demonstrating the modular concepts.
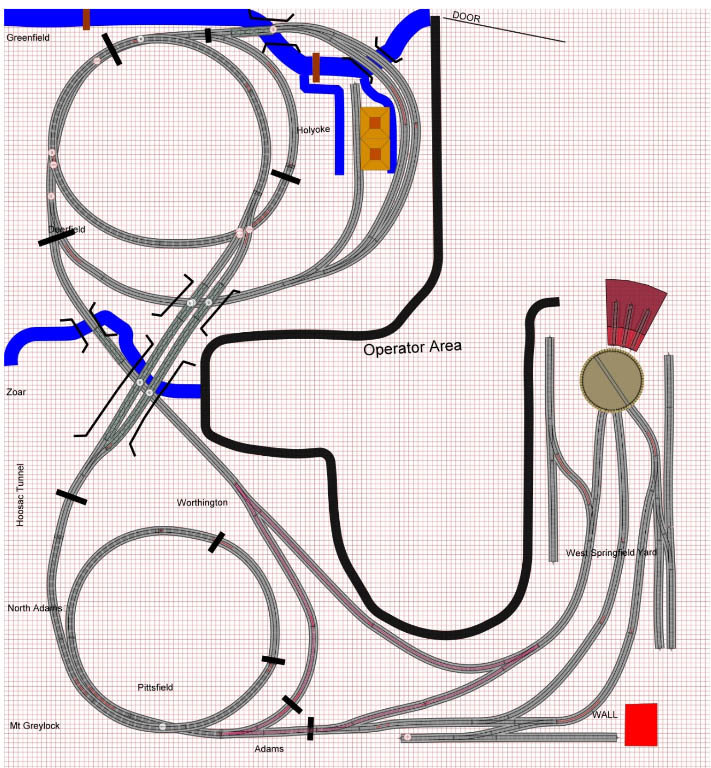
Before we get too far into the dismantling. I want you to envision the PLAN as described onto an ANYRAIL multilayer plan almost two years ago. At the top is Greenfield HELIX and Holyoke. The middle is the Deerfield River and the bottom is the Hoosac Mountain.
The plan we came up with considered making the fewest cuts into the scenery while still maintaining the structural integrity of the modules. If they were put together properly, they should come apart with minimal damage. As you can see, the layout had a long way to go before it could be called completed, but the move is less than two months away and it was taking a while to plan and pack.
The rolling stock and all of the engines have been wrapped in bubble wrap and carefully boxed up. The problem now was to safely put away the structures and bridges so that they wouldn’t get damaged in the move.
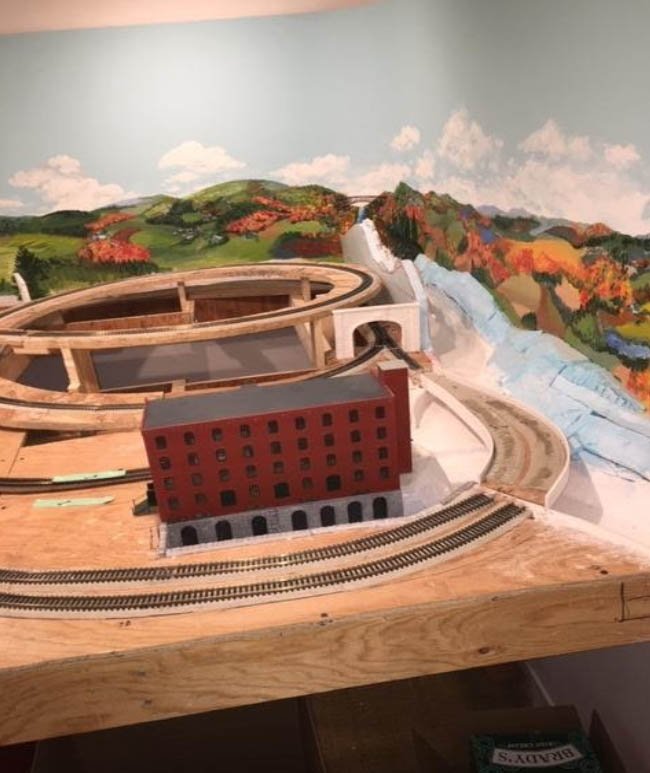
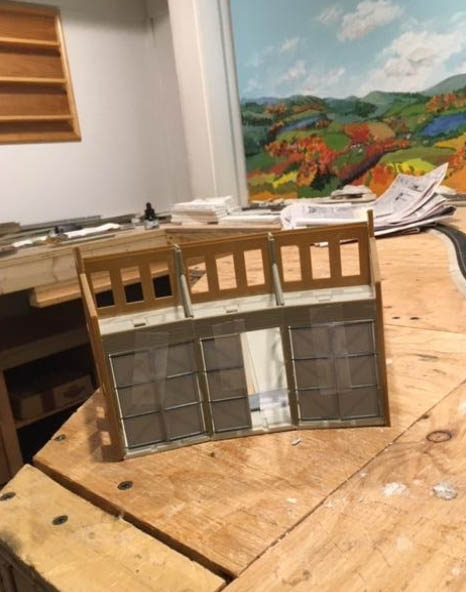
The structure featured here is a four-story factory building representing Hampden Papers in the canal city of Holyoke, Massachusetts.
The factory sits between two canals and the water flows through the basement of the building to turn the shafts that power all of the equipment in the factory. The dam between to two canals is on the Connecticut River.
Not only the factory building in Holyoke, but the dual track Truss Bridge that spans my Deerfield River needed to be carefully packed.
That bridge took hours to build after being able to finally find one at the Amherst Model Railway show in West Springfield last January.
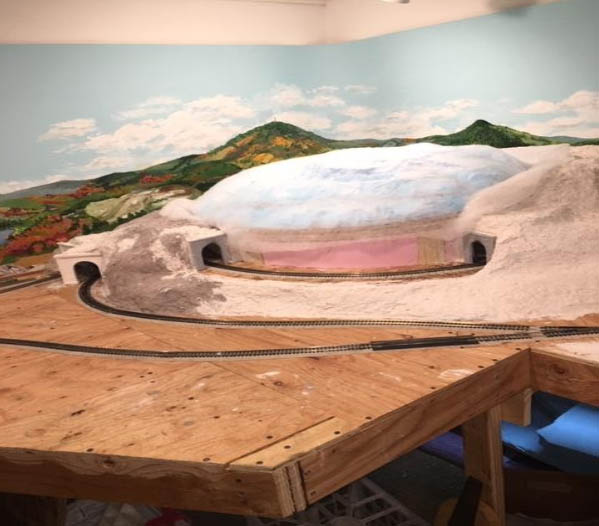
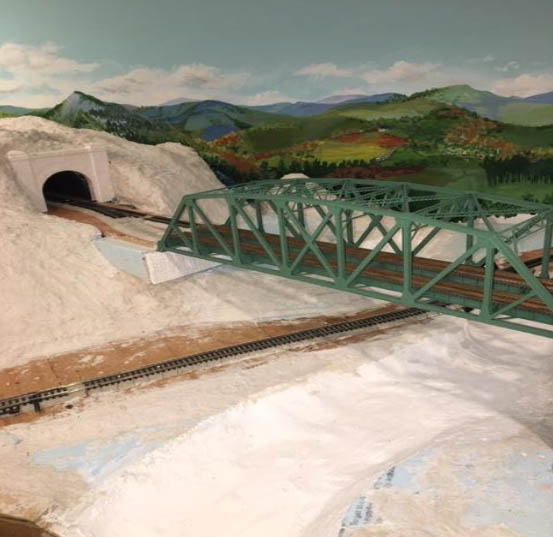
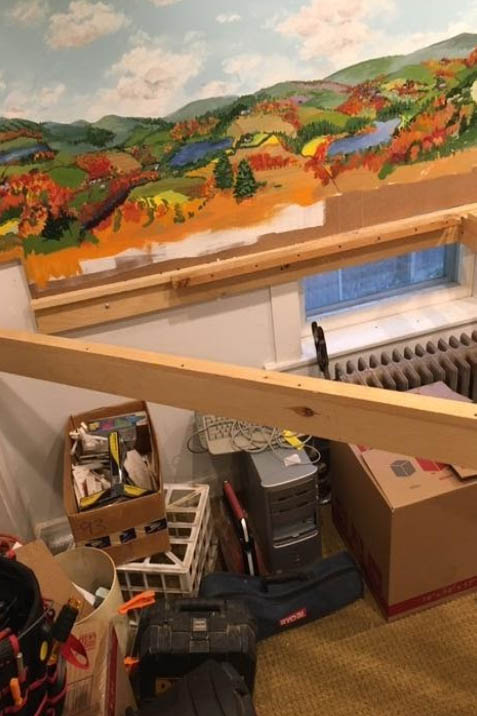
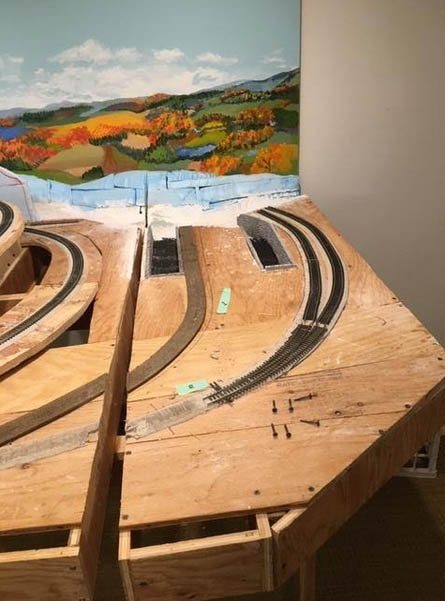
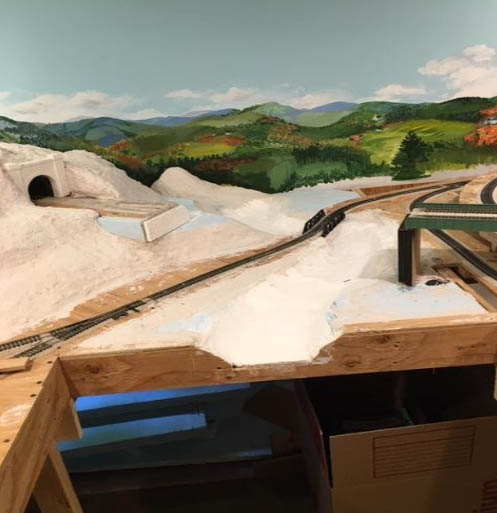
The backdrops in this area of the scenery represent the hills of Western Mass and the tunnel portal you see Is the East Portal of the Hoosac Tunnel with “1877” cast into the plaster.
The Deerfield River flows from Vermont into the gorge next to the tunnel and then down into the Connecticut River. My hope was to be able to model one of the Zoar Outdoors white-water rafts on the Deerfield. I did a rafting trip a few years ago and it was a super exciting event for an old man.
The area above the Hoosac Tunnel portal was to become a pasture/pond dairy farm so we had the Hoosac liftout set up as a lightweight foam sub-module to lift out and allow maintenance and scenery work to be done in and around the Hoosac Helix.
A helix was used in order to climb the six inches needed in a span of only nine feet across the west wall. The helix on the other wall, above Holyoke was used to bring the level back down. The mountain in the background is Mount Greylock and the iconic war memorial tower.
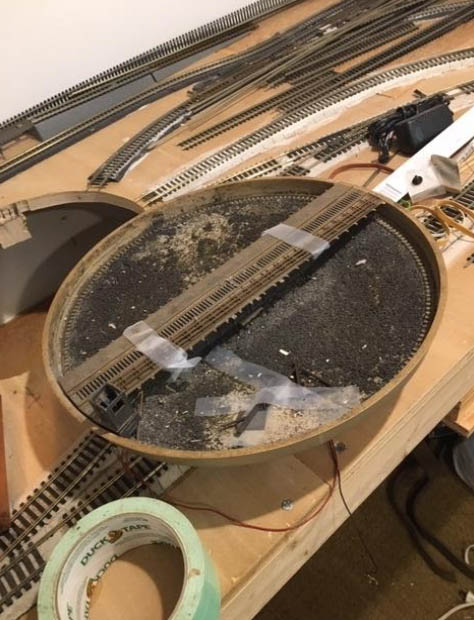
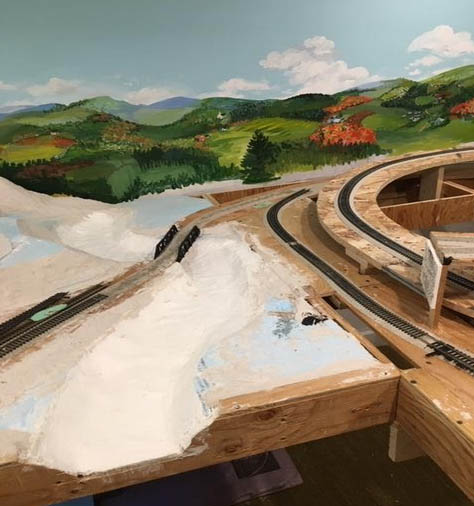
The other fragile models, in my HO scale modular layout, that we had begun to build were the Three Bay Roundhouse and the 90 ft Turntable. The packing of these was done to insure their safety while in storage and during transportation acreoss the state.
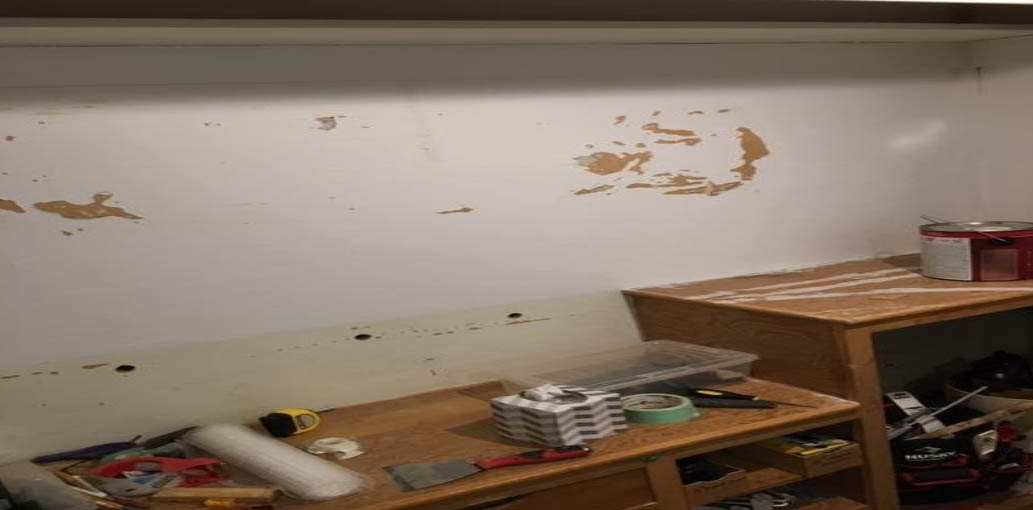
Once the Turntable was removed from the Yard, it was time to return the Yard space back into a closet. As is evidenced by the holes in the wall, there was quite a bit of damage to repair.
Since we were taking the HO scale modular layout apart module by module, it was critical that we find out where the seams were below the sub-roadbed.
The track on the connectors to the Yard and the Yard itself was all on Sub-roadbed that wasn’t part of the modular system. Therefore, all of that track had to come up.
Another discovery became apparent when going through this process. Since most of the work in the Yard area was my earliest layout work, I could see what a difference some of my later techniques made. The later use of Elmer’s Clear glue and pushpins to set the sections of track into the roadbed was much easier to dis-assemble that any of the track I set with nails.
The Reversing Wye module is removed. It was as simple as finding the seam between the Wye module and the Hoosac Helix.
After removing a couple of bolts, making a few careful jigsaw cuts through the sub-roadbed along the seam line and presto, the Wye is free. We’ll get to the backdrop in a later step.
In order to make it easier to get some of the larger modules out of the room and into storage prior to the trip, We decided to go back to the Holyoke end and take out the Canal Module.
Luckily, when we were creating the canals, one of the stone walls fell right on a module seam so we didn’t have to cut apart any of the stone walls of the canal.
Once it was unbolted, and the seam spreader inserted into the end of the seam, the jigsaw was able to able to find its way along the seam without too much trouble.
Once we got to the Connecticut River section of the module, we switched over to a carpenter’s crosscut saw to carefully cut through the foam and plaster.
You might note the numbered tabs of green tape on the subroadbed. These number match a corresponding piece of tape on the section of track that had to be removed. The thought of cutting through the track seemed too daunting and potentially damaging. With the use of the Elmer’s Clear and push-pins, the track came up easily and because the glue is water soluble, it is easy to wash off the plywood.
Once the canal model was separated from the helix and removed to storage, it was time to take out the Deerfield River section that sits between the two helixes. One side was easy, just unbolt and run the jigsaw down the seam.
The hot glue of the support for the approach bridge had to be undone but the seam was pretty straightforward. However, the cut along the Hoosac Helix had to cut through a lot of celluclay and foam. Stiill though, not as bad as it could have been.
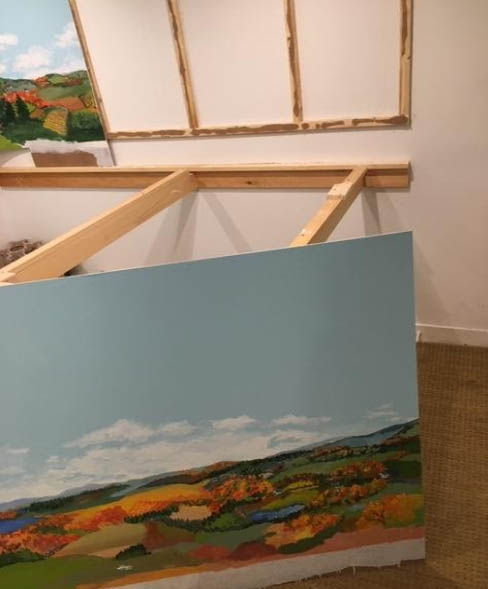
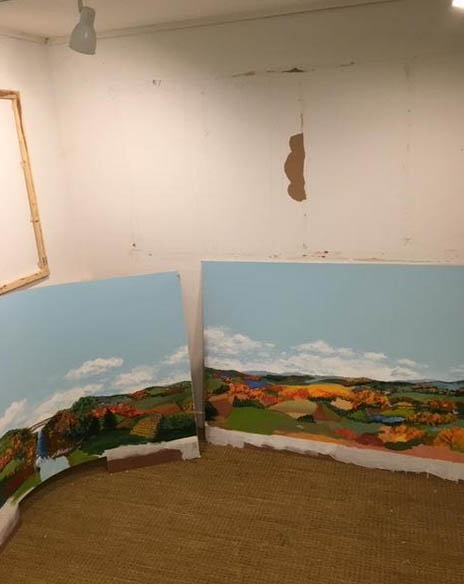
Now that all of the modules have been removed from the L-Girder frames and the support legs, it is time to get the Backdrops removed and safely stored.
Thinking back to how the panels were installed, I had to cut through fabric tape and joint compound at the seams, but the panels themselves were easy to remove from the furring strips that had held them with a light application of construction cement. My wife would not have been happy if I broke any of the panels, but really, that was about the least stressful portion of the dis-assembly.
It’s been about three weeks since the last of the panels were removed. The house has been sold; the layout room has been returned to use as a bedroom for the new family. We’re excited about being able to have all the components safely stored and ready to be picked up by the movers in a week or so.
I wanted to get this document off the table because we still have a lot to do before we’re done. I hope it has been helpful to any readers that are getting ready to start a new layout. Do it with the eventual dis-assembly factored in.
Norm.”
A big thanks to Norm for sharing some advice on a HO scale modular layout – hope his reassemble goes well!
That’s all for today folks, please do keep ’em coming.
And don’t forget, the Beginner’s Guide is here if you want to take your first step towards your own layout.
Shotgun Tom has been back in touch with a video for the San Diego model railroad museum:
“Hi Al
First of all I want to commend you for your emails that I receive on a Daily basis about some of the wonderful model railroad layouts not only in the United States and in the United Kingdom but All Over the World that you present.
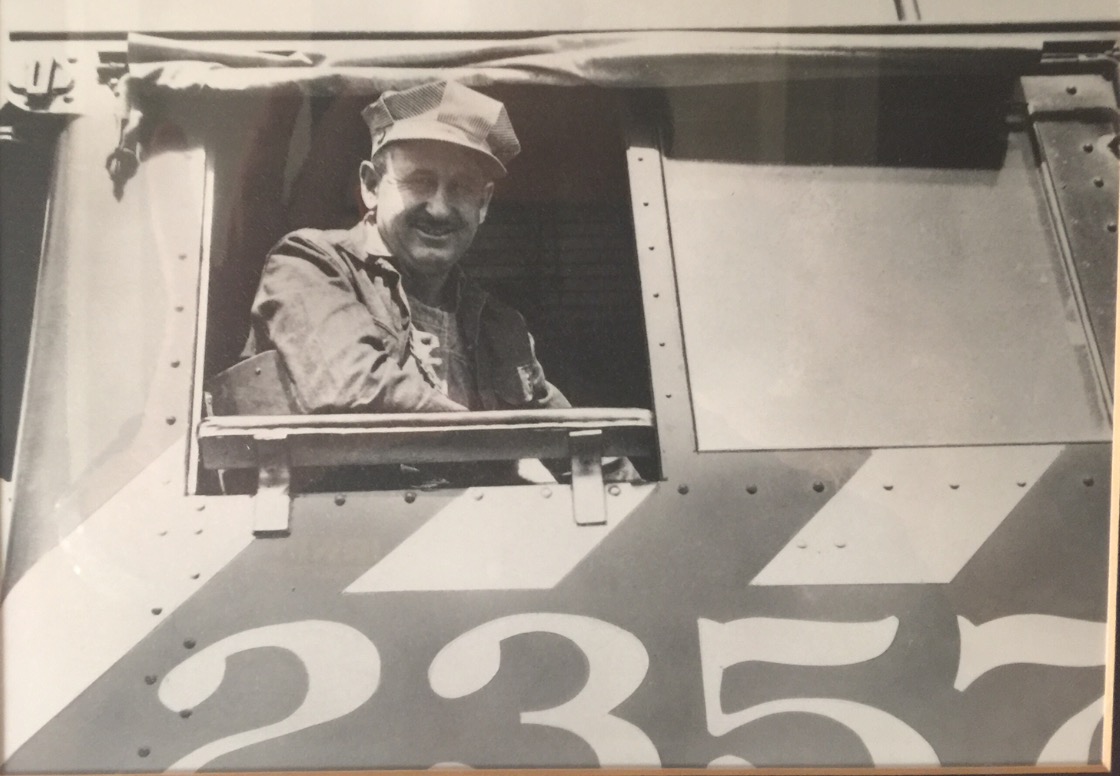
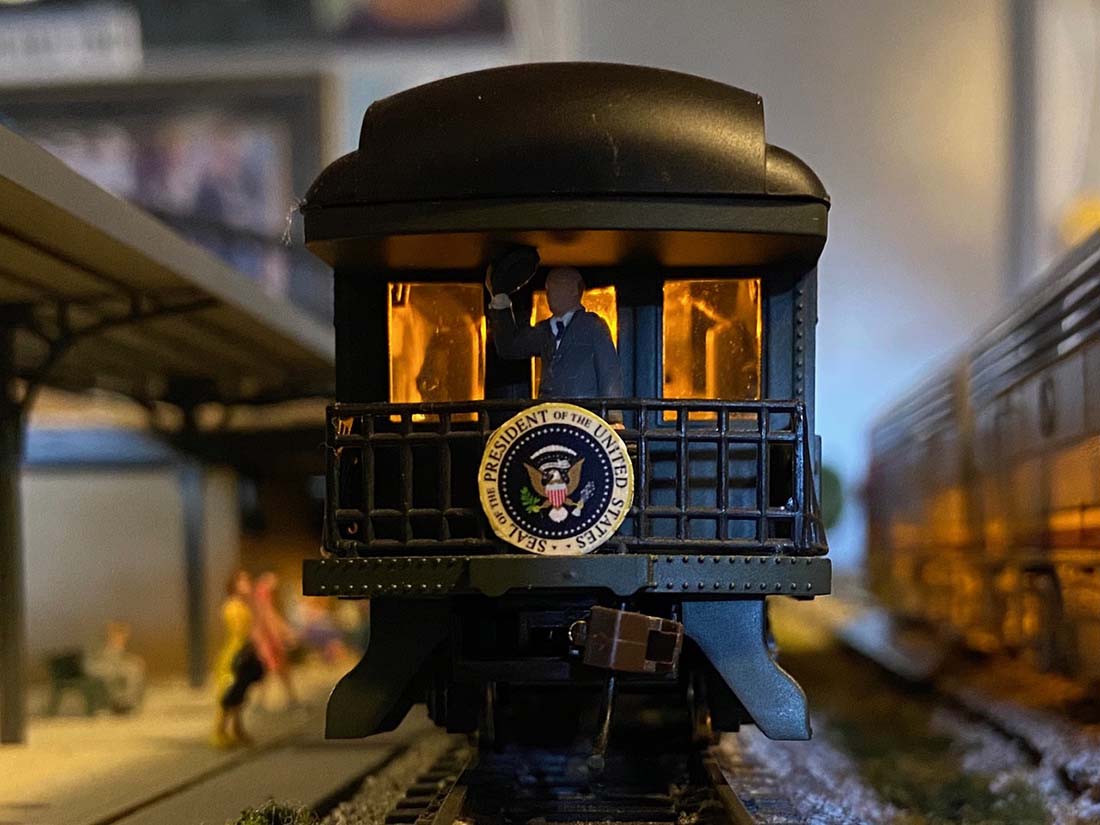
My Dad J.G.Irwin Sr. was a Real Railroad Engineer on the Santa Fe. He was the engineer who bought President Harry Truman in to San Diego in 1948. Here he is in the Santa Fe yard in 1955 on the 2357 switch engine.
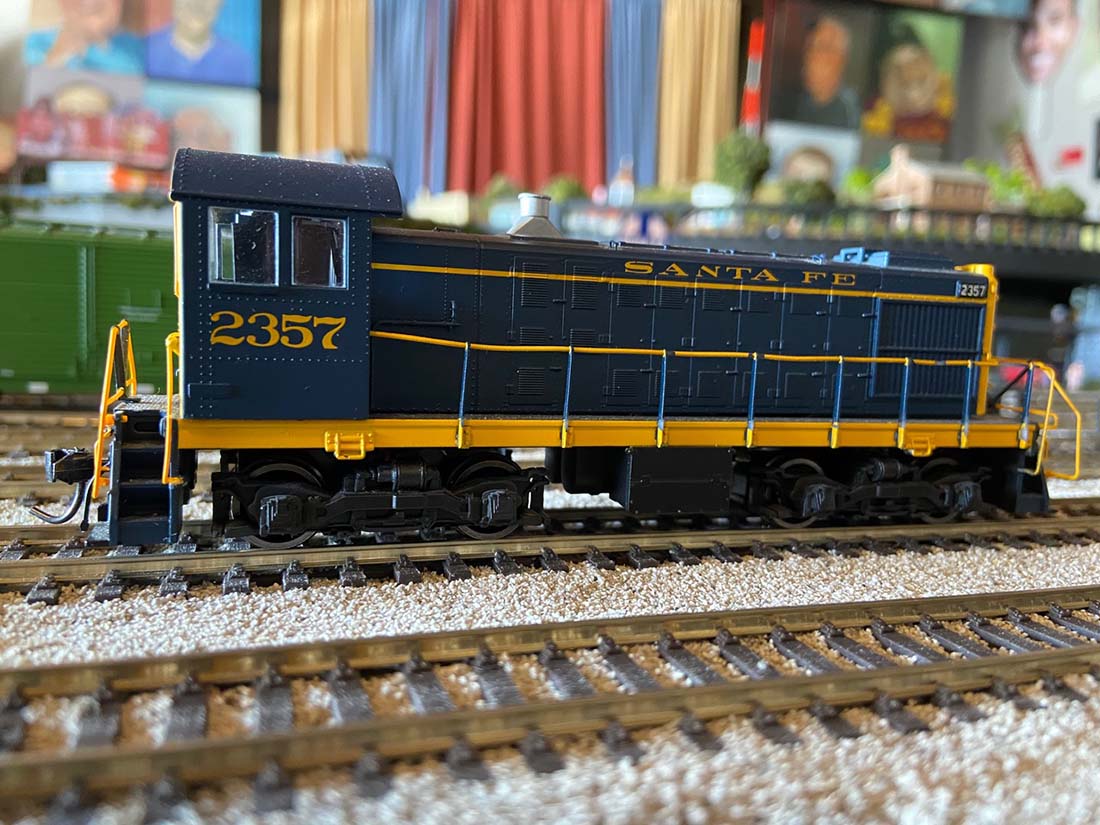
Here is my 2357 on my Layout.
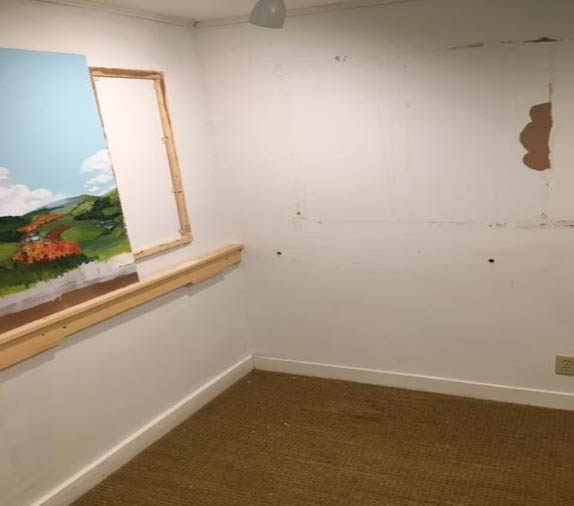
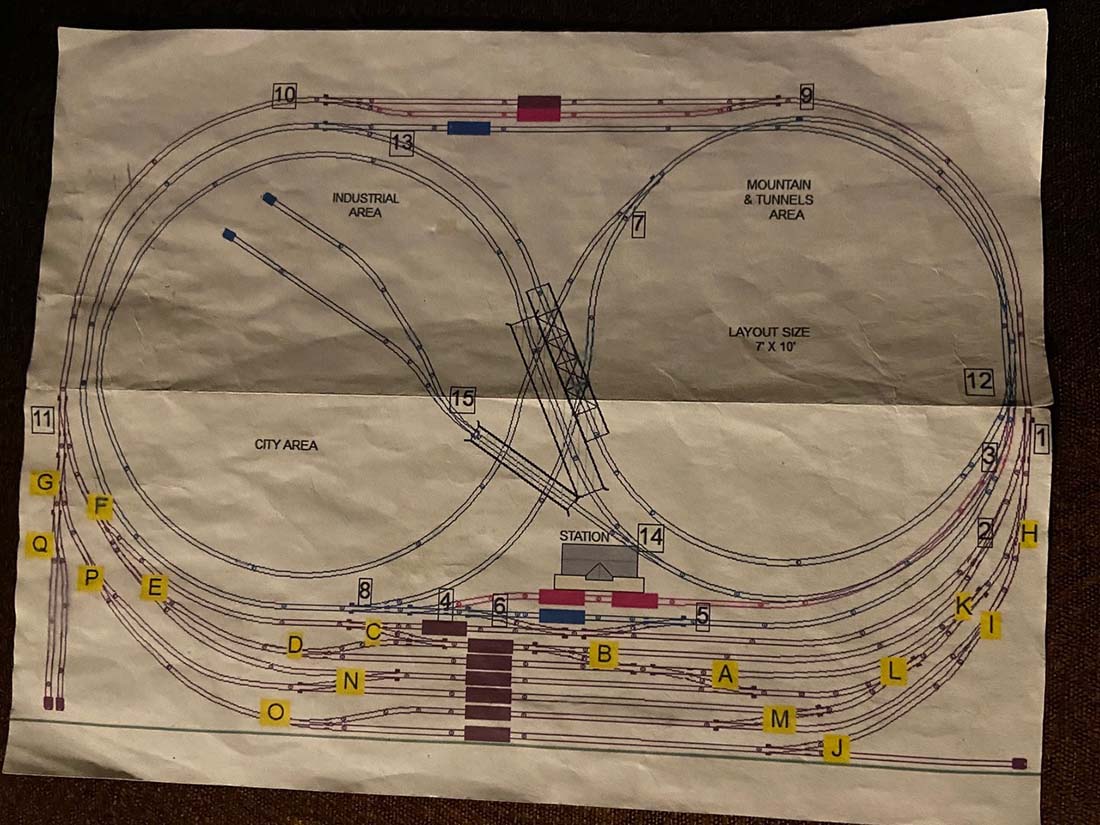
My Plans
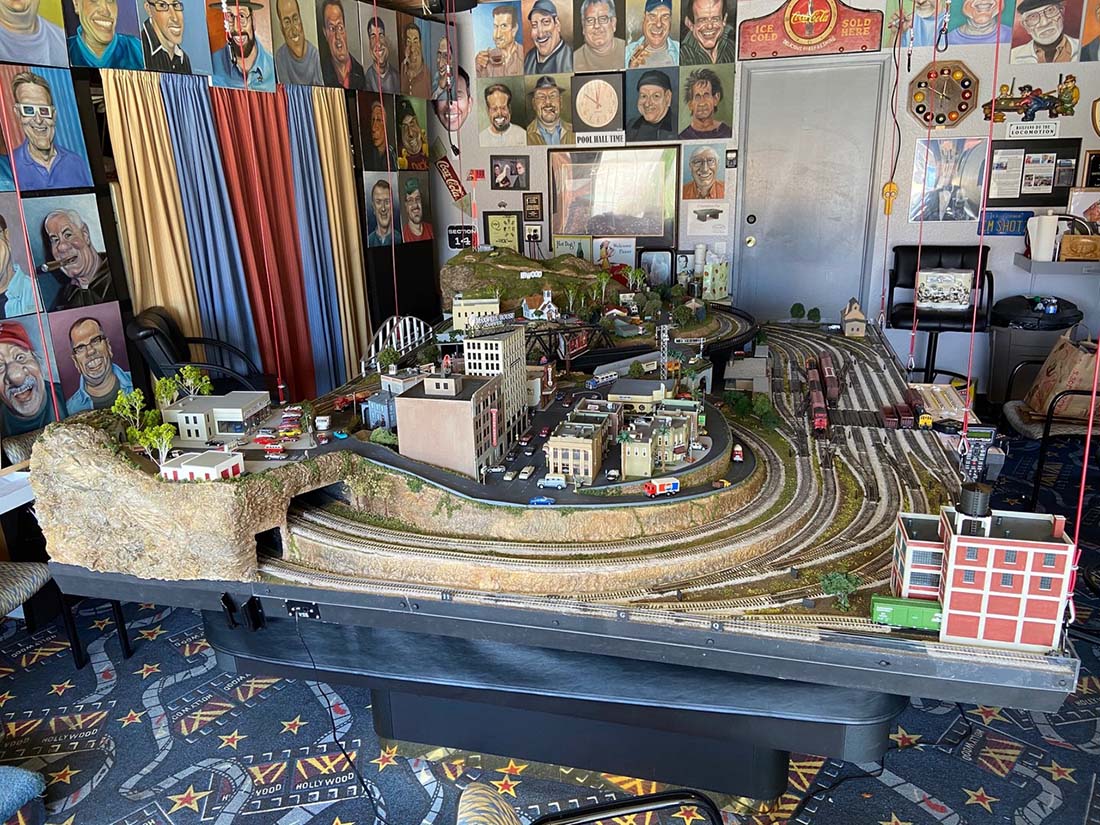
My Layout is custom built by Lloyds Layouts of Paramont California.
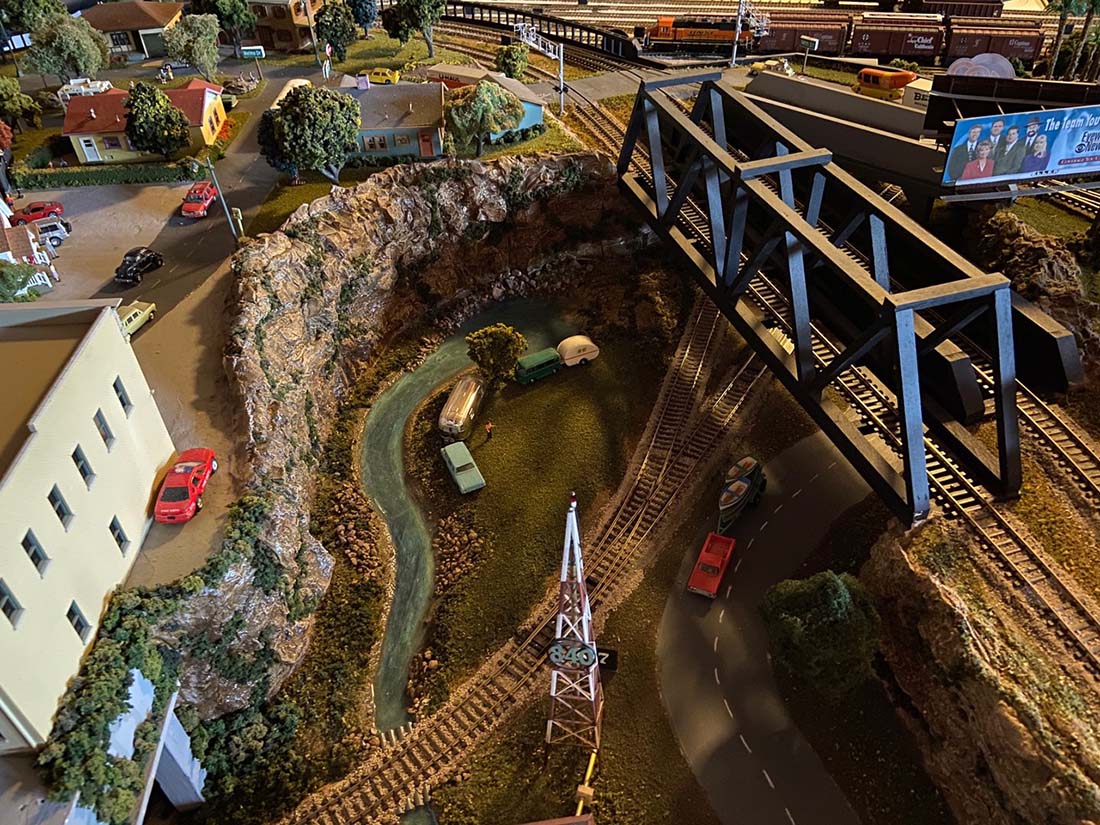
Being in Radio and Television for the last 50 years I wanted three things on my layout. A downtown area, Industrial area and a Neighborhood area.
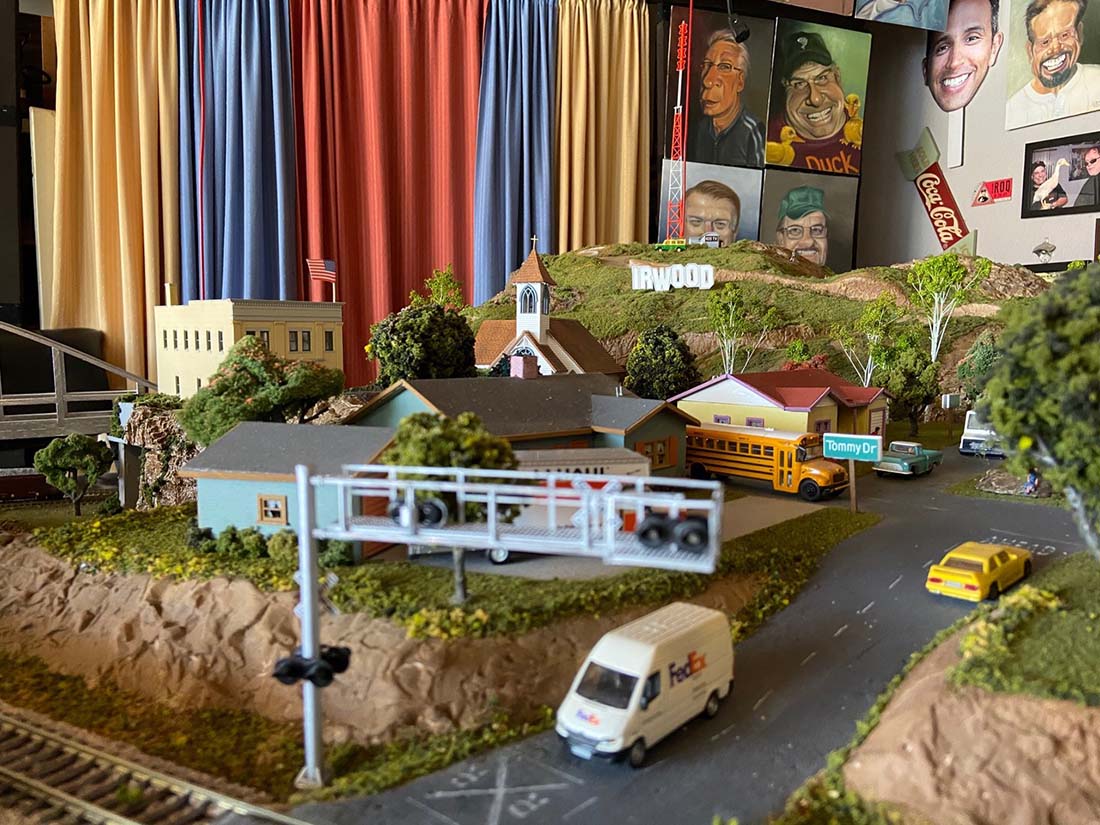
My crossing signals, My IRWOOD sign, and my Television Tower on the Hill
My President Harry Truman car
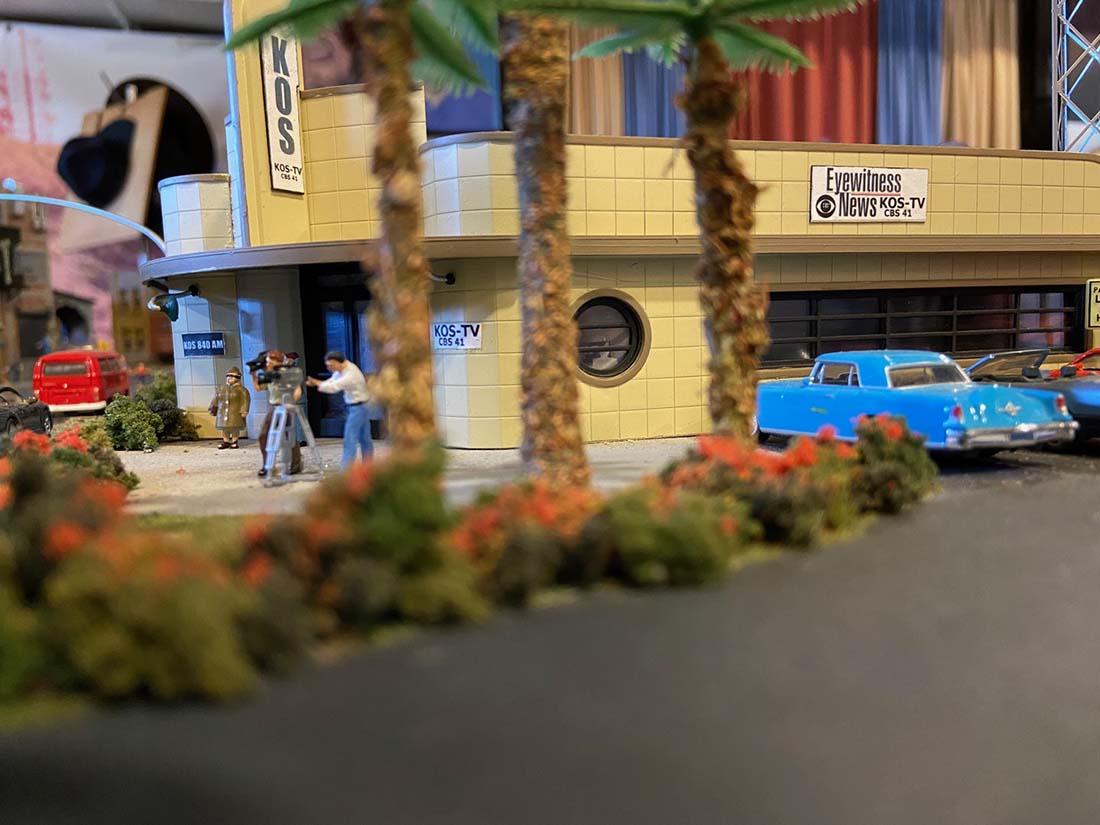
In the downtown area I wanted to make sure that I had an AM FM Radio and a Television station all in the same building like it used to be in the 60s.
And on my Layout a mountain with Broadcast Tower for the Television station and FM station and an AM Radio station with it’s tower down by the river.
My KOS-AM Radio Tower by the river
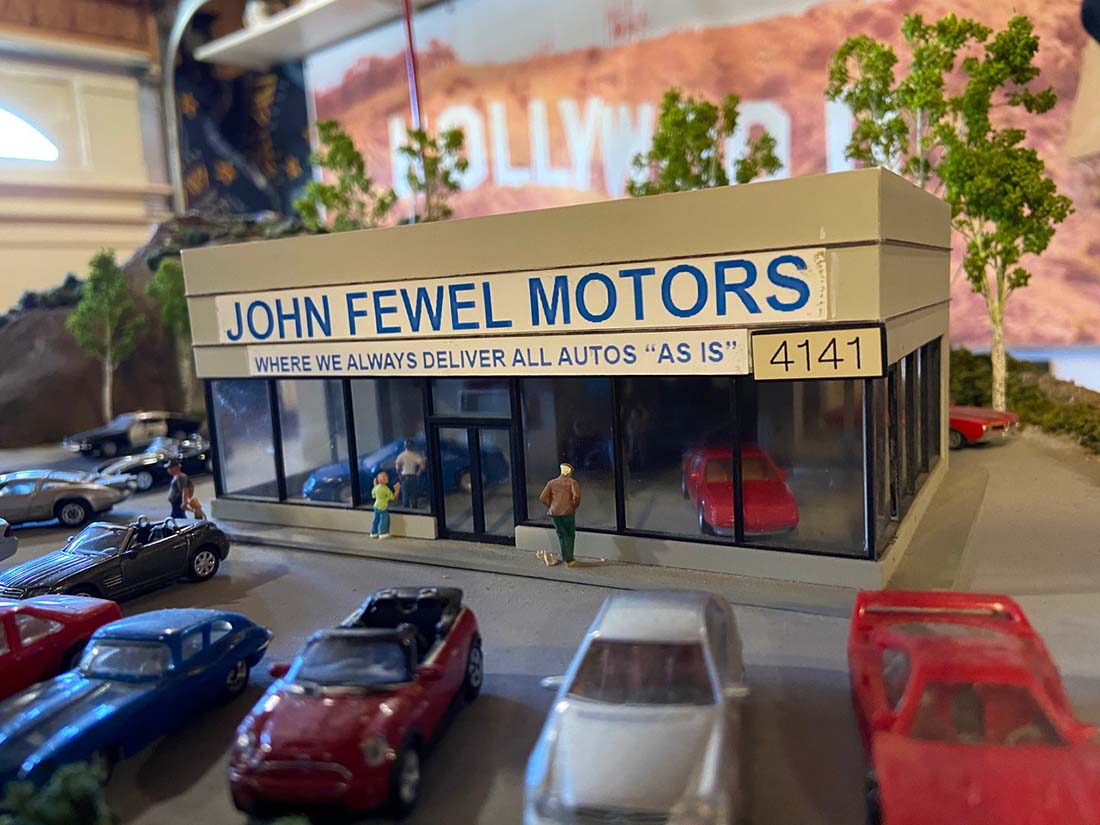
My Friend John Fewel worked in Sales car lot. John came up with the slogan.
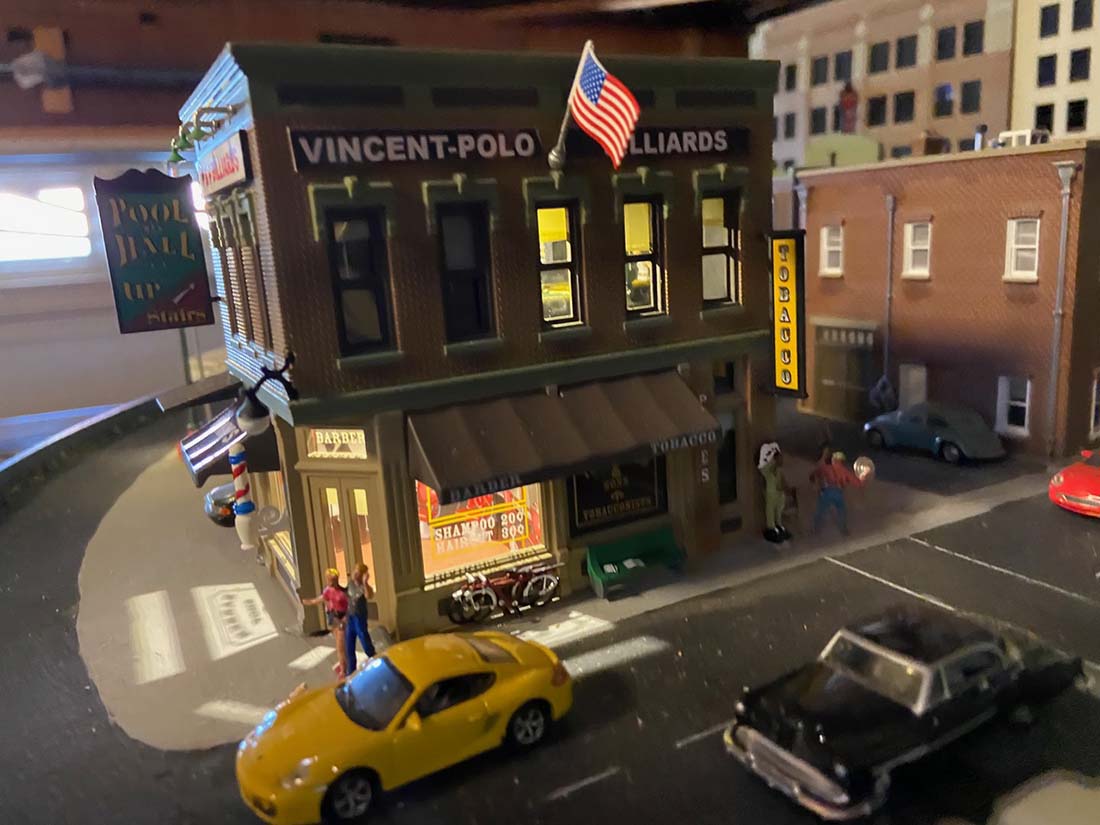
My Layout is sitting on my Pool Table so we must have a Pool Hall on the Layout.
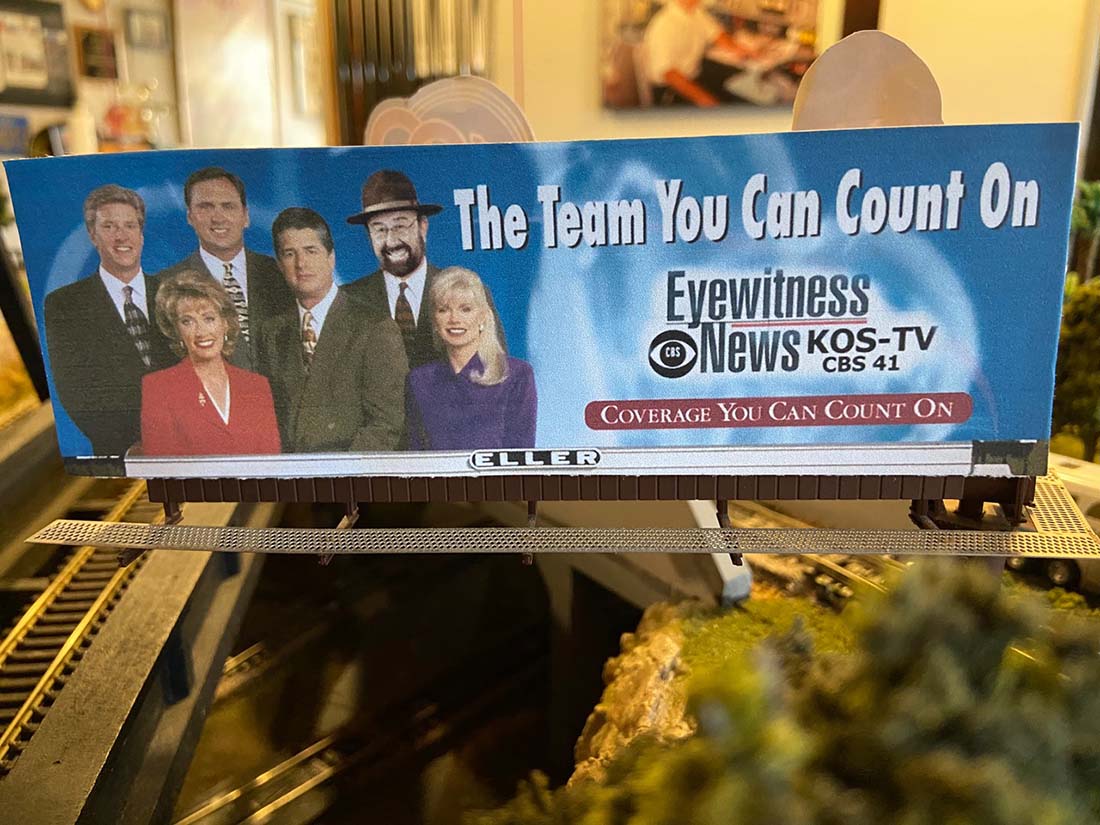
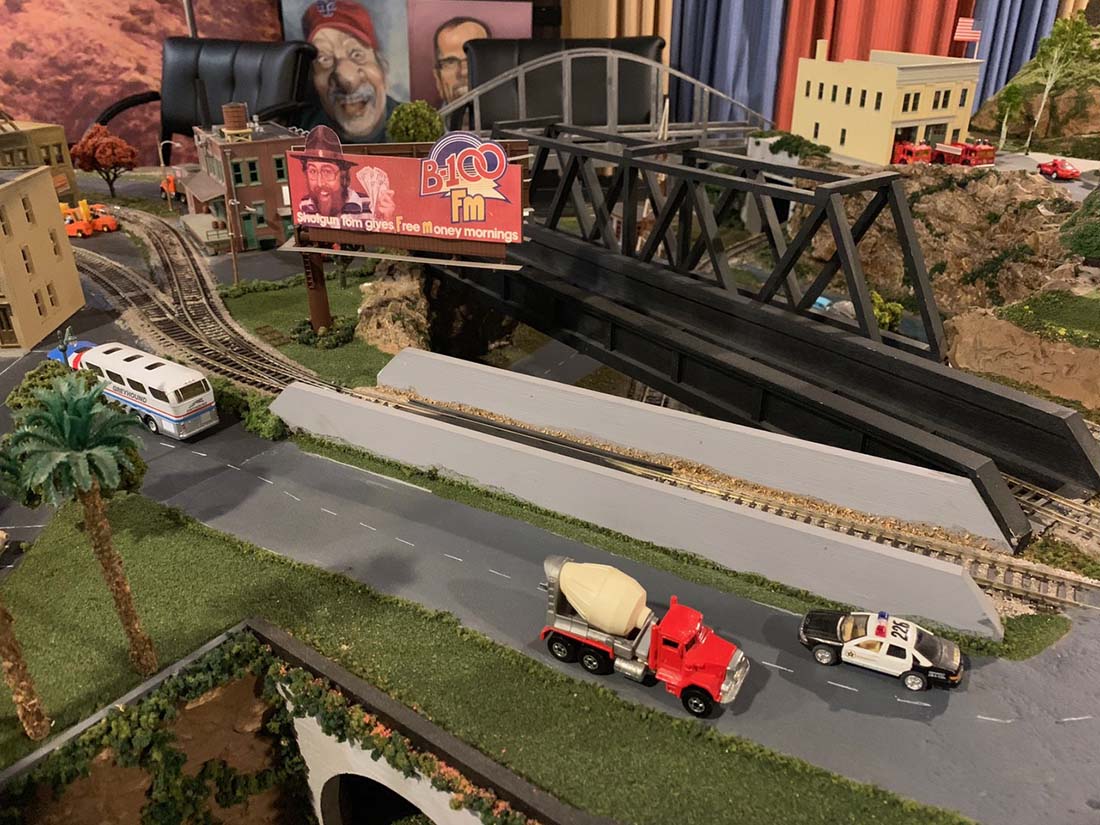
My Billboard when I did The Morning Show at B-100-FM in San Diego
My Downtown area (4 lanes)
I recently did a LIVE webinar Tour of my Layout in my garage for the San Diego Model Railroad Museum which is located near the World Famous San Diego Zoo. My message was “Let’s keep Model Railroading Alive.”
The LIVE webinar was not only to show off my Layout but it was to raise money for the San Diego Model Railroad Museum in San Diego’s Balboa Park.
If some of your readers would like to make a donation to our museum it would be greatly appreciated because with COVID-19 that’s going on around the world are museum that used to be open seven days a week to the public is now only open three days a week Friday Saturday and Sunday. Our museum has four wonderful clubs N scale HO and an “O” gauge.