Bob’s been back in touch with his HO scale Dairy Queen.
“Al,
Here is another kit bash for you.
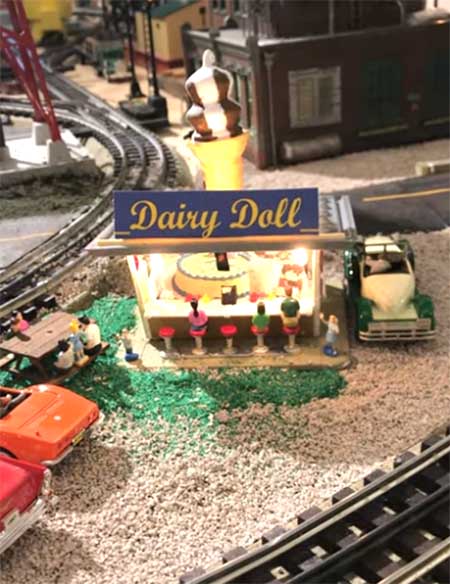
When I was growing up in the 50s my friends and I would bike about a mile to a soft ice cream store named Dairy Doll.
I had a small space on the layout that was begging for attention so I purchased a plasticville soft serve. It was all one color except for the roof. I painted it using several colors then I tried several sign colors.
I installed lights on the roof and in the roof overhang.
Then I purchased a HO scale Dairy Queen whistle which was a hand out years ago. I installed a slow RPM motor upside down in the roof. It has an 1 1/4 inch shaft that I inserted into the cone and glued it in.
I added chocolate stripes to the ice cream. I put in some patrons and some of my 50s cars. I also added some bicycles since the pictures were taken. The video shows the finished scene.
Bob”
Bob’s HO scale Dairy Queen build put a smile on my face – I loved it.
“Hi AL;
I’ve been reading and enjoying your posts for several years. Finally decided to submit my first post – of a post.
I can’t take credit for the idea, I just put my twist on it.
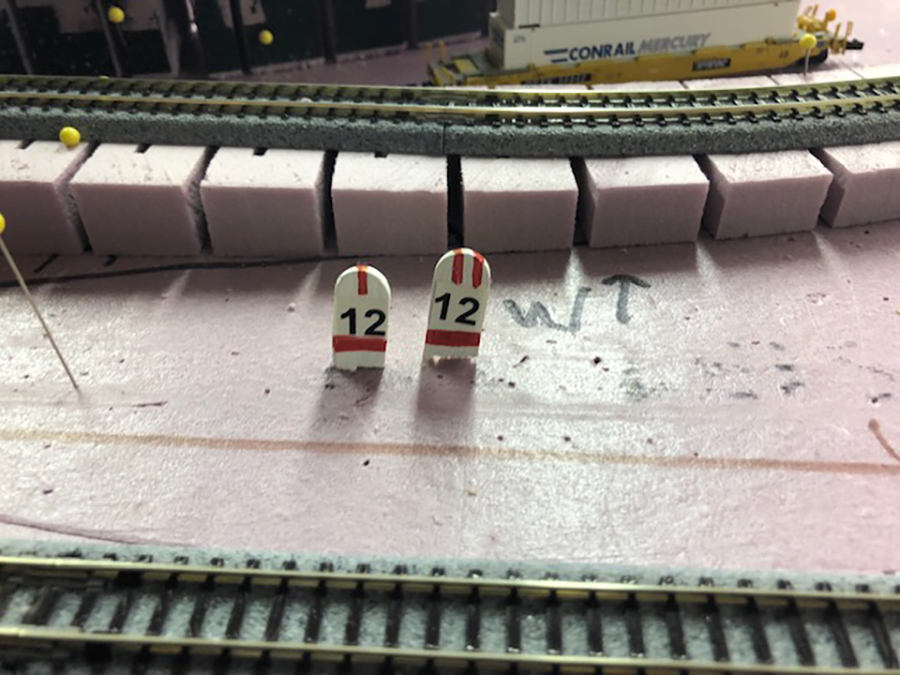
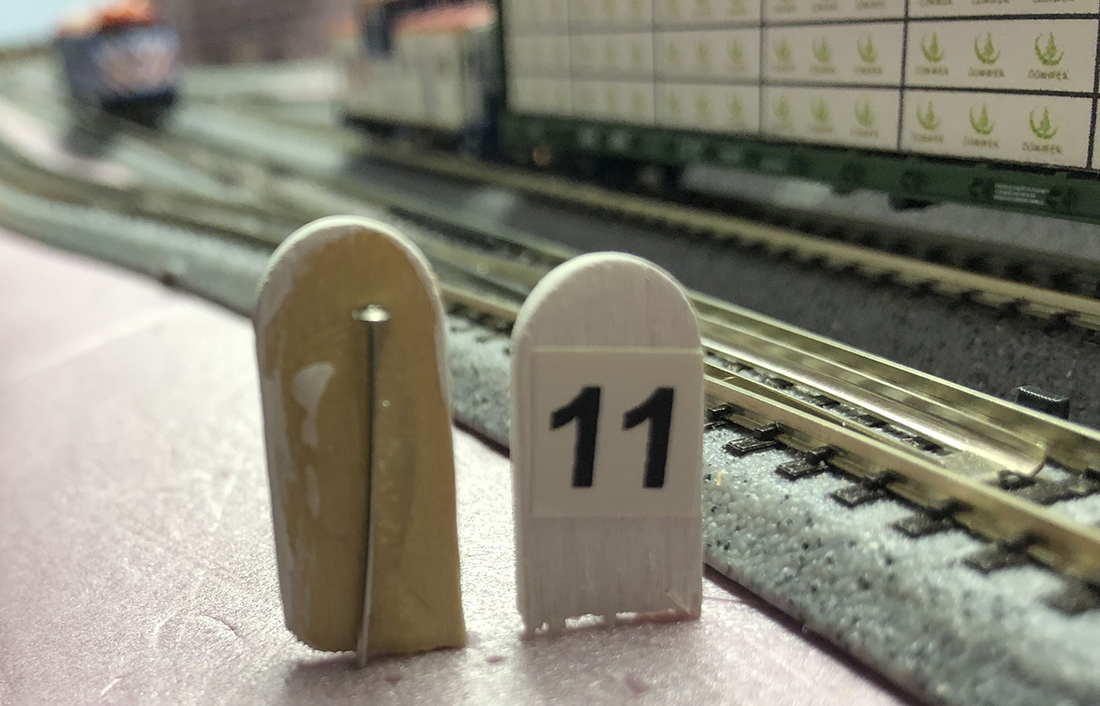
Looking to add turnout #s to our N scale layout and saw the idea to use ends of popsicle sticks painted white to simulate mileage posts.
Instead of gluing them, I hot-glued a pin on the back so I could move then easily. Then I painted and attached printed labels so the numbers would look better than my writing.
Additional option. I have several turnouts that need to be thrown “together” i.e. a crossing.
For these, I add red underline markings noting that they are part of a group & then a number stripe on top giving them individual IDs within the group, (I, II, etc.
This labeling is repeated under the layout to also give each wire a unique code.
Thank you for providing this site so we can all enjoy the hobby better.
The best to you.
JB & Judy – Illinois, U.S.A.”
“Hi Al.
Quick note from another new guy. Long story short.
Worked in a hobby shop as a teenager and loved all of it but the trains stayed with me.
First Lionel as a kid then HO in high school and in and out of it till a few months ago when the isolation began because of the dangers of the virus.
Jumped into N gauge because I could do a door sized layout in the corner of my shop that is normally full of old Brit sports cars (have about ten of them) mainly MGs but just about all of the 50’s and 60’s over the years and that’s a lot of years as I’m now 82 but still kicking.
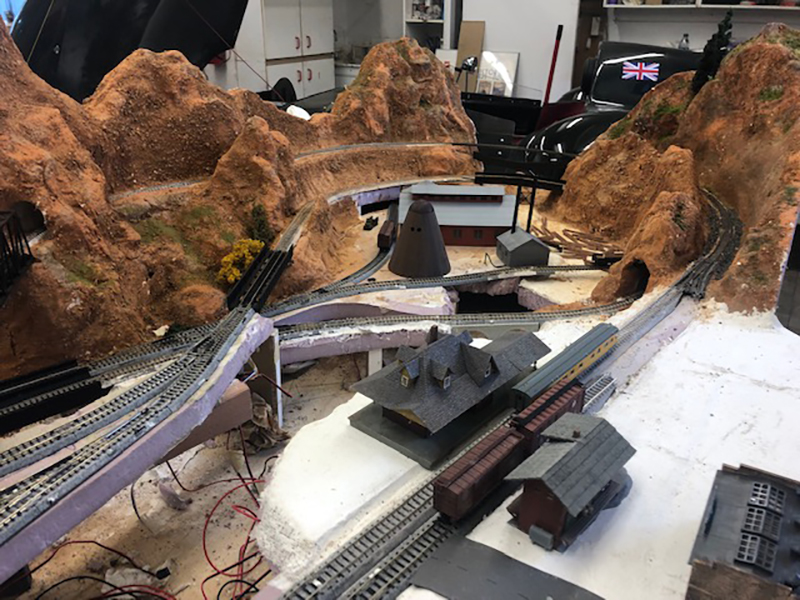
Railroad wise I’m well along with my mountain style layout with a lot of scenery in that little space.
Keep up the good work. I enjoy the variety of projects on your site.
Best regards to you and fellow enthusiasts.
James”

“Al
This is a thank you to you and John for all that you have done for everyone.
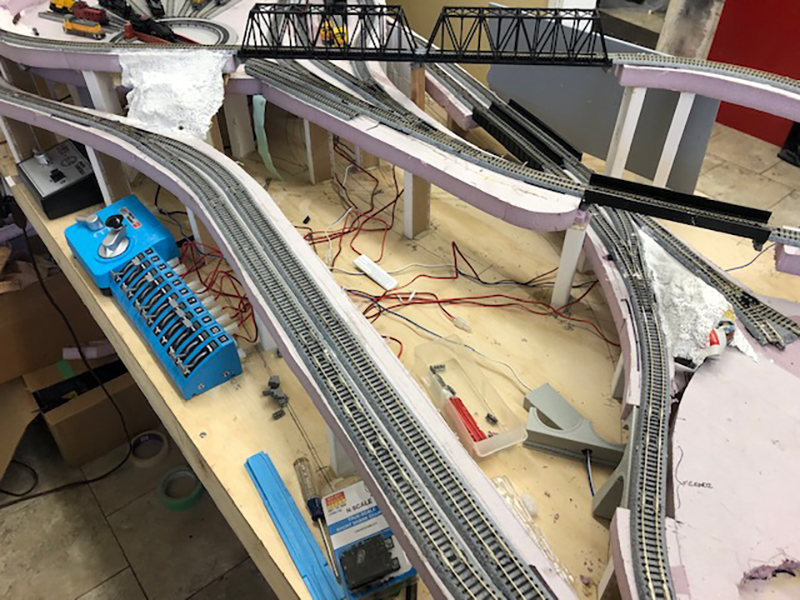
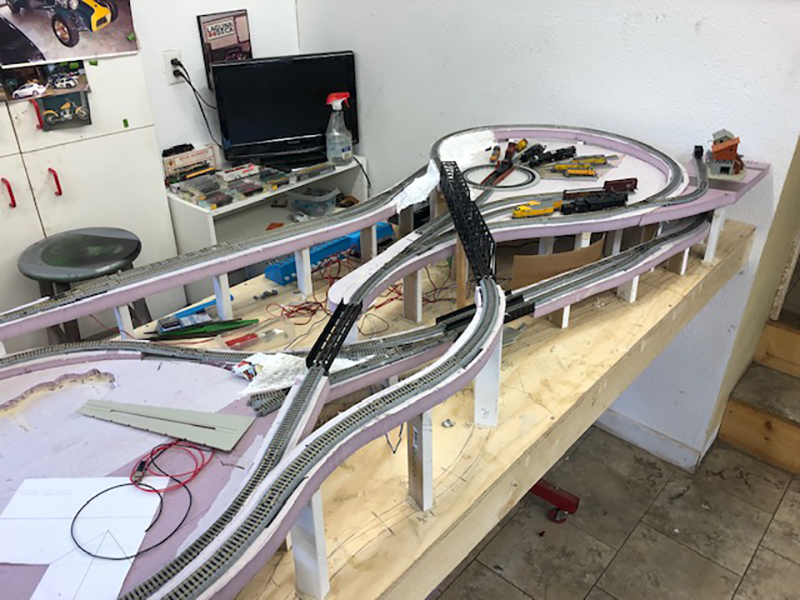
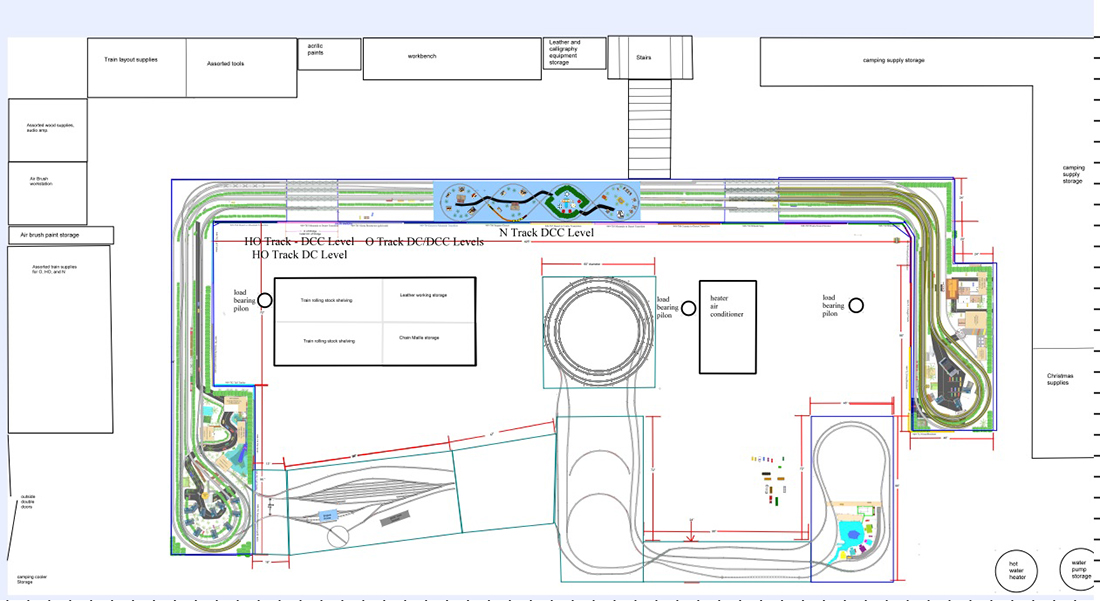
I started an O scale extension to my layout. The first picture is a pictorial of my basement.
The colored section is the new layout, at 19 inches off the floor. Projected for the future, the HO layout will be above it at 38 inches with the N track (in blue) at 48 inches. I used AnyRail 6 software program to build the design. Sorry if the picture is a bit busy but I have all the layers displayed. I found the software very easy to get familiar with and to use.
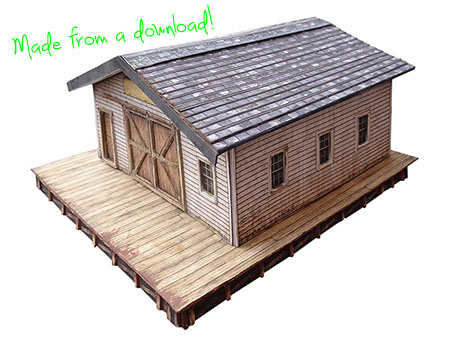
But this post is about the buildings going onto the bottom layout instead. ALL the buildings on this layout have been and shall be from your printouts. I have presently built 31 different buildings plus the embankment for the raised section. I am using John’s techniques with a few changes.
I knew I was going to be building a lot of buildings. With the virus causing everything to be closed (craft stores), here in Virginia, and knowing I wasn’t going to eat that much cereal I needed something else for backing.
Wandering the local hardware store (Lowe’s) I found the Ram Board in the carpet area for $30. A soft fiber board that is 36 feet by 3 feet and about one eight thick. Very easy to cut with an craft knife.
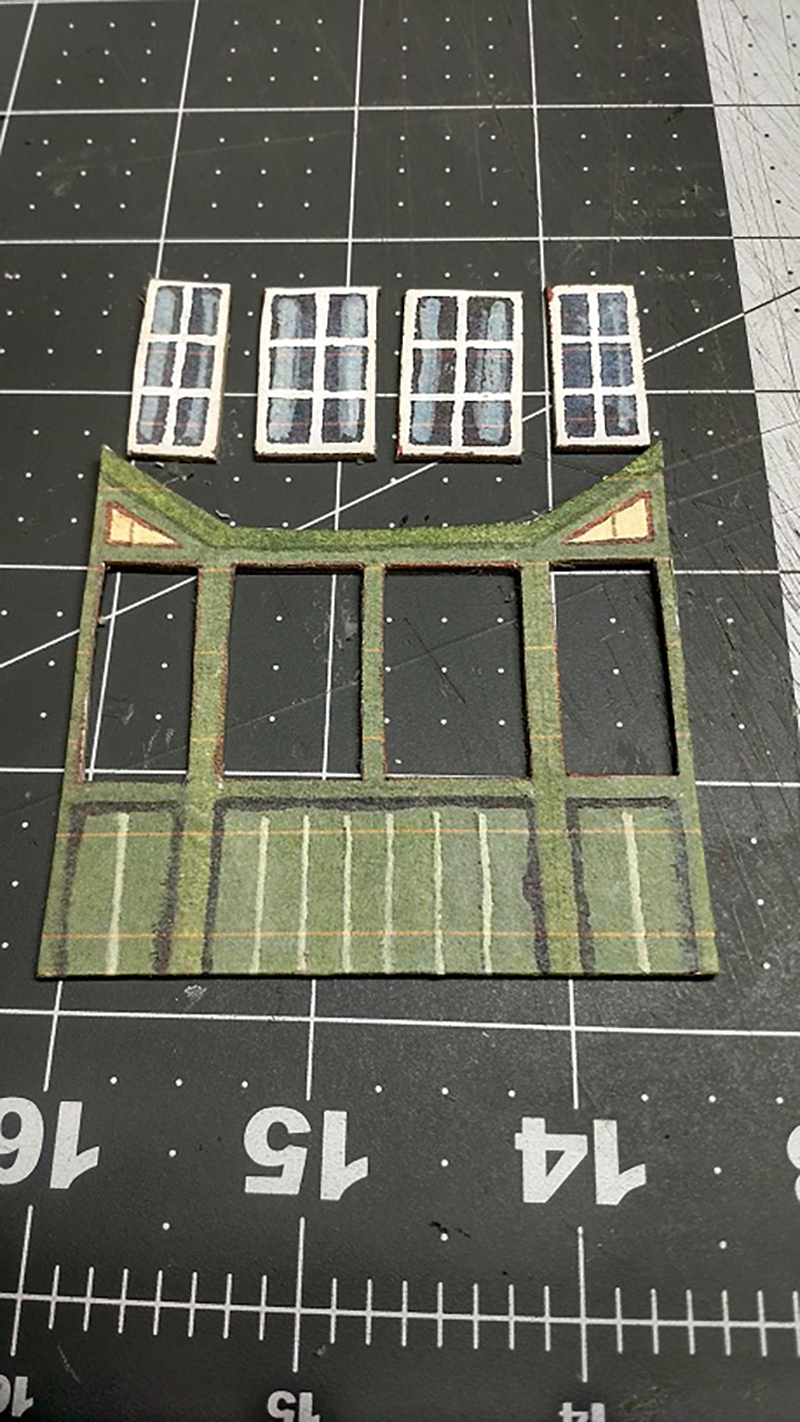
My printer is such that I could do the enlargement for O scale as per your recommendation in your Hints document. I cut all the printouts so that I could connect them so that front, back, and sides were separate complete items. The next picture is the only exception.
The printouts are glued to the board with Elmer’s white glue and when dried (under a heavy book, Thanks John) all the excess board is sliced away. It took a couple of hours to ensure full drying (because of the fiber board) and to ensure all pieces were properly flat.
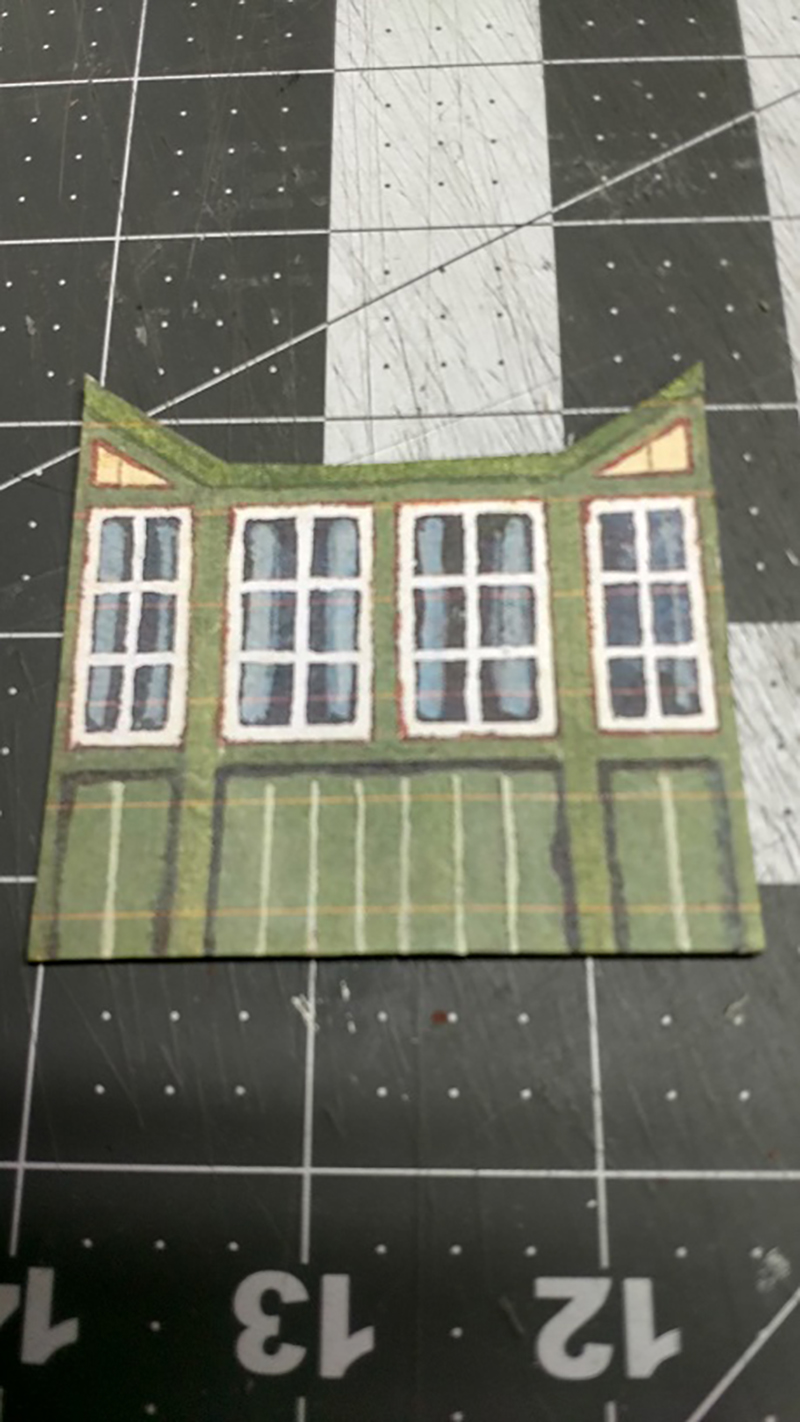
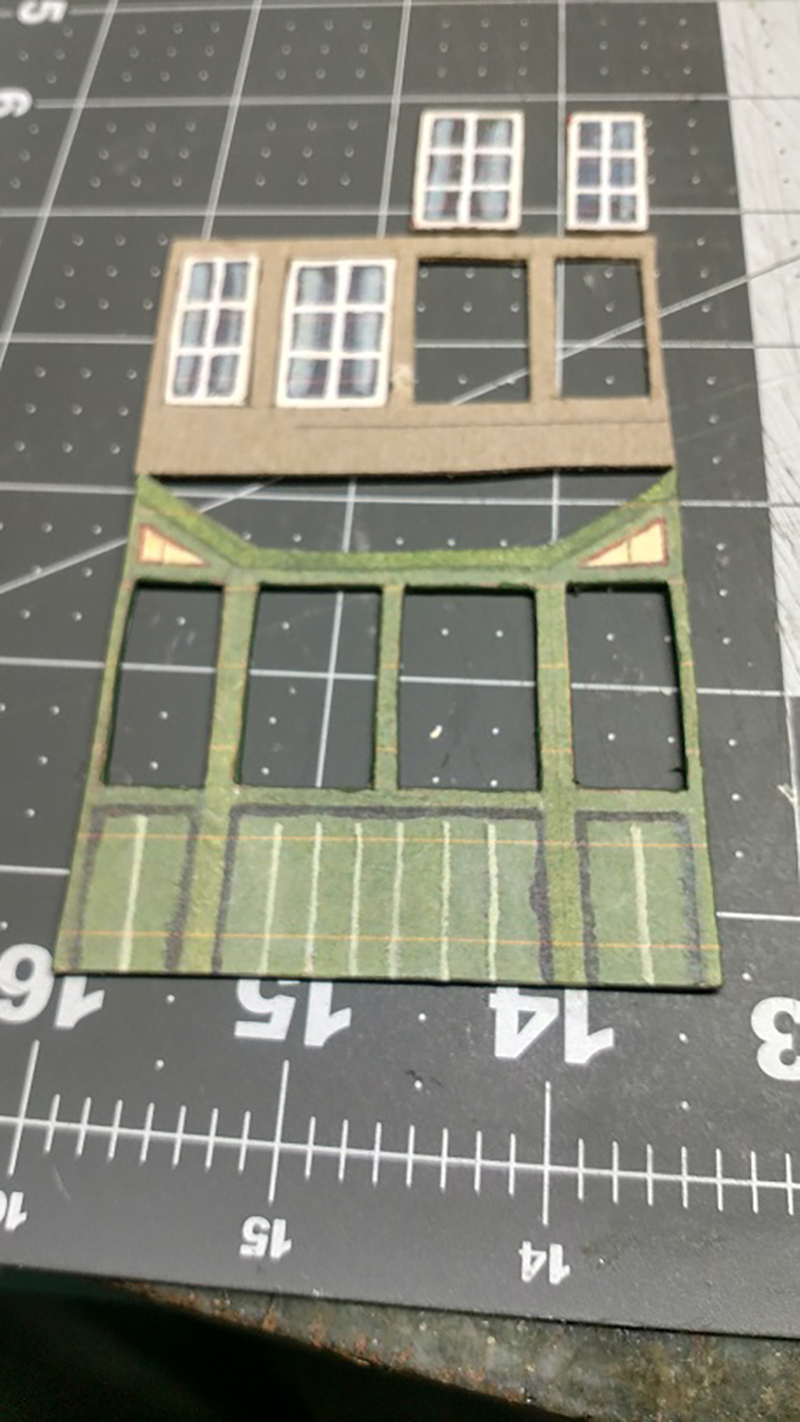
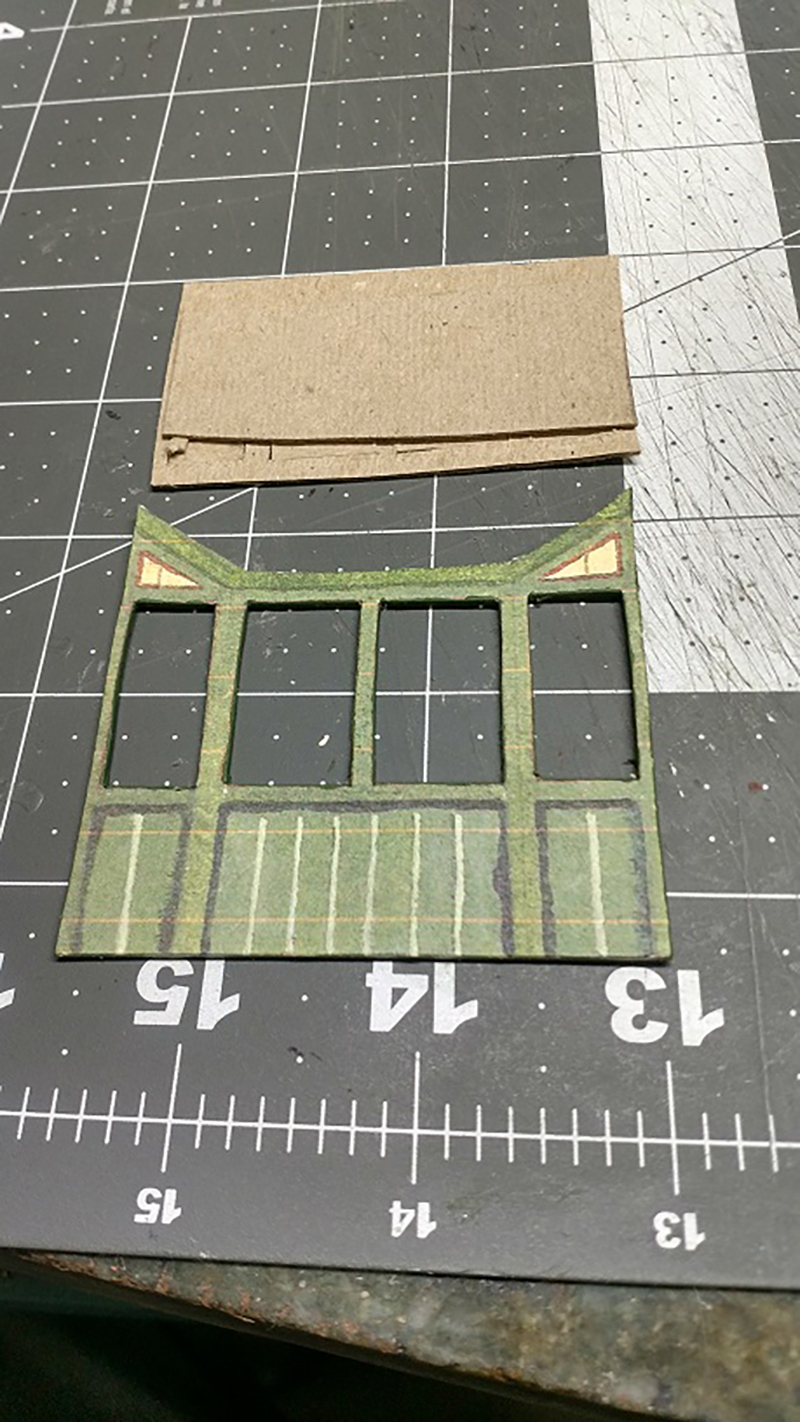
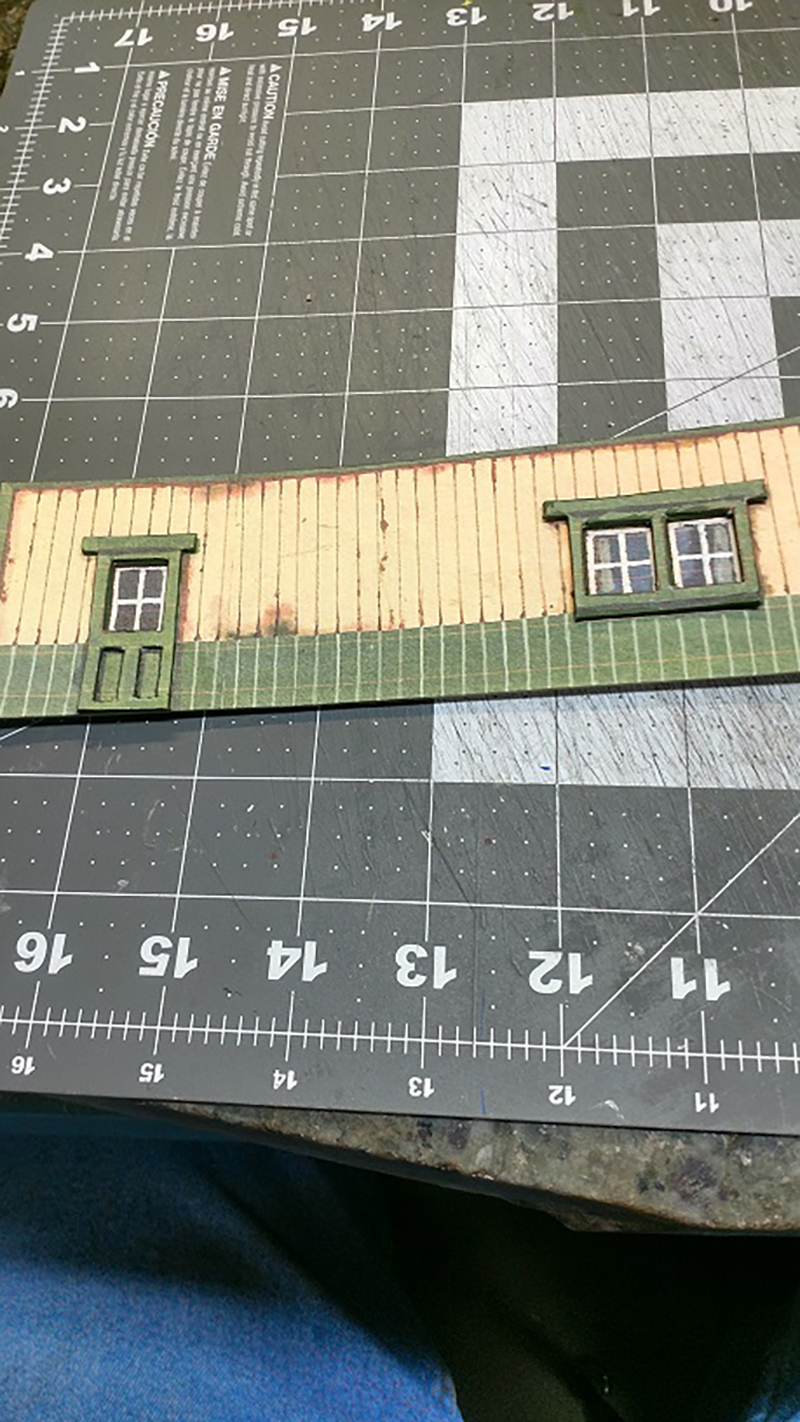
Then copied the outline of the selected items onto another piece of the board and cut out the items again, as shown. This ensured that they will be recessed. Because the items were cut out, they needed backing, as shown in the next picture. But in the meantime, the original piece had all the cut edges painted the similar color as the front edges (thanks John). Once assembled the windows were properly recessed.
On another print out of the same building I used the same technique to cut out the frames to the door and windows, as displayed. The following picture shows the window and door frames positive on the building and the windows negative to the building.
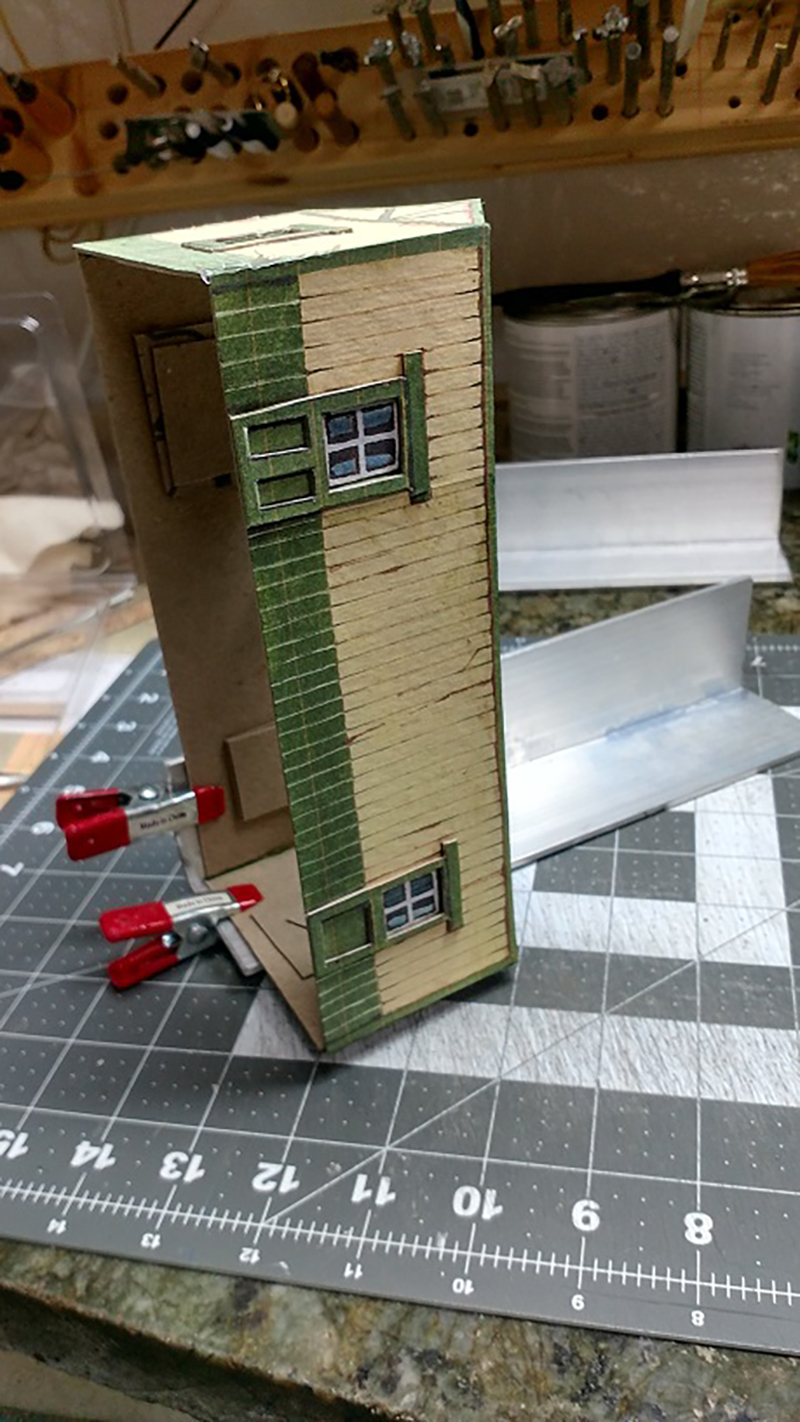
The next picture shows where I assembled the separate pieces one corner at a time. Giving me a good solid 90-degree angle on each corner. The angle iron is 2-inch aluminum angle (3 feet at the same hardware store for $4) cut to 10-inch lengths. After assembly I realized I forgot to paint the sides of the window and door frames.
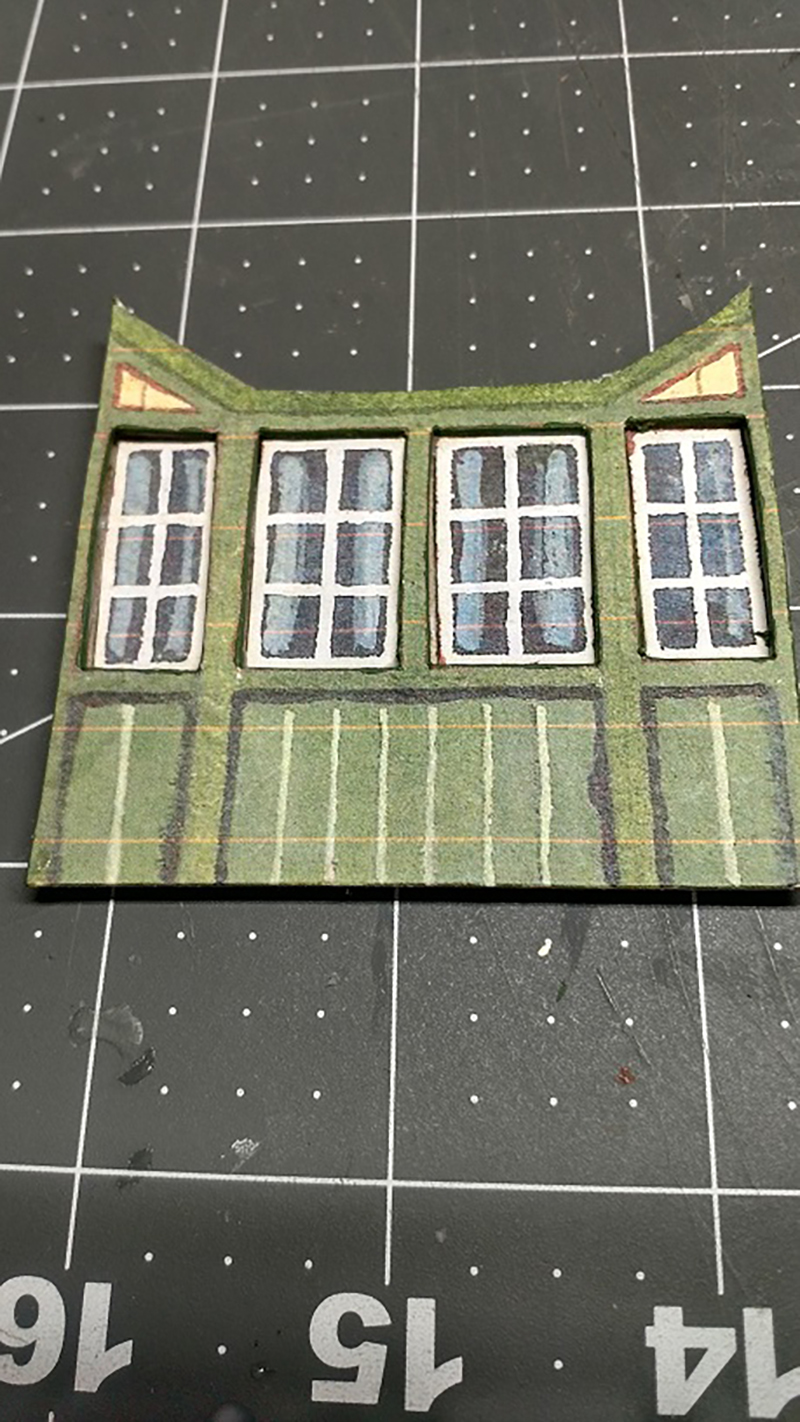
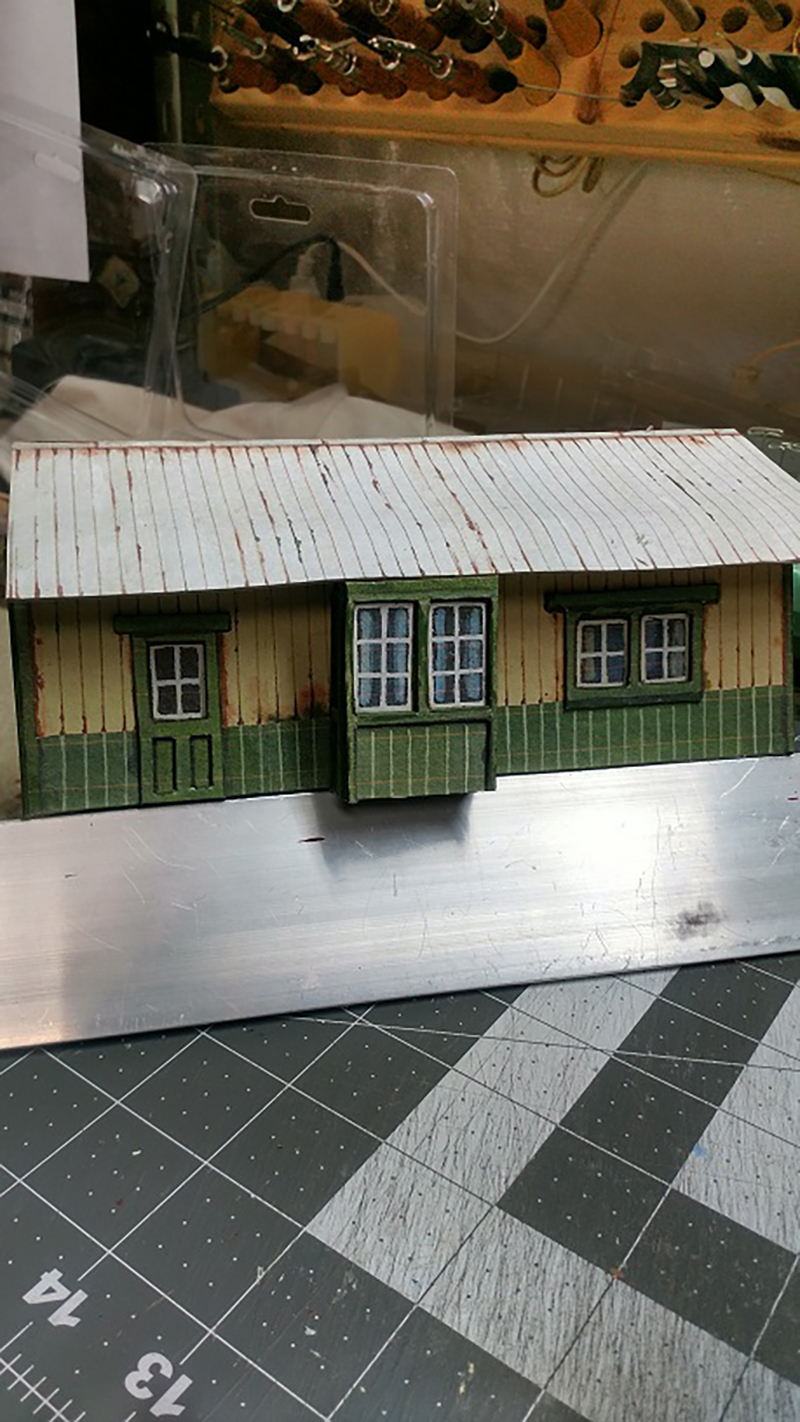
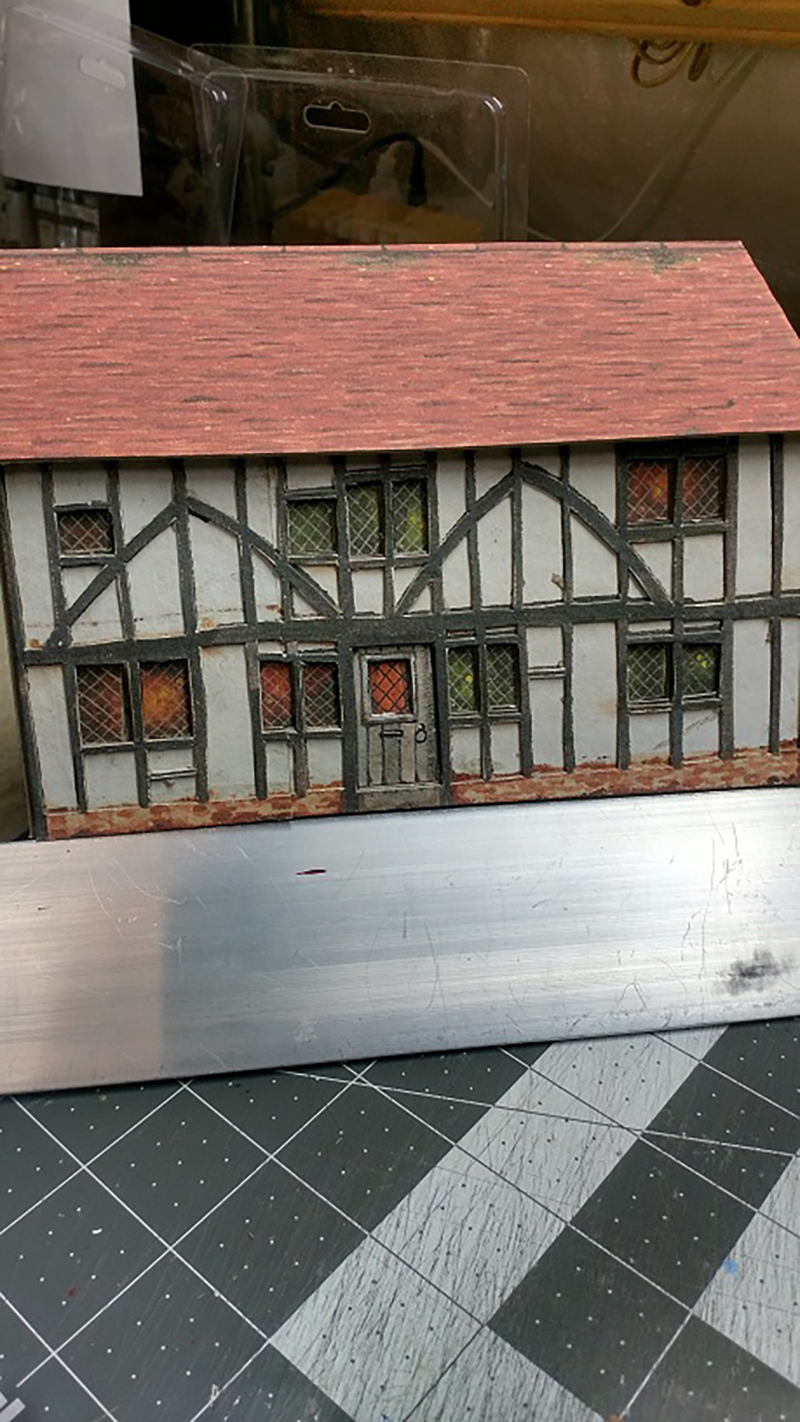
The next picture shows one side of the finished product. The last picture is the house that took the longest time. The windows are recessed and the building is recessed to all the black trim. Cutting out all the black trim was a real test of patience.
After 31 buildings the cost per building is less then $10. Al’s original print out (if bought separately and not part of a special sale) + nothing for multiple reprints + about two feet of Ram Board + the white glue + a couple of ‘snap off’ blades (to keep the points sharp) + LOTS of patience, for each building.
Worst case = 31 buildings at $10 is $310. At my local train shop the respective size buildings run from about $60 to $150. Average case = 31 buildings at $100 comes to $3,100. After placing the finished items on the layout it looks like I should build a few more of some that I have already built (maybe with a few alterations using John’s ideas).
Thank you, Al and John. And yes, coffee before I start in the morning and a glass of WHITE wine after six in the evening.
Lawrence”


A big thanks to Bob for sharing his HO scale Dairy Queen build, Jb, James and Lawrence.
Lawrence really does show you can pretty much build anything out of the print out scenery – I think that’s the fun of it.
That’s all for today folks.
Please do keep ’em coming.
And please don’t forget the Beginner’s Guide if you want to make your start without any of the usual mistakes.
Best
Al

James. I have to say that’s quite a vision you had for your layout. Being able to see in your head the finished layout, which is complex is no mean feet. Please keep us up to date with progress. A track plan would be good if you can supply one.
Bob, Great job of kit-bashing your Dairy Doll scene. I loved the rotating ice cream cone and lighted building. Very clever.
James, Looks like a great start on your N scale mountain layout. What is the brand of track you’re using? Does it come in flexible sections?
Lawrence, Loved your detailed description of building Al’s printed buildings. I like the aluminum angle used to get perfectly square corners. You obviously have a lot of patience to cut out all the windows and doors and frames as separate layers to achieve the more realistic 3D results. What a great ad for Al’s buidlings.
Nice work all…was hoping for a pic of James’ cars as well 🙂 Just the 2 MGs myself!
Lawrence…
Wow! Excellent work and I like your ideas…
The RAM board is something that I will have to check out and try….
The use of aluminum angle to get perfectly square corners is pure genius!
Thank you for the new ideas…
John
James: I am a former president of the Houston (Texas) MG Car Club! I would love to know more about your MG collection. Perhaps Al could provide my email address to you and we could communicate off-board. Congrats on your magnificent layout!!
Steve – which MGs do you have? I have a ’71 Midget myself. (Not to make this post about cars, but it’s interesting that we share common interests!)
Bob,
Your Dairy Doll ice cream stand is a great addition to your layout. Your vision and craftmanship execution were fabulous. I believe that those touches from our own lives adds so much interest to our layouts. I have – in waiting – a stateside Texaco service station from the 40’s – 50’s to model after the one that my uncle ran for as long as I knew him. Would have modelled my grandfather’s Gulf station – worked there quite a bit – but could not come up with a comparable kit / kits to bash. Keep the trains running. Ron
Hi Susan
Mine are only just barely classics…a 1998 VVC F and a 2004 TF. Affordable fun – whereas model railways these days can be rather expensive :-). Mind you, I have a few Tri-Ang locos from the late 1950s still running on the original motors…new brushes of course…so it needn’t cost too much if one is happy to run robust if not to have super-accurate models.
Lawrence’s use of angled aluminium is one of those great ideas which you think “of course, simple but brilliant”!
AW heck now I want a hot fudge sundae a 20 minute drive to cow town !! 🙂 (corydon )
Wait a minute. That’s not an HO layout! …unless Marklin is now selling Lionel Look Alike HO Track. Nice work on the Dairy Queen though.
I think the scale of the dairy doll is a little off.