HO scale atlas track

Scott’s been back in touch with an update on his HO scale atlas track:

“Alastair: I love your site.

Over a year ago, I posted some pics of the DCC HO layout my wife and i have been working on since December 2017 and wanted to send you an update.

Many years ago I had an HO DC layout in a spare bedroom with mountains built into the walls and very difficult under table access to the parts of the layout where the train always derailed.

That layout came down due to a ceiling leak and i put the track, table and buildings (many of which i have had since I was a child in the 50s and 60s) into the attic in my garage.

In December, when our grandson was almost one, my wife and i started work on the present HO DCC layout in the basement.

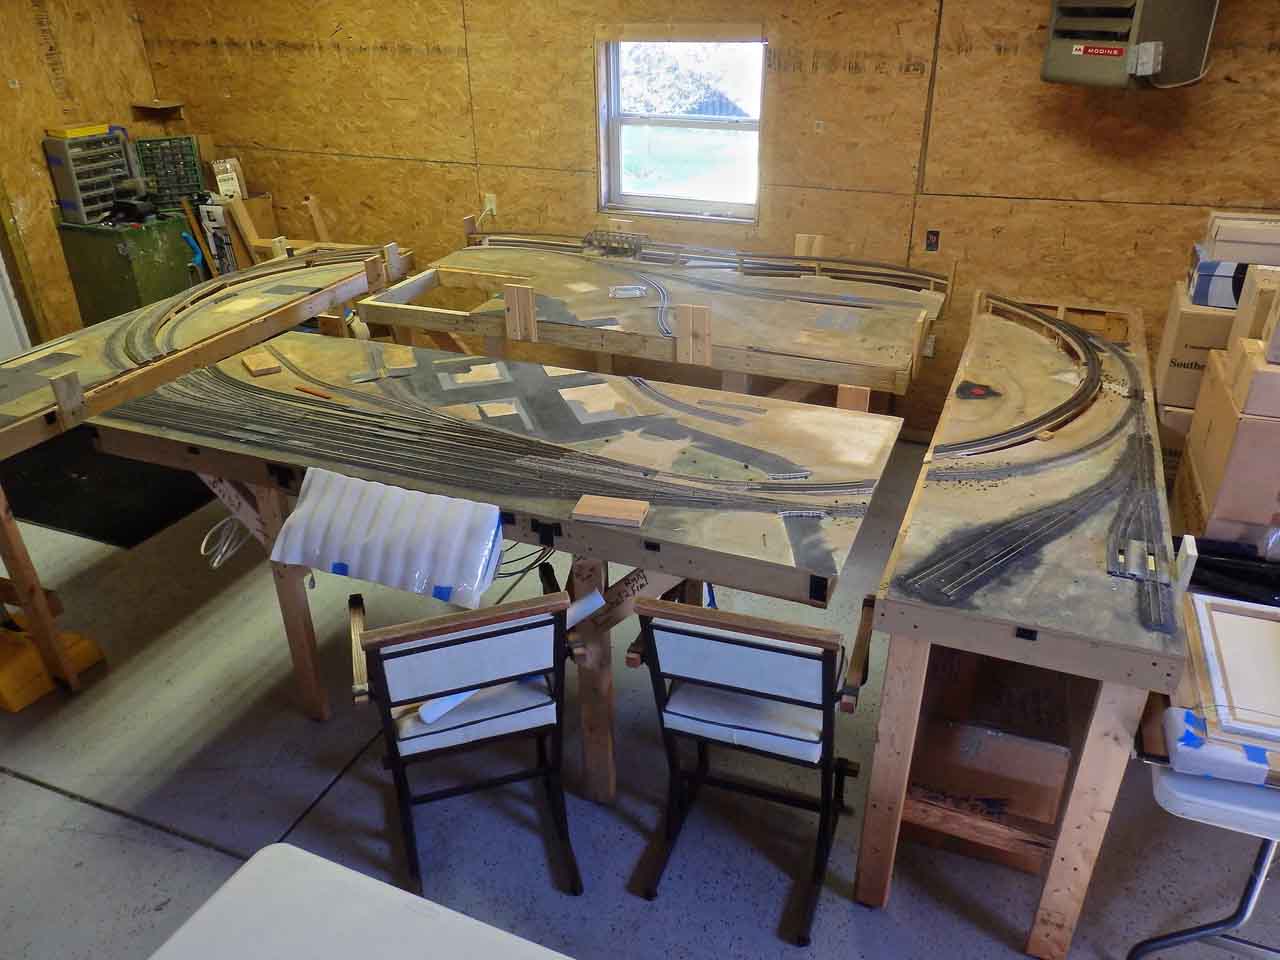
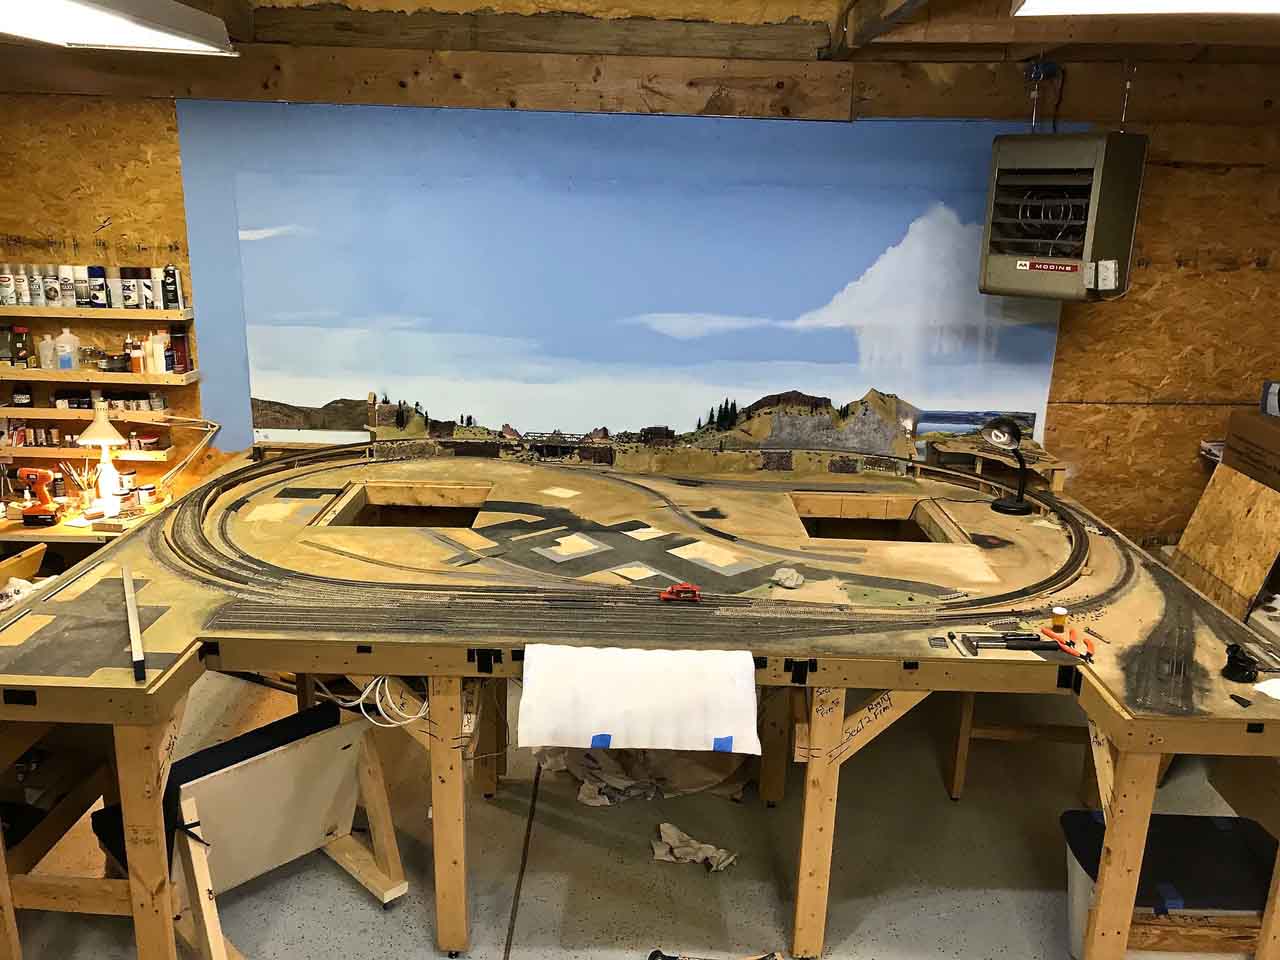
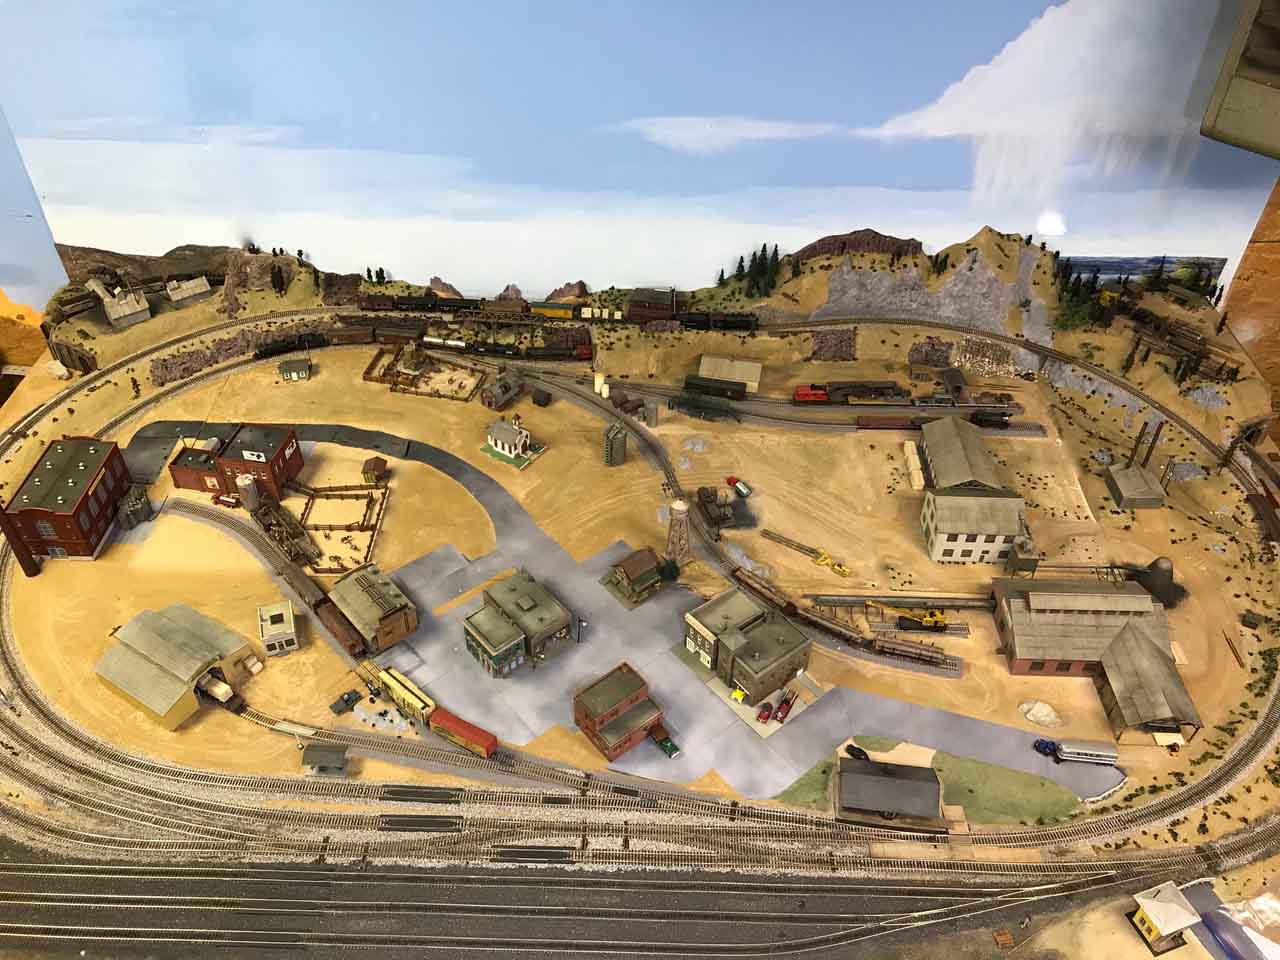
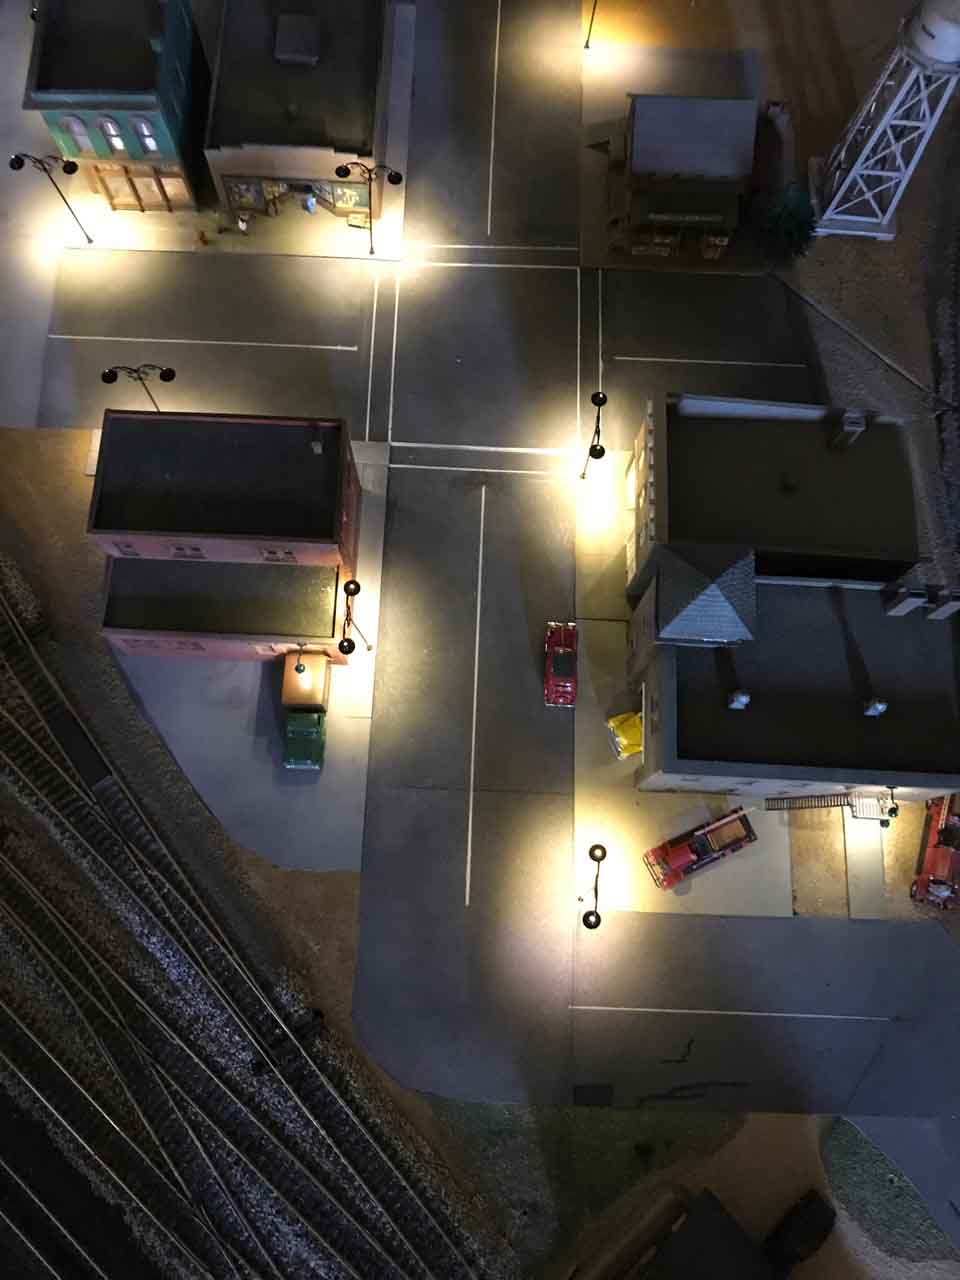
My wife insisted on not putting the layout against the walls so access wold be easy and people could walk around and see the table from all angles. This turned out to be a brilliant idea as i no longer had to worry about placing every building so you could see the font of it and no longer had to crawl under the table to fix problems.

The table is designed to be seen from a height of three feet and the top is 5/8″ plywood squares screwed into 3/4′ x 34′ planks with 36′ x 1 3.4′ wood legs (unfortunately i did not install screw in spacers and has to use shims to level the table on the tiled basement floor.

The table surface measures 13 3/4′ x 5′ plus 7′ x 5′ for total area of 104 sq. ft.

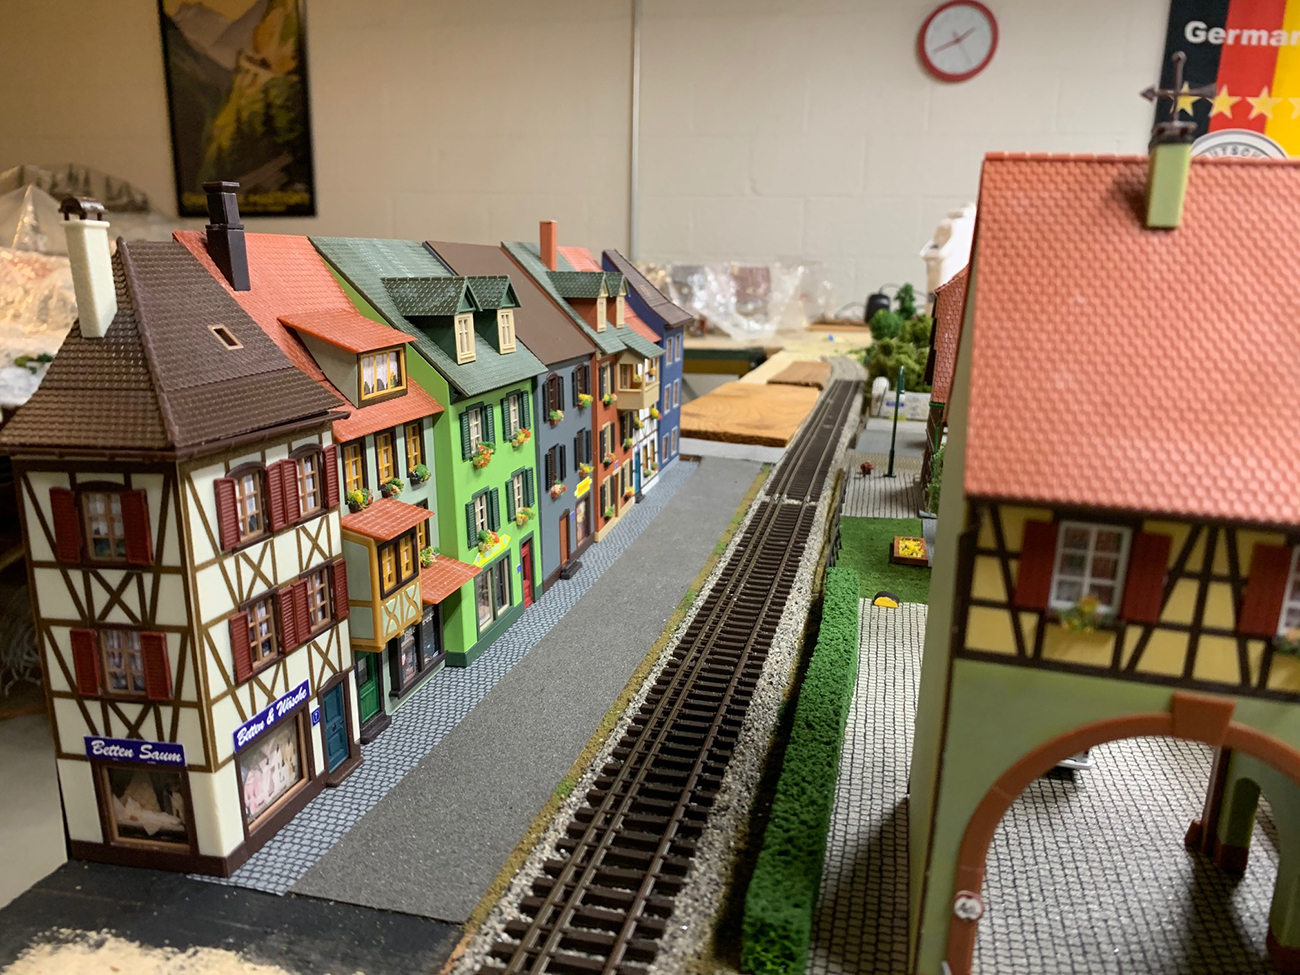
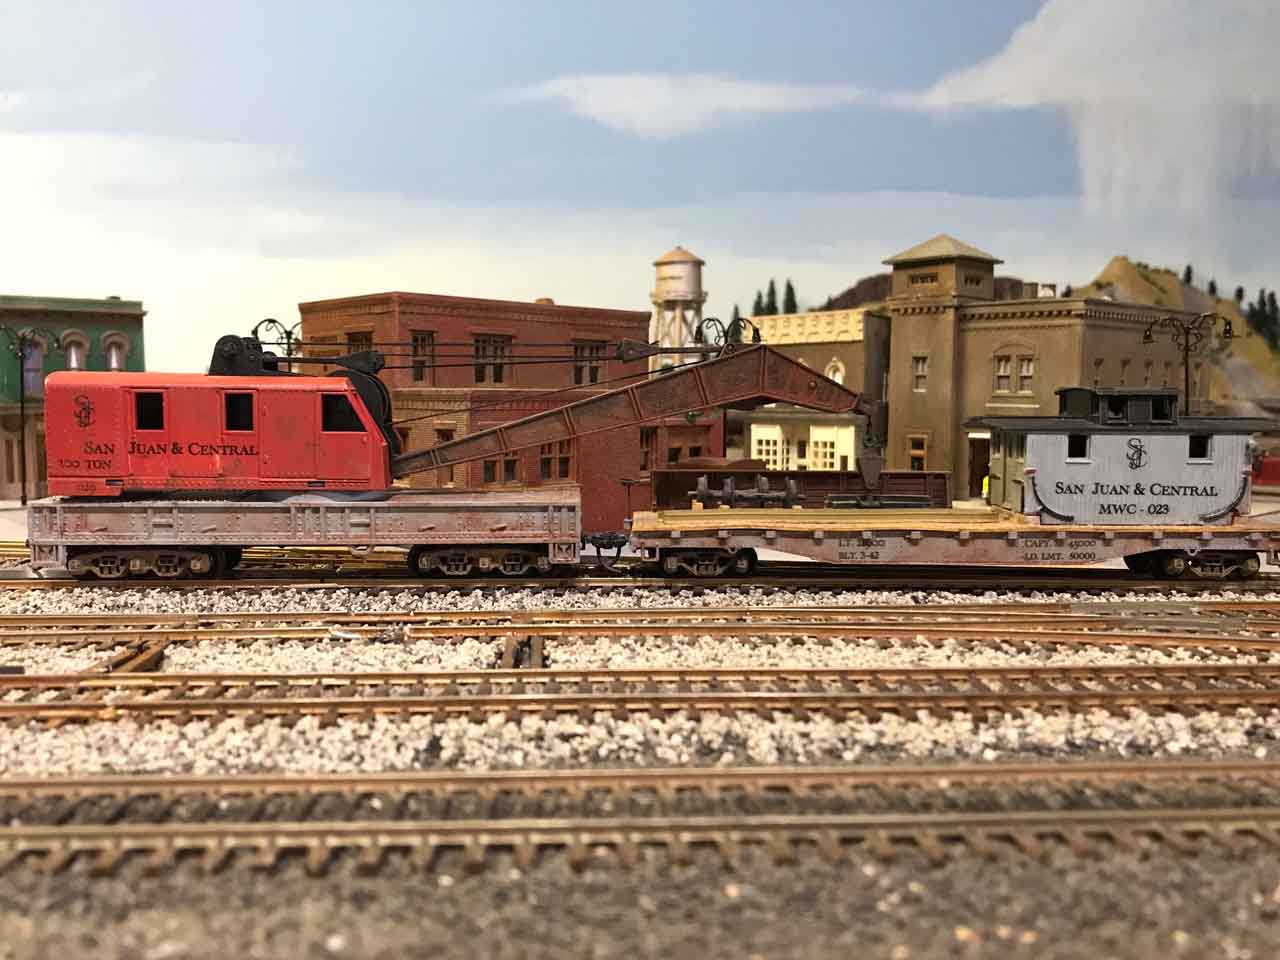
The layout is made from old HO scale Atlas track (brass code 100).

The trains are DCC with NE Powercab controller.

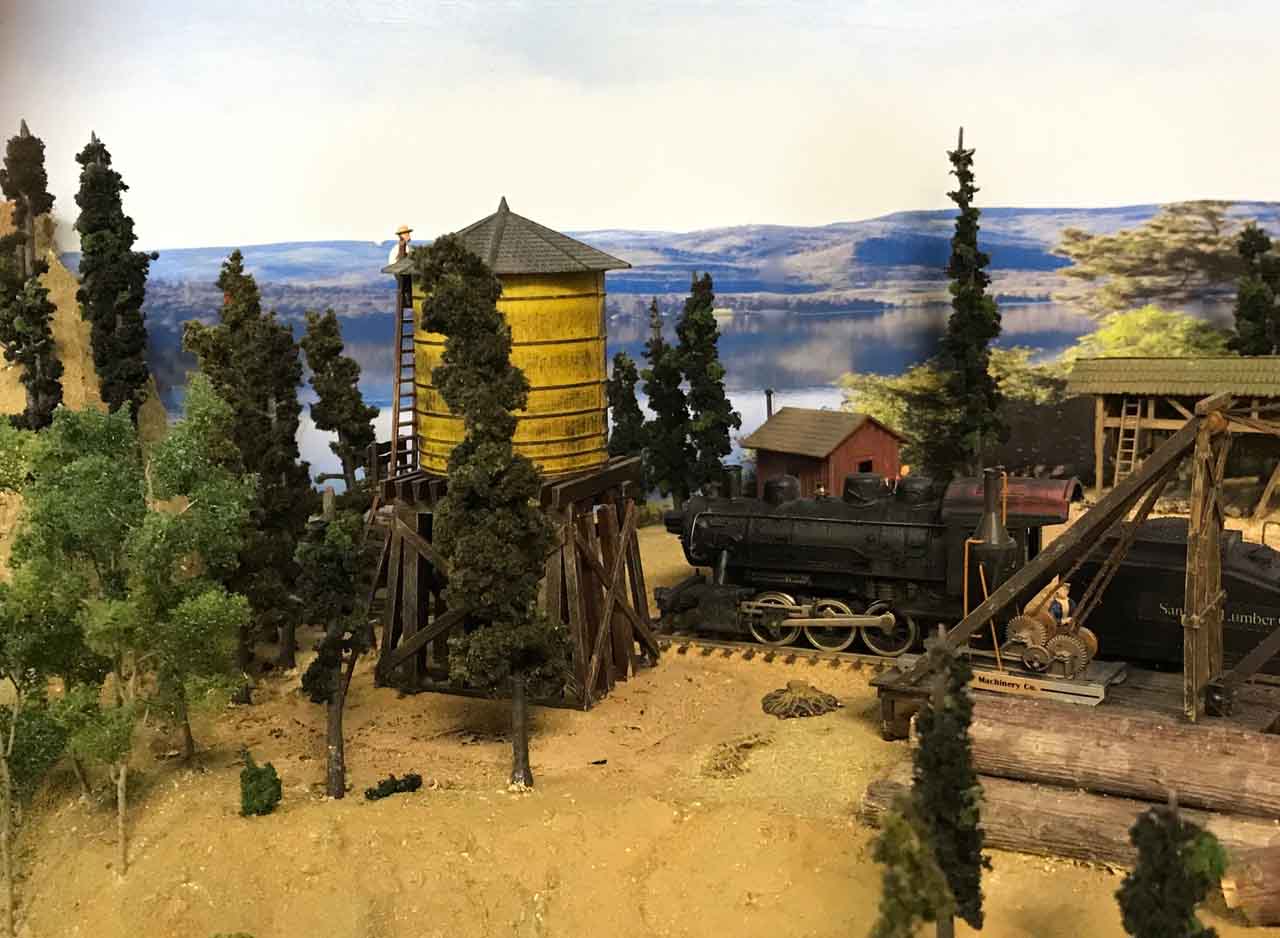
We have 15 turnout switches and dc light bulbs in most of the buildings powered by an old Sound and Power & Light 9001 transformer. The bridge lights are X-Mas lights.

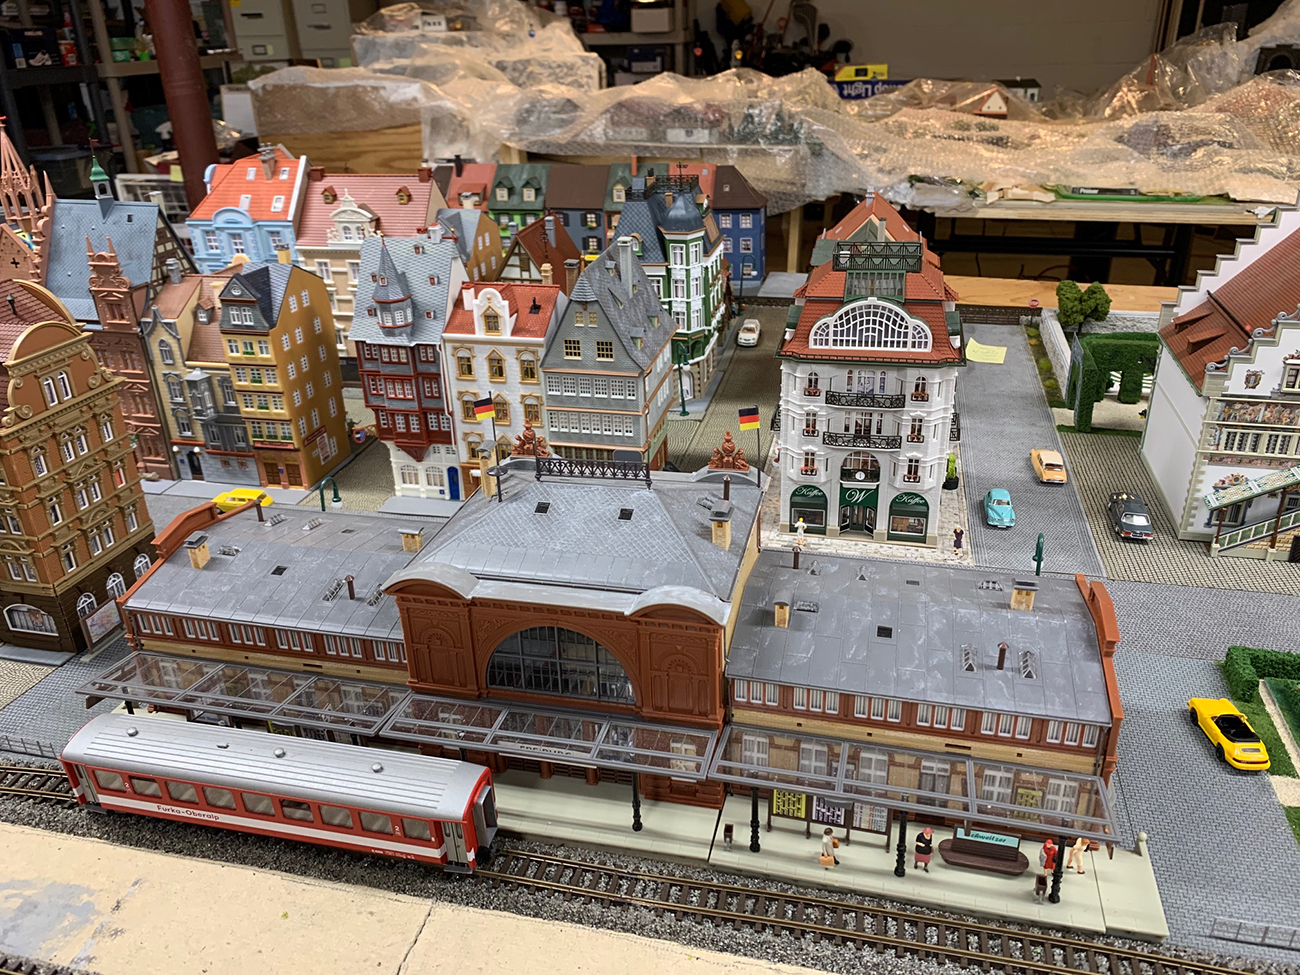
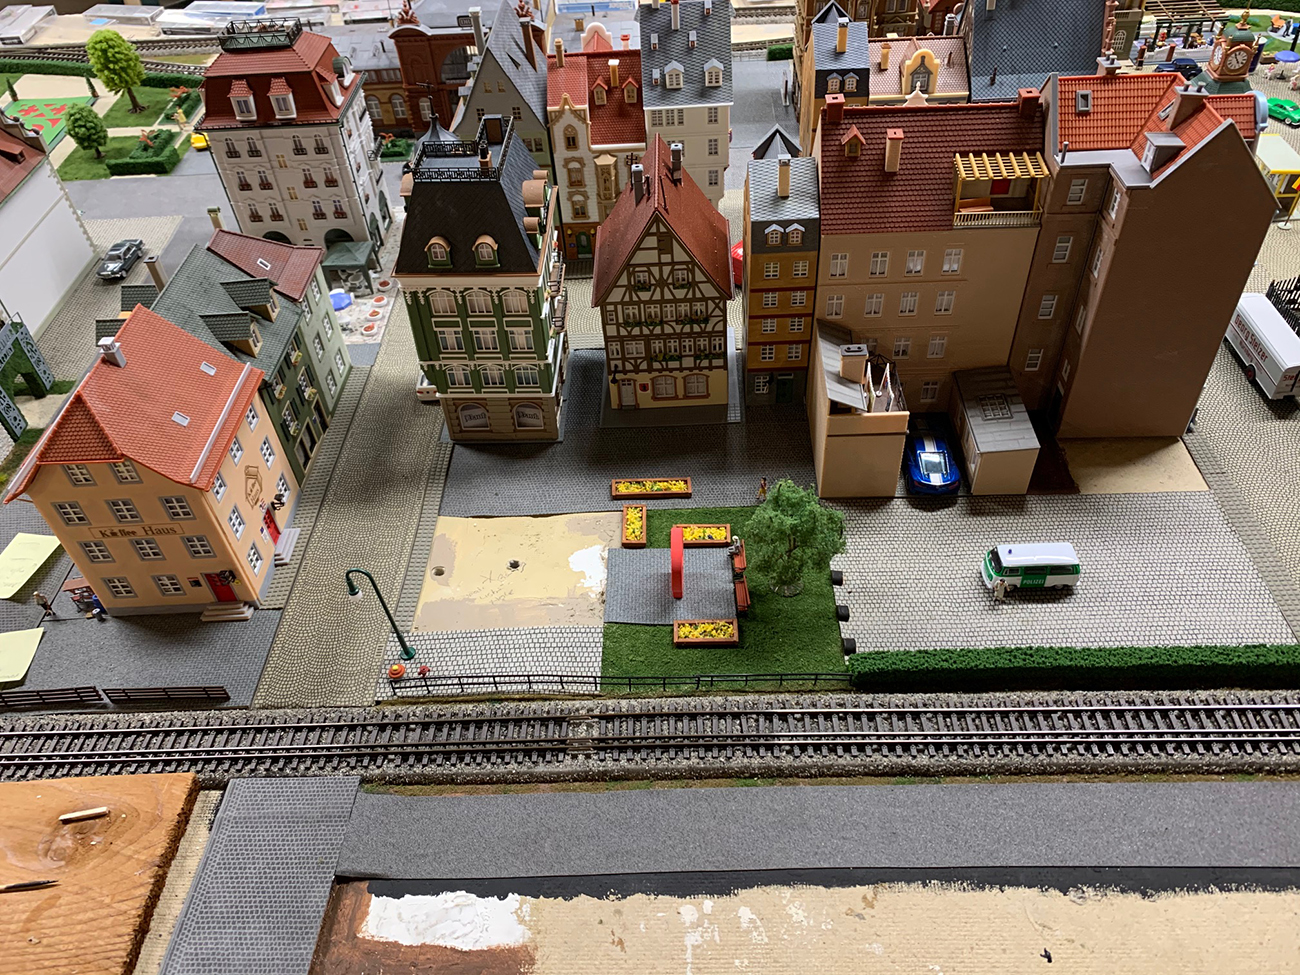
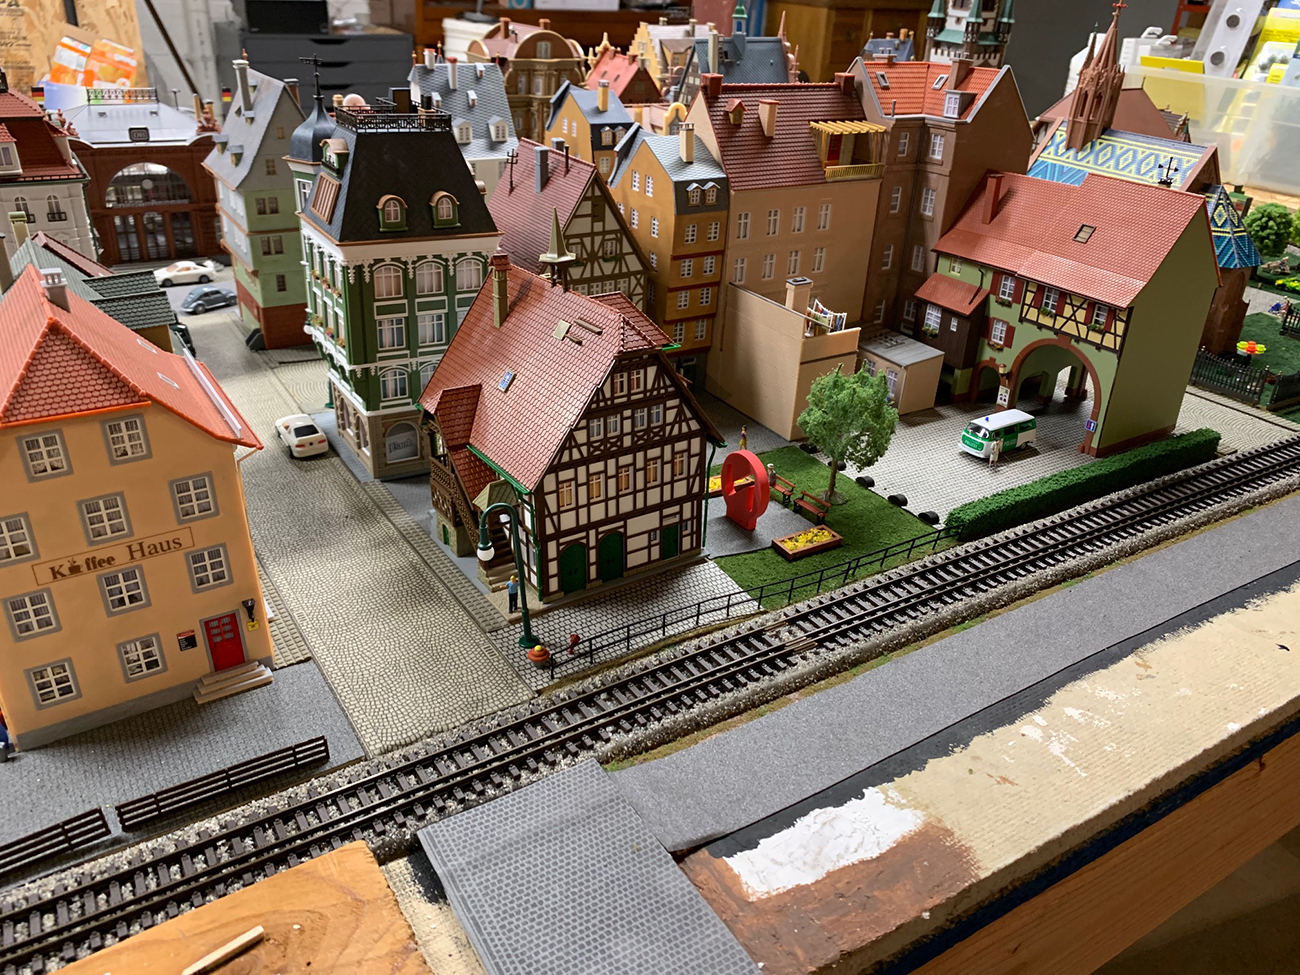
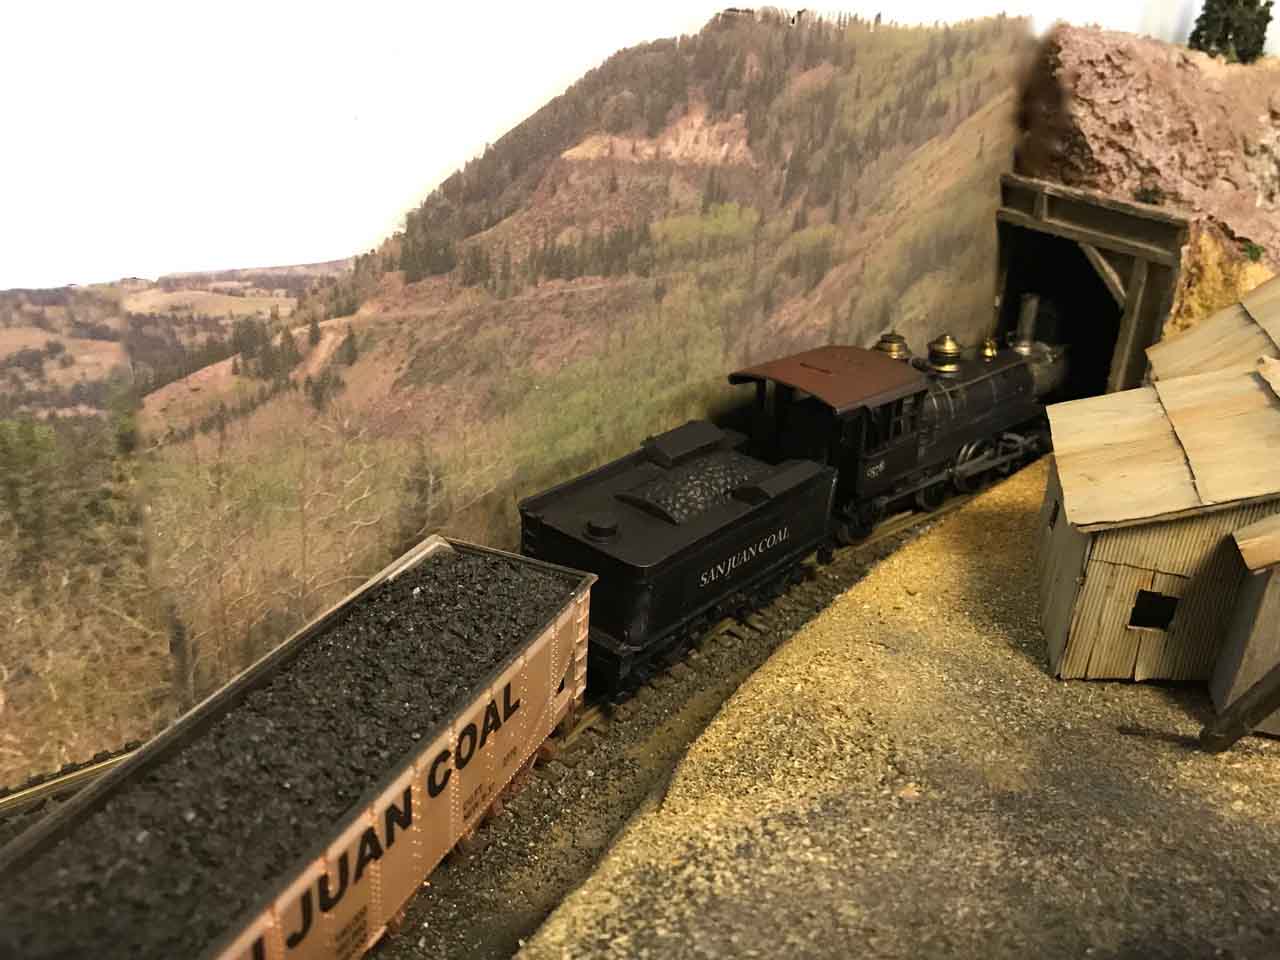
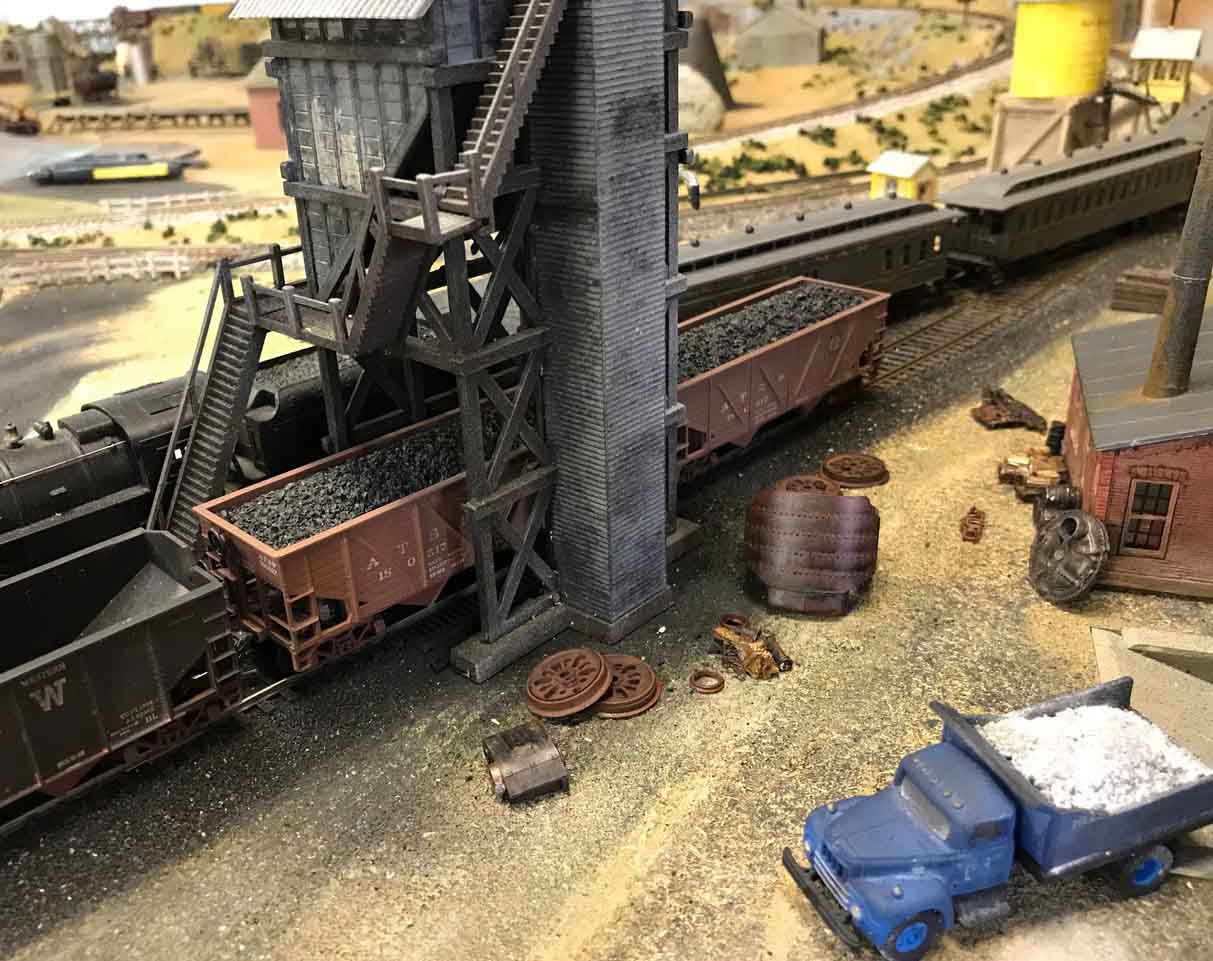
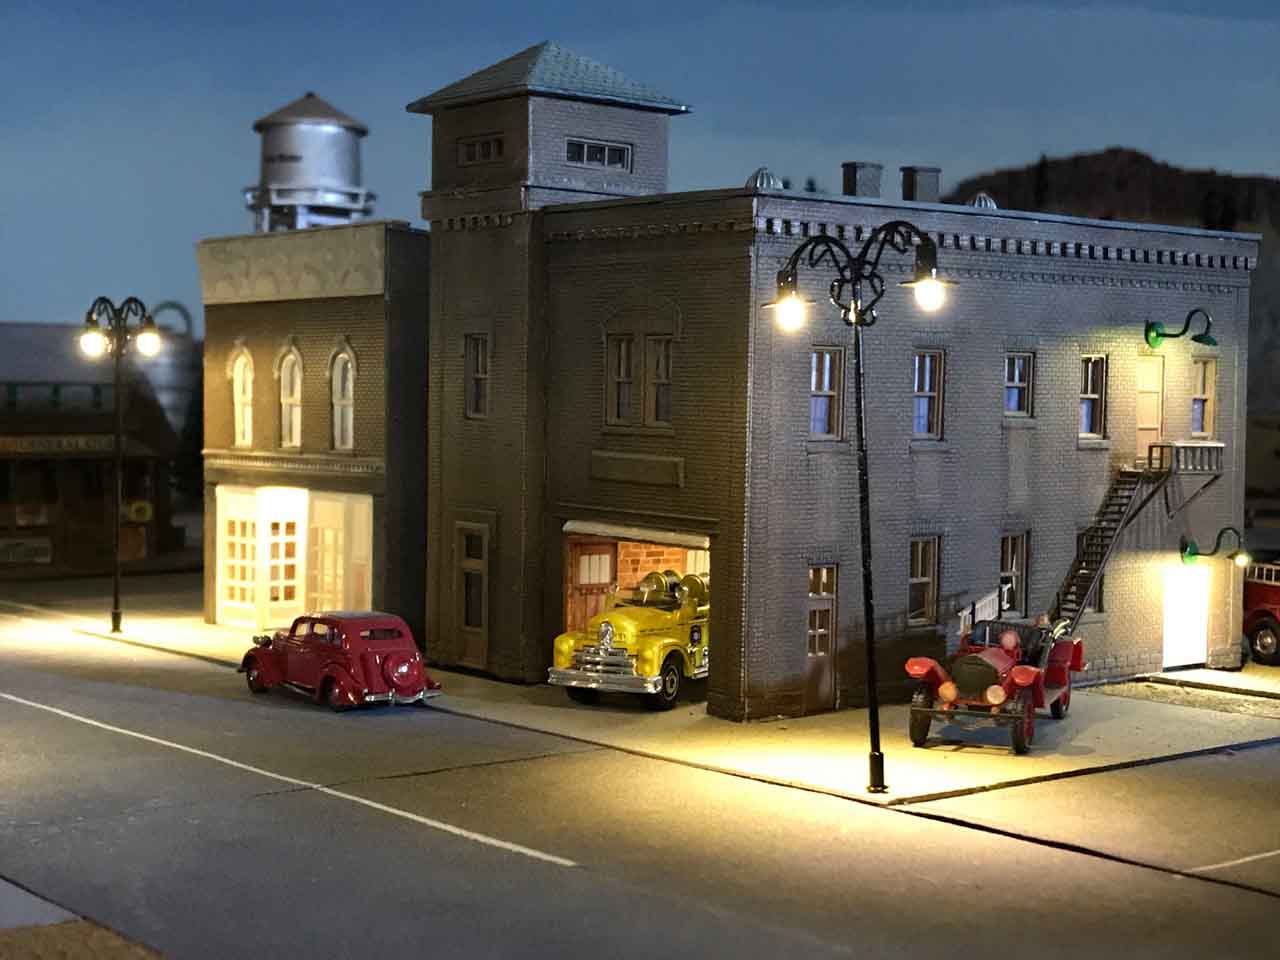
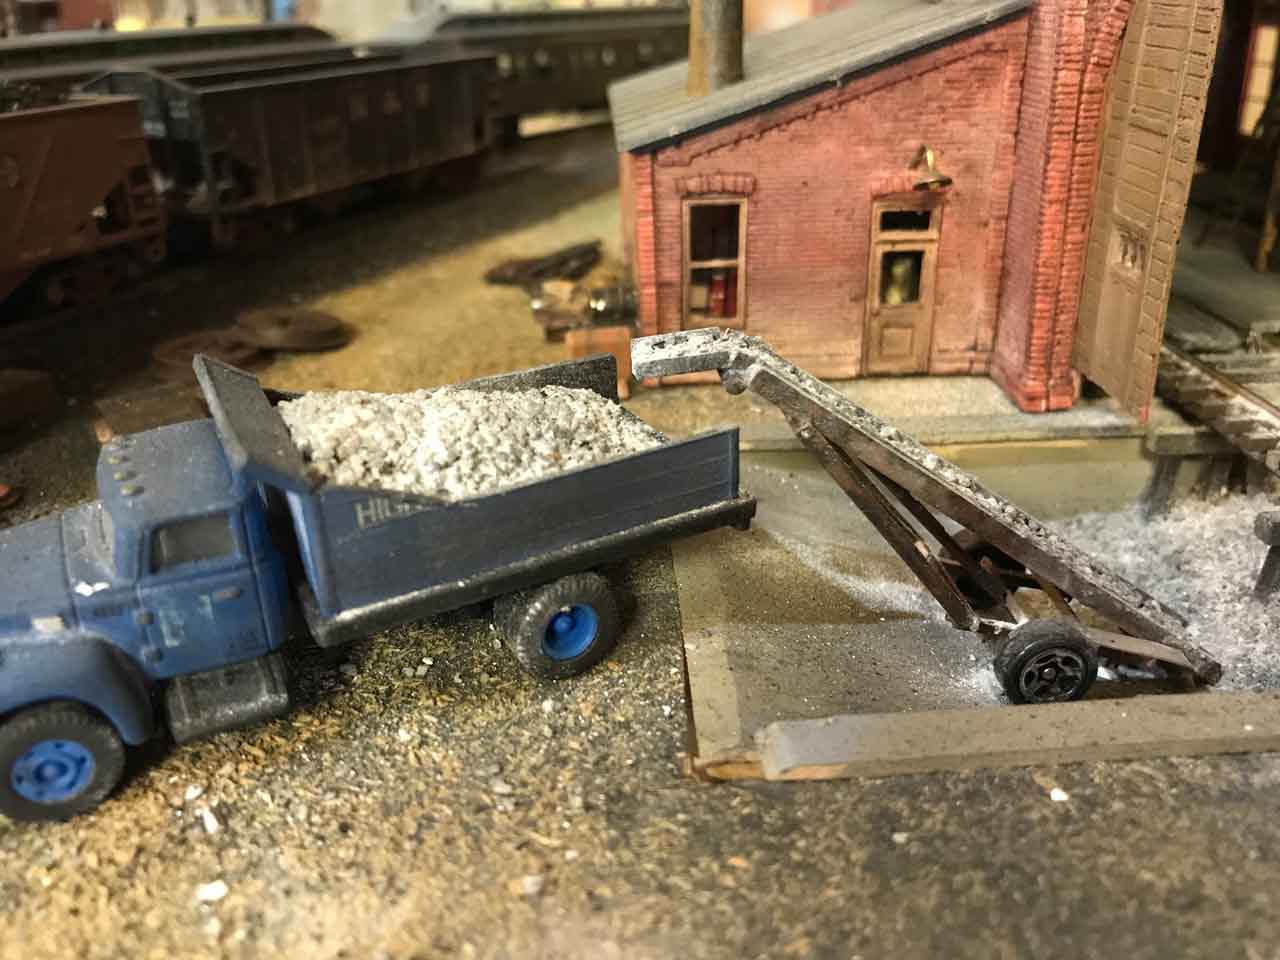
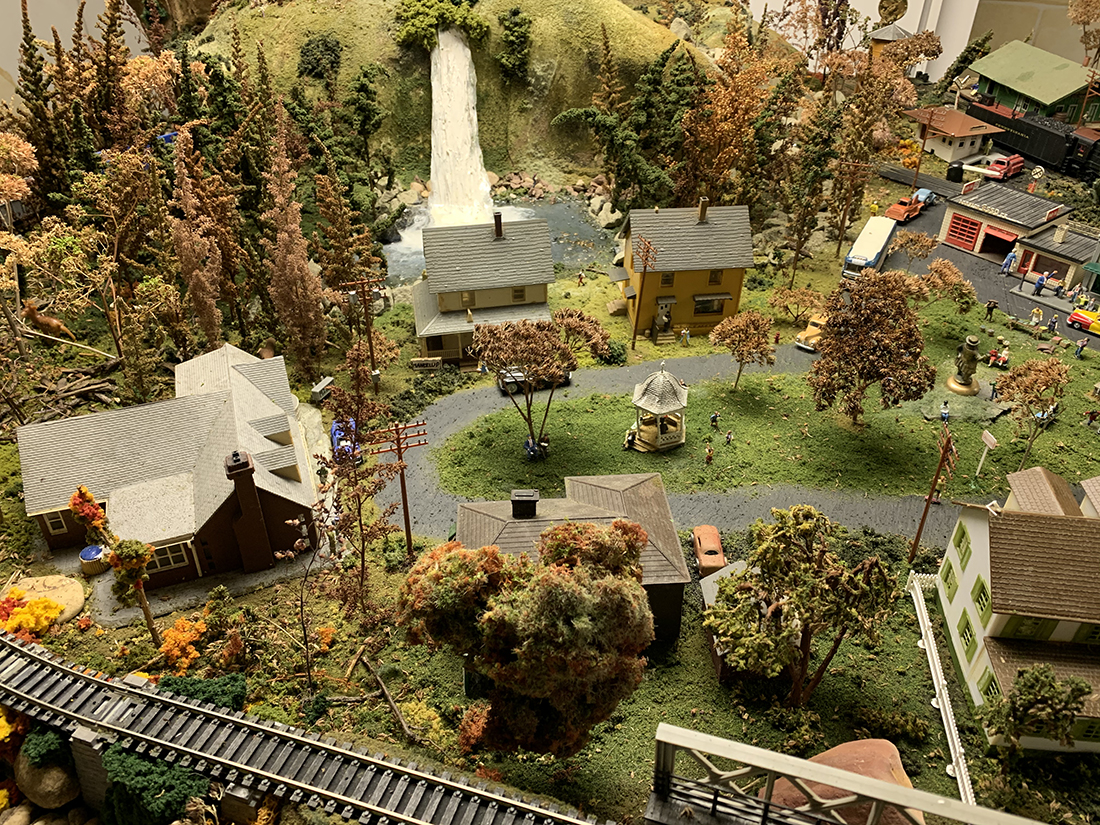
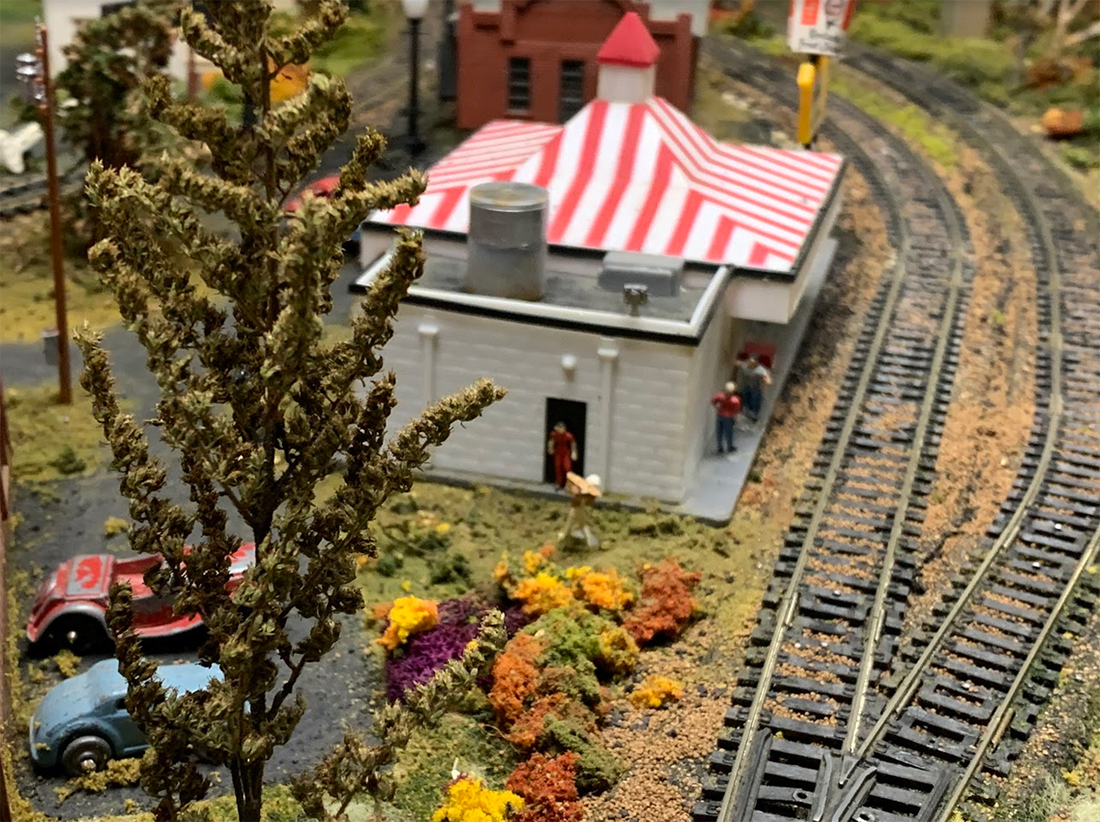
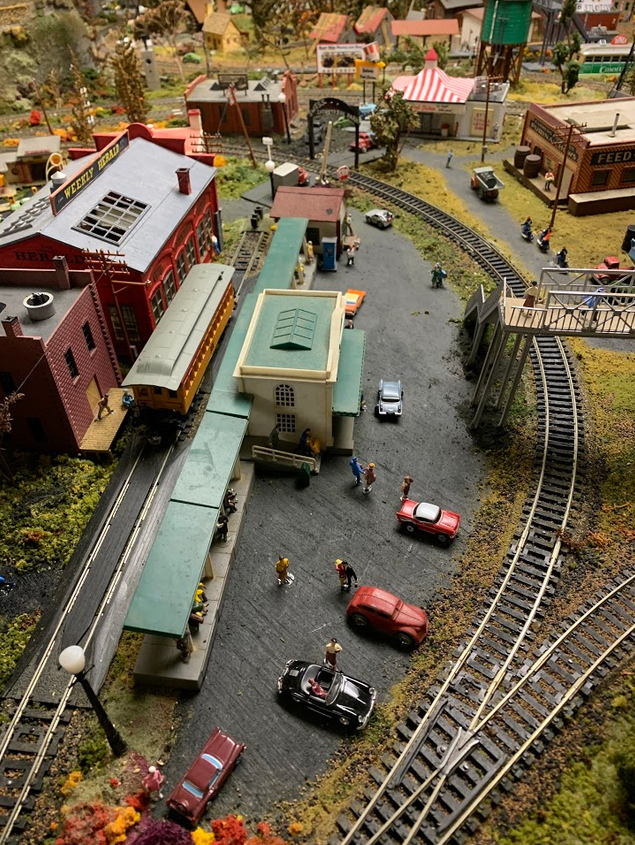
The setting is small town and rural 50s and early 60s. I run Broadway limited diesel and steam engines and many of my cars are from the 50s and 60s including the nuclear waste and chicken cars that light up and the nuclear missile and helicoptor carriers.

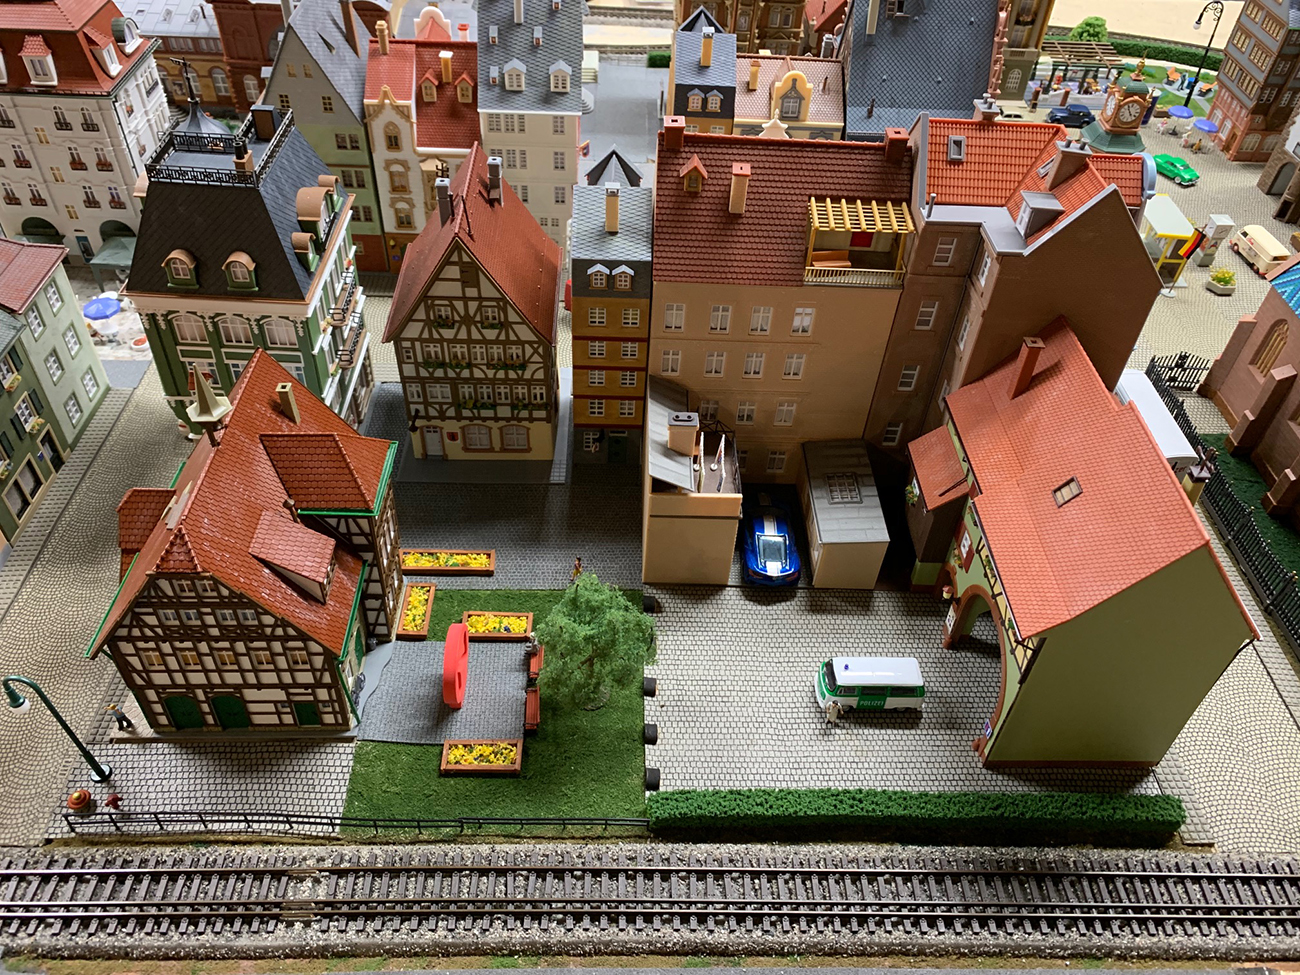
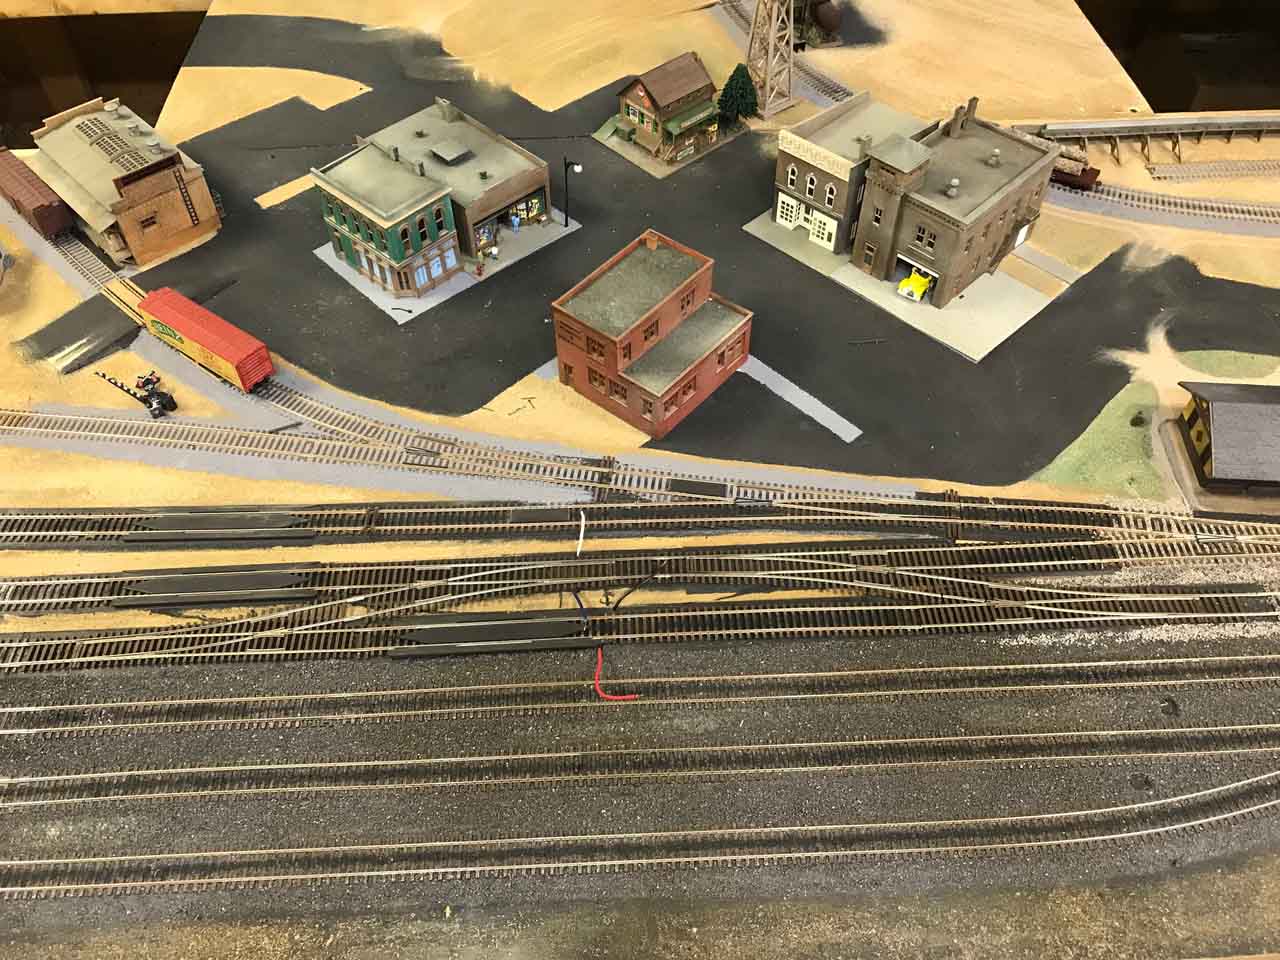
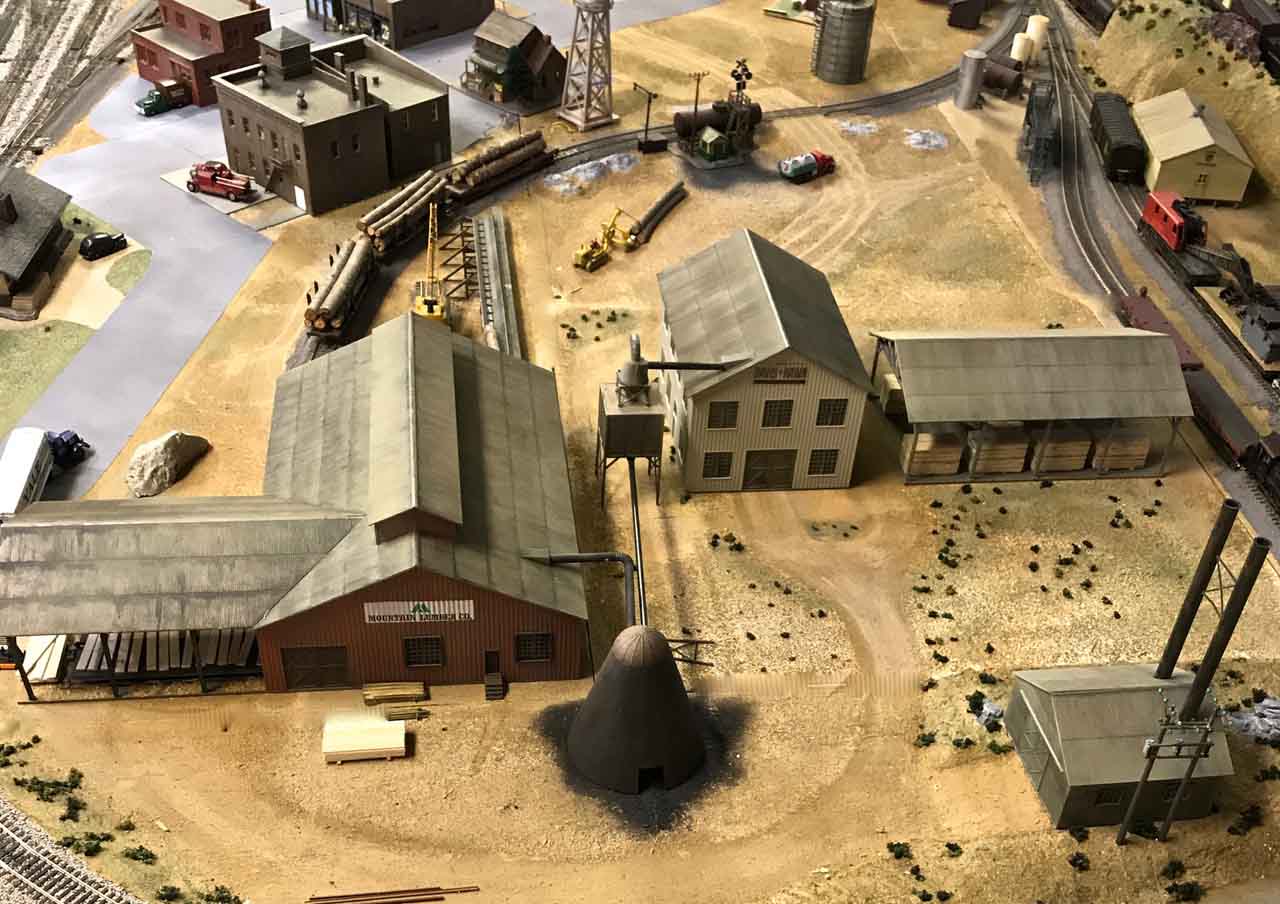
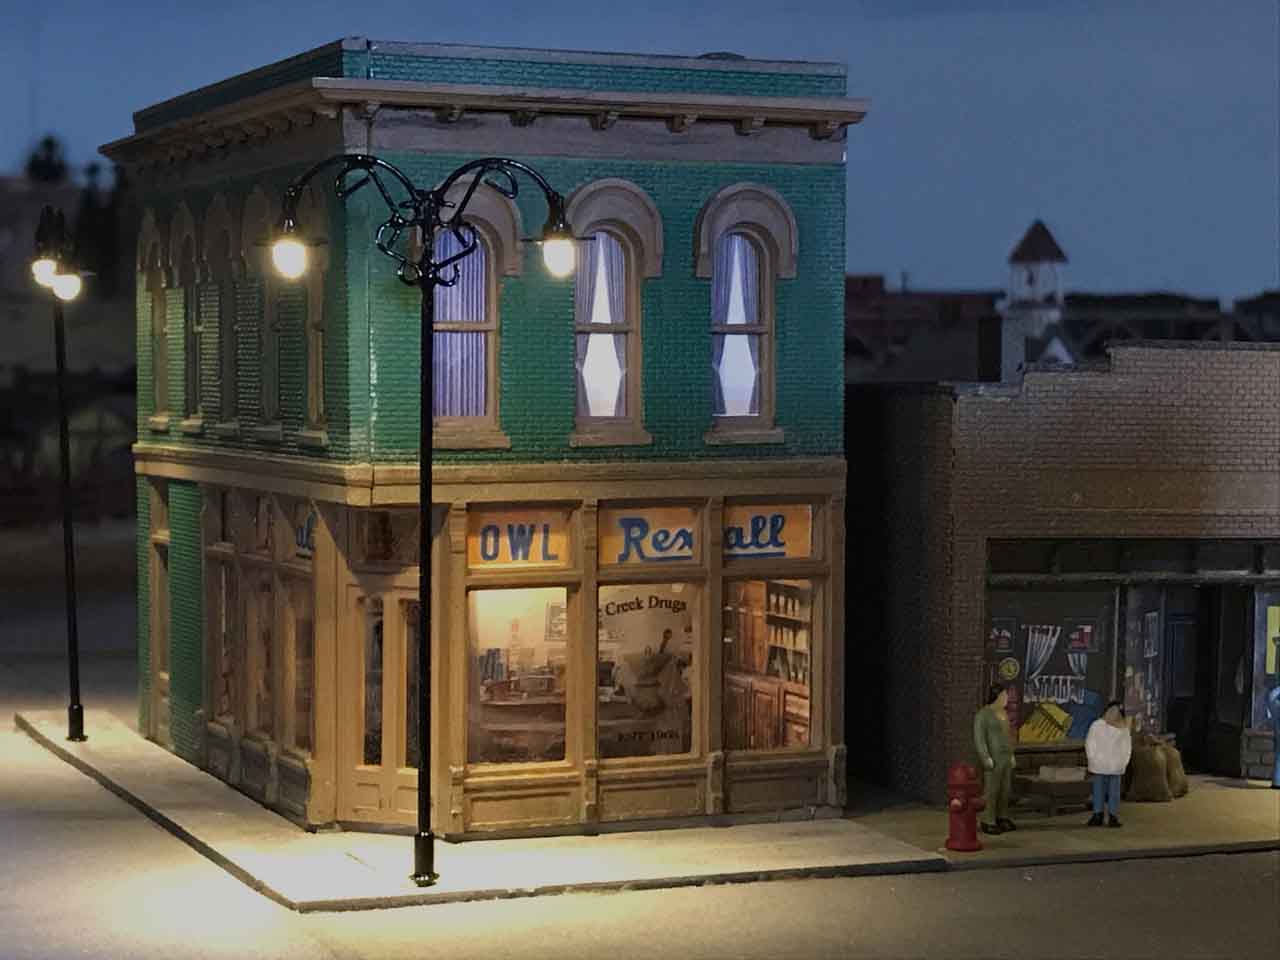
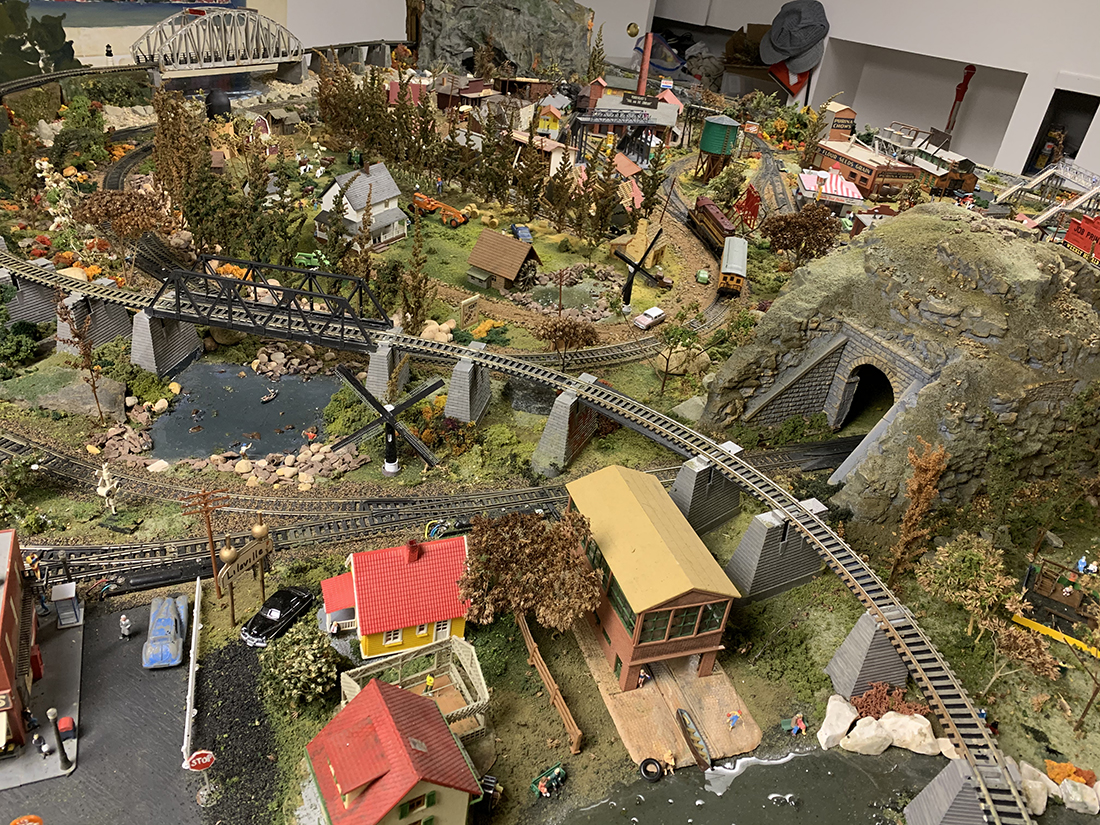
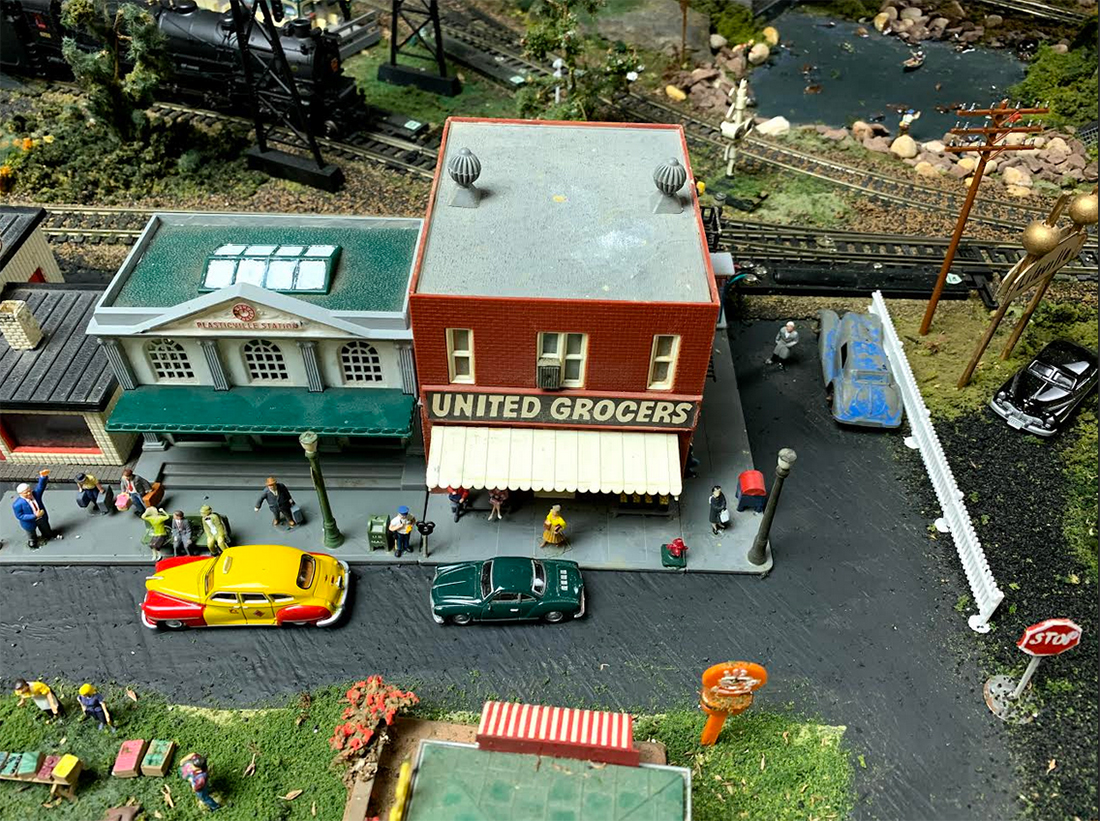
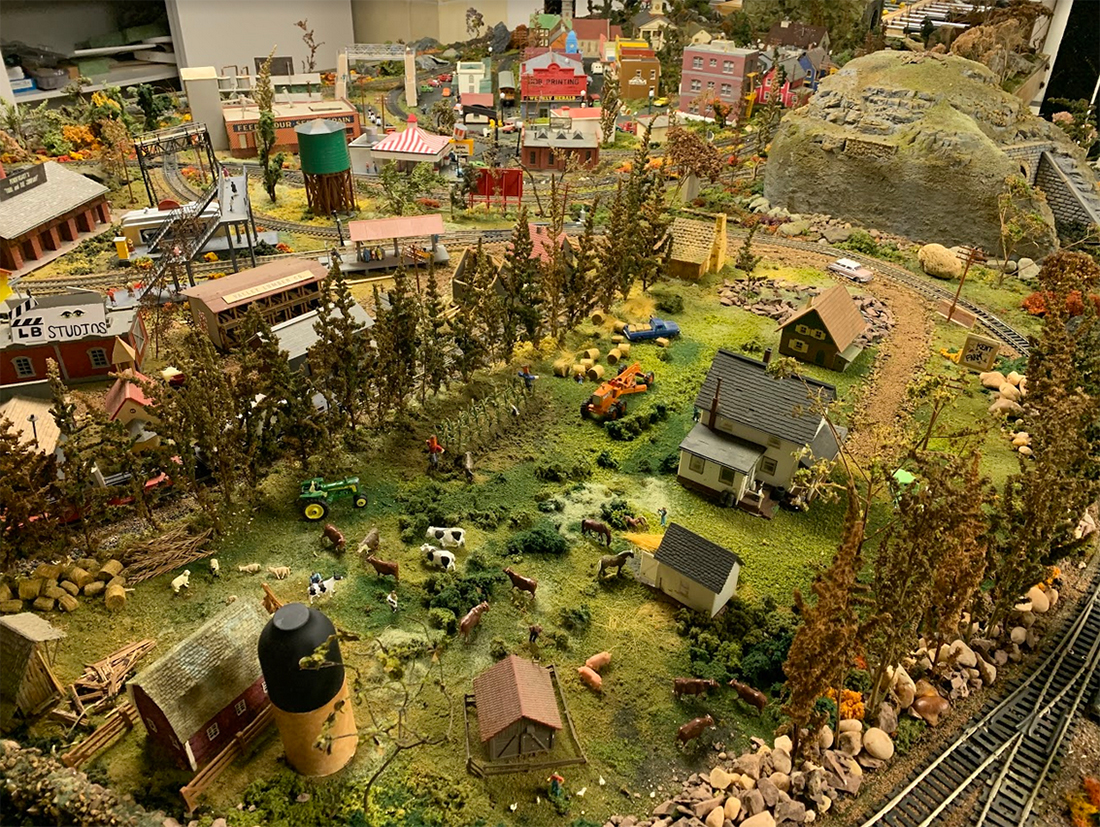
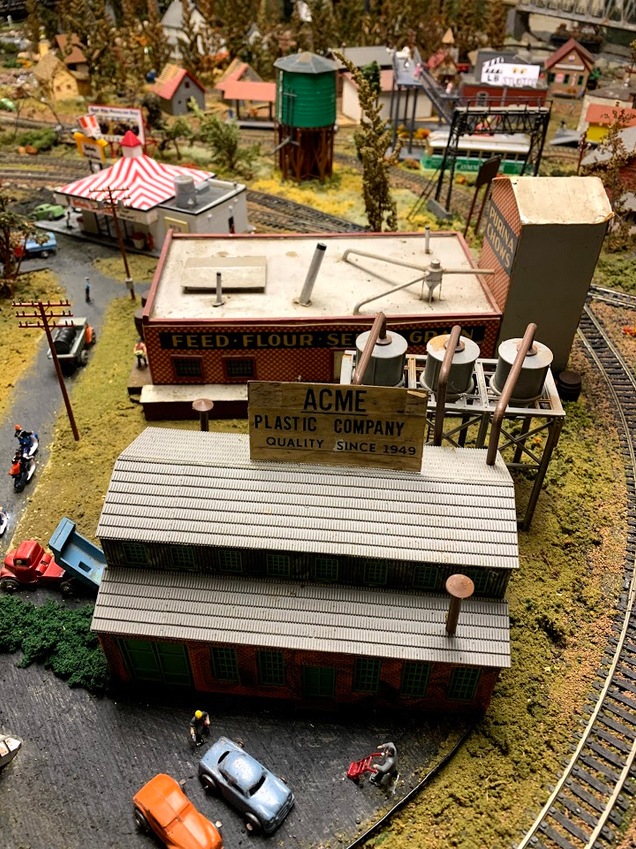
We have about 85 buildings, some of which are older than me (67) including a cardboard Purina Chow factory, old plasticville buildings, and a wooden butcher shop made from a German (possibly pre-war) kit where the roof lifts off so you can see the slabs of meat and the meat grinder on the counter.

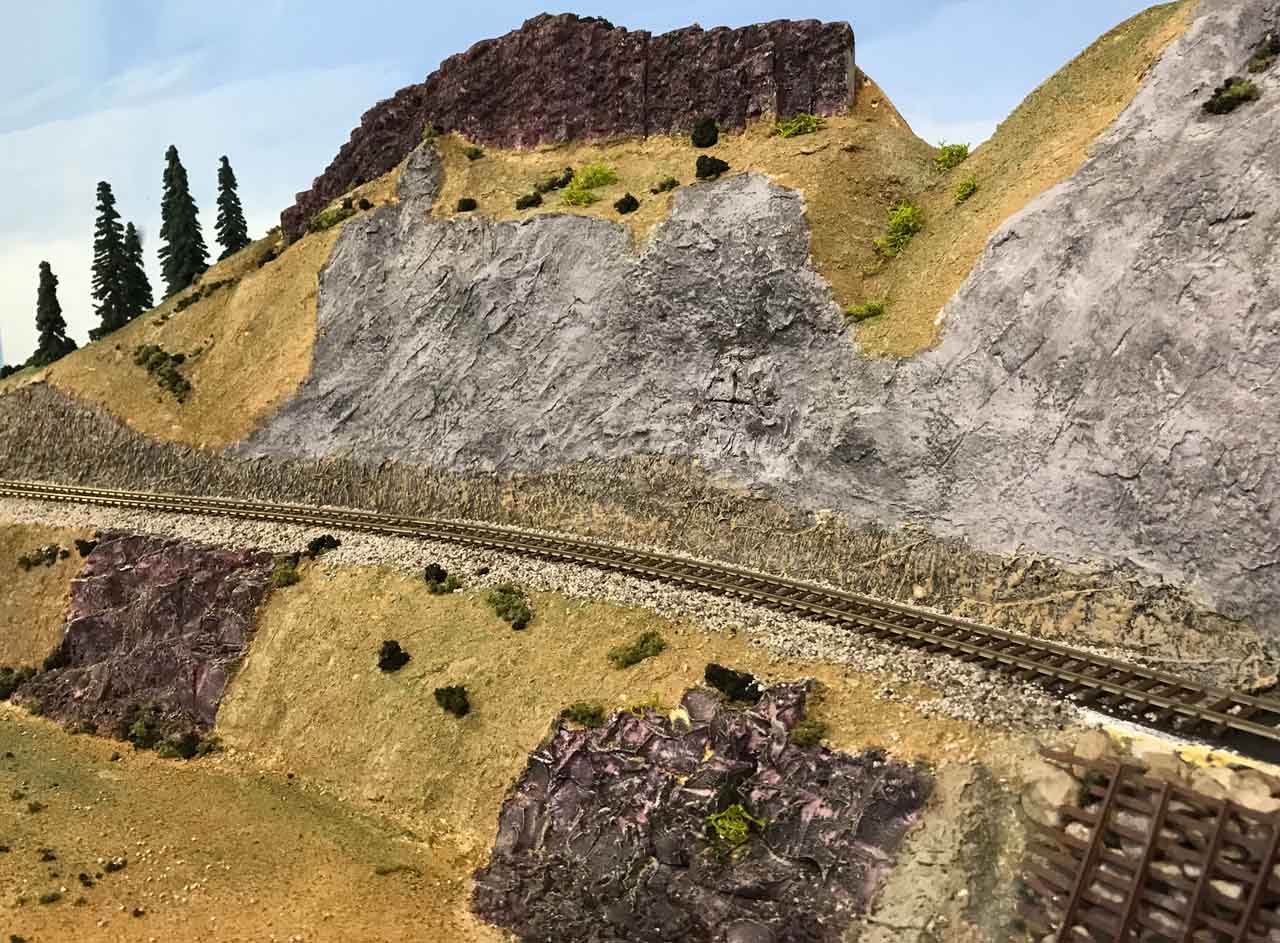
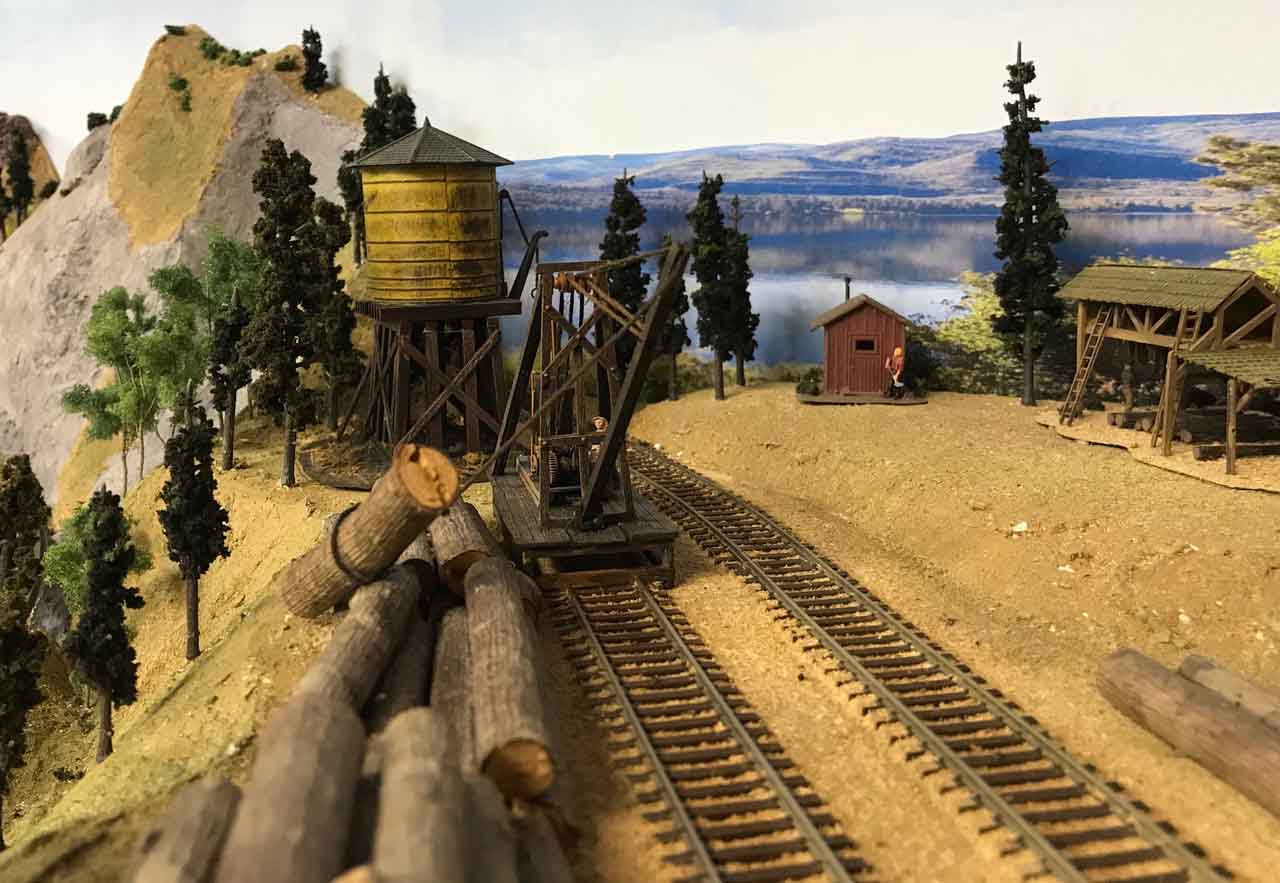
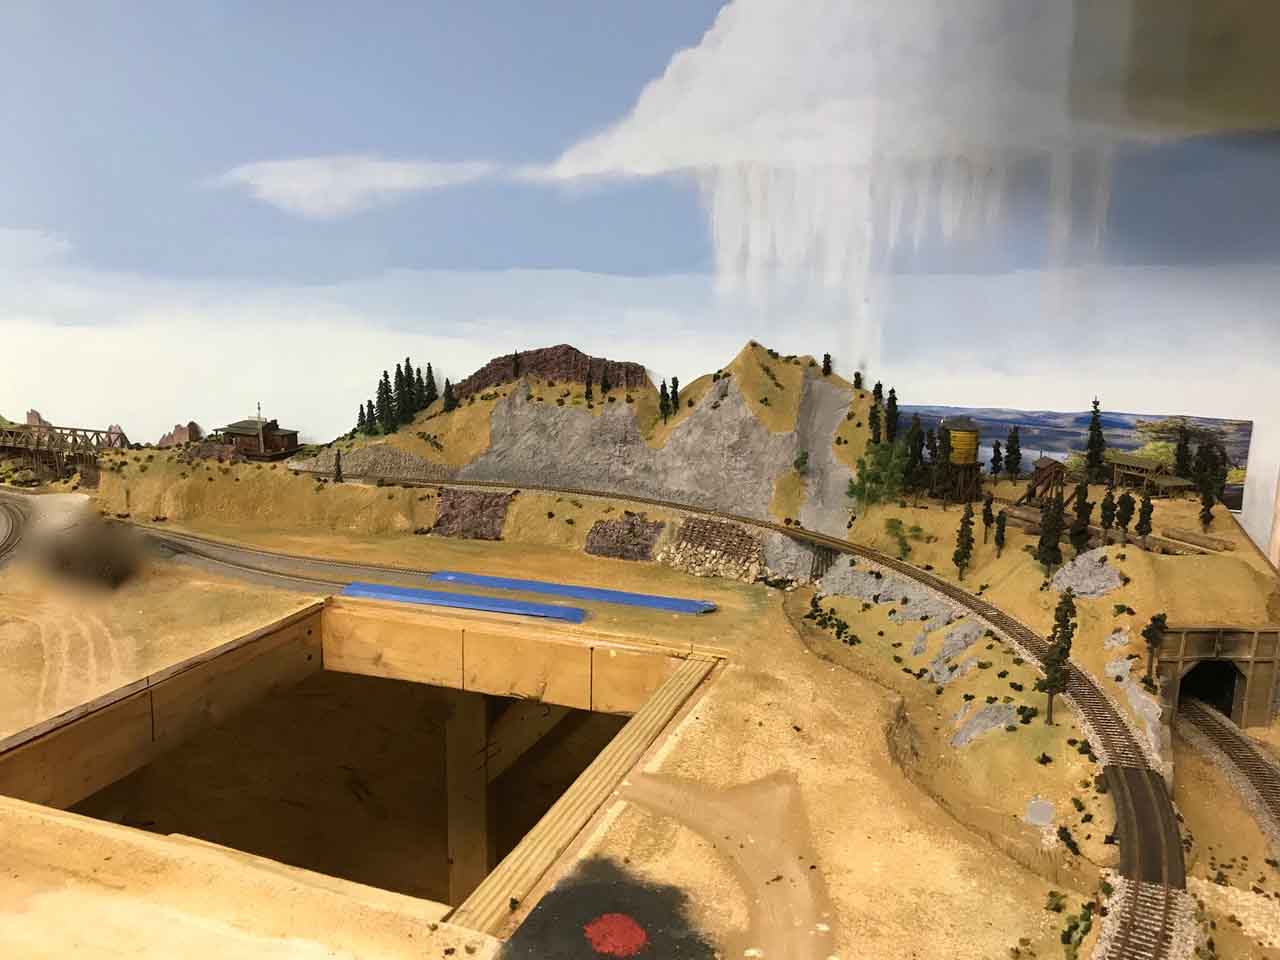
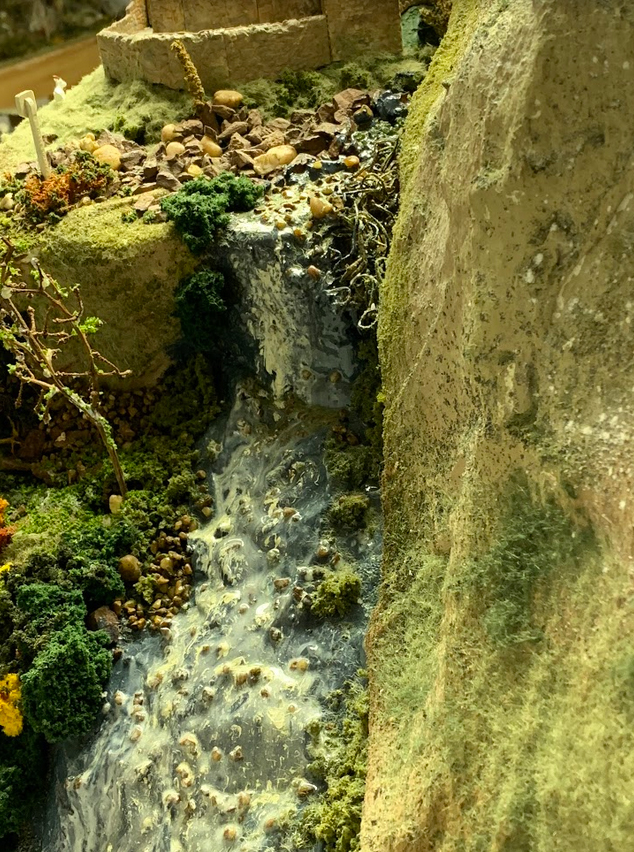
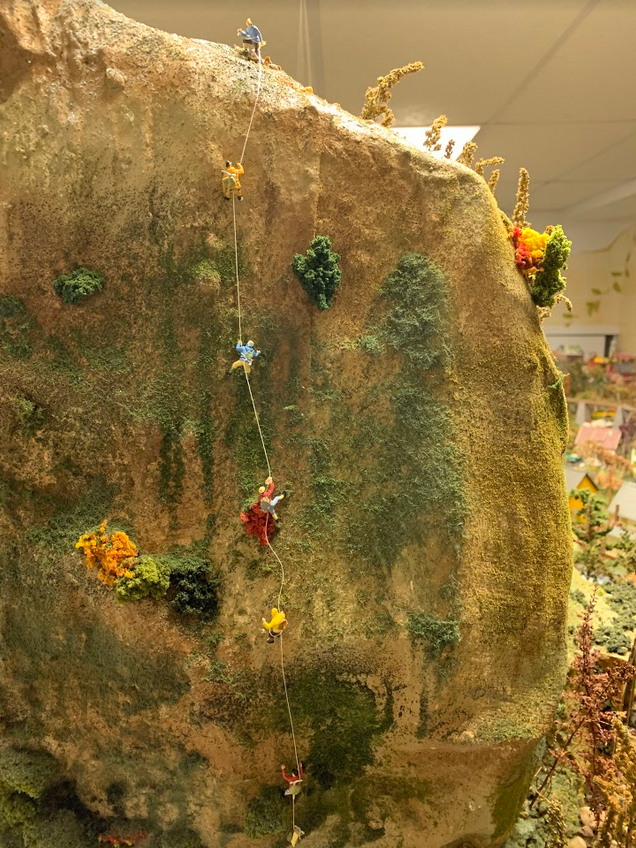
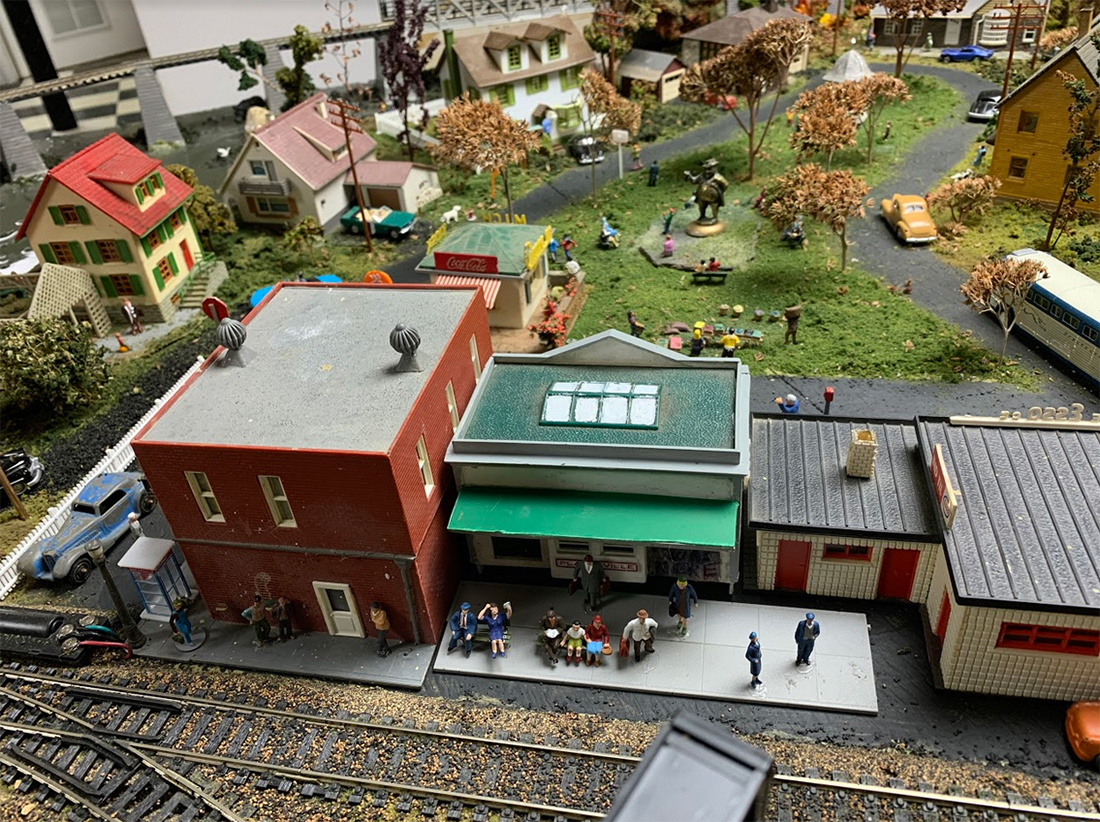
We have more than 200 people and animals and hundreds of trees. We try to use natural substances where possible. Actual sand, rocks, flowers or twigs or grape vines for trees.

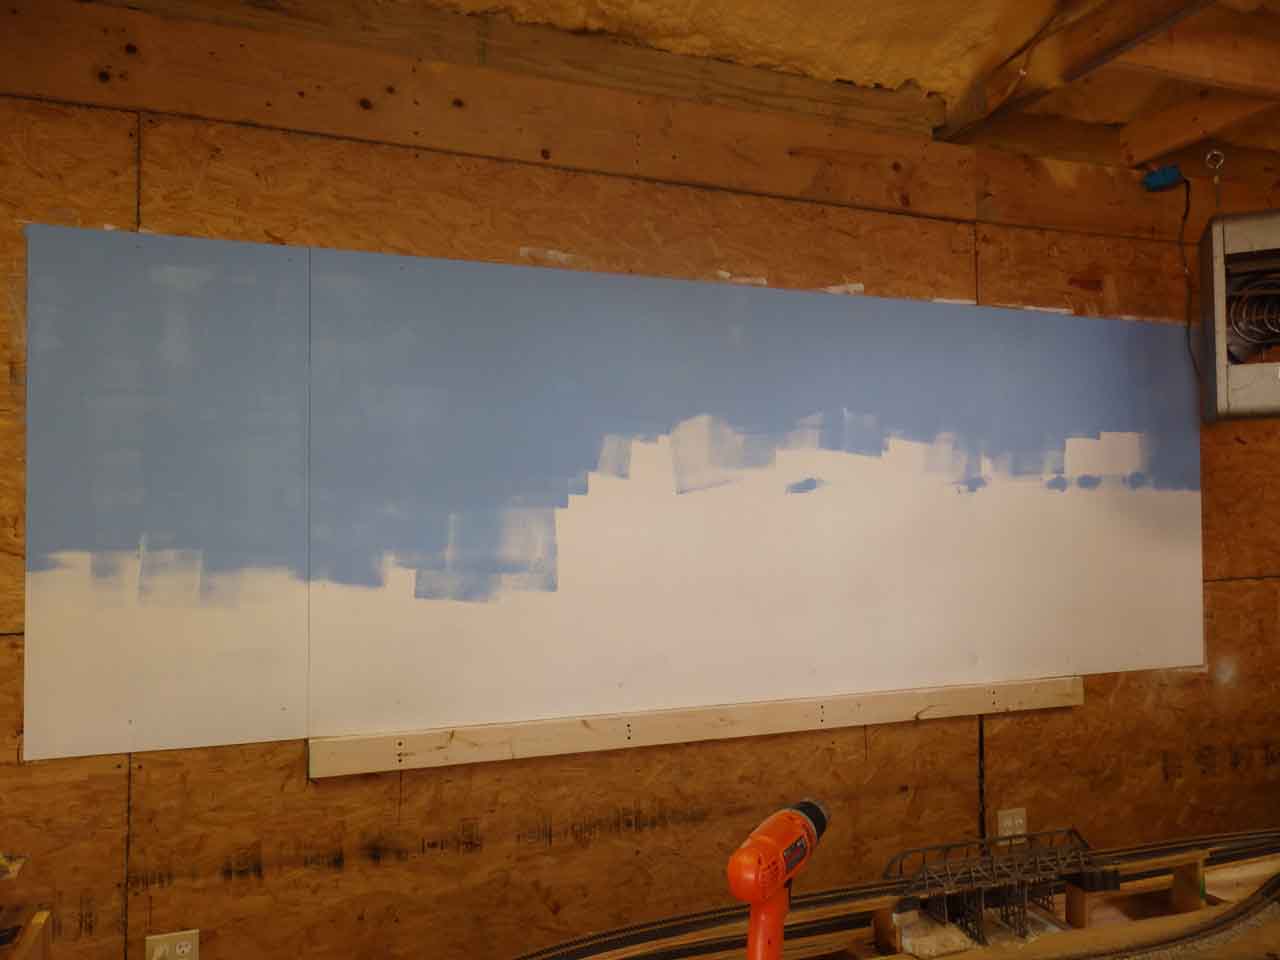
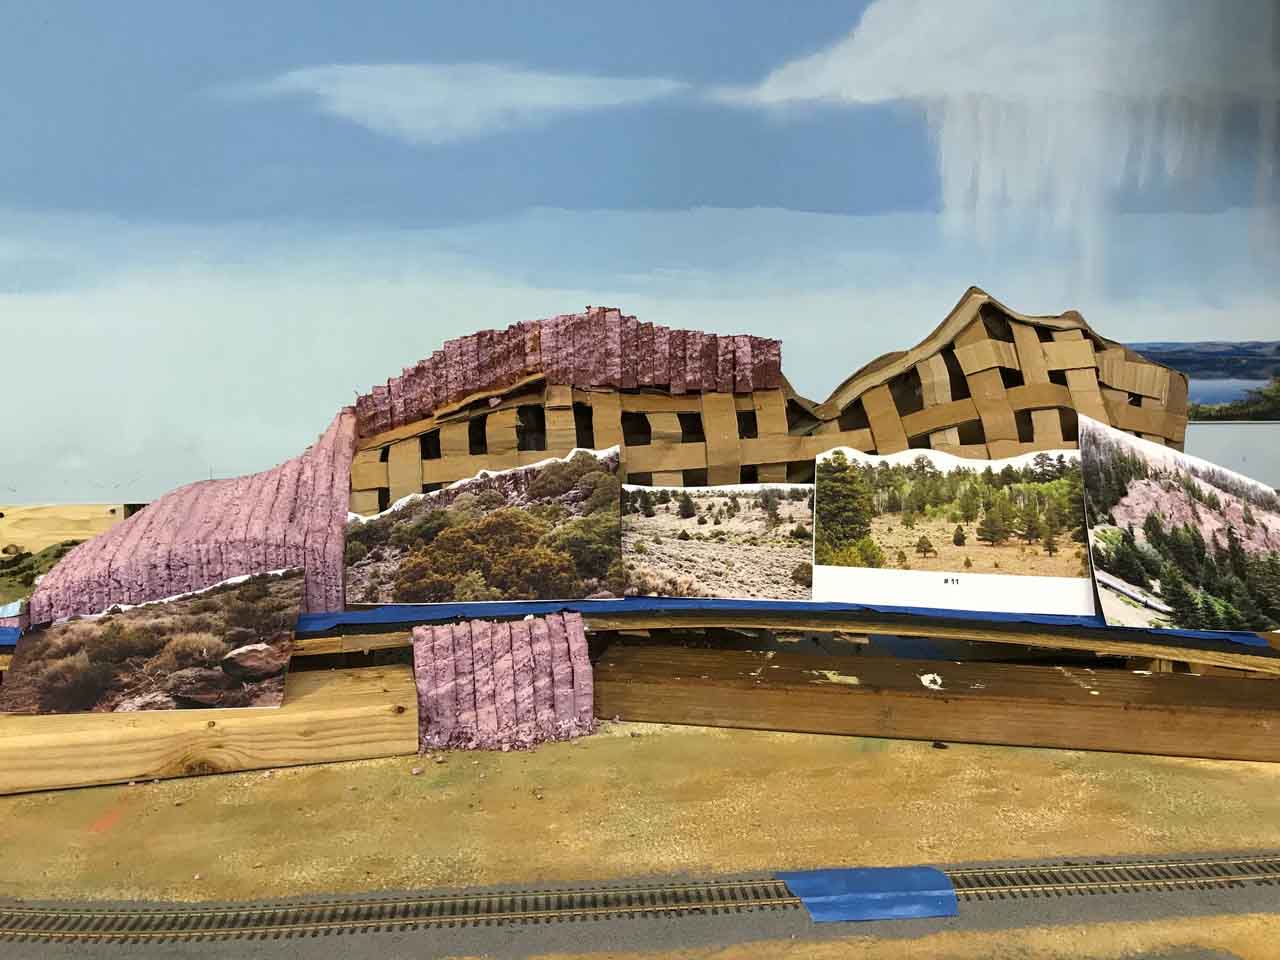
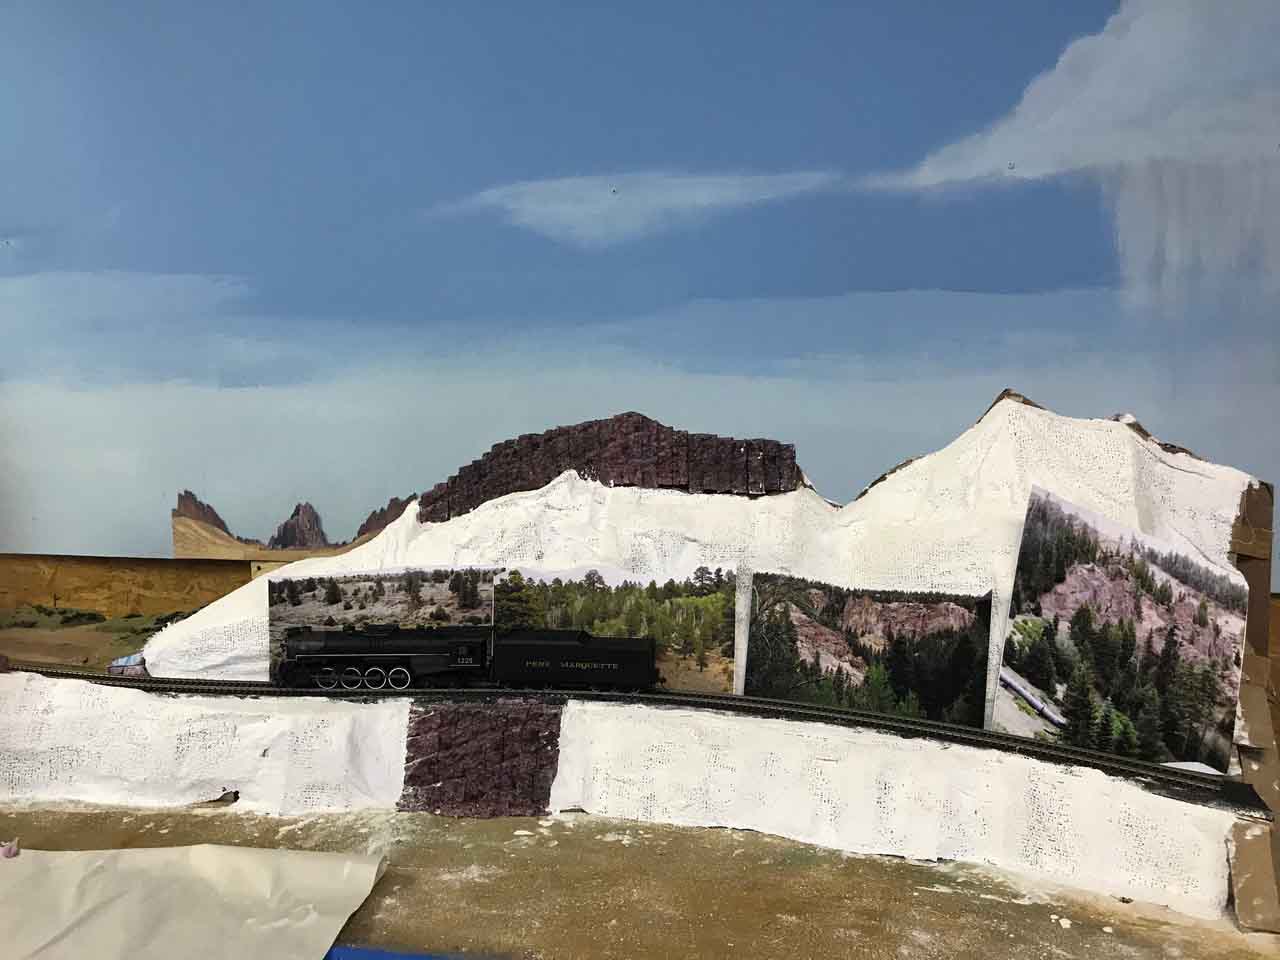
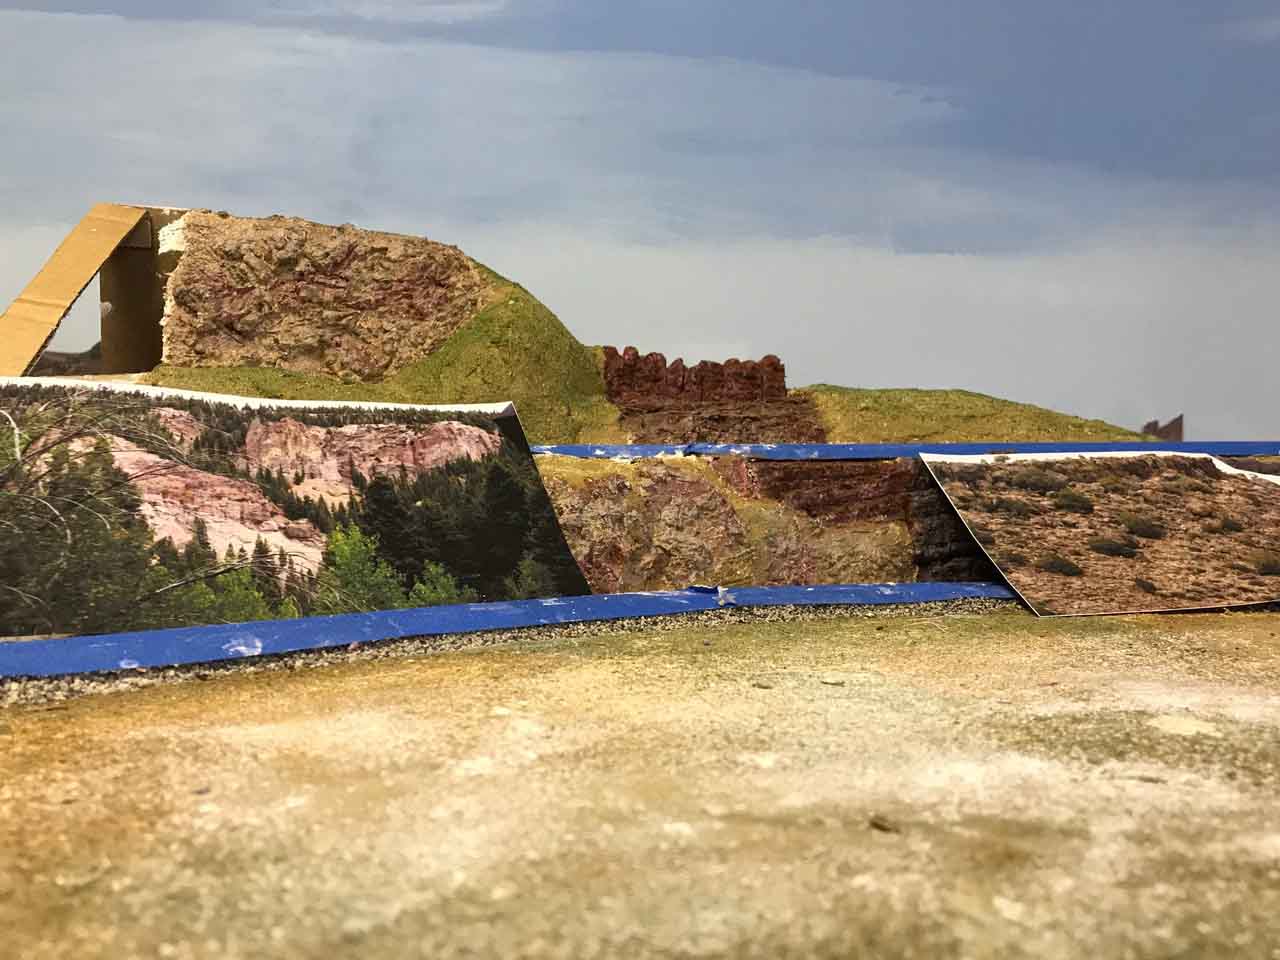
Mountains are mostly old school wire mesh covered in plaster cloth. Snow is dried out plaster sanded into flakes.

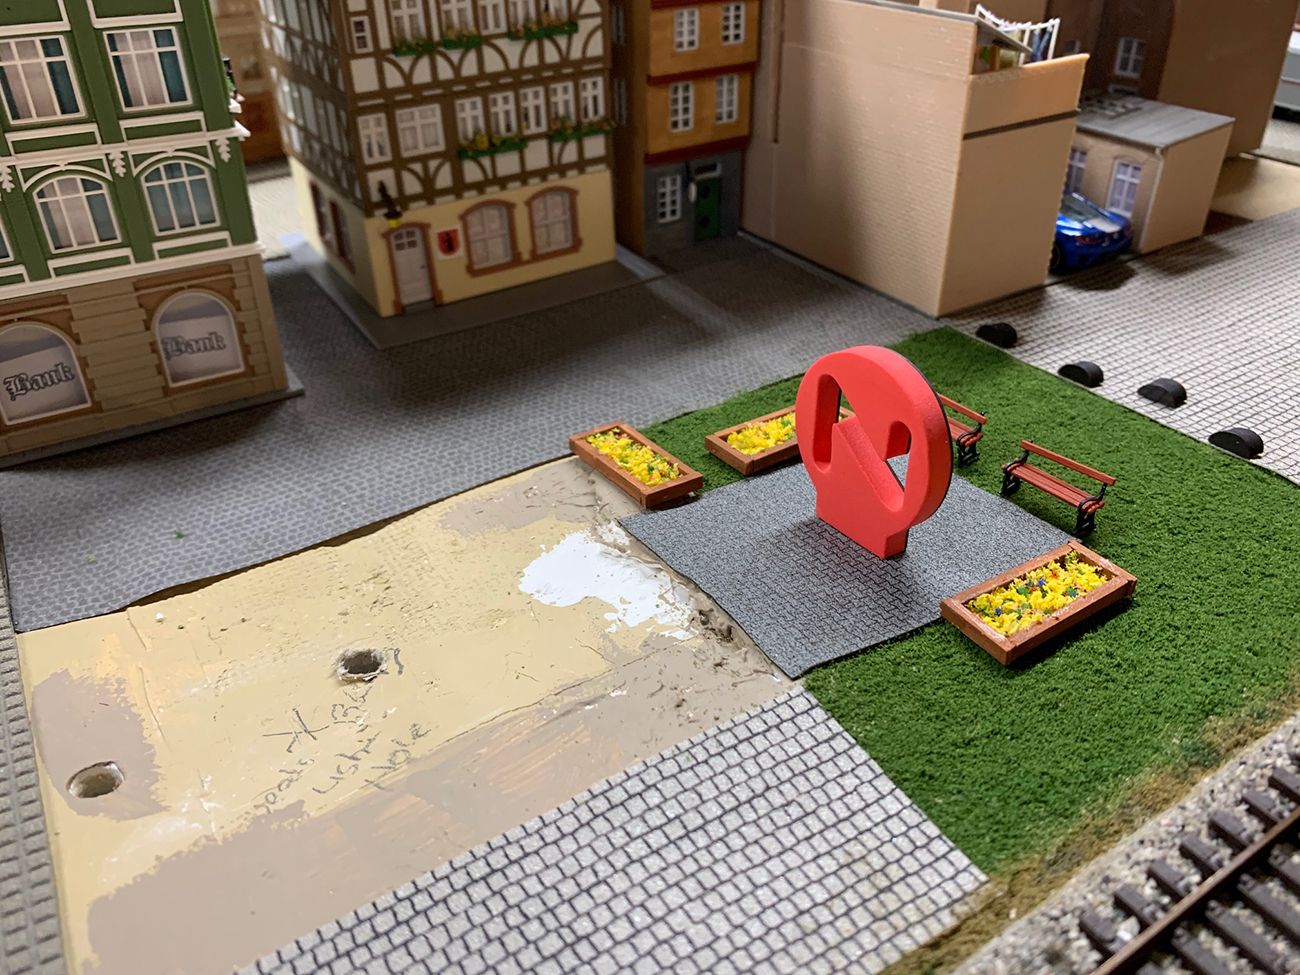
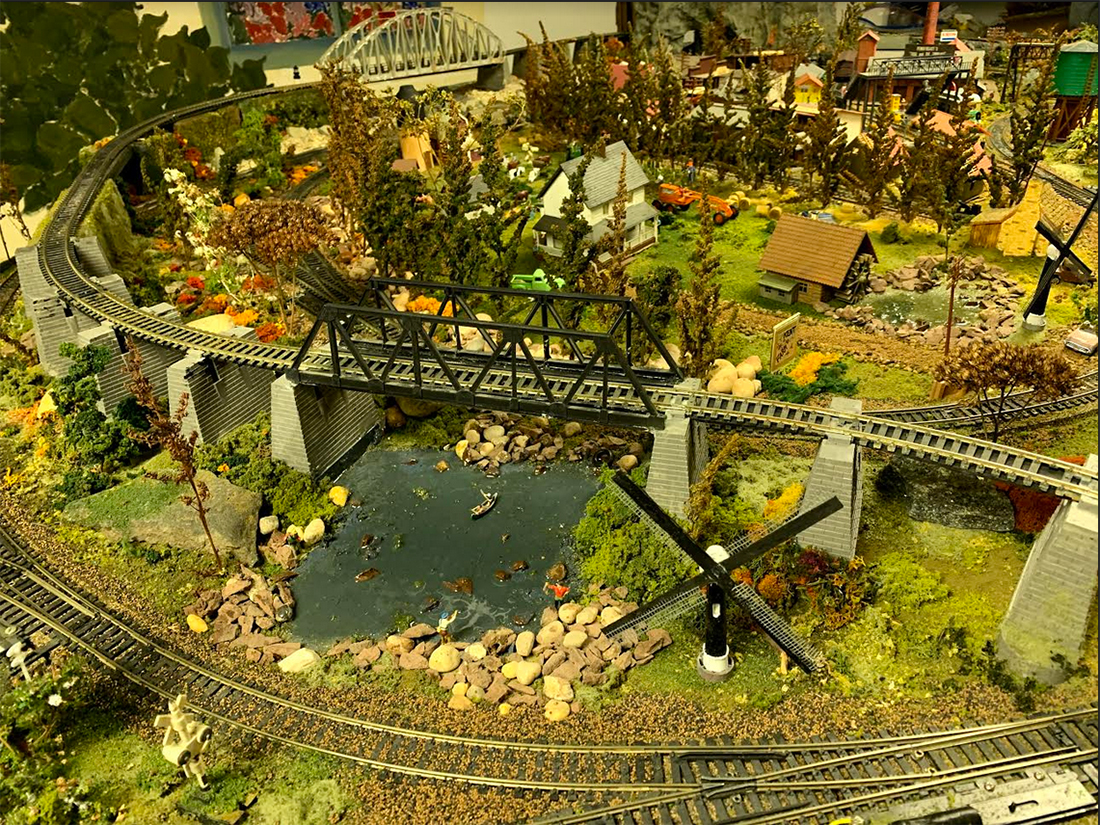
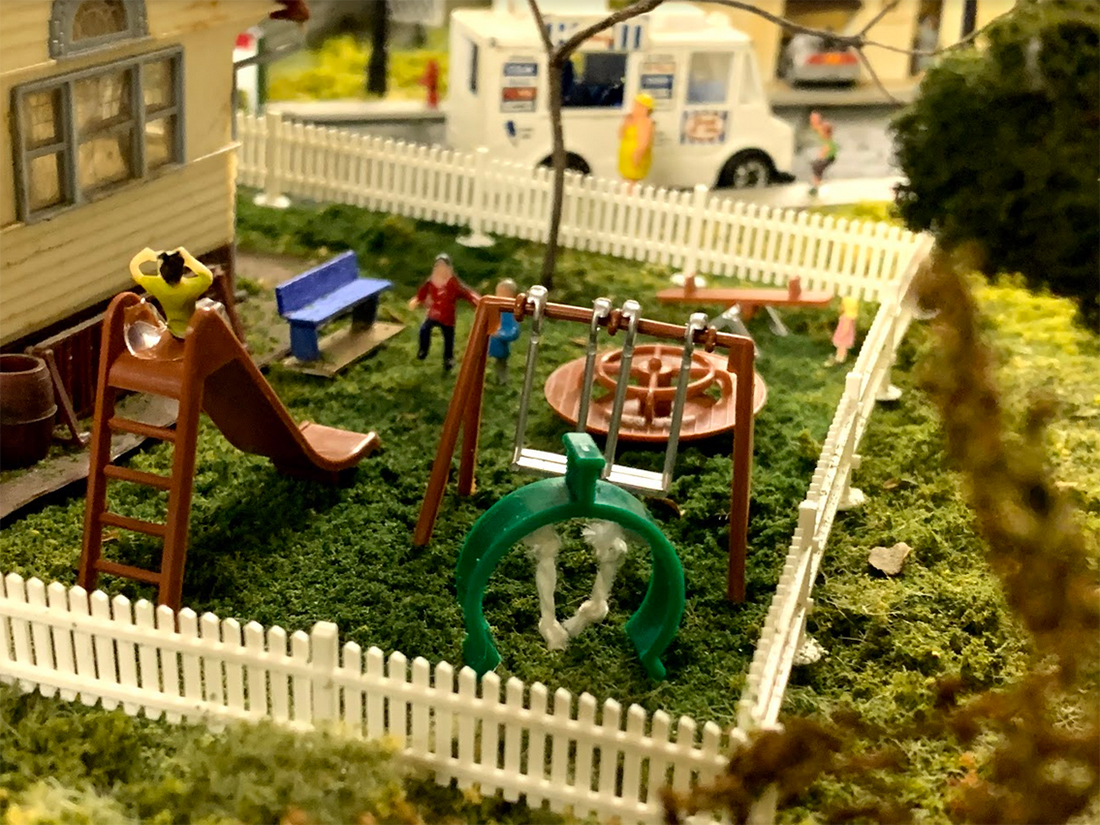
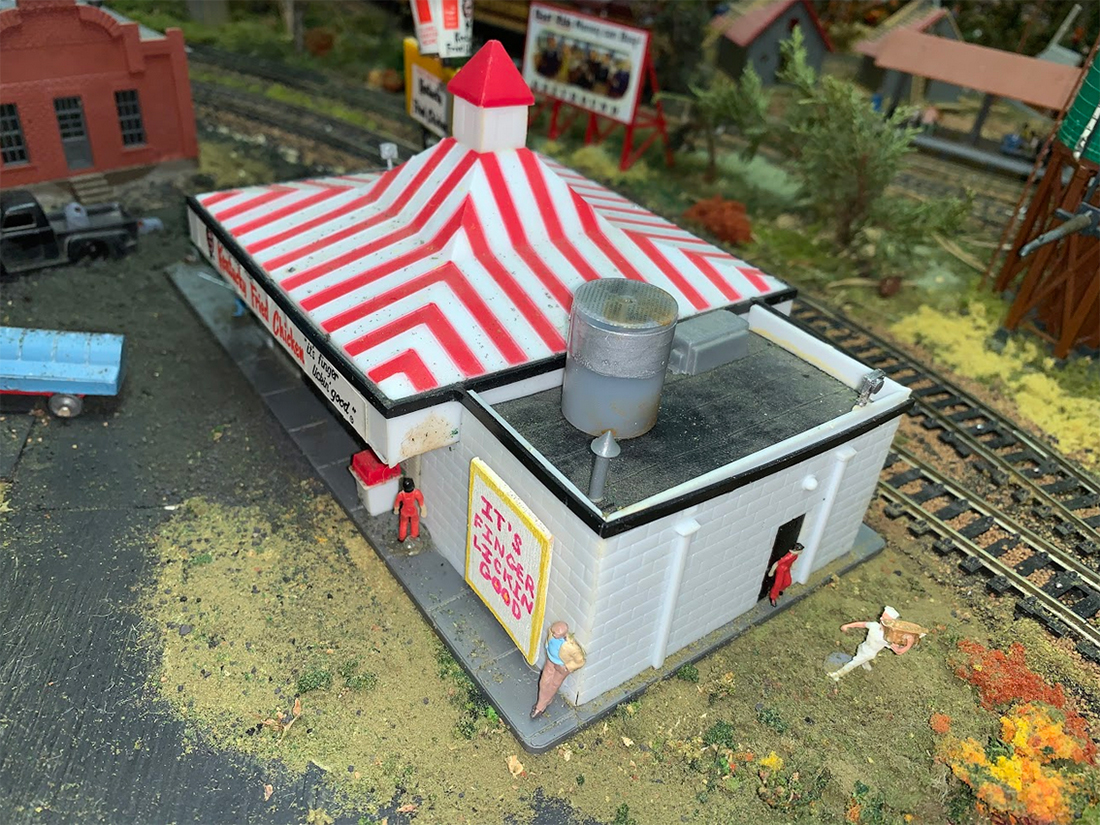
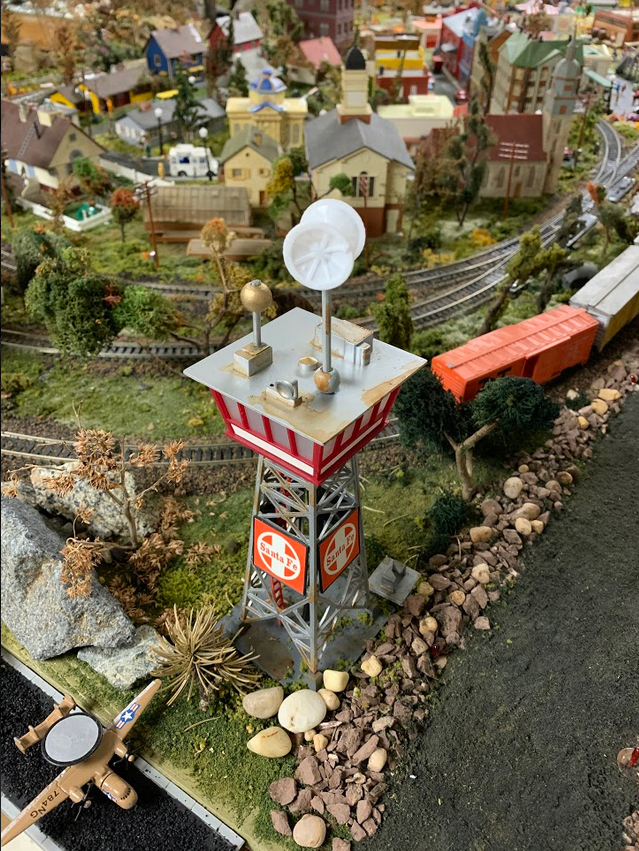
My wife finds ways to use household items or items you would normally throw away: the tear off seals on eggbeater boxes become radar dishes for the air control tower; paper clips and screening become wire mesh fences, the metal at the bottom of small glass candle holders become bases for the runway lights and interior building lights, the raft in our lake was modeled after one we saw in Antigua and is made from the plastic covers on office phones that are labelled line 1 and line 2 with paper clips for the rails, the windmills are made from discarded electric tooth brush stems with bristles pulled out, the farm silo is a toilet paper role with a rubber cap from some household item, the green rope swng in the school playground is a clip from something, the air unit on the roof of Kentucky Fried Chicken was moisture absorbant from a package we received.

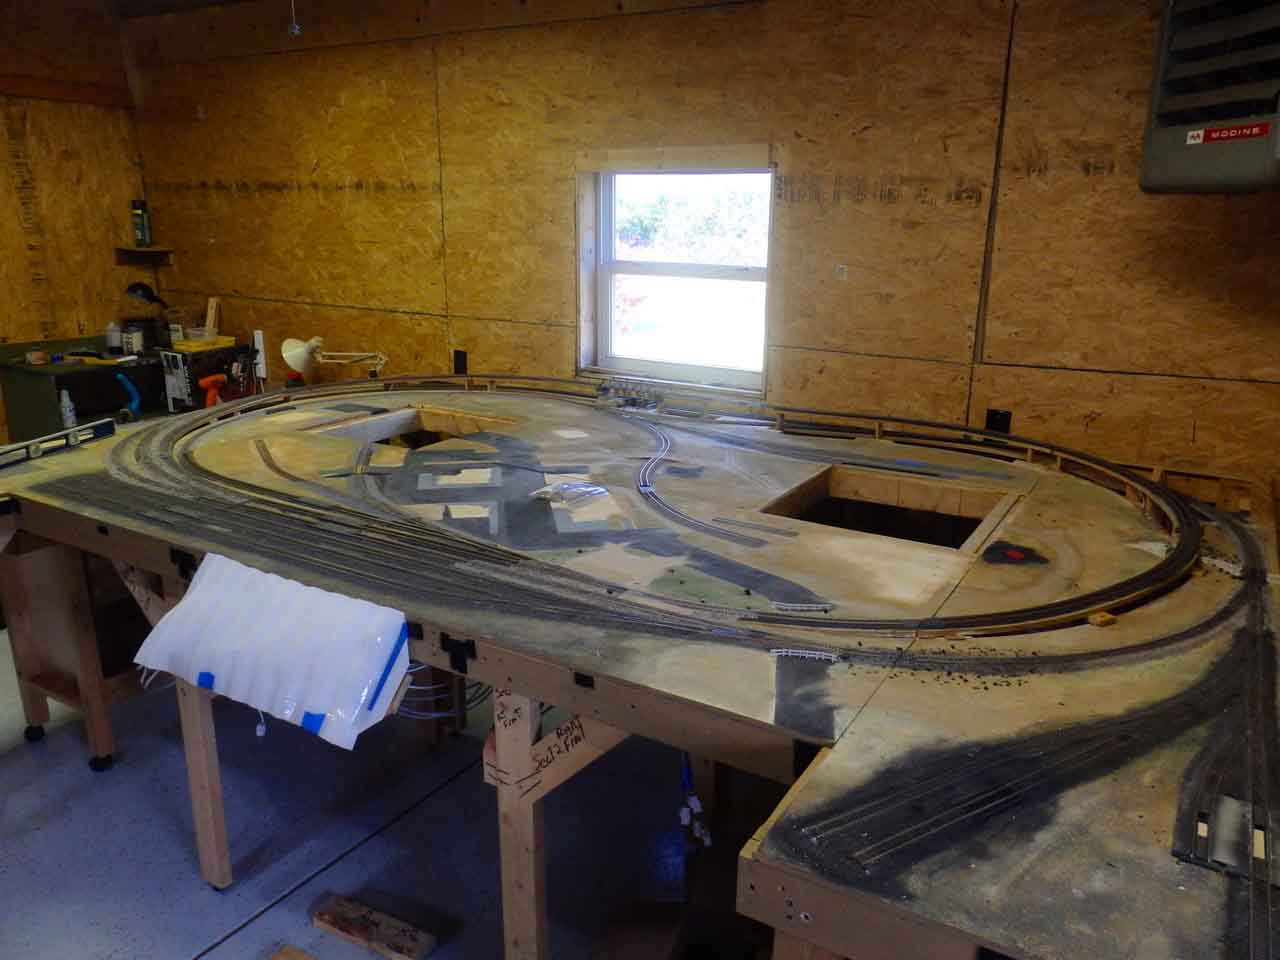
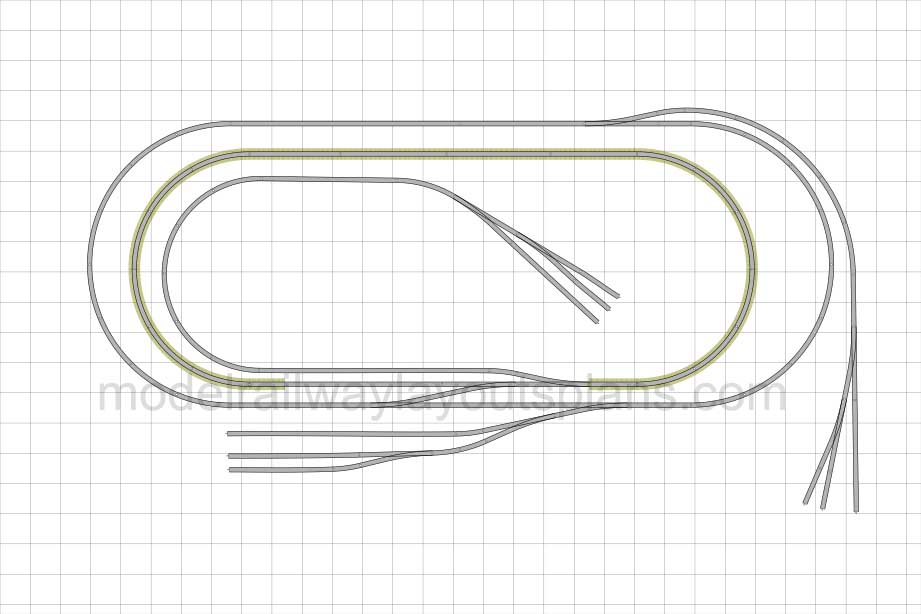
The layout consists of two lines. The inner was based on Atlas HO No. 16 6 x 10 and the outer as freelanced with an elevation to 3”.

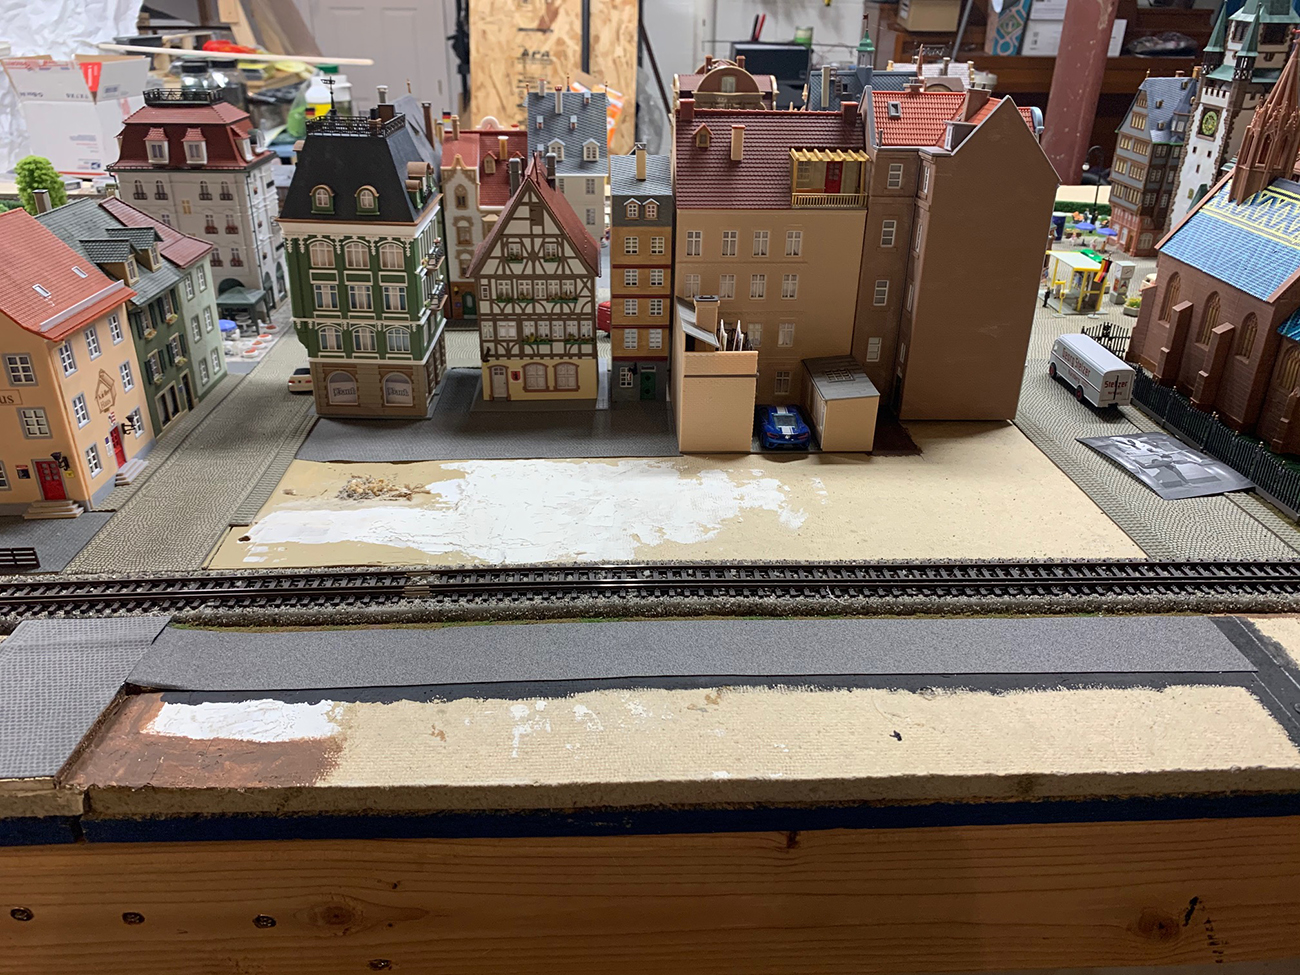
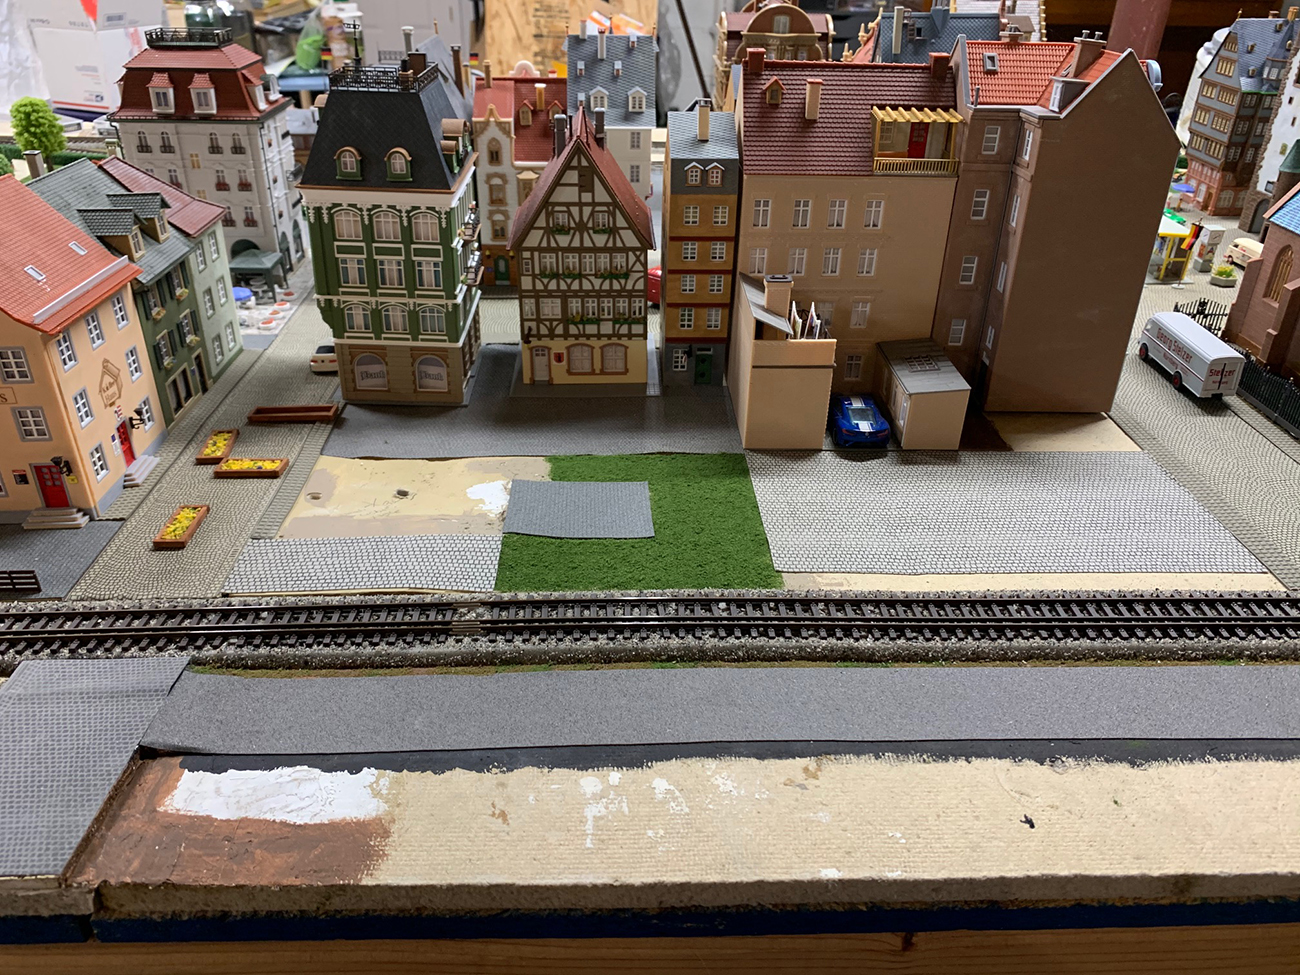
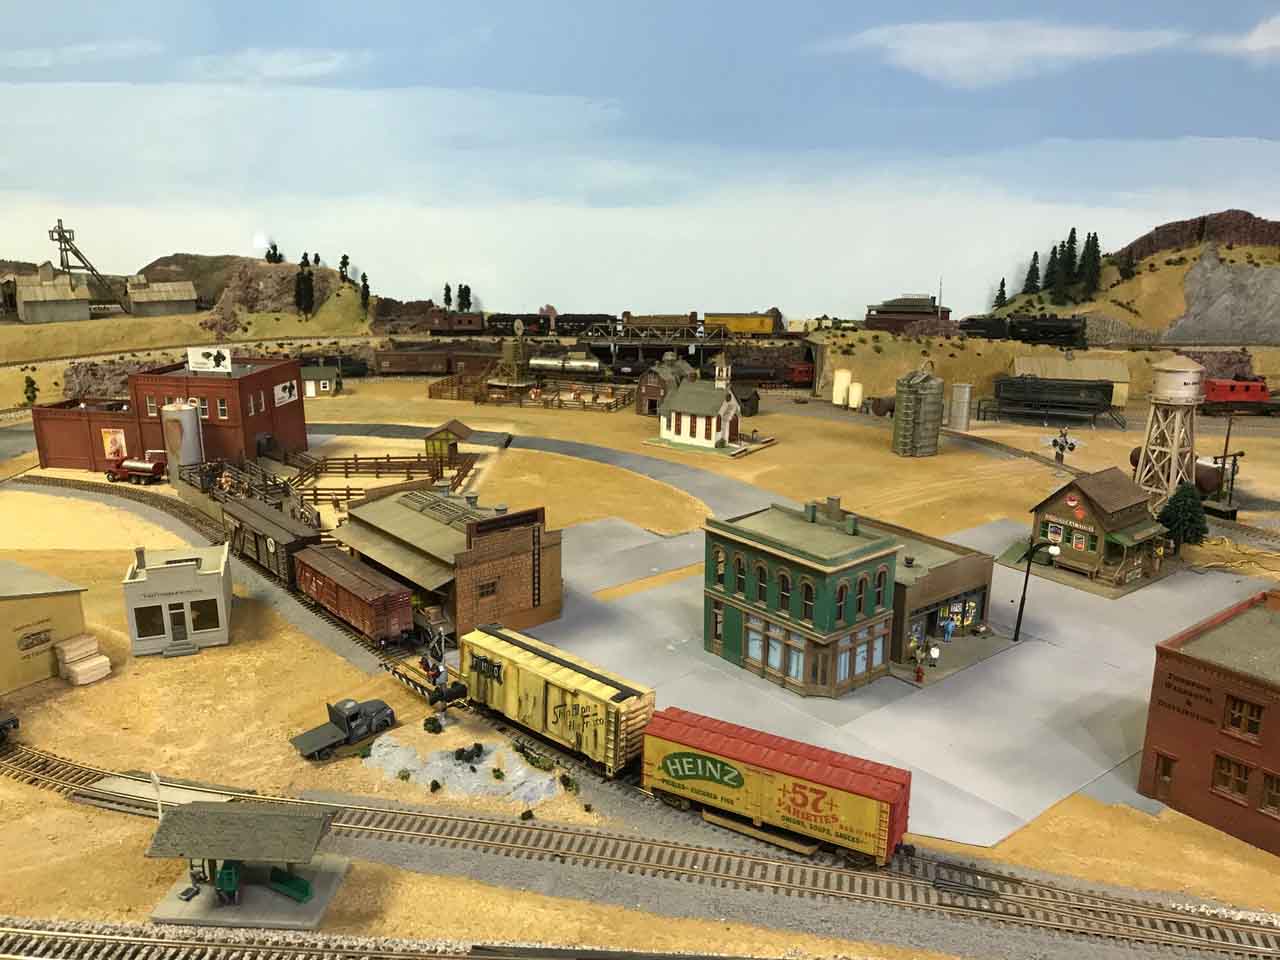
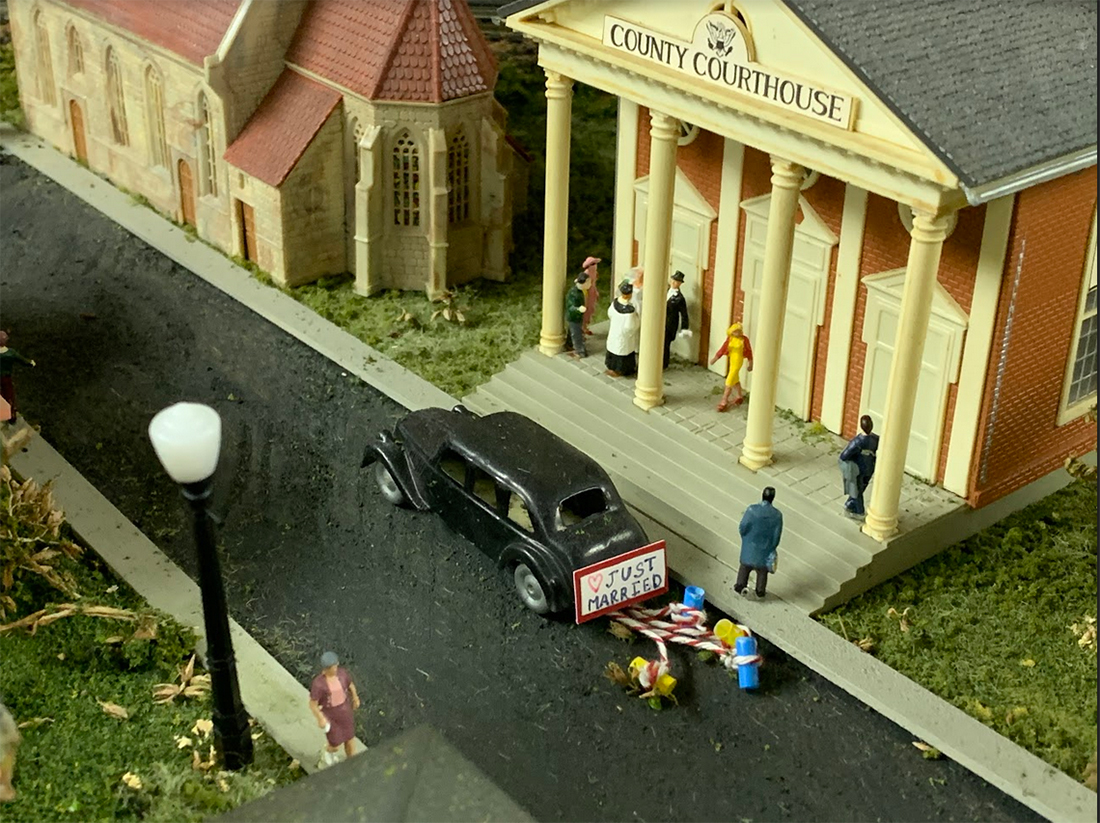
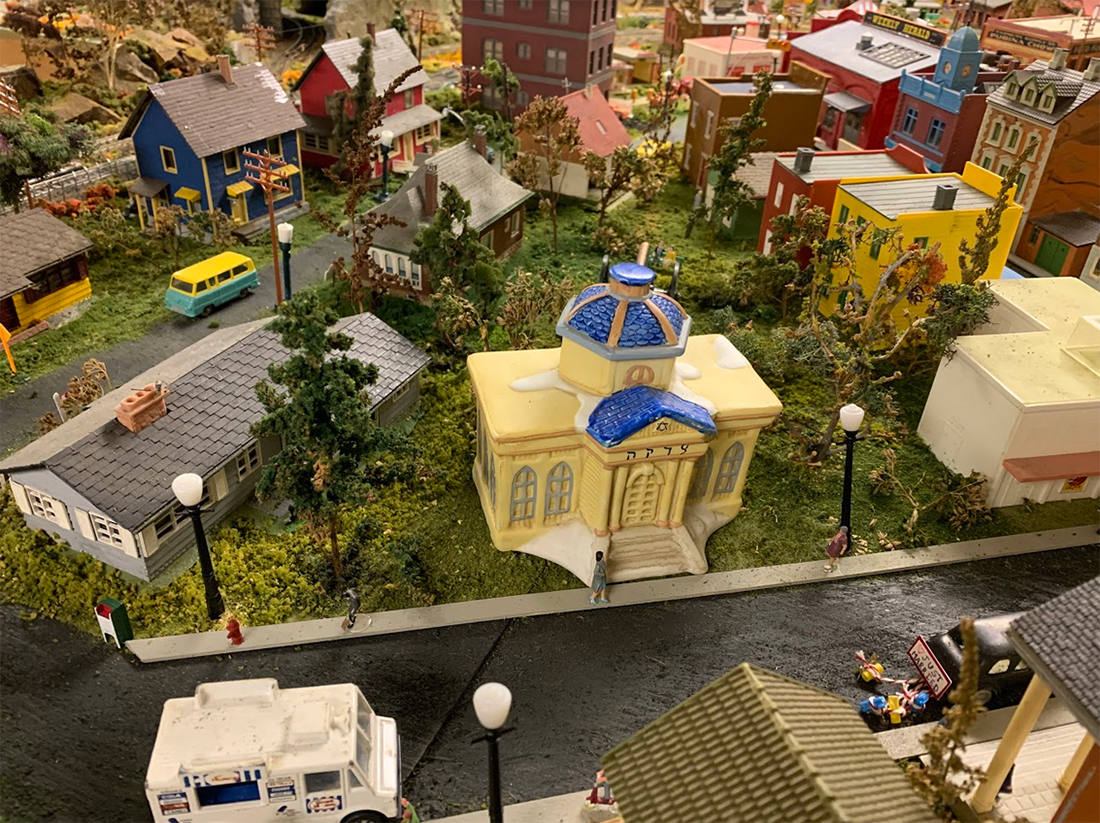
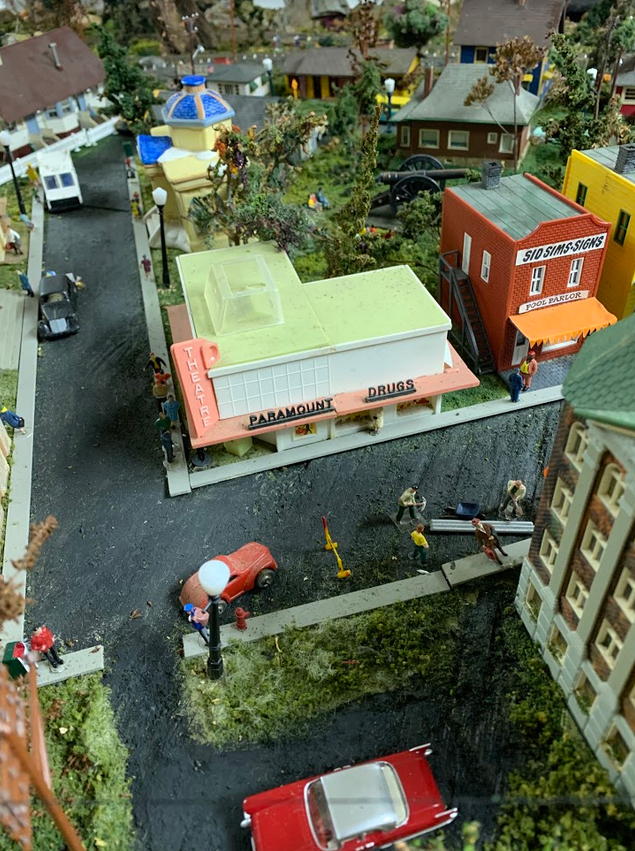
My wife designs the towns, does the streets and sidewalks, makes all of the signs, and is in charge of placement of people because everyone has a story and placement of each person must fit their story.

The two main towns are named for our grandchildren.

The industrial park is named for a friend who helped procure a number of the buildings. The houses are named for family and friends. When one couple told us they were moving, my wife had a for sale sign on their property the next day.

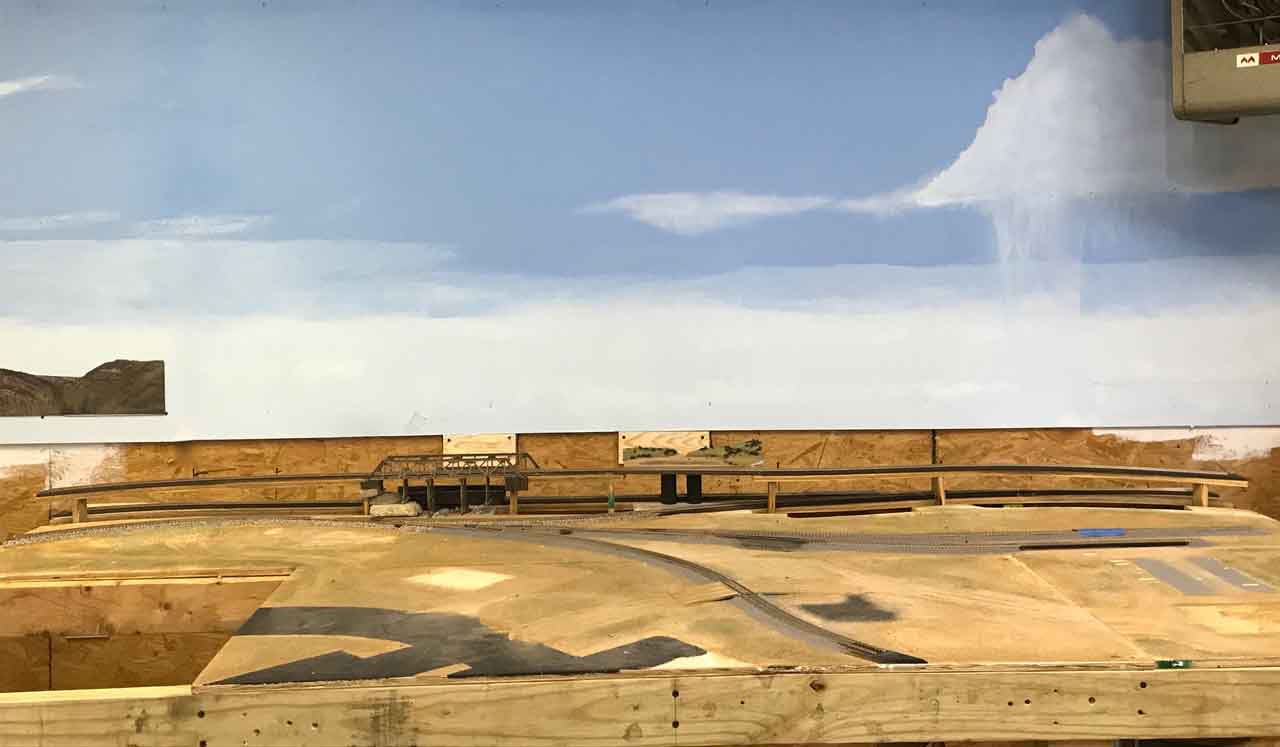
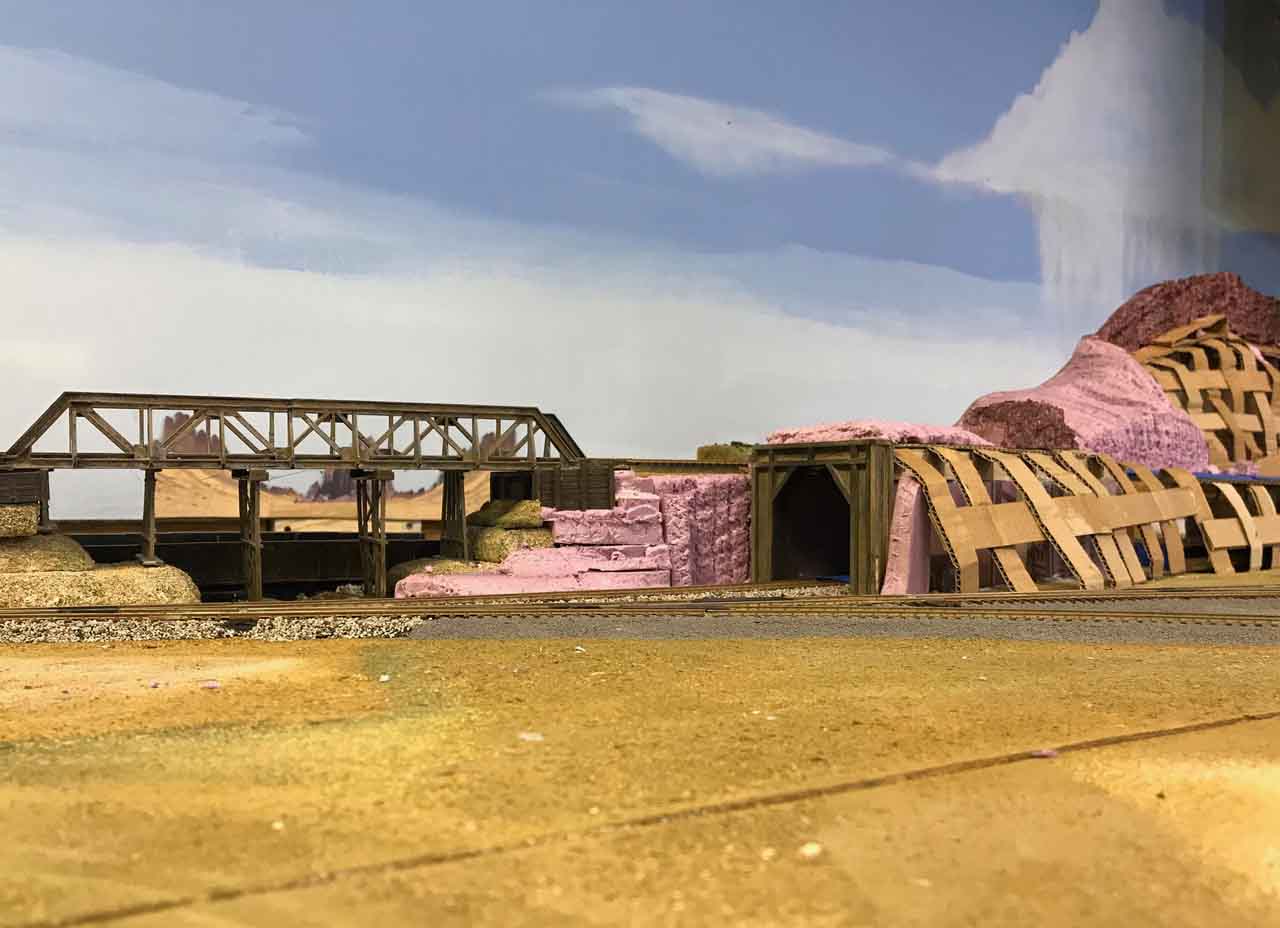
Here is the Atlas design for interior run and a pic of the layout in early days which was changed slightly to make the bridge cross water before turning.

HO scale model railroad

HO scale modelrailway

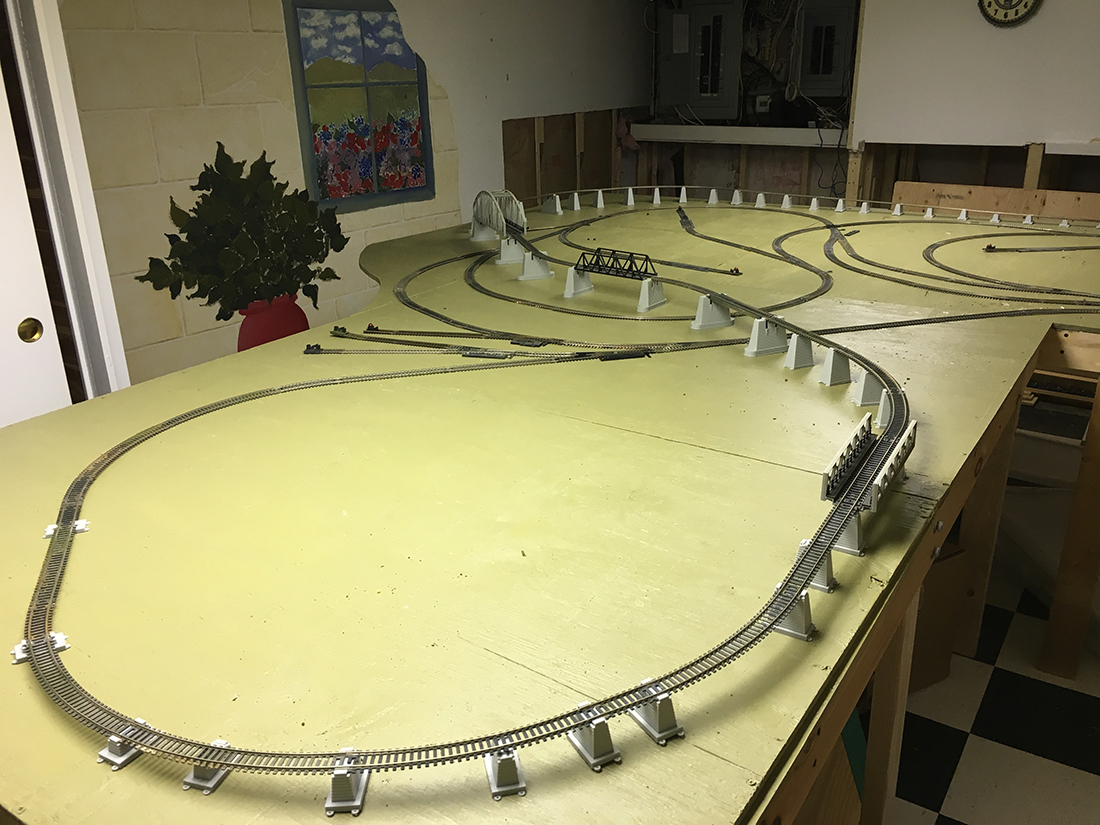
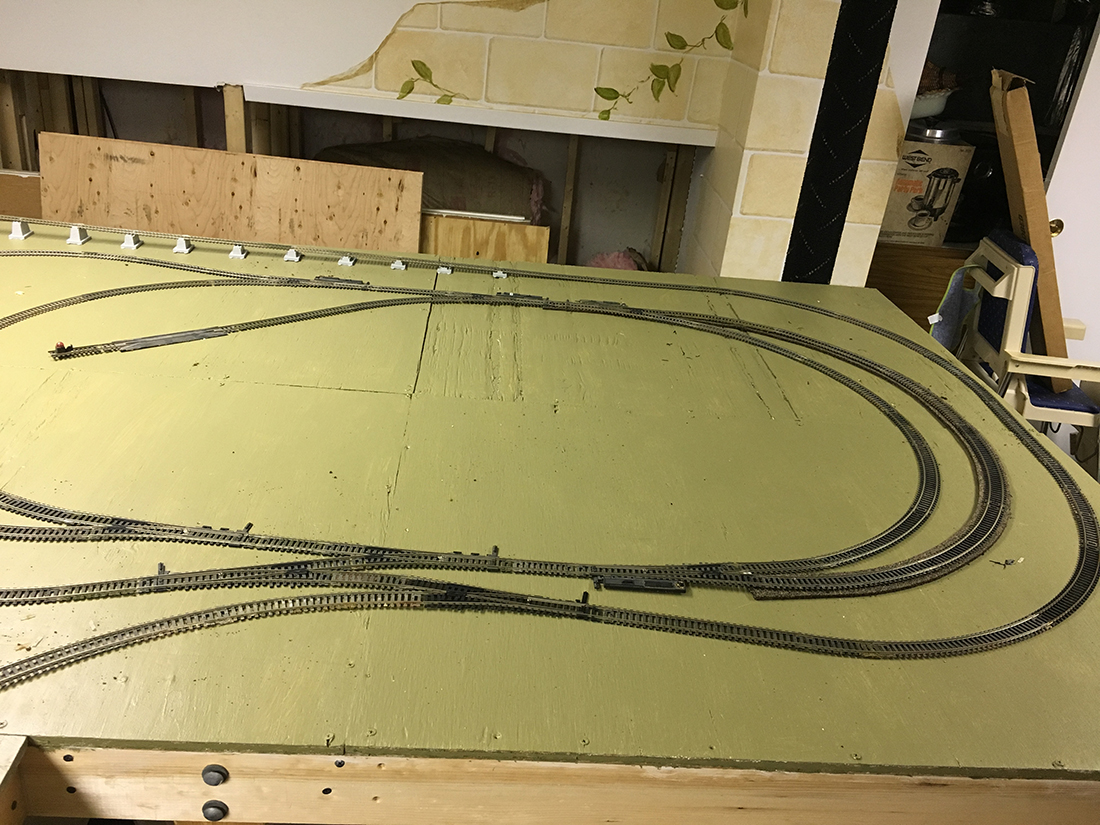
Track plan for inner loop.

HO scale


HO model railroad

Ho railroad

HO scale railway

JO modelrailway

HO scale model railroad

HO scale Atlas track

HO scale Atlas track

HO scale Atlas track

HO scale Atlas track

HO scale Atlas track


HO scale Atlas track

HO scale Atlas track

HO scale police dog

HO cars workmen

HO platform

Hope you enjoy.

Scott”

What a layout – there’s a lot going on, but doesn’t look crowded. I loved it. A big thanks to Scott for sharing his HO scale atlas track.

I’m sure some will wonder where the trains are. All in good time. Remember, a layout can be whatever you want it to be.

A huge thanks to Scott.

That’s all for today folks.

Please do keep ’em coming.

And don’t forget The Beginner’s Guide is here if you want to grab the bull by the horns and get going on your very own layout.

Best

Al

PS Latest ebay cheat sheet is here.

PPS More HO scale layouts here if that’s your thing.


German model railway layout

Rob’s been in touch with his German model railway layout:

“I’ve been a fan of your blog for several years, and have learn so much from the contributors. I look forward to opening my email each day to see the wonders you send forth.

I’ve been working on my Murren and St. Goar Scenic Railway since I returned from a trip to German and Switzerland in 2009.

I wanted to recreate views and moments from that trip in HO scale.

I’d not done any railroading since I was a teen back in the 1960s, so it’s been a real experience relearning everything.

It’s encouraging to read posts of others who have questions and made mistakes we can all learn from.

My submission shows a small addition to my city (based on Freiburg, Germany) three streets off the Main Avenue.

There was a block of empty space left over from other building installations. I’d debated what to do with it for some time, and finally decided to just tackle the space with basically what I had on hand.

Our recent stay in place orders here in Michigan have provided many extra hours of time to ponder and work on train projects.

I tend to work on my German model railway layout in an organic fashion, and have found that I greatly admire those modelers who can build a layout with all those yards, mainlines and switches.

I’ve also learned that I’m not very good at that part of the hobby.

What, it turns out, I really like is doing building kits and creating landscapes for the train to run through.

Your blog has reinforced that there is no “right” way to do model railroading, and that ideas can come from any source.

Attached are several pictures showing the progress of the city block addition from start to finish.

German model railway layout

View from the main station looking back toward to area where the new block addition was added. All the city buildings are lighted for night effect.

German model railway layout

The block as it looked before I started. The backs of the buildings on the facing block provide the background. I added a narrow road opposite, next to the tracks as a first step.

German model railway layout

I first added some grass for a small park which is to set behind the building on the block corner. Then I added stone paver sections to create a courtyard as seen in many German cities behind buildings. I found, and assembled a building kit that allowed a drive through from the side street into the courtyard to anchor the other end of the block.

German model railway layout

I built some simple planters, added benches and found a sculpture piece for the park. My youngest daughter teaches first grade so she has many craft and classroom items that can be adapted to the layout. In this case the sculpture is a throwaway piece from a lettering kit.

German model railway layout


Next I added some people, a tree, a hedge and a fence next to the tracks. These were all left over parts from other scenes on the layout.

German model railway layout

Then I added the two buildings, one at each end to enclose the block. One building I already had built, but did not use for a different scene, the other was purchased to allow the drive through into the court yard.

German model railway layout

View of the completed block.

German model railway layout

Wwith the recent article on how to finish the edge of the layout causing some discussion, I decided to try adding buildings across the street on the other side of the tracks. I purchased a set of kits for those half facade buildings that one puts up against walls. Only I don’t have any walls so I just placed them on the table edge and put a backing board behind them so they won’t fall off.

model railway buildings

I colored this row of buildings based on those I saw in Innsbruck on my trip to Switzerland this past summer. The middle building on the block is make up from leftover parts from the other kits in the set, and allowed me to fill the space completely.

I hope your readers fine them interesting and even useful.

Rob,

Murren and St. Goar Scenic Railway,
Ann Arbor, MI, USA”

A big thanks to Rob, it reminded me of Michael’s: German model railway layouts.

“Hi Al ..Just loaded this video to answer a few of the queries regarding my inclines and how steep they are in % , and of course showing how those magnetic couplings do hold even with a rake of 6 coaches on the inclines.

I would also like to thank all who sent there best wishes for my wife’s Deb (aka the Stig ) recovery with her hand.

I did eventually get her to A & E and with a Xray showed she has a broken wrist, so looks like Dave is going to be busy in the home for a while yet…

Regards

Dave”


Latest ebay cheat sheet is here.

A big thanks to Dave and to Rob for sharing his German model railway layout.
That’s all for today folks.

Please do keep ’em coming.

And don’t forget The Beginner’s Guide is here if you feel like you are missing out and everybody else is having all the fun.

Best

Al


12×8 HO scale – Joe’s

Joe’s been in touch with his 12×8 HO scale:

“I began this 12’ x 8’ HO some years ago.

Knowing that we would be moving in the future, I built it as four modules. With that in mind, I went as far as I could but stopped at major landscaping as I didn’t want to cut it apart when it came time to move.

The layout is all DC.

That move became a reality in April and so the layout was broken into its four components.

The new house has a 25’ x 25’ shop and I have placed the layout in ½ of it and my workshop, with its power tools, saws, etc. on the other half. I made a curtain out of 9’ x 12’ tarps to pull between the halves when I use the saws and stir up a lot of dust.

12x8 HO scale benchwork

Here is how it looked initially. There was a lot of leveling to be done as the shop floor was poured with drainage in mind (so it could be hosed out, something I won’t need to do).

Fortunately, I built it with screw adjusters on each leg. That being said, there were some legs that had to be adjusted by removing and re positioning the leg higher or lower on the layout frame.

12x8 HO scale benchwork

Here it is in position, leveled and cross-bolted together.

model railroad backdrop

I watched a DVD on how to paint a backdrop and here is where I began.

The railroad is freelanced, late steam prior to 1950 set roughly in NW New Mexico. The town is San Juan Creek (named for the San Juan mountains of that area).

The local shortline is the San Juan & Central. Major industries include San Juan Coal and San Juan Lumber; both own and operate their own branchlines.

There is a saw mill, a planing mill, oil distribution center, a small cattle ranch and beef processing plant. Various other normal businesses are also included.

Here are some pix of the early work.

model railroad backdrop

Here is the finished backdrop. There was so much touchup to do on the right side that I decided to put in a storm cloud and some rain.

Backdrop completed, I begin to “imagine” how the scenery will develop. I was/am really pleased with how the backdrop turned out! I’m NOT an artist!

HO scale finished backdrop

Getting there. Beginning to look similar to the mock-ups.

Once again, I separated the four modules before I began working on the mountains as it was easier than trying to do this with it against he wall. Being able to design and construct from the rear of the layout really made it all the easier.

We rode the Cumbres & Toltec in 2013 and there is where i based the scenery. I printed out some of my 400+ photos and used them as “inspiration” for the mountains, etc.

making cardboard mountains for model railroad

I started by thinking I would use 1” foam insulation for the mountains but after about 1 ½ ft, realized I would use the old “tried and true” procedure as you can see and use the foam board for details/outcroppings. Yes, that is “Shiprock” in New Mexico behind the bridge.


model train track plan

Most of the first year was devoted to getting the scenery done

Planning HO scale scenery

As mentioned, I went “old school” on the scenery. Plaster cloth over cardboard webbing followed by sculpture-a-mold, paint, texture and more paint. I continually referred to my area photos for color, etc.

HO scale mountains

One section finished and ballast laid while it was still away from the wall, making it much easier than any other way.

HO scale planning scenery

I moved the rear center module to the wall and secured it in place and re-leveled it all. Then I began the transition scenery toward the coal mining corner of the layout. Again, using my own photos of the area as guides to color and terrain.

Before working on the landscaping at the corners, I connected all the modules, tightened and leveled them all once again and connected all the trackage between the modules. Then I checked all the electric connections and turnout wiring (Tortoise switch motors) and verified that everything worked.

There is a #6 turnout under the mountain on the right that I wanted to know worked correctly before going any further.

Finally, I ran trains on all the trackage for a couple of hours. Switching, making up consists, etc. until I was sure everything worked.

Laying HO scale track with backdrop

Here is what that looked like.

HO scale lumber sawmill

The right (east) corner of the layout features the logging operation.

HO scale with middle access hole

The following year was mostly filled with detailing and making sure everything worked together and complimented the overall intent of the railroad. Most of the buildings, etc. were placed on the layout where they belong.

HO scale sawmill logging operation

Here is the logging operation with the San Juan Lumber Co. steam engine completed.

HO scale steam train tunnel

San Juan Coal occupies the west corner. Here you see the San Juan Coal steam engine with a string (not visible) of hoppers at the coal tipple (also not in the shot).

HO scale adding buildings

As operations resumed, I discovered I had an issue transitioning between inner and outer main lines. I could not get trains from inner to outer loop without putting the train on the outer loop onto a yard track or backed up on the passenger station siding.

So, a double “crossover” was installed using four #5 code 83 Micro Engineering turnouts controlled by Tortoise switch motors (making a total of 21 turnouts, all controlled by Tortoise motors). This was my first use of M.E. turnouts and I really like them! The actual rail does not seem as heavy as Atlas or Shinohara but that is not an issue.

For what it is worth; I went with the Tortoise because of the 2 built-in SPDT electrical switches. I use one set to power the frog and the other set to control the indicator lights.

HO scale coal hopper

Detailing continued: this is around the engine house and the coaling tower, etc. I couldn’t find a dump truck to haul the ashes from the ash pit so I cut down a box van.

Overhead view HO scale sawmill layout

Overall look at the layout.

HO scale sawmill layout construction


Downtown San Juan Creek with the beef processing plant (Talones Packing Co.) and cattle yard in the background.

HO scale timber yard for sawmill

Here is the saw mill, the planing mill and generating plant. The M.O.W. yard is to the right, oil distribution is upper right and upper center.

90% of this year has been devoted to doing lighting the buildings and the streets of San Juan Creek and installing interiors in some of the buildings.

HO scale fire station

This is the fire dept. next to the bank on National Ave.

HO scale store

Creek Drugs is on the west end of Montezuma St. next to the Western Auto store

HO scale overhead view of fire station at night

Street lighting installed. The streets are 180 grit sand paper sprayed with black and gray paints. Adding the white lines was a real trick and I botched it twice!

Because we live in SW Missouri, we have winters that drop into the low 20s/mid-teens and I bring all the locomotives into the house along with all my paints and glues. The shop IS insulated but it can still get below 40º.

This year, I will be bringing them out by the end of April to begin operations. But first, I have track maintenance and general layout cleaning (spelled “spider webs”).

Here is where I am at the time of writing:

HO scale crane caboose

Lettered and weathered the M.O.W. crane and work caboose. Other than the decals for the Santa Fe, which runs through San Juan Creek, I make ALL of my own decals. These were printed on “Inkjet Clear Waterslide” decal paper. If I am putting the decal on a different background, I’ll print them on “Inkjet White”paper so they can be more easily read.
With inkjet printing, you have to spray 3 or 4 light coats of clear gloss or the ink will run. Laser printing does not need to be sprayed.

HO scale construction truck

The ash pit needed a conveyor to load the dump truck so I scratch built this one.

HO scale steam train

I purchased this Bachman 2-8-0 some years ago. It was Reading # 2000. I just completed changing it over to San Juan & Central engine # 476.

Again, I created these decals. This time, I made a full sheet of decals and did the print, either color like this one or white like some of the others on a black background. I saved the .docx files to a memory stick and took a sheet of “Laser White Waterslide Decal” paper to the UPS Store for printing. Cost less than $2 a sheet. I knew I had a number of decals that would be going on the steam locos so I made bunch with different numbers, etc. and in different sizes.

Once applied, any decal needs to be “fixed” with a light coat of “Dullcote”. Then it is easy to weather. However, in this case, since the name and number had been changed, I sprayed with Semi Gloss as I wanted the engine to look fresh out of the shop.

When I get everything up and running, I post pix. of the other four steam engines.

Thank you, Al for publishing these pictures. I hope they inspire fellow modelers as their pictures have inspired me.

75 year old modeler,

Joe”

My word – what a layout. Love the pics, and loved the narrative Joe sent too.

I hope you enjoyed this post as much as I did. Stunning stuff.

It reminded me of Ray’s: 12×4 HO scale.

That’s all for today folks.

Please feel free to leave a comment below if you want to get involved.

And don’t forget The Beginner’s Guide is here if you want to take the first step on your model railway.

Best

Al

PS Latest ebay cheat sheet is here.

PPS More HO scale train layouts here if that’s your thing.