Peter’s been in touch with an update on his model railway village.
I loved looking at his pics – but what really made it for me was looking at his previous post too, because it gives such a strong sense of what this hobby is all about.
I suspect you’ll feel the same – here it is:
“Hi Alastair,
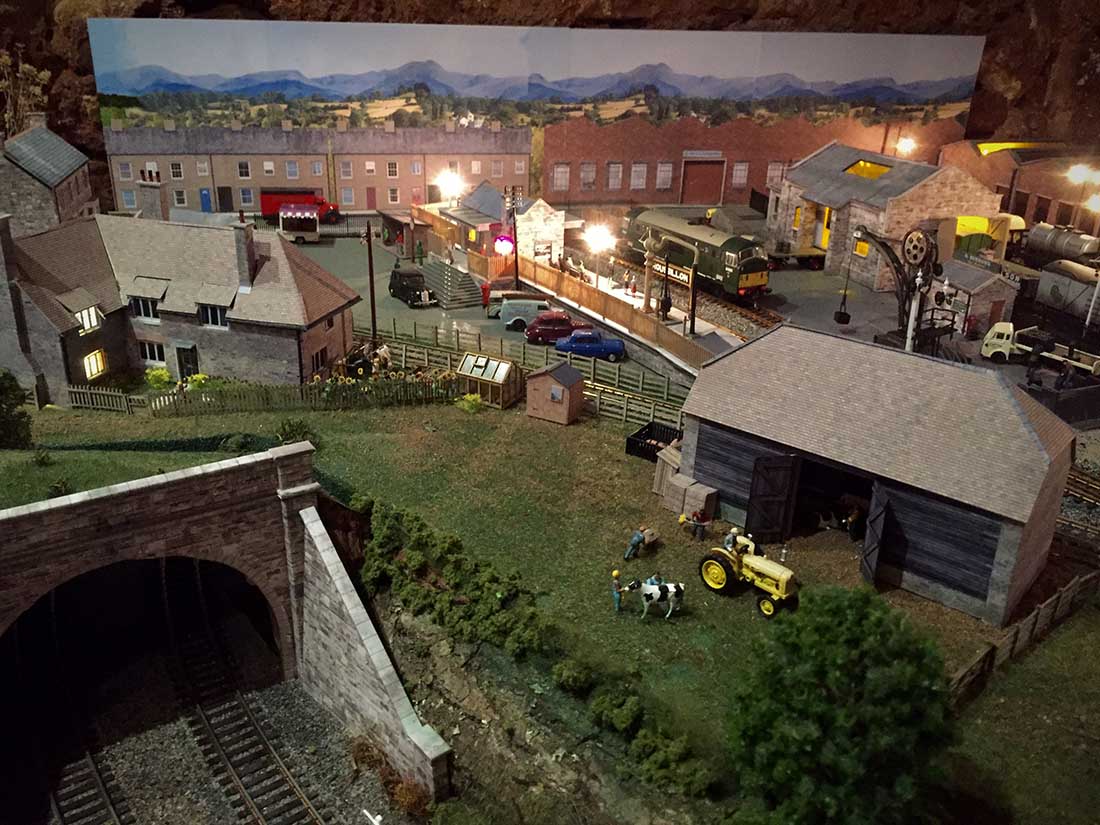
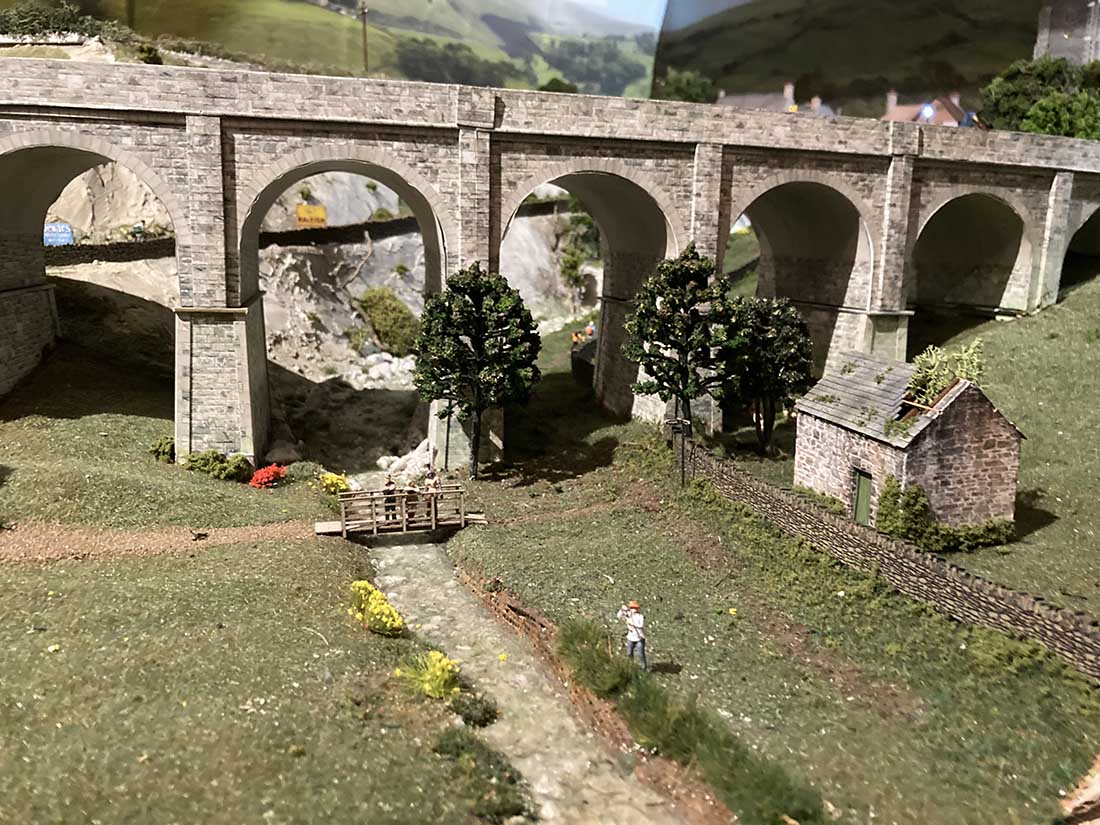
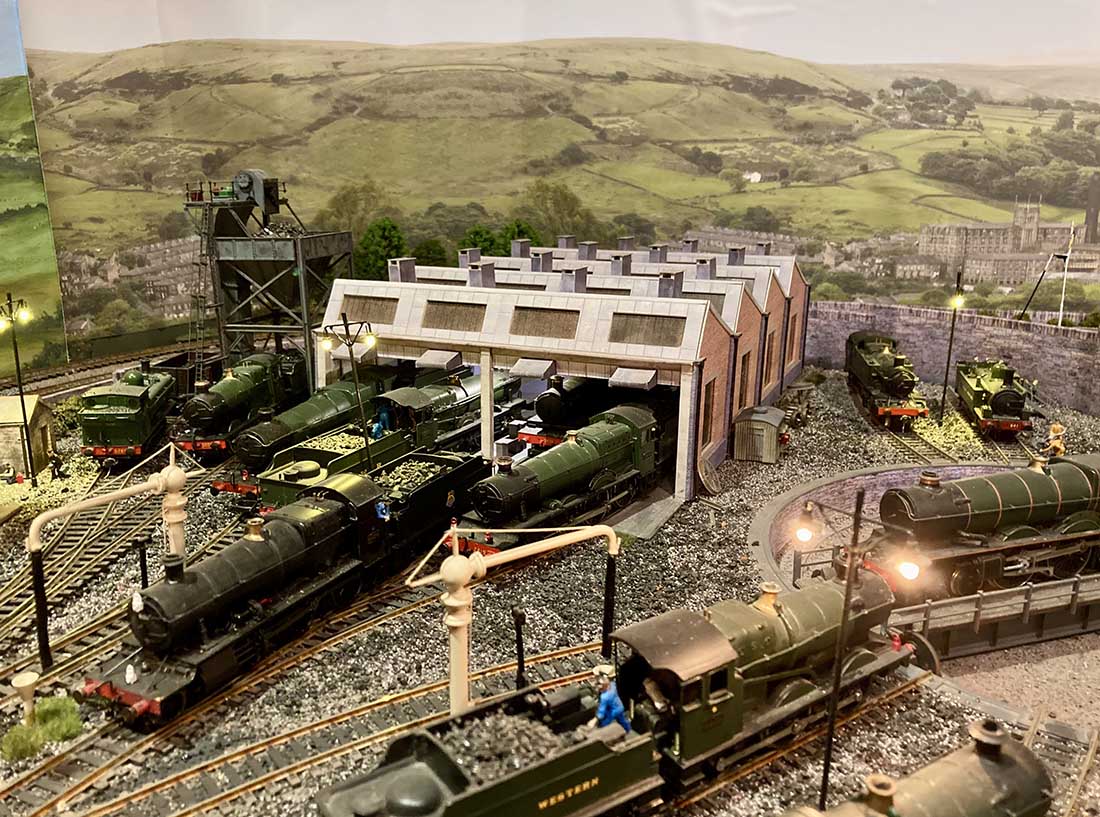
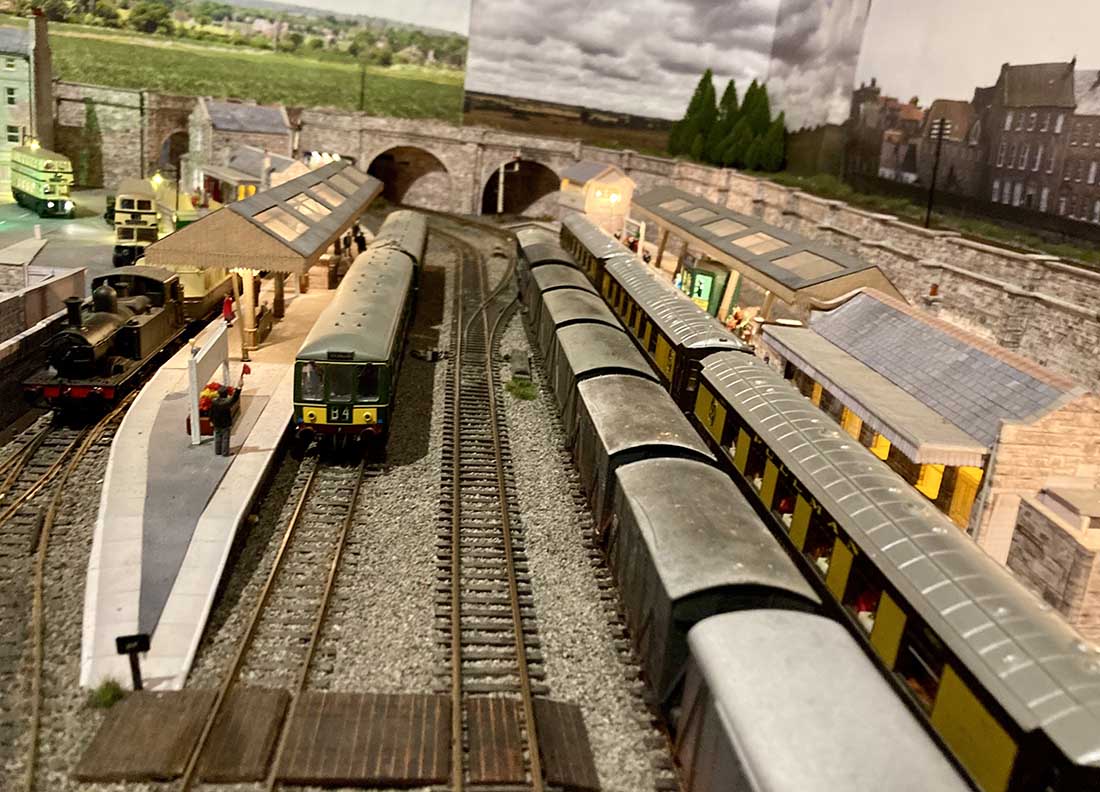
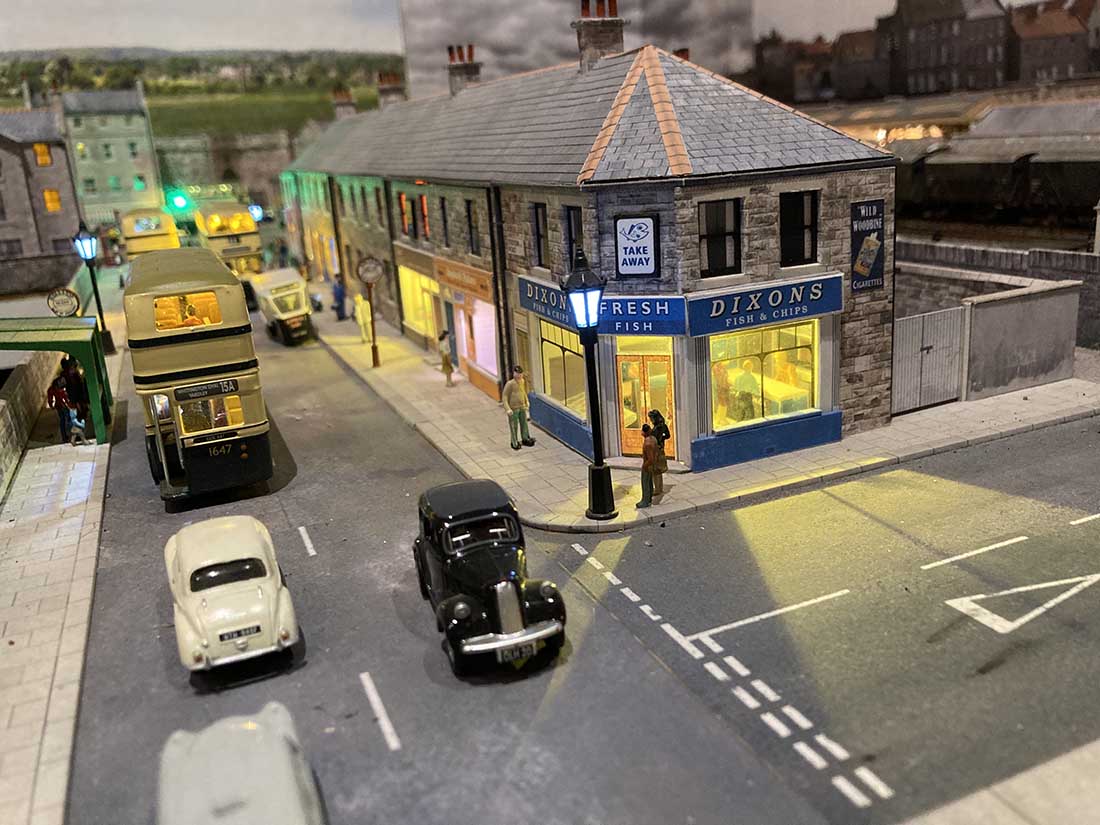
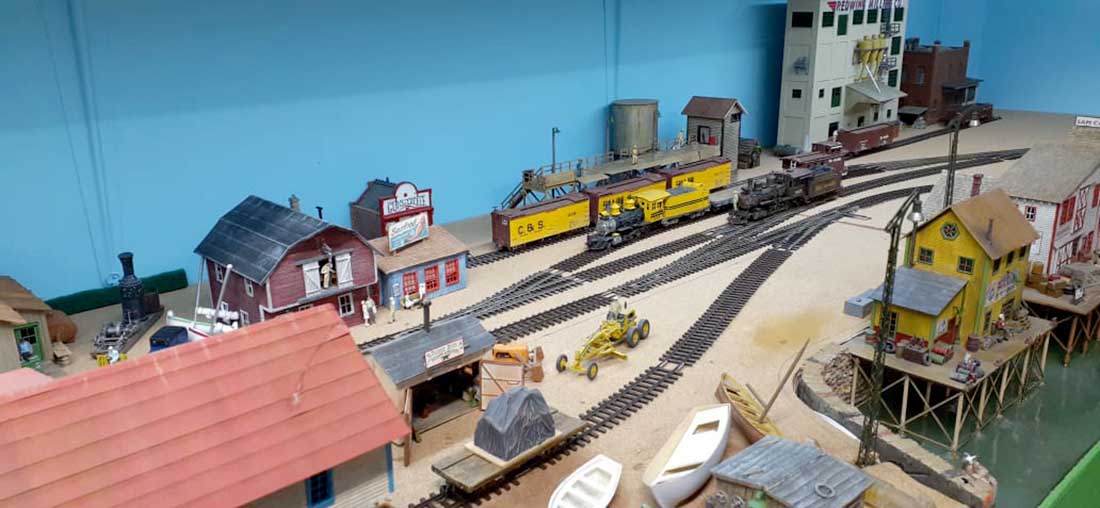
It has been a while since I sent any pictures to you so thought I would show you what has been happening in my model of Tyseley, Birmingham.
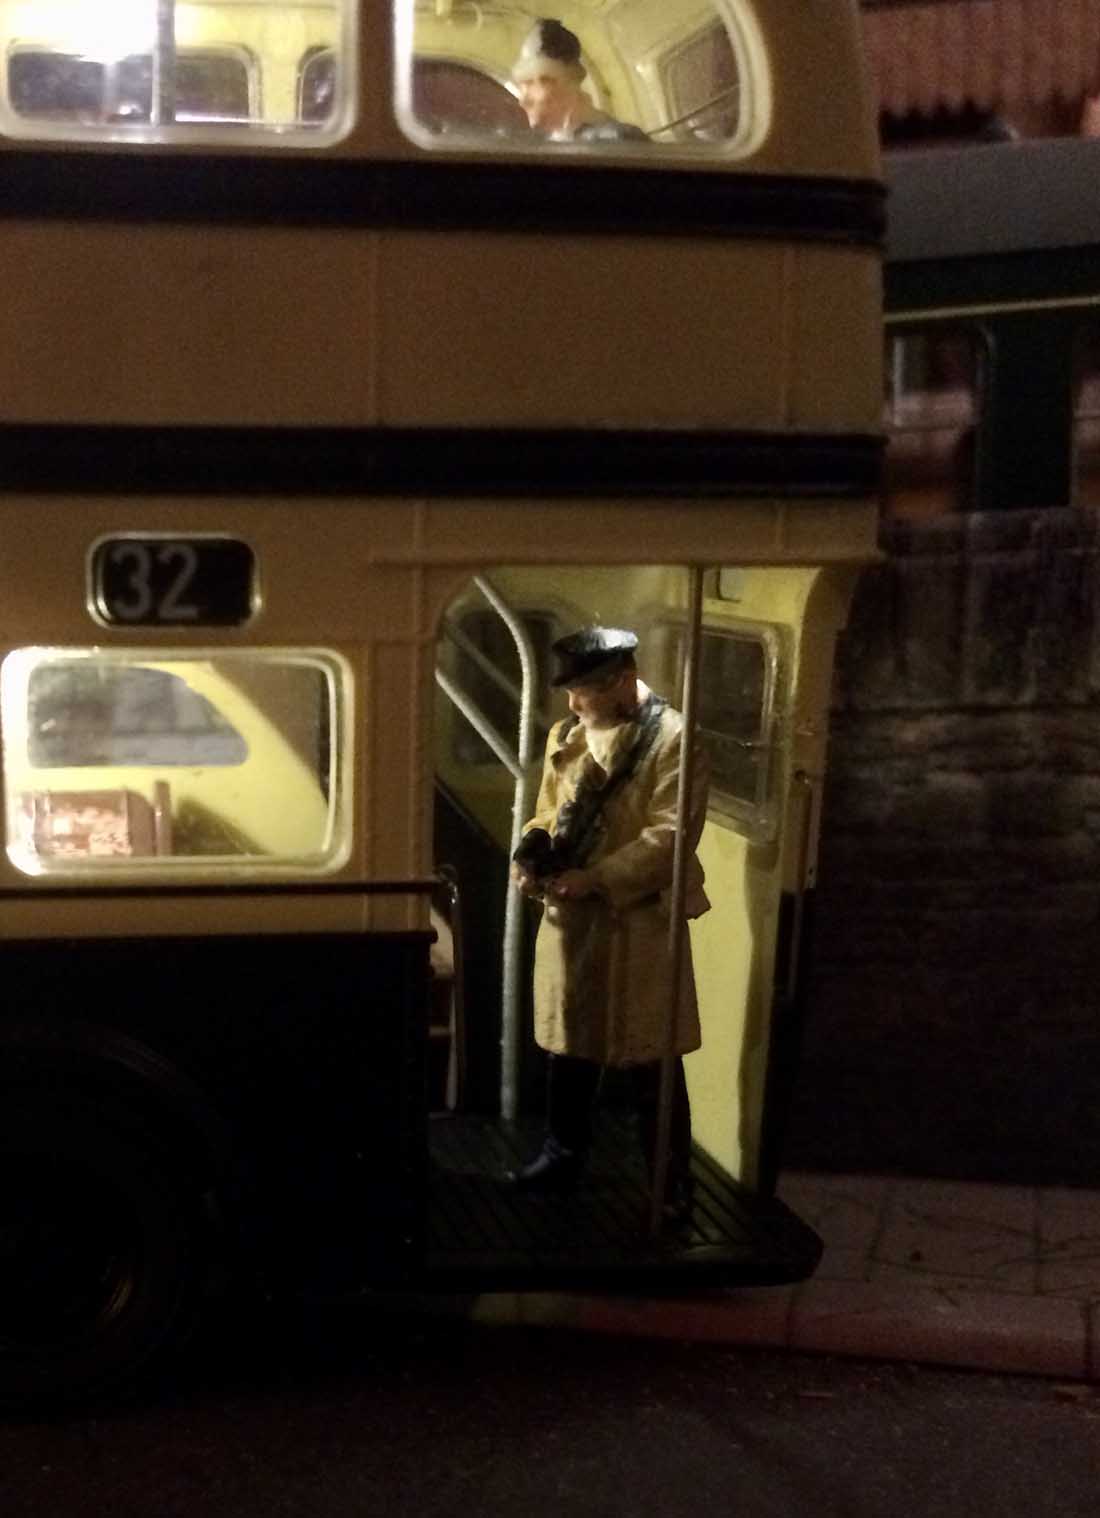
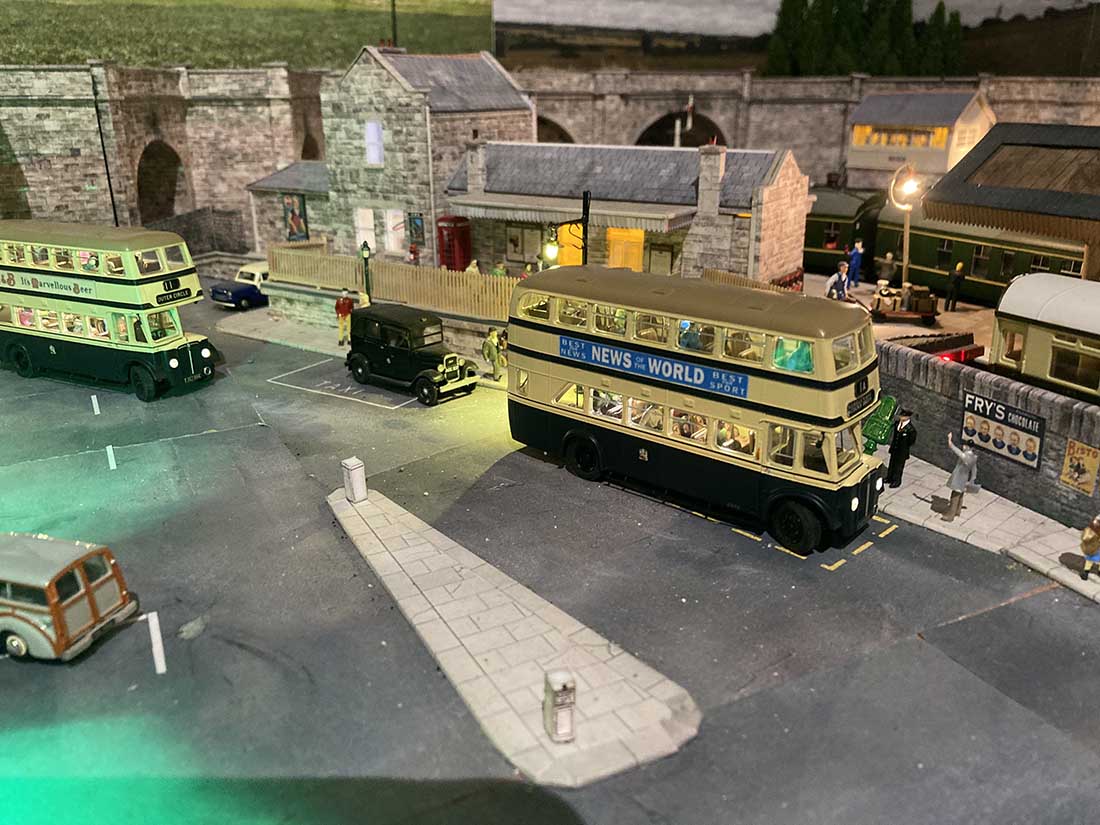
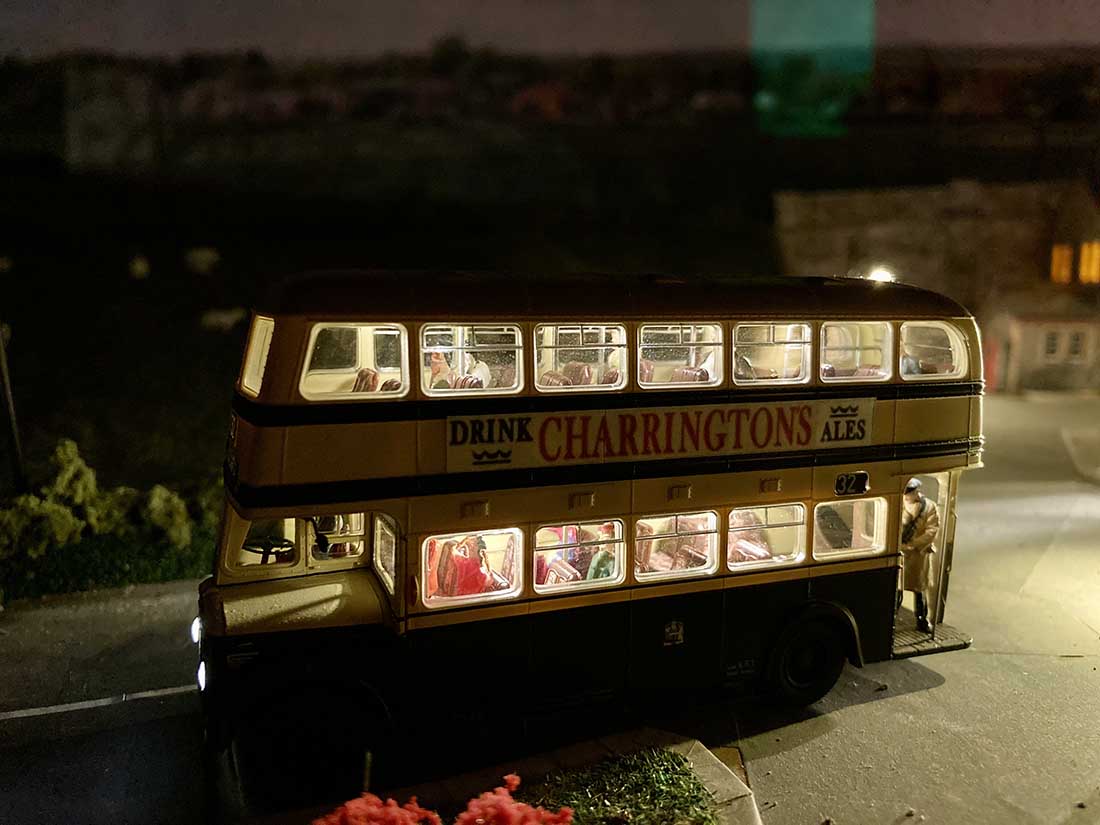
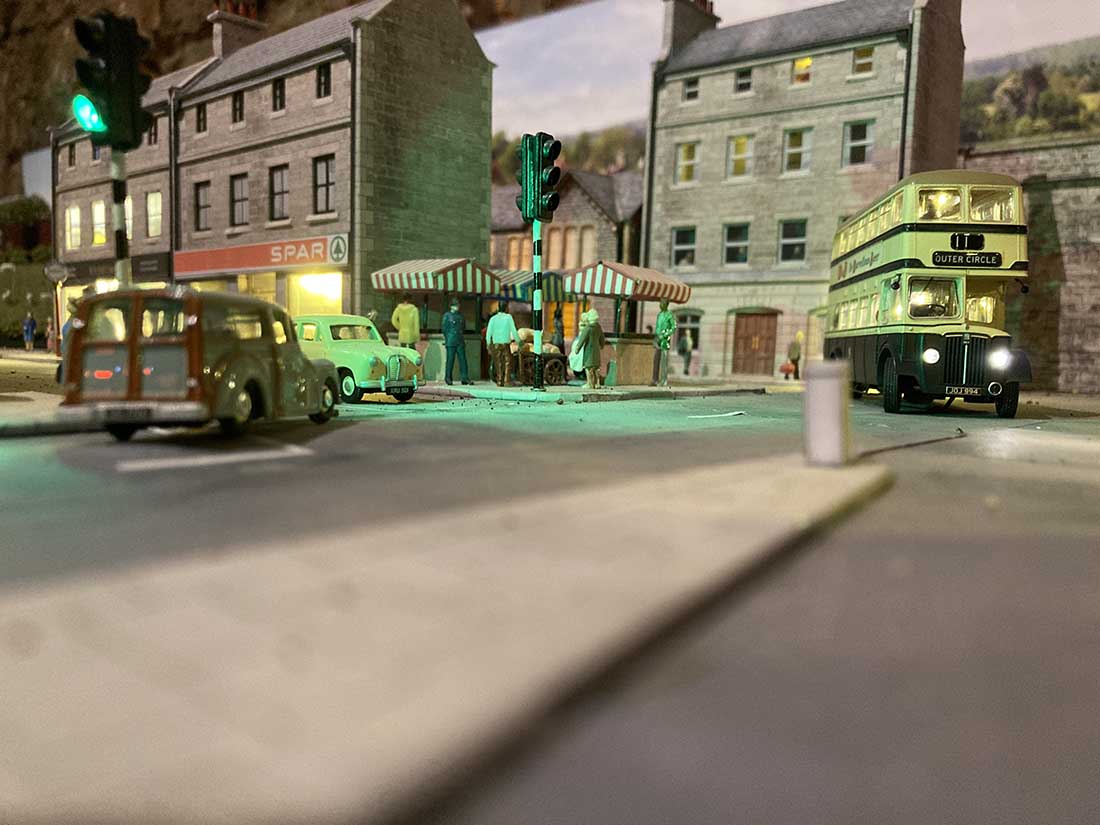
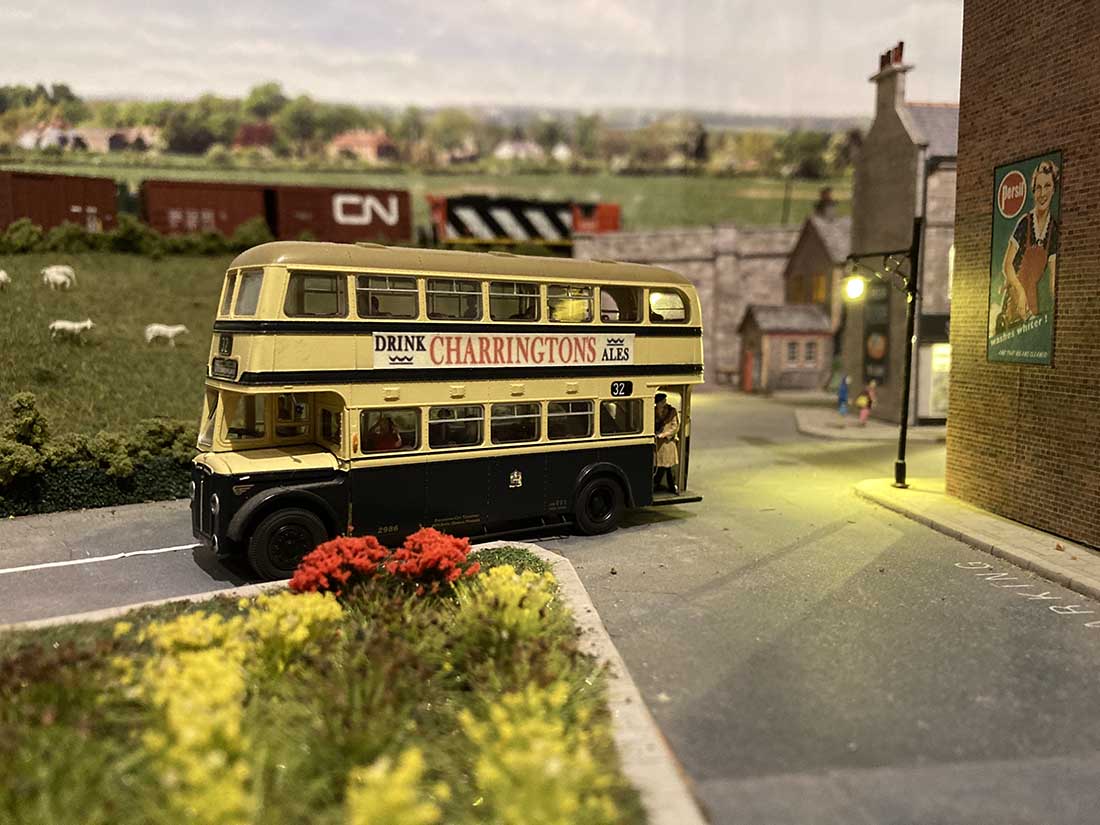
As you can see traffic jams existed even in the early 60’s mainly because of all of the buses!!
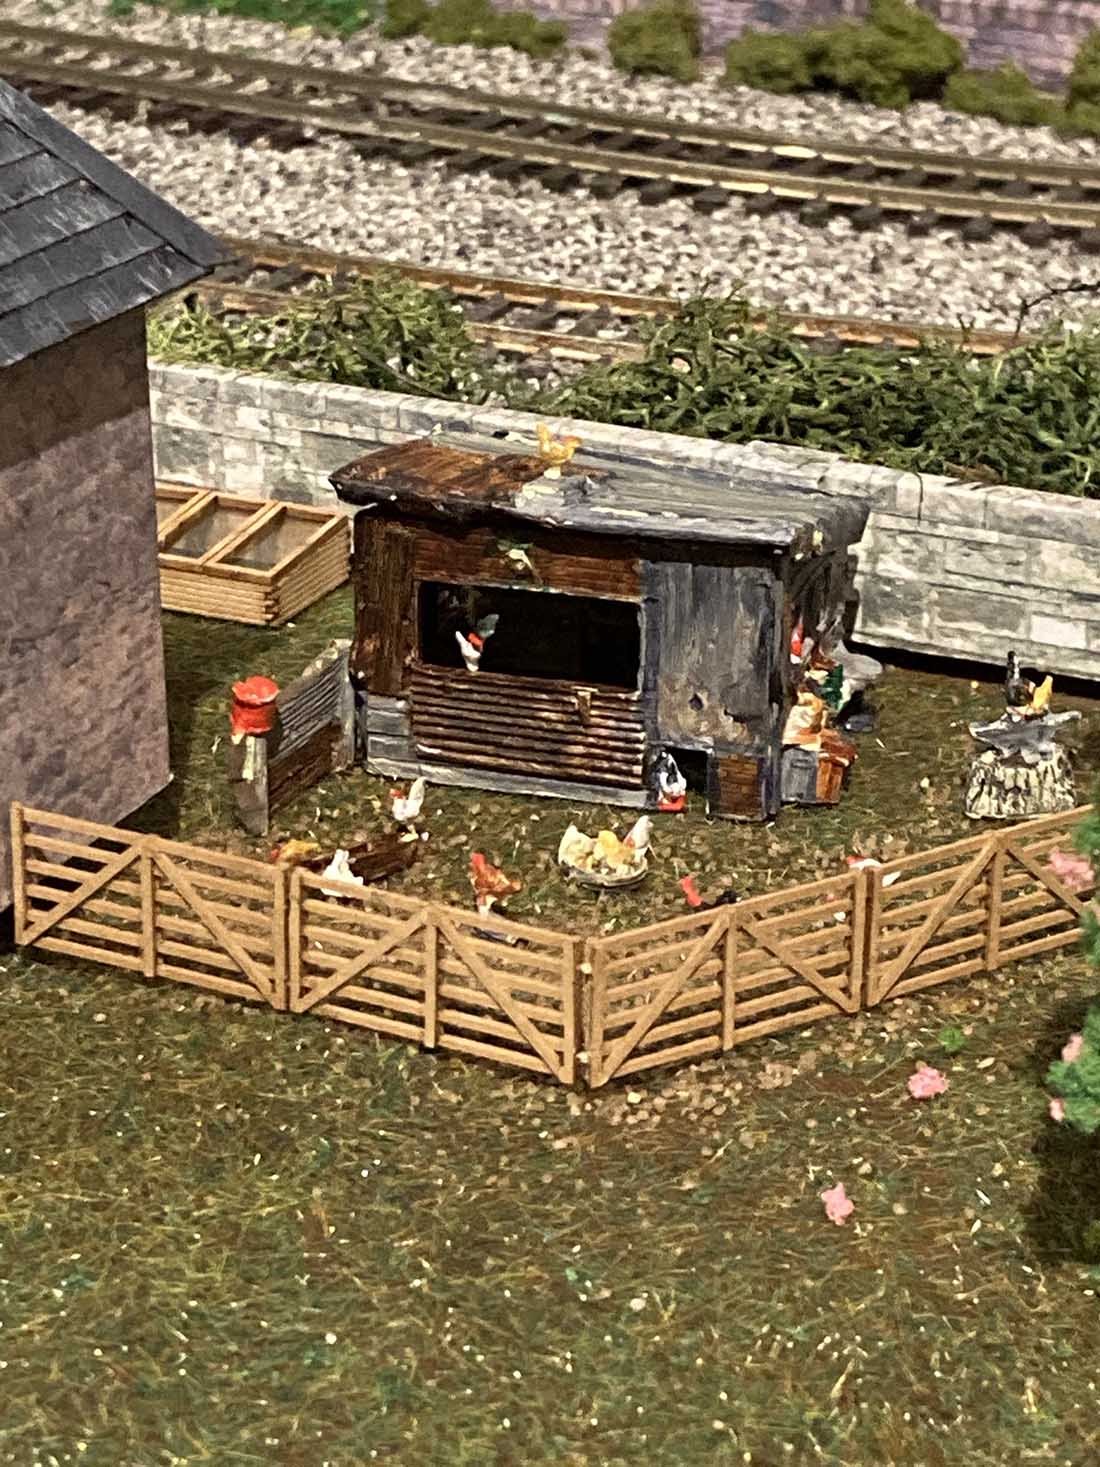
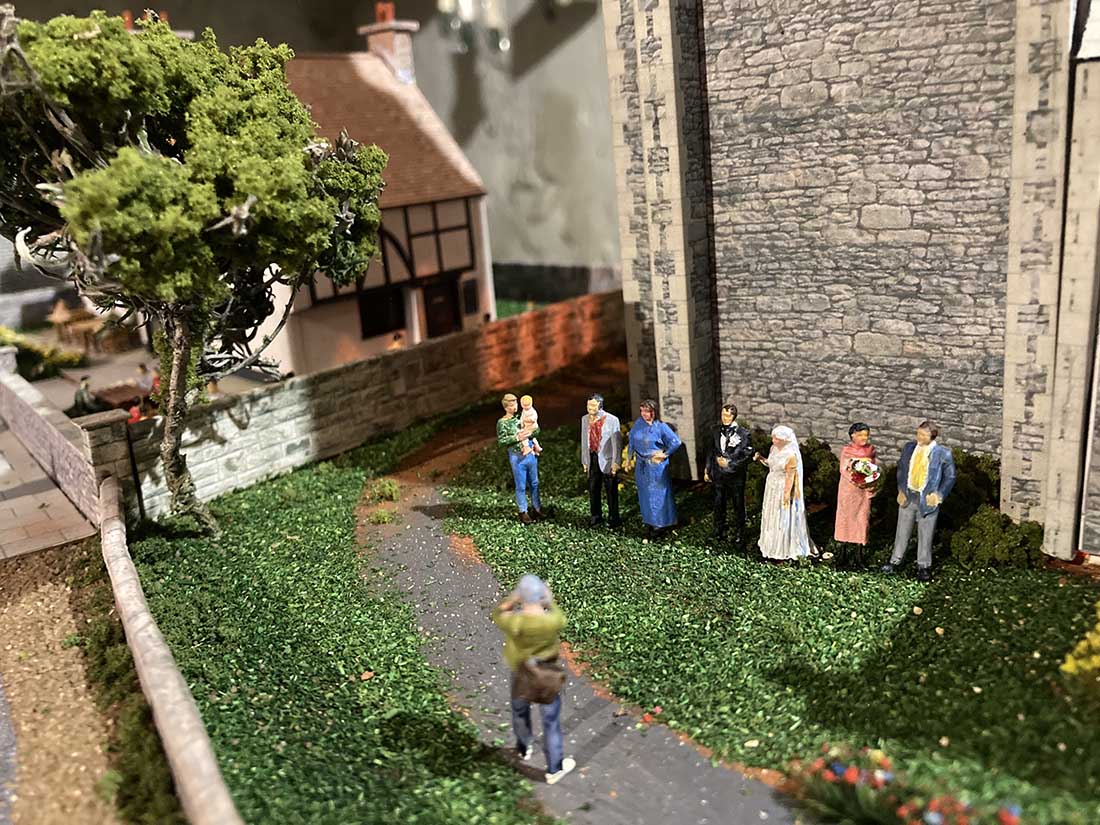
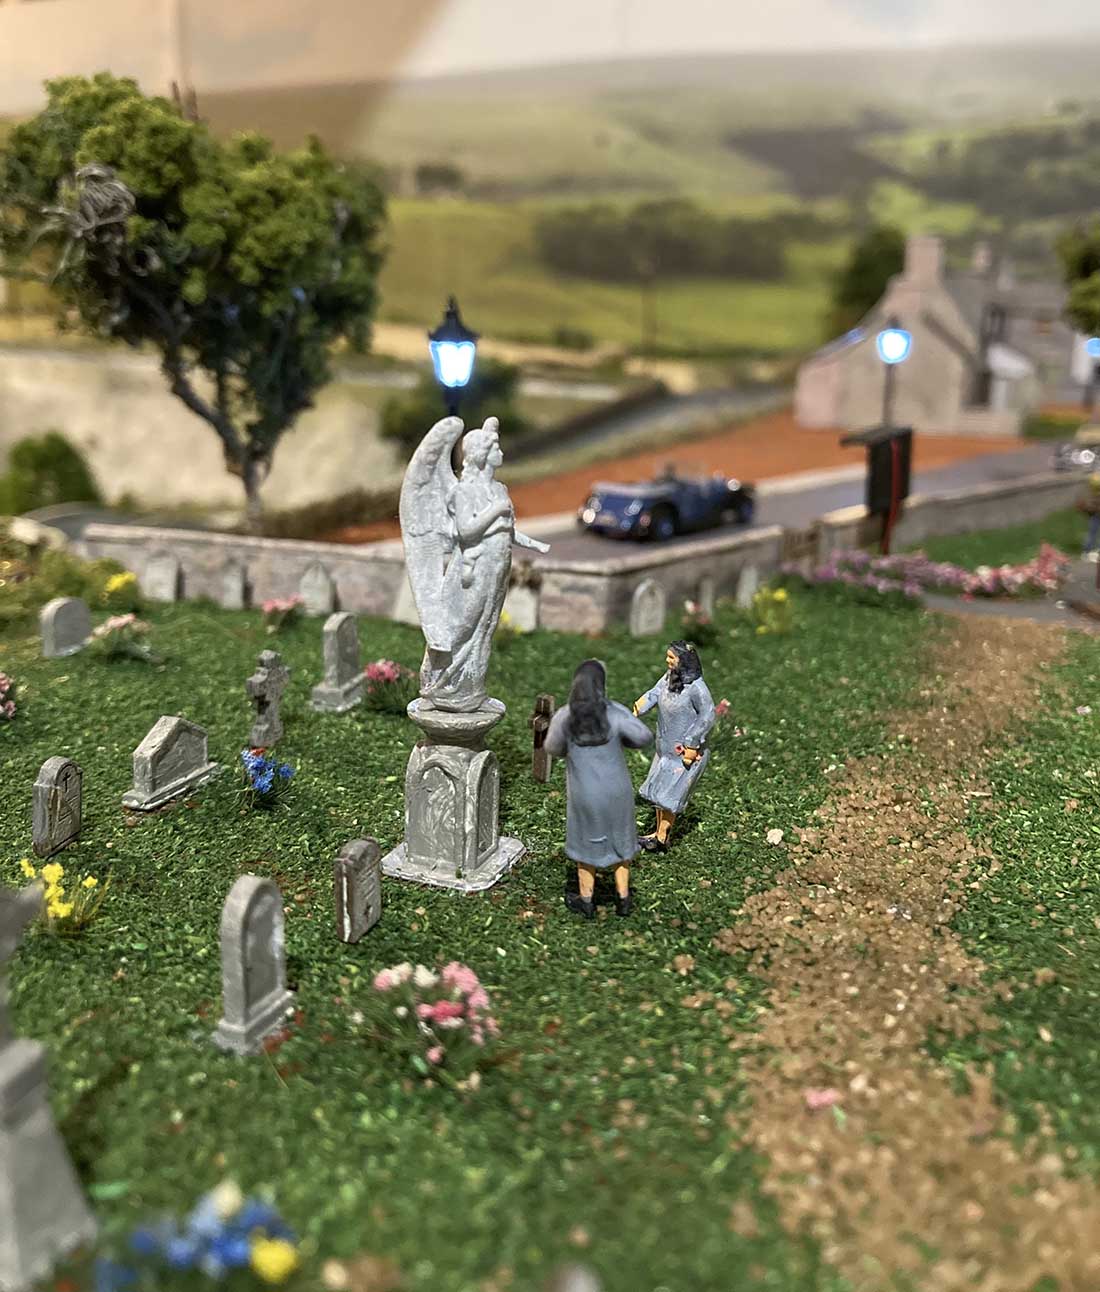
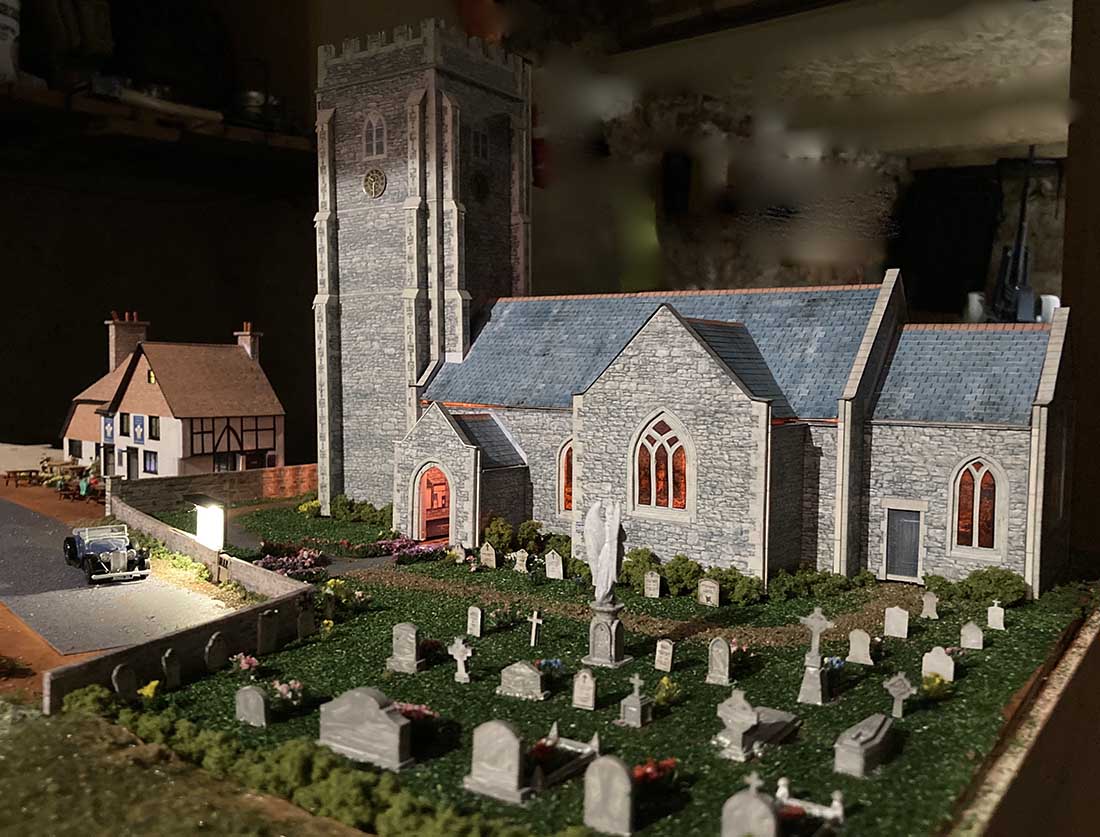
I must thank my wife for her work in painting a lot of the people like the bus conductor and the animals. In particular the chickens in the coop which were so small. She also painted the nuns and the wedding party!
Can anyone spot the interloper from North America?
Peter”
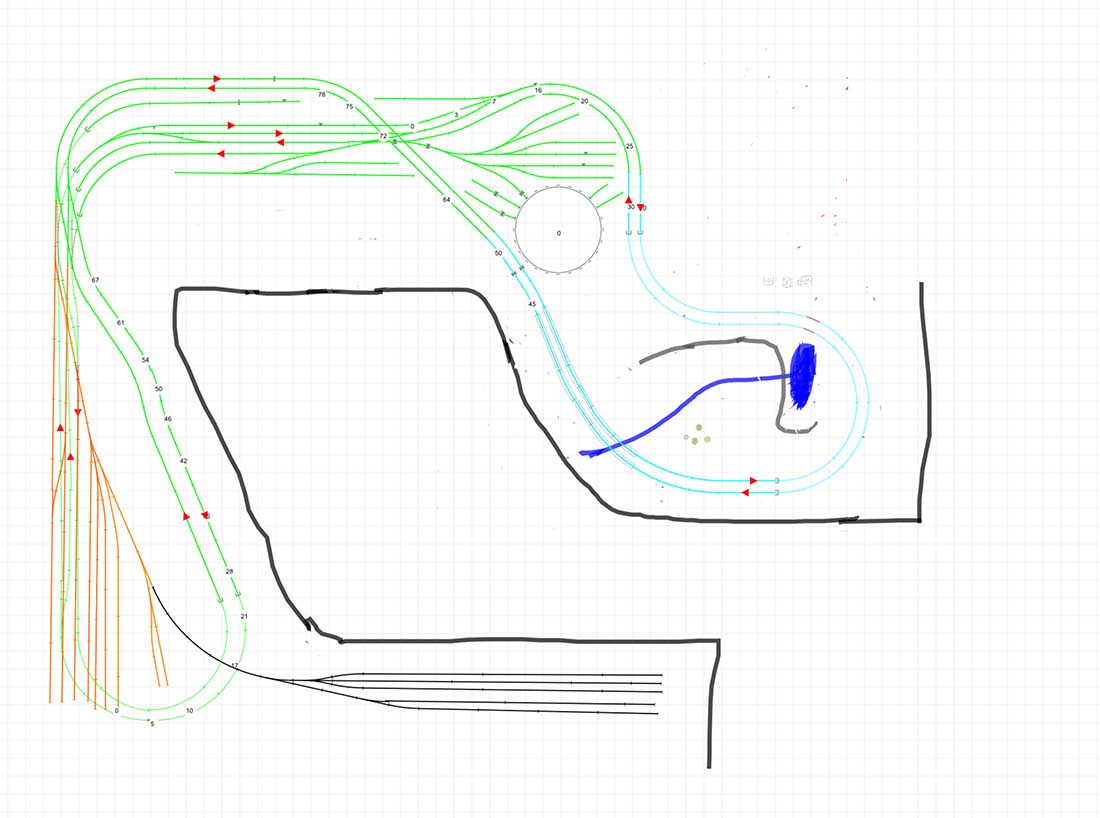
Here is a copy of my layout created on an app called Train Design. I hope it is clear enough for you. The different colours indicate the phases when the work was completed. The dark gray being storage and orange an upper level to a branch station and coach sidings on top of the two main lines in the tunnels below.
Model railway village:
A huge big thank you to Peter for sharing his model railway village update.
Brian’s been in touch, he been busy with his model railroad test track so everything works just fine before the scenery goes down.
“Hi Alastair,
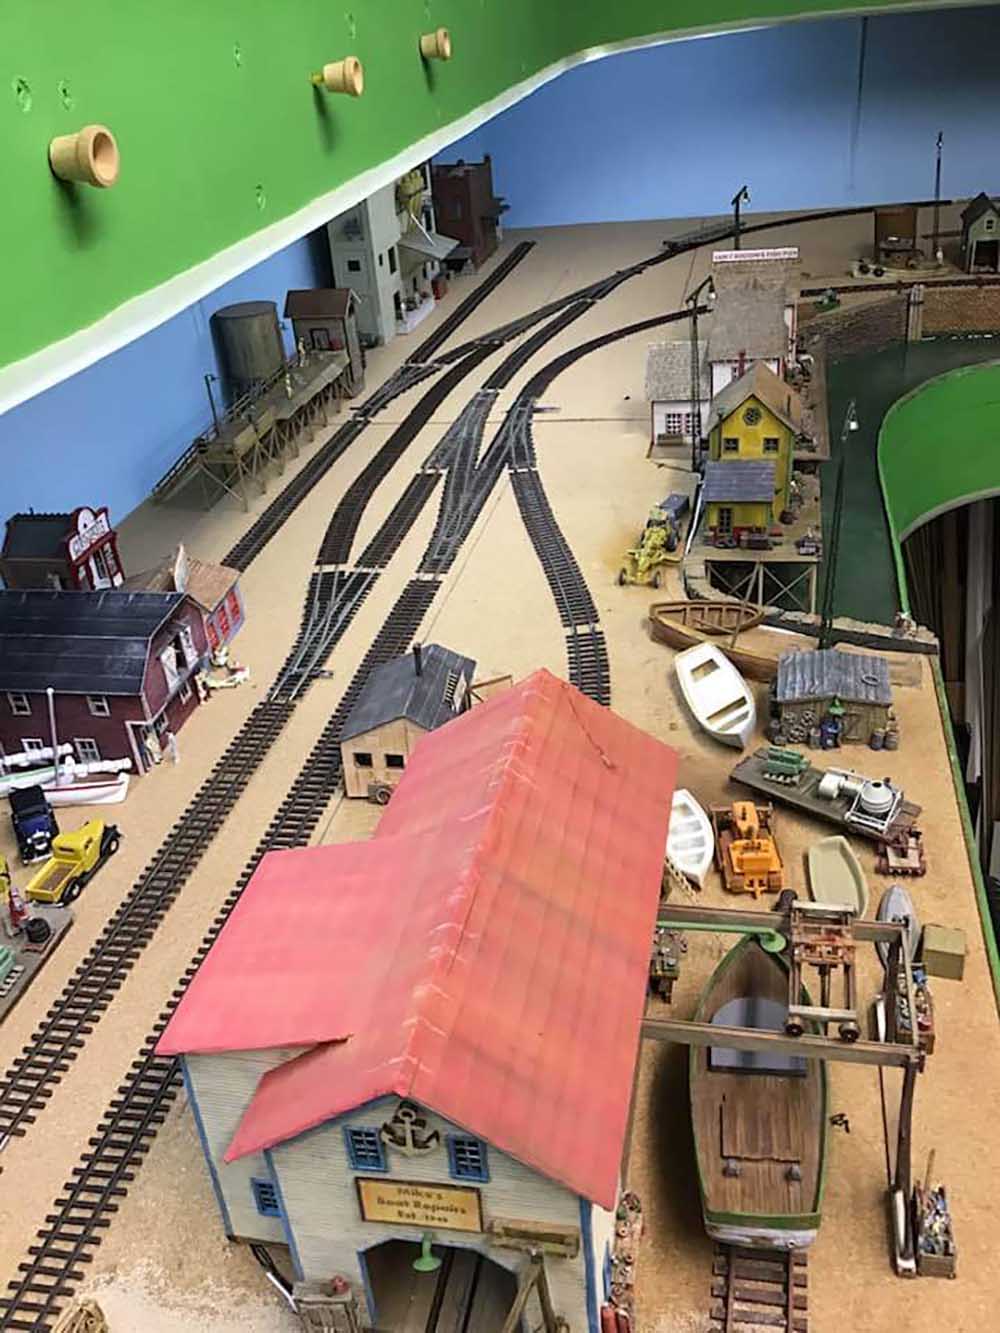
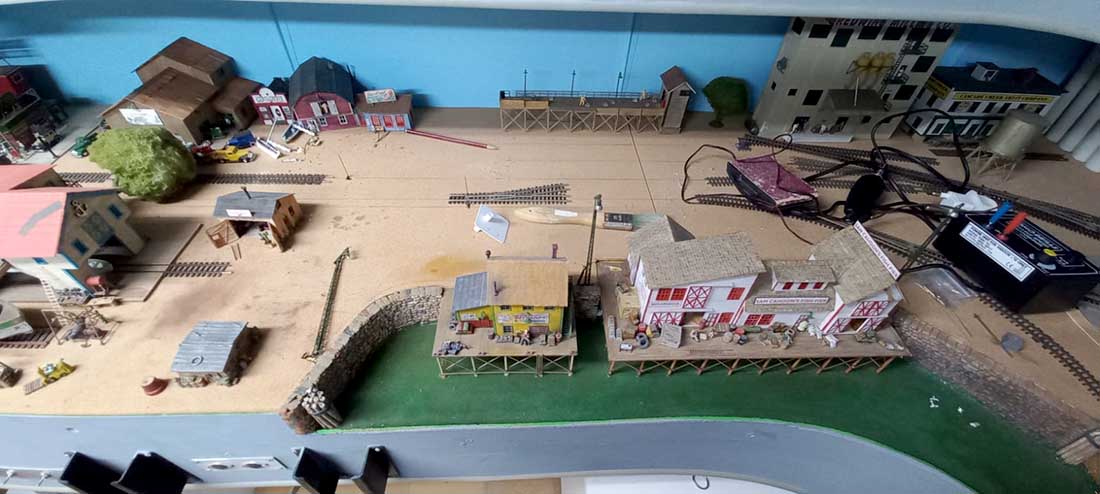
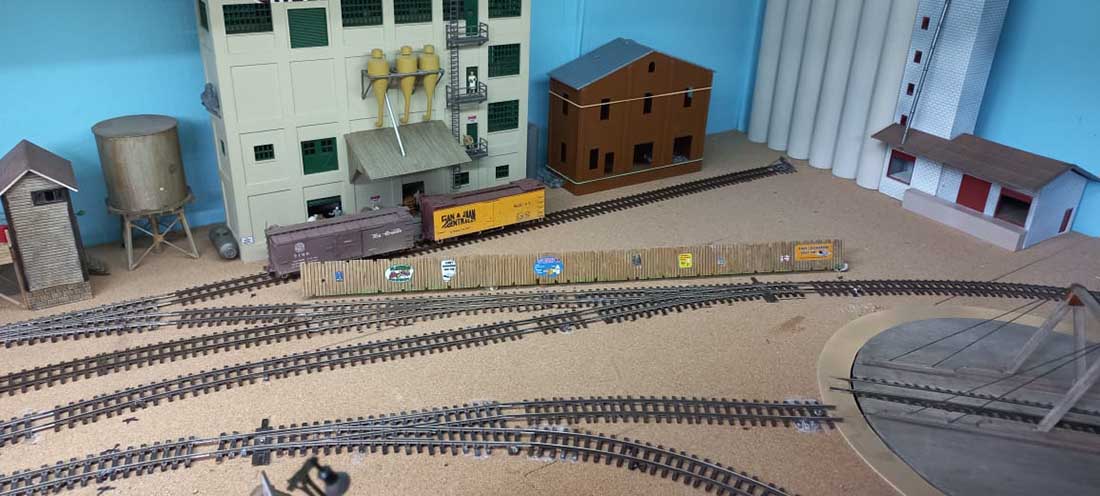
More progress on the lower level beyond the harbour after having temporarily laid the track in place to make sure that it was in the correct position I wanted before fixing it down.
Photos below were taken before I changed the facia colour to grey.
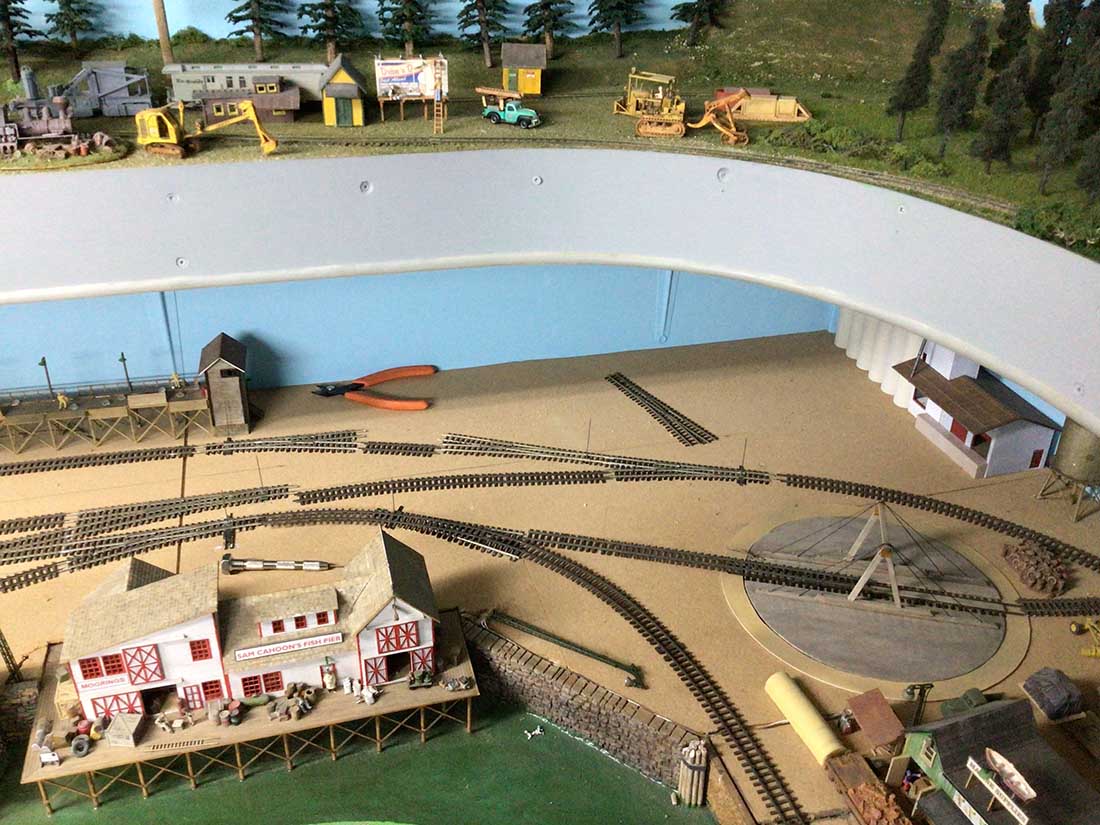
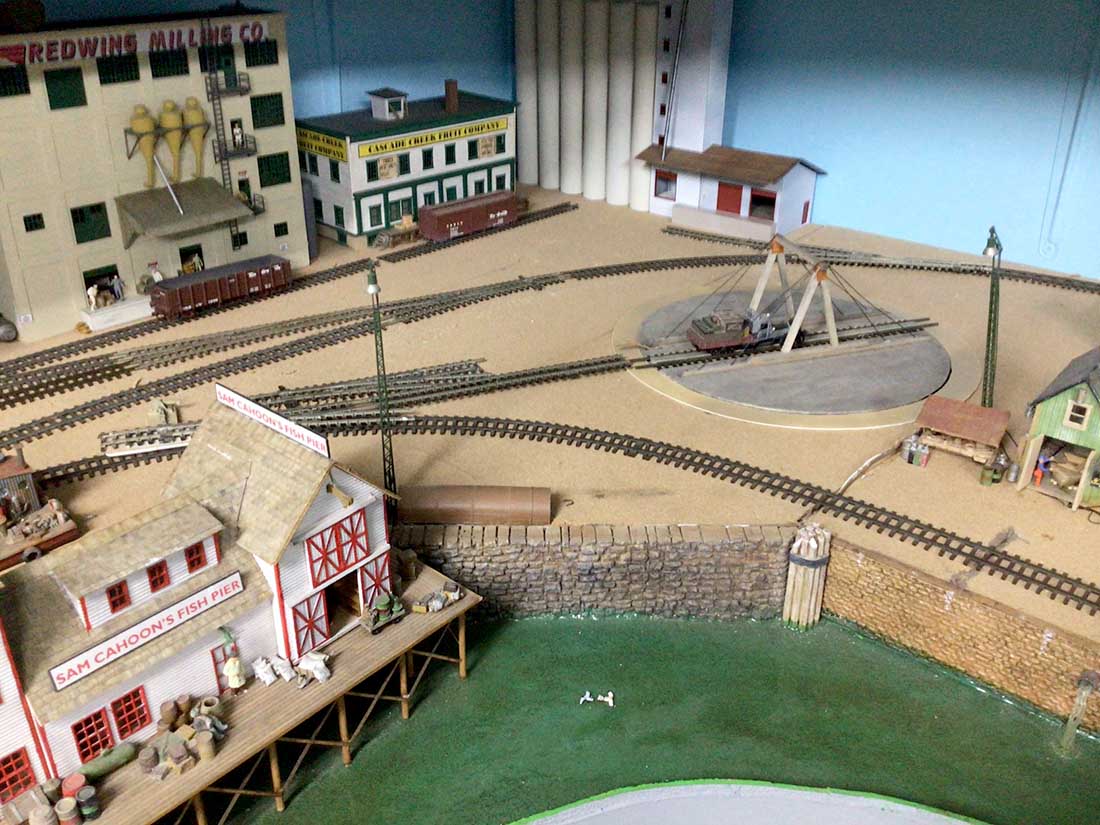
Another view of the proposed track work minus the point still to be added leading to the turntable off to the right.
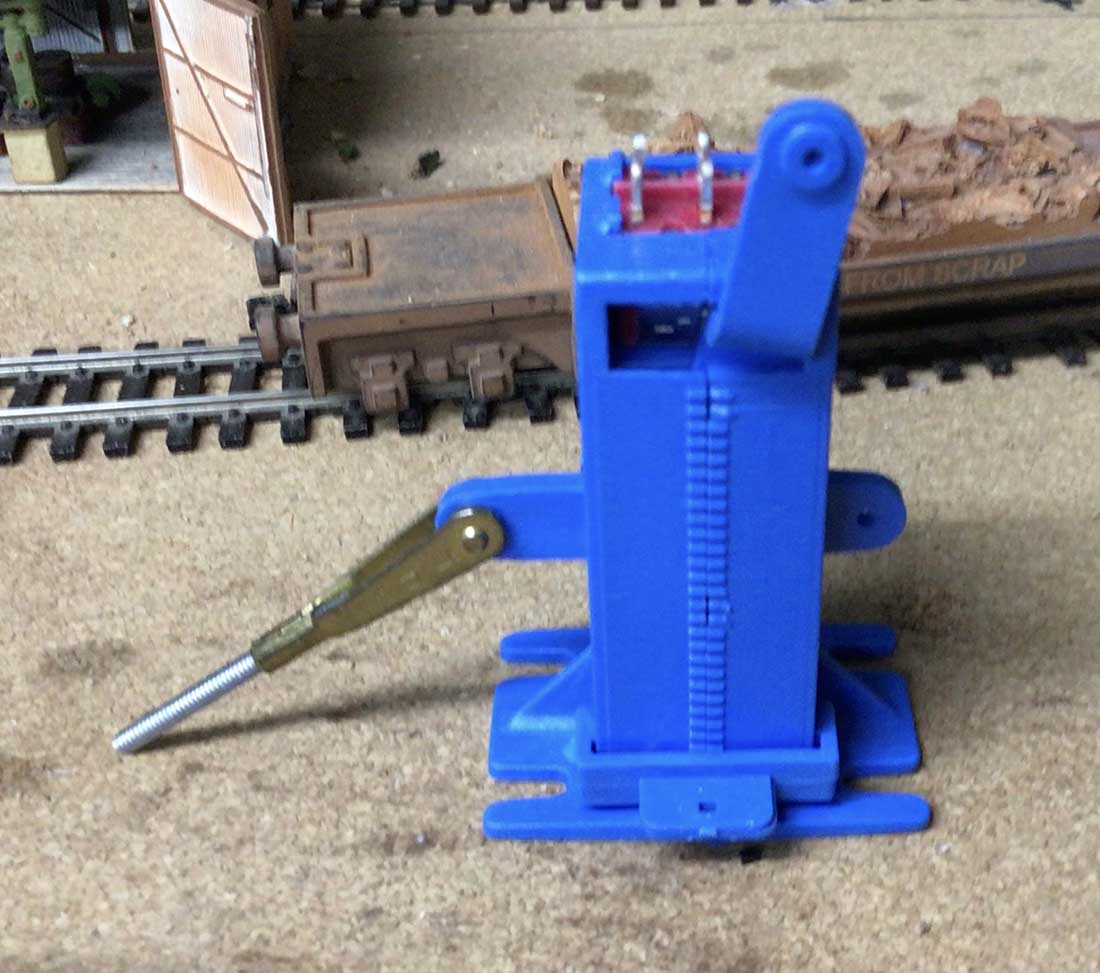
Below is one of the Blue Point switch machines that I use for all my points (turnouts). They are all manually controlled. This photo shows it upside down and on top of the layout but will be mounted underneath each point (turnout).
Looking closely one can see the thin spring steel wires coming up from under each point for the Blue Point switch machines. The converted and kit bashed Atlas turntable (manually operated by hand) worked exceptionally well and did not need a switch to change the direction of the locomotive on it when rotated 180 degrees. It does it automatically on rotation.
Model railroad test track:
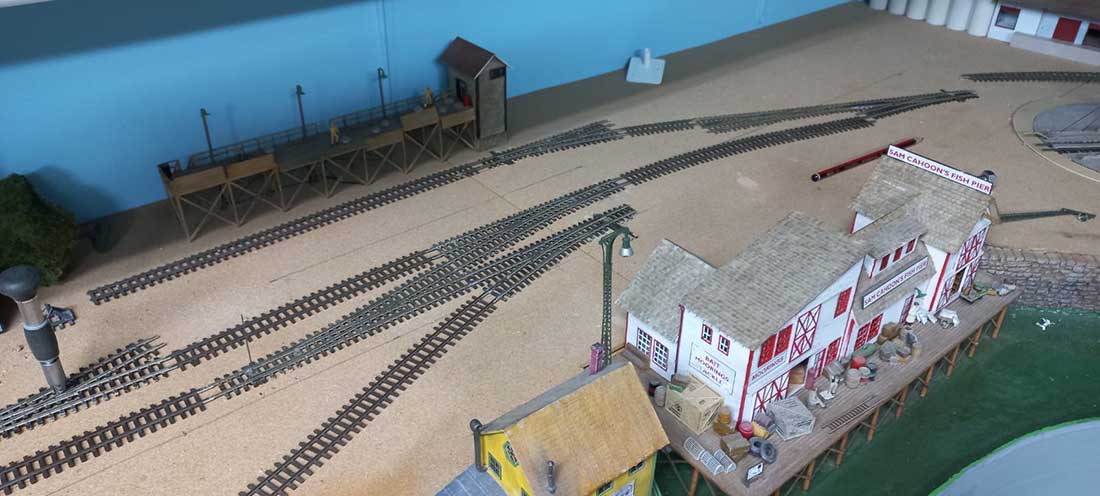
Cutting and fitting the pieces of track in its intended location. Here the point leading to the turntable can be seen on the right.The red knobs on the facia operate the push/pull point machines shown below.
Making a mess in the process while placing the track in it proposed location.
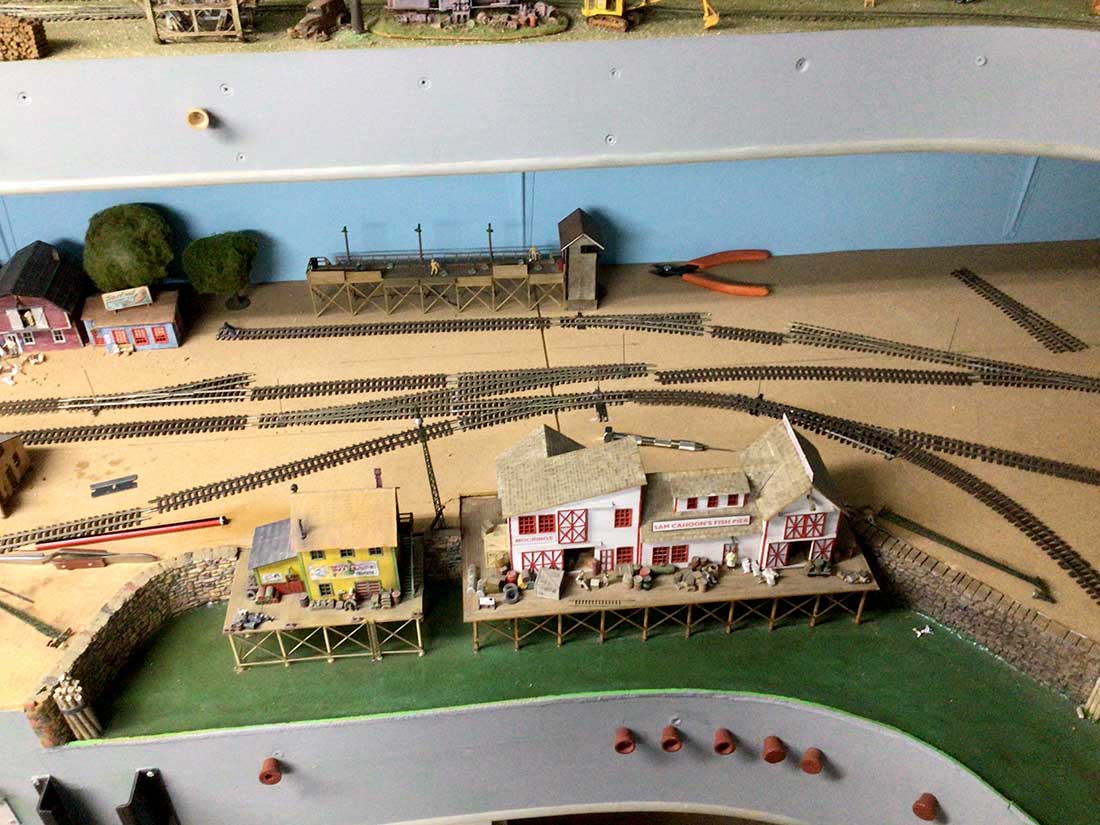
I should have done all the track work before fixing the buildings in place to avoid knocking things down in the front. One is never too old to learn. (Need long arms to reach over them).
The white piece of styrene top middle is the template used under the layout to mount and drill the holes in the correct position for the point machines.
Checking clearances at the back to make sure that the buildings will fit with the track in place. (Below)
An HOn3 Pierce Arrow Galloping Goose carrying freight being turned on the turntable.
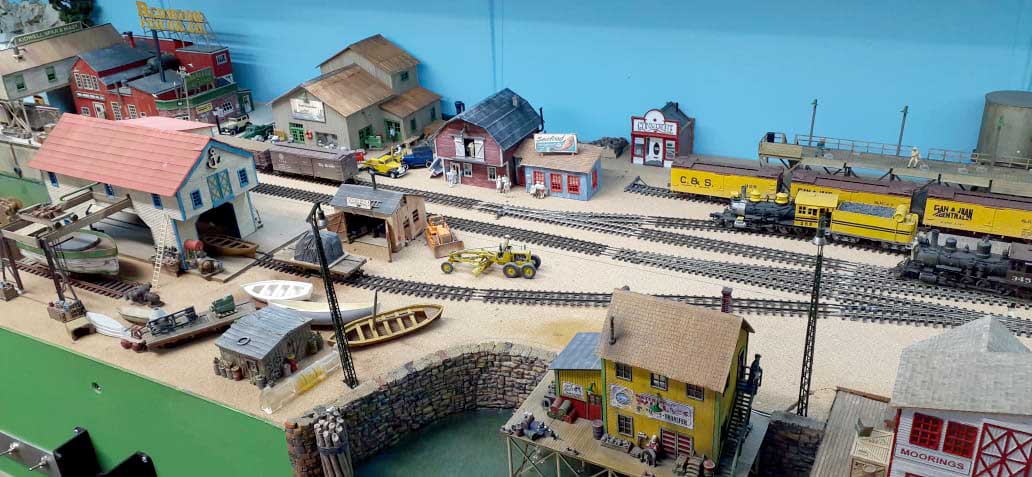
Again checking clearance of the track in front of the buildings with different rolling stock.
Slowly getting everything back in its place after testing and re testing the track for any running problems that may have occurred. I did find one electrical short, corrected it and promptly found a second one. All running smoothly now.
A new background building 50mm deep under construction. (Brown brick one)
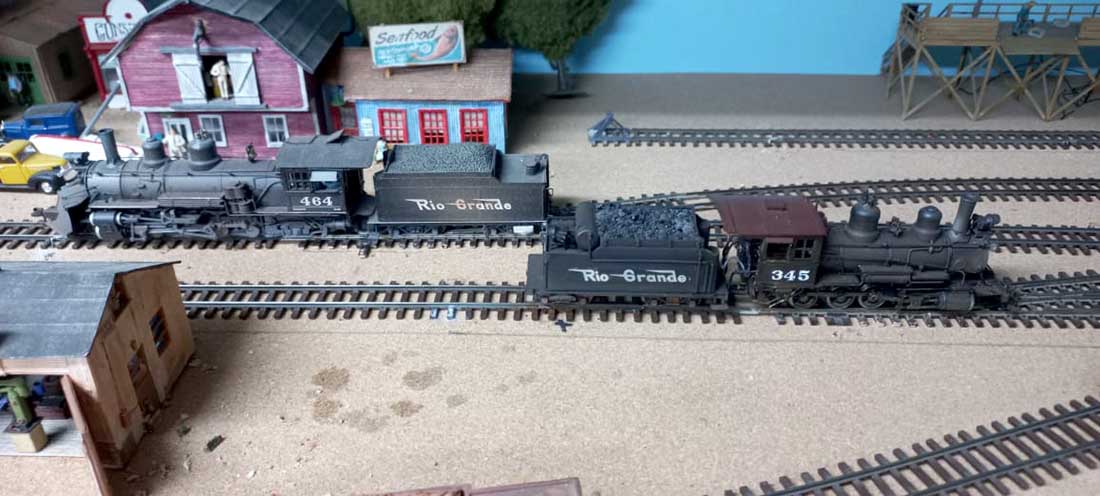
Two of my HOn3 locomotives that were used in testing. A Blackstone K-27 2-8-2 (464) and a brass C-16 2-8-0 (345).
Now to start with the ground cover and the scenery to go with it.
A very big thanks to Alastair for keeping this site going for all the Modellers out there.
Until next time.
Brian – the HOn3 guy from Knysna RSA”
A big thanks to Brian for showing us how he puts together his model railroad test track.
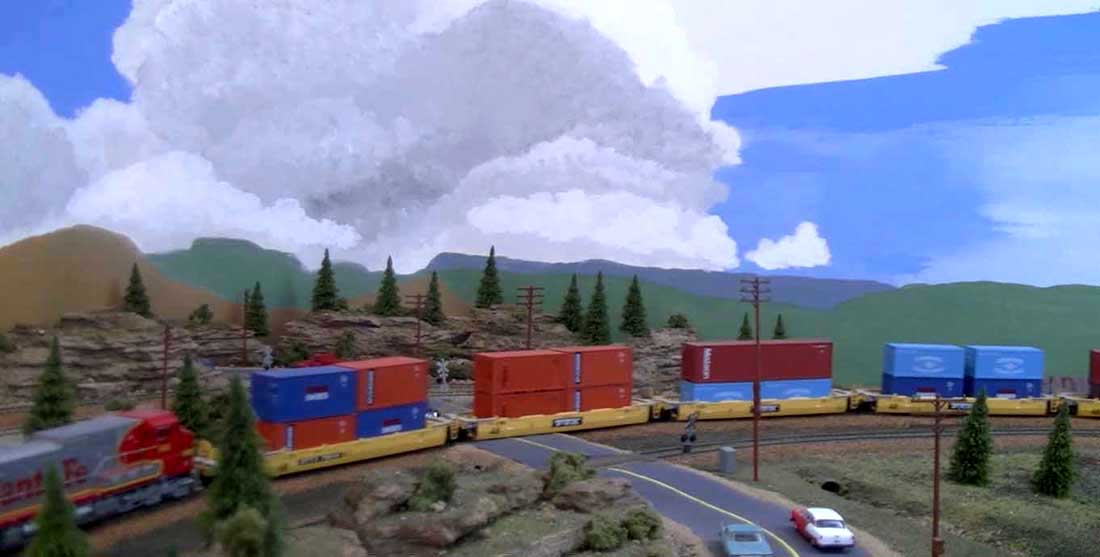
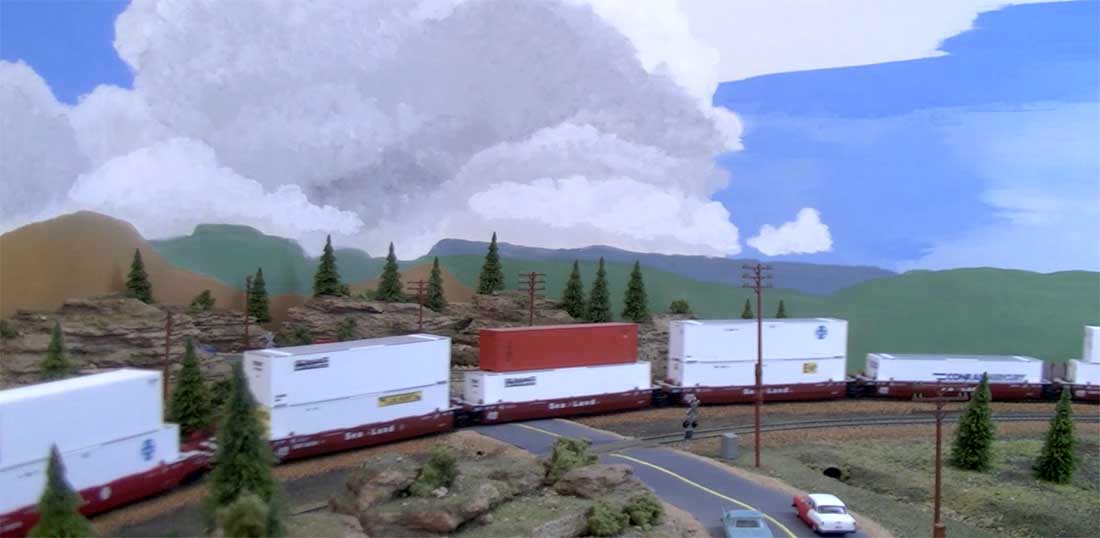
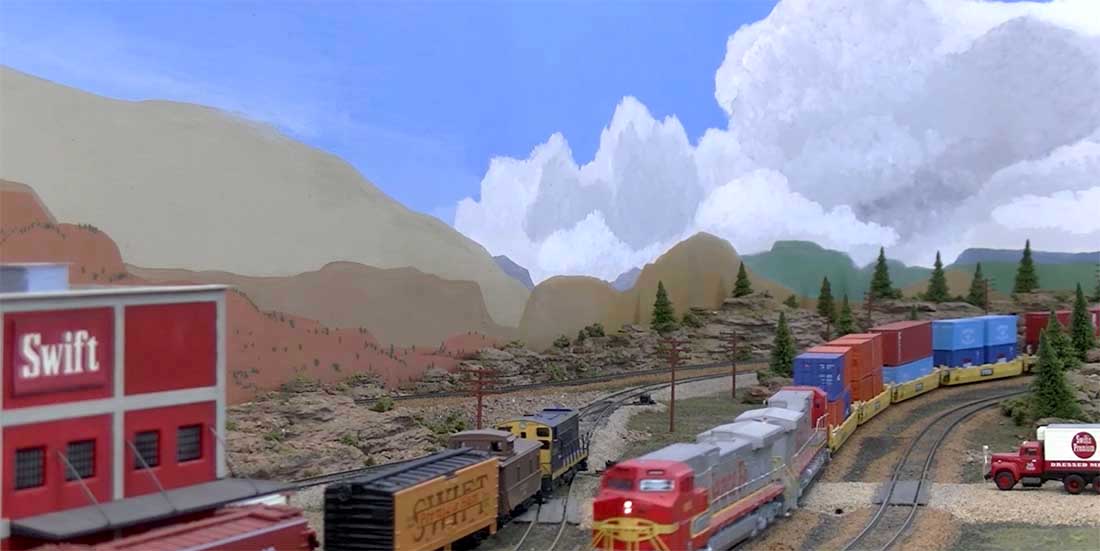
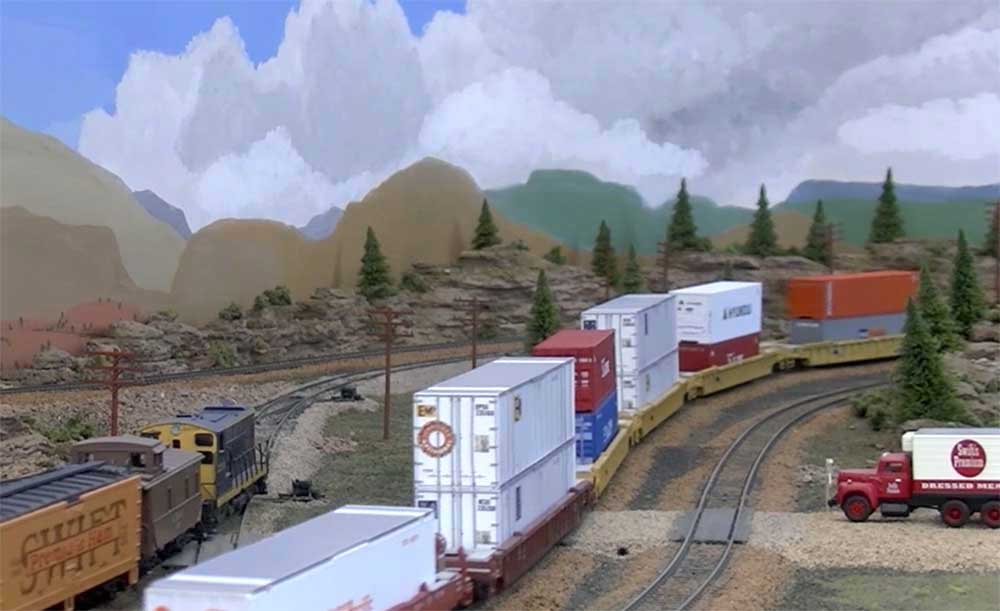
“This video features a stack train. My layout goes through a tome warp from time to time. The layout is “set” from 1958 to 1962. It becomes 1992 on occasion.
I spent a month in Flagstaff Arizona one summer on an astronomy education workshop. We had reading assignments, so I walked to the Flagstaff station where is a small park. I sat there to read and watch trains. When I got home, I just had to have a stack train.
In the 1992 phase an AMTRAK train can be seen from time to time.
Gary’s been in touch – he’s added to the 8×10 HO scale train layouts on the blog.
But first, some news about the future of the blog.
Some of you may have noticed there have been quite a few re-posts recently.
There’s a reason for this: Sales of the Beginner’s Guide and the printable buildings have been really slow this year, and it’s these sales that fund the advertising for the blog.
So I’ve placed less ads. This means fewer new people find it, so there are fewer submissions.
But the trouble is, now the sales aren’t even covering the cost of the package I use to send my emails.
It may mean, in the future, I only send to those lovely folk who support the blog, month after month.
Who are these people? The folk that took the membership option after buying the Beginner’s Guide.
But I really hope it doesn’t come to that – that’s why I’m running another silly sale – but this time with a difference.
To those who have already bought the Beginner’s Guide (numerous times!) thank you so much, and I hope this is a good reason to buy it again.
And if you’re feeling really kind, please take the membership option, even if you only stay for a month or so.
I’d really like to keep this show on the road, but I can’t get myself into the mess I did in 2019. I thought then I’d have to hang my boots up, but you lovely lot rallied and saved the day.
I’m a bit wiser now, and I’ll do all I can to keep it going, because just like you, I love seeing what lands in my inbox each morning.
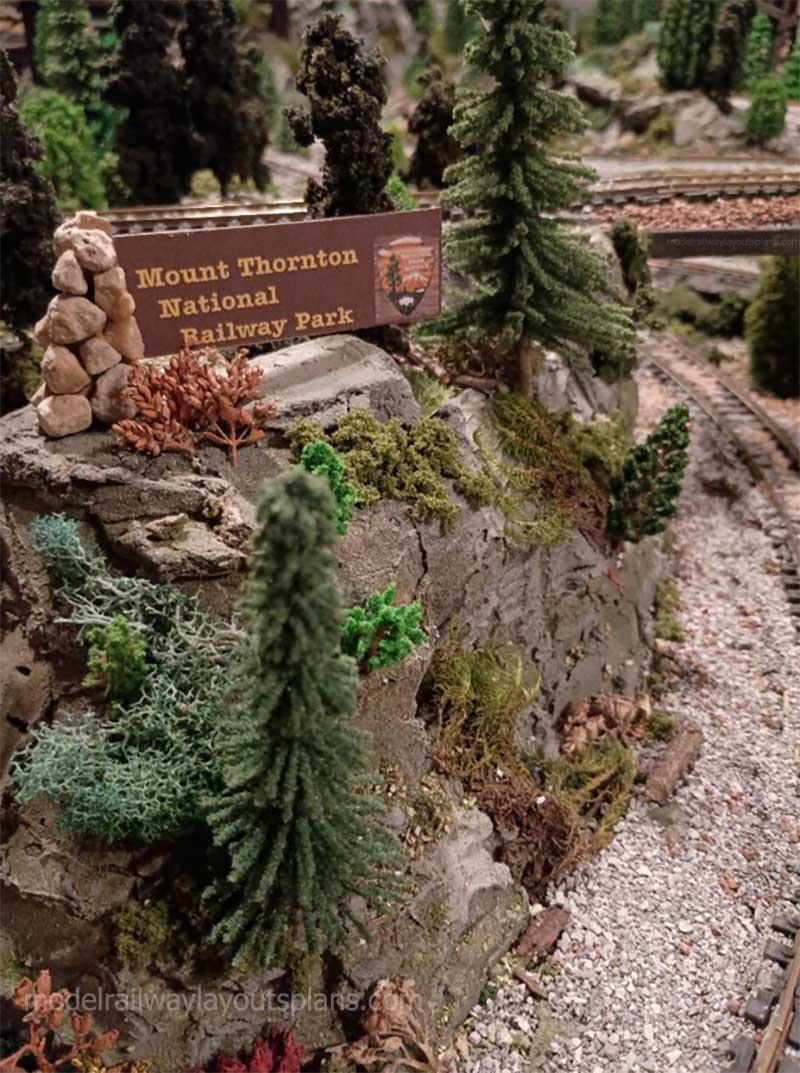
I’m back with another update for my Mount Thornton National Railway Park and I have proof that model railroading is a living, breathing endeavor.
I am so grateful for your part in connecting the model railroad community and giving all of us the opportunity to share and relish in our accomplishments.
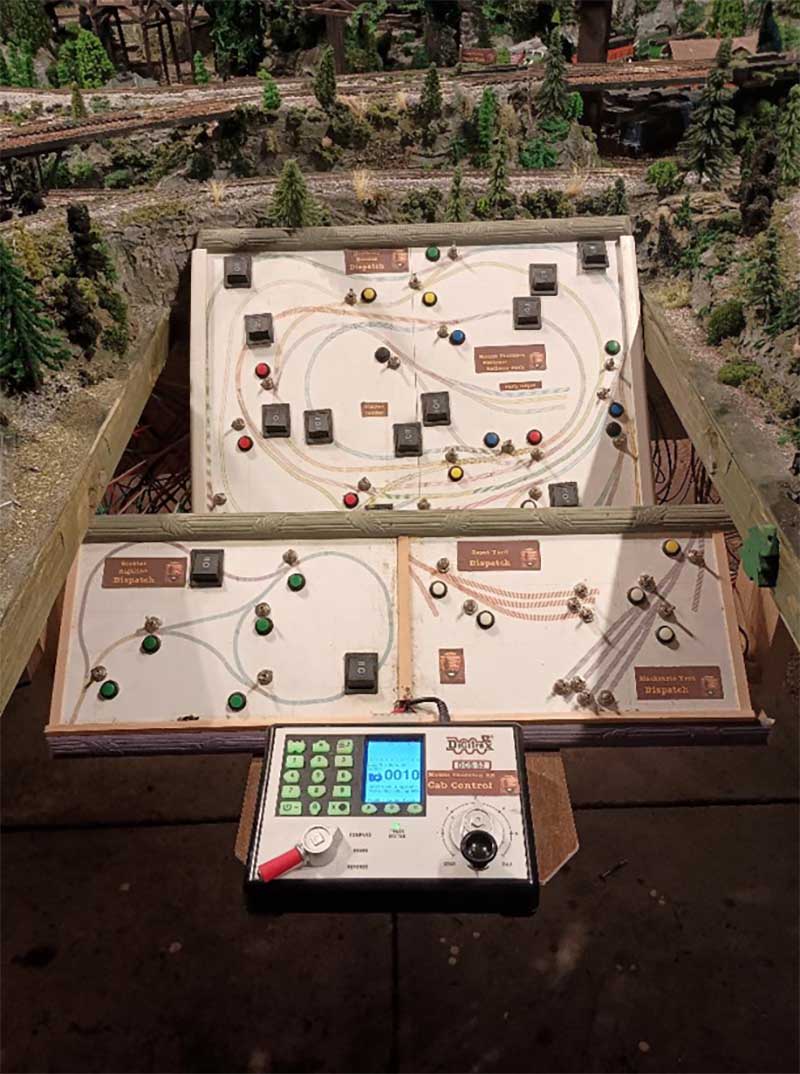
My layout is a maximum track activity based on a national park theme, with lots of options for continuously running trains.
I hope to share some updates in this edition as well as a few lucky decisions that I wish I could say were well thought out engineering efforts.
My 8×10 layout takes up most of my garage, but is hoisted to the ceiling for the car to fit below. Because I have an electric garage door opener, the layout is “notched” in order that it misses the garage door motor when raised.
This turned out to be my first lucky decision in that the notch allows me to reach the center of my layout, even with the control panel in place. This would have been a huge problem otherwise.
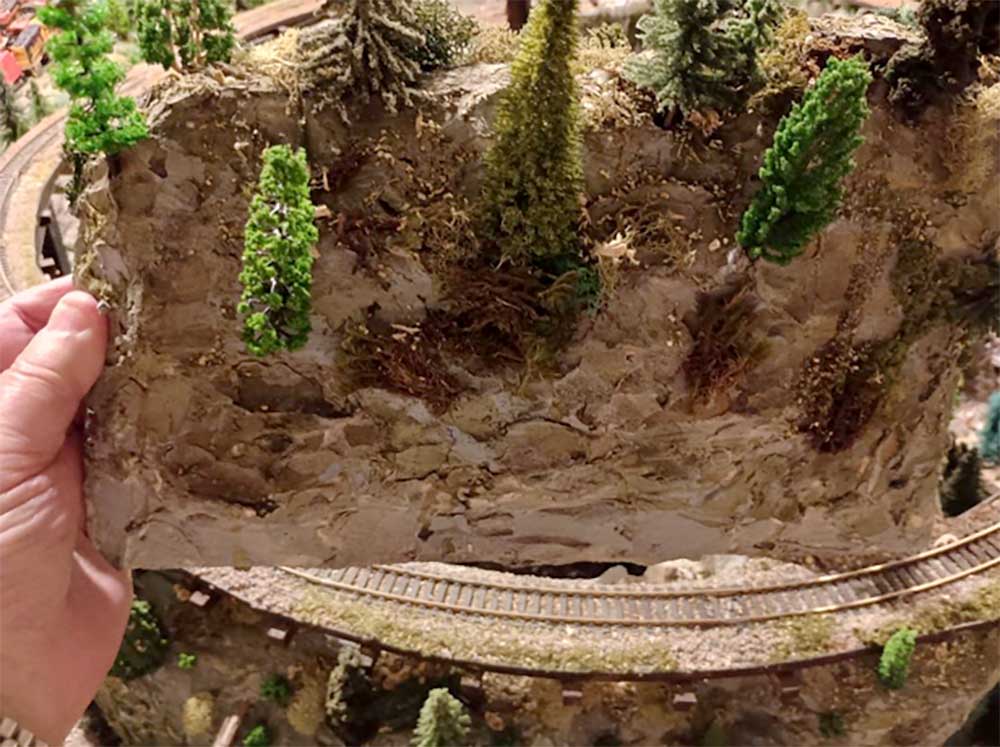
The next lucky decision was born out of necessity. I intended to utilize newspaper wads as support for the plaster cloth for my earth structures or mounds. However, we don’t read the newspaper anymore so very little left over newsprint, even though you will see a little newsprint inside the mountain.
The lucky break was that this work was being done around the Christmas holidays so I had an adequate supply of used gift wrapping paper. This worked out really well since newspaper gets soggy and collapses while the gift wrap holds up well and doesn’t collapse when wet. Lots of buried wrapping paper below the plaster cloth.
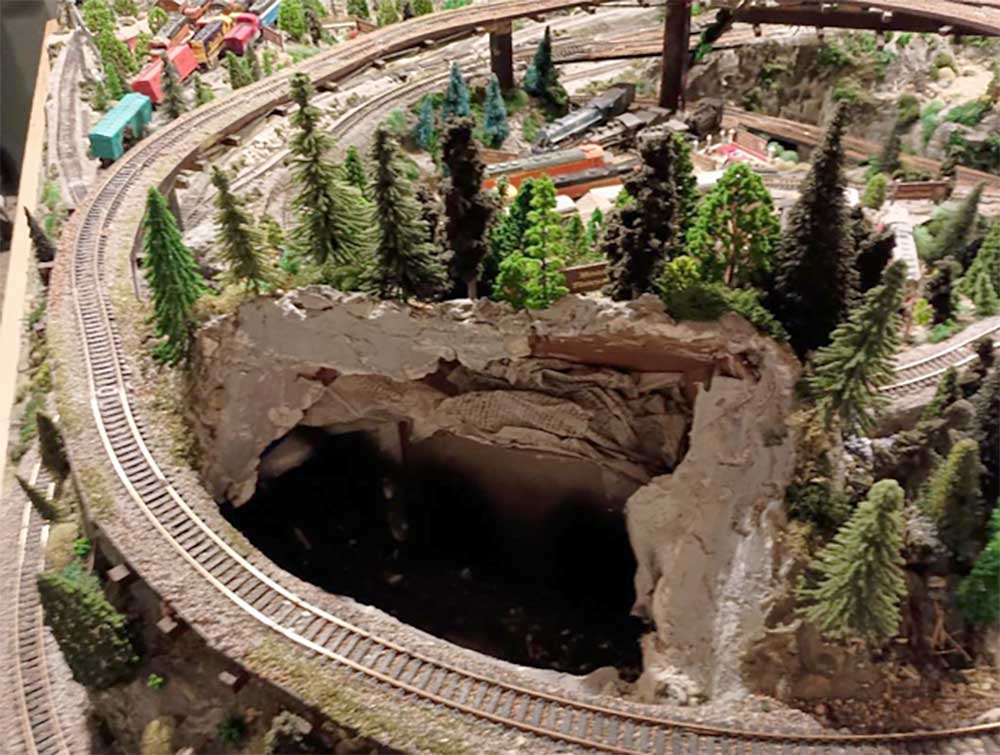
The next idea wasn’t one of luck, but rather a real simple solution for tunnel access. It was simply a piece of light plywood with all the paper wads, plaster cloth, joint compound and foliage attached. It simply just lifts out if access is necessary.
In previous submittals I shared some highlights of additions to the layout. This past year has been exceptionally meaningful as you will see with the following examples.
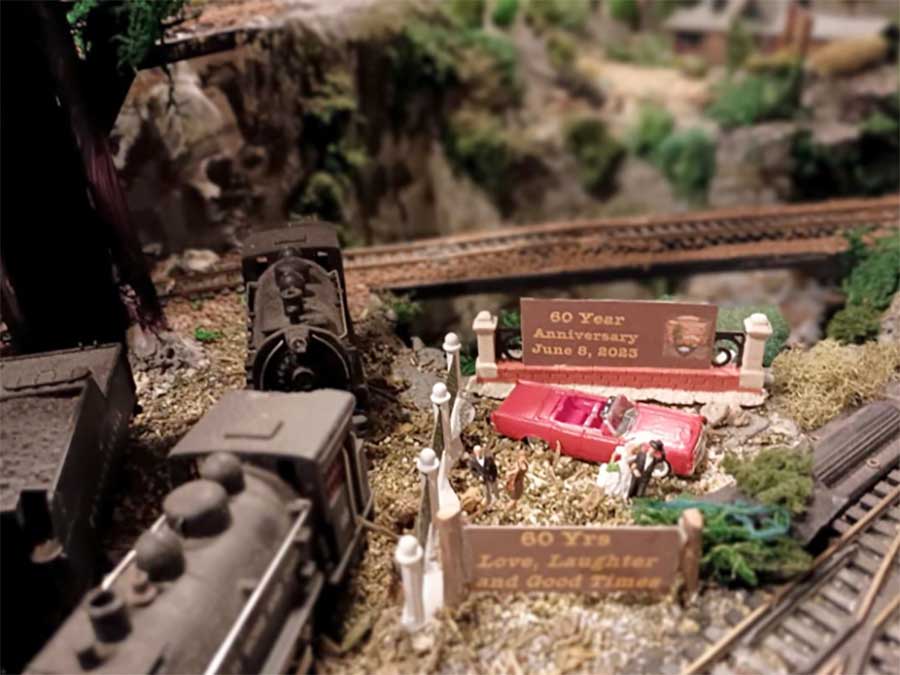
To start the past year, my wife and I celebrated our 60th wedding anniversary as the kids and grandkids surprised us with a visit to home. Total miles traveled for the group were in excess of 10,300 miles since they all came to Ohio from Nebraska (5) or Montana(4).
Naturally this event had to become part of the layout and is symbolized by the red convertible which is a story in itself.
My wife and I were both freshmen at The Ohio State University and met at a sorority/fraternity function where the guys picked up the gals from their sorority house. Luckily I had my mom’s brand new red convertible for this endeavor.
My dad had purchased this new car for my mom as a way (I’m guessing), to make her feel young again with both of her boys in college. However, my mom had her feet operated upon and she had casts on both feet and could not drive. My brother and I suggested that we should keep the car active by taking it to school for spring quarter– and our dad agreed.
So with the top down, I pulled up in front of the sorority house and the young ladies came streaming out the door. This one cute little blond spotted the red convertible and hopped in alongside me and the rest is history.
It was love at first sight; me for, the cute blond; for her, the red car. I eventually won her over and we got married the day after my graduation, in the church next to my fraternity house, and the reception was at the fraternity house. That was now 61 years ago.
We went on our honeymoon to the Pacific Northwest which allowed me to “research” the mountains that I could use 60 years later for my national park theme.
Now “we” are part of the layout, right next to the historical engine display.
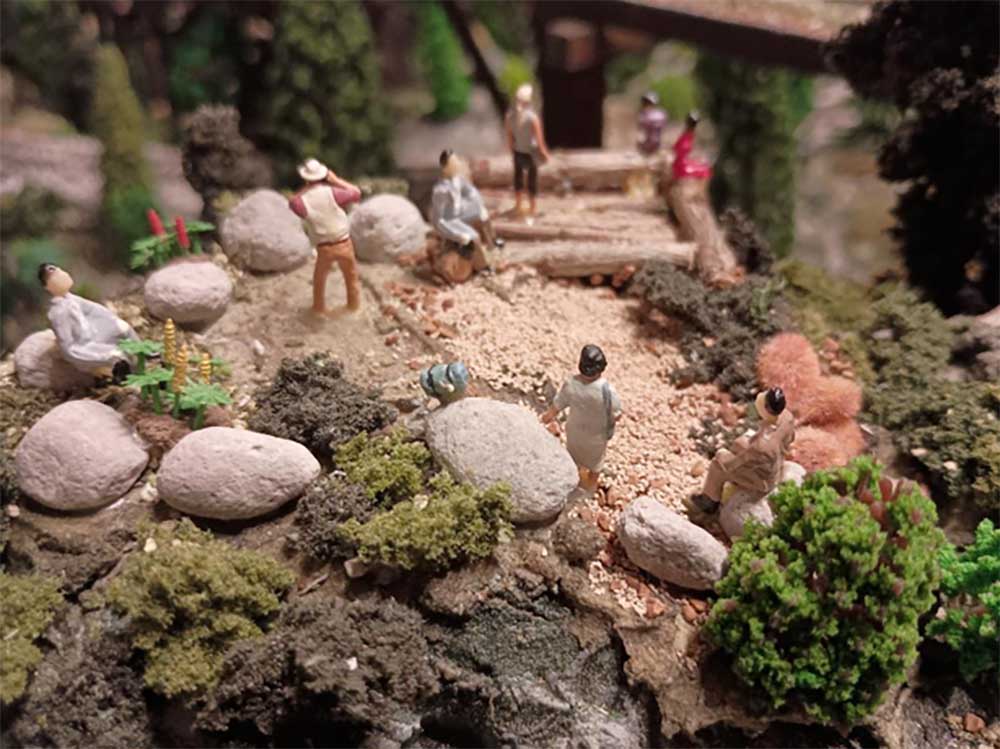
My oldest daughter had her Leanne’s Lookout enhanced with more hikers making it to the destination and enjoying the view.
Next, a new bridge now connects granddaughter Mackenzie’s Mound from the Mackenzie Yard area, making it easier to access the view from the mound.
Every event wasn’t happy during the year, but it does give us a chance to re-live all the good times.
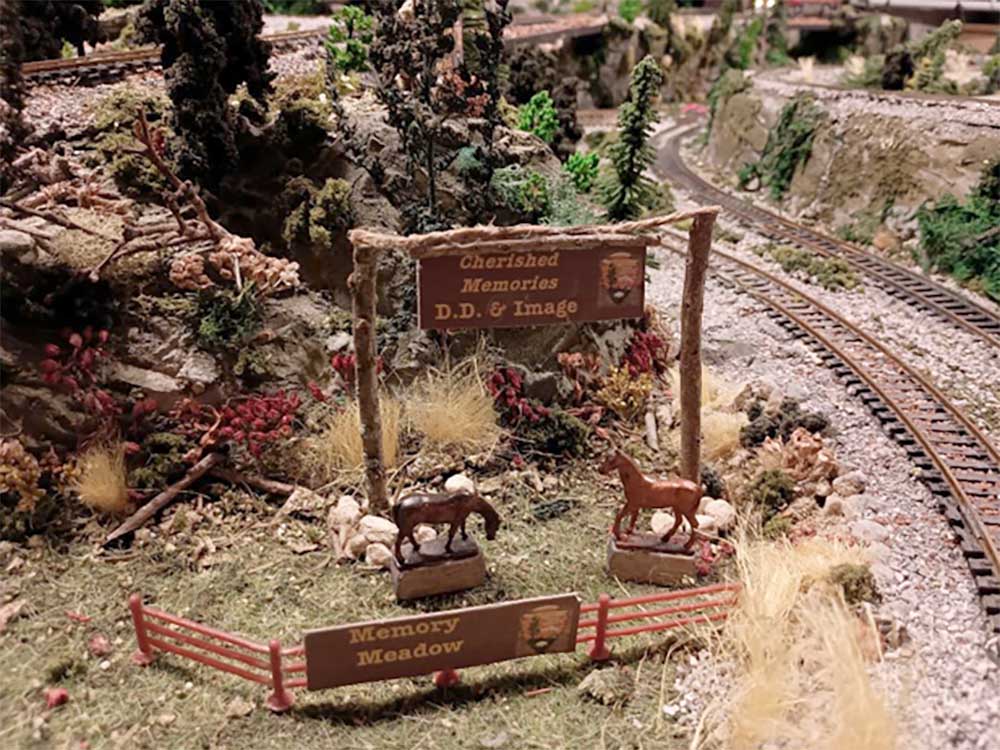
For my youngest daughter, I created a Memory Meadow as she had to put-down her beloved horse DD as the horse had developed health issues and was in pain. I also added a statue of Image, the horse she grew up with and with whom she won the Hunter/Jumper championship as a teenager at the Ohio State Fair.
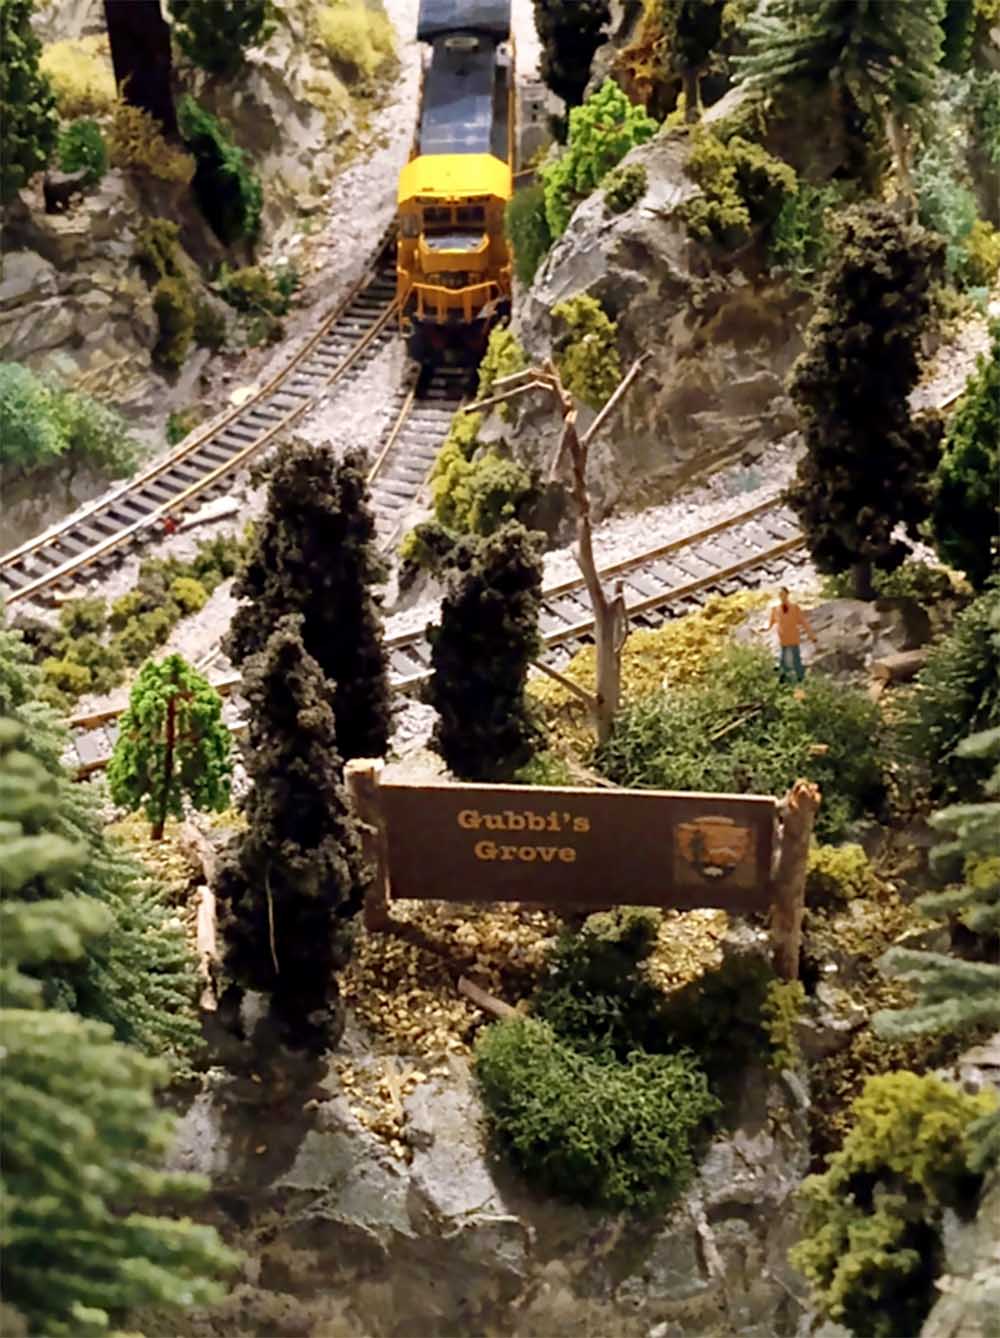
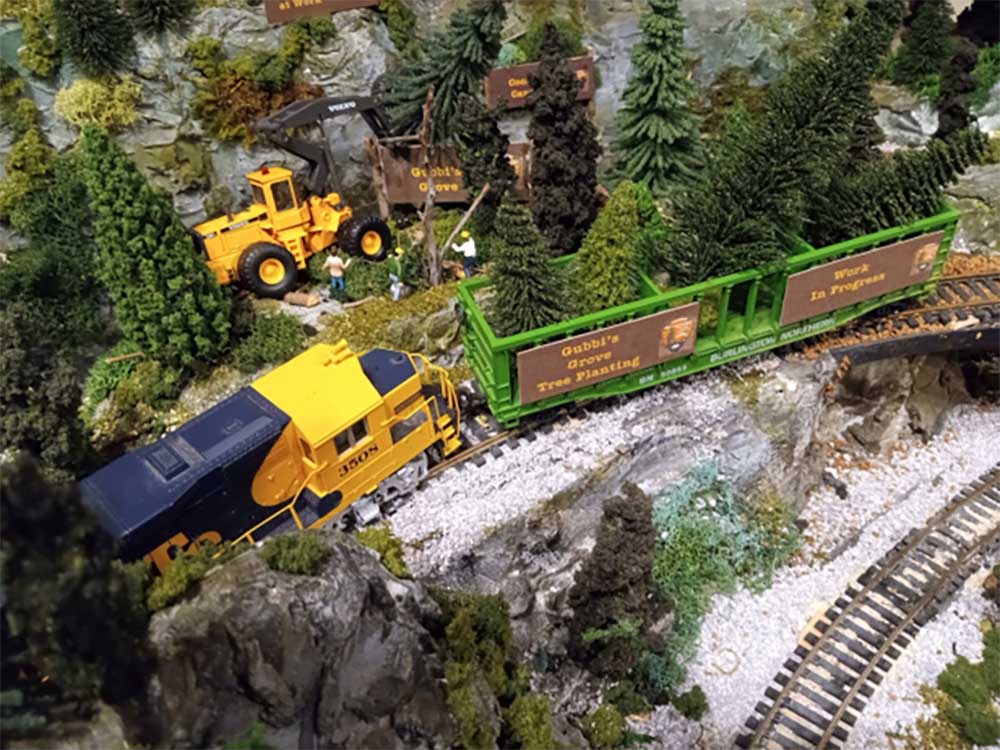
The real highlight of the year was the interaction with my wife and her oncologist/surgeon. As I previously reported, I created Gubbi’s Grove in recognition of their relationship.
Since we see him every 6 months, he is always interested in the latest update to the national park, so for the next visit, I told him that the park had received a grant to upgrade Gubbi’s Grove. Last October I shared the Phase 1 Tree Planting work that was being done for his grove.
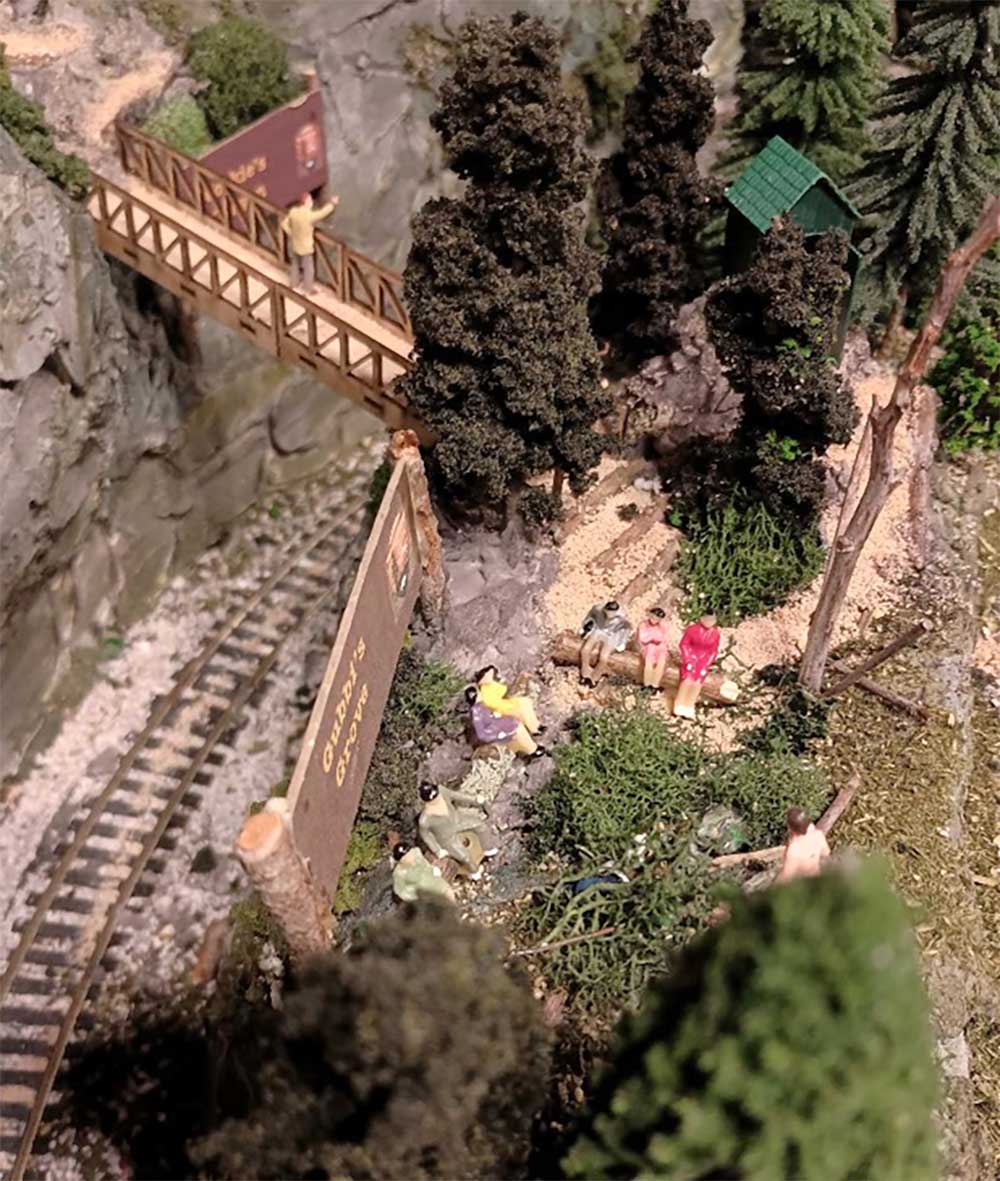
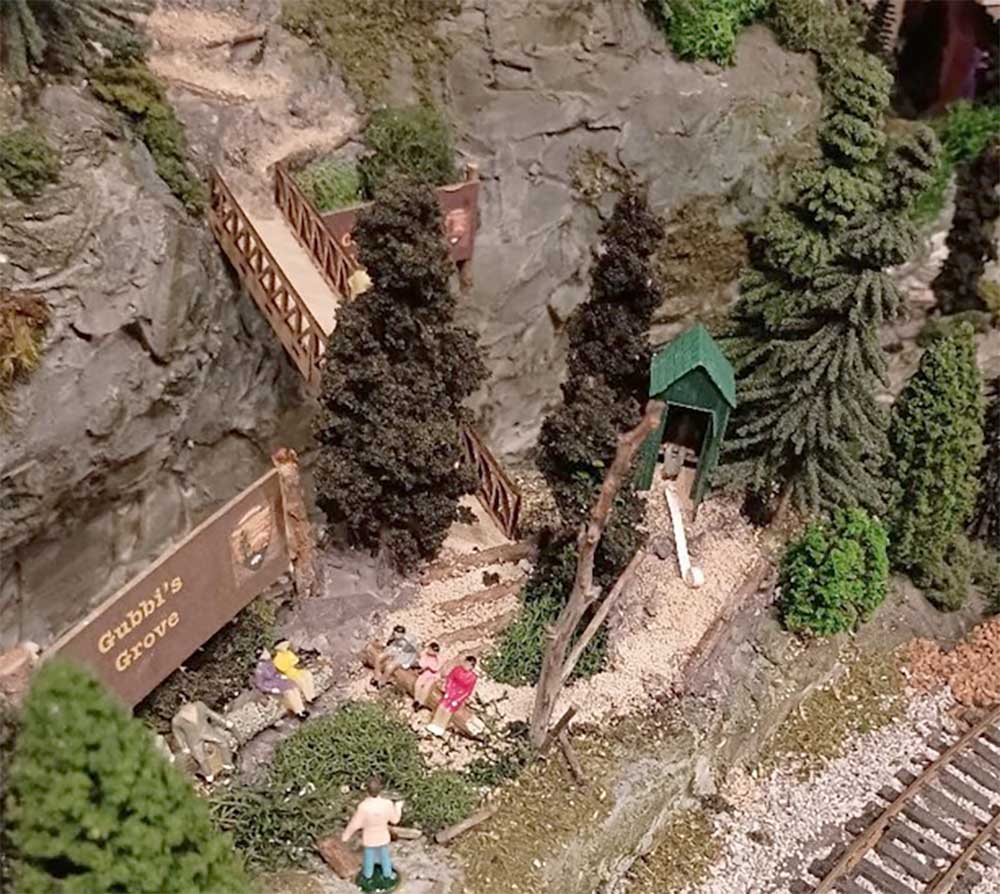
Then this past May, in celebration of my wife’s 5 year “cancer free” appointment, I showed him Phase 2 of the grant for the Infrastructure Improvements to Gubbi’s Grove, including a footbridge connecting to a trail above Cookie’s Canyon to Sharon’s Summit. In addition there is a new outdoor classroom with log benches and a new trail to the restroom facilities.
I must give credit to one of Alastair’s submitters for the toilet paper humor idea, though I suspect the poor hapless chap in the outhouse won’t appreciate the humor. (See Alastair, we really do look at all the pictures)
That’s all for now. Eventually I will get my cab ride video completed and send on the next update. I am having more fun as life moves forward. Once again, thanks for all you do to keep model railroading alive and well!
Gary”
That’s all for today folks. A huge big thanks to Gary for sharing. Gary’s previous post is here: National park model railraod.