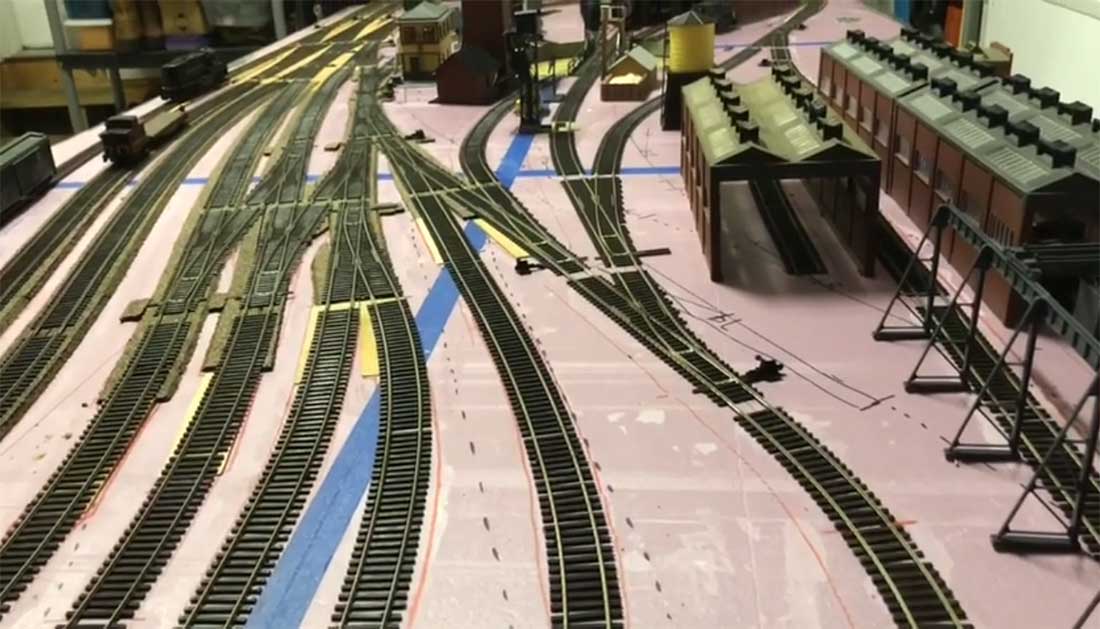
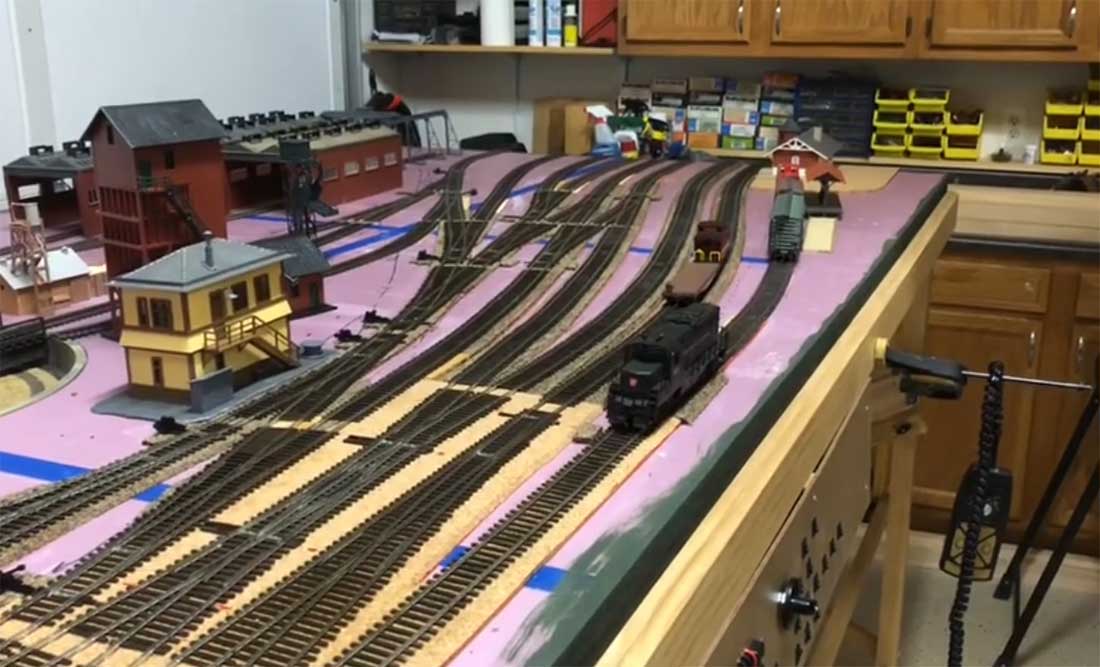
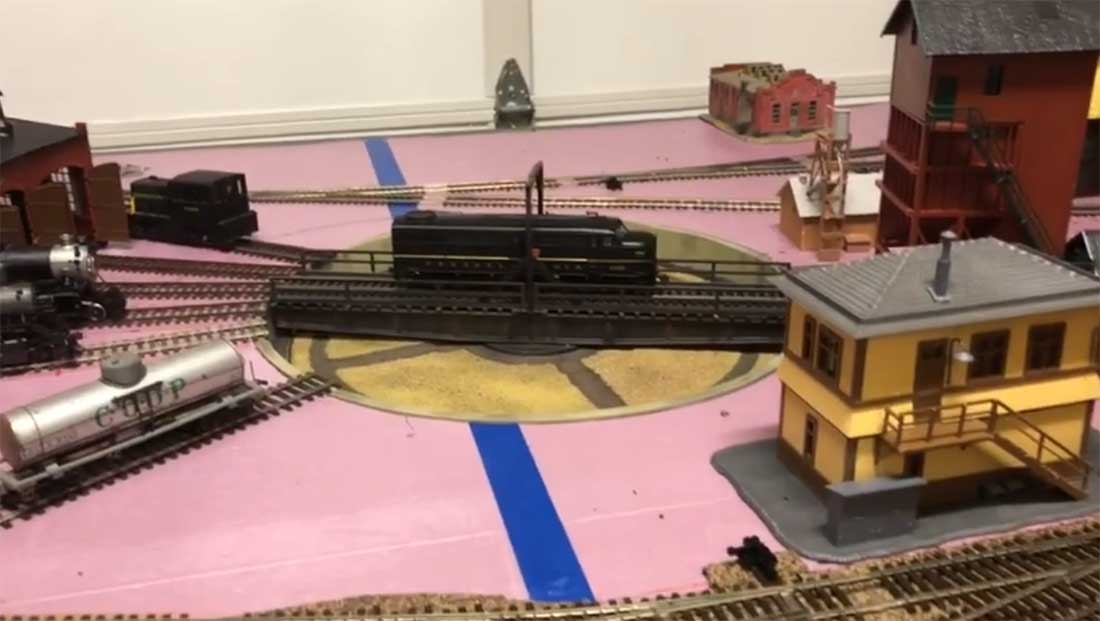
I wanted to share a video link showing current state on my switching layout. It’s moving along. Track is glued down and everything is powered up.
Will not be long before ballast starts to go down and I start to paint and detail my structures.
So glad I’m no longer an arm chair modeler anymore. Small spaces can make for interesting layouts. Even if I do no more than what I have now I’m having fun !
Stunning stuff from Bill – I love that fact he’s glad not to be an armchair modeler anymore. Like I keep saying, it’s all about making a start, just like Brian did:
“Hi Al.
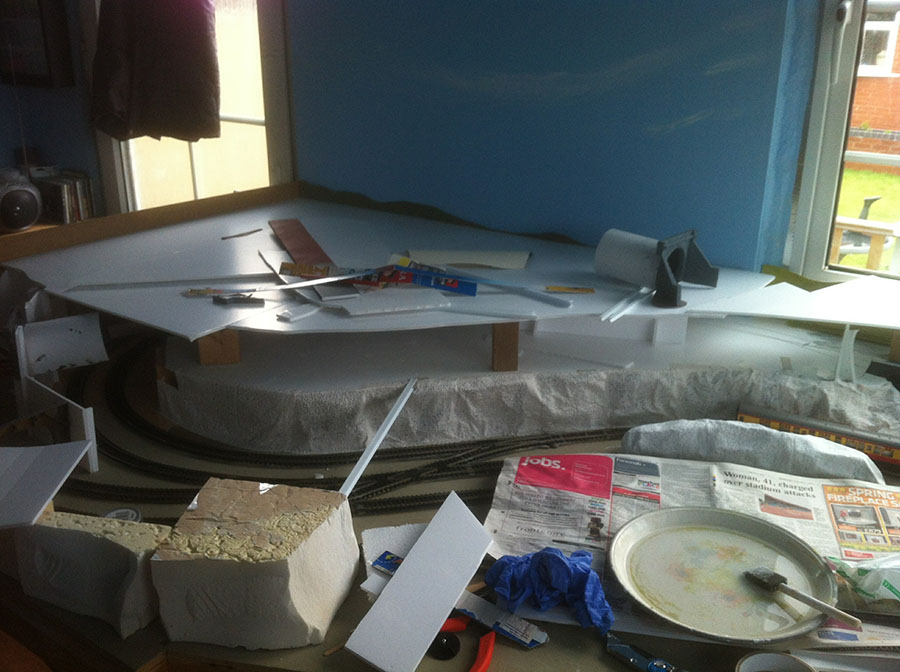
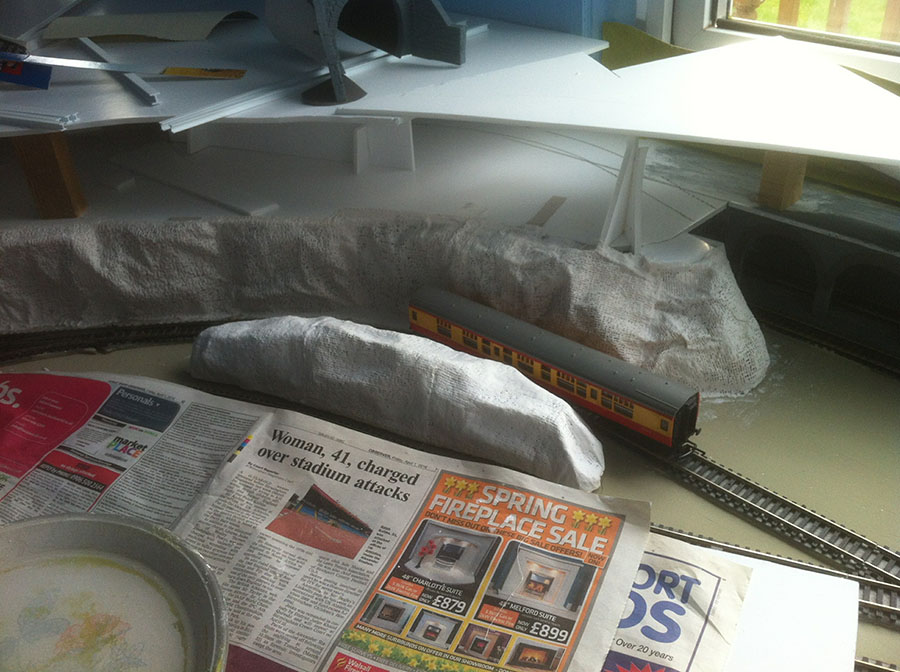
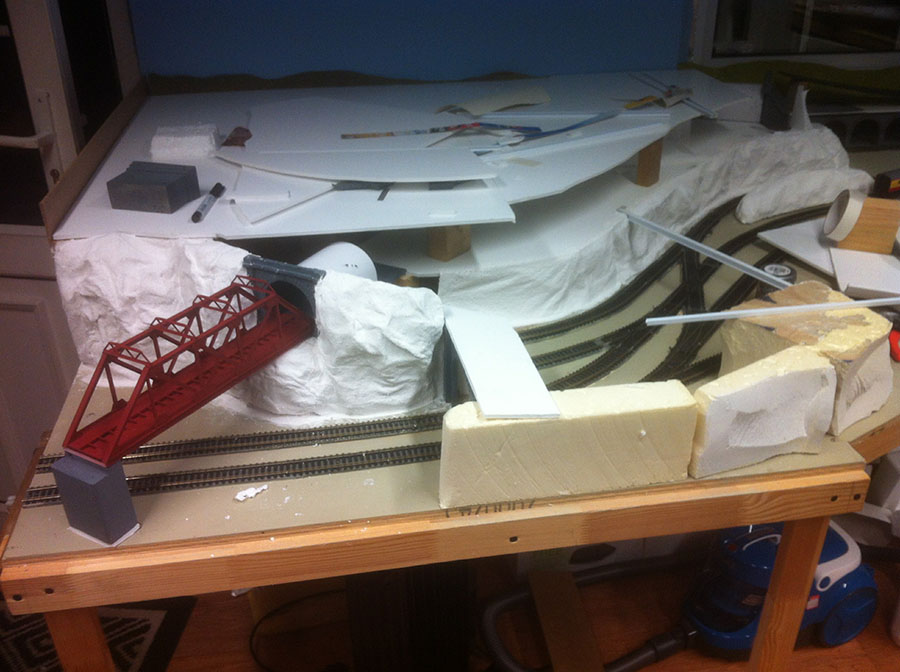
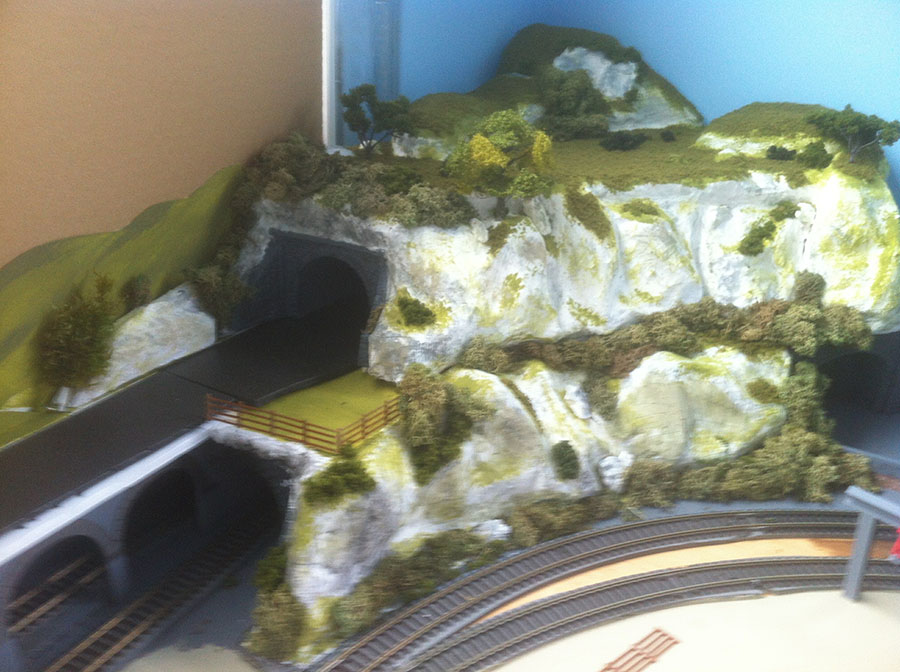
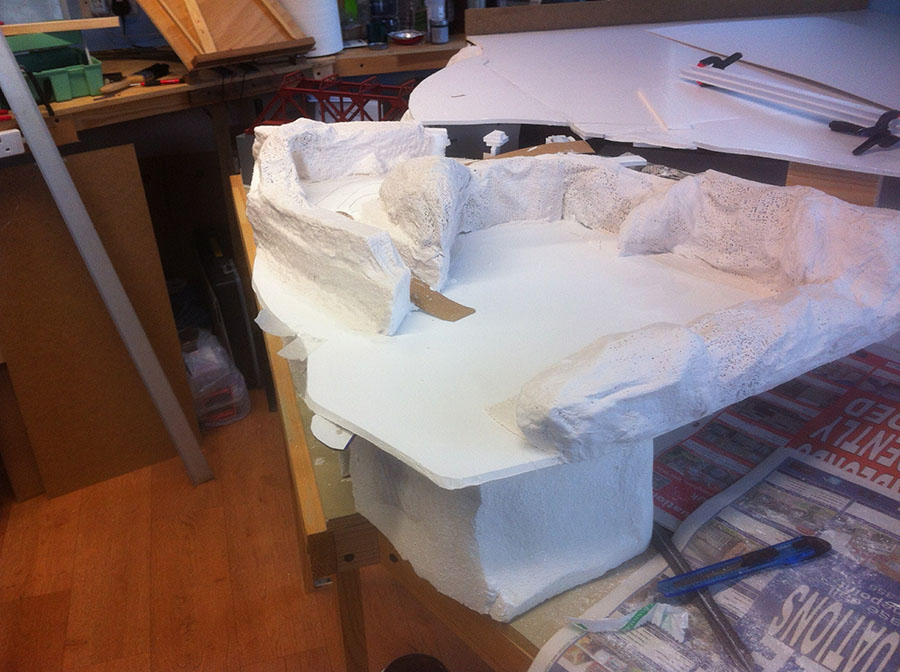
Just a few more photos of the progress on my layout efforts. Thanks for showing my last pictures, it’s nice to know that it’s not for my eyes only. Some foam board, mesh, screwed up newspaper and a few rolls of Modrock, and things are taking shape.
Cheers Brummie Brian”
That’s all for today folks.
A big thanks to Brian and Bill for sharing his HO Scale track switching layout. Two chaps who just made a start one day…
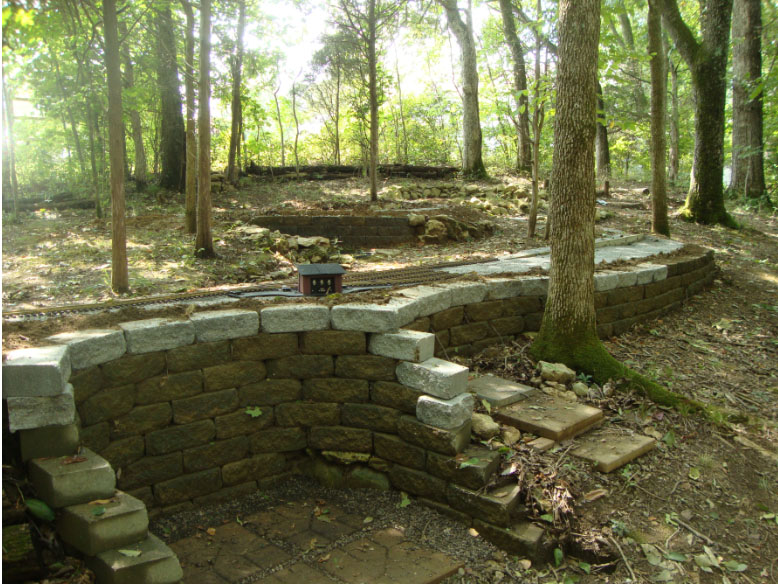
My outdoor G scale railroad is currently covered in leaves, branches and snow not to mention that much of my ballast has washed out. So I have some drainage work to do this spring.
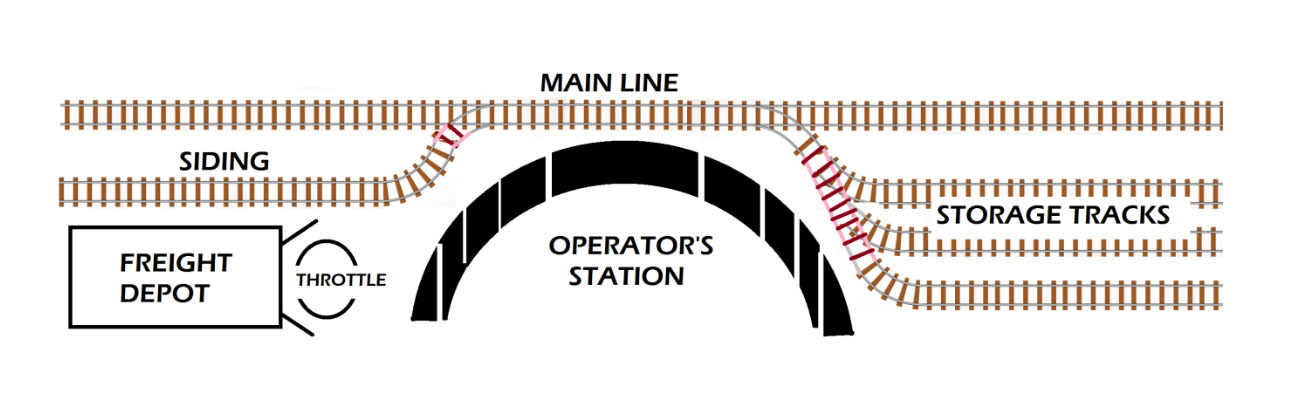
Building an outdoor layout has a lot of complexities, therefore I’ve always planned to keep the track plan as simple as possible. Less to clean, maintain etc… I’ll have a loop that’s about 20’X50′ and 4 dead end sidings for storage and switching.
From the operator’s station I’ll be able to control the throttle, turn storage tracks on/off and manually throw switches (turnouts). No wiring, it’s all manual but controls should be within arm’s reach and at waist height.
Operator’s Station:
(note the top row of new retaining blocks where I had to raise this portion of the track to get the grades to work out)
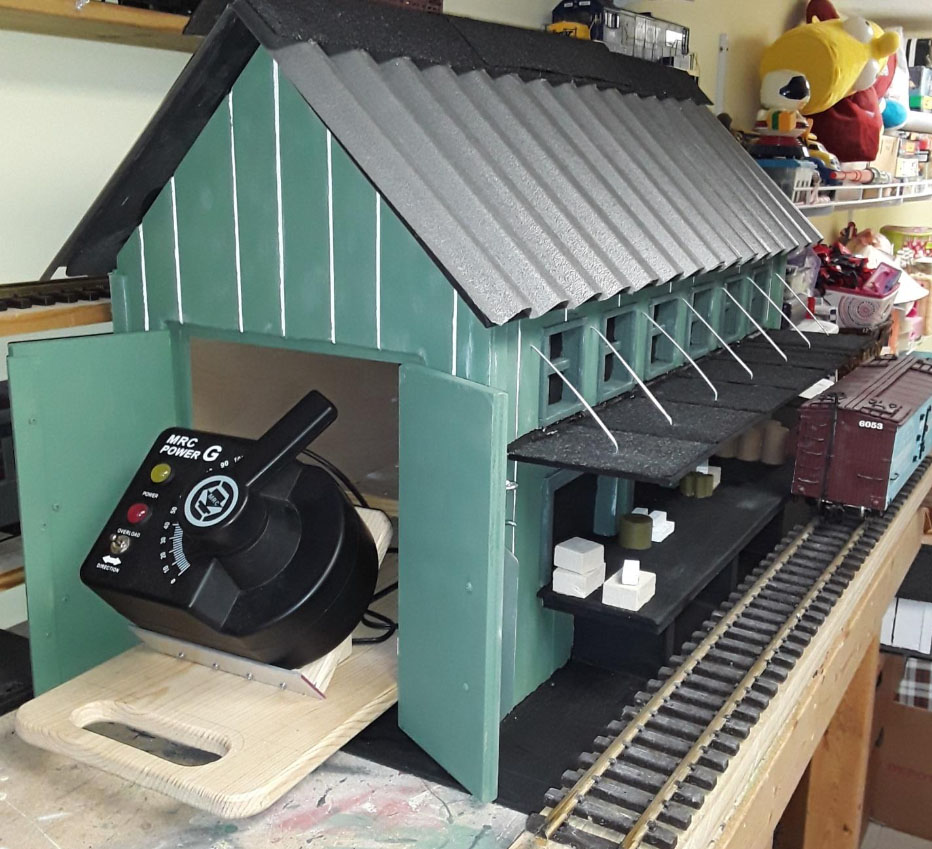
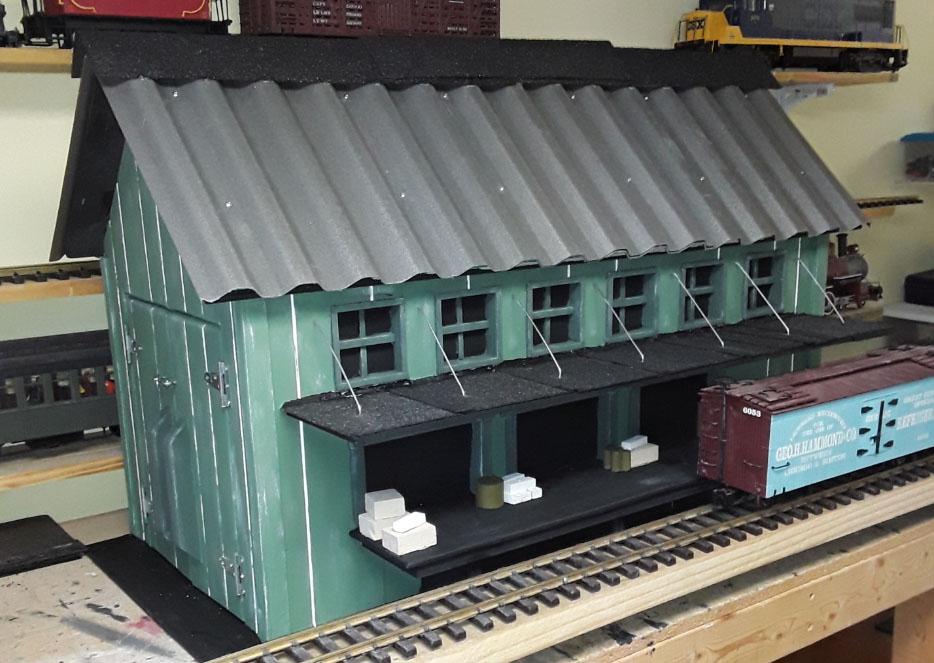
With the track in place, I decided it was time to build a structure to house my power supply. I plan to leave the power supply outdoors during the summer months, therefore this building had to be well protected from the rain and critters. There will be 110 Volts coming into the building and 24 volts DC going out to the track. I’m using a 10 amp power supply which powers my track just fine with only one attachment point and very little voltage drop.
I’ve used real shingles for roofs on all my other buildings, but with my shingle supply running low, I decided to use this corrugated plastic sheeting. (wish I had stuck with the shingles).
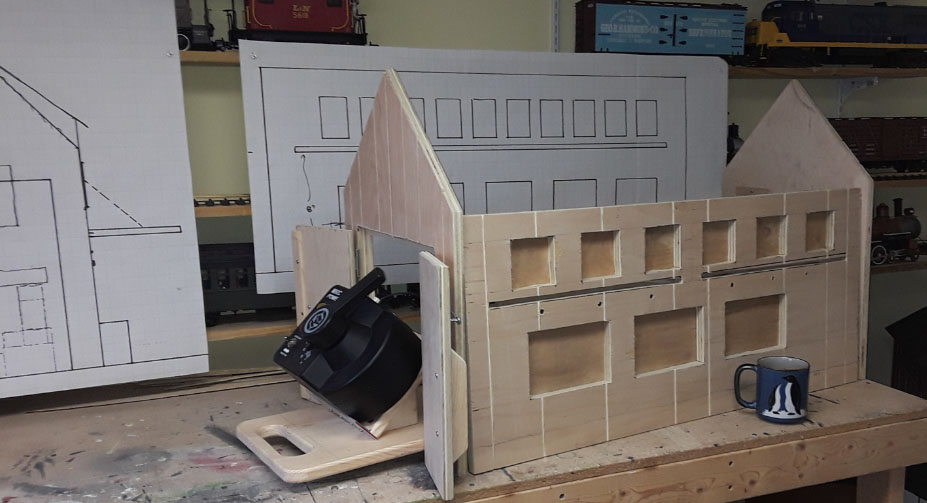
I build to 1/24 scale also known as half scale (10 feet = 5 inches, 5 feet = 2.5 inches). I like to draw the building full scale on grid paper first, it gives a good visual and helps me get the proportions right. In this photo you can see where I changed the number of windows, roof pitch etc… after seeing the profile on paper full size.
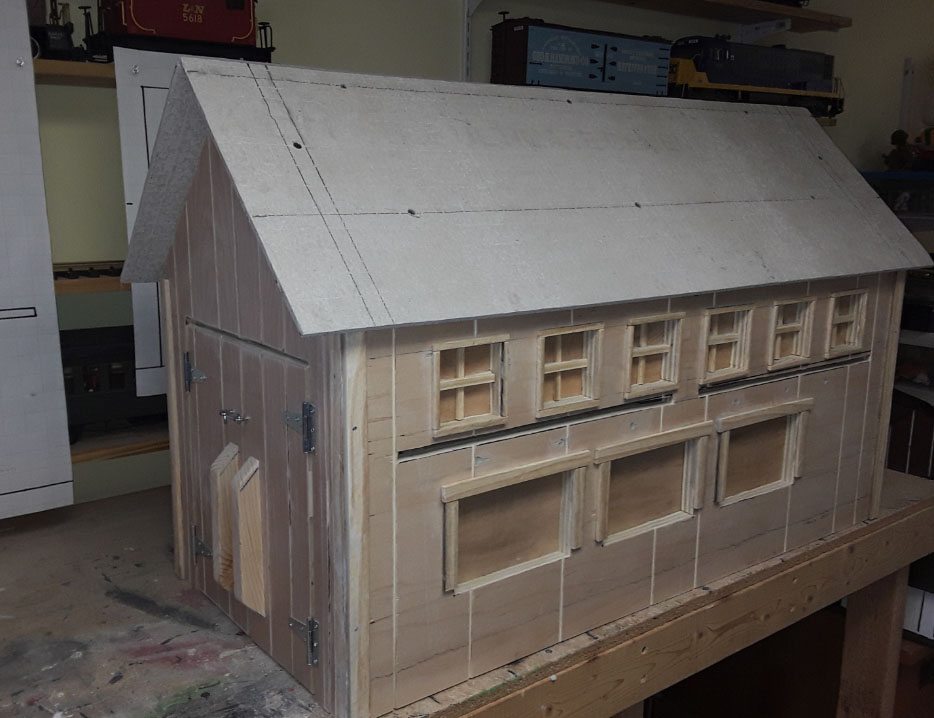
The roof is concrete backer board. I would typically glue shingles directly to the backer board, but in this case I covered the backer board with plastic film then put the corrugated sheeting on top of that. The base is fiberglass, the walls are birch plywood and assembly consists of screws, construction adhesive and exterior house paint. (and a little calk here and there to fill any gaps)
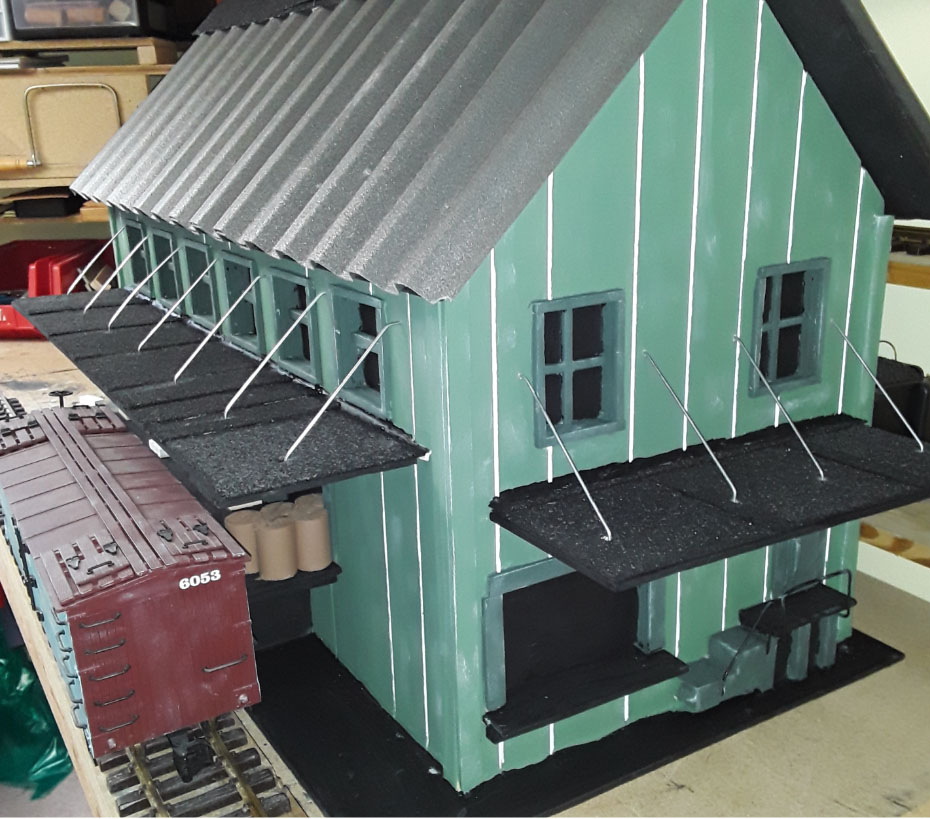
The dock roofs are fiberglass covered in shingles and firmly attached. The wire supports are just for appearance. I developed a pretty good technique for plexi-glass windows, but in this case the windows are plywood painted black for a more robust seal.
I cut the vertical grooves in the walls to add some extra detail. It’s a free feature, just takes a little extra time on the table saw.
I don’t know how much this thing weighs, but do know I’ll be using a dolly to haul it out to the layout! I’ve been making buildings during the winter months for about 5 years now, they are piling up in my basement. Hopefully this summer I can start hauling them out to the site and getting them set in place.
A big thanks to Al for the work he puts into his blog. Its great seeing what everyone is up to, and sharing my projects is something I always look forward to.
Happy Modeling!
Cary in Kentucky”
A big thanks to Cary for sharing his G scale train buildings.
I do love it when I see Cary’s name pop up in my inbox. What a project – not only does it look he’s had fun with it all, it looks better and better with each update.
Can’t wait for the next one.
That’s all for today folks, hope you enjoyed it as much as me.
Gibb’s been in touch with his N scale track plans 2×6:
“Hi Al,
I really enjoy your site and look forward to every days post.
I recall you enjoy seeing some start to finish (never finished) layouts so I’d like to share mine.
As a youngster, I had my Lionel train set and as a teen I did some HO on a 4×8 sheet of plywood but it didn’t amount to much.
So many years ago, because of space and time limitations, I decided to construct a N scale 2×4 railroad.
I used a 2×6 sheet of 1/4” plywood attached to a frame of 1×3 boards.
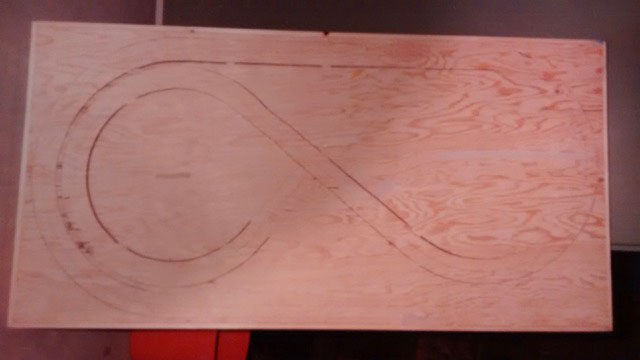
The track plan was laid out on the plywood and where grade changes and elevated track was planned, the plywood was cut with a sabre saw.
Not all of the cuts can be seen in the photo below but some do appear as darker lines.
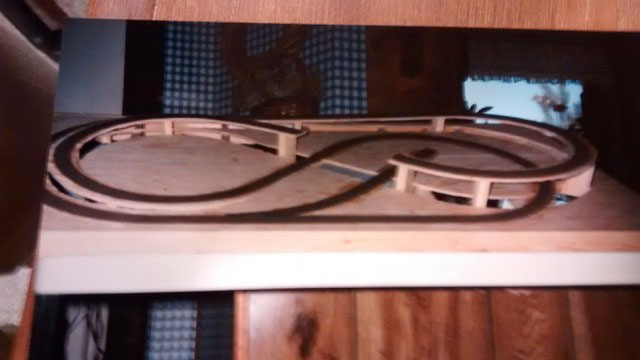
The next photo shows how the cut areas have been raised and supported to form various grades and elevated track areas.
Cork roadbed has also been installed.
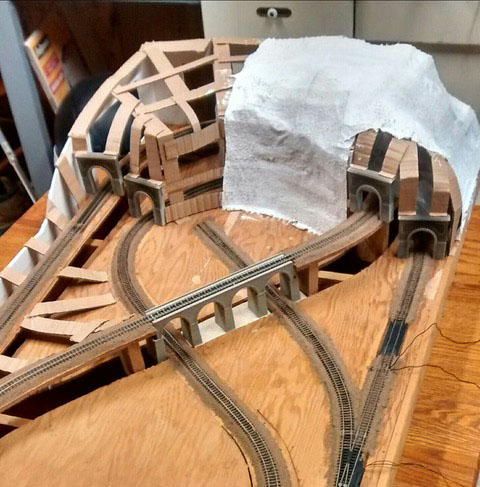
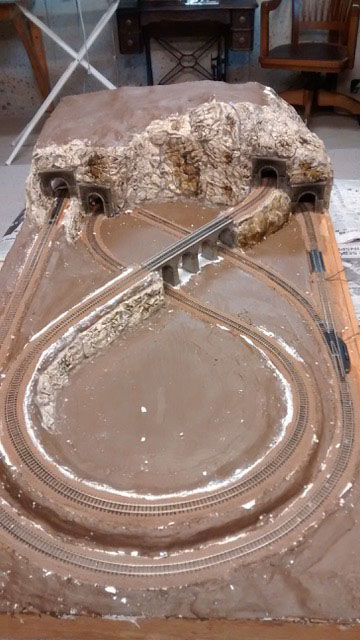
Now Atlas flex track has been installed and ballasted as well as a store bought viaduct and tunnel portals.
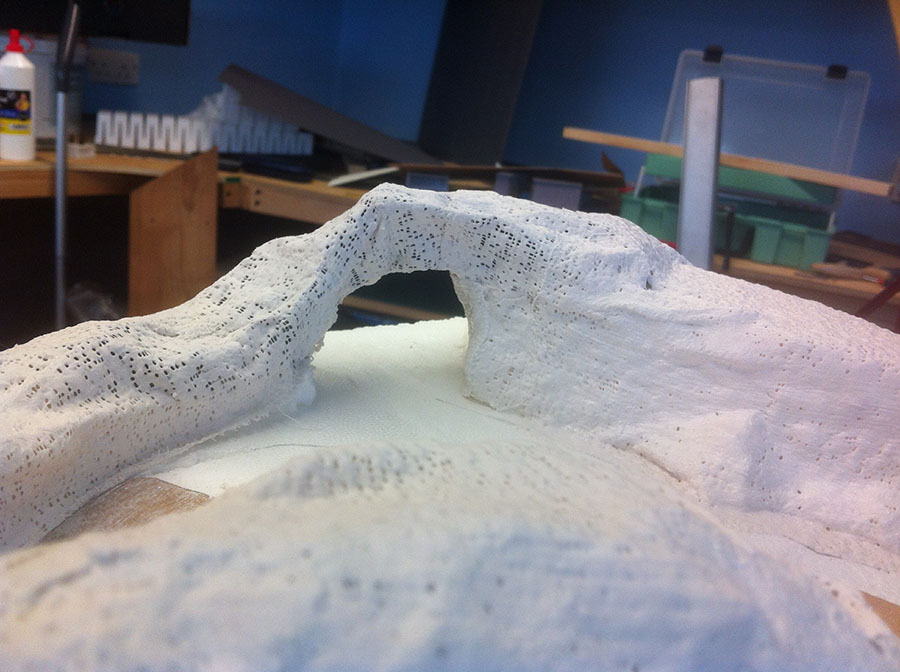
Mountain construction is underway using a corrugated cardboard web hot glued together being covered with plaster cloth. Old school but I had fun.
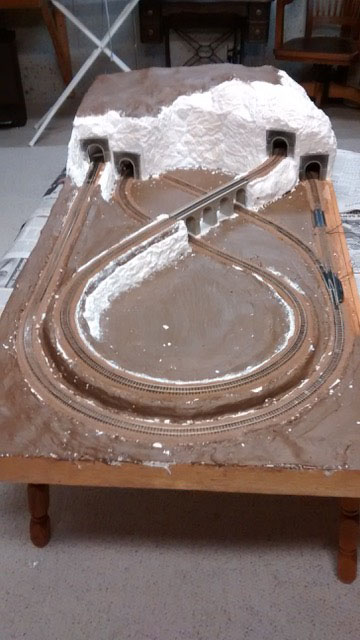
The mountain and raised areas are done and background paint applied to “soil” areas.
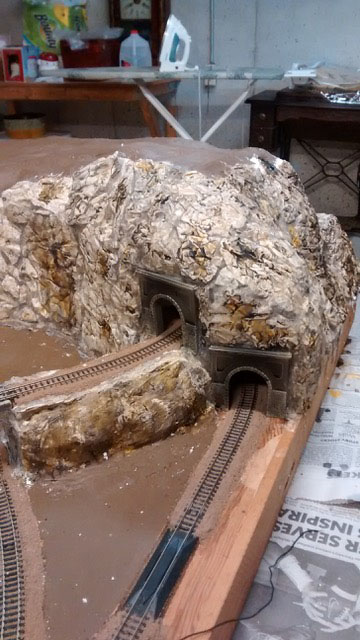
The rock texture was created by pouring a very thin layer of plaster onto crumpled aluminum foil and placing a piece of plaster cloth in the wet plaster for reinforcement.
When cured this was removed from the foil and pressed against the mountain. It was thin enough to crack and conform to the mountain profile and hot glued in place.
After placement, the cracks which are not very big, were filled with spackling compound.
N scale track plans 2×6:
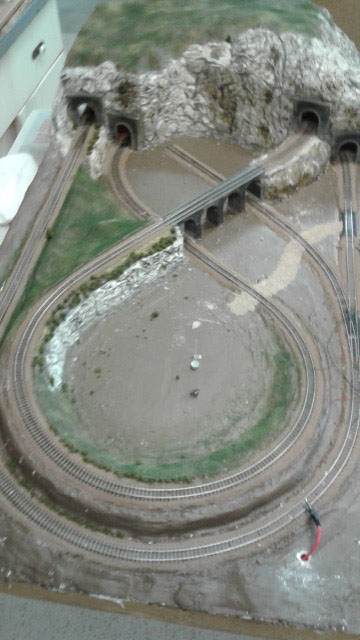
The rock faces have been colored with washes of gray, yellow and brown. I made a novice mistake and didn’t prime the mountain face before coloring. The alkalinity of the plaster changed the color of the washes.
The tunnel portals after coloring.
The landscaping getting under way.
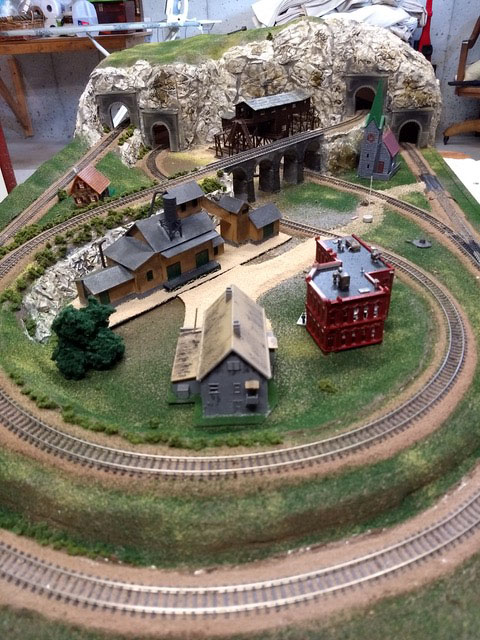
As of now. Still lots of scenery work to do.
Hope you find this of interest.
Gib
Lebanon, Ohio, USA”
A fantastic layout from Gib to add to the collection of N scale track plans 2×6 – and I loved his narrative, you really can tell he had bags of fun with his layout.
And he’s right, I do love seeing them come together from nothing more than a bare base board. It just goes to show, it’s all about making a start – and if you want to make that start, grab the Beginner’s Guide right now and make it happen.