People often post comments about model railroad benchwork foam on the blog – so I was very pleased to get this in from Bill:
“Al,
I so enjoy seeing everyone’s work on your site that on a nice Virginia US afternoon I booted my wife’s Jeep from our garage so I could start to put to foam board a layout plan I had in my mind for a long time. The wife’s Jeep came back in after a couple of hours as I agreed to give half the garage to her and have the other half for man land toys.
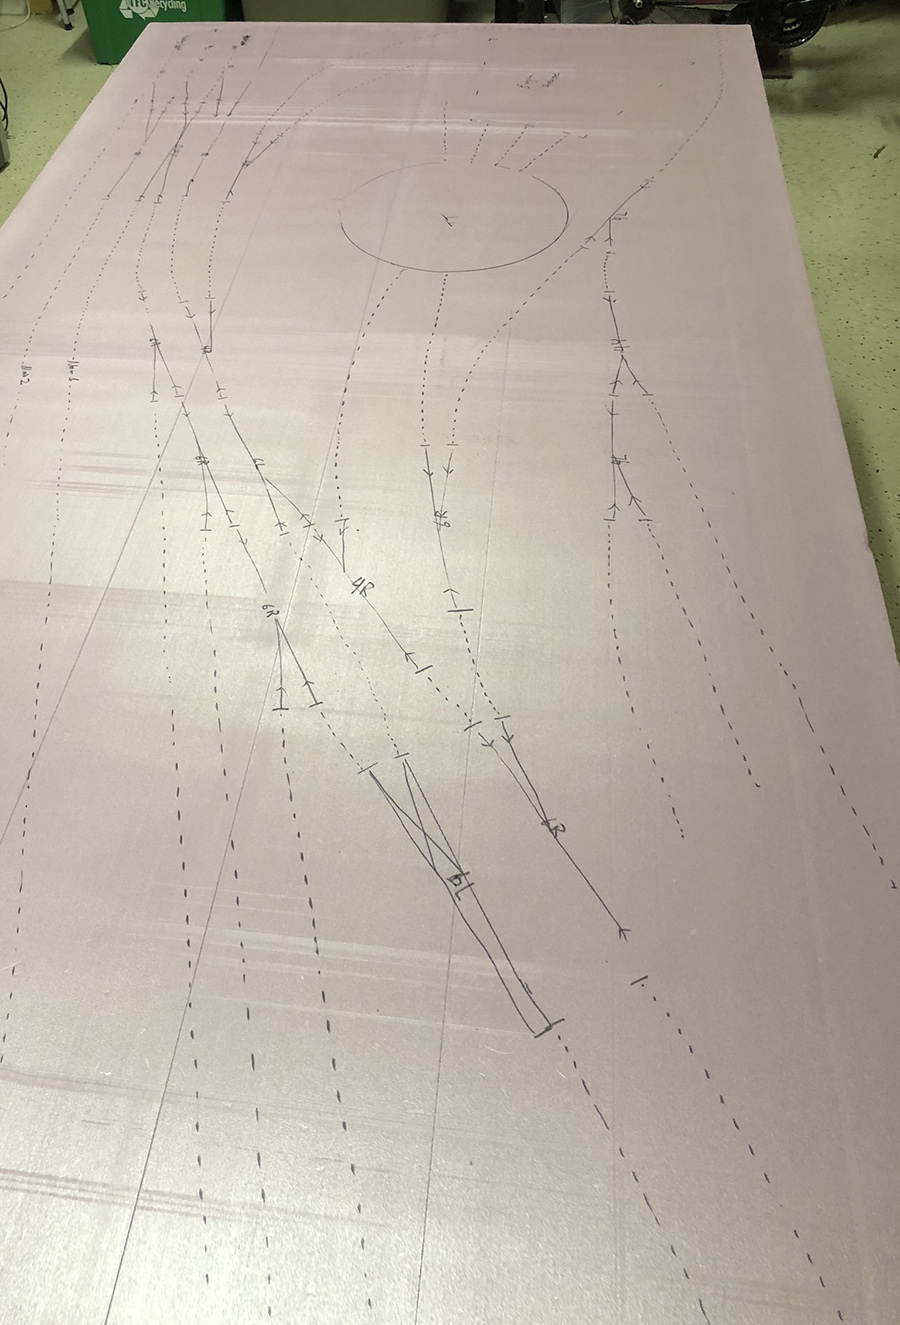
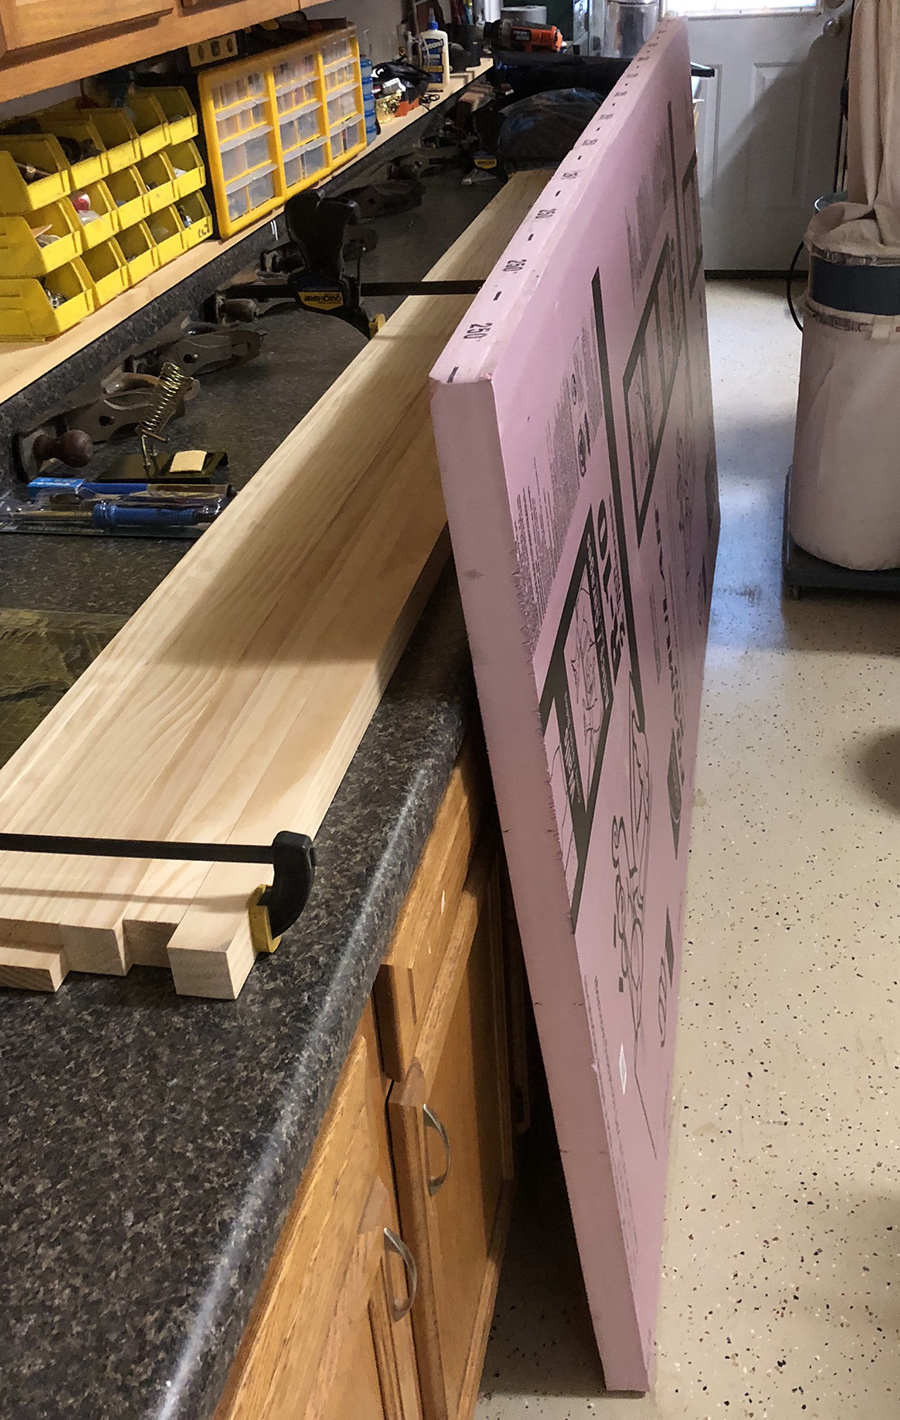
Like many I have totes full of modeling materials- far more than I can ever use on what will become a modular 4×16 switching layout that has to be lite and portable. In my pictures you can see why that is the case- the garage is pretty full already. In my minds eye I have the supporting frame work created as well as a structure so I can stack multiple sections for storage and transport. Should be fun to build as I have time this winter.
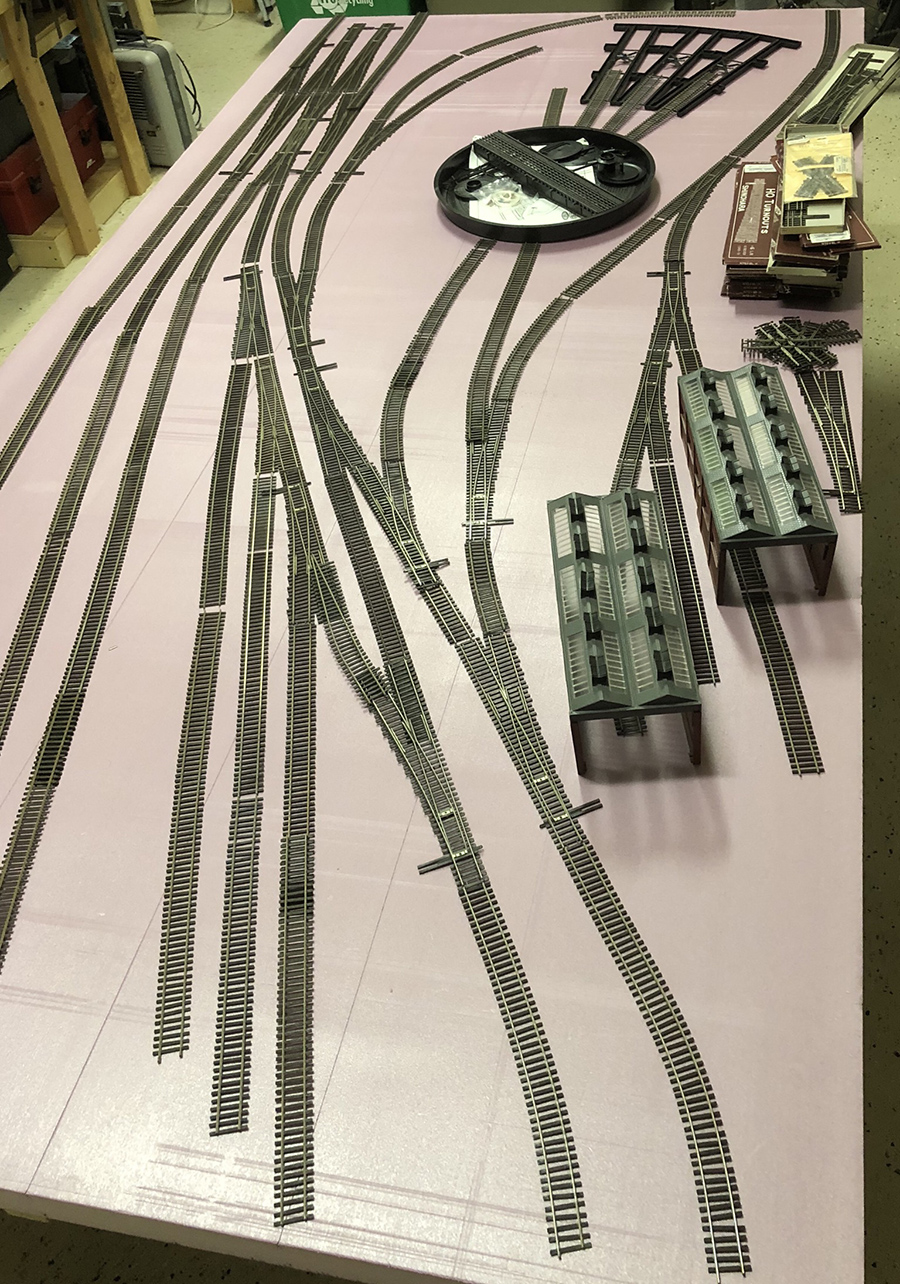
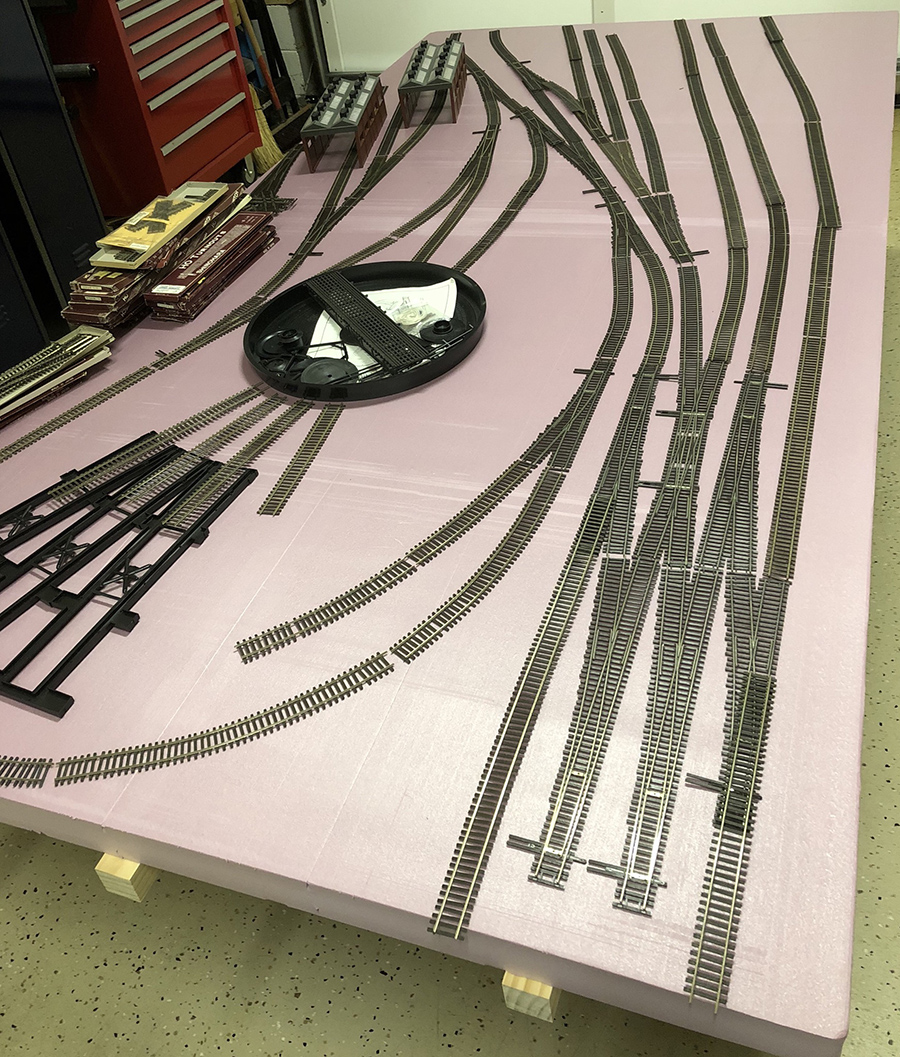
The layout is an engine terminal, repair and MOW area and a yard with industrial sidings going off on the next 4×8 sheet which will come together in the next year if all goes to plan. Even though I will be running small engines and 40ft cars I wanted to have the ability to have big engines on the main so I’m going to use #8 and #6 switch’s in most applications.
When time permits I’ll set it up again and tweak track arraignments as I already see my yard lead goes into a main with little room to switch more than a car or two without blocking the main. The double slip switch while looking nice may not be practical on the main at its location. This is the fun of the hobby and very much like how real railroads do it. If it doesn’t fit the need redo it.
As I build the foam bed frame and support structure I’ll send in more pictures to show how things come together.
Thx
Bill from Richmond Virginia”
A big thanks to Bill.
And Michael has been in touch again – if you missed his stunning 11 x 27 ft layout last time, it’s here.
Michael sent in 3 videos (which I have stitched together) which show his layout before and after the scenery. It’s a must see:
A huge thanks to Michael (again!) and Bill to for his model railroad benchwork foam explanation.
I do like to publish the layouts in their earlier stages, because it’s all about making a start.
Michael’s added to the collection of Fastrack layout plans to the blog:
“Alastair –
I decided to share the progress I’ve made on my railroad which I started exactly two years ago.
I had just retired and my mother suggested “why don’t you set up your train?” Great idea!, I’ve been wanting to do that for years.
To be clear, what my mother was referring to was an O gauge train layout Lionel 736 train set that my grandfather had given me when I was four or five years old. More than fifty years later, after many years in storage, moving from house to house, it was time to resurrect the set.
I immediately started building a layout and acquiring more trains. I wish I had also looked at the Beginners Guide. I think it would have saved me some headaches.
But all has turned out OK, and even after reading tons of building advice, I think there is no substitute for actually trying the build, seeing how it works, debugging it, and changing what’s required to make the silly thing run.
I had some goals for this layout:
– Run multiple trains on long runs.
– Have great scenery of mountains and forests.
– Be able to easily reverse the trains.
– Have ample yards for storing multiple trains and additional rolling stock, and
– Work only with vintage Lionel steam engines and Lionel rolling stock (in other words, circa 50’s and 60’s conventional).
I decided to concentrate on A.T.S.F and Denver & Rio Grande roads as these were predominate in the Rocky Mountain west.
I did get all newer fastrack track – I didn’t want to mess with the old tubular track. I added 18 gauge wire directly to the metal tabs under the fastrack to minimize voltage drops. Easy to do although a bit time consuming, and much easier to undo than soldering.
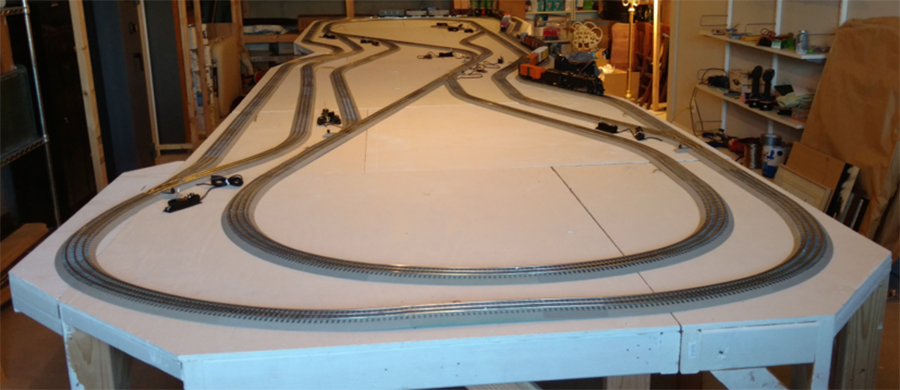
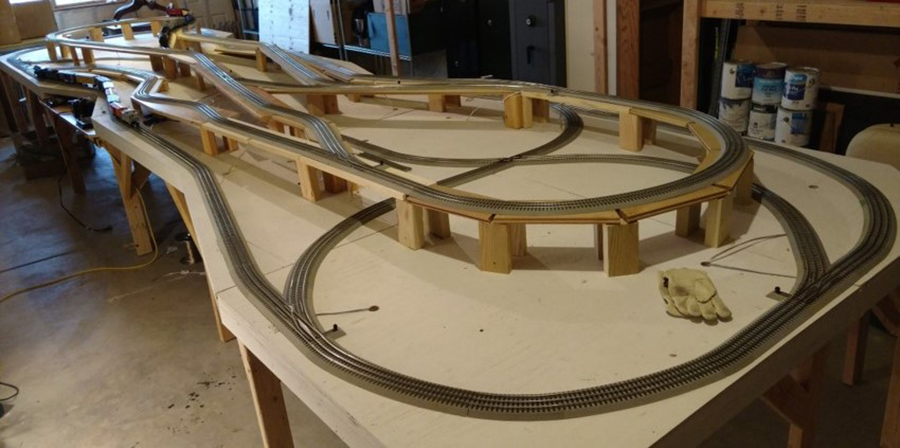
Pic 1 September, the initial table I built and a test layout. The table was 7 x 26 ft. The table is built with deck screws (which are easy to back out and do not strip in the event a change is needed).
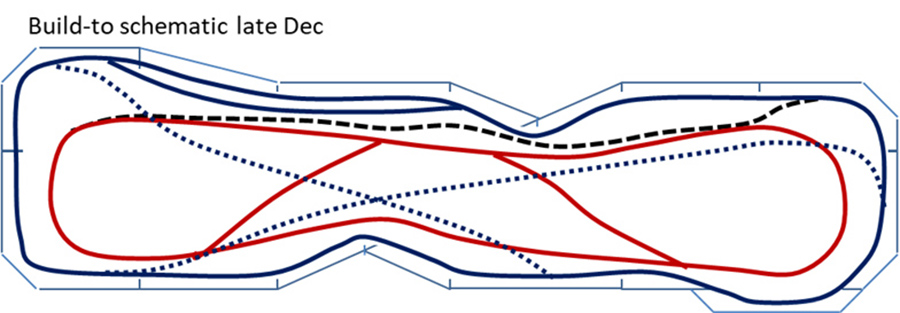
Pic 2 December, I decided to have two levels with connecting incline.
I was working to a the following powerpoint sketch: the upper level is in red and the incline connecting upper and lower levels is the heavy dashed line.
(All images are clickable)
I began serious testing with this configuration. By February, trains were running but there were also serious problems. The initial inclines were too steep for my vintage trains, and I came to realize that the extensive lower level tracks would be impossible to easily access once mountainous scenery was installed. See the video 1. I ran the trains constantly to debug everything.
I realized I needed a better design tool than powerpoint drawings and trial and error track assembly. I started using SCARM for my track design.
Suffice it to say I went through multiple different design updates through 2017 using SCARM. Build a little and test a lot. The biggest and most useful addition was a wye and a small yard. I also slightly extended the dimensions of the original table. I finally settled on and completed building the following track plan in spring.
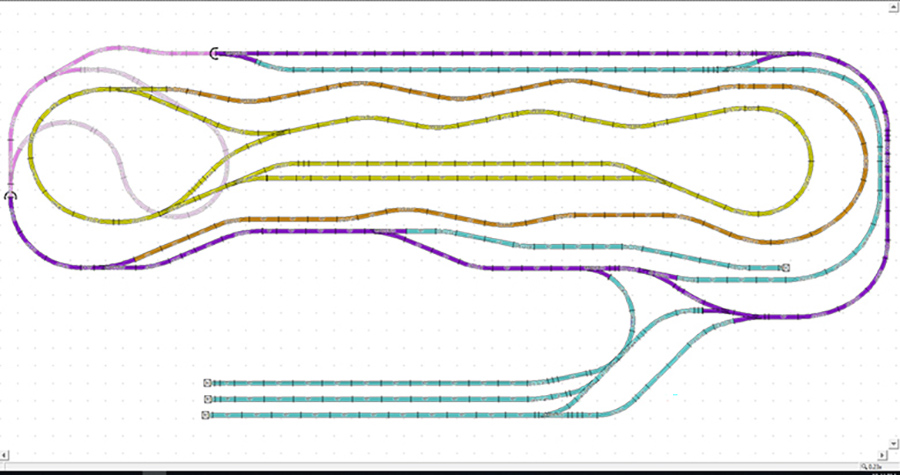
This track plan for my O gauge layout is 11×27 feet in size. The upper level is depicted in yellow, the mainline of the lower level in purple, the single much longer 1.5% grade in orange. The light blue spurs and sidings on the lower level are individually powered as are the pair of sidings on the upper level.
There are parking areas for six full length trains, although only two can be running at any given time. Both the upper and lower level include a reversing loop plus the wye and yard to reverse the trains. The lower reversing loop is under the large mountain on the layout. The design comprises of a little over 2.4 scale miles of track.
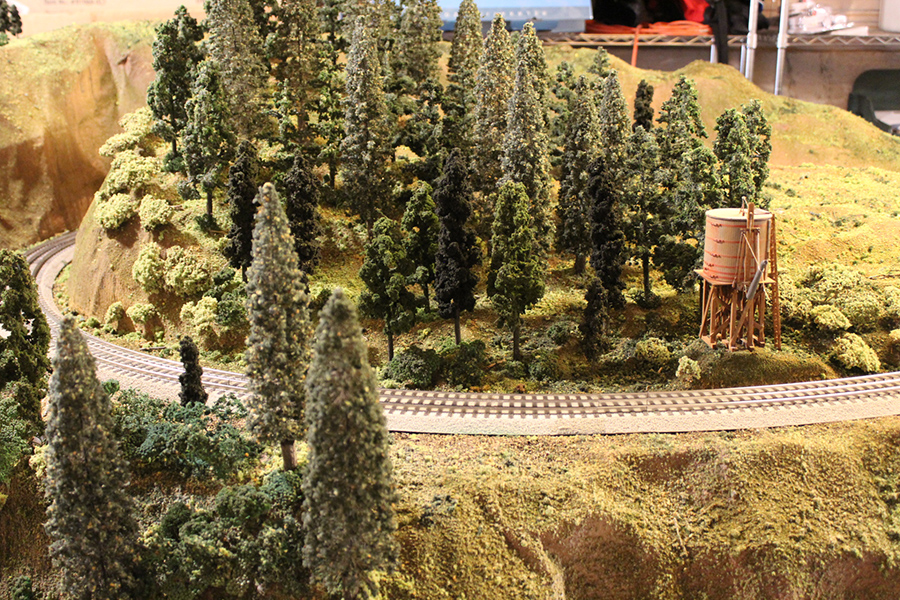
Right now I have basic scenery installed everywhere and the trains run well. The only really tricky scenery element involved the removable sections on the mountain (used to access the reversing loop and tunnel area). I have only a single structure installed: a branch-line water tank. With the basic scenery installed, in the next construction phases I will be concentrating on adding steam and mining related structures to build out this little world.
I am going to take some time to get the building elements right so they make sense and work together.
Fastrack layout plans :
Upper level mountain, forest, water tank.
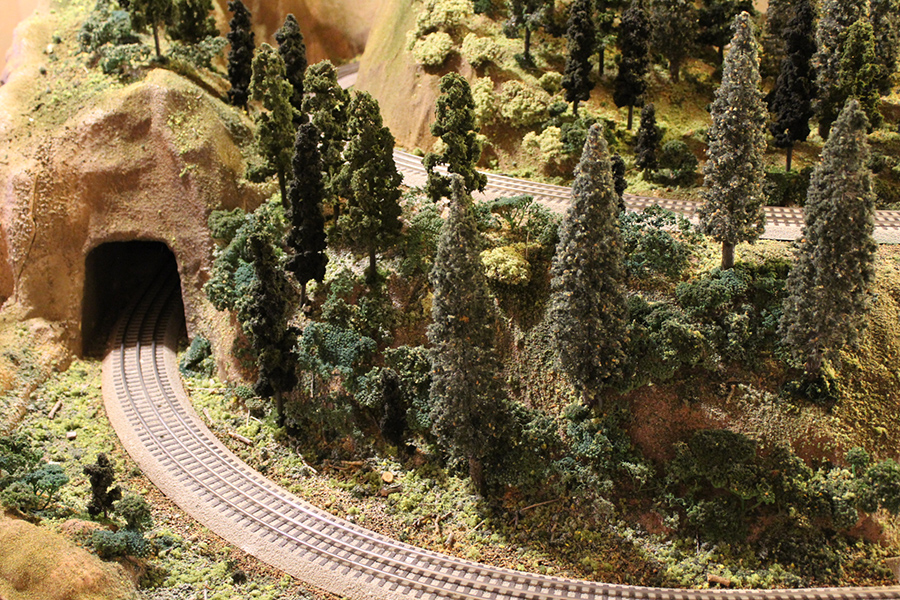
Tunnel under mountain
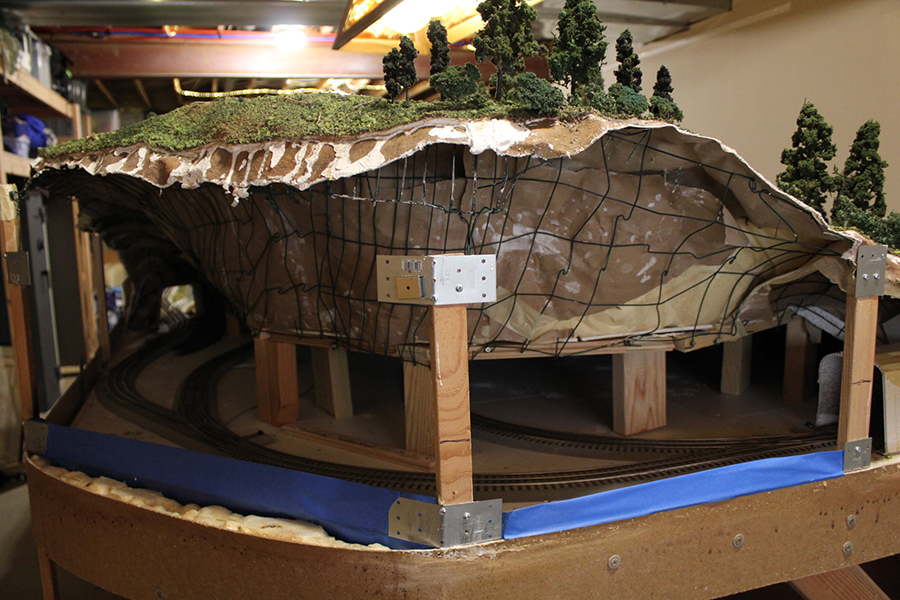
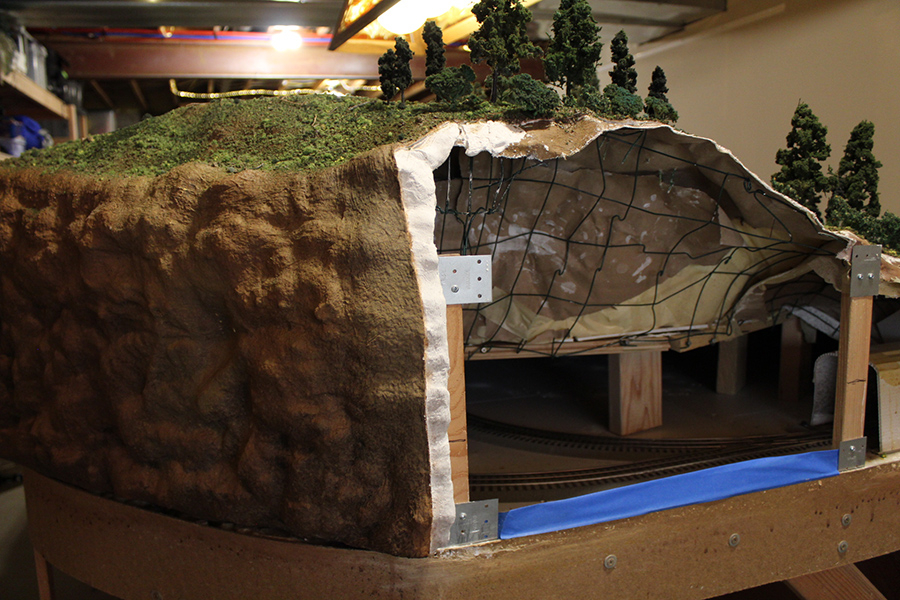
The reversing loop under the mountain is accessed using three removable sections. The sections are held on with cabinet magnets.
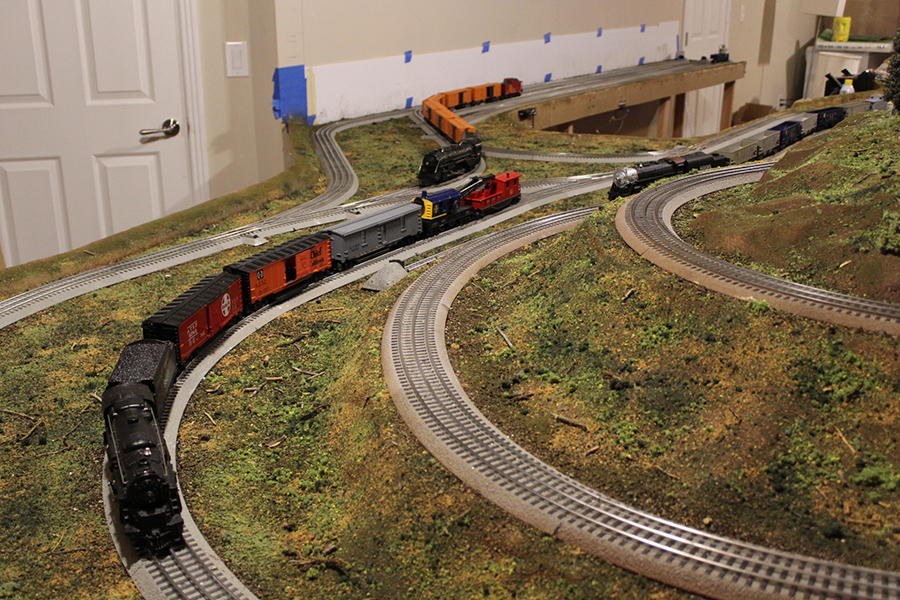
Three trains in the yard sidings and spurs
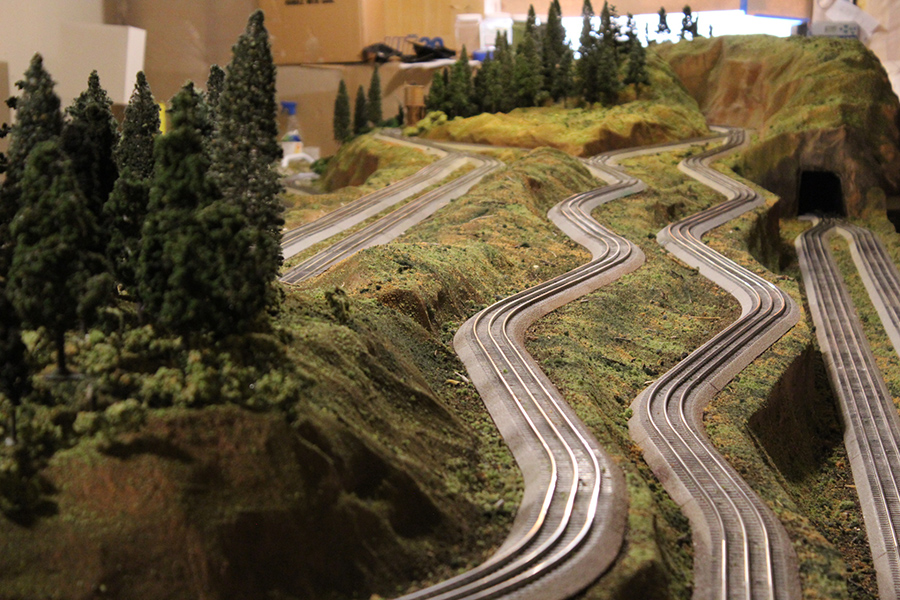
Long view down the back of the layout looking toward the second tunnel entrance and the mountain
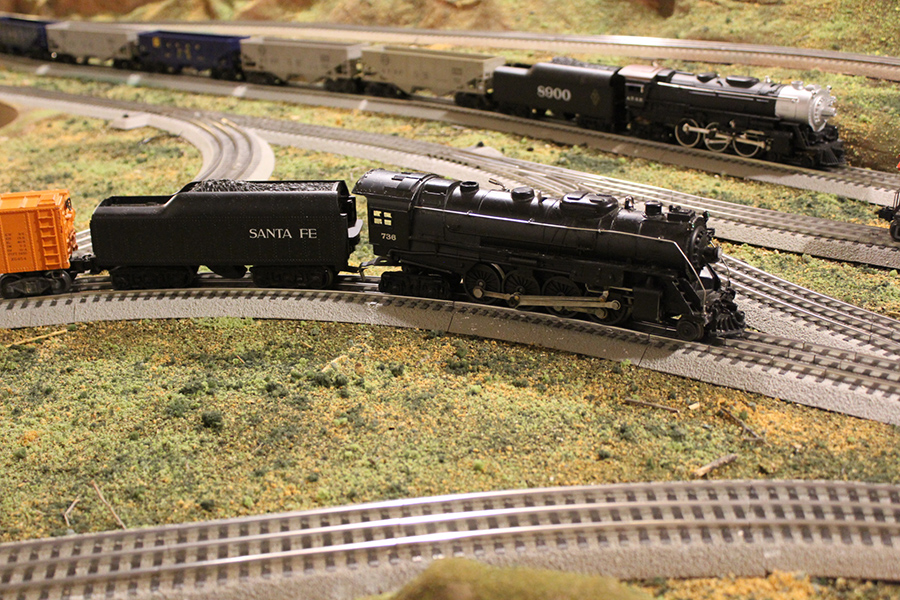
The original Lionel 736 from my grandfather – the tender currently with a reproduction shell
Enjoy!
Michael”
And Michael has sent in a video too:
A huge thanks to Michael for adding to the Fastrack layout plans collection. What a write up. I love the way he describes how he got the track plan just right before he got busy on the scenery.
I think he’s done excellent post and I hope you enjoyed his O gauge train layout as much as I did.
Lastly, seeing as quite a few of you mailed me on Dave’s post yesterday, here’s another from Dangerous Dave and the archives:
“Hi Alastair, Well I got there, just completed and uploaded the video showing the completion of the layout.
After doing various alterations to my layout I can now say it has been completed, I have included a few tips again, and tried over this series to show more or less how to build a layout, with a good many tips to make it easie, along with saving money… and yes Tonys is open again, got a special licence, the Judge was a member of the club.