Shelf layout HO scale

Brian’s been in touch with his shelf layout HO scale – I do enjoy seeing your layout from the very start:

“I model in HO scale but based on 3 foot gauge, hence HOn3.

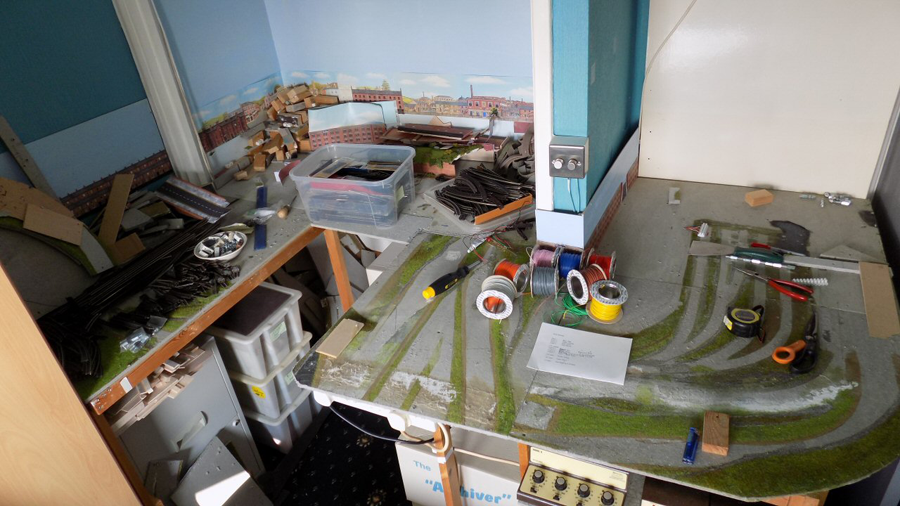
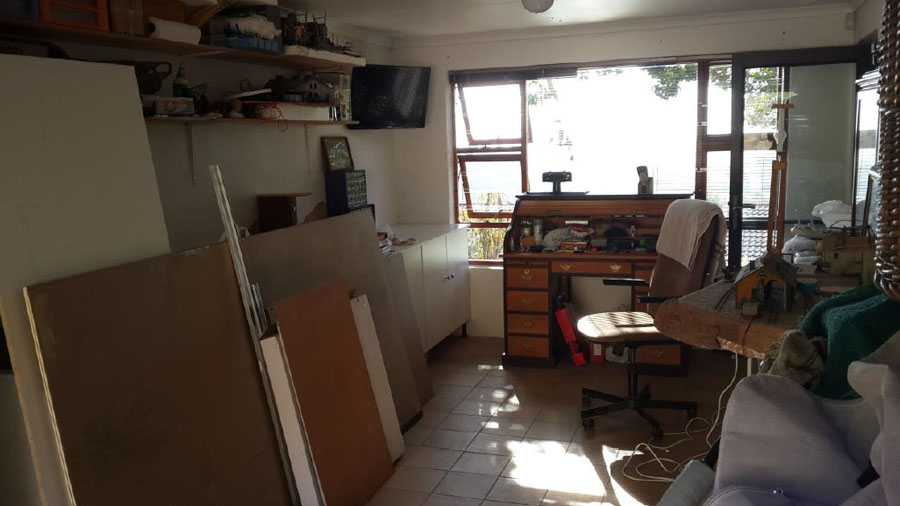
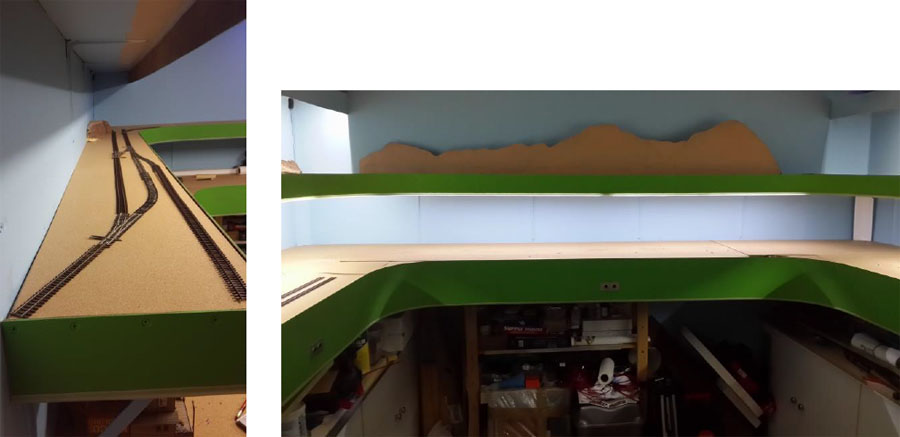
Below is the garage in the process of being converted into my train room. I put up a drywall 6 foot in from the garage door (behind me in this photo) as a storeroom for my wife’s household equipment.

Access to it is through the door at the back right. This left me with a 14ft X 10ft area for my layout.

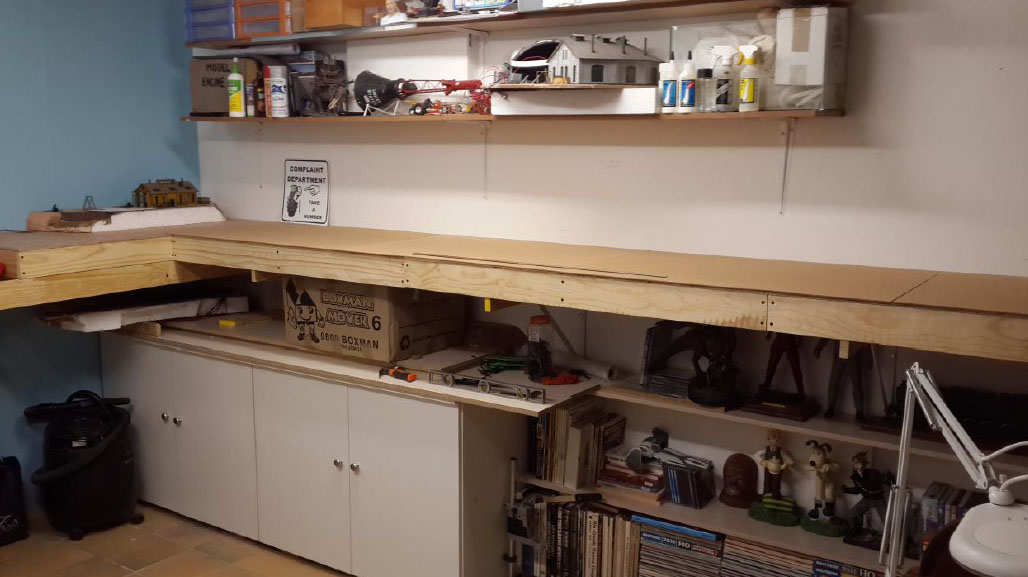
Below is progress with the upper level still to be erected. A must have, are cupboards below for storage of model train “stuff”

room for model railroad

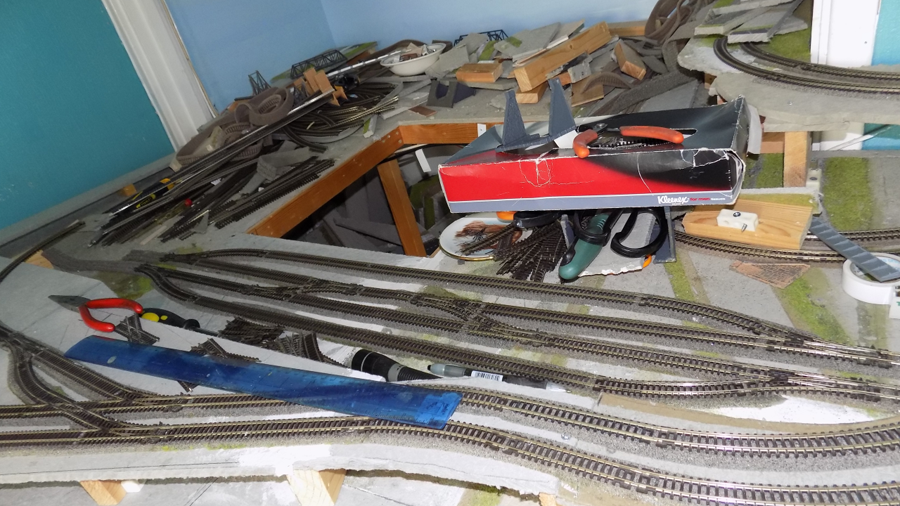
My layout is not so much about long runs (but will have a double loop and involved operation around logging shown in photos at the end) on the upper level.

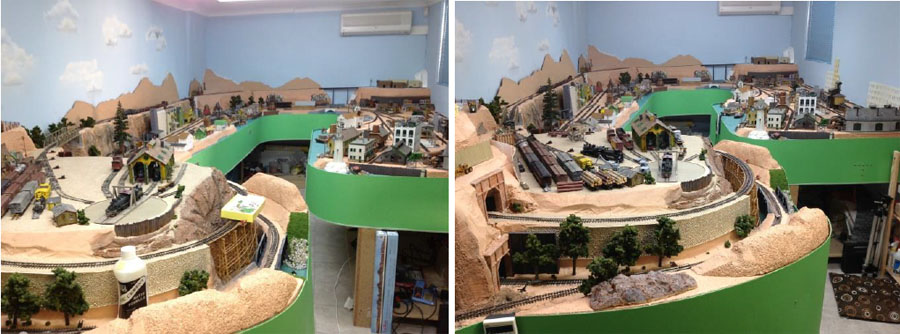
Left photo below shows the start of the logging area. Right photo shows all the lighting under the valances installed. Rear upper storage shelf in the middle has not been installed yet. It will have the strip lighting under it to light up the area where the sawmill will be situated.

room for shelf layout

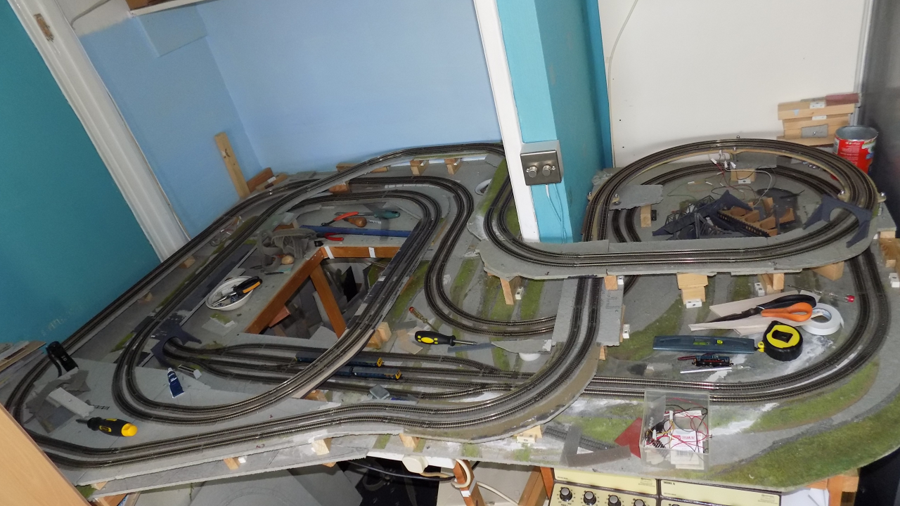
Photos below show the top deck of my two level layout is more advanced than the bottom with track laid and operational. Scenery in certain sections is complete. Photos taken from left to right as you enter the room, first the top deck.

shelf layout ho scale

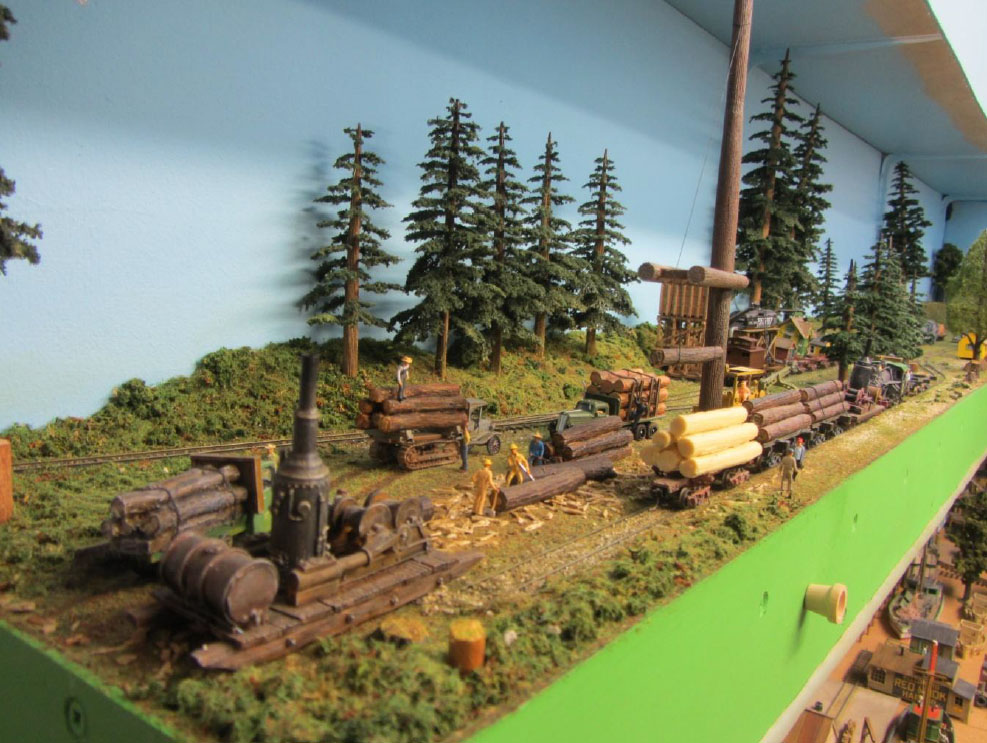
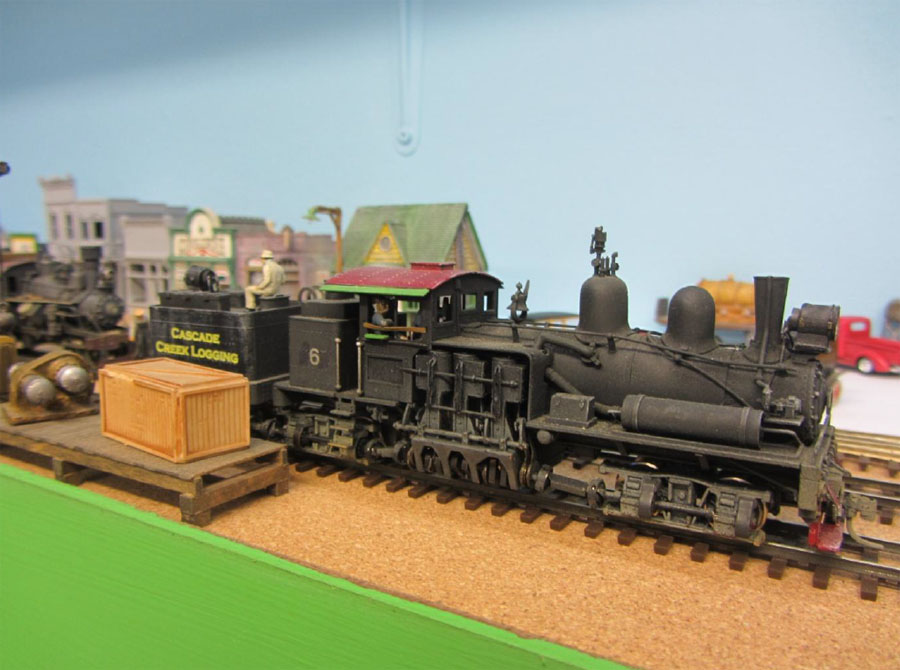
A busy logging scene. The knobs for operating switches on the fascia board are part of the Blue Point switch machines all around the layout. The Log skidder is one of many resin kits by Rusty Rails. Log loads are cast in resin by me before painting and weathering. The Vehicles are modified kits.

shelf layout ho scale

The loco in the photo above is a brass Westside Heisler (one of two that I have) painted and weathered by me as is the case with nearly all the locos except the two Blackstone locos. They still need to be weathered and a train crew added.

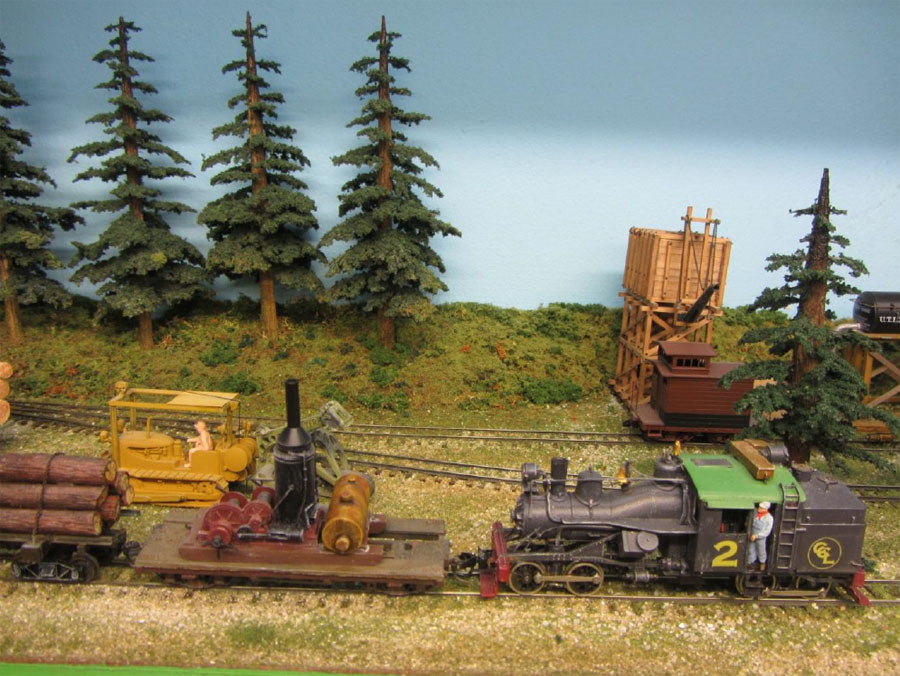
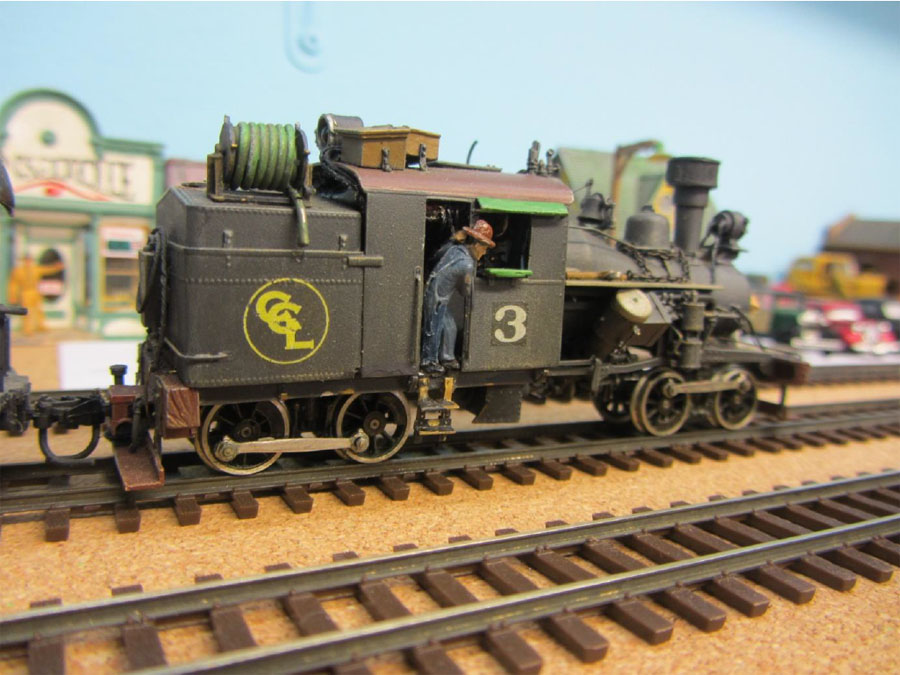
The photo below identifies what CCL stands for – Cascade Creek Logging. The Mallet is a very old PFM model.

shelf layout ho scale


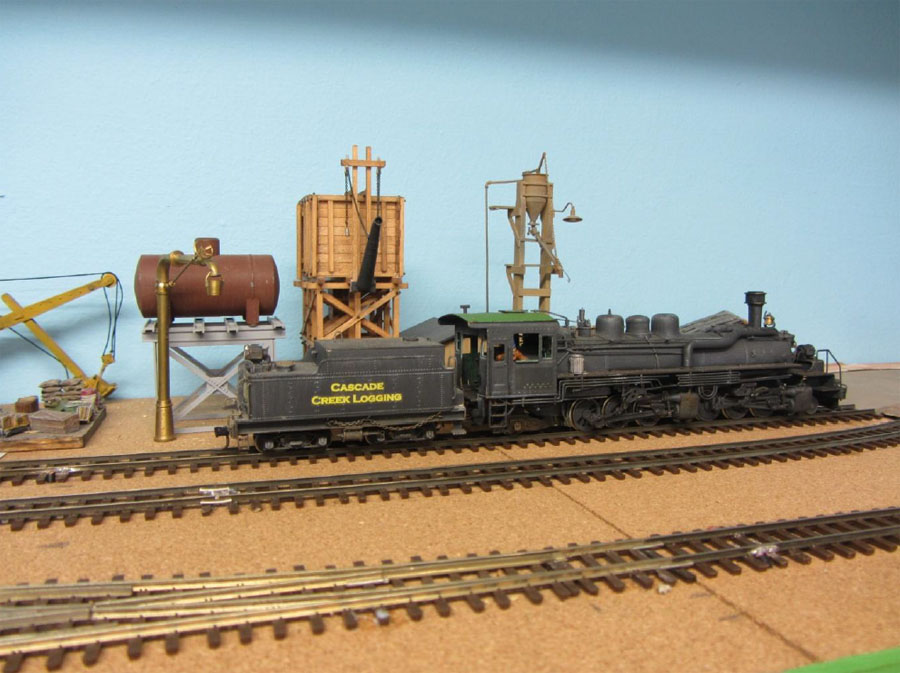
Photo below is a 3 truck Shay (one of two that I have) by Westside models.

Below is the other Heisler, also a Westside model. Kadee couplers are used throughout on all locos and rolling stock.

shelf layout ho scale

shelf layout ho scale

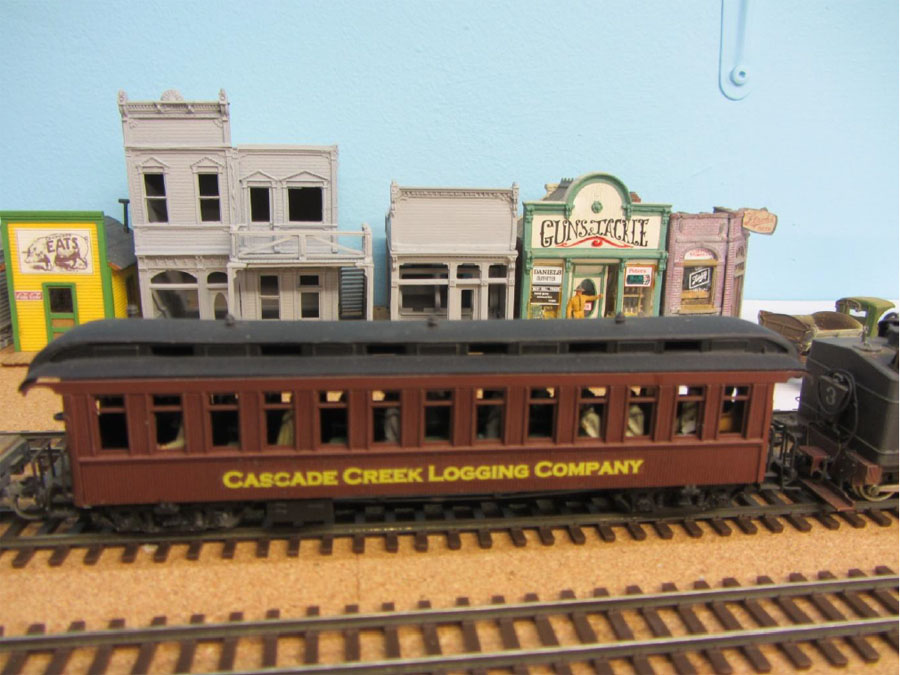
A company Coach (CCLco) built from a (long gone) E&B Valley kit I have about eight of these.
Below, a billboard and truck with figures is by Woodlands Scenics. Big Mcgiffert log loader is a Rio Grande Model and the truck mounted log loader by Walthers.

model railroad shelf layout

Below is a Woodlands Scenics Tie and Plank mill. Disconnects log trucks are by Rio Grande Models.

logging shelf layout

shelf layout saw mill

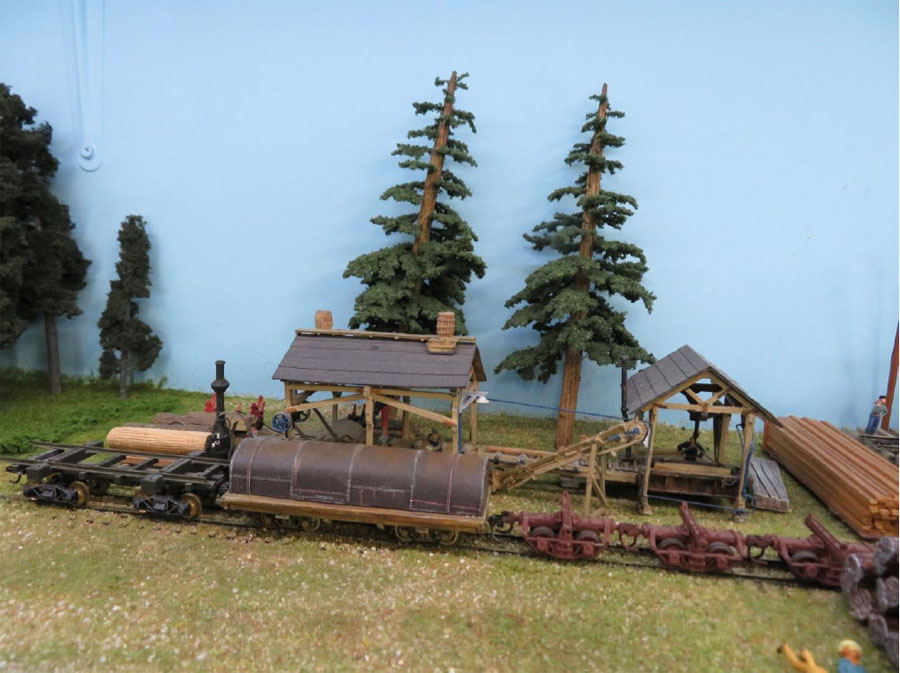
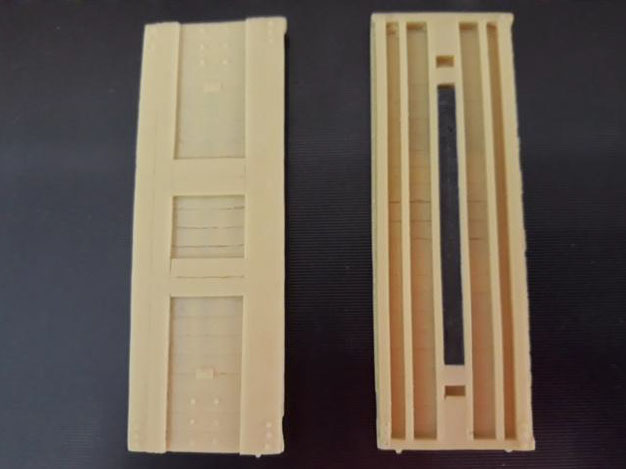
Flat car with water tank in above right photo (both) are cast from resin. Lead strips fitted between the beams of the car (shown below) to add weight before adding the bolsters and trucks, painting, staining and weathering.

shelf layout ho scale

Photos below are: Tepee sawdust burner by JV Models. Caboose a Durango Press kit; Donkey log skidder on another cast flat car is a Scale Structures kit. Cast logs on HO Rivarossi log cars converted to Hon3: A Woodlands Scenics vehicle loading cut wood.

model tream logging steamer

model railroad town

Above is mixture of Campbell and Woodlands Scenics kits all fitted with interior detail and lights

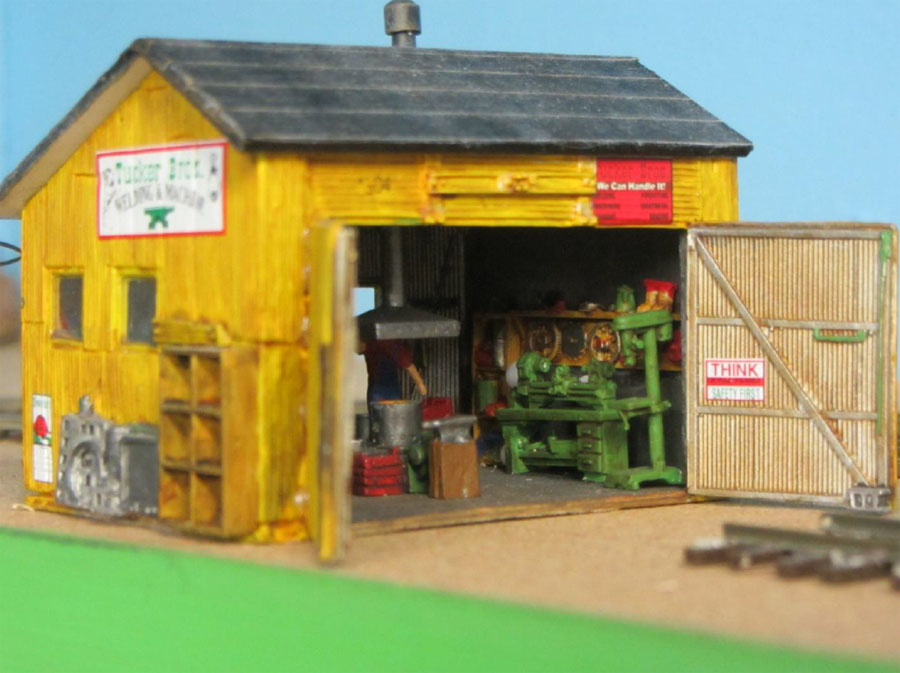
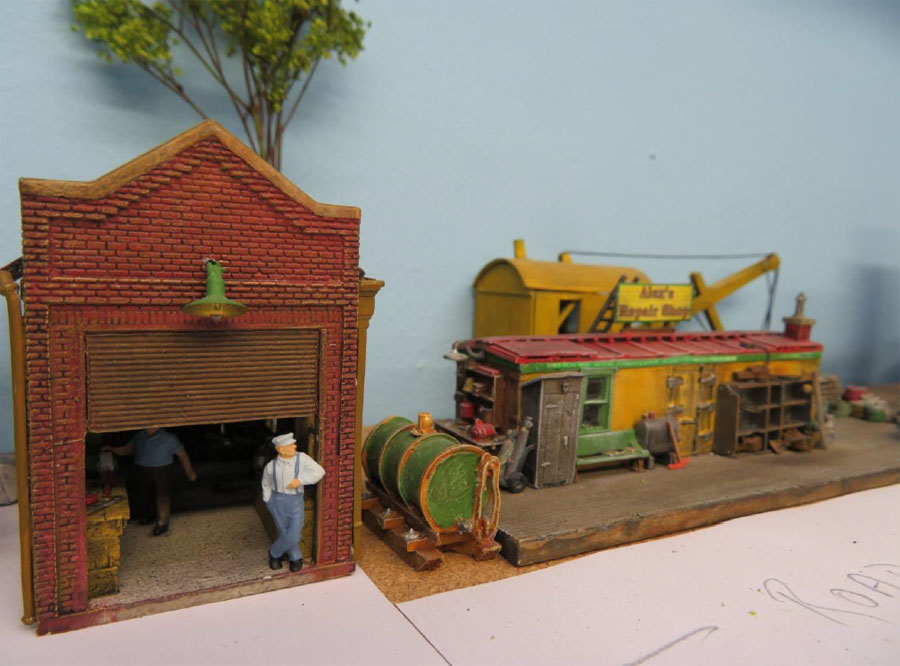
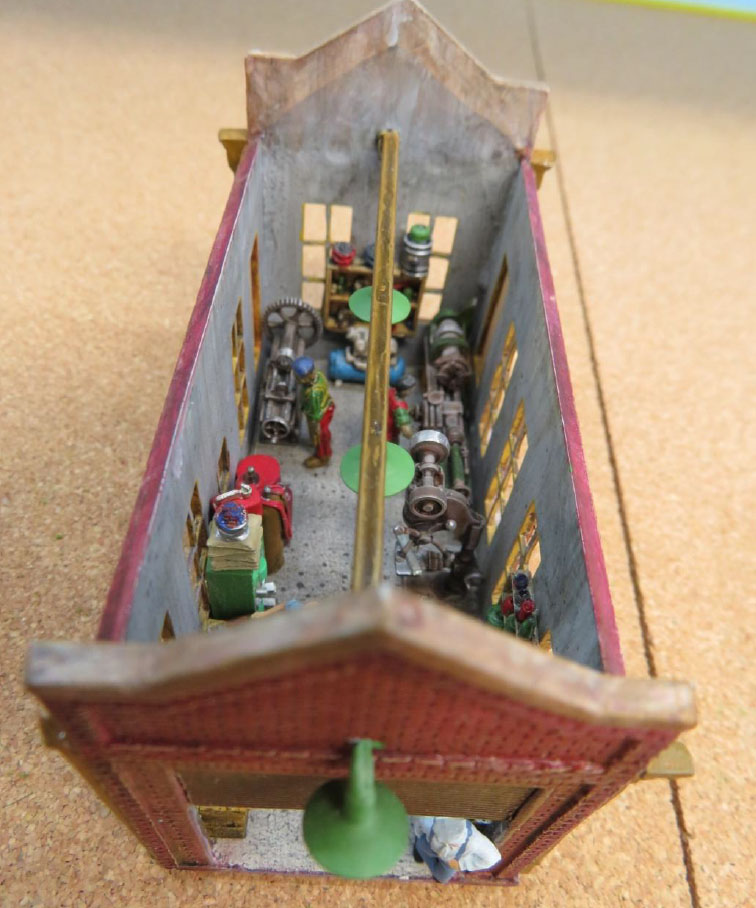
Below is a Woodlands Scenics Tucker Bros machine shop with lights and arc welding unit inside.

model railroad work shed

Below is a Rio Grande Models Rotary snowplow kit OM.

shelf layout ho scale

model train locomotive

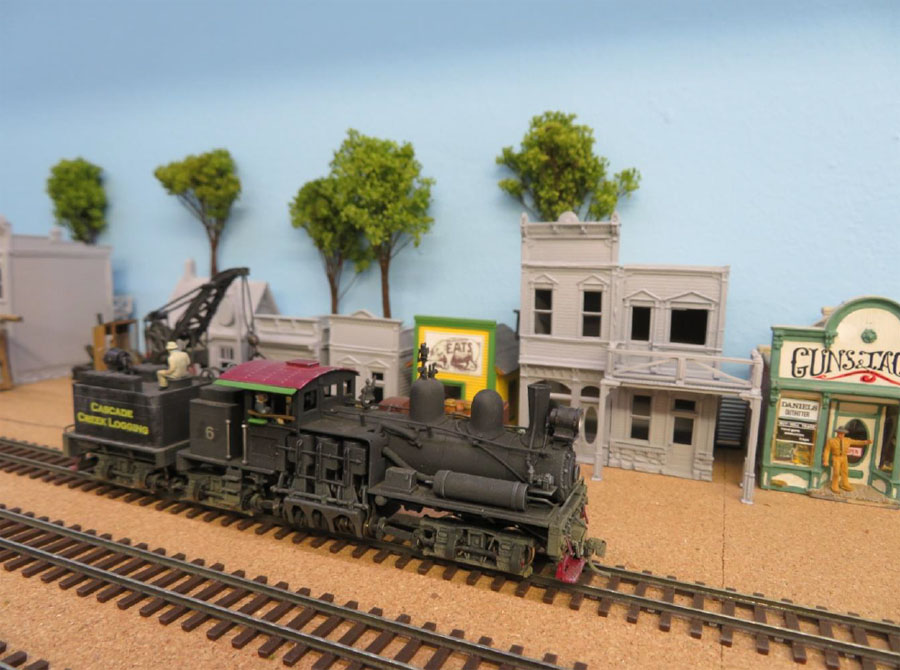
Above is another 3 truck Shay with mostly Woodland Scenics buildings in the background awaiting painting.

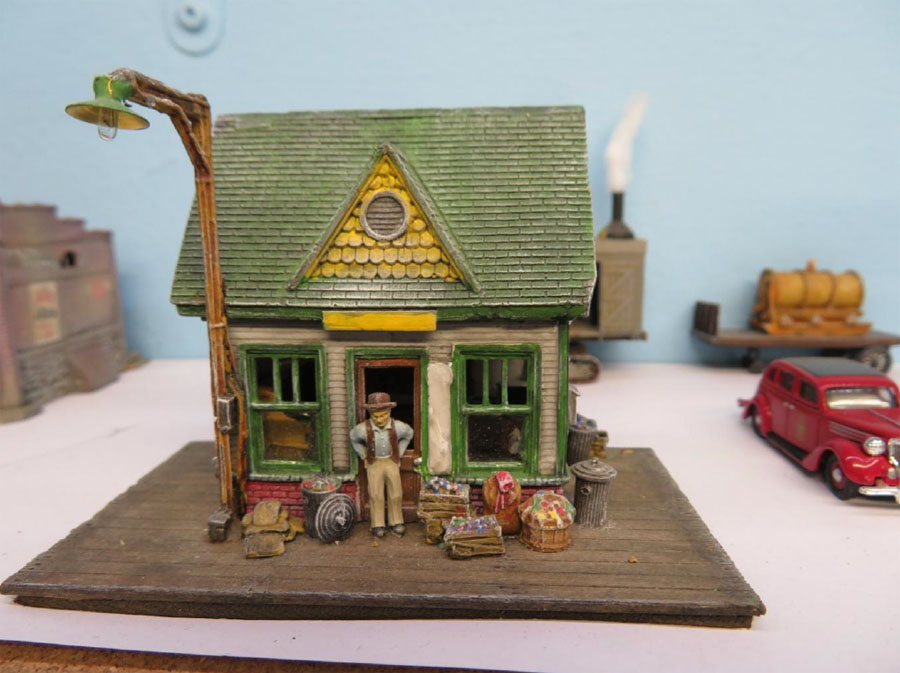
Below is a Woodlands Scenics gas station kit converted to small line side station with a working street light.

model railroad sidings

Below is a Design Preservation Models “practice” kit. Full interior detail and lights added from my “bits box”

shelf layout ho scale

model railroad buildings

Top level terminus (Cascade Creek below). The tank car is by Narrow Gauge Car Shops.

shelf layout ho scale

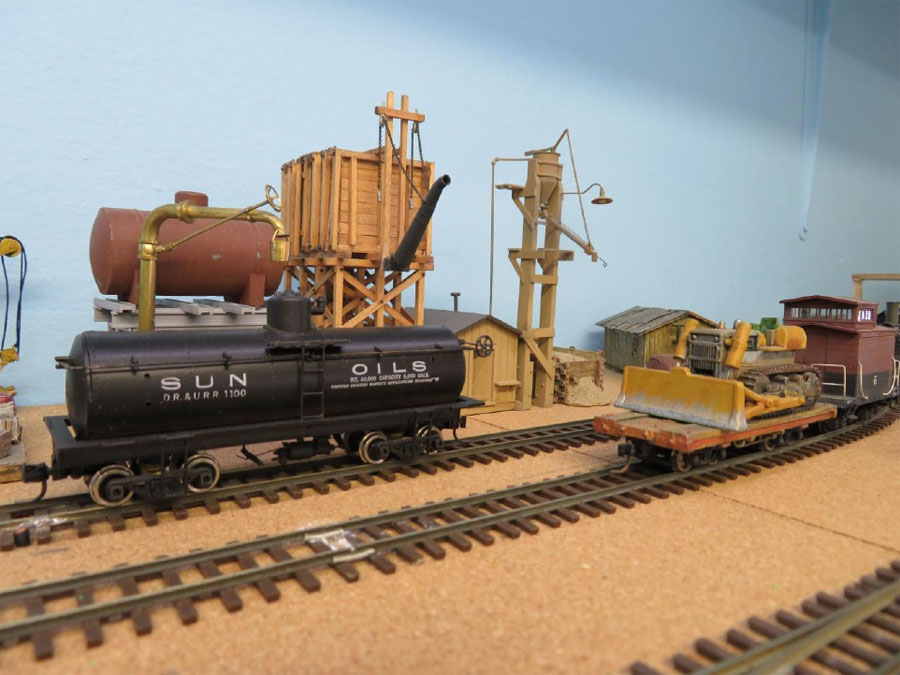
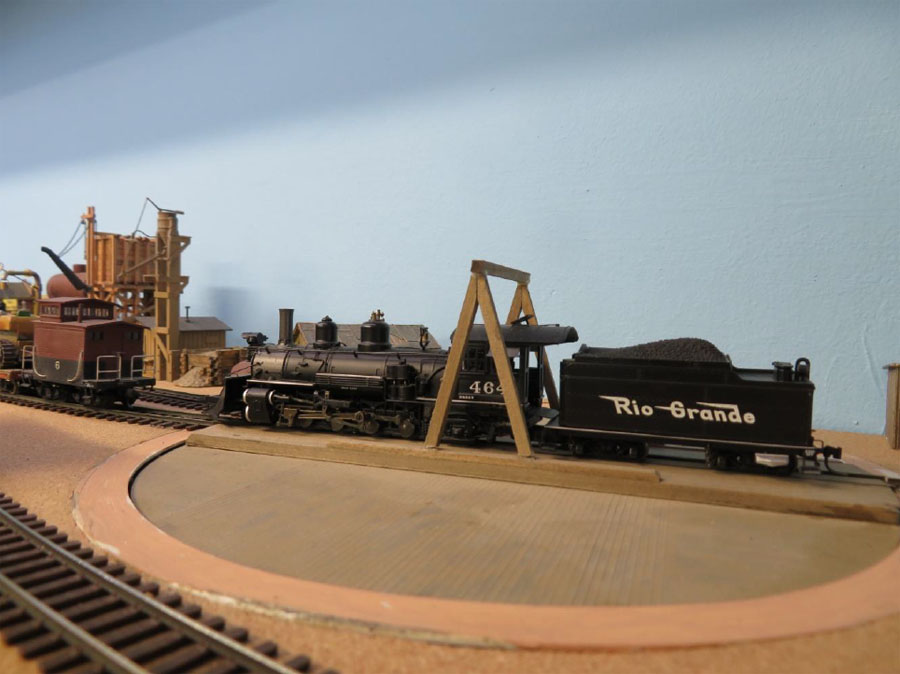
A Blackstone K27 (one of two that I have) on a modified HO (to HOn3) Atlas turntable with a Tamiya
gearbox mounted underneath.

The lower deck:

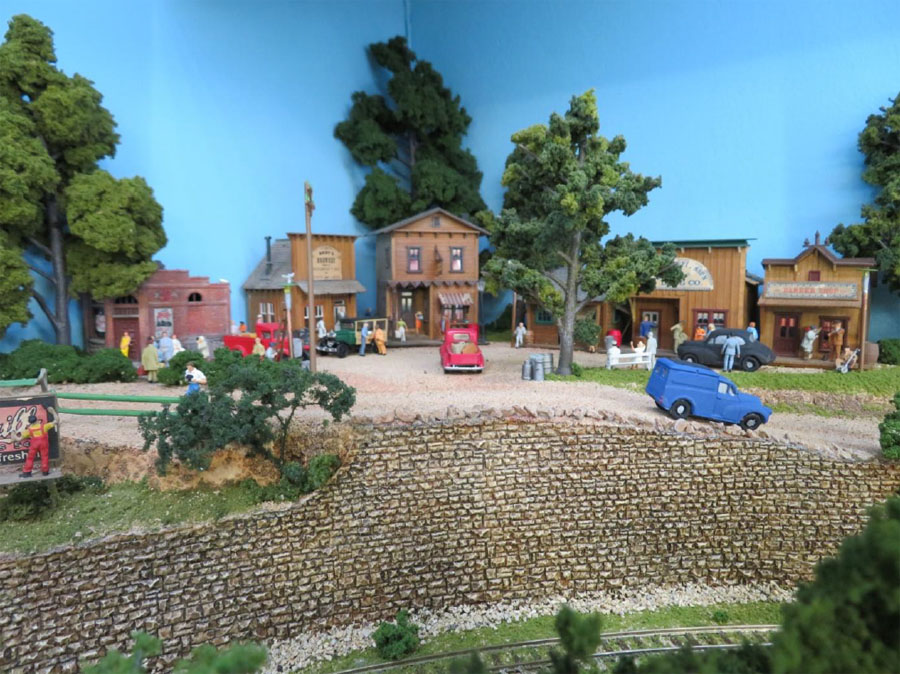
Lots of work to do but at least most of the structures are built and painted. Some photos to show the extent of the detail. I make sure that all my buildings have interior detail and lights.

The Lenz LH100 throttle (have 3) right rear is the DCC system I use to operate the layout. All locos are DCC with sound from tsunami and Blackstone.

model railroad harbor

model train factory

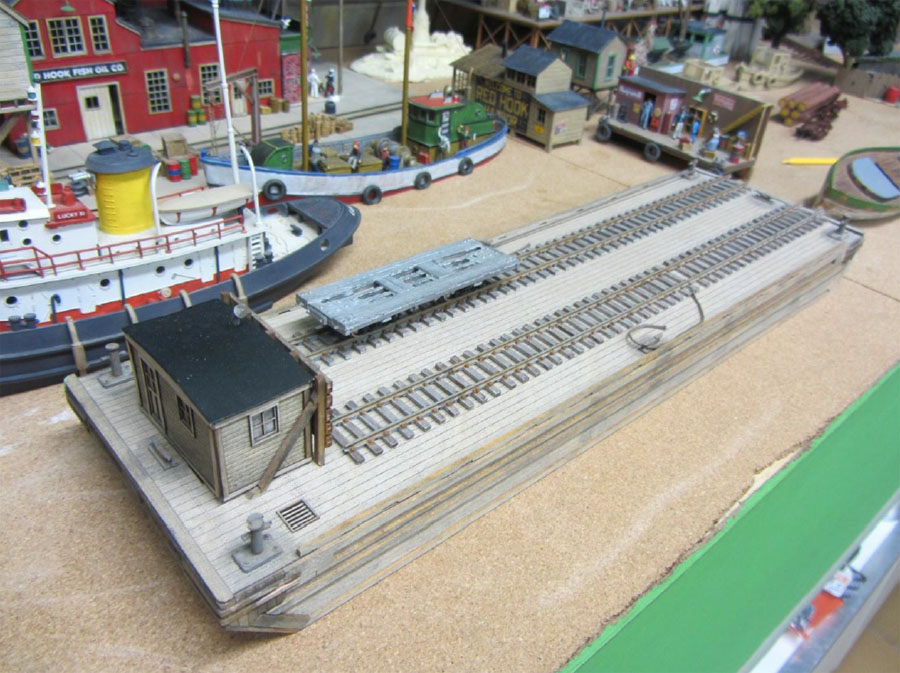
The harbour buildings are a 9 building limited edition set (only 350 made) by Foss Scale Models. All buildings have full interior detail with lights which were not supplied as original equipment.
An American Model Builders barge kit below, converted to be a car ferry.

Some of the boats are modified resin kits by Rusty Rails.

model train pier

model train store

Above, two Woodlands Scenics station kits made into a larger one!

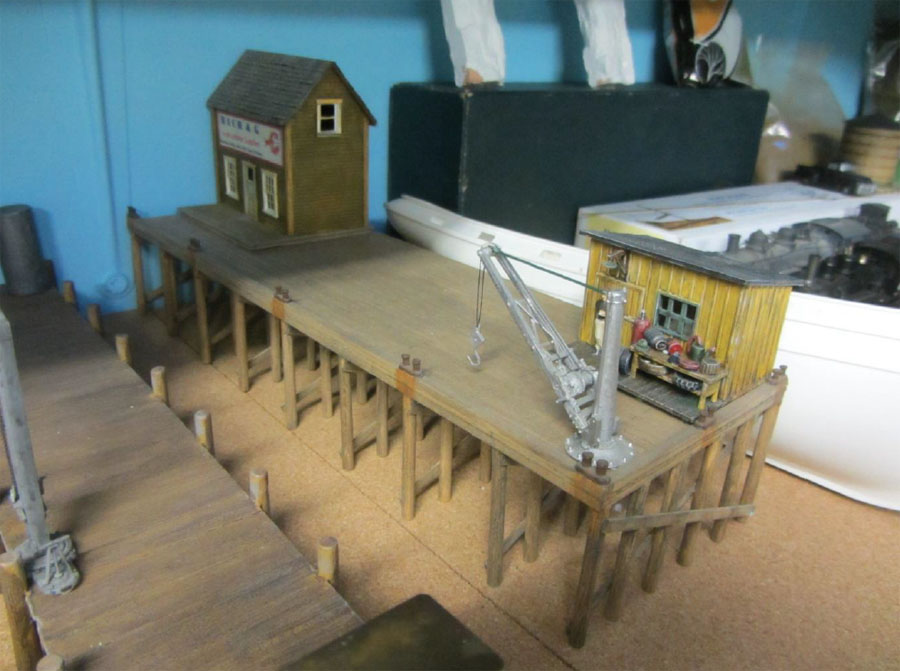
The contractor’s barge is mostly scratch built but the hull and cabin supplied by Kibri.

model train barge

A few scratch built piers with a Campbell scale sheriff’s office modified into a lobster supplier.

model railroad pier

Shelf layout HO scale Conclusion:

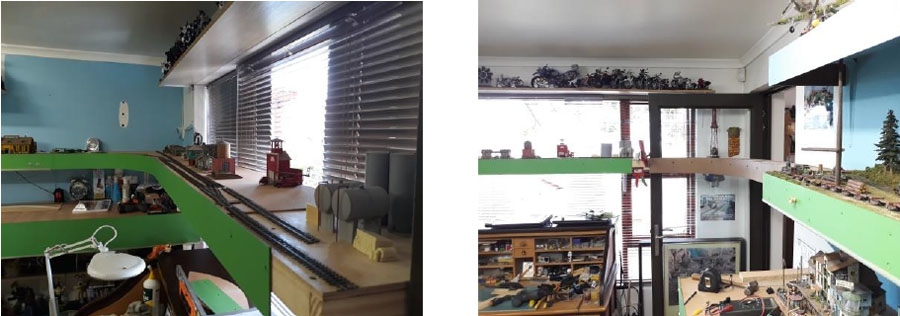
I have stated at the outset that this layout is a work in progress. Since the above photos were taken I have turned the top shelf layout into a continuous run by adding a joining section on the right, in front of the window as you enter the room. There will be a lift out section at the door shown in the right hand side photo. This shelf will have more industry on it. In the photos below, is the new section.

shelf layout ho scale

To get this far from the start of the build to the above has taken 14 months (started Nov 2016). This excludes 90% of the buildings which were salvaged from my previous layout in Cape Town.

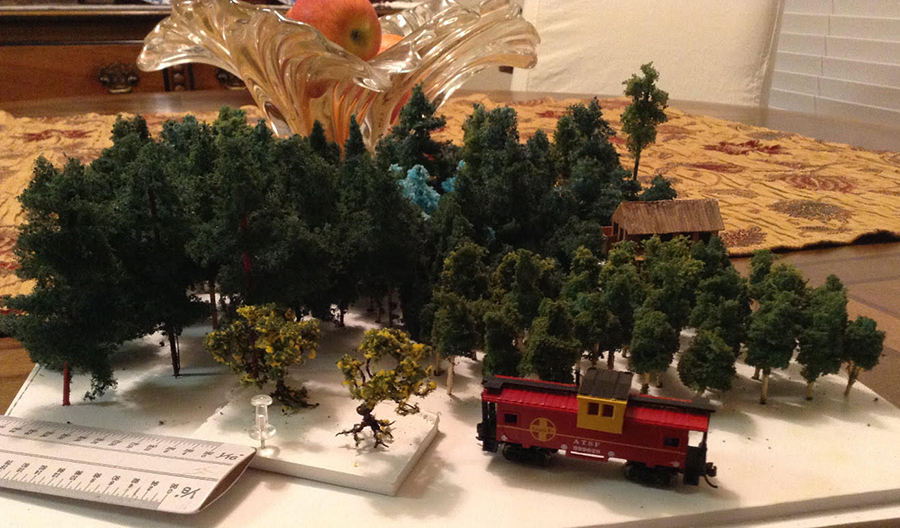
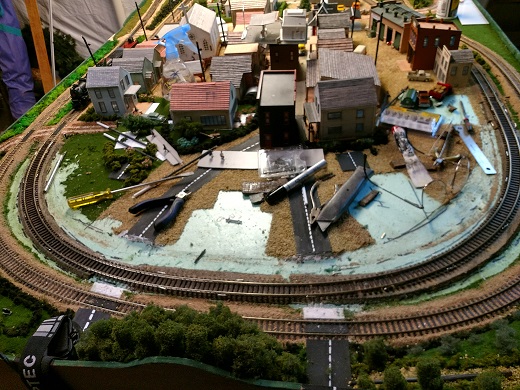
Photos below are of my old layout, 22 foot x 11 foot layout in Cape Town. (Lots of mistakes on it).

shelf layout ho scale

Brian”

A huge thanks to Brian for taking the time to share his shelf layout HO scale. I don’t know about you, but I loved it.

Can’t wait to see the updates too.

That’s all for today folks. Hope you enjoyed it as much as me.

And if you want to get going on your layout, the Beginner’s Guide is here.

Best

Al

PS The comments are still rolling in on the new ebay cheat sheet. Glad it’s working for you!


Eric’s latest N scale layout

Eric’s been busy on his his latest N scale layout:

“Hi Al

Wensdale Moorside project. (N Gauge)

I know I have been quiet recently but I have been struggling with devising my new layout and I know you enjoy seeing them in construction so here goes.

As I mentioned in my final mailing of the old layout I wanted to try giving myself all round access instead of having to crawl under to the quite tight centre hatch so I cut out the front section as you will see in the first picture.

The problem was that I didn’t want an end to end layout and I wanted different levels, well to be very honest I spent around 5 months trying to get it to work trying many different track layouts and driving myself nuts into the bargain.

So in the end I have relented and enlarged my centre hatch with less front space and eureka I am happy again and feeling constructive.

This is a simple twin track layout that is large enough to run two trains per track using four controllers. What delights me with this is that trains will appear over the three levels popping in and out of tunnels on different levels that will confuse the viewer.

The scenery will be minimal with just moors, castle and farm, with a bit of luck there will be a small river scene in the centre. I have quite a bit of the scenery done now which I will start showing in my next offering. This time instead of having169 lights working as on my previous layout there will be no lights on this layout at all so daytime videos will be the order of the day.

Keep up the very good work you do Al, we love your mailings.

Happy modelling

Eric (Leeds) UK”

N scale layout

N scale layout

N scale layout

Great to hear from Eric again. His last post is here.


“Hi Al my tip is I get old slate roofing tiles and break up into small pieces then glue them to make dry stone walls

regards

Kevin”


“Hi, from America,

I’m doing an 8’ X 5’ in our basement HO scale. 5’ because my longer cars were derailing often around the curves. So I took to some reading up on the curve diameters east and then west of the Rockies and found out lots that I needed to change. Diameters of my curves has got to go bigger.

A four foot radius was then used by taking a string attaching it to the center point and screwed down and using a pencil marked it out. Now I’m adding mountains by using 2”foam 4’x8’ sheets cut to s rough shape of my mountains then using the slash and jab technique to make them look awesomely real.

Then made bridges 100% by hand an installed them temporarily to see now how it looked. Purchased a train station put it on the model, found out the proportions were wrong for the mountains of how I wanted it to look. Should have had the HO scale model first for comparison. Fixing it now by making mountains bigger and with a tunnel. Will send pics after almost done, later.

Sincerely

William”


“Hi Al. Just posted this video, shows some more of the 14xx with a Hawksworth Auto- Trailer added… then surprise surprise… Changes on Dave`s Model Railway again ..LOL ..well cant just sit back, got to keep having something to do… as they say… always something to do on a Model railway Layout.

Regards

Dave”


Brand new ebay cheat sheet still going strong.

That’s all for today. Thanks to everyone – please do keep ’em coming.

And if you want to join in on the fun, the Beginner’s Guide is here.

Best

Al

N-scale layouts

Wayne’s been in touch added to the n-scale layouts on the blog:

“Just call me the Conductor of the Landen-Meyer Railroad.

Landen is my soon-to-be four year old autistic grandson, who, like me, lives near trains, and we hear and see them often.

I decided a few years ago that, since I had time (trains are for 14 year olds, I hear?), I would get started early.

So, I began to spend time making content for an N-scale railroad. Several hundred trees, buildings, outhouses, a bridge or three are under construction.

Also, since I had no prior experience doing a model like this, I began doing little studies.

The idea in mind is an 1800’s abandoned gold mining district, and nothing in it is a “new” building, so I make them from scratch using those little cedar wraps that you soak and use on the barbeque. Trees are wire armatures, various colors, brands, and manufacture dates (composition varies), of abrasive scrubber pads glued in tree-fashion onto the remains of incense sticksbecause theysmell nice.

Rocks are plaster casts and some sculpting (when I get there).

Here are some photos:

n-scale layouts

My first caboose and many trees (more now- this was almost two years ago).

The scale in the foreground has been replaced by a model railroader’s scale.

Executive outhouse studies.

One has a handicap ramp.

6inch (16cm) square Basic Concept- nothing but wood, abrasive-pad trees, acrylic color, and plaster in this one. Water in the hot tub needs to be changed.

As far as an actual TRAIN was concerned, for these past two years, all I had was that caboose. Sad, I know.

I’ve been told I do things backwards. So I finally got a small 24″ dia. set last Christmas (funny how that works) and some polystyrene packing blocks from a desk I bought:

n-scale layouts

The base is a 30 inch square (76 cm) piece from a left over hollow core door blank. Sides will be finished in luan panels along with that clever idea for a cover having pneumatic pistons to operate. It’s a start, anyway.

The idea is to encourage interest. Eventually, (I did say I have another ten years) this piece will be nestled into a larger layout with more trains

This is a photo of the “switcher tracks” centerpiece for part of that layout:

n-scale layouts


N-scale layouts:

Kennecott Mill, AK.- abandoned, not quite fully 1800’s but a lot of character.

I have scoured the inter-webs over the last two years for abandoned buildings and have quite a collection to

exploit. Mine tunnels, Head frames, water-cannon mining, panning, dredging, and sluicing are all planned to be included.

If you like, I’ll keep you posted.

Be advised though, this is a long term investment.

But you all already knew that… 😊,

Finally, I often see questions about layouts by other N-scale layouts enthusiasts, but I have not seen any reference on your website regarding computer software for railroad modeling.

I offer the two that I know of:

The first is a freeware provided by Atlas:

https://shop.atlasrr.com/t-software.aspx

The second is a more robust version by SCARM:

https://www.scarm.info/index.php

This version is like Atlas’, but has a more thorough library of track manufacturers in it.

Purchasing the full version is reasonable, and gets you more goodies. Buildings are very primitive though.

Both offer terrain modeling, bridges and tunnels, track incline tools and a 3D viewer of your masterpieces.

Neither are particularly computer-intensive or difficult to use, but you need to experiment to understand them.

Here’s a screen shot of some N-scale layouts study:

n-scale layouts

Thank you for your support of my grandson’s new hobby.

I hope this interests and encourages others.

Wayne”

A big thanks to Wayne for adding to the N-scale layouts collection. Quite a few on the blog now!

“Hi Alister,

I enjoy reading your wide range of posts for the modeling railroad community.

I thought the fans of older steam engine kits might enjoy my rebuild of the Penn Line HO K-4 Pacific.

I originally built the kit in the late 50’s, and upon leaving for college, what little HO running stock I had was boxed away. A couple of years ago (now in my 70’s)I decided to rekindle my interest in an HO layout, and began by disassembling the old K-4 (I still had the original assembly manual and hex wrench for the drivers), stripping the paint from the metal castings, pickling in boiling vinegar, and spray painting with semi-gloss Krylon grill paint.

The soft iron hand rail had rusted, but all of the small brass stanchions were still in place. I removed the rail, straightened it, and removed the rust with 4/0 steel wool. After degreasing, I blued the wire with Birchwood-Casey paste gun bluing and polished to a high blue/black polish. I resent the rail to the original pattern (much better that I did when 15) and reinstalled.

I made the coal load for the tender by placing a piece of plastic wrap in the tender well, filling it with fine synthetic coal, and wetting with the classic 2:1 70% isopropyl alcohol:Elmers white glue mixture. After drying, I removed the coal load and gently peeled off the plastic; worked well.

I had to remove the motor and polish the oxidized commutator, held in a mini-drill press with a loop of 1200 grit wet-or-dry (dry!) automotive paper. While not modern by any means, the old DC worm drive motor powers her around the layout quite smartly!

Enjoy,

Rob”

“Take a track cleaning car and clean the cleaning pad with TRANSMISSION FLUID! Leave just a very light coating on the pad then run the car over the road. This will not only clean the track but leave a thin film of fluid on the track to keep the track clean.

Moreover a quart bottle of fluid should be a lifetime supply for a very reasonable price!

Martin”


And Lawrence has been in touch again (his last post is here):

“Hi Al

Thought I would give an update on my track. But first I want to say I really envy those out there that have been doing it for years and have lots of trains, houses, people, and autos. And that have rebuilt their layouts more than once. Now to explain why.

I started from nothing and with a little research built a design that would work with the track and scenery I wanted. Built the table, laid the foam base and foam for mountains and rail risers (not knowing any better used the four-degree store bought items). Then I put the track down (refer to the attached picture, red and orange) and put the electrics for the track installed for DCC.

Then I decided I could afford a DCC passenger steam engine and tender (4-6-2). Had DC diesel engines and cars from when I was a kid. Found out that the steam radius is 19” minimum and not the 15” minimum of Diesels. Refer to the grey on the picture where I tore up the track and adjusted for steam. And ran the train for an hour in each direction without any derailment. YIPPEE

Affording a little at a time I worked on the scenery. Scratch building the 400 trees and most of the buildings. Used a couple plasticville houses from old set. Got to the decision on getting a new train or the water for the lake and river. The water won out. Used Deep Water as the rivers were from half to three quarter inches deep and the lake was three quarters deep = fifteen packages of the deep water.

Now the next interesting (frustration to the maximum) part. I wanted a freight engine and tender. When I could finally afford it, got it (4-8-2). Ran it on the tracks *&^%$#*&^%. It derailed on almost every arc. The engine is one inch longer and the tender is three inches longer. The traction wheels are smooth. Going up the four percent grade it could pull ONE car before slipping. Ordered the Bullfrog Snot.

In the mean time I tore up all the track shown in green on the picture. Now was also the time to install the 2 right hand switches, 2 left hand switches and the crossover. That means also the scenery in those area torn up. Spent a LOT (really a great amount) adjusting the track (sometimes one eight of an inch) to prevent an engine or tender derailment. Ran the engine (with and without power) across the track to find any kinks or curves too sharp.

The Bullfrog Snot came in and applied two coats on the traction wheels and now it can pull six cars up the hills before slipping and any amount on the flats. And just got all the track adjusted and ran both trains in both directions for over an hour without any derailments. YIPPEE And no problems with the double crossover at all. Again YIPPEE

Now I can go back and fix all the scenery that I destroyed in the process and on to the lights.

Lawrence”

A huge thanks to everyone for today’s post, especially to Wayne for adding to the N-scale layouts.

Please do keep ’em coming.

And if you want to join in the fun, the Beginner’s Guide is here.

Best

Al

PS Thank you for all the comments on the new ebay cheat sheet – glad I updated it.