4-6-2 Pacific locomotive HO scale

Warren’s been in touch with his 4-6-2 Pacific locomotive HO scale:

“Hello, Alastair;

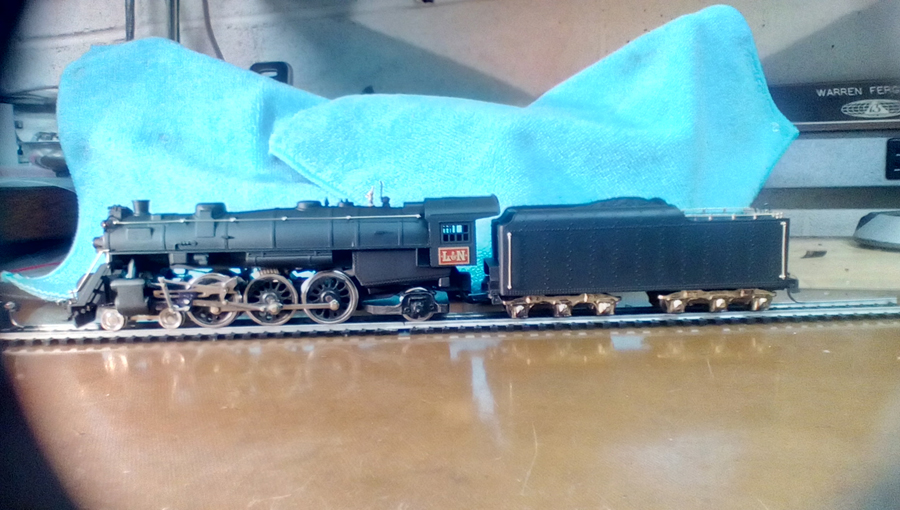
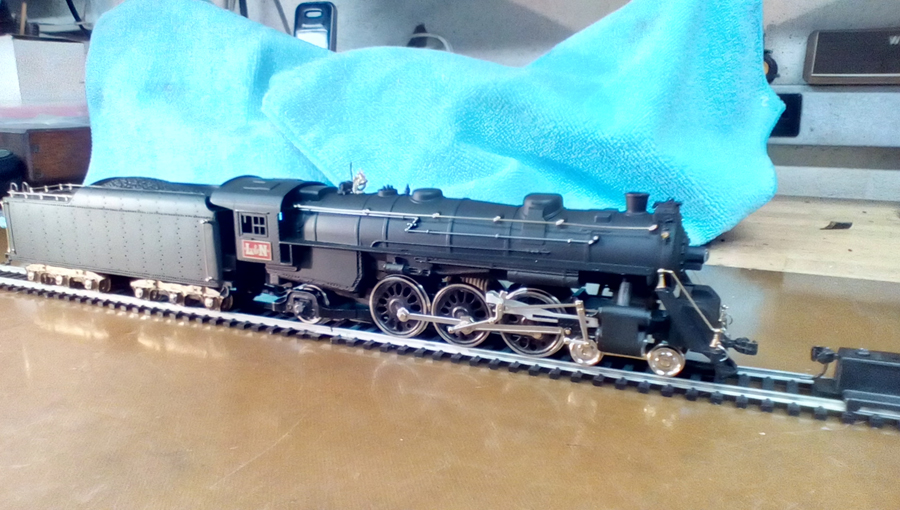
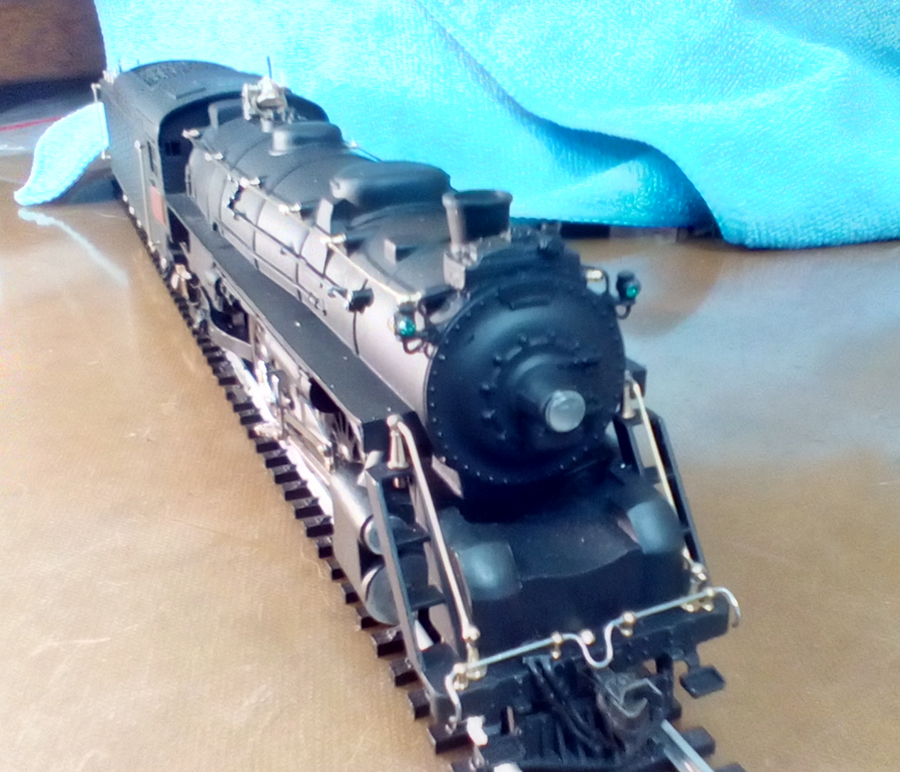
I have attached pics of a Mantua HO gauge 4-6-2 Pacific loco and tender I have restored.

I bought it on eBay for a few dollars, and I liked the way it’s built, so I decided to “fix” it.

It had started life as a C&O unit, painted blue. There were a lot of miscellaneous problems with it, and I had to find valve gear for the left side.

I grew up in a little town on the Louisville & Nashville railroad in Alabama, so of course I’m modeling the L&N.

I found the red/gold L&N heralds on the cab from a gentleman in northern Minnesota. His company is Northern Scale Models, and he’s a pleasure to deal with.

Once I had all needed parts, I started by rebuilding and reworking the drivers and trucks.

All the driver rods have been bushed to eliminate excess movement, and the valve gear rivets have been tightened to prevent the gear flopping around.

I removed all flash in the driver wheel spokes and used gunmaker’s liquid blue to darken them.

I made the front truck from brass stock, and used brass wheels on it I bought online. I found the brass trailing truck spoked wheels online too, and had to rework the axle to fit the truck.

After finishing the chassis, I removed all mould marks on the boiler, polished out flaws, and added the details seen, including Sunbeam generator, brass bell, pop-off valve, boiler feedwater heater, class lights, air and signal hoses, pilot steps, & coupler lifter.

The paint I chose is Badger Engine Black, and it’s a great product. All handrails are handmade from .020 brass wire, and the throttle linkage is .020 steel wire.

This is my first effort at restoring (aka kit bashing?), a metal loco, so I hope you will cut me a little slack on this one.

One area I haven’t tackled is decals. I’ve tried on another loco, but they just look like decals. I can’t figure a way to seal edges and blend them into the paint without ruining the paint.

If anyone has ideas, I’d sure appreciate your help.

Thank you for all you do, Al, I read your blog faithfully each morning.

Warren”

4-6-2 Pacific locomotive HO scale

4-6-2 Pacific locomotive HO scale

4-6-2 Pacific locomotive HO scale

4-6-2 Pacific locomotive HO scale


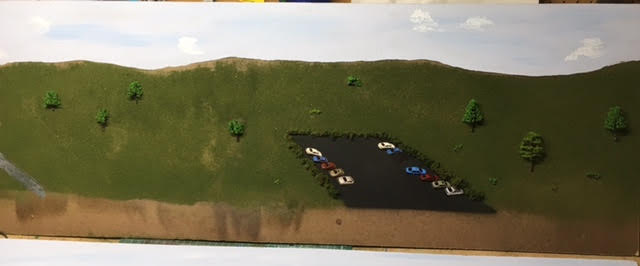
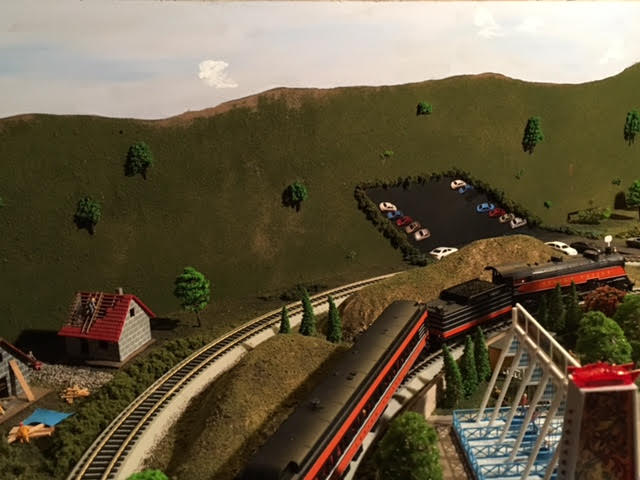
“Hi Al Another view of the log train shown previously. Scenery finally getting there along the shelf towards the yard.

Ballast and roadwork is next on the to do list at the town and yard.

All the best

Brian.”


Latest ebay cheat sheet is here.

A huge thanks to Warren for sharing his 4-6-2 Pacific locomotive HO scale, and to Brian too.

Some impressive stuff there – I do love seeing the different scales, scenery, styles and my inbox each day. Please do keep ’em coming folks.

That’s all for today folks.

Please do keep ’em coming.

And if today is the day you get started on your layout, the Beginner’s Guide is here.

Best

Al

PS Latest ebay cheat sheet is here.

PPS More HO scale train layouts here if that’s your thing.


Painting model train backdrops

Jack’s been back in touch, with his take on painting model train backdrops – he’s added some perspective.

(His last post is here).

“Hi Al,

Continuing on the preliminary work on my backdrop I found another perspective issue. I have the beginnings of a parking lot at the edge of the layout, so I need to continue the parking lot onto the backdrop. I taped some tablet paper to the layout edge and marked the edges of the parking lot on the paper. From the area where the scene is viewed I approximated the angle needed to continue the edges of the parking lot onto the backdrop.

I then took the paper down and from the point where each lot edge meets the background I drew a number of lines at different angles like spokes. Reattaching the paper, from my viewing area I chose the lines representing the best angle for each side of the lot. I then drew the lot on the paper and quickly sketched in some scenery. The photos show the final sketch and what it looks like from the viewing area.

I transferred the parking lot onto the Masonite and sprayed it to match the blacktop on the existing lot. I photographed cars on the lot from the perspective of the viewing area, printed them out, cut them out and pasted them on the lot. They aren’t perfect, I may redo them, but it gives the impression of cars parked on the lot.

For the grass, I used spray glue and sprinkled Woodland Scenics blended turf on it. I painted the sky blue, added some darker streaks and clouds. My real problem, and I could use some comments on this, is that I wanted to make it look like you were looking off into the distance. It just doesn’t look like I imagined it would. I think maybe my horizon is too high. Maybe I should start it just behind the parking lot. Maybe I should start a hill just beyond the parking lot. Any ideas would be helpful.

Jack”

painting model train backdrops

painting model train backdrops

painting model train backdrops

Jack’s previous post is here: Model train 3D backdrop.

Now on to Barry:

“Hi Alistair,

I have been signed up to you for a while now and have gleaned a lot of information from a lot of your people. My first train set was in the 50’s. My first model railway was in the early 1970’s but did not last that long as my wife and I were not doing too well. Now wife number two and I are very close to our 25th wedding anniversary, my model railway is up and running and failing and being tweaked in many places.

I have joined the throng of camera recorders and have just posted my first and short Video on You Tube. Have a look at it and if you think it is worth it please publish on your site. It is under, Castlebridge. OB owner.

Barry”


Latest ebay cheat sheet is here.

“Hi Al

Best tip I can pass on is one to help with the frustration caused by dropping tiny screws and other parts on the floor.

Buy a white dust sheet from a DIY warehouse – or grab a sheet from the airing cupboard if you like :-). Spread it on the floor below the bench or table where you are working.

Since tiny screws, nuts and bolts are seldom white, when you drop them, as I often do, they stand out much more clearly than they would do on a typical shed/workroom floor or carpet.

Regards

Steve”

A huge thanks to Steve, Barry and to Jack for showing us his take on painting model train backdrops.

That’s all for today folks.

Please do keep ’em coming.

And if today is the day you get started on your layout, the Beginner’s Guide is here.

Best

Al

PS Latest ebay cheat sheet is here.

PPS More HO scale train layouts here if that’s your thing.


Dave adds weight his rolling stock

Dave’s been back in touch again.

If you’re unfamiliar with ‘Dangerous Dave’ have a look at him in the Hall of Fame. You can see how he got his name too…

“Hi Al,

just loaded this video, shows adding some weights to rolling stock, we have so many these days that are light and do tend to derail on points etc, adding some of these can be a big help in curing that problem.

All the best from

Dangerous Dave”


Latest ebay cheat sheet is here.

That’s all today folks. There’s just not enough time in the days at the mo.

Beginner’s Guide is here for everyone that wants to start their train journey.

Keep ’em coming.

Best

Al