Brian’s been in touch. He’s been busy adding a model train sawmill to his layout:
“Hi Al, I have finished the sawmill at last and placed it on the layout. It just needs to be “bedded” into the surrounds.
This is a continuation of my previous post of building and modifying a Fine Scale Miniatures Sawmill.
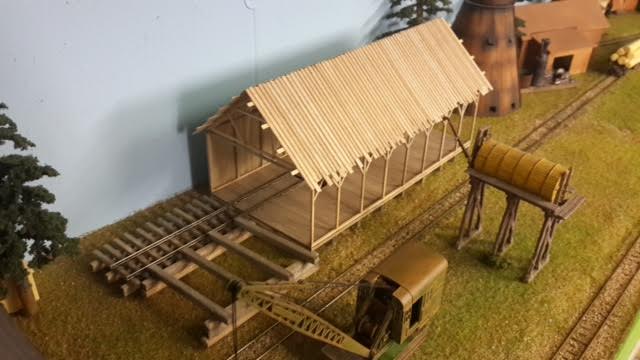
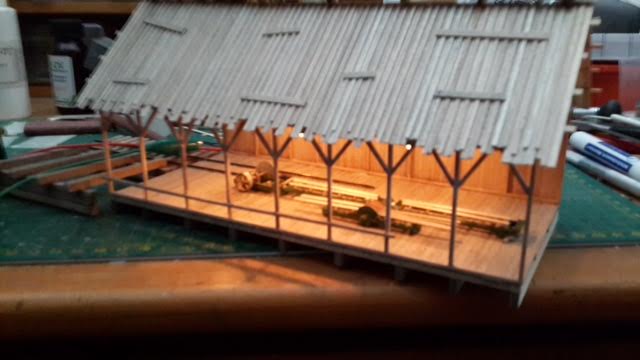
Photo below, roof done except for the roof walk and fire barrels
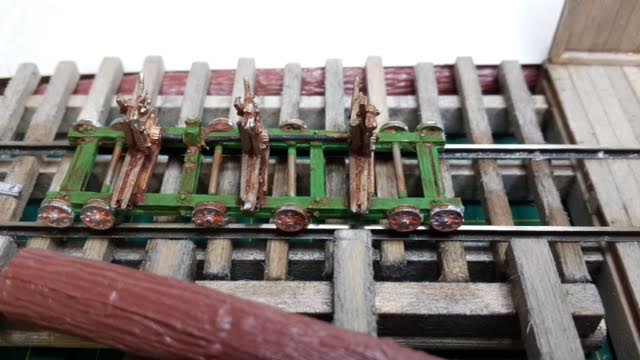
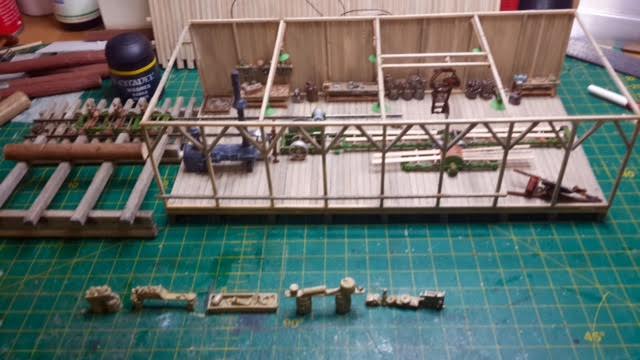
Below, test fit on the layout to make sure all is in the correct place. The crane will be used to offload logs from the log cars as well as the incoming logs by road on trucks.
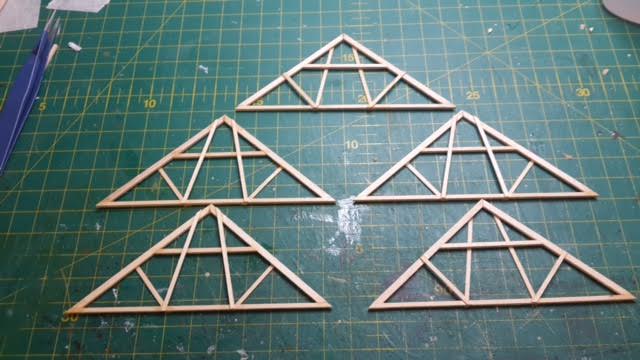
Below, the mitre box used for cutting the roof truss pieces at the correct angle and length.
The five roof trusses assembled.
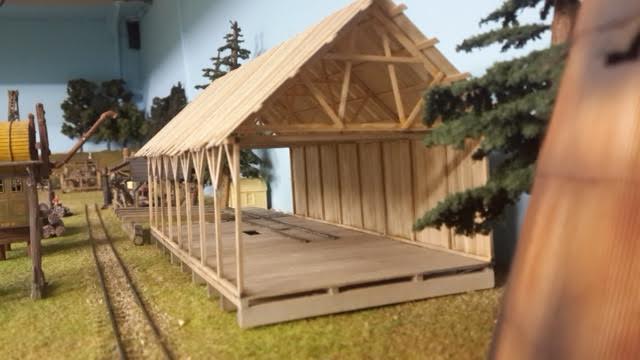
Final test before carrying on with the building at the workbench.
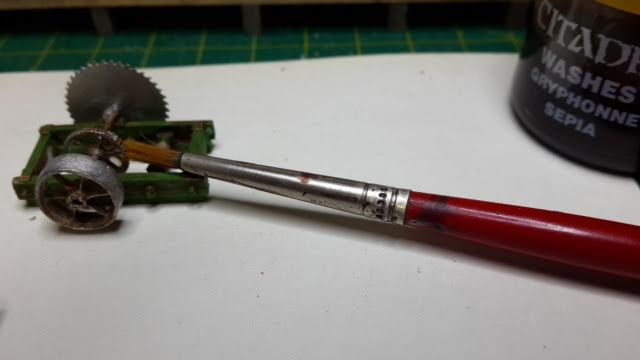
This is where a lot of time is needed in painting all the details. After the main color, I use a wash to age it and add the used look to the parts. (I use Warhammer washes)
Same procedure used here as above.
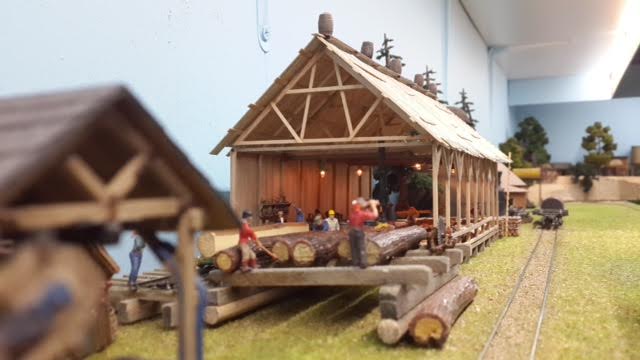
Model train sawmill:
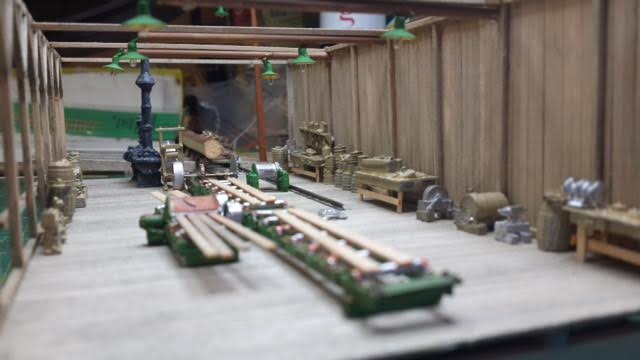
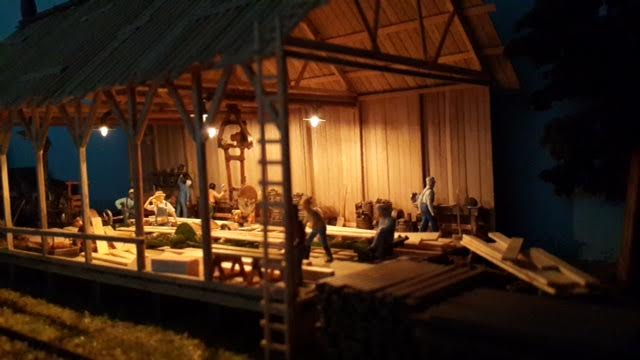
I have used 12 volt grain of wheat bulbs in Campbell Scale lamp shades for the interior lighting and run them at 6 volts from a power source under the layout to ensure long lasting lights.
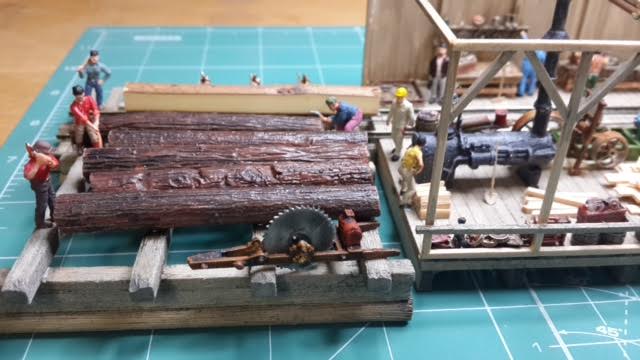
The fun part of the hobby is placing all the bits and pieces in the model.
I spray paint all the metal castings with a light sand color and when dry, I start picking out all the detail and color on them. When this is complete, I then do a black wash over all the parts and do a final dry brush using white acrylic paint from a tube.
Figures in (as close as you can get) positions are placed around the model to bring it to life. I have placed 15 figures around this model.
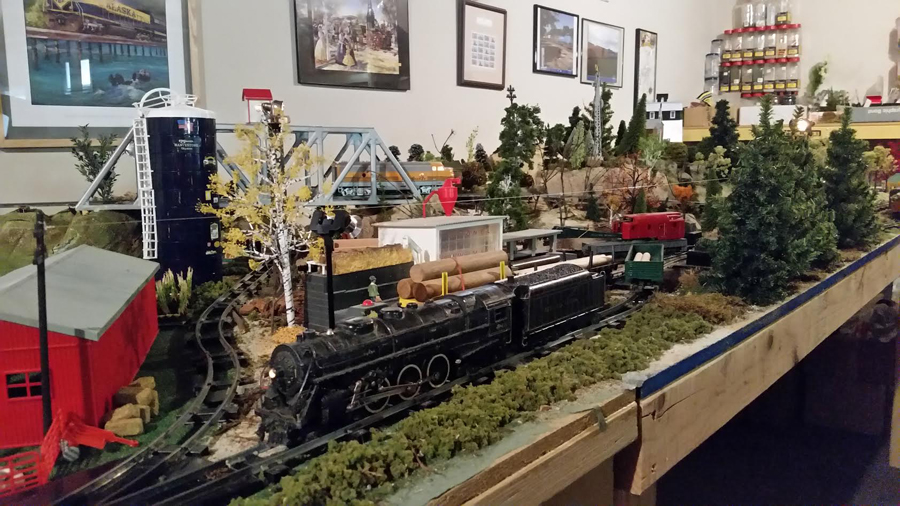
Two night shots of the sawmill in action.
Final photos of the sawmill on the layout ready to receive the first load of logs.
Total number of hours to build this model is 91. It is an HO Scale model used on my 3 foot narrow gauge layout named the Cascade Creek Railroad.
My next model to build is also a Fine Scale Miniatures kit of a logging repair shed which will be placed to the right of the sawmill above.
Till next time – keep having FUN.
Brian”
A huge thanks to Brian for sharing his model train sawmill. I’ve lost count of the wonderful ‘step by steps’ he’s done for us.
“In a previous post, I described by system for lighting buildings and hinted about my capacitive power supply, for snap switch control.
I’m using Atlas switches with their push-button controllers.
Looking back, I wish I had started out with the Tortoise switch machines, since they are more robust and electrical controls are simpler.
But at this point, I don’t want to deal with the hassle and work of converting all my switches.
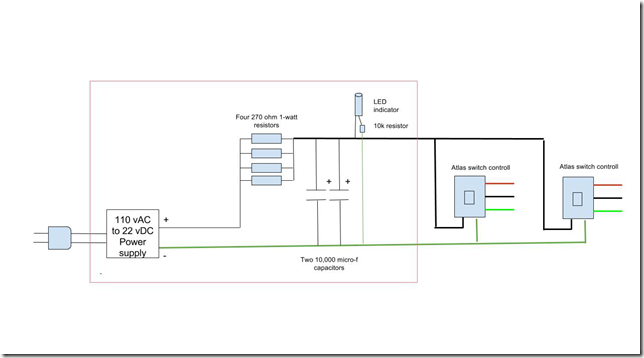
A wiring diagram of my capacitive switch power supply is shown below.
The power block on the left supplies 22 vDC from the house line. It’s from an old laptop I don’t use anymore.
The current flow in limited by four 270 ohm, 1-Watt, resistors wired in parallel to give the equivalent of a 68 ohm, 4-Watt, resistor.
These provide current into the two capacitors store the power to throw the switches. (Note that these are electrolytic capacitors that must be wired correctly as of polarity. If you reverse the connections, they might blow up, and would be totally destroyed.)
All these components can be obtained from suppliers (I got mine from Radio Shack which is pretty much gone).
The LED provides a power indicator. In operation the capacitors build up voltage to 22 v over a short couple of seconds.
When you push a button, the stored power quickly goes to the switch mechanism and the LED goes out.
When you release the button, the voltage again builds up and the LED lights.
Switch controls are connected to the red and green bus leads, one for each switch.
The red, black, and green leads go to a switch, wired as shown in the Atlas package the switches come in.
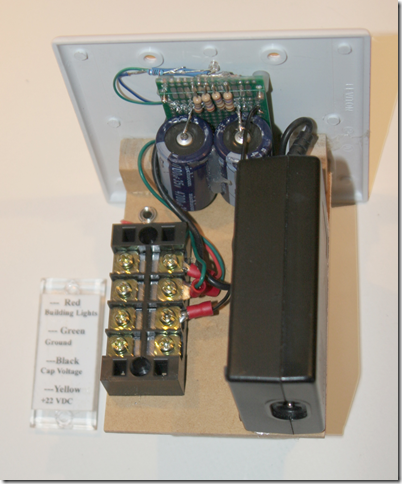
Everything inside the red box in the diagram above is shown below. The electronic parts are soldered onto a printed circuit board with many unconnected holes (from EBAY). Wires are routed and soldered between the components as needed.
The circuit board is held to the front plate with screws and spacers. Everything else is held together on a wooden board with hot glue which is then hot glued to the plate.
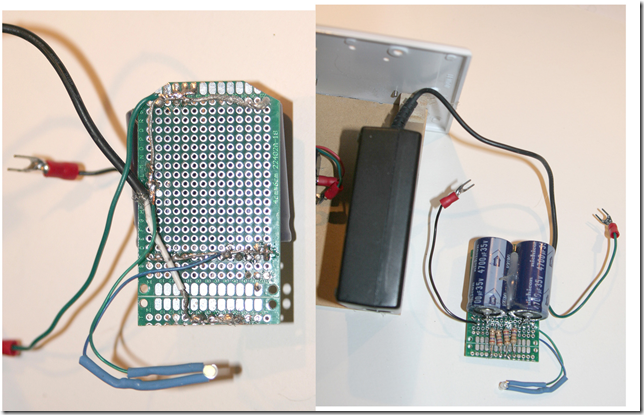
The front and back of the circuit board is shown below. Wiring is not critical, just make sure everything is connected correctly. The resistor for the LED is inside the blue shrink tubing.
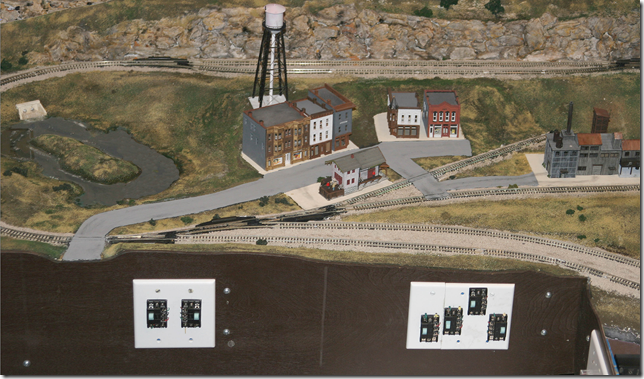
Below are the two control panels for the yard at Cassiusville (panel on the right) and the Inverashur passing siding (panel on the left, Inverashur siding behind the town).
Another switch on the right of the Cassiusville passing siding is out of the picture. Readers of my last blog will recognize the station and mine.
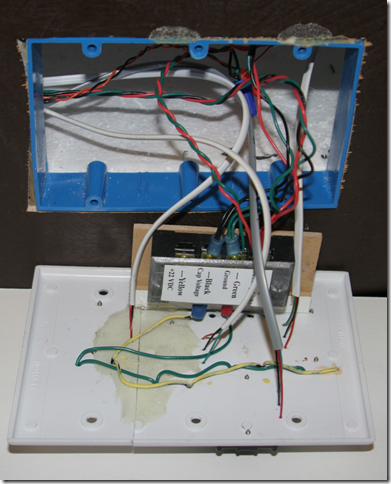
The back of the yard panel is shown below. They don’t make 3-gang cover plates, so I have to cut a 1-gang and a 2-gang and glue then together with epoxy.
I hope I have made everything clear. Write in your questions.
Dean”
A huge thanks to Dean for sharing he’s learnt on his Atlas model train switches- please do post you comments and questions below.
When growing up, my brother and I used to play with the trains which my father left me upon his passing.
There were a couple of engines and a few cars and some layout accessories.
In 1963 I laid out a small circular track enjoying it for a short time before having to box up the set due to lack of space.
But years later after moving into a house which provided room in the basement to design and build a nice layout, I recaptured my train enthusiasm in earnest.
The original layout I designed in that first house, was just a little smaller than the one I have today in a larger basement. When I finished building the tables I begin to design a track layout then the town and countryside layout.
Once I completed the track layout I found I needed to purchase more cars and engines plus a good deal of accessories, people, cars, buildings etc. I used eBay for some of the equipment, but then I joined the TCA and started going to their shows.
At those shows I purchased most of the equipment I have today, along with getting display layout ideas from various train enthusiasts. I gained valuable knowledge from their generously shared expertise.
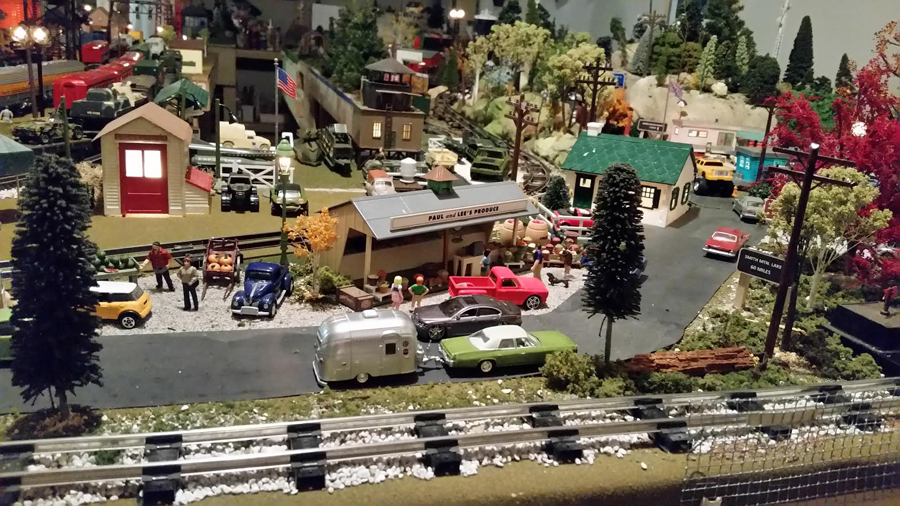
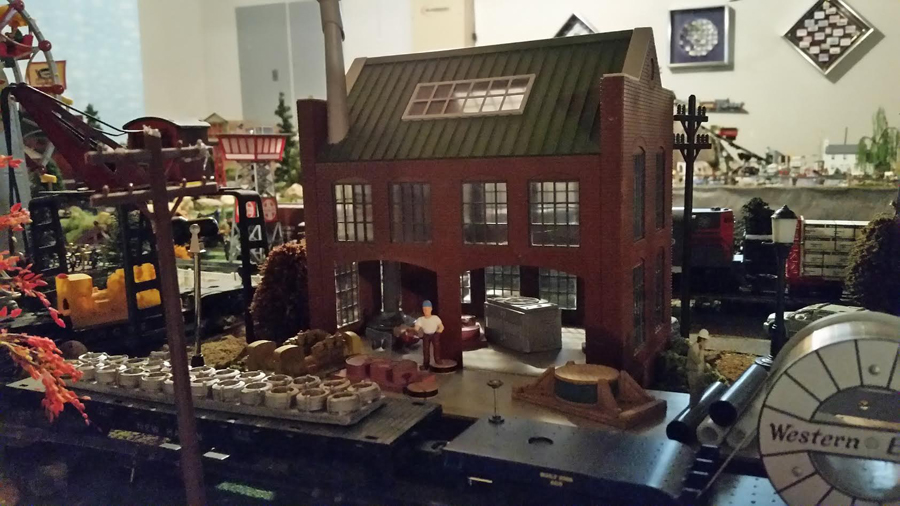
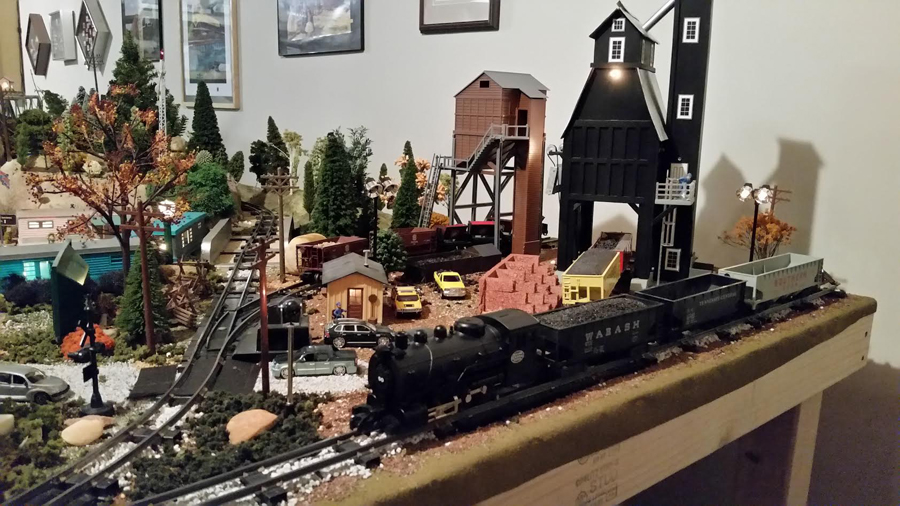
My first table design consisted of a city, coal yard, rock quarry, warehouse district, oil refinery area, cattle holding pen, farm area, an airport, in addition to a mountain & lake area. Over the next two years I developed my original layout adding a considerable number of trains (new and vintage) along with more landscape scenes.
In 2007 we moved to a new home which provided even more space to expand my layout. Taking down the old layout, piece by piece, not to mention all the grains of sand & gravel, and moving it to the new house presented a real challenge and one I would not wish to do again. Once moved I started to rebuild, expanding the layout at the same time.
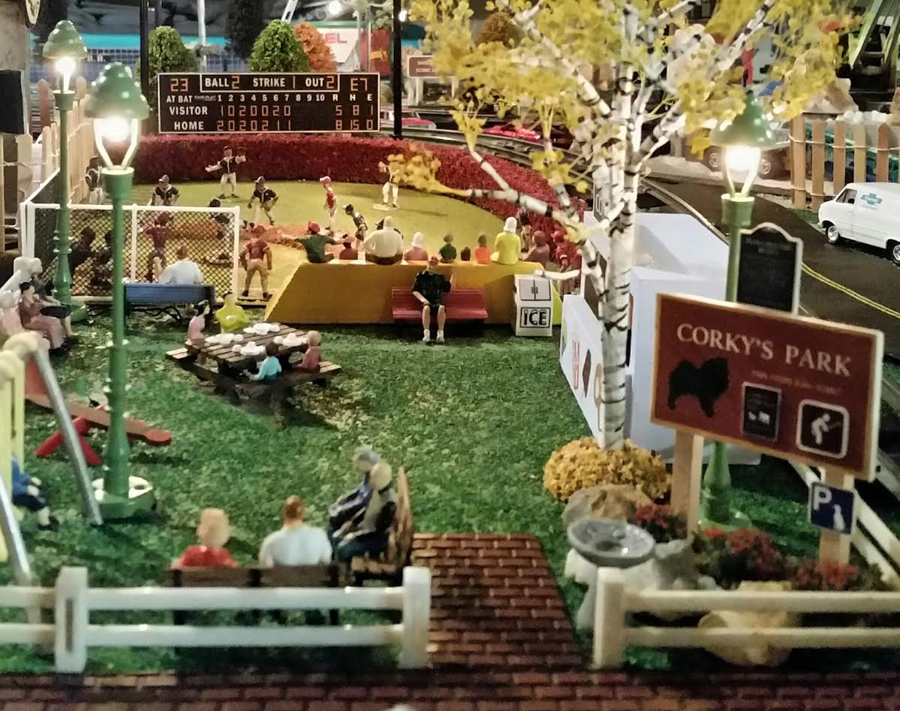
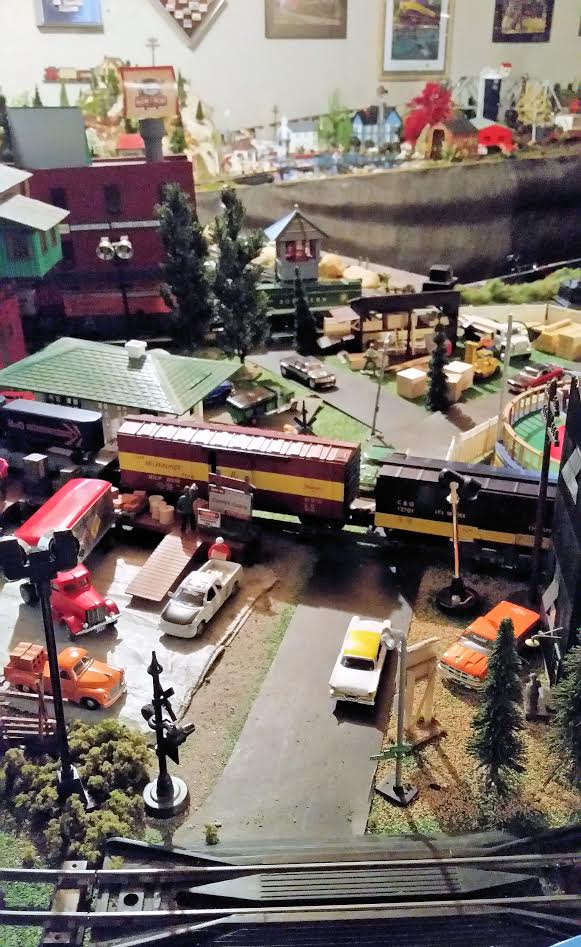
On the new layout I added new mountain ranges with a bridge connecting one peak to another peak over a road leading from town to lake & farm area through the mountains. I also added a train switching yard and a carnival. Along with several other displays…hobo area, trailer park, military base, auto repair shop and baseball field with a park attached. Hanging from the ceiling commercial and military aircraft fly over the layout.
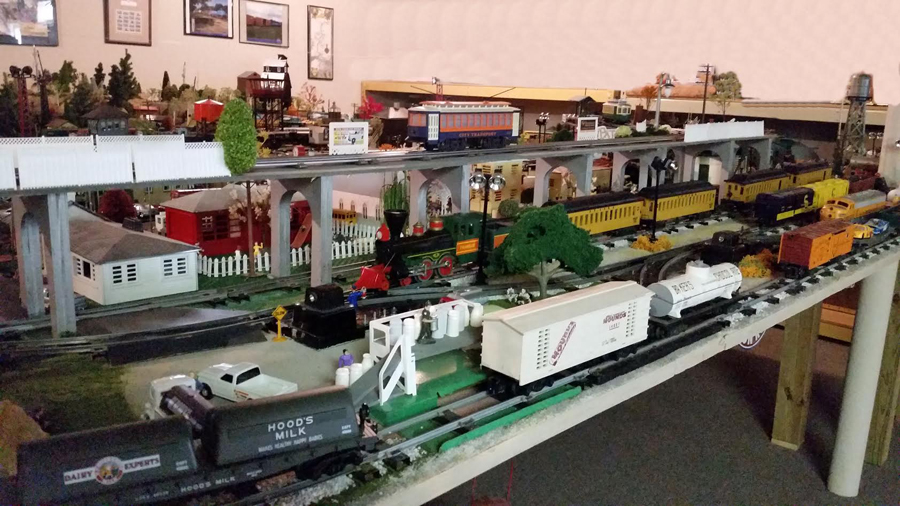
My most recent addition is a trolley running from one end of town to the other end of town. When I decided to add the trolley I wanted it to run down the middle of Main Street, however, that would require too many changes to the city structure.
After giving it some thought I decided to build the tracks over the city, similar to Chicago’s “L”. It worked out great, fits in very nicely and adds a different dimension to my layout. I am always looking for vintage and new pieces that will fit in with my layout, but space-wise I have been told by my wife that expansion is not feasible unless we get a bigger house. Hmmm.
I design my layouts by focusing on what I want on the tables and how it should flow, knowing what I want my layout to be but having no major design on paper or computer. I just looked at what space I had and started laying track then fit in the buildings, bridges, tunnels, roads, etc. From time to time I have changed some of the existing layout areas but mostly just enhancing the landscape and set-up. I enjoy being creative with my layout.
I am not a collector, just someone who was given a few treasured pieces of an S Scale train set; deciding to make it a hobby and it has grown from there. I have several pieces of American Flyer which date back to the 50’s, also inherited from my father.
Recently I joined the Washington & Old Dominion S Gaugers. I enjoy the camaraderie with its members during meetings and while doing train shows.
Ed”
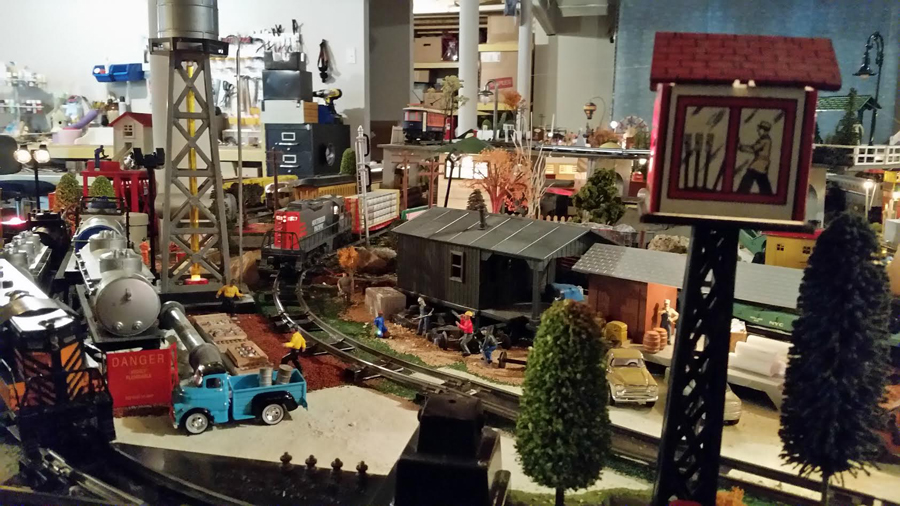
S scale layout:
Great stuff from Ed – bags and bags of character in that S scale layout. I loved the narrative too.
Now here’s an offer on some of the print out scenery – which can only mean one thing: another bonkers video from my good friend John.
It’s all HO scale, so if you want N scale, just reduce the print by 50%.
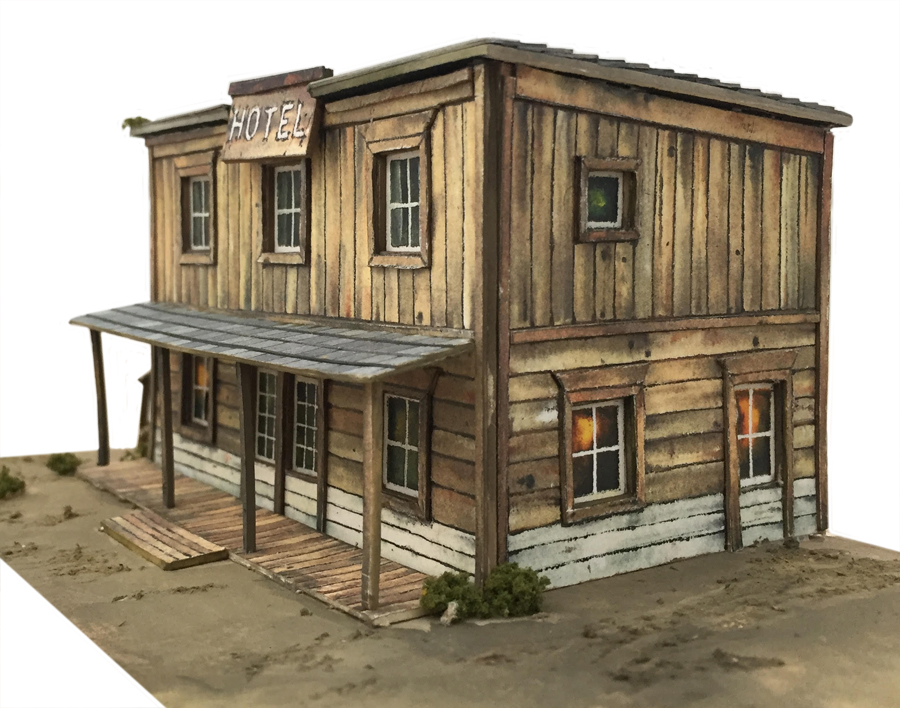
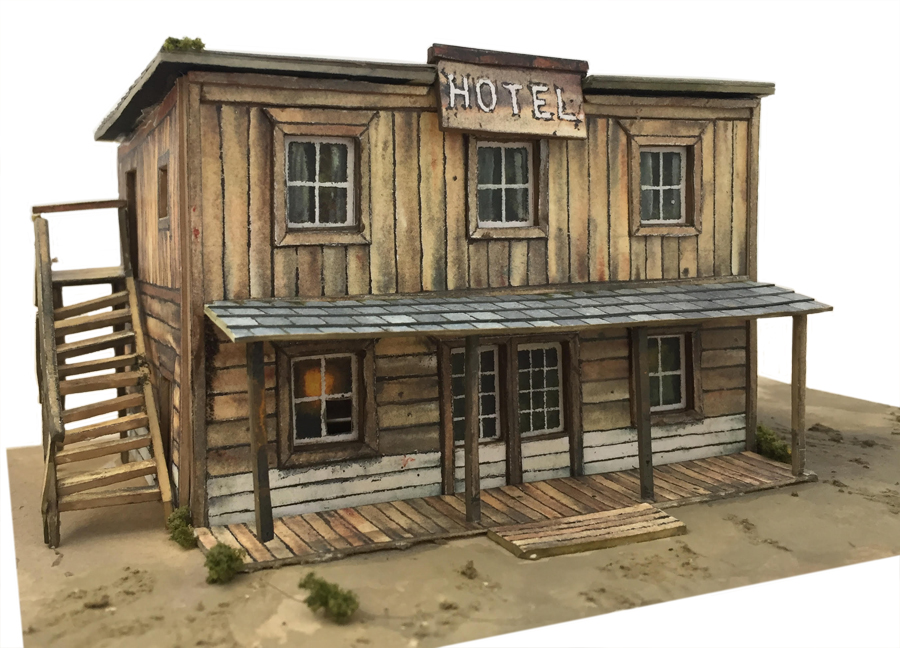
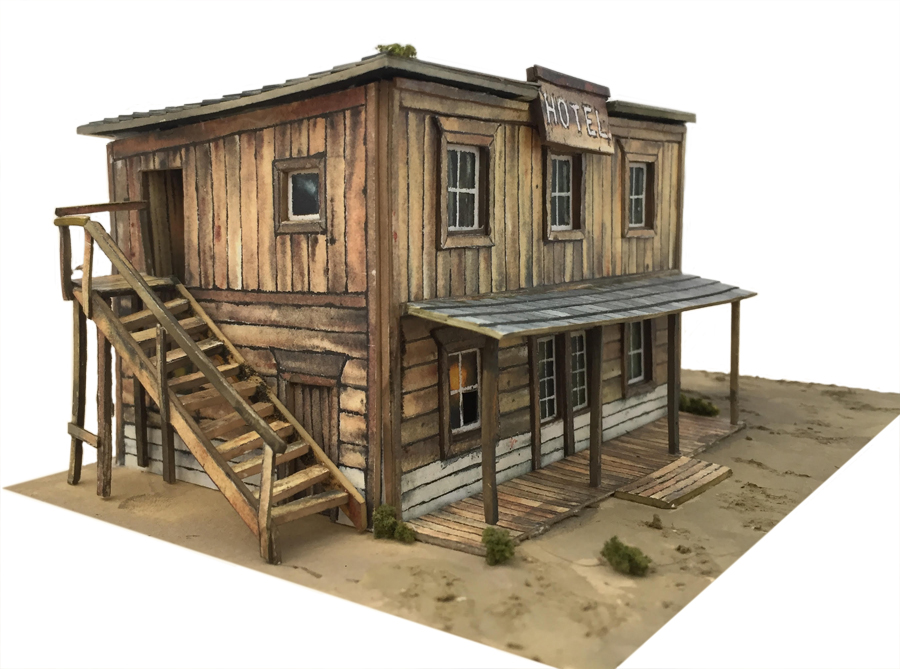
This bundle (it’s scenery that you print out and stick together, in case you didn’t know) is a old saloon / hotel, some wonderful fences and a set of patios too.
Here’s the saloon – or hotel – depending on what sign you stick on it (you get both with the print).
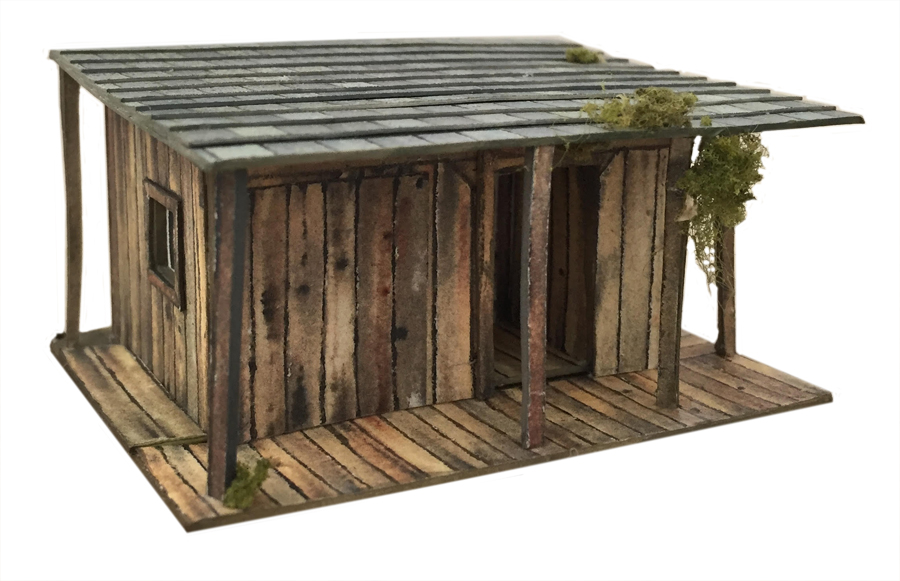
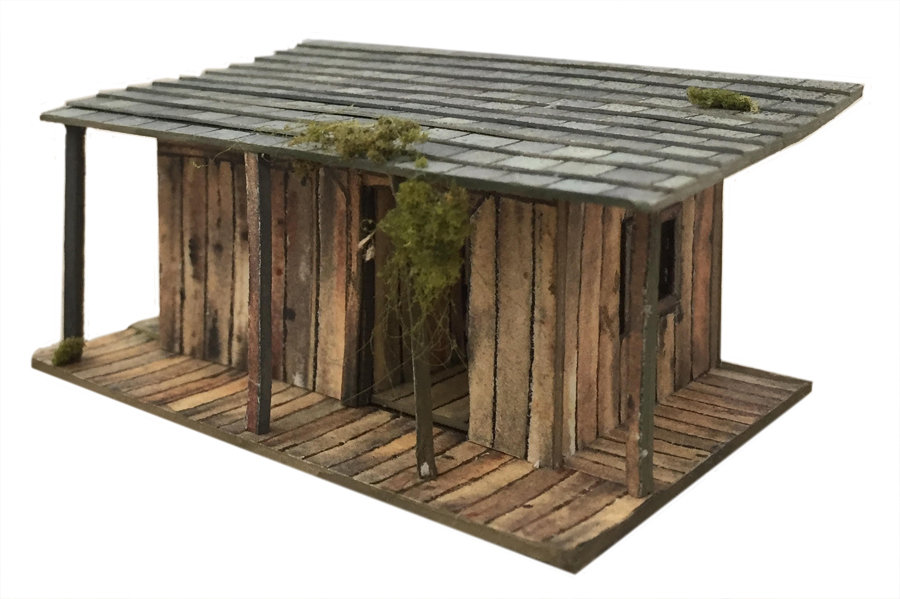
And if you’ve watched the video below, you’ll also see that John used the same print to make this little shed:
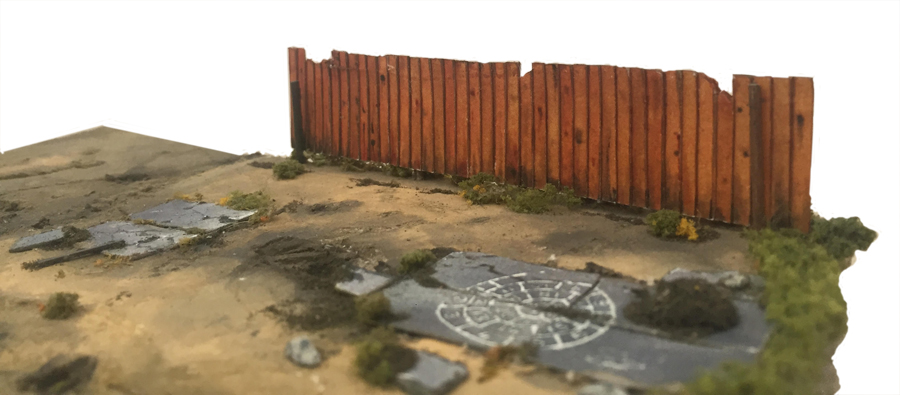
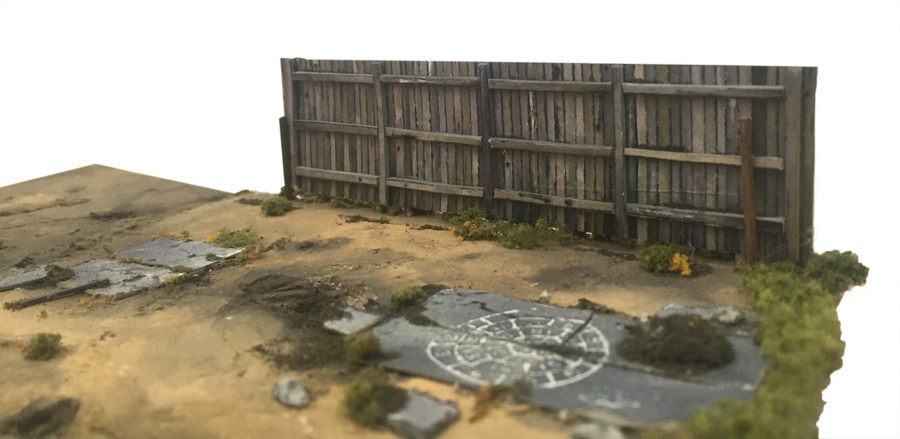
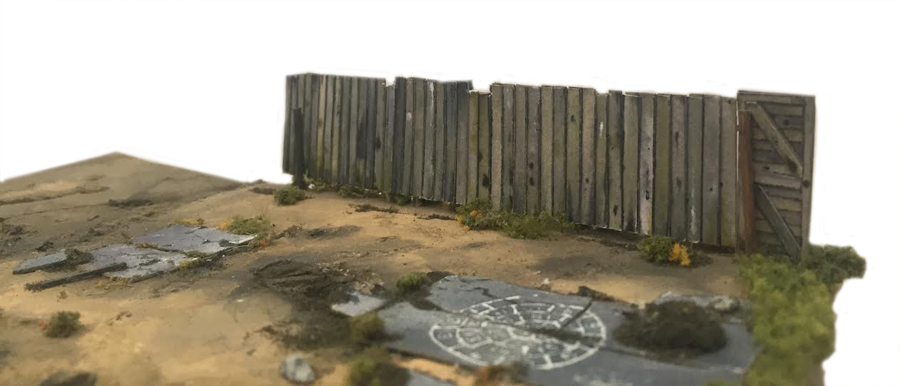
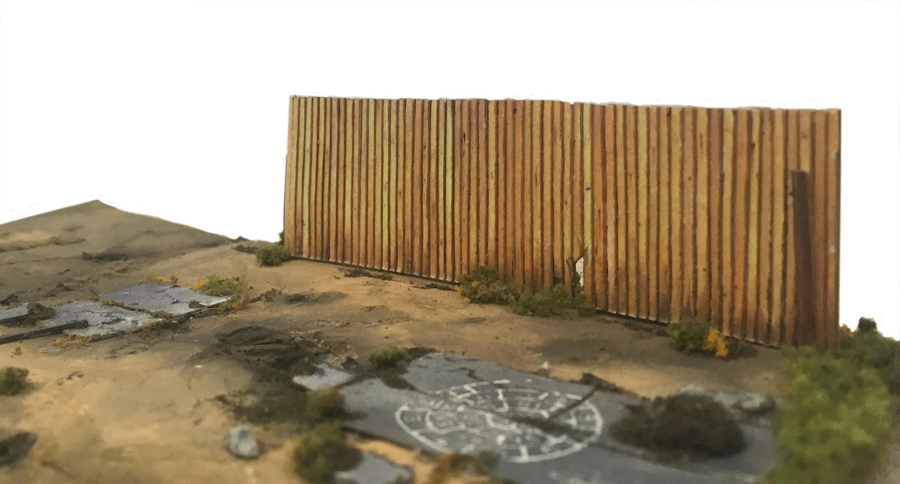
And here are the fences – here the pics only show a short length of them – but of course, you can print out as many as you like and make the fences as long as you like.
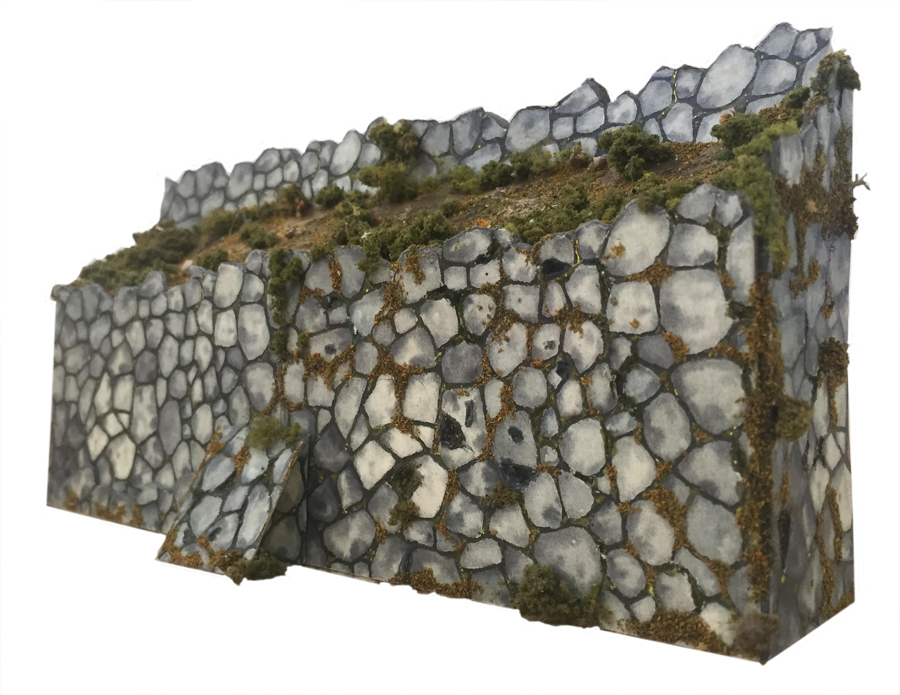
The patios are included in this set of prints too – but I didn’t take any pics – you’ll see them on the vid though. John also made a wall out of one of the patio prints too:
Here’s the vid:
As with all the printable buildings, they are in the store at full price, but right now, you can get all three for just $11.97 – that’s less than $4 each!
Just click here, or the button below, to buy them right now at the discount price, and save yourself $18. Course, I’m biased, but that’s not a bad saving at all.
That’s all this time folks.
A big thanks to Ed for sharing his S scale layout.