Eric’s been back in touch with a spot of N gauge british railway modelling:
“Hi Alastair.
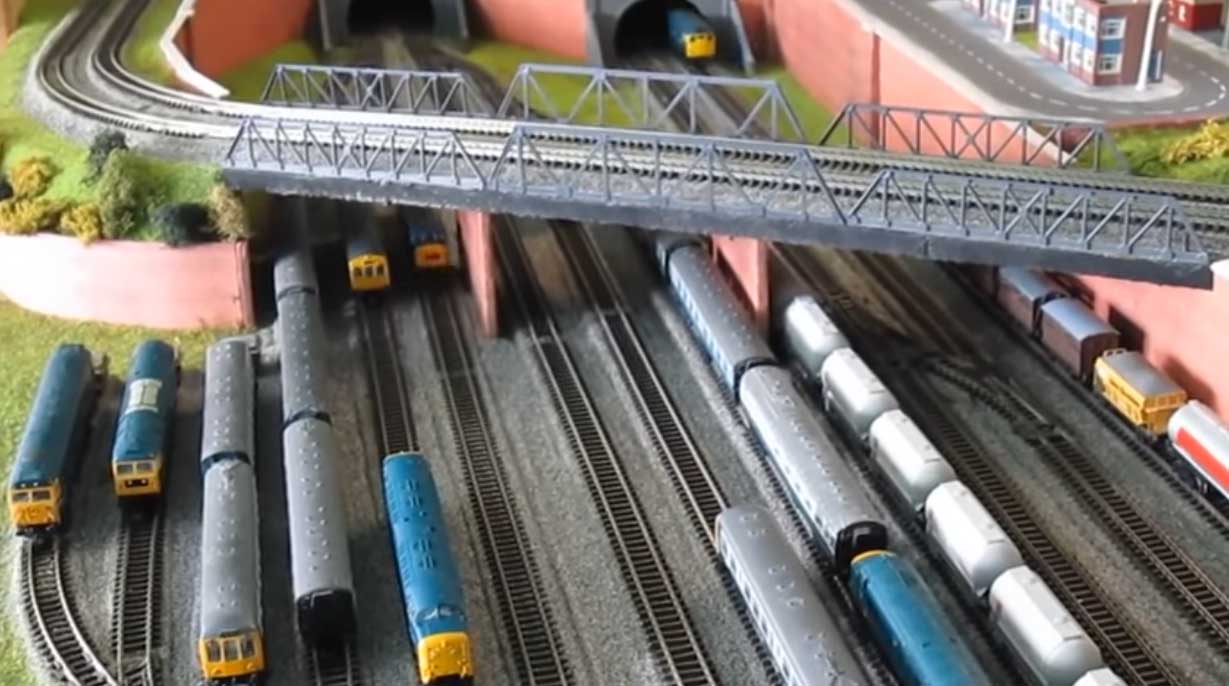
May I present my latest N gauge layout Wensdale New Town. (Specs at bottom)
Tore down my countryside layout around 5 months ago now and have been really busy. The track laying was done in around 1 month and working great so no worries there.
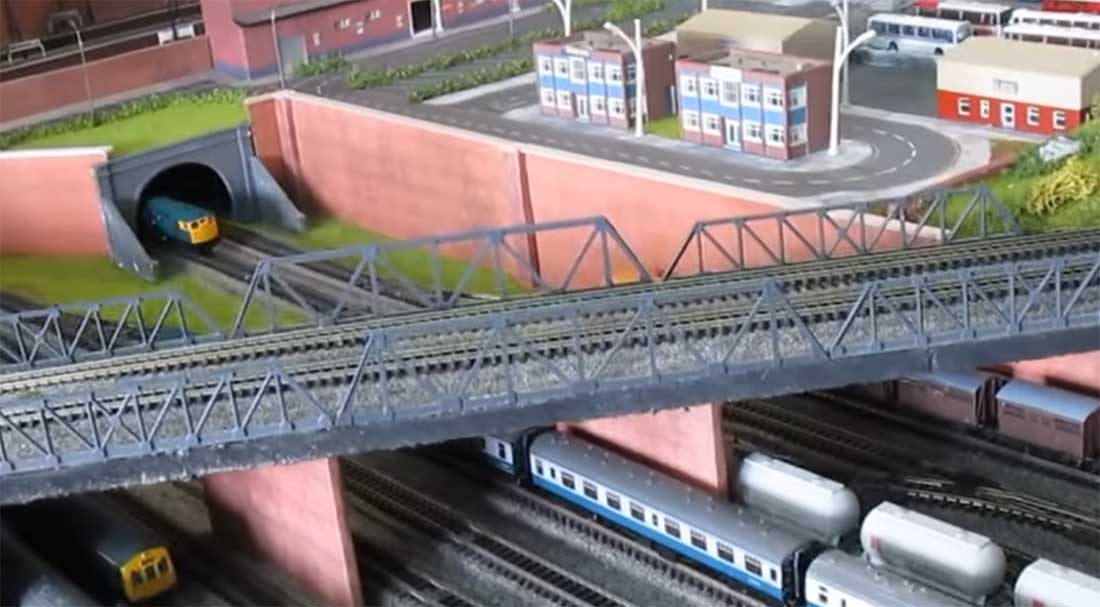
This time for my creation of my old (and favourite) layout of Wensdale, Here is where the messy hard work comes in, compared to the last time I now have two mainlines and two goods lines, now making 4 tracks instead of two. I have not used the helix as I have always in the past, just used ramps this time.
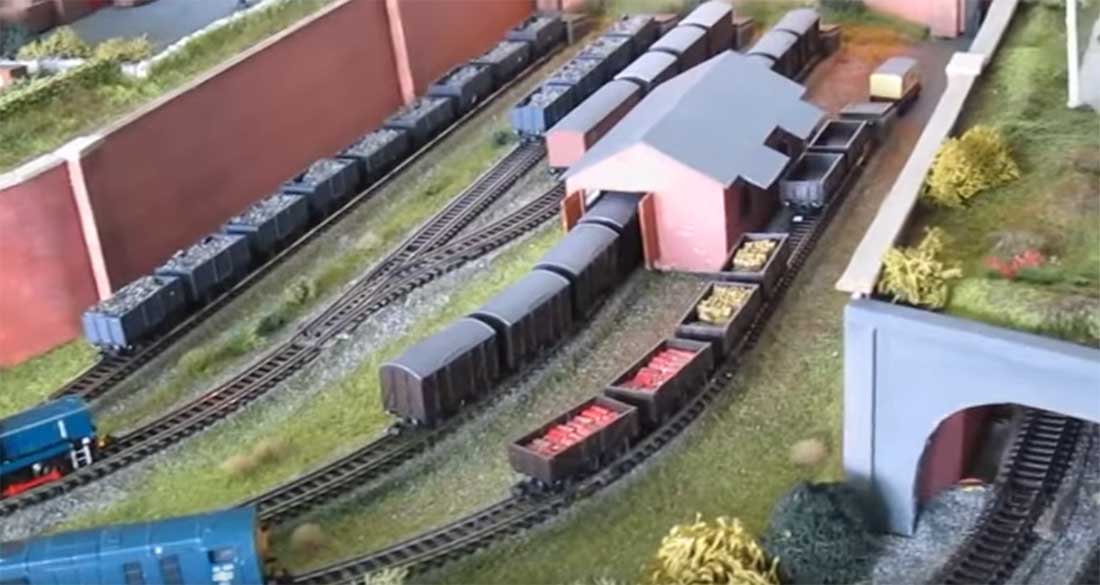
Well Wensdale was originally a quiet market type town but with having more tracks, I decided I needed to upgrade the town and surrounds to a more industrially orientated place. I have placed more emphasis on creating different backgrounds to set it in. To this point I have all areas of the layout more or less done with still a heck of a lot more to do.
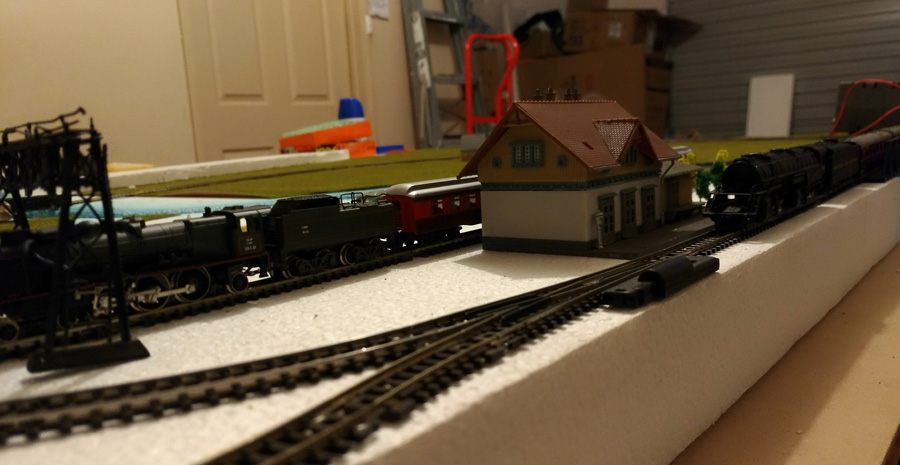
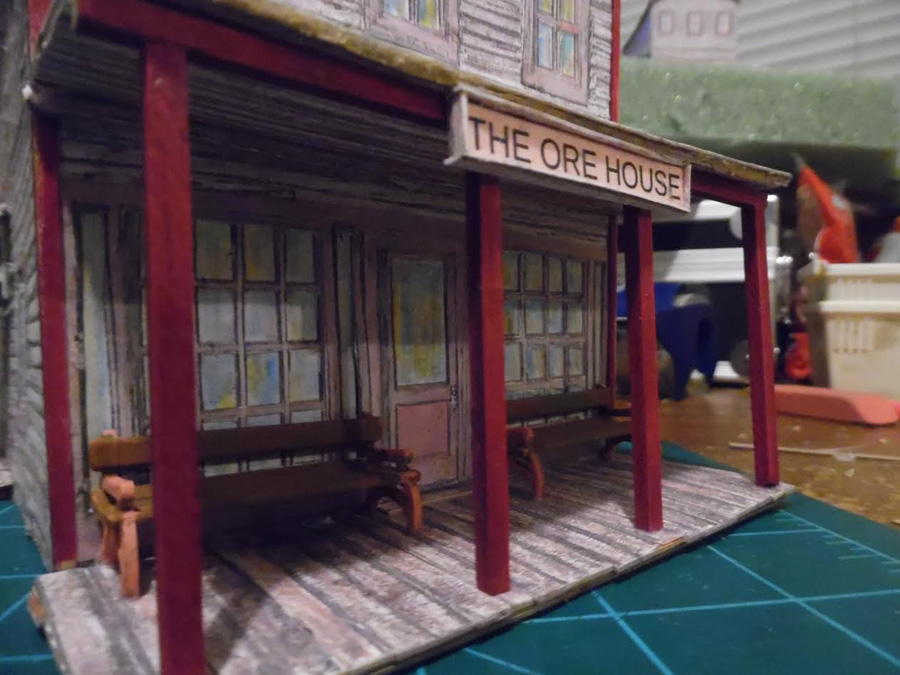
Also this time I have been experimenting with making my own balsa station with canopy, it’s not great but it passes rather than going for a new kit (and a lot cheaper I may add as it uses a few old kit parts). This took a while to do as it has it’s ticket office with staff inside and of course wiring in lights and all the rest, but quite pleased with results, the dome is made using plastic trellising some black card and clear plastic, apart from one portal my first go with balsa.
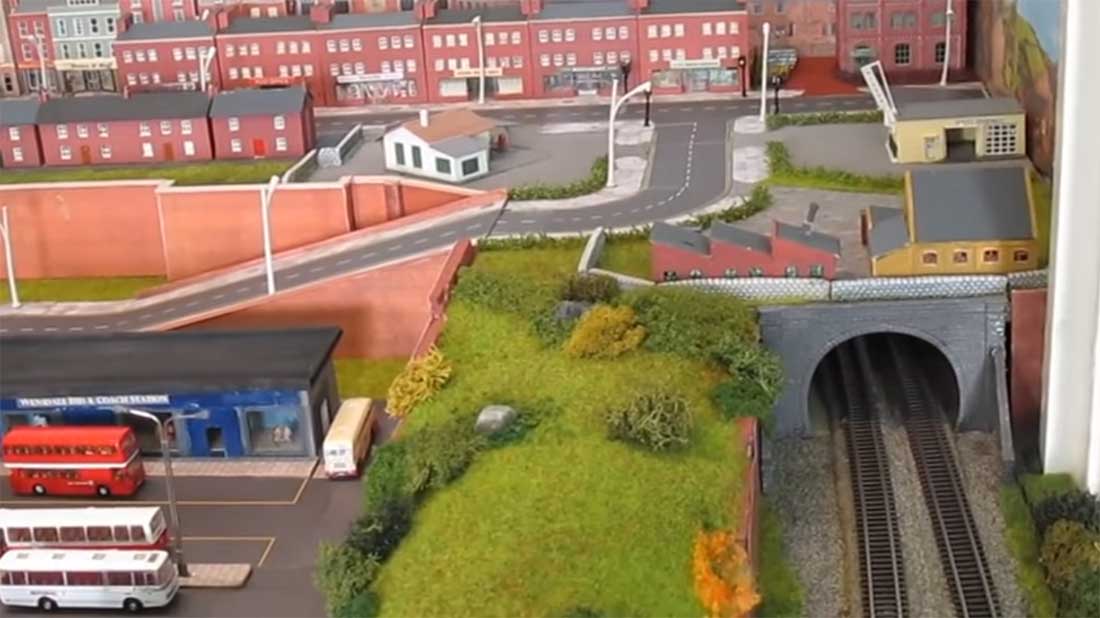
My second attempt was a small bus station that after the practice with the main station has turned out pretty well, it is very loosely based on the Pontefract bus station which has a similar appearance although the real one has doors front and back, I haven’t the space (or spare kit bits) for that.
The original backgrounds are Peco with added factory and housing glued on and these are turning out better than I hoped when I started and fit well with the surrounds.
A major job was converting my housing stock from country stone to town brick, a lot of fiddly painting and then a lot of new kits these also needed painting to match, with my awkward fingers it took quite a while, but thankfully now finished.
Note to the right of the layout the Burtons clothing factory background. I grew up with Burtons huge factory at the bottom of the street, even now I live within a mile of the place so in a way I have included a part of my own life in this layout. (See notes below for more details).
I have finished all the roads and pavements/ sidewalks on the layout, and mentioning the roads, none of the roads are bought, but designed on my computer and rather than having very narrow 40 mm roads I have more town like 60 mm roads complete with yellow lines, bus stops, parking zones and zebra crossings, ok cost a bit in ink cartridges but made as needed so much more user friendly, ok the curves aren’t brilliant but hey I never said they were the real thing or perfect.
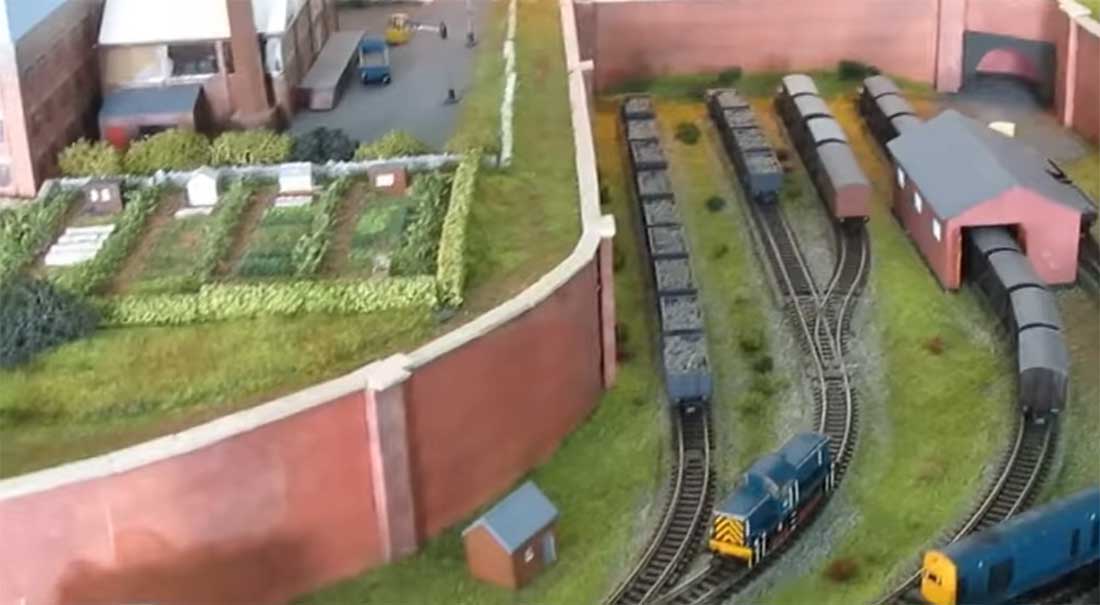
If anyone remembers my Newdale layout, on there I got quite a few compliments on the gardens at the cottages. Well this time I have extended these to make 9 allotments on spare ground. I buy the white plaster preformed tiles then instead of just painting them, I use scatter materials to bring them to life, of course this is also time consuming but it is worth it for the finished article.
Finally the lift out centre section over the hatch which has the station car parking space and bus station has been arranged.
The whole lot is DC operated and consists of over 150 lights (Yes they all work too). I am sure all modellers know how fiddly these are to wire up and the time it takes, two old controllers work the house lighting and another for the street lighting, this also means they can be fully regulated.
It actually surprises me how much is available online to help make a layout different and adds more realism when you dig deeper than the standard ware you get from the big suppliers. Look for the ones that do their own special items. That’s how I found the background extras, allotments etc, so get digging guys and gals and don’t forget Al’s page of card models.
Still tons to do but the basics are now in, lots of people, trees, shrubs and vehicles to go on yet but we’re coming along.
The video is a mix of running and showing off what has been done to date, I must admit it’s a bit jerky at times, lets put that down to old age J At the end it shows my main road along the back wall where the cinema is and the way I do all my wiring to removable boards on the layout of which there are many for easy access to tracks below.
One big plus is not one running problem during filming.
Now the things everyone likes to know.
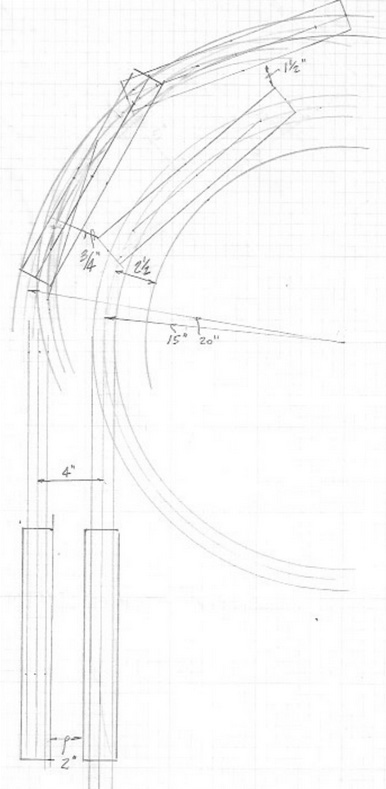
The baseboards at their widest measure approximately 90” * 72” (229cm*158cm) they are built using Sundeala (Compressed newsprint) model board and work round a built in wardrobe with a solid wall, plus an access hatch. The track I use is Peco Setrack and their flexi track. All is DC operated.
One thing I will mention again is that I do not plan a new layout by planning ahead on paper but do it in my head allowing me to alter things to fit as I go along, so don’t ask for a track plan please. J
In 1921 Burton began to develop the Hudson Road factory in Leeds which gradually became the biggest clothing factory in the world, employing 10,000 on the site and producing over 30,000 suits a week. It was the biggest employer in the city. Hudson Road is the heart of the Montague Burton empire. He chose Leeds because it was the centre of Britain’s textile industry and so he had access to skilled tailors and machinists.
Happy N gauge British railway modelling
Eric (Leeds) UK”
N gauge british railway modelling:
Latest ebay cheat sheet is here.
A big thanks to Eric. Yes, the video is a bit wobbly, but I still enjoyed it. Loved the narrative too. Eric’s last post is here.
That’s all for today folks.
Please do keep ’em coming.
And if today is the day you poke boredom in the eye, the Beginner’s Guide is here.
Best
Al
PS Latest ebay cheat sheet is here.
PPS More N scale layouts here if that’s your thing.