John’s added ot the Hornby train sets on the blog:
“Some 7 years after purchasing a Hornby OO gauge digital train set, ancilliary track and a range of buildings, modelling materials etc, I eventually got around to planning how I could constuct the type of layout I wanted to create.
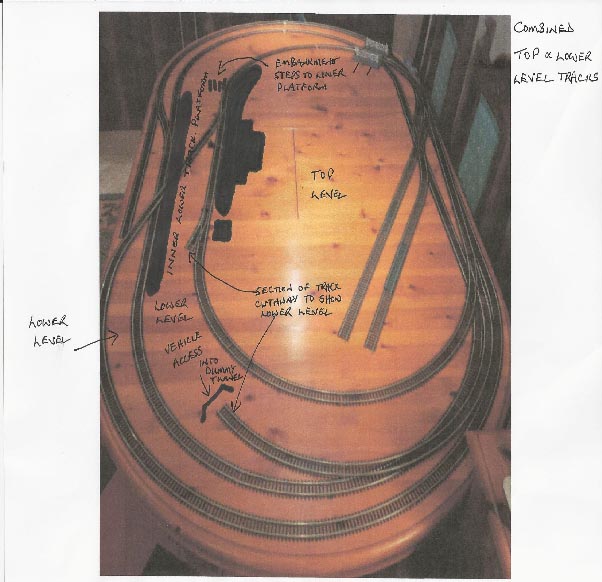
Having studied a number of existing layouts I started by using my dining table to see what could be achieved by working to a limited size.
Using 1st, 2nd and 3rd radius curved track I eventually constructed the layout shown on my dining room table.
The concept of having an upper and lower track layout provides the ability to run trains from the upper tracks to the lower tracks.
The eventual layout was modified to allow trains to travel to and from the upper and lower tracks in a forward direction and additional sidings were also added.
I then set about finding someone who had the expertese to build my layout in consultation with me, working as far as possible to the design and style I sought to achieve.
The person I eventually found was Steve Pilling who is based at Long Eaton in Derbyshire.
Steve has worked mainly with N and Z gauge layout construction in the past but he willingly took on my challenge to fit in a lot of track in the confinment of a 6’ 6” x 3’ 6” board.
The other requirement I gave Steve was the need to make the layout fully transportable!
This in fact is Steve’s speciality as he constructs the smaller scale sets within a case which can easily be shipped around the world to his various customers!
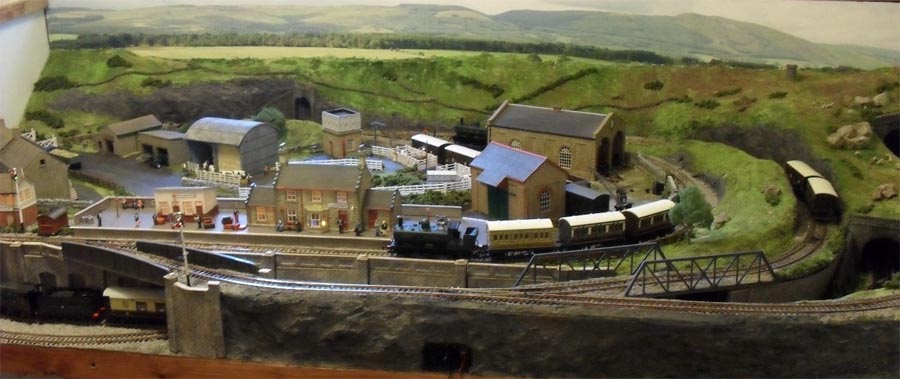
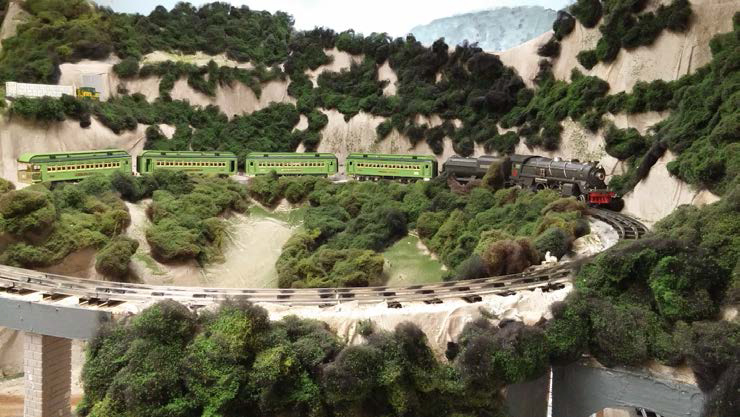
My Lammermuir layout is based loosely on the concept that the original idea of constructing the London to Edinburgh main east coast line passed through Haddington, as was originally proposed.
This would have taken the mainline close to the Lammermuir Hills to the south of Edinburgh. In reality, the east coast line did not pass through Haddington but took a route via Drem to the north.
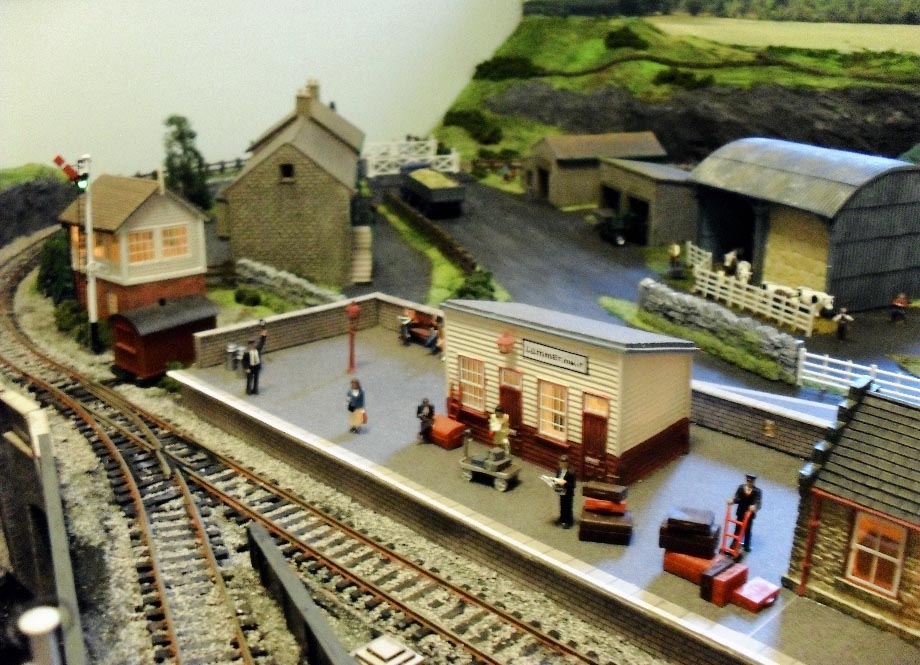
The distant views are of the Lammermuir Hills and the theme of the layout combines a rural station and livestock loading docks to transport cattle and sheep.
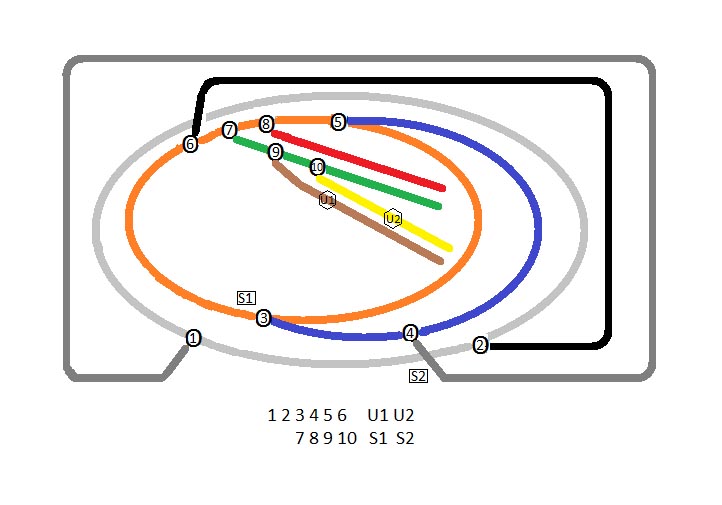
Track Circuit Plan
(The grey and black tracks are tunnel and lower track)
There are 10 electrically operated points, 2 electric uncoupler units and 2 electric signals
John”
“Hello Al, This the first time posting something, so I hope that it goes well.
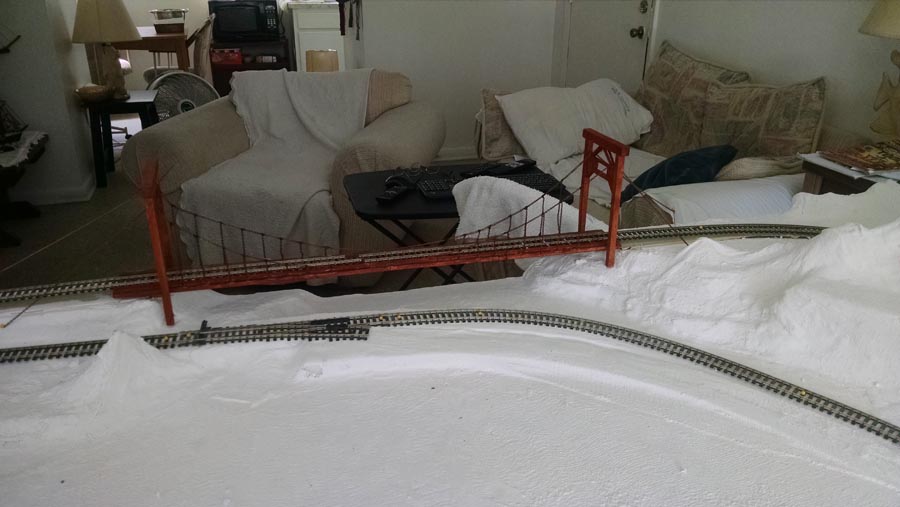
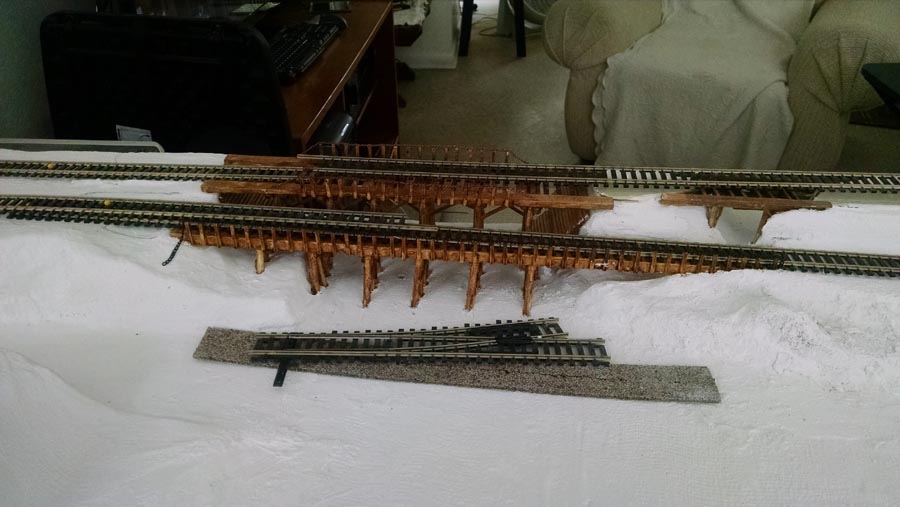
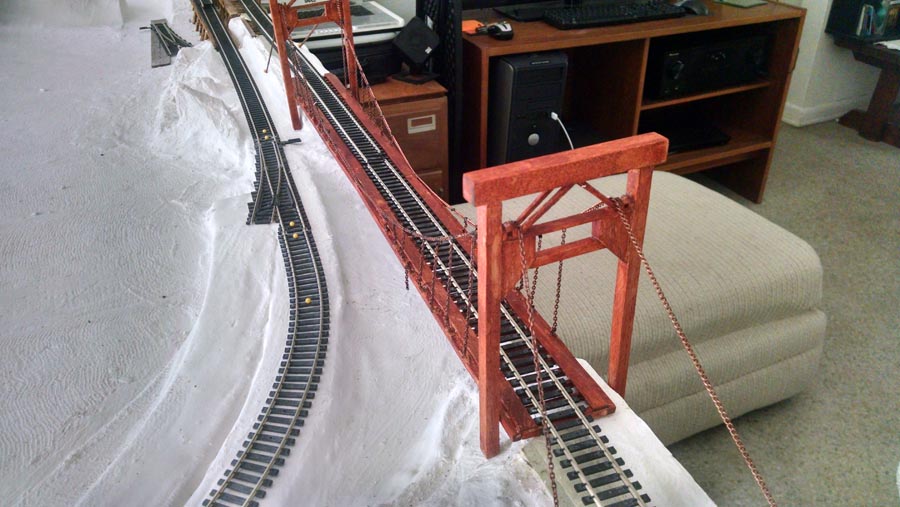
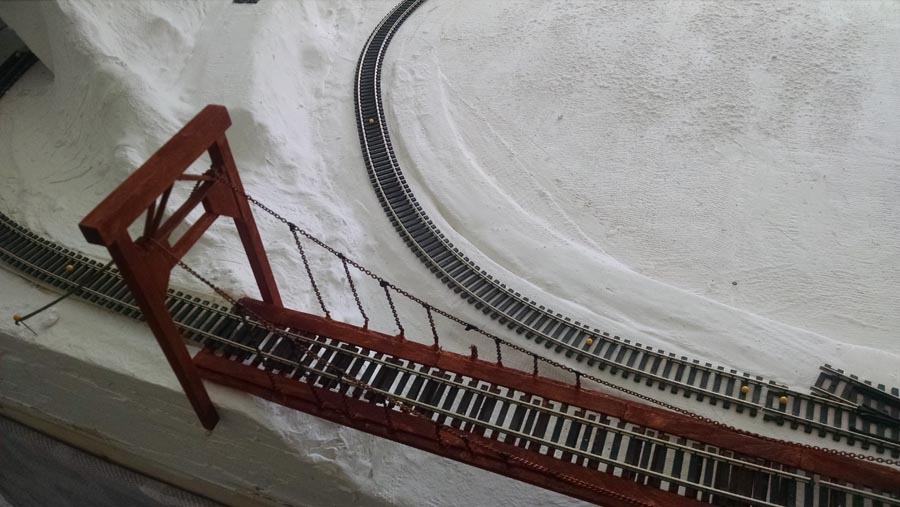
I am building an HO table in my apartment, after being away from the hobby for 30 years.
I am a disabled vet and don’t have much money so I look for any way to make things cheaper.
I have gone to wal-mart here and got small square and round wood stock and coffee stir sticks as well as wood matches (cut the heads off)I have made several bridges from them. I think I have about 10 dollars in all.
Please remember they are my first attempt in 30 years.
Alva”
I think Alva’s bridges are very impressive – and I can’t wait to see the next installment from John too.
That’s all this time. A big thanks to Ken for adding to the Hornby trains sets on the blog.
Kim’s been in touch with a very good way to make a model train rock wall:
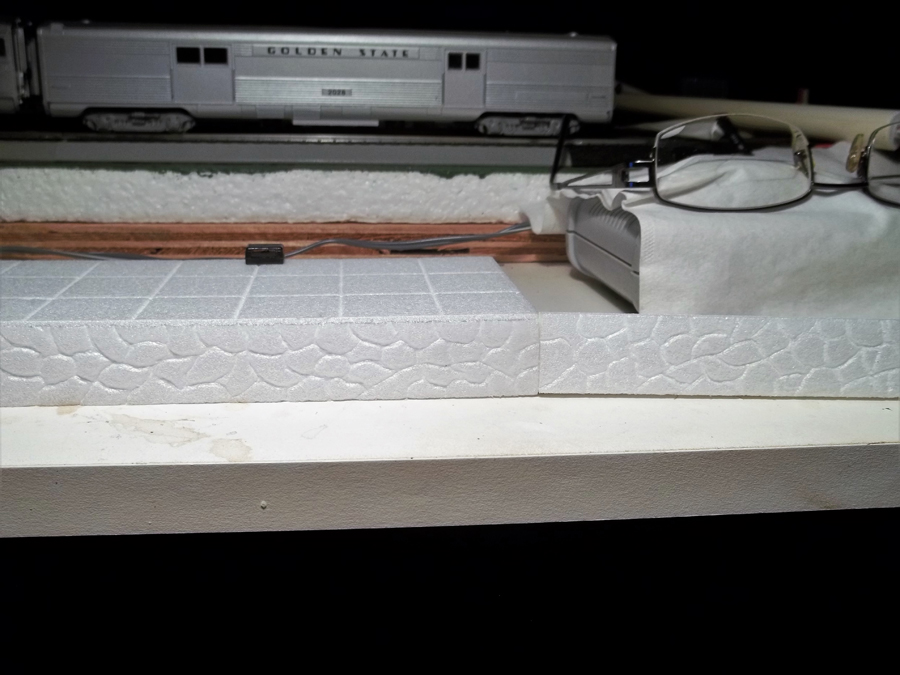
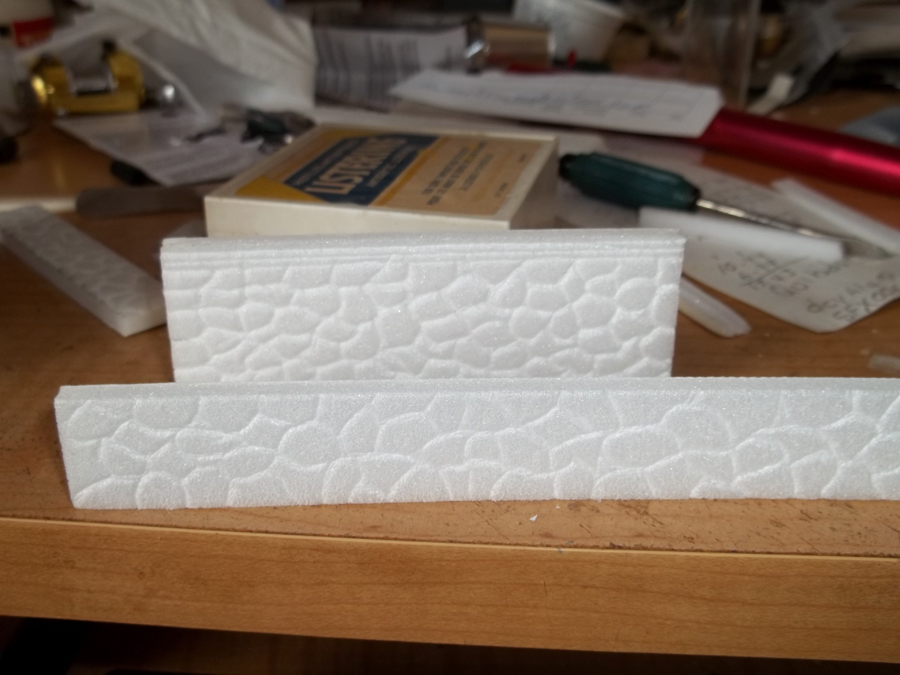
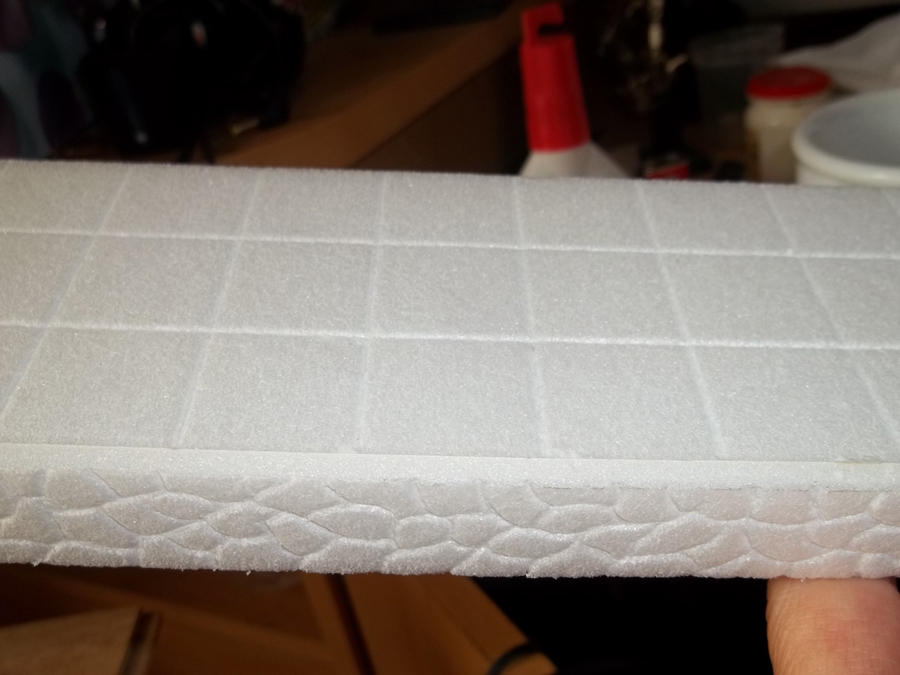
“Hi Al. Hope everyone is doing well. I have an idea for the group. Cheap easy and no mess. Crafter’s board. Come’s in 3 feet by 3 foot less than a 1/4 inch crafter’s board.
It has paper on both side’s so remove the paper on one side and us a dull pointy object to carve lines. You will figure out how much pressure to use and not to use when doing it. Doesn’t take much. This idea can save a lot of money to make wall’s, portal’s, homes.The third is stepping blocks. If you stand it up can use it for a retaining wall. then paint. I pay $1 for each board.
Kim”
“Hello,
I have been reading your posts for some time now! Great stuff! I always look forward to opening another email with some great ideas!
Not too long ago, myself and my 10 year old started a model (on a budget… I’ll say again, he’s a 10 yr old boy… haha). My hopes is that this will be a hobby that will (willingly) take time away from the play station, tablet, etc… Down the road, better investments will come. But for now, we have been working with minimals and lots of items from ebay! Still, no cheap….
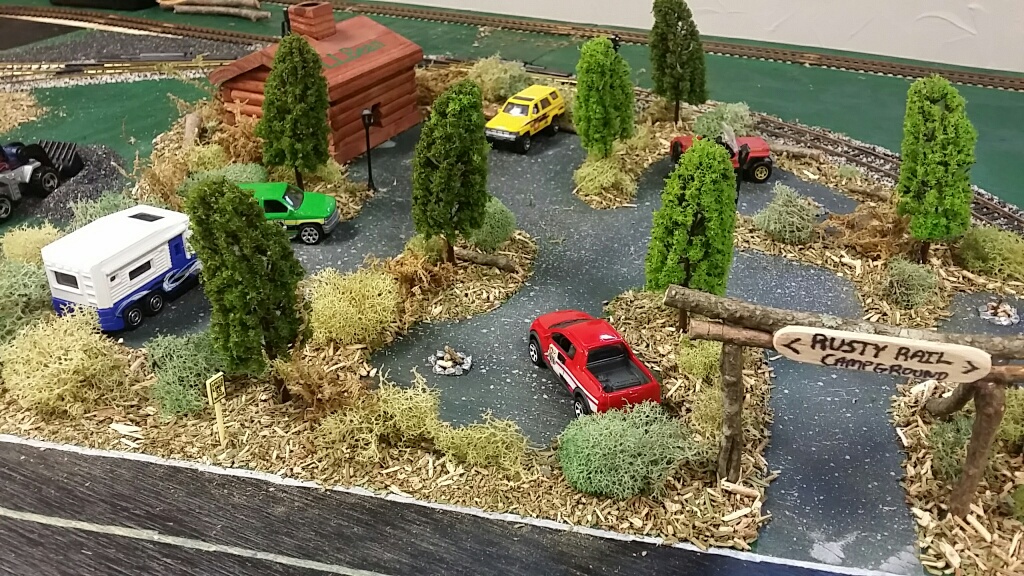
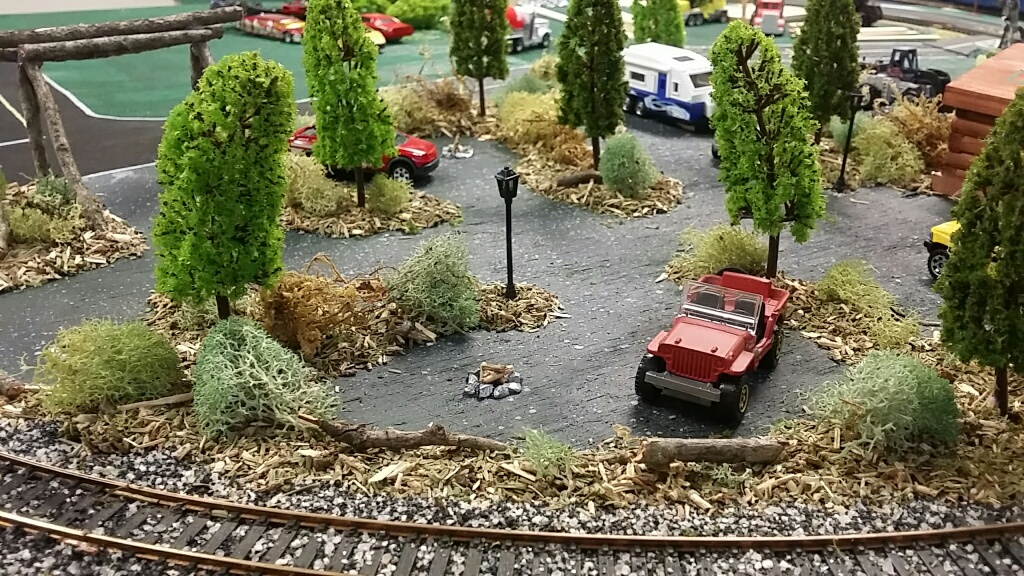
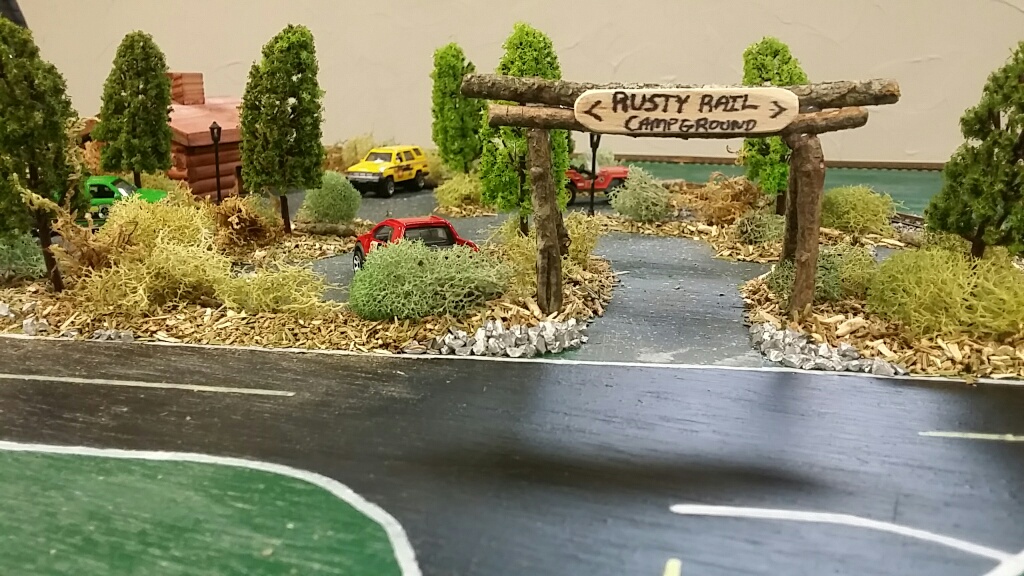
So last night, he approached me and wanted to use his matchbox cars on the set. No problem! Whatever it takes to keep him entertained with the start of a great hobby, right?! But, he wanted to focus some senery around a matchbox that he has with a tow behind camper… “We need a campground!”
So it began! Take a look at the photos! (Keep in mind, the “log cabin” is temporary…)
He is my question…. I have looking for camping type scenery. I haven’t found much for good prices. We are currently establishing wired track switches, buss wires, streetlights, etc… So buying little plastic tents just isn’t in the cards right now. However, I have seen a printable paper template for camping tents that are made from paper! I have not been able to find a source for this template… But, I am looking for ideas to sweeten this little spot within reason… thoughts?
Regards,
Will”
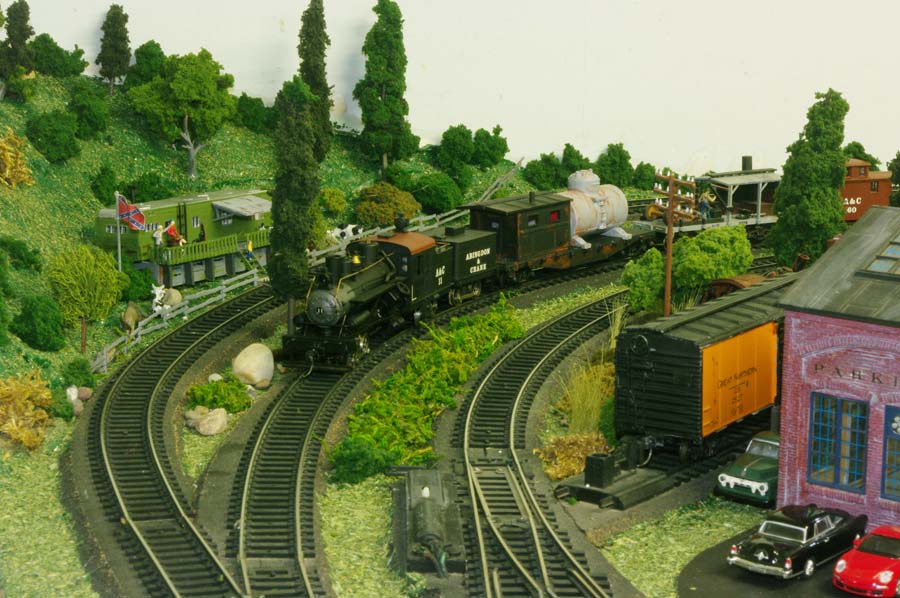
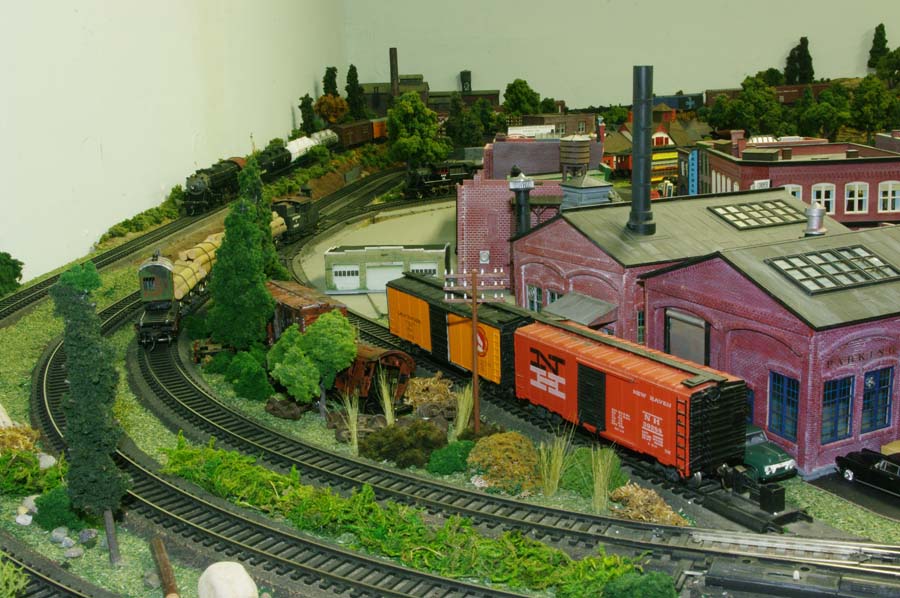
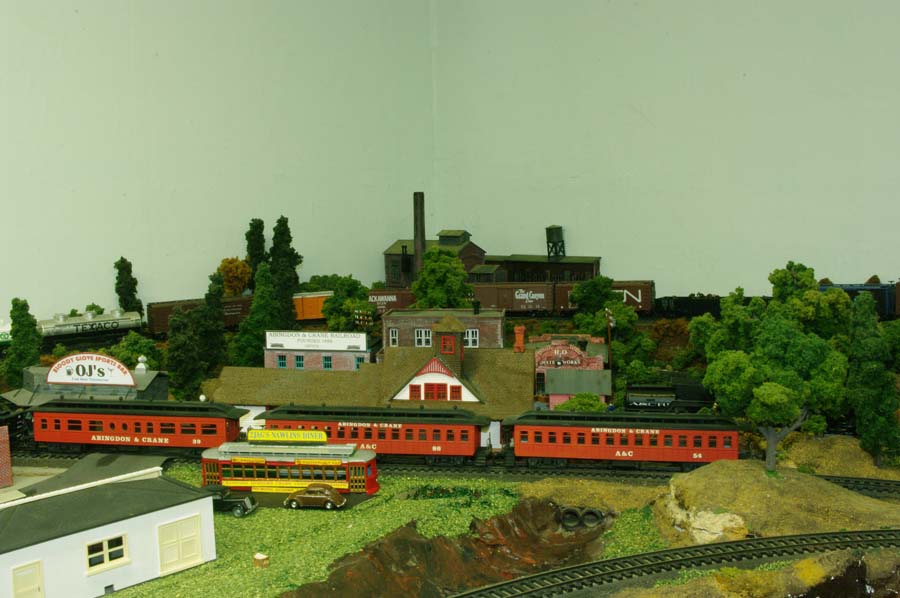
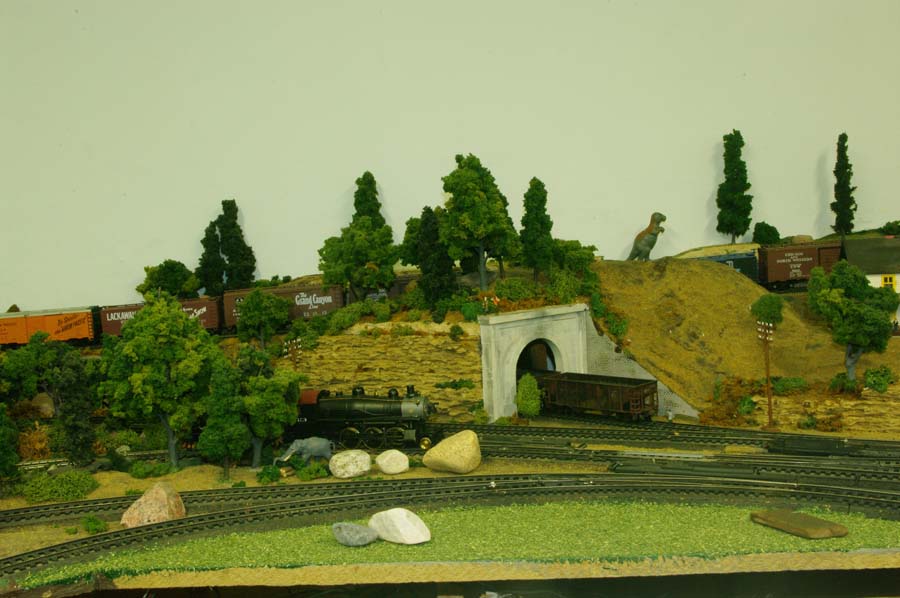
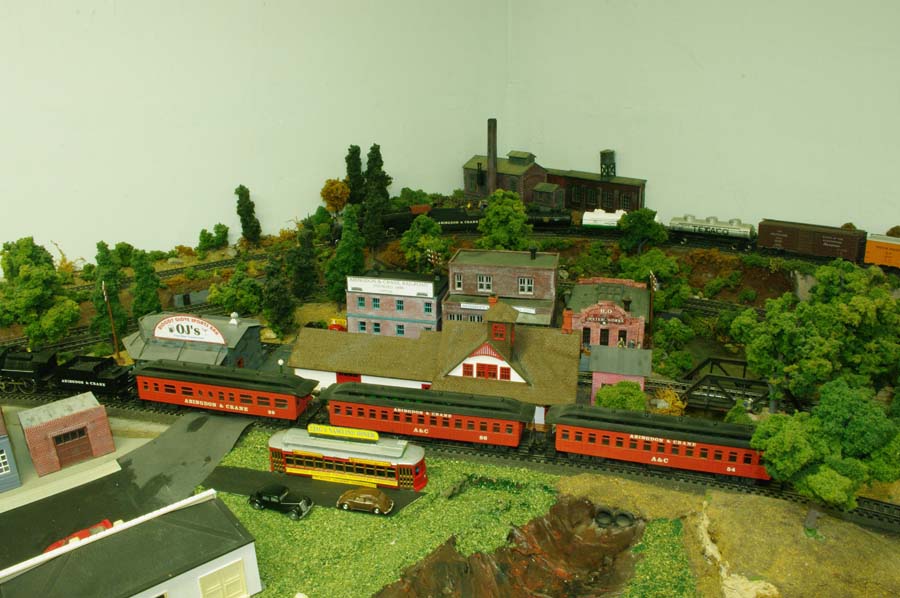
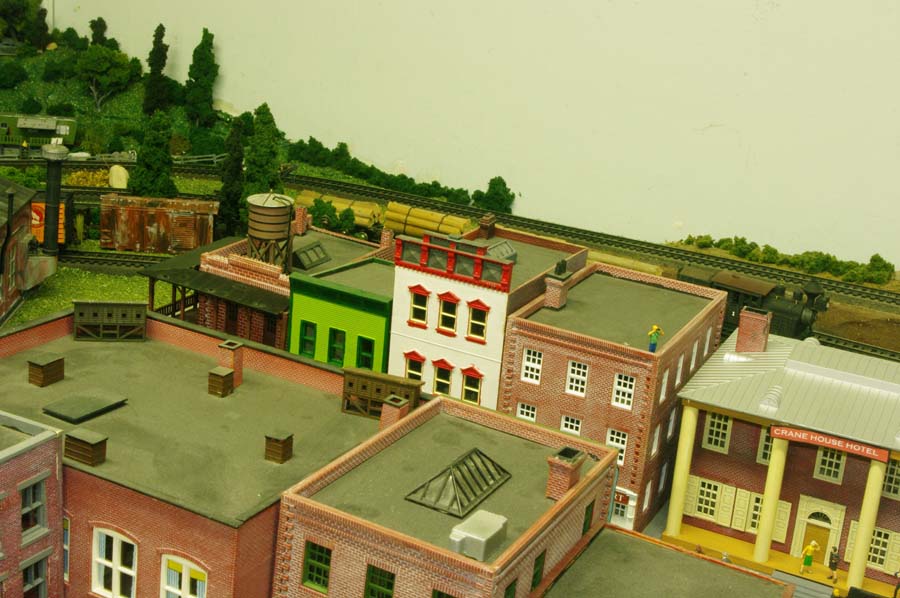
“The second edition of A&CRR pictures features Abingdon, Pennsylvania, just across the state line from Crane, NY. Parts of Abingdon are very much unfinished, leaving me with something to do.
Abingdon’s major industries are the Johnson Brewing Co., with a kit building and a smaller scratch-built, and a small steam-powered sawmill. There is also a scratch-built pump jack pulling up that rich Pennsylvania crude. The Phineas P. Gage (google it) School of Mine Engineering prepares young men for a rewarding career.
Some day the farm way in the back will look like a farm, perhaps with a small landing area for an Autogyro. The hinged bridge allows benddown-free access and is built from an article in Model Railroader from the 1980’si
L. Johnson, President”
And lastly, Eric has been in touch again. You’ll remember from a few posts ago, he’s rebuilding his layout. Here he shows the trains running before he gets busy on the scenery.
A huge thank you to everyone. I loved Larry’s second installment and I hope you did too.
If today’s post hasn’t got you inspired, I don’t know what will – other than the beginners guide.
One last thing. I keep getting mails asking for ‘more American’ layouts. Well, folks, it’s all very simple. You send ’em in, and I post ’em. So it’s up to you…
John’s been in touch with how his Lionel Big Brute saved the day on his show layout:
“You asked for more standard gauge material. As I build one of these layouts a year for the club’s annual show, I have numerous photos.
The last set was of a layout which has been under construction for some time. It is permanent and thus is constructed with care and attention to detail.
The following photographs are of layout building at the extreme opposite. The club display is built each year starting with blank tables in three weeks.
In that time we must build a display which is worth seeing and which works. Thus, we use the quick and dirty method. We also try to limit the mess we will need to clean up after the show, thus, details like ballast are out.
Now, as I reported last time, a friend who collected antique Standard Gauge died last year. As he failed over the preceding few years, I knew that his collection would not long be available for the shows. I purchased replacements, but knock offs with more recent electronics. A shadow of the quality of the antiques, the only good feature is worm drive which keeps them from running away down hill.
Due to problems getting up hills during an earlier show I added two locomotives between shows to solve that problem, one a 39 lb. Lionel Brute.
One of these had been produced in the 1920’s but Joshua Lionel Cowen, the founder of the company, examining the prototype determined that a locomotive that heavy and big was not a toy. So the prototype sat in the show room in New York until it closed.
Now due to a market made up mostly of old men like me, this monster is being produced. It is roughly based upon The Milwaukee Road’s Class EP-2 bi-polar electric locomotives, the equivalent of rocket science in the mid 1920’s.
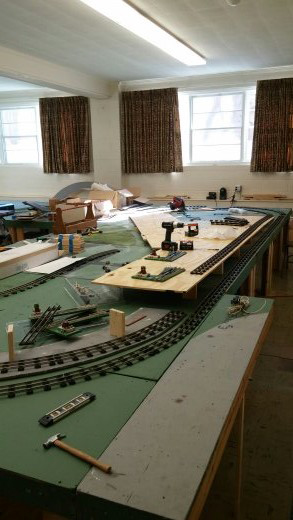
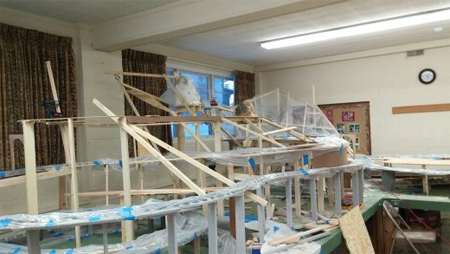
So the first two photos are of the first day of construction. The club members had unloaded the tables from trailers and set them up in a large L. This was to be shared half for Standard Gauge and half for subway models and O gauge tin plate.
My task was to build a loop around the short end of the L for one train to run and to build a dog bone, a single track between the three reverse loops at the bottom of the hill, holding tracks, thence up three levels to a top loop, for a second train.
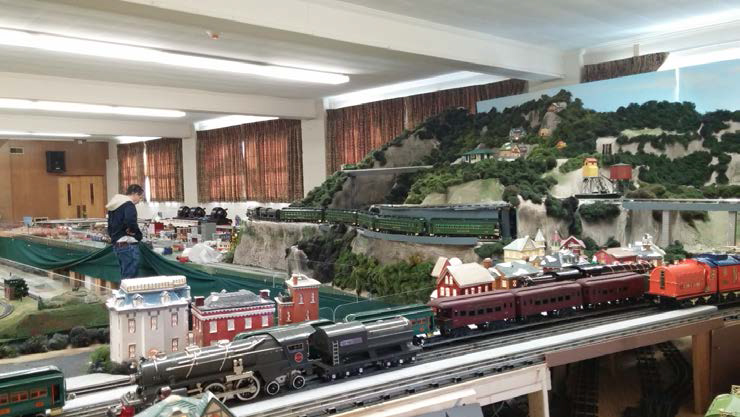
A passenger terminal and city occupied the short end of the L and the mountain was to occupy the portion of the long end of the L allocated to Standard gauge.
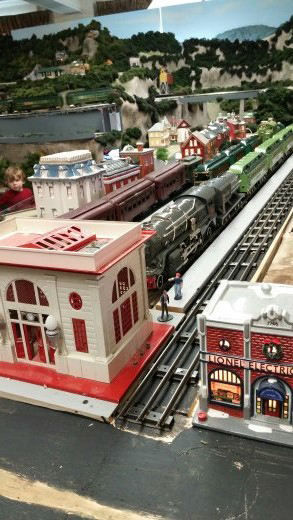
The end result was two trains running at all times and others on display in the passenger terminal. Lighted ceramic buildings add are not to scale, but these are toys. Few if any notice any flaws.
Day one a few hours after the tables were set up. The table work for the three lower loops is almost in place. The loops are on the table only at the extreme low end of the grade. The problem is to get high enough to clear at a point where the top of the rail is already two inches above the deck. That requires a serpentine route to add distance.
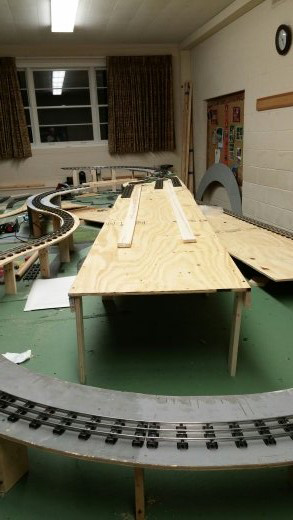
This this the end of the first day. The Serpentine line is in place and there is clearance for all but the extended pantograph of the Bruit. That was simply removed, no one noticed.
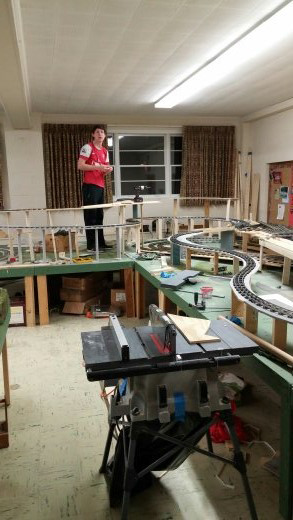
By the end of the first Monday, two long days and one evening the table work had reached the third level with the track following close behind. From comparison with one of my assistants you get some idea of how high that is. You can see the three lower loops. He is standing by the incomplete table work for the upper loop.
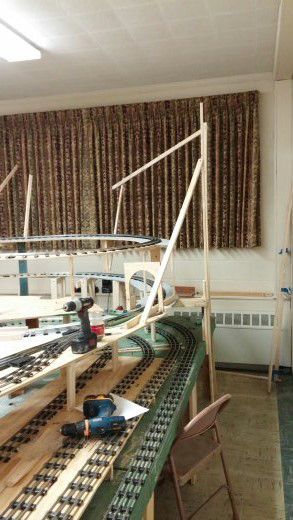
Toward the end of the first week, the track in place, the first structure of the scenery goes up. As you can see, this is cheap furring strips and 1x3s, dictated by the fact that this will all be in a dumpster within six weeks.
As I work full time, most of this was done weekends and at night, But each year I do take two days off to get this done on time. Here you can see the partially in placed frame for the mountain and at the far end window screening is already in place. The mountain’s terrane is made with good quality paper towels dipped in patching plaster, mixed to about the consistency of latex paint, laid over this window screening.
Lionel Big Brute:
A paint brush is used to smooth out the plaster and to try to hide the edges and the designs pressed into the towels. Additional plaster is painted over this layer just to fill bare spots. On steep areas, cliffs, plaster is painted onto the wire a and then paper towel is pressed into the wet plaster. When that sets plaster is then painted onto the towel.
If a towel starts to slide down the hill, placing a dry towel on it connecting it to a stable piece above will stop the slide. Both techniques avoid landslides during construction. On a permanent layout there would be more structural support and several layers of plaster would be painted over the initial layer. The final layer would be much stiffer and is applied with a small towel which is also used to carve rock formations on cliffs and in cuts. Patching plaster is a must, plaster of Paris will set much too fast and a second layer would set nearly instantly. Plaster is dictated for a project of this size as it is cheap.
If we used products found in hobby shops the cost would be prohibitive. This display used about 90 lbs. of dry plaster. A permanent display this size would use three times that amount as the carved layer is made stiffer and thicker so it can be properly detailed. We are building in a church basement, thus I pour cheap white vinegar in the slop sink every hour or so to keep plaster residue from our buckets from clogging the plumbing. This is critical.
On this display I do not have time to detail the rock faces very much, thus I rely on paint and foliage to camouflage these sins.
The last step of construction is putting a skirt on to hide the boxes and tools stored under the table. As can be seen the back of the terminal is open so the operators can access trains on the loops. The next day the crowds are to descend and the noise level in this room becomes similar to that of a factory floor.
This is the terminal. The red train to the left is Ives and we believe the coaches were from before World War I.
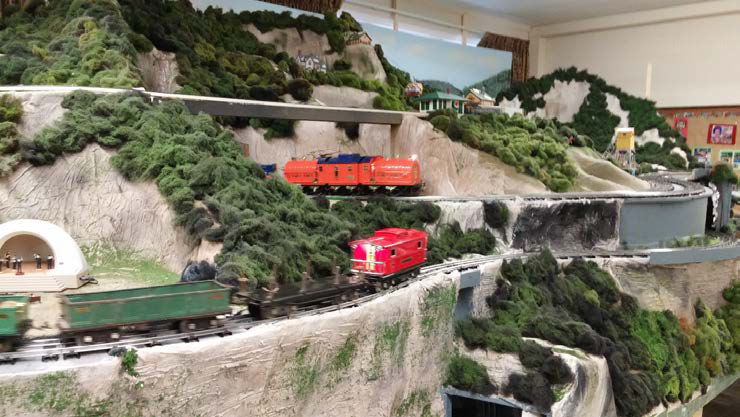
The Lionel Big Brute on the hill. The locomotive is pulling a 17 car freight and is nearly over its own caboose. Train length is dictated by the capacity of the upper loop. This is a 3% grade all the way from the bottom loops to the yellow coaling station seen in the distance. As controlling speed is important we try to keep the grade constant.
This is the upper loop. It is a bowl so the Lionel Big Brute can be seen as much as possible.
We do not use smoke as it would quickly fill the room and this is February so opening the windows is only an option if desperately needed. For a public display we need to be mindful of possible respiratory issues.
The backdrop seen here is tied to the drapery system on the windows. We can only use such a backdrop here as club members must access the trains under the scenery from the real and this is the only place where we can place a backdrop behind their walk way. We cannot attach anything to the walls.
The display ran for three weekends. After the last train is shut down, we must vacate the room in one week. We save the track, the foliage the buildings and trains, but all the plaster, wood framing and screening goes in the dumpster.
This show attracted 2,015 visitors in those three weekends. We know of no other display anywhere where standard gauge trains climb quick and dirty mountains. And of course it is worth noting that two of the three young men who assisted in constructing this display normally confine themselves to N gauge. So for us N gauge guys this is probably the equivalent of going outside and screaming.
Thanks for your work Al and for your interest in this somewhat obscure aspect of the hobby which our club seeks to preserve as long as we can.
John McHugh again.”
A big thanks to John for sharing his Lionel Big Brute. It was wonderful to read what goes on behind the scenes!
If it’s left you feeling inspired, have a look at the latest ebay cheat sheet.
Anyhow, keep ’em coming.
Best
Al
PS Thanks to everyone who has mailed me on the beginners guide. if you haven’t taken the plunge yet, it’s here..