John’s added ot the Hornby train sets on the blog:
“Some 7 years after purchasing a Hornby OO gauge digital train set, ancilliary track and a range of buildings, modelling materials etc, I eventually got around to planning how I could constuct the type of layout I wanted to create.
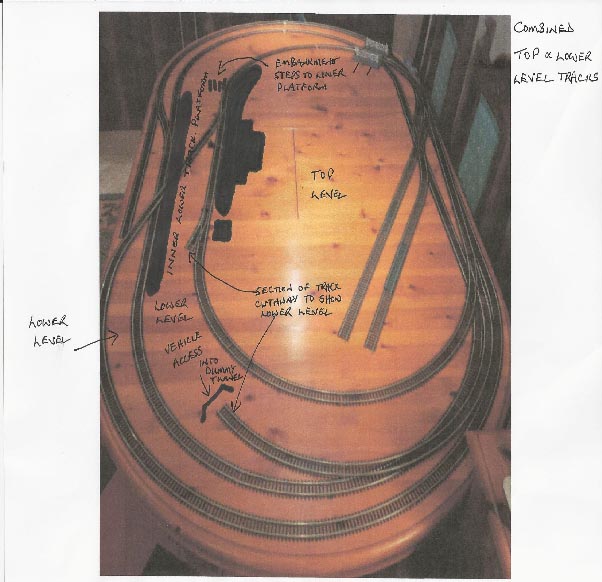
Having studied a number of existing layouts I started by using my dining table to see what could be achieved by working to a limited size.
Using 1st, 2nd and 3rd radius curved track I eventually constructed the layout shown on my dining room table.
The concept of having an upper and lower track layout provides the ability to run trains from the upper tracks to the lower tracks.
The eventual layout was modified to allow trains to travel to and from the upper and lower tracks in a forward direction and additional sidings were also added.
I then set about finding someone who had the expertese to build my layout in consultation with me, working as far as possible to the design and style I sought to achieve.
The person I eventually found was Steve Pilling who is based at Long Eaton in Derbyshire.
Steve has worked mainly with N and Z gauge layout construction in the past but he willingly took on my challenge to fit in a lot of track in the confinment of a 6’ 6” x 3’ 6” board.
The other requirement I gave Steve was the need to make the layout fully transportable!
This in fact is Steve’s speciality as he constructs the smaller scale sets within a case which can easily be shipped around the world to his various customers!
My Lammermuir layout is based loosely on the concept that the original idea of constructing the London to Edinburgh main east coast line passed through Haddington, as was originally proposed.
This would have taken the mainline close to the Lammermuir Hills to the south of Edinburgh. In reality, the east coast line did not pass through Haddington but took a route via Drem to the north.
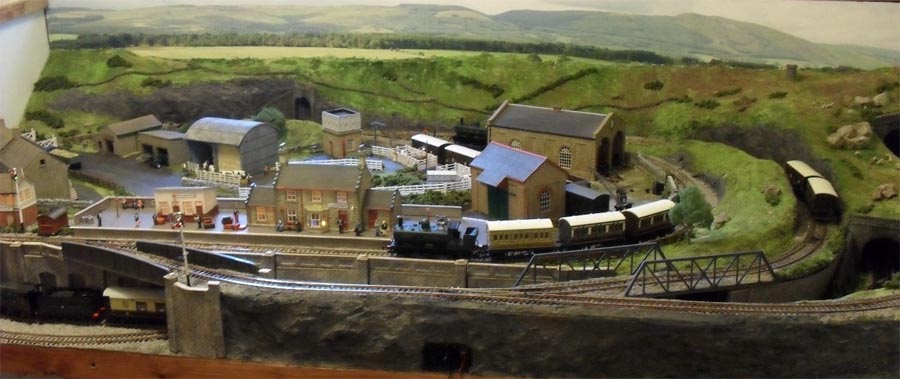
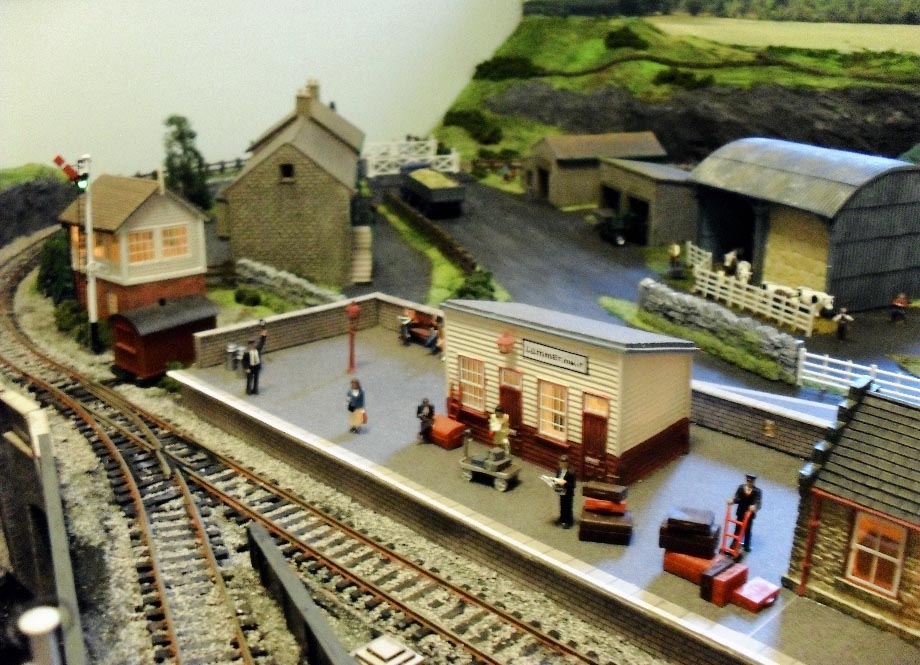
The distant views are of the Lammermuir Hills and the theme of the layout combines a rural station and livestock loading docks to transport cattle and sheep.
Track Circuit Plan
(The grey and black tracks are tunnel and lower track)
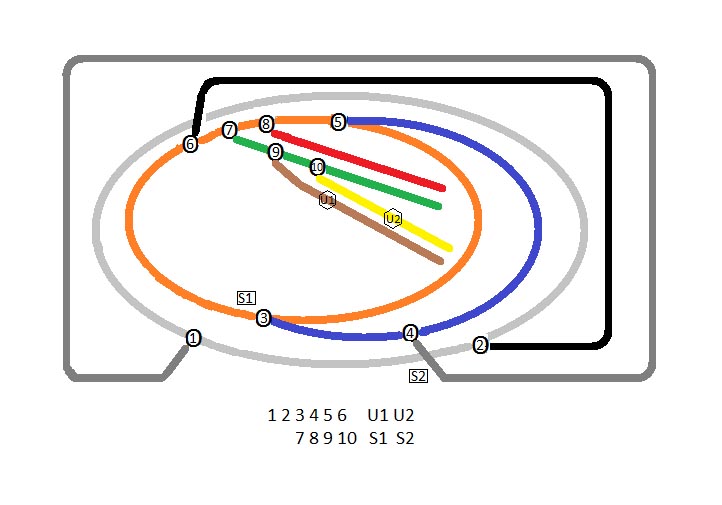
There are 10 electrically operated points, 2 electric uncoupler units and 2 electric signals
John”
“Hello Al, This the first time posting something, so I hope that it goes well.
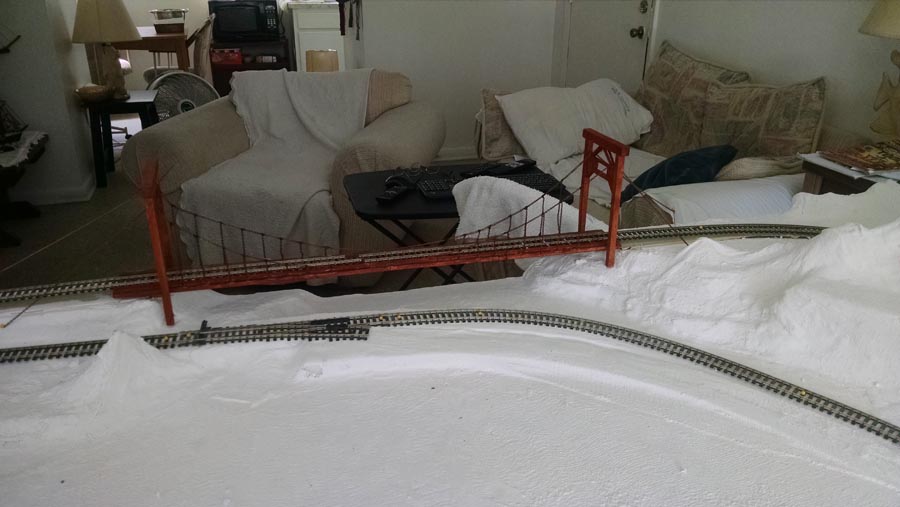
I am building an HO table in my apartment, after being away from the hobby for 30 years.
I am a disabled vet and don’t have much money so I look for any way to make things cheaper.
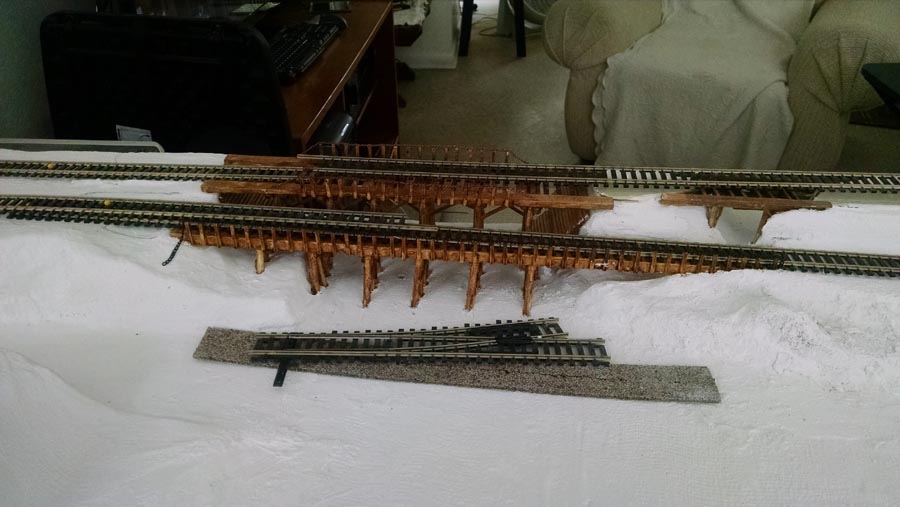
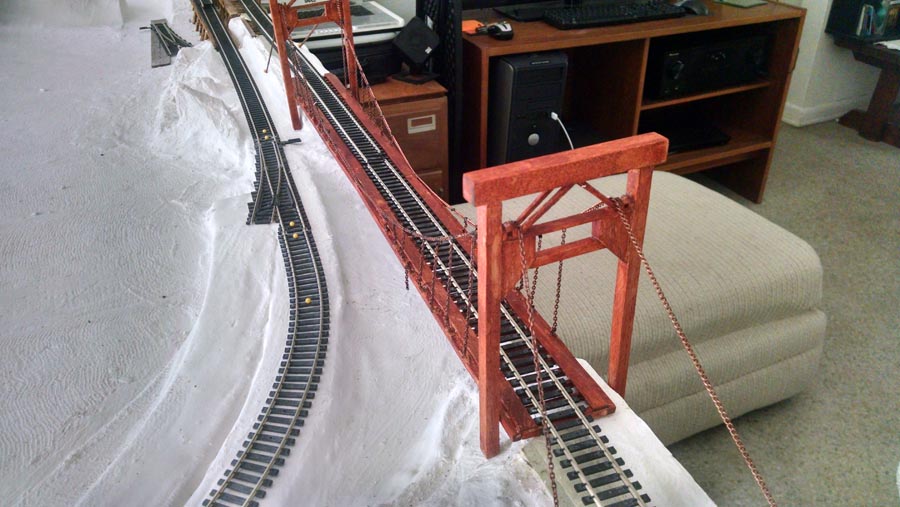
I have gone to wal-mart here and got small square and round wood stock and coffee stir sticks as well as wood matches (cut the heads off)I have made several bridges from them. I think I have about 10 dollars in all.
Please remember they are my first attempt in 30 years.
Alva”
I think Alva’s bridges are very impressive – and I can’t wait to see the next installment from John too.
That’s all this time. A big thanks to Ken for adding to the Hornby trains sets on the blog.
Please do keep ’em coming folks.
Latest ebay cheat sheet is here.
Best
Al
PS You can grab the beginners guide here.


Cracking little layout layout John, shows what can be achieved in a small space in OO.
Nice bridges Alva, looks like the basis of a great layout. Lokking forward to further installments.
Steve R UK
Hi Alva
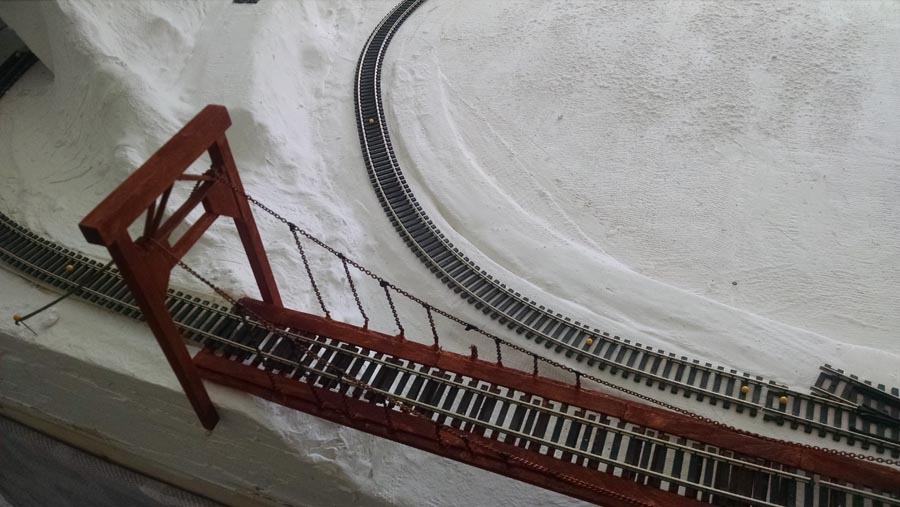
Could you send in some more close-ups of the suspention bridge, what did you use for the wires and droppers??
Regards
Mark
love your layout a running video would be a nice to see as my layout ain’t up yet looks like a long way off in the future lol
no cash for it lol keep up the good work I do love them bridges
some good ideas thanks
Nice work after 30 years. Very impressive.
Hi Alva, very nice bridges !
I am an absolute beginner, I was wondering what’s that white base you are using for your lay-out: first time I see a white base like that.
ciao!
Paolo
Morning all,
Smashing little layout John, the different levels and tunnels give it a lot of interest and make it look bigger than it is. Some more pictures please?
The bridge construction looking very good as well Alva, shows what you can achieve with cheap materials without having to buy kits.
Mike S
Nice job there John , and Alva that bridge work is great …Dave
very very nice layout……detail just makes things stand out……and Alva your bridges look top notch…..your certainly no novice….and thank you for reminding us – that very simple materials can sometimes make some beautiful and useful additions…..thank you for reminding us – we just have to use our imaginations a little bit……
Hi John,
Fantastic layout, really impressed. More pictures Please. A Running Video is Definitely a Must See, Please can we have a Running Video, ASAP.
Kind regards.
John.
Good lookin posts, fellas. From a fellow vet, thanks for your service, Alva. If the rest of your layout is as well done as your bridges, you’ll have a winner!
What scale are the Buildings
Great work John. Take a bow, you earned it. Please continue sharing with the
rest of us. Regards,
James Ervin
John; Very fine layout you have there! You have a lot going on without it looking
jammed in and unrealistic.
Alva; Great work! Your bridges show that you don’t have to throw a lot of money
around to have very good results. The arts and crafts stores have a lot of wood
shapes and supplies that are very useful and reasonably priced. As an aside,
thank you for your service to the country.
nice work both of you
how do you avoid electricity going to the end of a track when it is also conected to the rest with a rail switcher? Do you install a switch as an interruptor to that dead end track so it has no power after the loco is placed there ?
Fantastic railway layout.
A running video please.Well done to both of you.
Dave (uk)
I assume by “rail switcher” you mean a track switch, also known as a turnout or point, where the siding turns off from the main line. Most track manufacturers make turnouts so that when the blades are set towards one route, the other is electrically dead, usually by both rails of it getting the same polarity, ie both rails positive or both negative, so any loco on it won’t go. However, if you want to drive a train into the siding and shut down the loco, while bringing another loco in behind it, then yes, you would need to have a break in one rail (you can get insulating plastic rail joiners to keep the rail ends in line and stop them touching) and feed the end section through an on/off electrical switch. Or, if you want to spend more cash, you could go for a DCC (digital command control) system where all the track is live all the time and the locos are told when to go or stop individually by coded messages from the controller. I’d advise reading up on DCC quite a bit before deciding if you want to invest in it.
Rod
Thank you, that is what I thought but was not sure if there was another way
Thank you John and Alva for sharing your model railroads. You have both done a very fine job as both layout and quite unique. What a wonderful fulfilling hobby.
Cary B
Great jobs, both of you. Alva, one vet to another, thank you for your service to your country!
Alva Your bridges really look the part. If you continue to build to the same standard your layout should be very impressive. I like the way you have tried and succeeded in keeping the bridge structures in scale. Some modellers unfortunately build in 12 inches to the foot scale. I.e full size. especially with track side structures. I’m not sure if this is ability or they just lose that sense of scale. It is always worthwhile keeping a small wagon or scale figure to hand beside your modelling table to help keep your structures in scale. It does work try it. Keep us posted on your progress.
John, Nice looking layout! I did the same thing when I started planning my Christmas layout: laid out the track on a big table and played with various track arrangements. Then I made the mistake of getting some track planning software that allowed me to create a more complicated track plan than I was able to build. I started that layout in 1997 and just recently realized that three levels was just too much to cram into a 66 x 78 inch layout area, Now I’ve removed the third level and simplified the track plan so that I might actually get it finished by this coming Christmas.
Alva, You’ve done a fantastic job building all those bridges and trestles for your layout. Is the white area of the layout all plaster cloth over foam and crumpled newspapers? That’s what I’m planning to do with my Christmas layout in the very near future. I could use some of your scratch-built trestles on my layout. Thanks for sharing your photos.
Pretty Neat.!!!!
John, your compact layout beautifully captures the serene English countryside, and Alva, kudos to you! Impressive patience on those custom structures, excellent start; you will have a lot of enjoyment with that layout!
John, Philadelphia USA
Beautiful bridges I haven’t played with a model RR in over 60 years but my 5 year old great grandson found my sons 45 year old HO trains and wanted to see it run so here we go building a lumber sene the lumber cars are old box cars taken apart and tree limbs from the back yard are timber it’s been a very enjoyable time with my little shadow as hes called not bad for a 4×8 plywood with 1 switch to run inside loop everything is homade from whatever we find water tank is a toilet paper roll water mill is a motor from an old printer home made wind blades and small dowell to hold it up and hooked to the transformer it blowes air like a good wind would do.
like the bridge work, very nice layout.