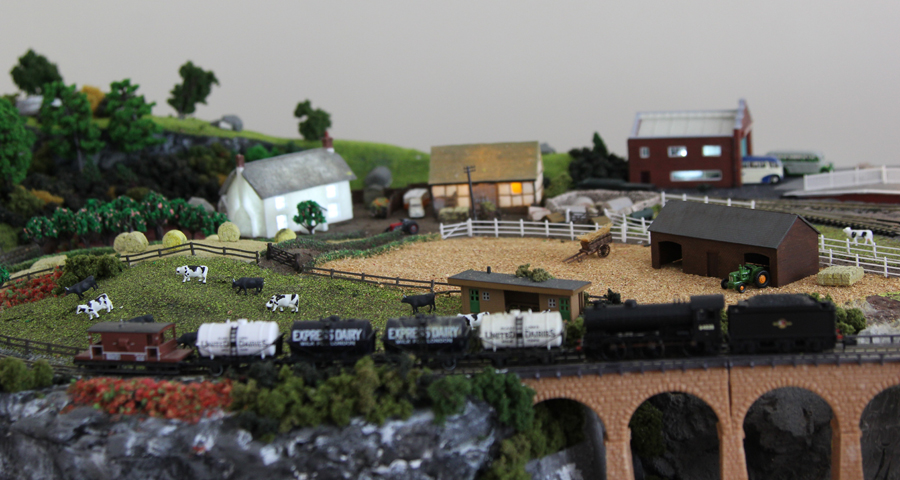
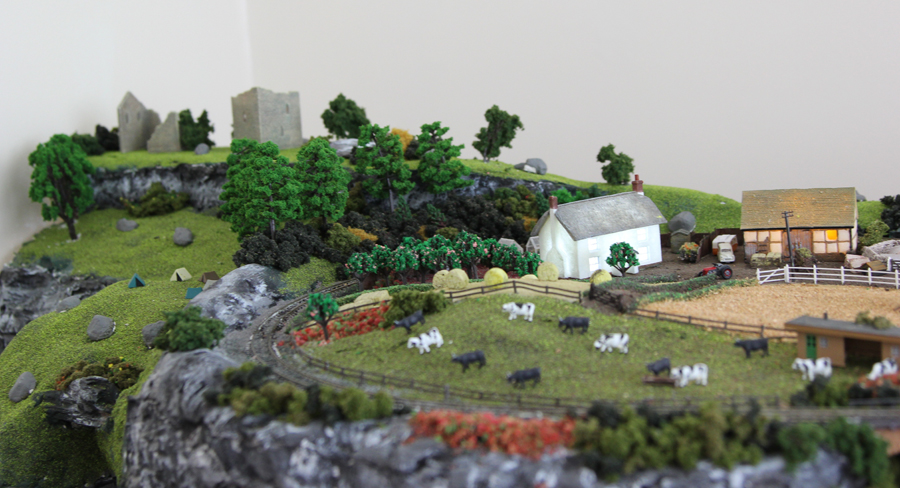
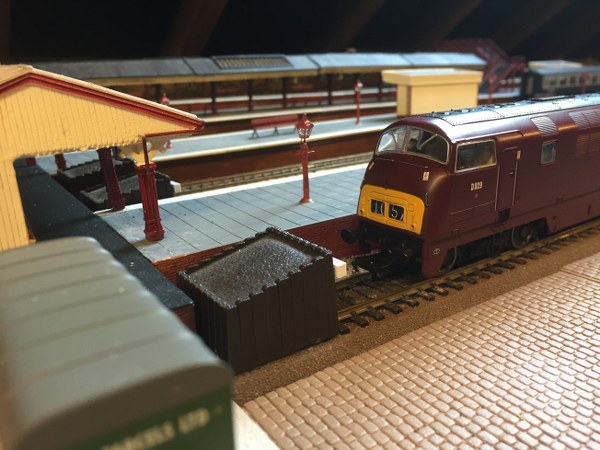
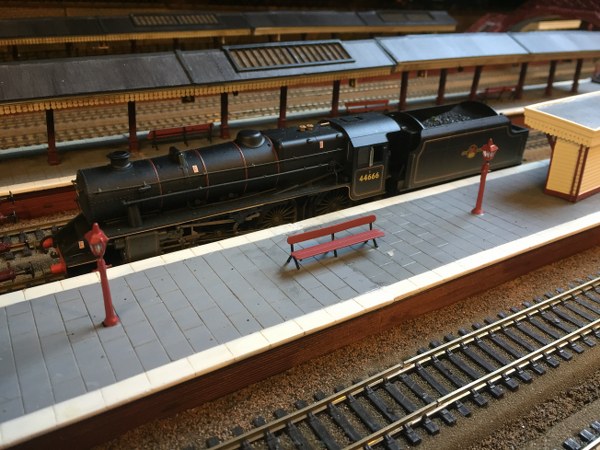
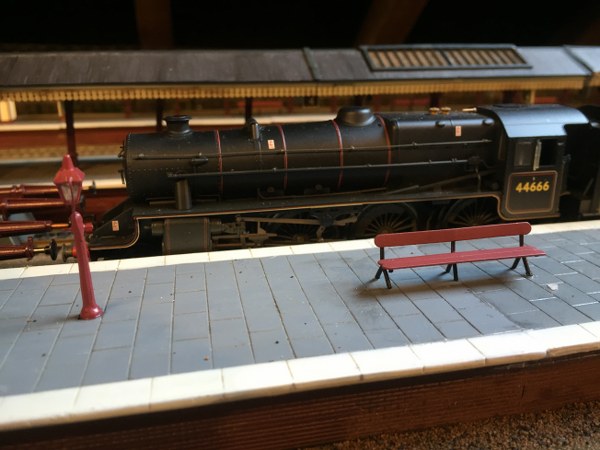
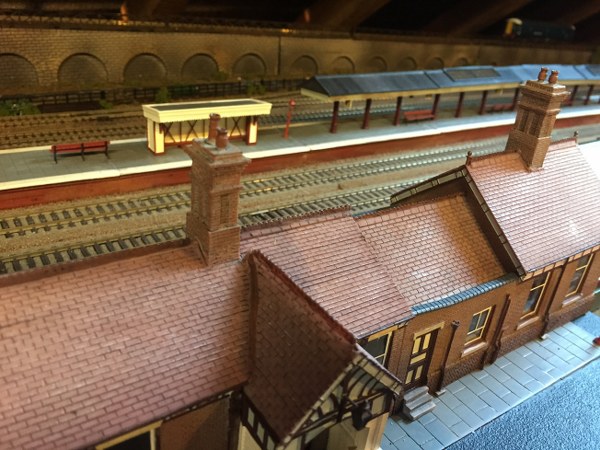
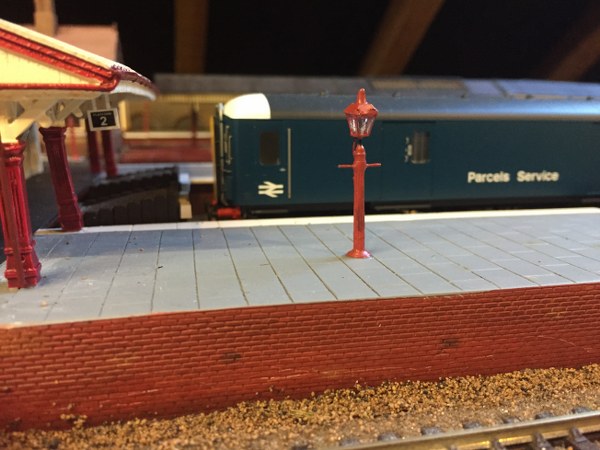
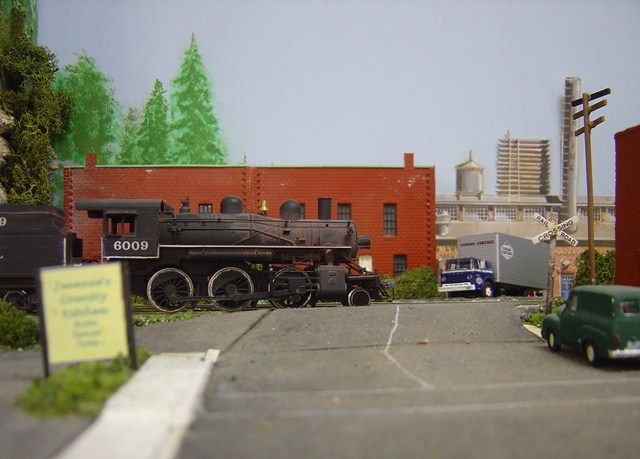
Kevin has been in touch with his N gauge UK layout:
“A few pictures of my n gauge layout. Originally intended as a retirement project I started it early and now it is almost finished.
I make no apology that it is not built to a particular era. I run what I like and mix steam with some modern diesel. I am sure the wrong locos are at times pulling the wrong carriages/wagons.
Overall size of bottom base board is 7 feet by 4 feet plus the small side extension.
The upper level is a basic first radius oval hiding a through fiddle yard for the lower two ovals. In addition on the lower level an end to end automatic shuttle runs from the station and off into a hidden area under the hills.
All curved track is “set track” and trains are analogue controlled. Where ever possible each building is lighted by led bulbs. I have added flashing red lights to buffer stops and inside a couple of sheds to imitate braziers/fires. About seventy lights are fitted throughout the layout.
Hills are formed with styrene sheets covered in “mod rock” and poly filler. The textured faces are formed by pushing screwed up baking foil into the soft filler to form the textured surface finish. This was then painted black and then dry brushed with two colour tones of grey acrylic paint.
I still have a lot more detailing to add – mostly on the platforms and to finish the lower level crossing near the horse paddock.
Kevin”
Kevin’s pics really got me thinking about backdrops. So I had a little fun.
This vid is only 20 seconds long but it really does show how much of a difference a backdrop makes to a layout:
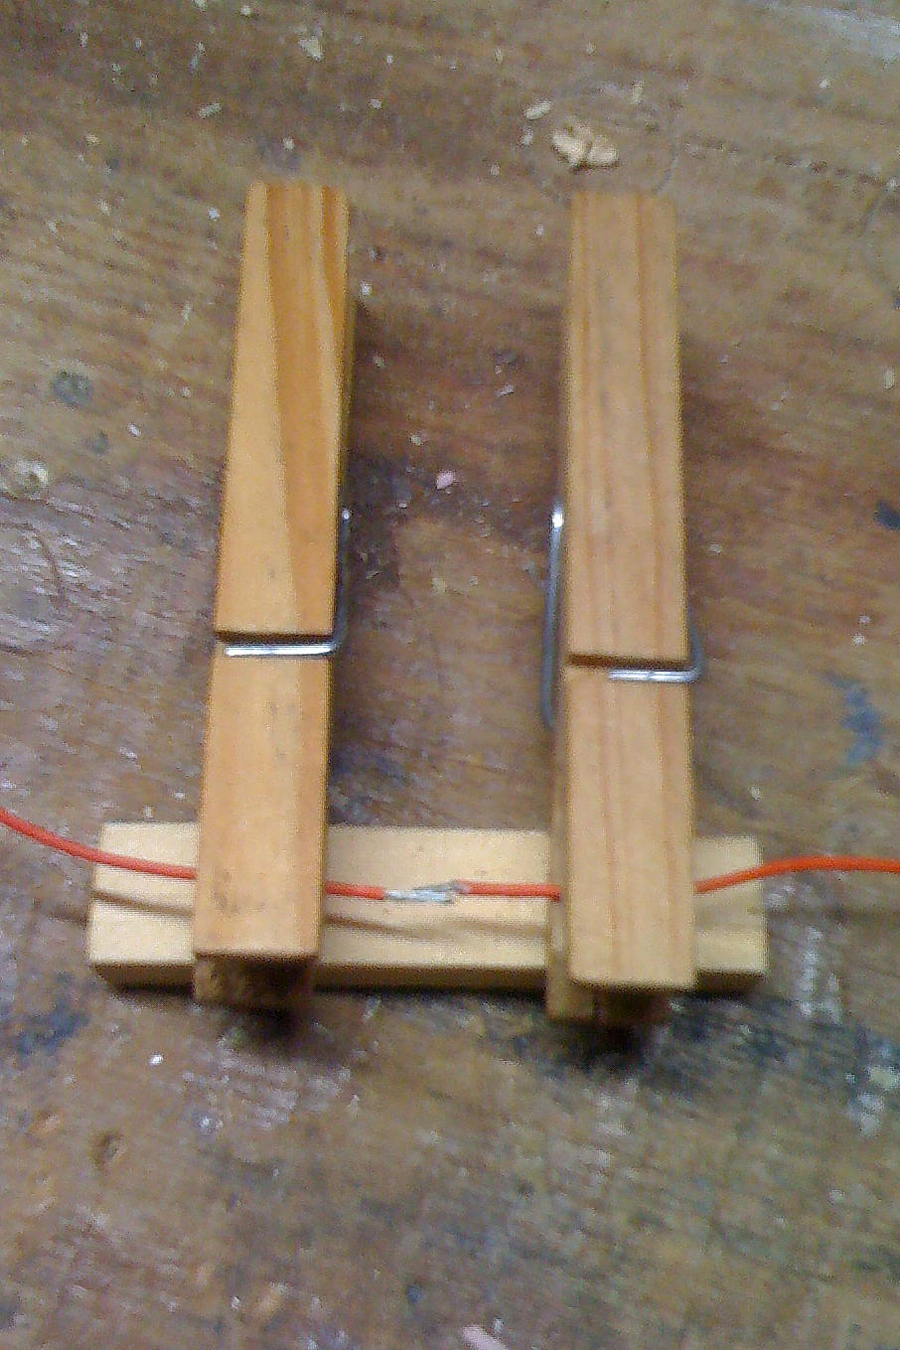
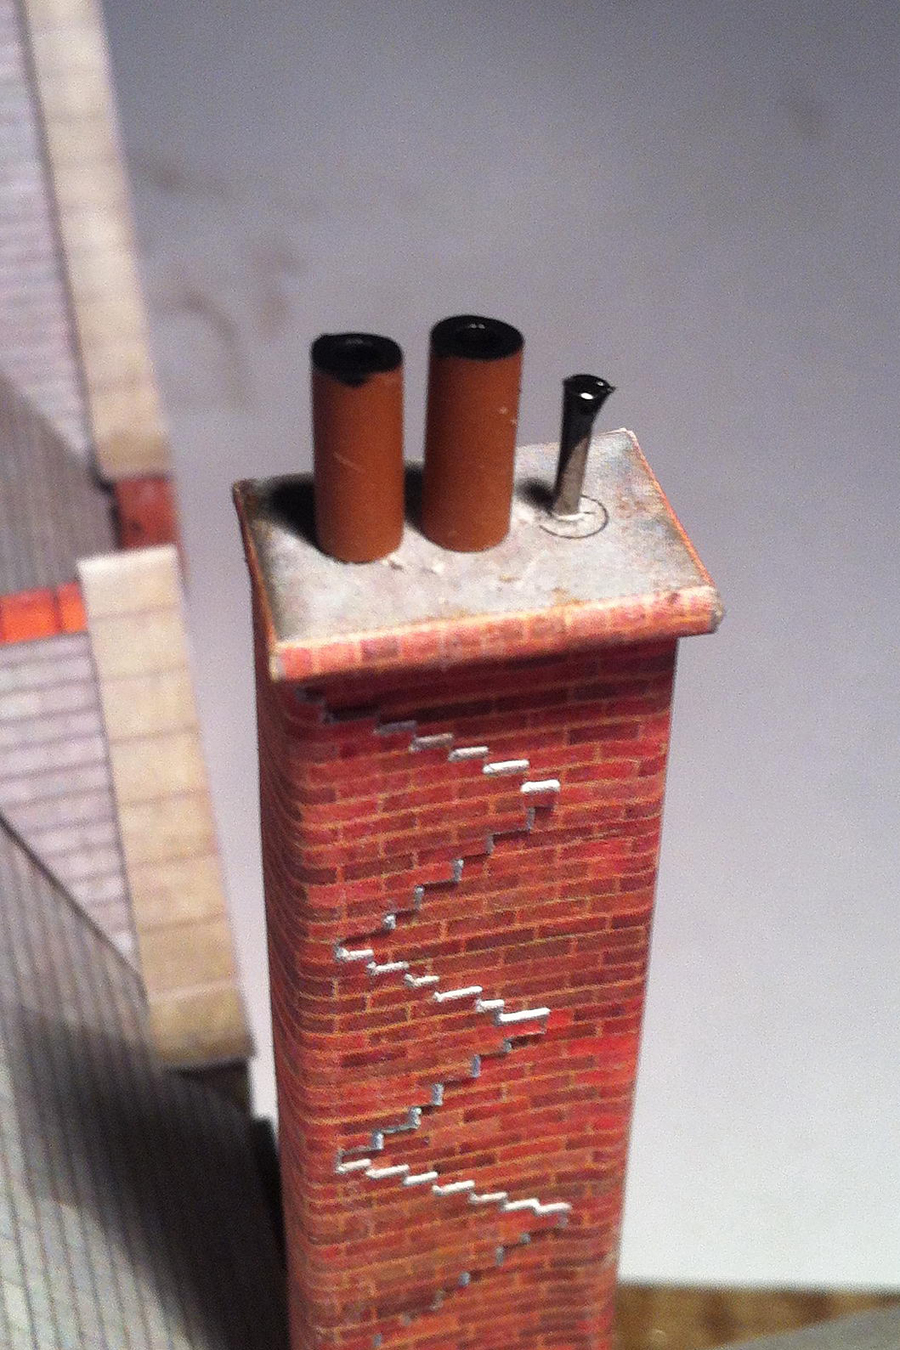
Three ideas to share. Some may be old hat but they weren’t to me so they maybe useful to some.
1. Soldering two pieces of wire together end to end can be difficult as, in my experience, they don’t stay still!! I found a simple solution was to use two pegs and a short scrap of wood to hold them together as illustrated.
2. Peco flexitrack basically wants to return to being straight particularly at joints and especially if they are situated at insulated rail joiners (not ideal but sometimes necessary). I discovered a way to solve the problem. I cut curves, at the desired radius, out of ply wood to use as a template. Set the track on the workbench and used panel pins (on thesides, not throught the sleepers) to keep the track in place. I then put a spot of superglue on every alternate fishplate, left it to dry and I had a piece of set track at the right radius that would stay there and I could trim to the exact length with no strain on the rail joiners.
3. I was doing some electrical work in the garage the other day with an incompleted cardboard model on the layout nearby, I noticed that one of the chimney stacks was lying on the ground – only, it wasn’t! I had trimmed off a bit of the brown cable insulation and it was the correct colour, length and diameter! My latest model has cable insulation chimney pots held in place by tiny panel pins which give support and hold them upright. A spot of black paint on the top finishes them off.
John”
A big thank you to John and to Kevin for sharing his N gauge UK layout.
I think Kevin’s layout has bags of charm. And John drives the point home that simple tips work best. There’s lots more just like them, in the beginner’s guide.
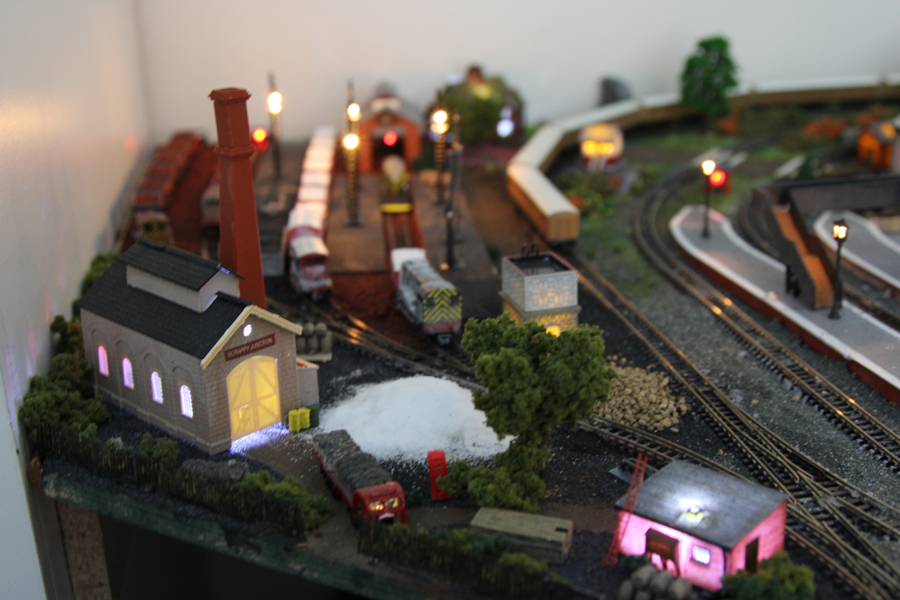
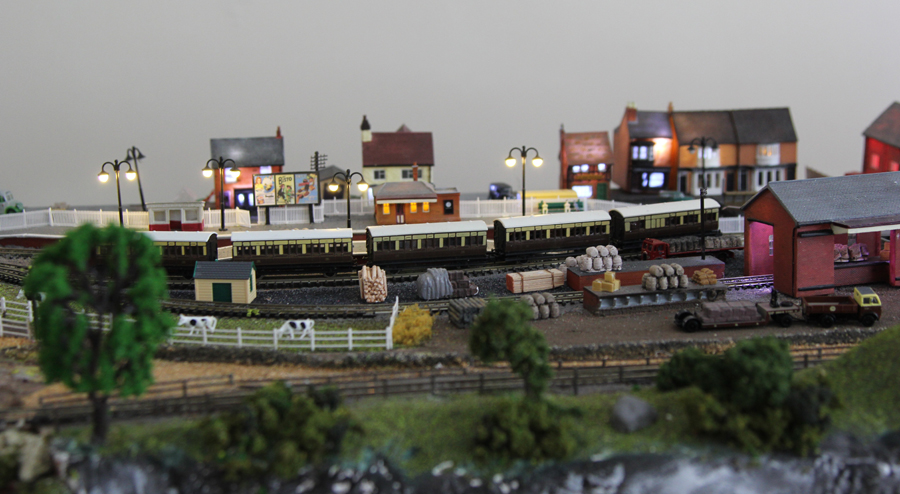
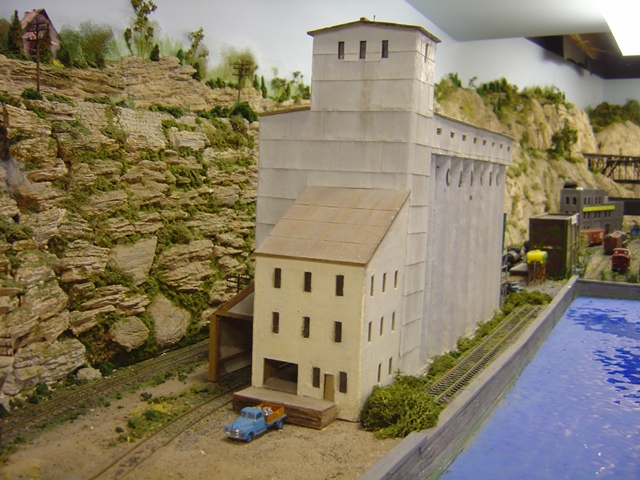
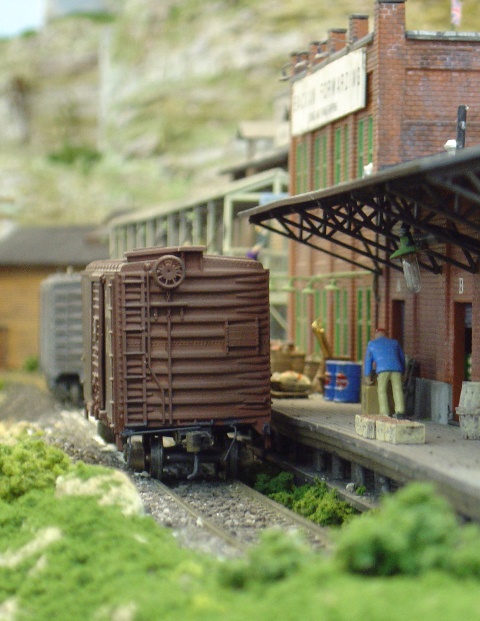
Stephen’s been in touch – he shows us what you can do with some model train station kits:
“Hi Al
Once again I have been inspired by the latest pictures and in my efforts to create a fairly reasonable attempt at realism with off the shelf items and a lot of patience I have started the through station, here are few photos of progress to date again it is not finished.
I have been pleased with the results, the station canopies are Wills Kits and while fiddly to assemble and to paint this takes many hours they do look credible in my view. Hope everyone likes them and there are more to come as progress continues albeit at a slow pace!
The ballast either side of the foam underlay is a mix of the cheap to buy scatter blended then some coal and other rubbish strewn about, some tweaks still to be done such as sleeper walkways and paths and weeds etc
Regards
Steve”
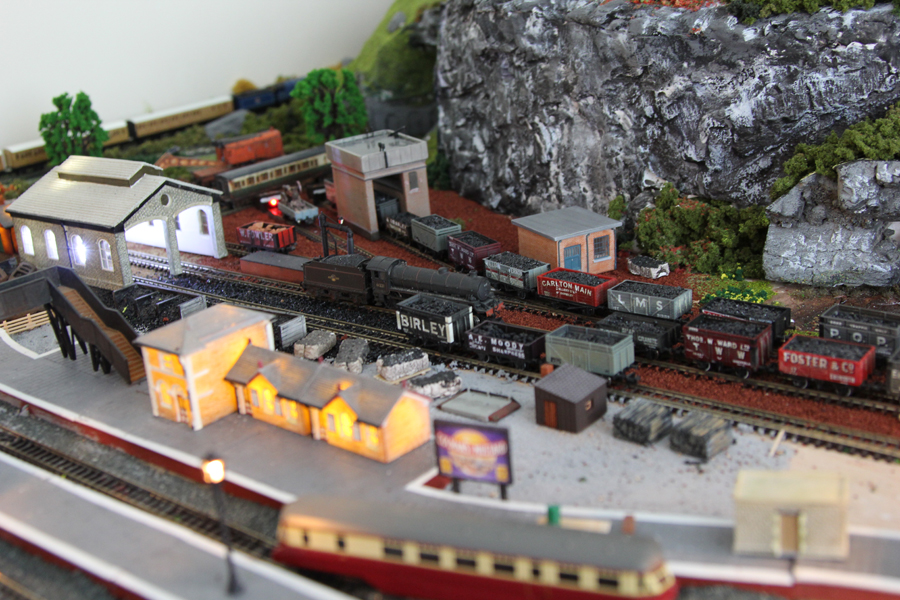
“Al,
Here’s a few more photos… there’ll be a few panoramic after I resize them. Please add to your post that the layout has been dismantled and that there are no videos – just lots of photos. When I get things up and going again in the basement of our new house & get everything unpacked, I’ll find the layout plan & send a copy of it to you.
Bob”
Bob’s layout was featured on the previous post if you missed it. It caused quite a stir.
A big thanks to Steve too for sharing his model train station kits. It’s a fantastic work in progress and pleasing to hear he finds this site is inspiring. I’m encouraged to go on!
That’s all for today folks. Please do keep ’em coming.
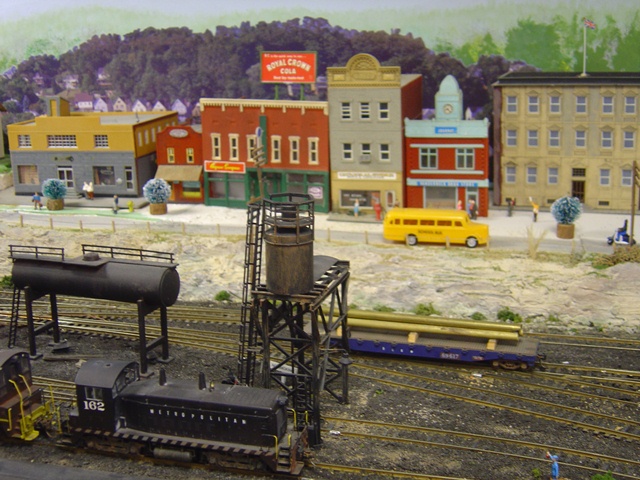
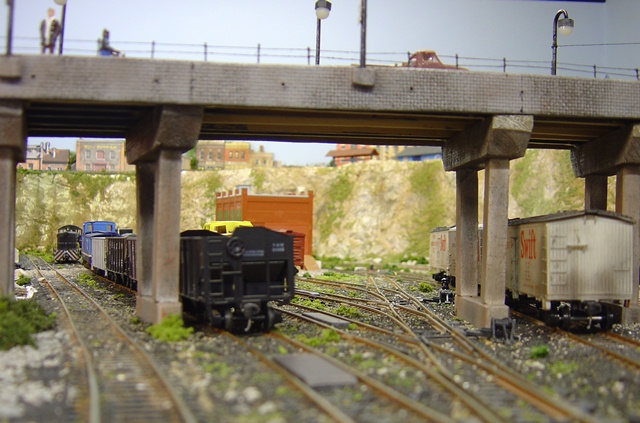
Bob had my attention with his narrative on his model train scenery ideas, but then when I saw his pics… wow!
Grab yourself a coffee, sit down and take your time over this one.
Hope you enjoy it as much as I did:
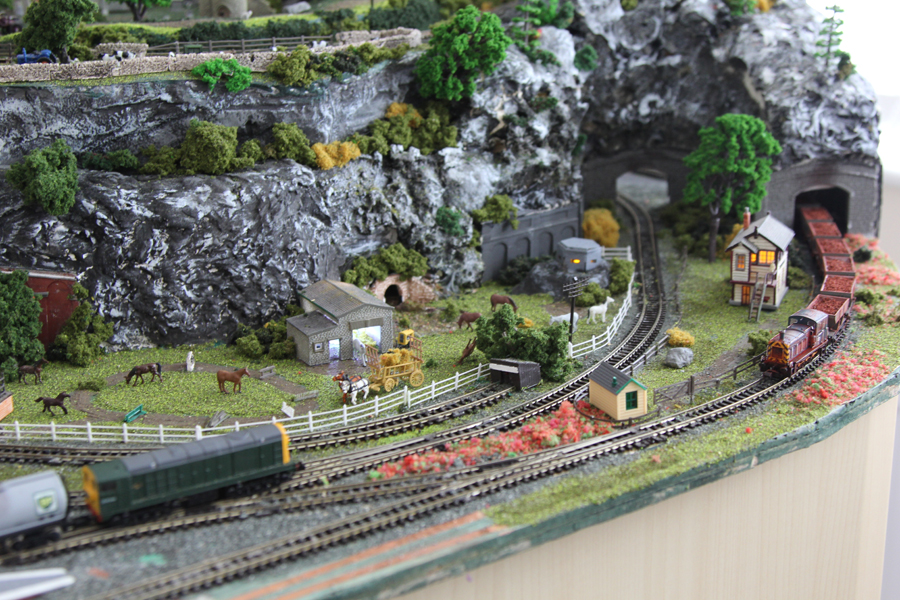
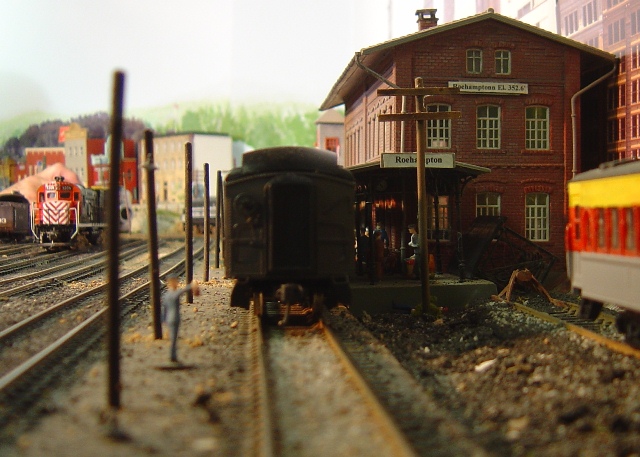
“The genesis of this layout was the result of a joint effort by myself and one of my oldest friends and fellow model railroader, Dennis Stembridge.
We went to High School together in Brockville Ontario and decided to build a model railway that would refect the scenery of southeastern Ontario and the Thousand Islands of the St. Lawrence River where we went to school.
We decided to make it a freelance line as it gave us more latitude for creativity. Also we are both fans of the late John Allen and his Gorre & Daphetid Railroad, one of the most beautifully detailed model railroads ever. We created an imaginary story about a line that evolved as a result of the government consolidations into the Canadian National Railway.
Our imaginary line came about when we thought “what if” a bridge line came about by taking over the abandonned trackage between Toronto and Montreal. We decided to choose the Kingston Ontario area locating our ficticious Roehampton on a branch just north of that city. Harbourside Junction and West Harbour are patterned after an imaginary harbour and junction just outside Kingston on the Cataraqui river.
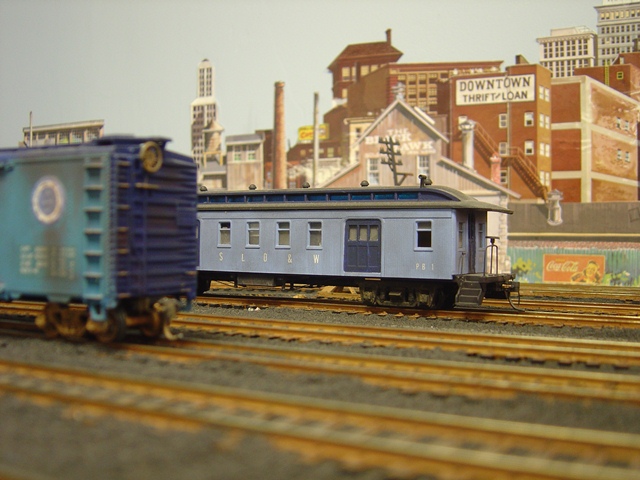
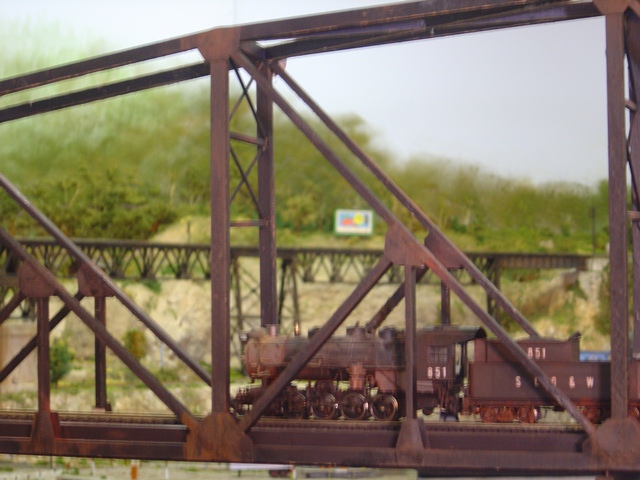
The line was to be called the St. Lawrence, Ontario & Western Railroad (SLO&WRR – we liked humorous acronyms and names hence railroad rather than railway – the former is American practice and the latter British).
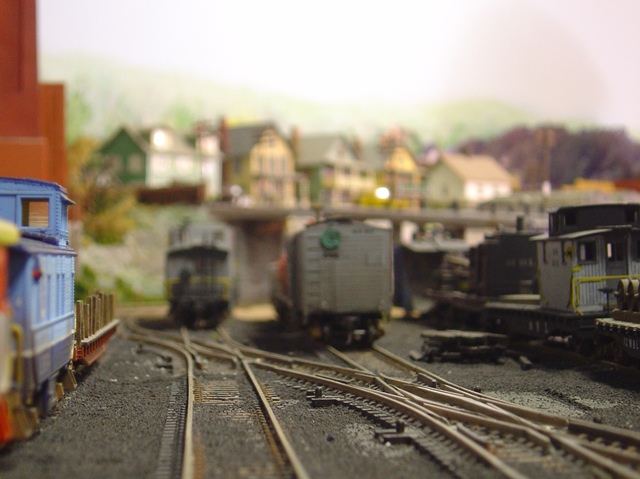
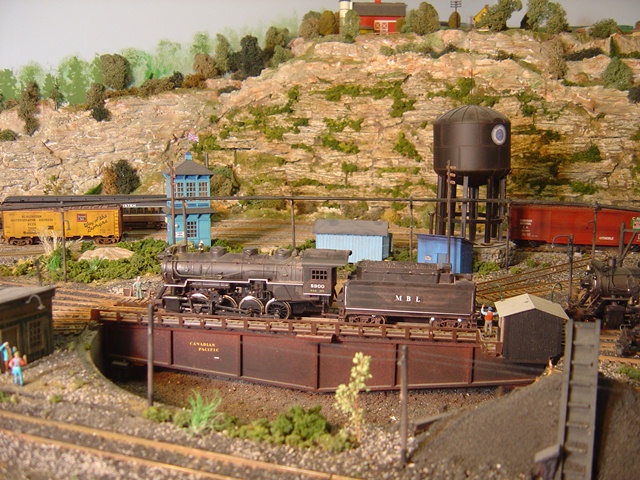
SLO&WRR owned and operated a short line and terminal switching road called the Metropolitan Belt Line (MBL). Our model railway was to represent the steam to diesel transition period of the 1950s that took place on Canadian Railways. Everything was to be finely detailed and weathered to make our models appear as realistic as possible.
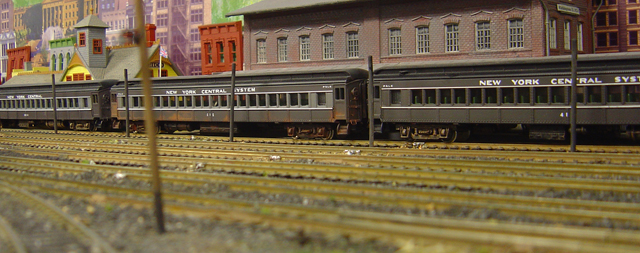
We developed our own logo and colours for our company and made our own decals to apply to our rolling stock. These were also used asd letterhead for switch lists and timetables. Because we were a bridge route with a major branch, it let us allow other lines operating rights on our tracks. So, it was possible to see equipment of the Toronto, Hamilton & Buffalo (TH&B), the New York Central (NYC), Canadian National Railway(CNR), and the Canadian Pacific Railway (CPR).
Model train scenery ideas:
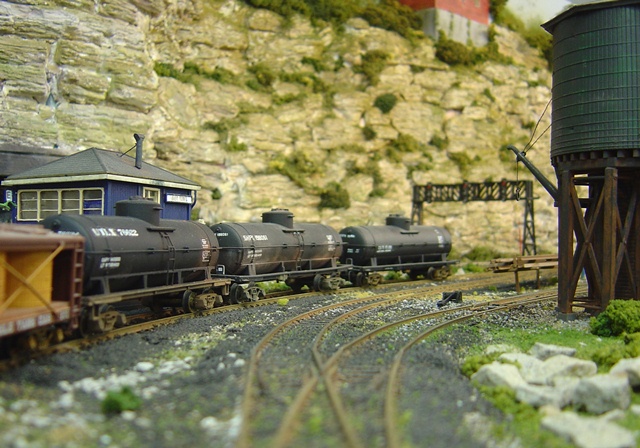
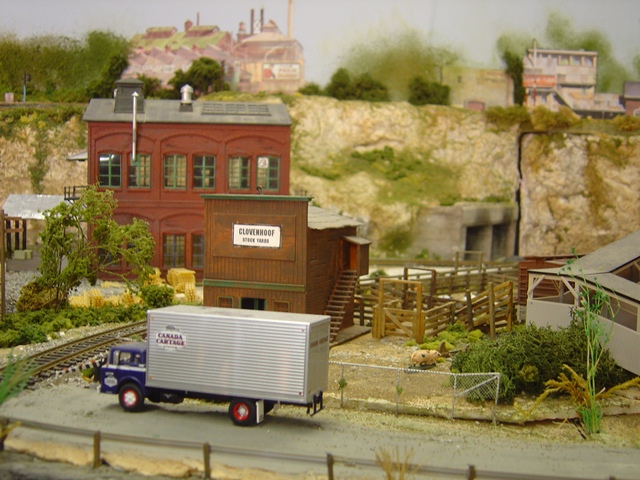
The scenery is hardshell plaster made from a variety of home-made and purchased latex moulds representing the geological transition from the granites of the Canadian Shield to the limestones found in the city of Kingston itself. Once the rock was in place, it was appropriately tinted with a variety of colours and then given a wash of diluted india ink to create shadow definition in the crevasses and hollows.
After that, when the rockwork was dry, we would spray it with water and, using a drinking straw, would gently ‘whiff’ the grout onto the rockwork. We used a variety of different coloured tile grouts put into a folded piece of paper to whiff it with the straw. This gave the scenery an earthen look that we couldn’t achieve any other way, and disguised the joins between the rock from the moulds. All tunnel entrances were home-made from hydrocal plaster, were painted appropriately then weathered.
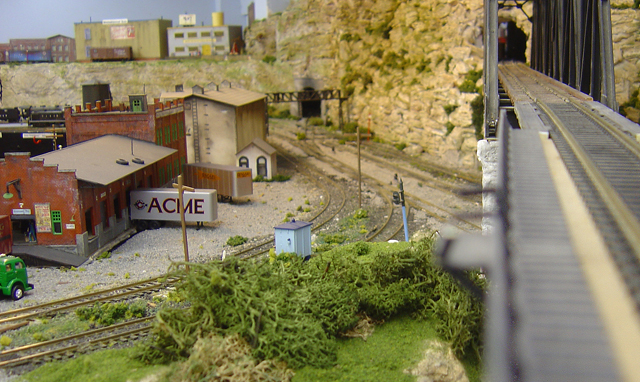
We then progressed to the vegetation. No new model train scenery ideas here – trees were hand-made mostly from lichen and the visible trunks used armatures of real twigs and some that were manufactured. Ground foams varied from coarse to fine to simulate grass and shrubs, and binder twine cut to size and the fibres were dyed to simulate grasses and weeds. All structures were either scratch-built or kit-bashed versions of what was commercially available. Attention was paid to creating a scene with appropriate figures and accessories. All vehicles were of the 1950s vintage.
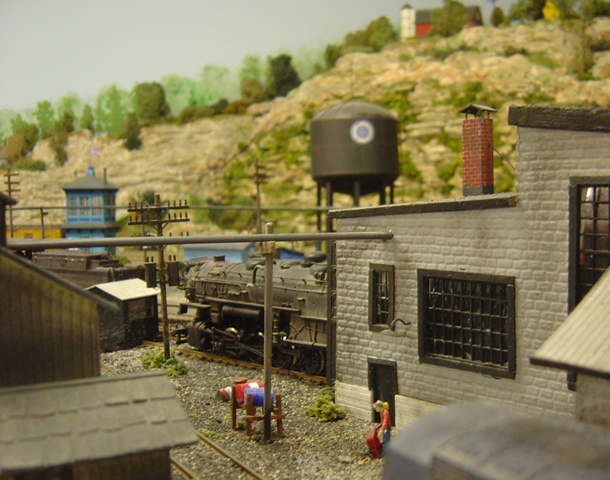
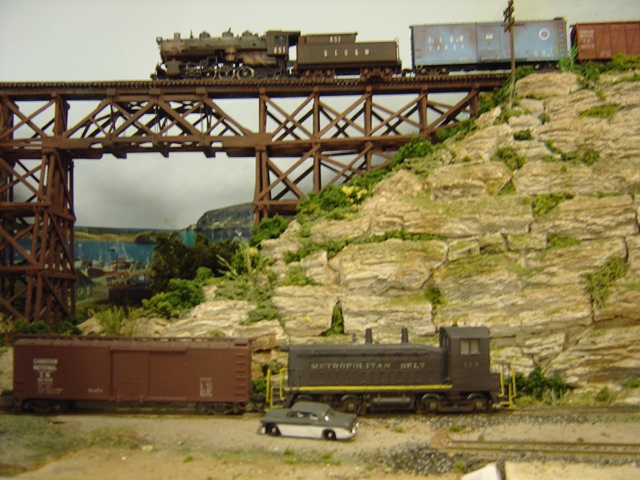
The gauge used was HO (1:87), big enough to be easy to work with, but small enough to put together a layout large enough for our purposes. Block control was put into place as when the layout was first being built over 15 years ago. DCC was far too expensive then. There were a total of eight throttles, with some restricted to specific areas for switching etc. and others used on the main line. Track was all code 100 nickel-silver, painted and weathered with a rusty clolour to look well used.
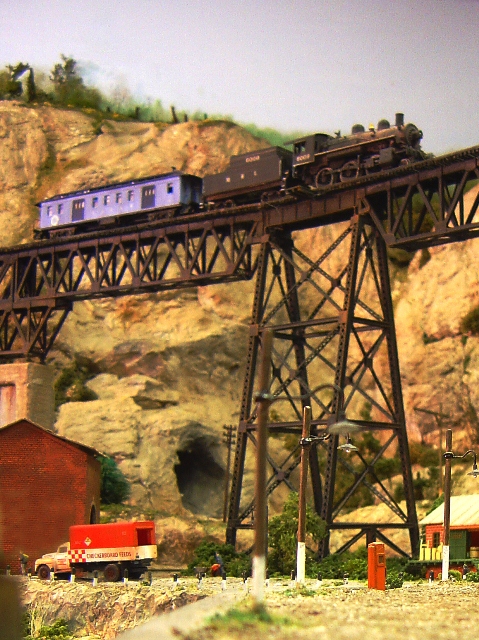
Ties were given oil and coal spills and some had ‘weeds’ growing in them to similate poorly maintained industrial trackage. Some track was hand-laid (in visible areas) and factory-made in hidden areas. We had a double tracked main line of 130 actual feet (260 feet of track), a branch to Roehampton of about 70 feet single tracked, and a branch to west Harbour of about 35 feet. All bridge work on the line was scratch-built or kit-bashed based upon researched bridge-building principles. The Stemmer Trestle was 8 1/2 actual feet in length! Another very large through truss bridge was scratch-built using strip wood, cardstock and drapery track to make girders, gussets and bracing and spanned nearly 800 scale feet in HO.
Our lighting was a mixture of flourescent and incandescent. The ceiling was black to minimize refection and distraction of the lighting when viewing the scenery. We had over 50 locomotive and 400 pieces of rolling stock, all of which had to be heavily weathered and modified to get the ‘look’ we wanted for our railway. All wheel sets and couplers were given a brown rusty look, and dirt grim and rust streaks hand-painted to simulate weather, dust, and grim that would come from regular operation. We used a lot of oil pastel scraped by Xacto kives into piles of various colours that were then either applied by a fluffy artist’s brush or fine wetted brushes. Afterwards, a fixative was applied to keep it all in place. Even our builtings and structures were given the same treatment.
For operation, we used switch lists and timetables. There were two large staging area, one hidden beneath Roehampton that could stage up to 6 trains in each direction on the main line, and a second one that was a hidden stub yard of 4 tracks leading into Harbourside Junction. Lots of industries plus the main line and two banches gave us lots of operational possibilities. Every Wednesday a crew of anywhere from 3 to 8 people came to help us operate and maintain the layout. Al told, there was over 1000′ of track and 85 turnouts which included about 6 double slip switches in areas of tight trackage.
Regards,
Bob”
An absolutely stunning layout. A huge thank you to Bob for sharing his model train scenery ideas. I loved his narrative of the planning and how the layout took shape.
I have no idea why, but when someone like Bob takes the time to explain the layout in the detail he has, it makes the pics so much more interesting. I can’t stop looking at them.
And don’t forget, there’s only way to see ALL the post, and that’s to jump on the newsletter (and you’ll get an excellent tunnel making step-by-step too!)
That’s all this time folks, until tomorrow’s mailing.