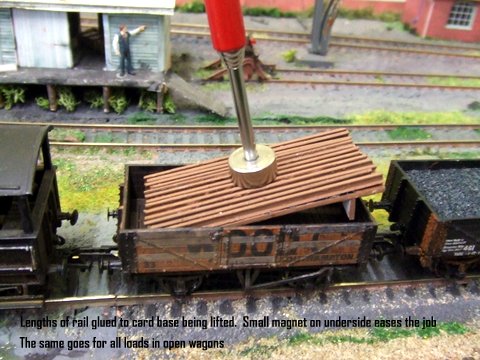
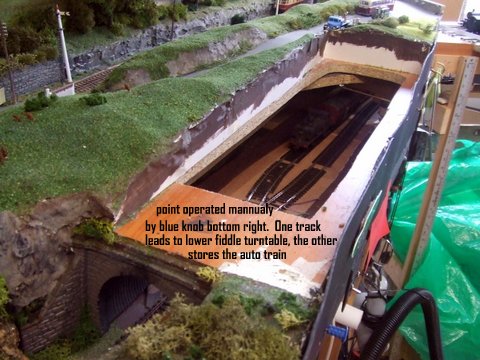
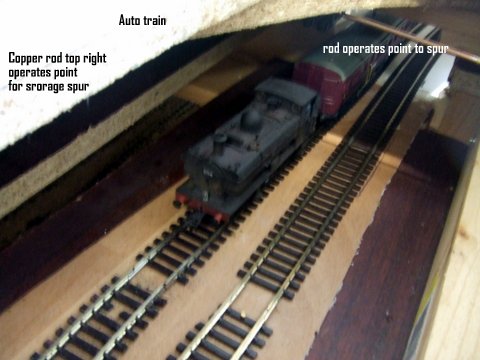
I keep getting emails on Kim’s track cleaner (you may remember it from way back). Anyhow, here’s Kim’s latest on it:
“Hi Al.
I forgot all about that track cleaner build. I see other’s really want the idea.
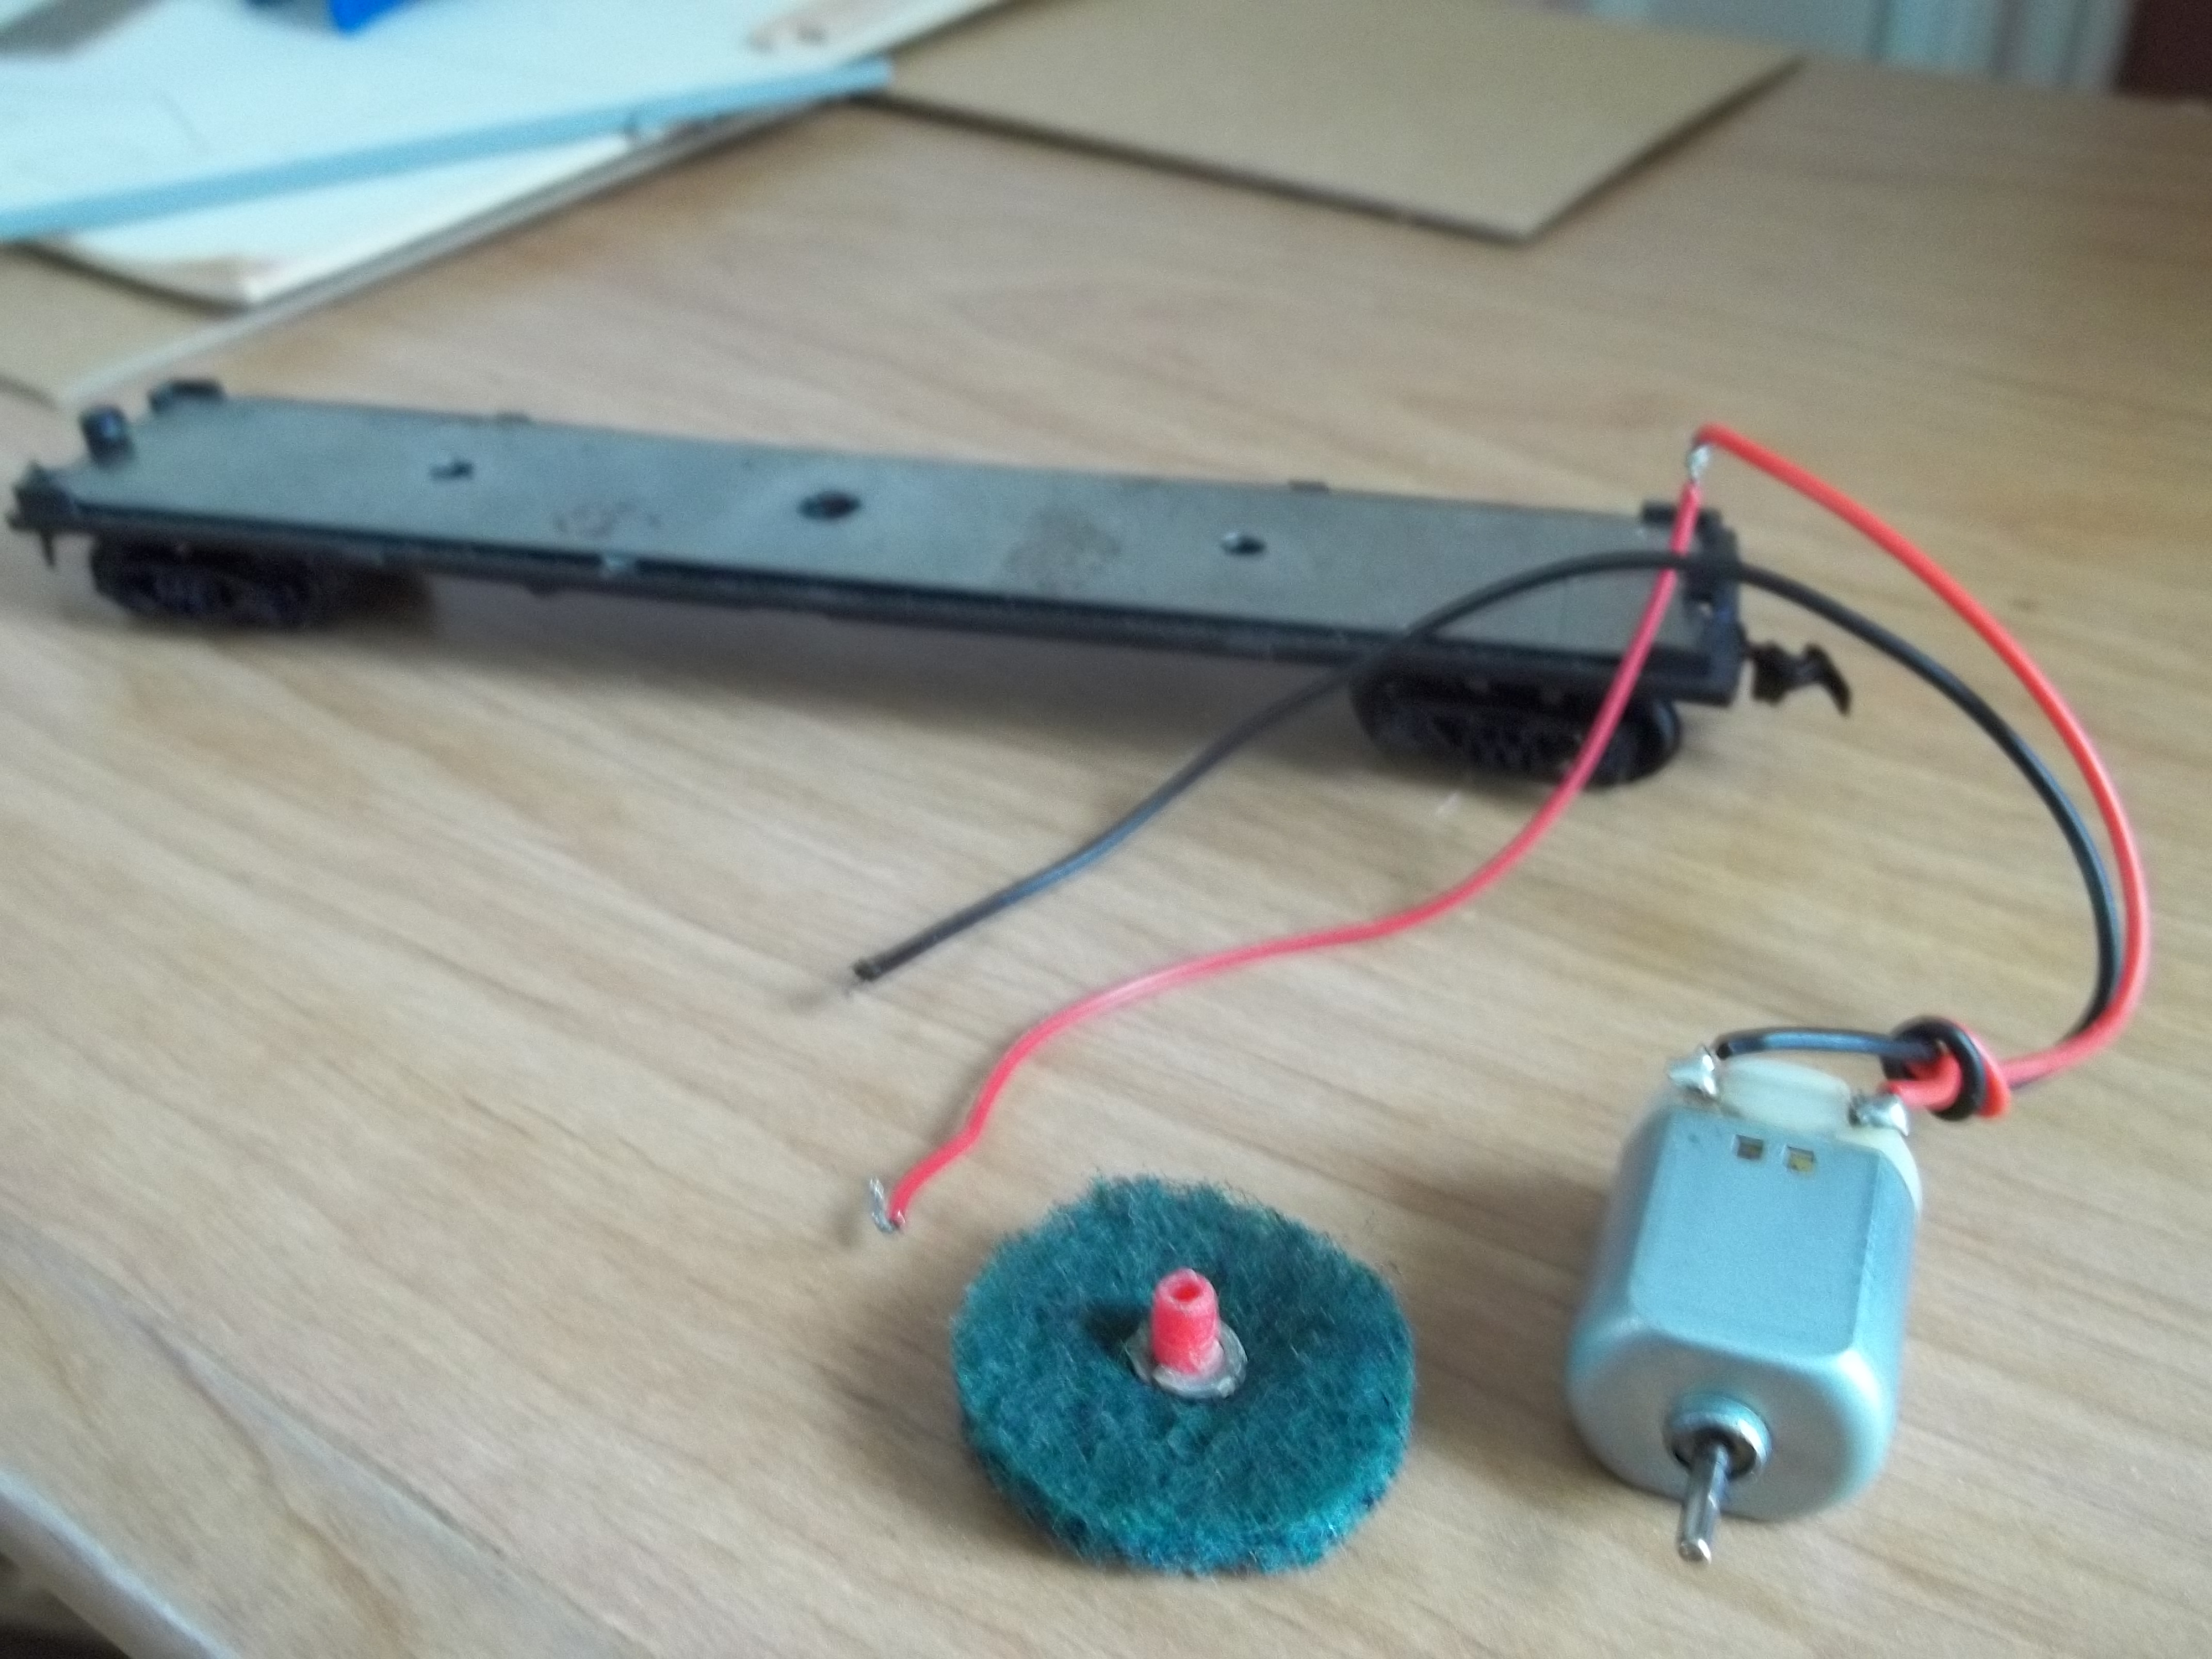
It really isn’t recommended to use the large motor to clean with as you can see it is so heavy it is bending the car frame lol.But man does it spin on a 2.4 battery.
So I recommend the smaller motor if you want to make one.The buffing pad is a kitchen scrubber. I recommend not to use the really abrasive pad like I have attached. Softer be better.
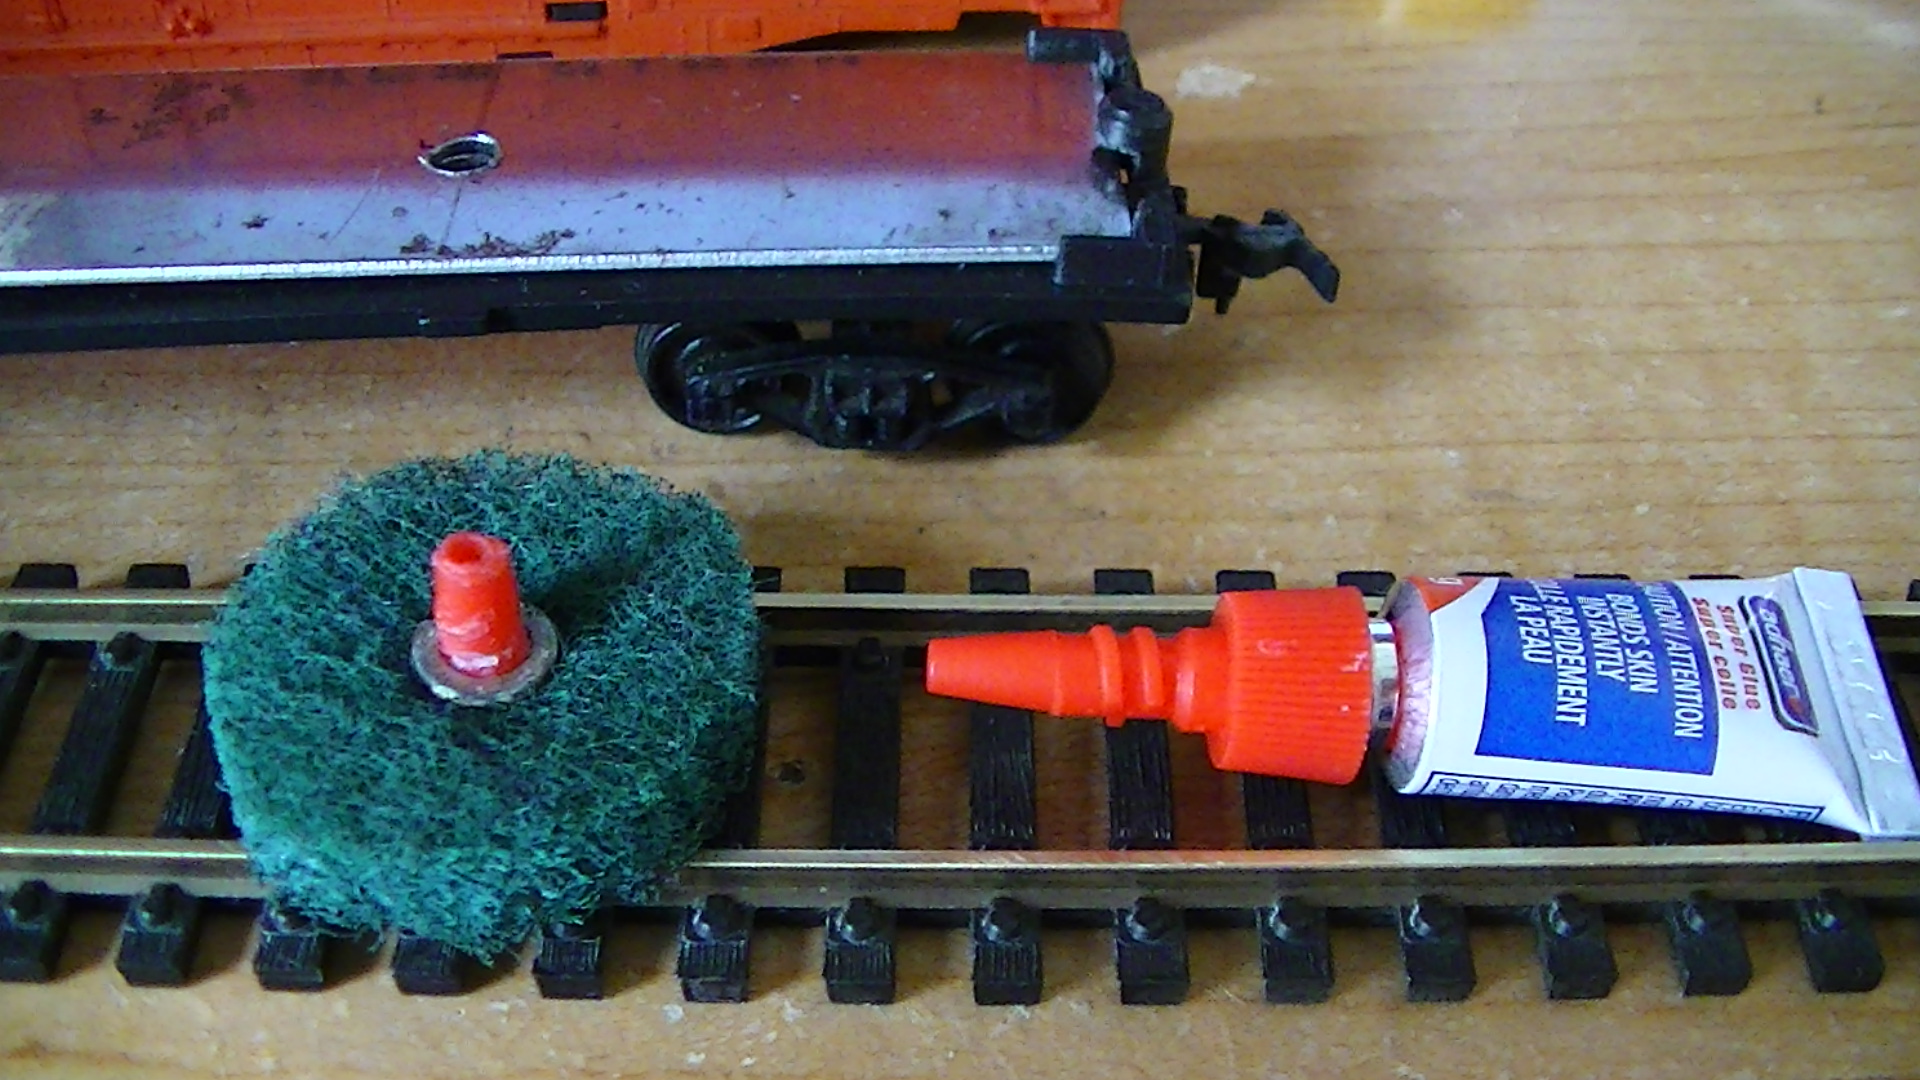
Okay cut the pad the same size of the track with a tiny tiny bit wider than the width of the track.
I used a empty crazy or instant glue tip for the post that the motor post will slip snuggly into.
I used a tiny washer on both sides of the pad.Force the washers around the glue tip on both sides as in photo.
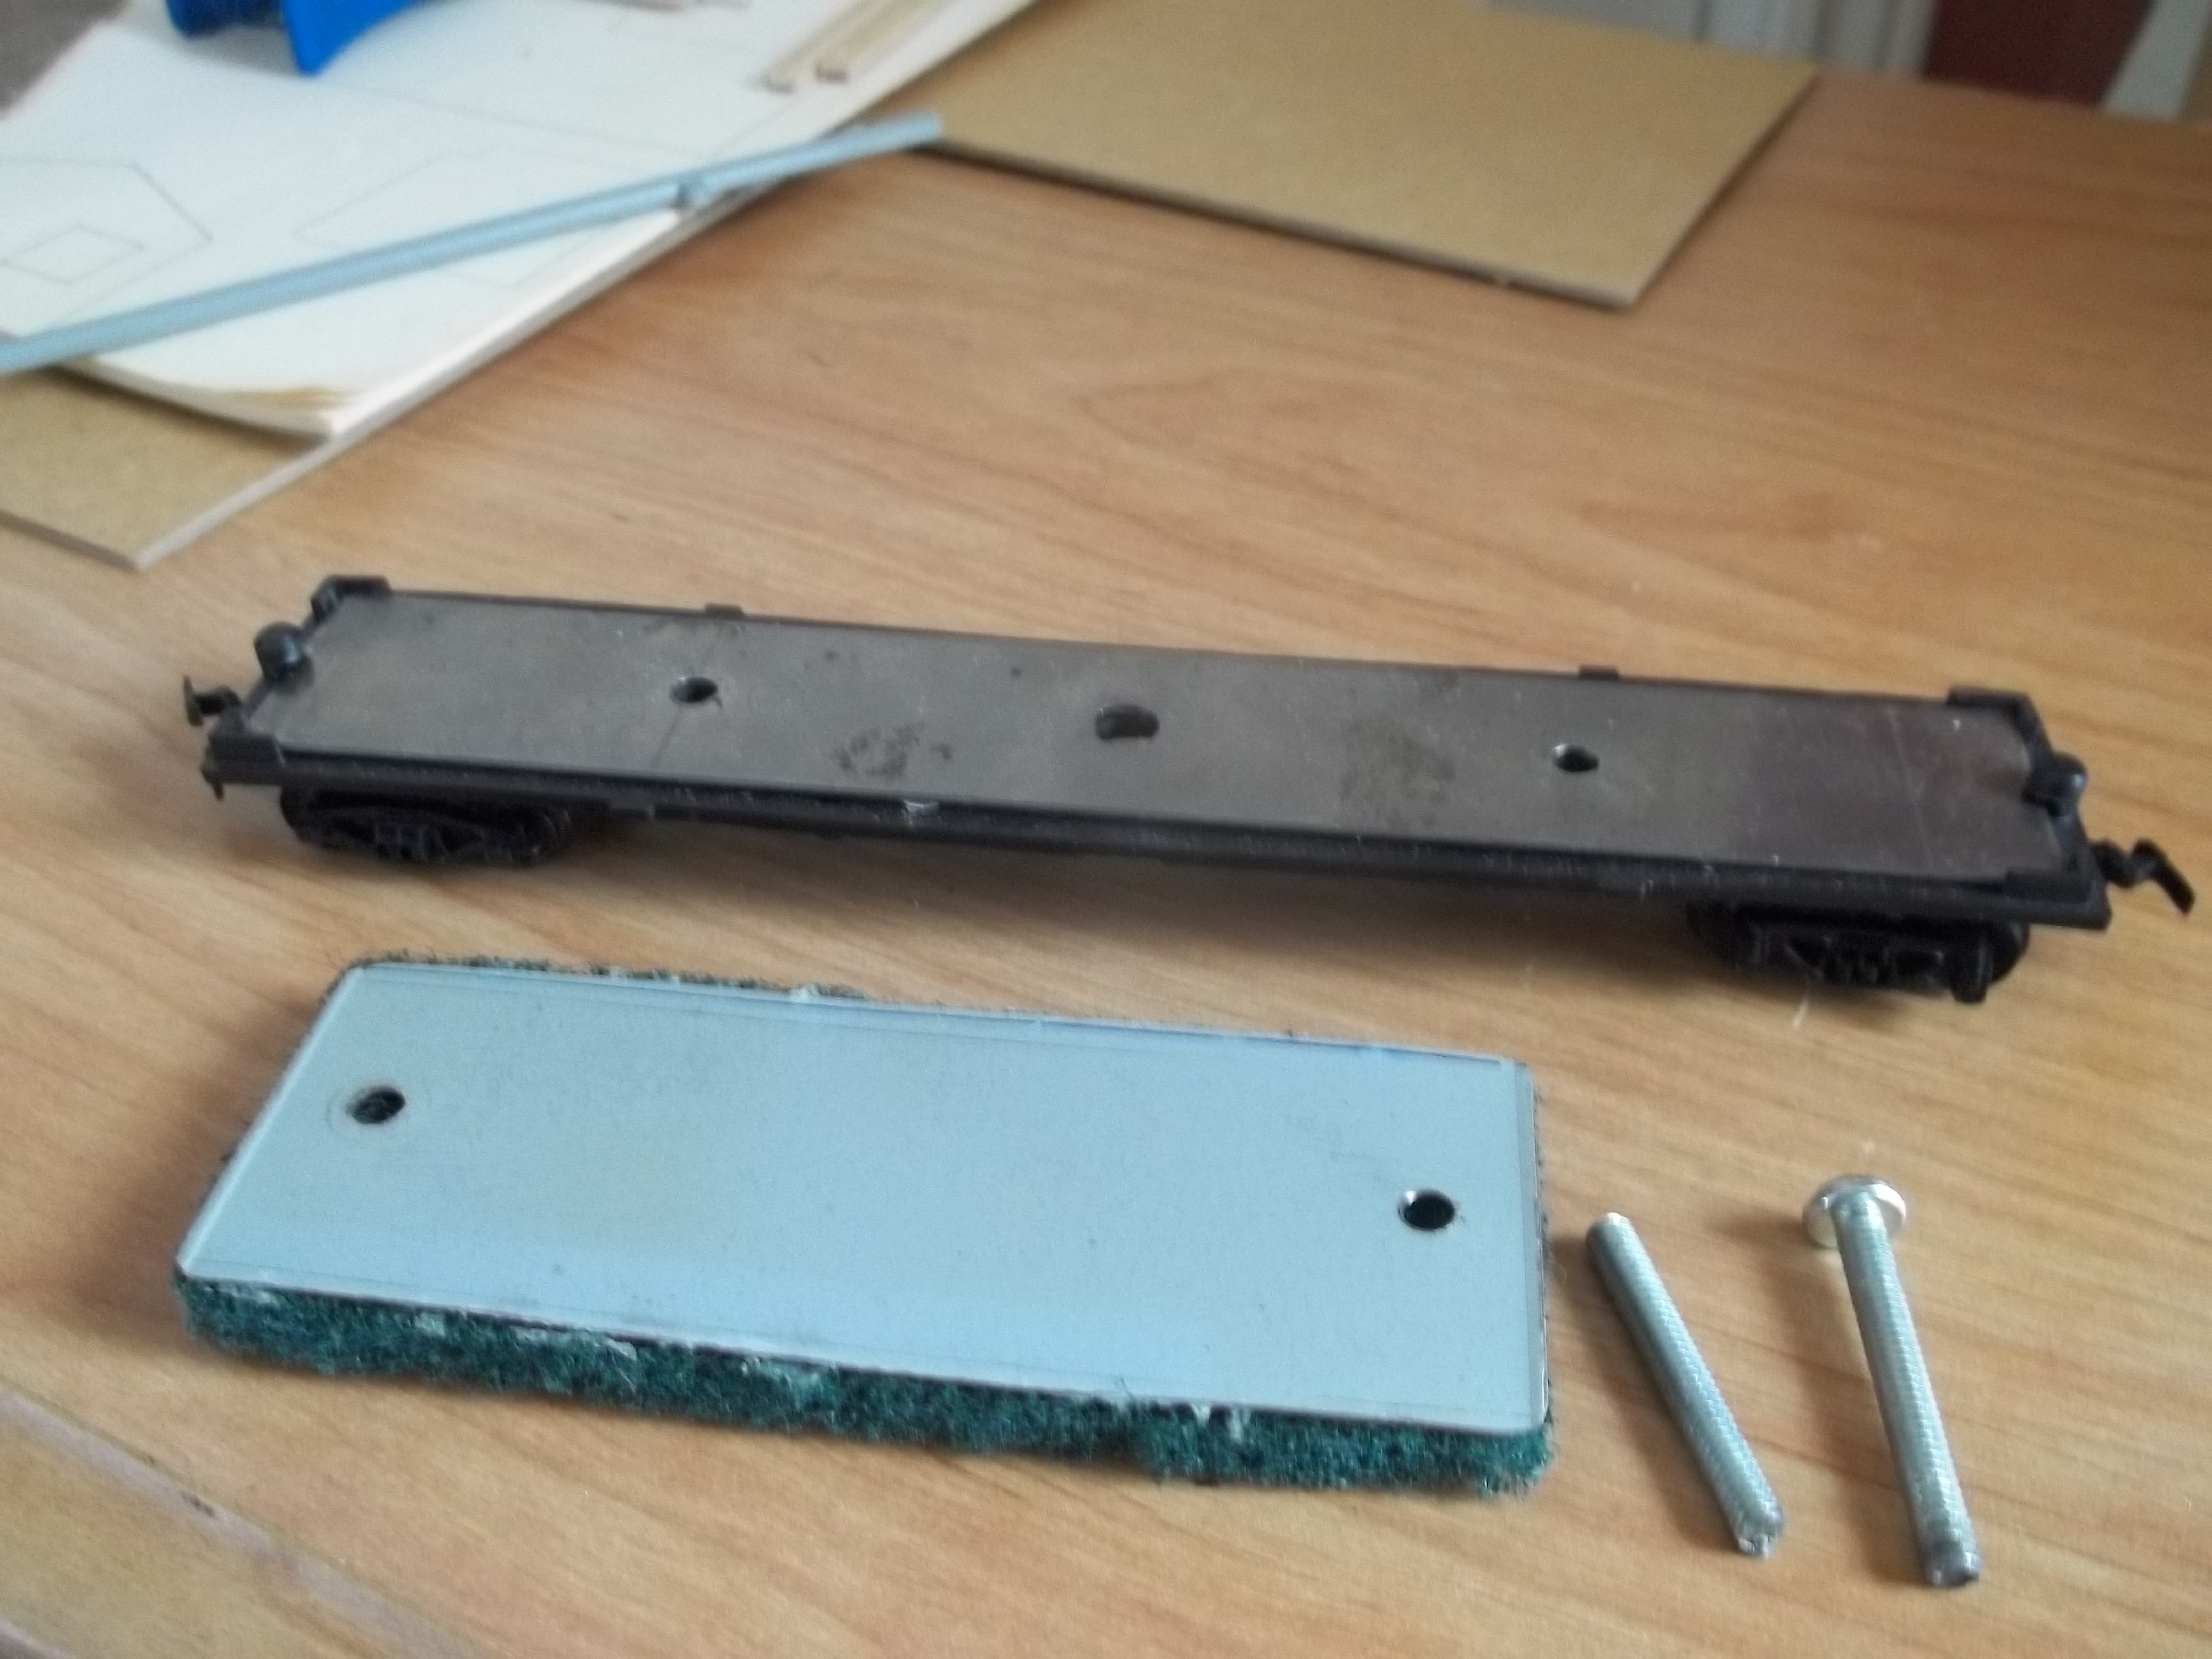
Take your car and drill a hole in the middle of the steel plate. Make the hole the same size as the lip on the motor where the shaft comes out.It will fit snug.
Make a bracket or brace to hold the motor on top of the car. Dont glue the pad to the motor as you want to replace the pad when it wears down.
Im not sure what idea in them photo’s people want to build. I have a scrub pad and small motor cleaner and that huge 12 volt monster. That one scares me. The small motor one is easy to make and is powered either 9 volts or 2.4 volts.
The first picture is a simple cleaner.
You see the holes matchup and two screws. When you turn the screws they will put more force with the pad to the track like the expensive cleaners you see with adjustable screws same thing. I don’t like this one much. As I found if your track connections are not even or stick out that cleaner will get hooked on it. So I went motorised.lol
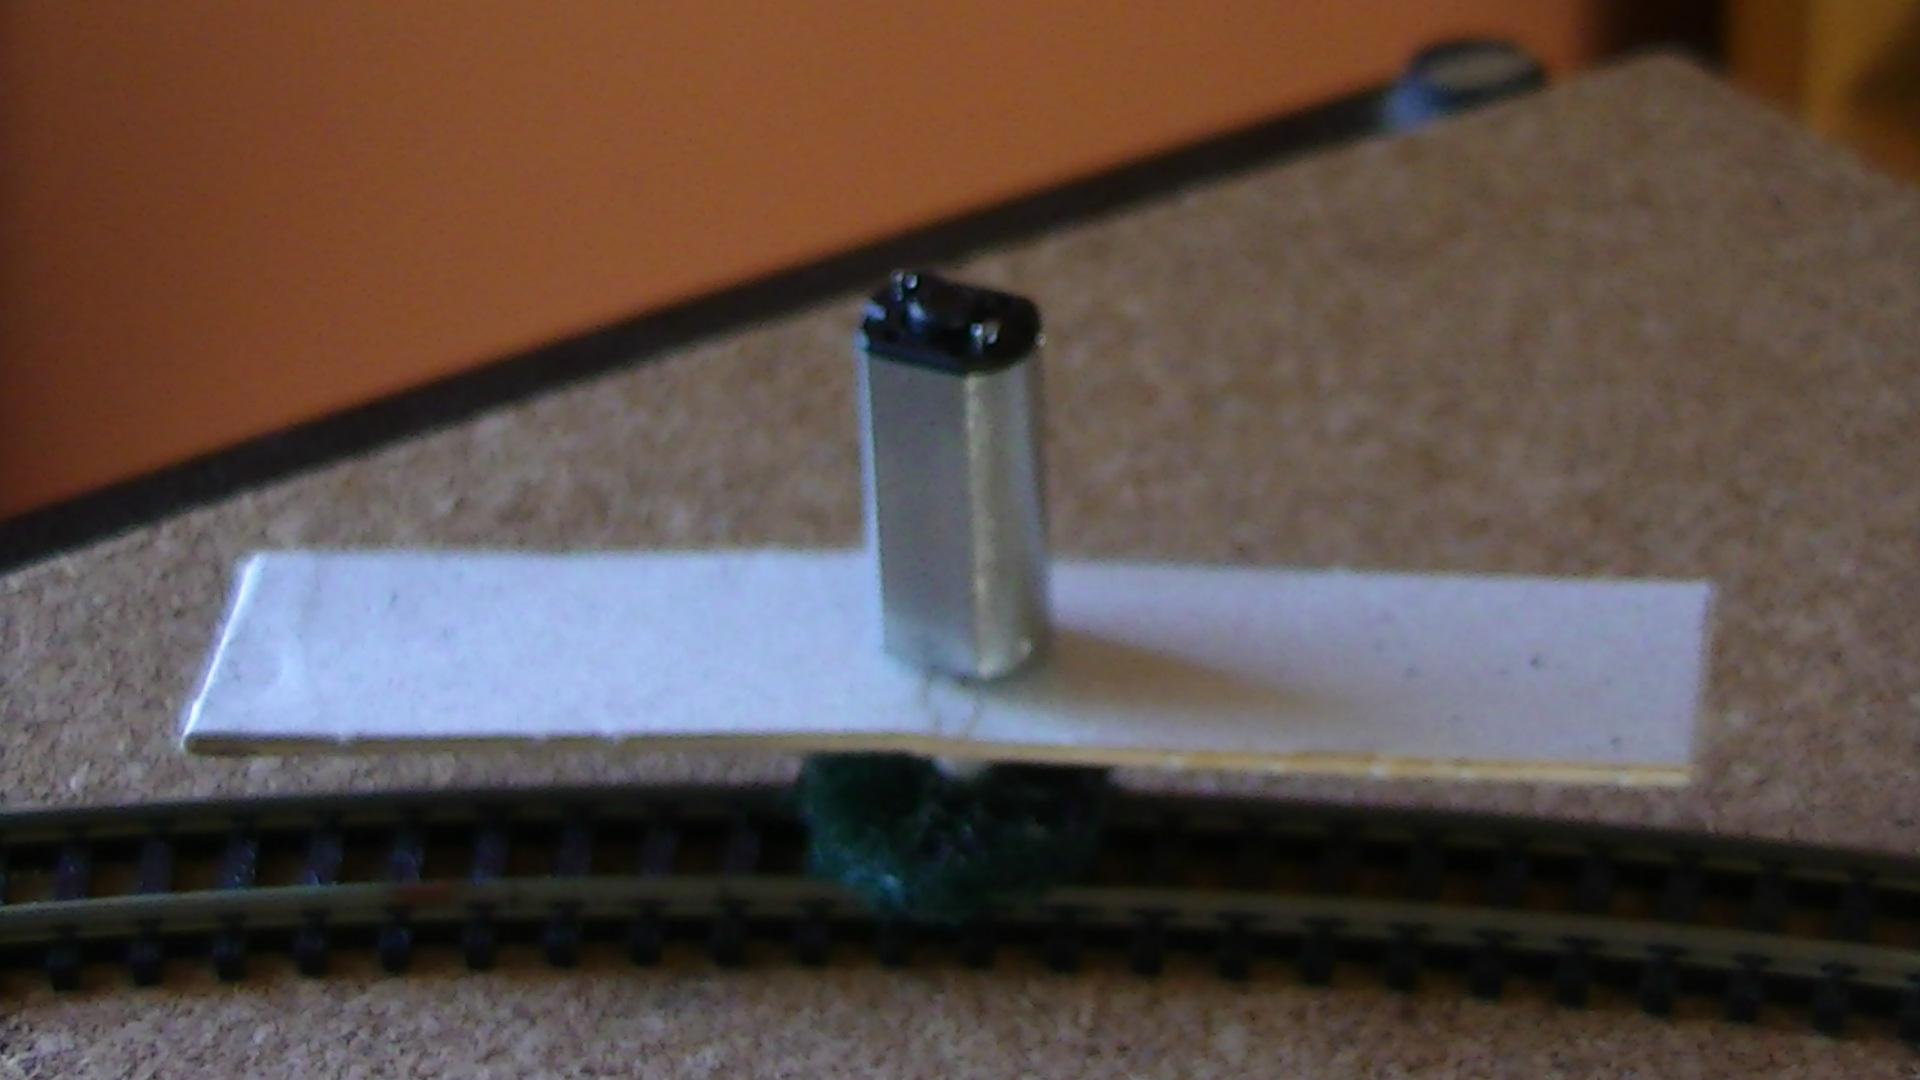
The last picture is a N scale cleaner.
The with paper is to show a car being there and the motor.I had 1 piece of N scale track to show it fits.That is a really small motor from ebay to power it. so if none want to make the motorised I have mixture idea may want.
Kim”
“Hi Alastair.
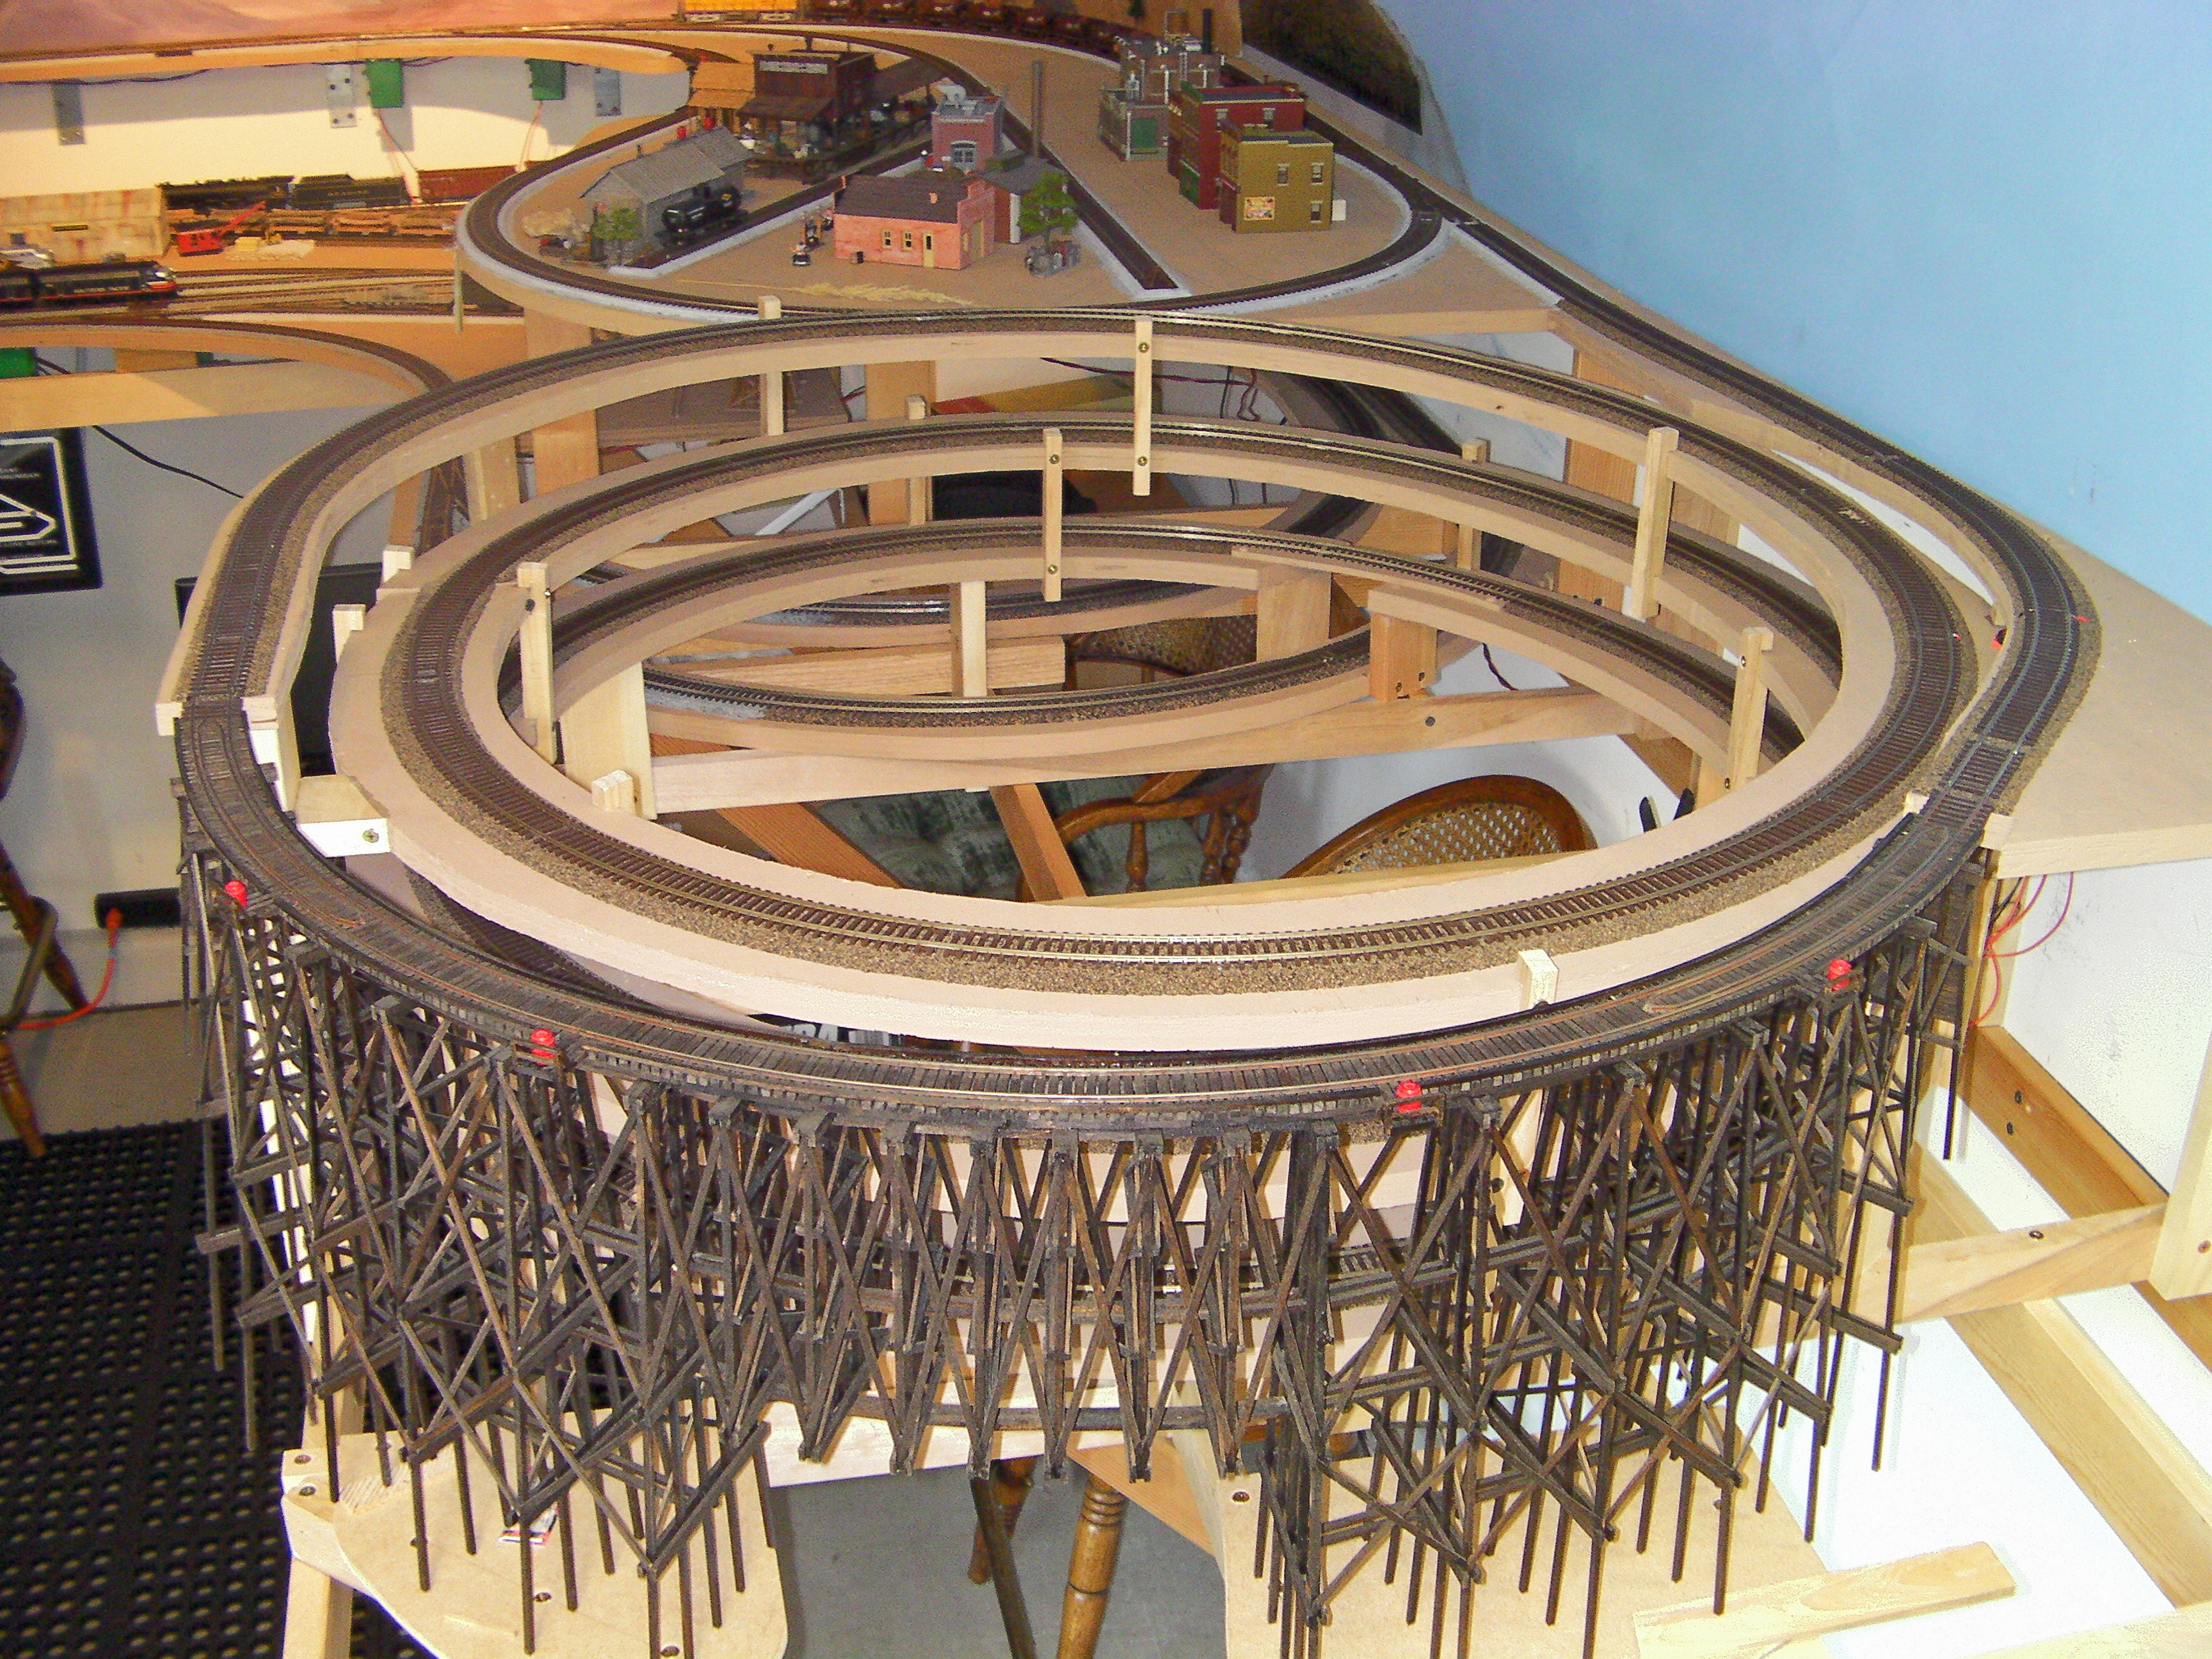
By building a helix you can literally double the running time on your layout.
The real key is to build the helix and then test the operation through at least all four seasons through heat and humidity changes.
Once you are happy with the stability of the operation, covering it up with scenery is a lot of fun and allows transition from one level to another very realistically.
Picture #1 shows the “testing” phase while picture #2 gives you an idea of scenery. This is one of three helix transitions on my layout.
Model Railroading is FUN!
Mark”

Big thanks to Mark. Spectacular pics!
I had hoped to publish a great offer on the print out buildings – but I’ve not had time.
So I’ve bought back this silly offer.
Have a look at the buildings below – you can get all three for just $6. I think they look great (but have a look and make your own mind up).
At $2 a buiding, it’s cheaper than the Big Kahuna deal).
So if you want to have a muck about with some scratch building, now’s a great time to have a go. You get all three buildings, for $6, but only until Christmas day.
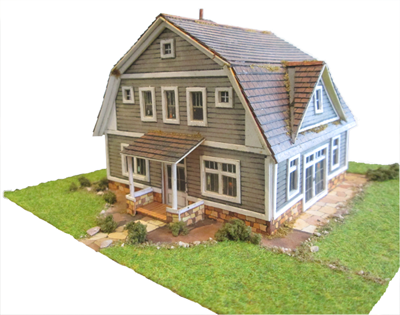
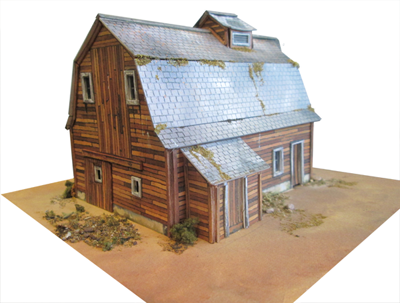
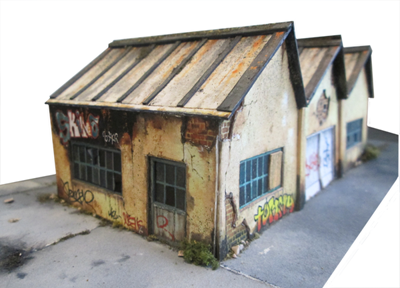
You can print them out to any scale you want too.
You can see some more pictures of them here. Have a look. He’s done a great job on the detail.
And if you fancy bagging this deal – all 3 for $6 – you can also do that here.
Happy scratch building…
Best
Al
PS If you’re looking for the latest ebay cheat sheet, it’s here.