Jim’s layout update

“Hello all, from across the Big Pond It’s Jim Volmer Sr. with an new update on my dream layout.

I have finally decided to name the new layout after my best friend. Her name is Starr and she is now eleven years old. Not my child, my children are all grown. NO Starr is my Doberman. Starr is my sweetheart, very loving, and highly protective of me. When my ex-wife would go off and get stupid acting toward me, Starr would go in front of me and sit there, just waiting for her to do something really stupid. Thank goodness, my ex-wife would back down. So since she is my loving companion I thought the best way to remember her would be to name the layout after her, and therefore the railroad will be called STARR POINT, and no, Starr does not know how to point.

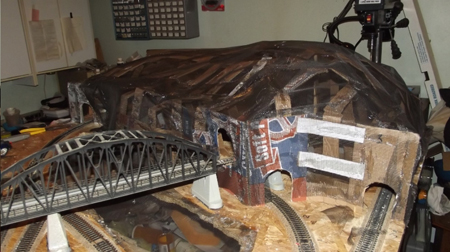
Ok now onto the update. The following pictures are of the MOUNTAIN. In the last update I showed the beginning of the mountain shape with the cardboard strips being used. So here is that last picture once again.
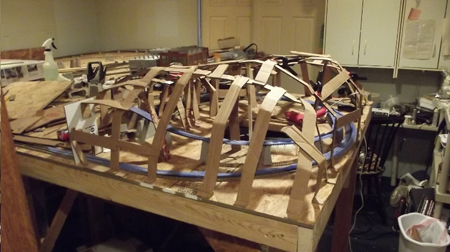
The picture does not tell the mere size of the mountain. It measures 4 feet 3 inches from north side to the south side, 2 feet 5 inches deep and 18 inches high. Whew, that is a very big mountain. It contains three portals, and two sets of track, one set that climbs up through the inside of the mountain to the 6 foot bridge that leads to the reverse loop and cargo terminal. The lower track runs through the mountain from the south portal to the north portal, exists and runs along the river that sits in the front of the mountain.

So here is a picture of the mountain with the screen installed and one with the plaster cloth also installed. It took 5 rolls of plaster cloth to cover the mountain and the river area.
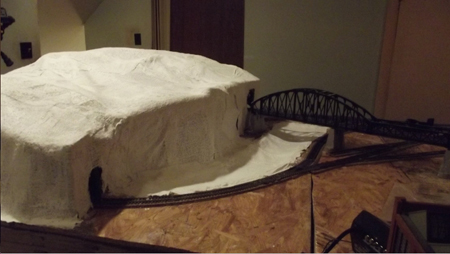
This picture is looking back 6 feet ( the distance from the mountain to the end of the bridge area ) toward the mountain.
For the portals of the mountain entrances, I decided to use rock ‘ out cropping ‘ from the old mountain. When I dismantled the old layout, I saved most of the rock out cropping to use on the new layout. I still have to make some to replace the ones I could not save, but that is okay.

The first picture is of the North Lower Portal with the rocks installed. It took approximately 30 minutes to complete this opening.
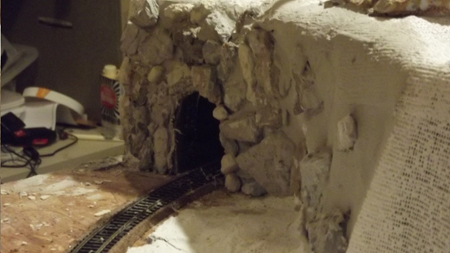
The picture above shows the South Lower Portal without the rocks installed. I wanted to show how dramatically the portals look once the rocks were installed and how they enhance the opening appearance.

And here you can see the dramatic difference the rocks once installed make the opening stand out so much more. There are many, many other options available for tunnel portals. Since this is a mountain area, what better material to use than rock ‘out cropping’s ‘ made using HYDROCAL. As you will notice the ‘PORTAL ENTRANCE’ that takes the train(s) to the upper level is not completed here. It will be completed shortly and included in the next update.

On the top of the mountain will be trees, lots and lots of trees, along with a HO Lionel operating Radar Tower and some out buildings in “N” scale for ‘force perspective’ It should look pretty neat once it is fully completed.

The ‘river’ area in front of the mountain shown below will include people fishing both on land and from a boat.
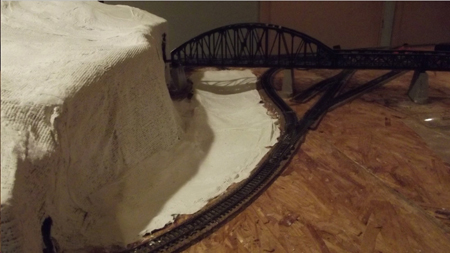
I am also going to include HO ROCK CLIMBERS for the mountain. I think it would be neat to have rock climbers climbing to the top of the mountain.

Well that is all for now. In the next update I will be showing the COMPLETED MOUNTAIN less the climbers for now the river completed less the men fishing, HO PROGRAMABLE TURNTABLE, and HOLDING TRACKS FOR THE ENGINES plus much more.

Until then, HAPPY RAILROADING
Jim Volmer Sr”


“Hi Al,

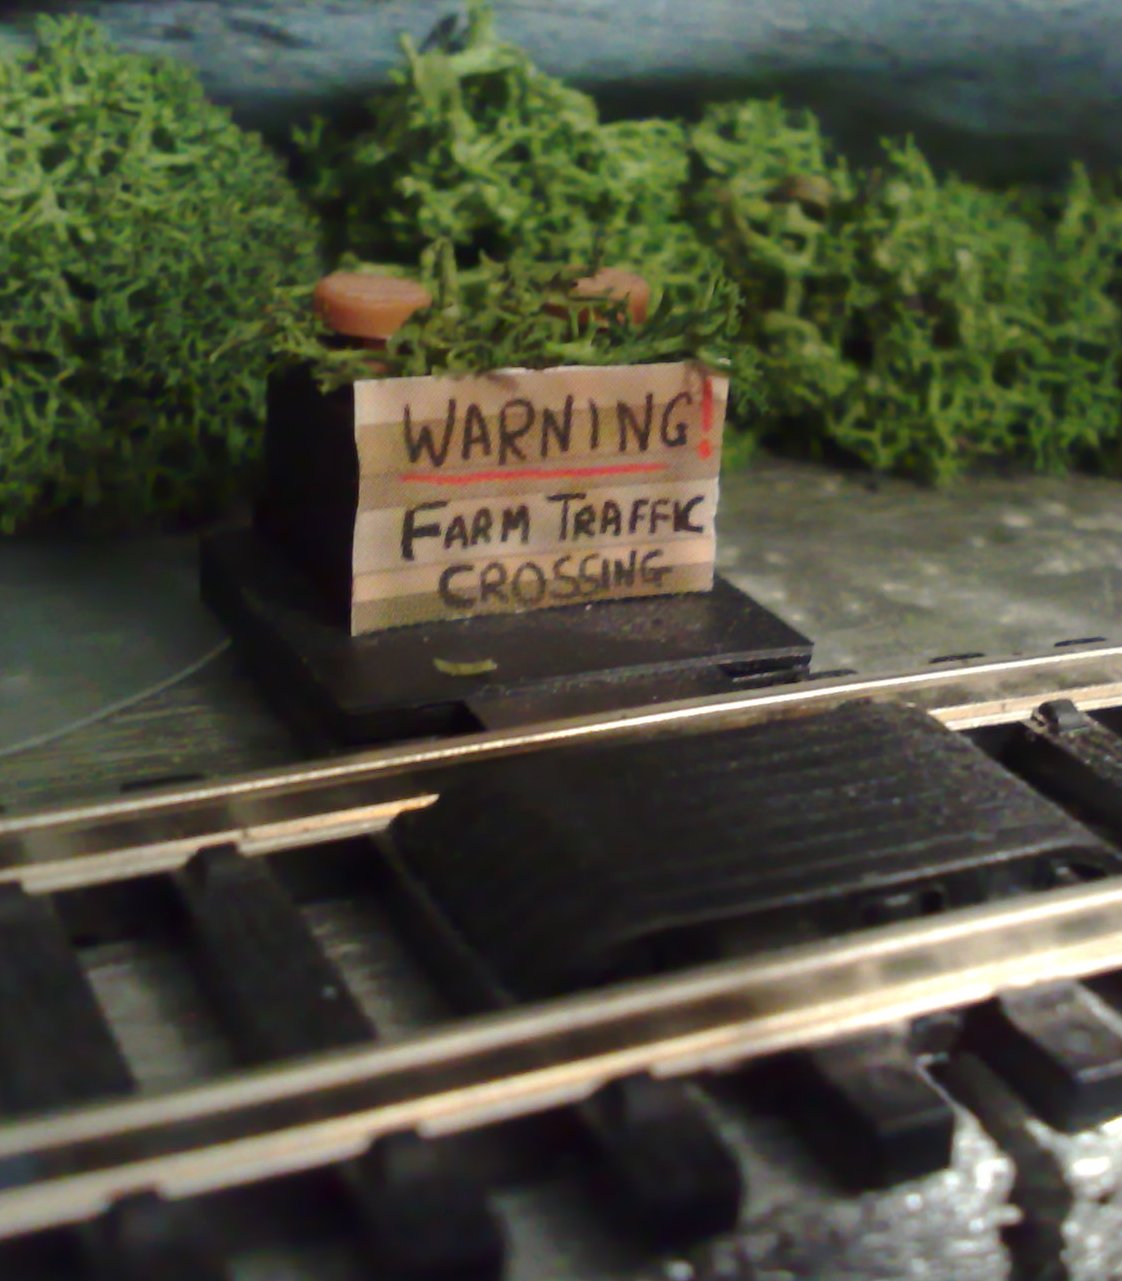
When I started the Railway In My Wardrobe, I was a complete novice and not interested in scenery. So I got a standard Hornby power rail. However, when I started adding scenery, the bulky power rail became more and more of an eyesore. I don’t have room to put a building over it. And I can’t change it out for soldered connections without dismantling the entire layout!

However, with a bit of signage on the front and some greenery on top, it becomes a raised flower-bed with marigolds. Well, almost!

Thanks for all the news, grand job you’re doing!

Robert”

“Hello Alastair,

I would like to take this opportunity in thanking your wonderful readers for their nice comments regarding my “Byodo-In 360” project.

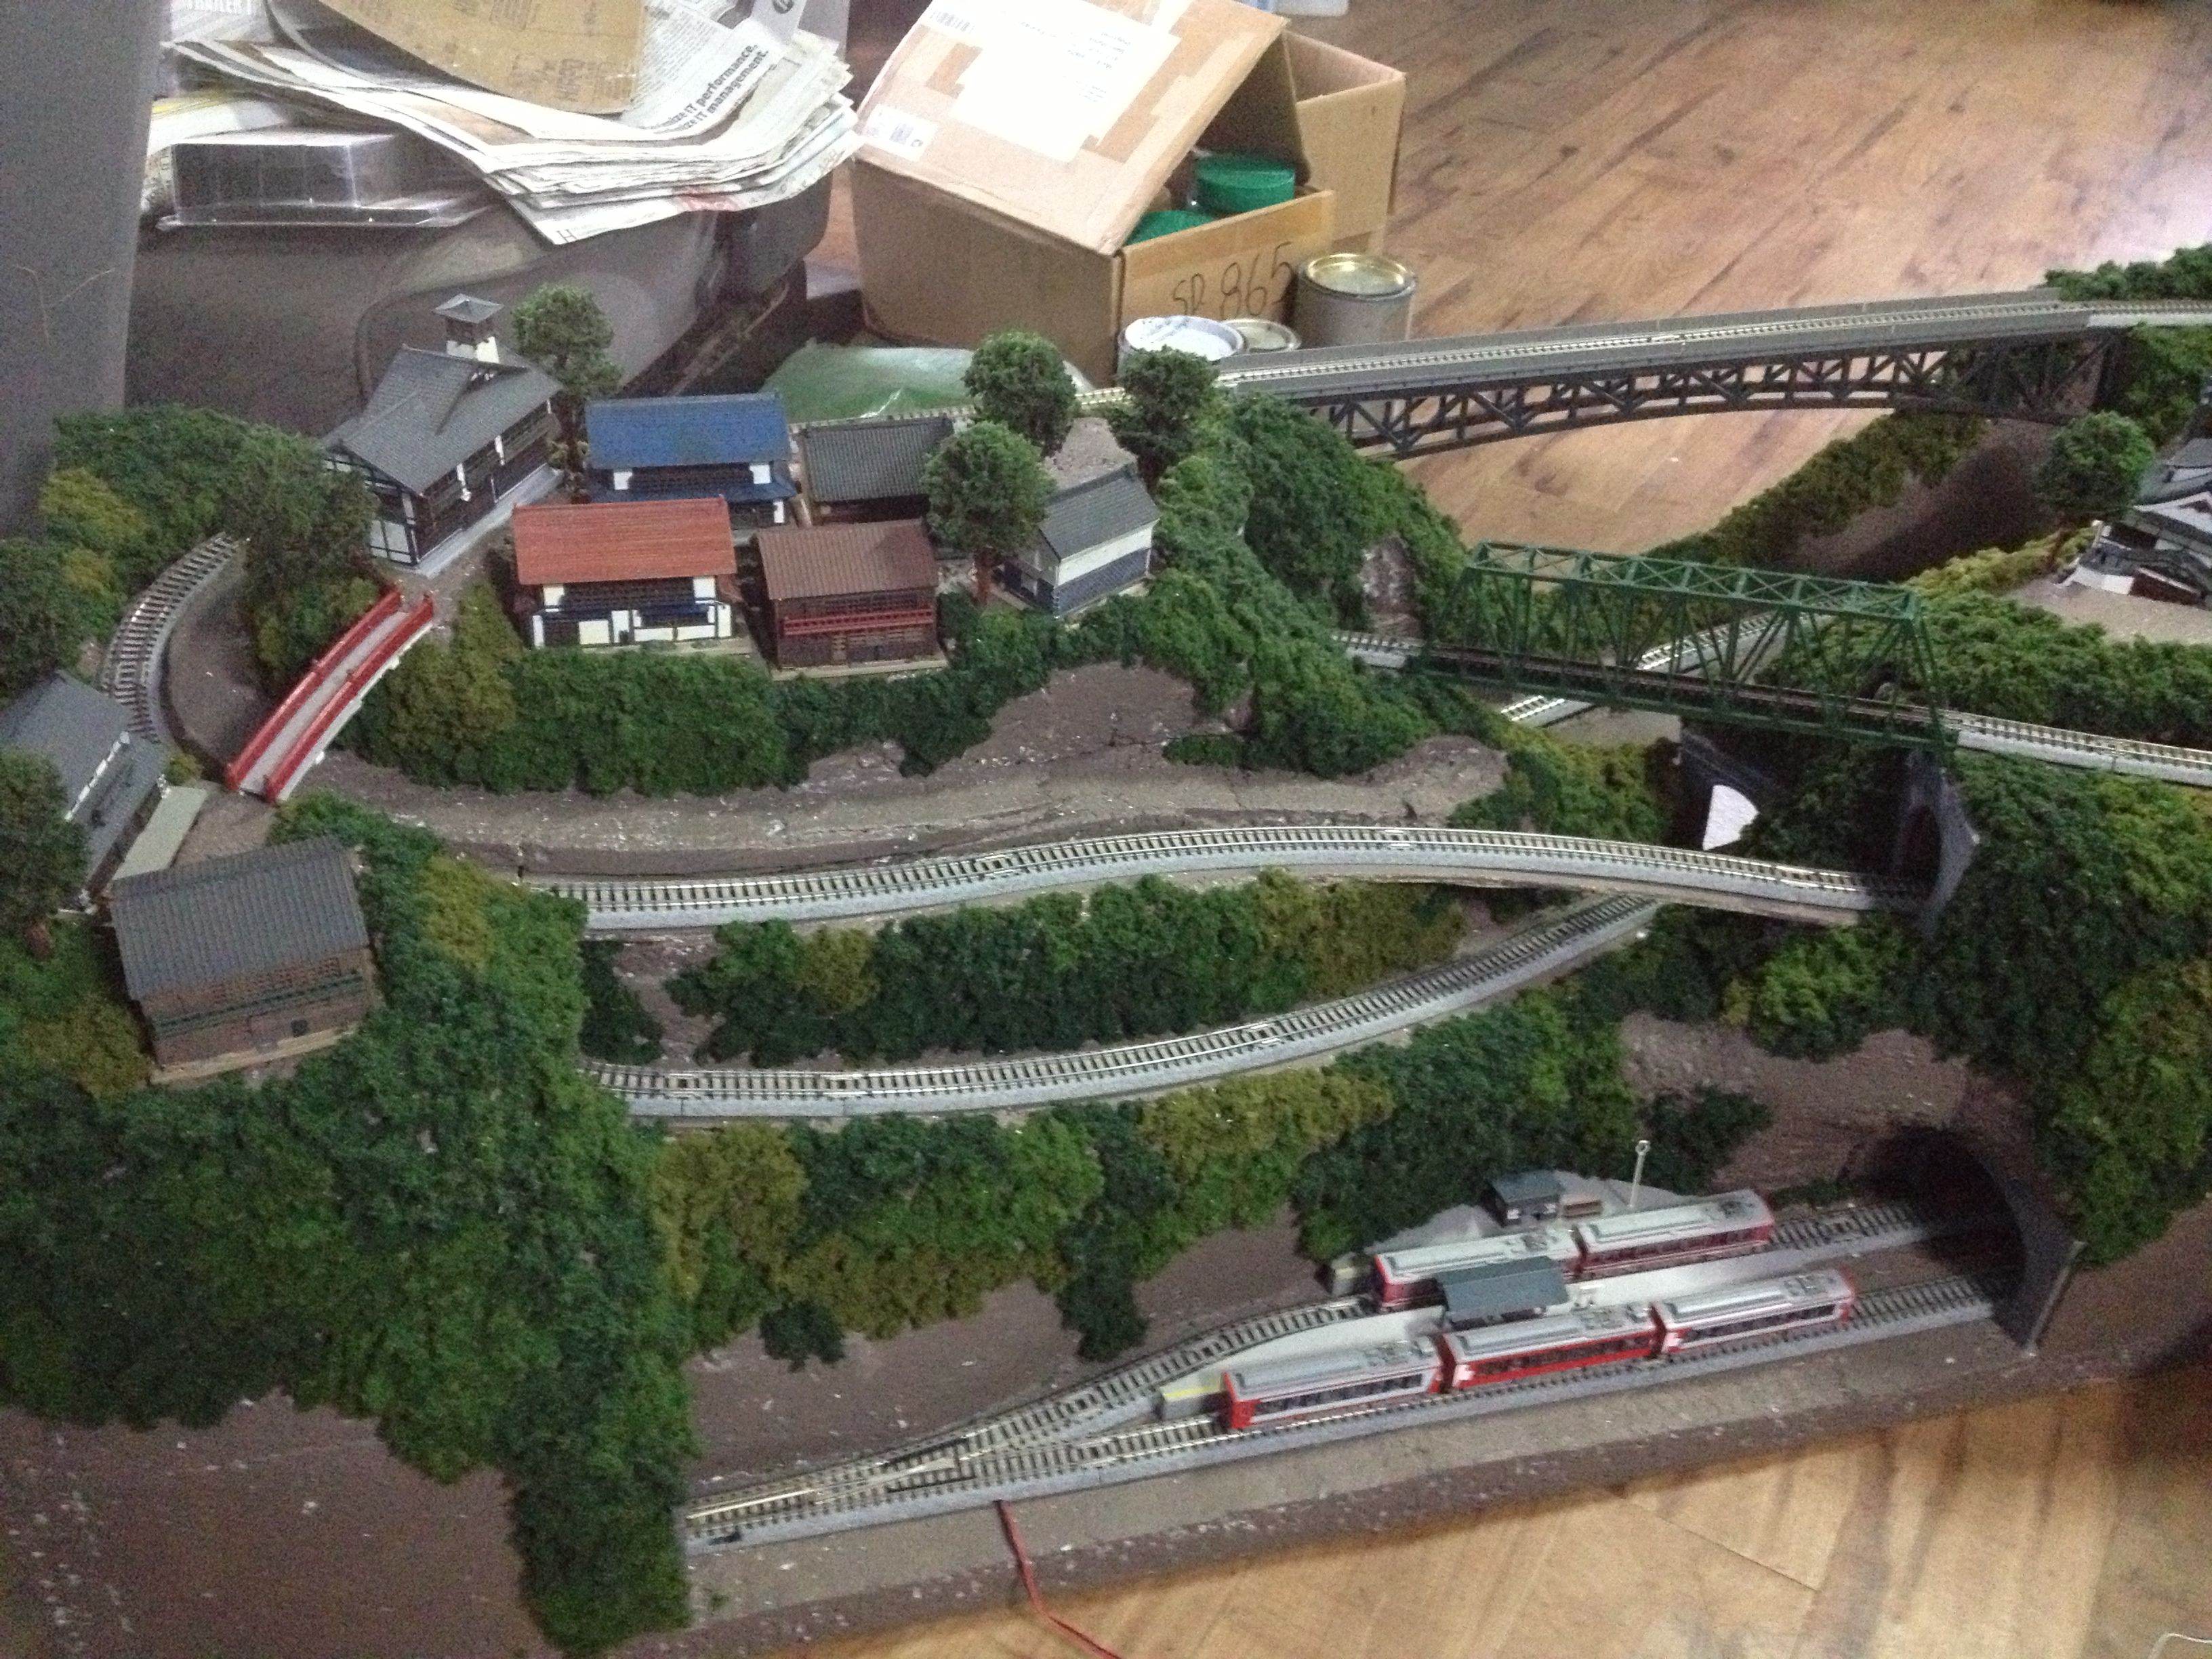
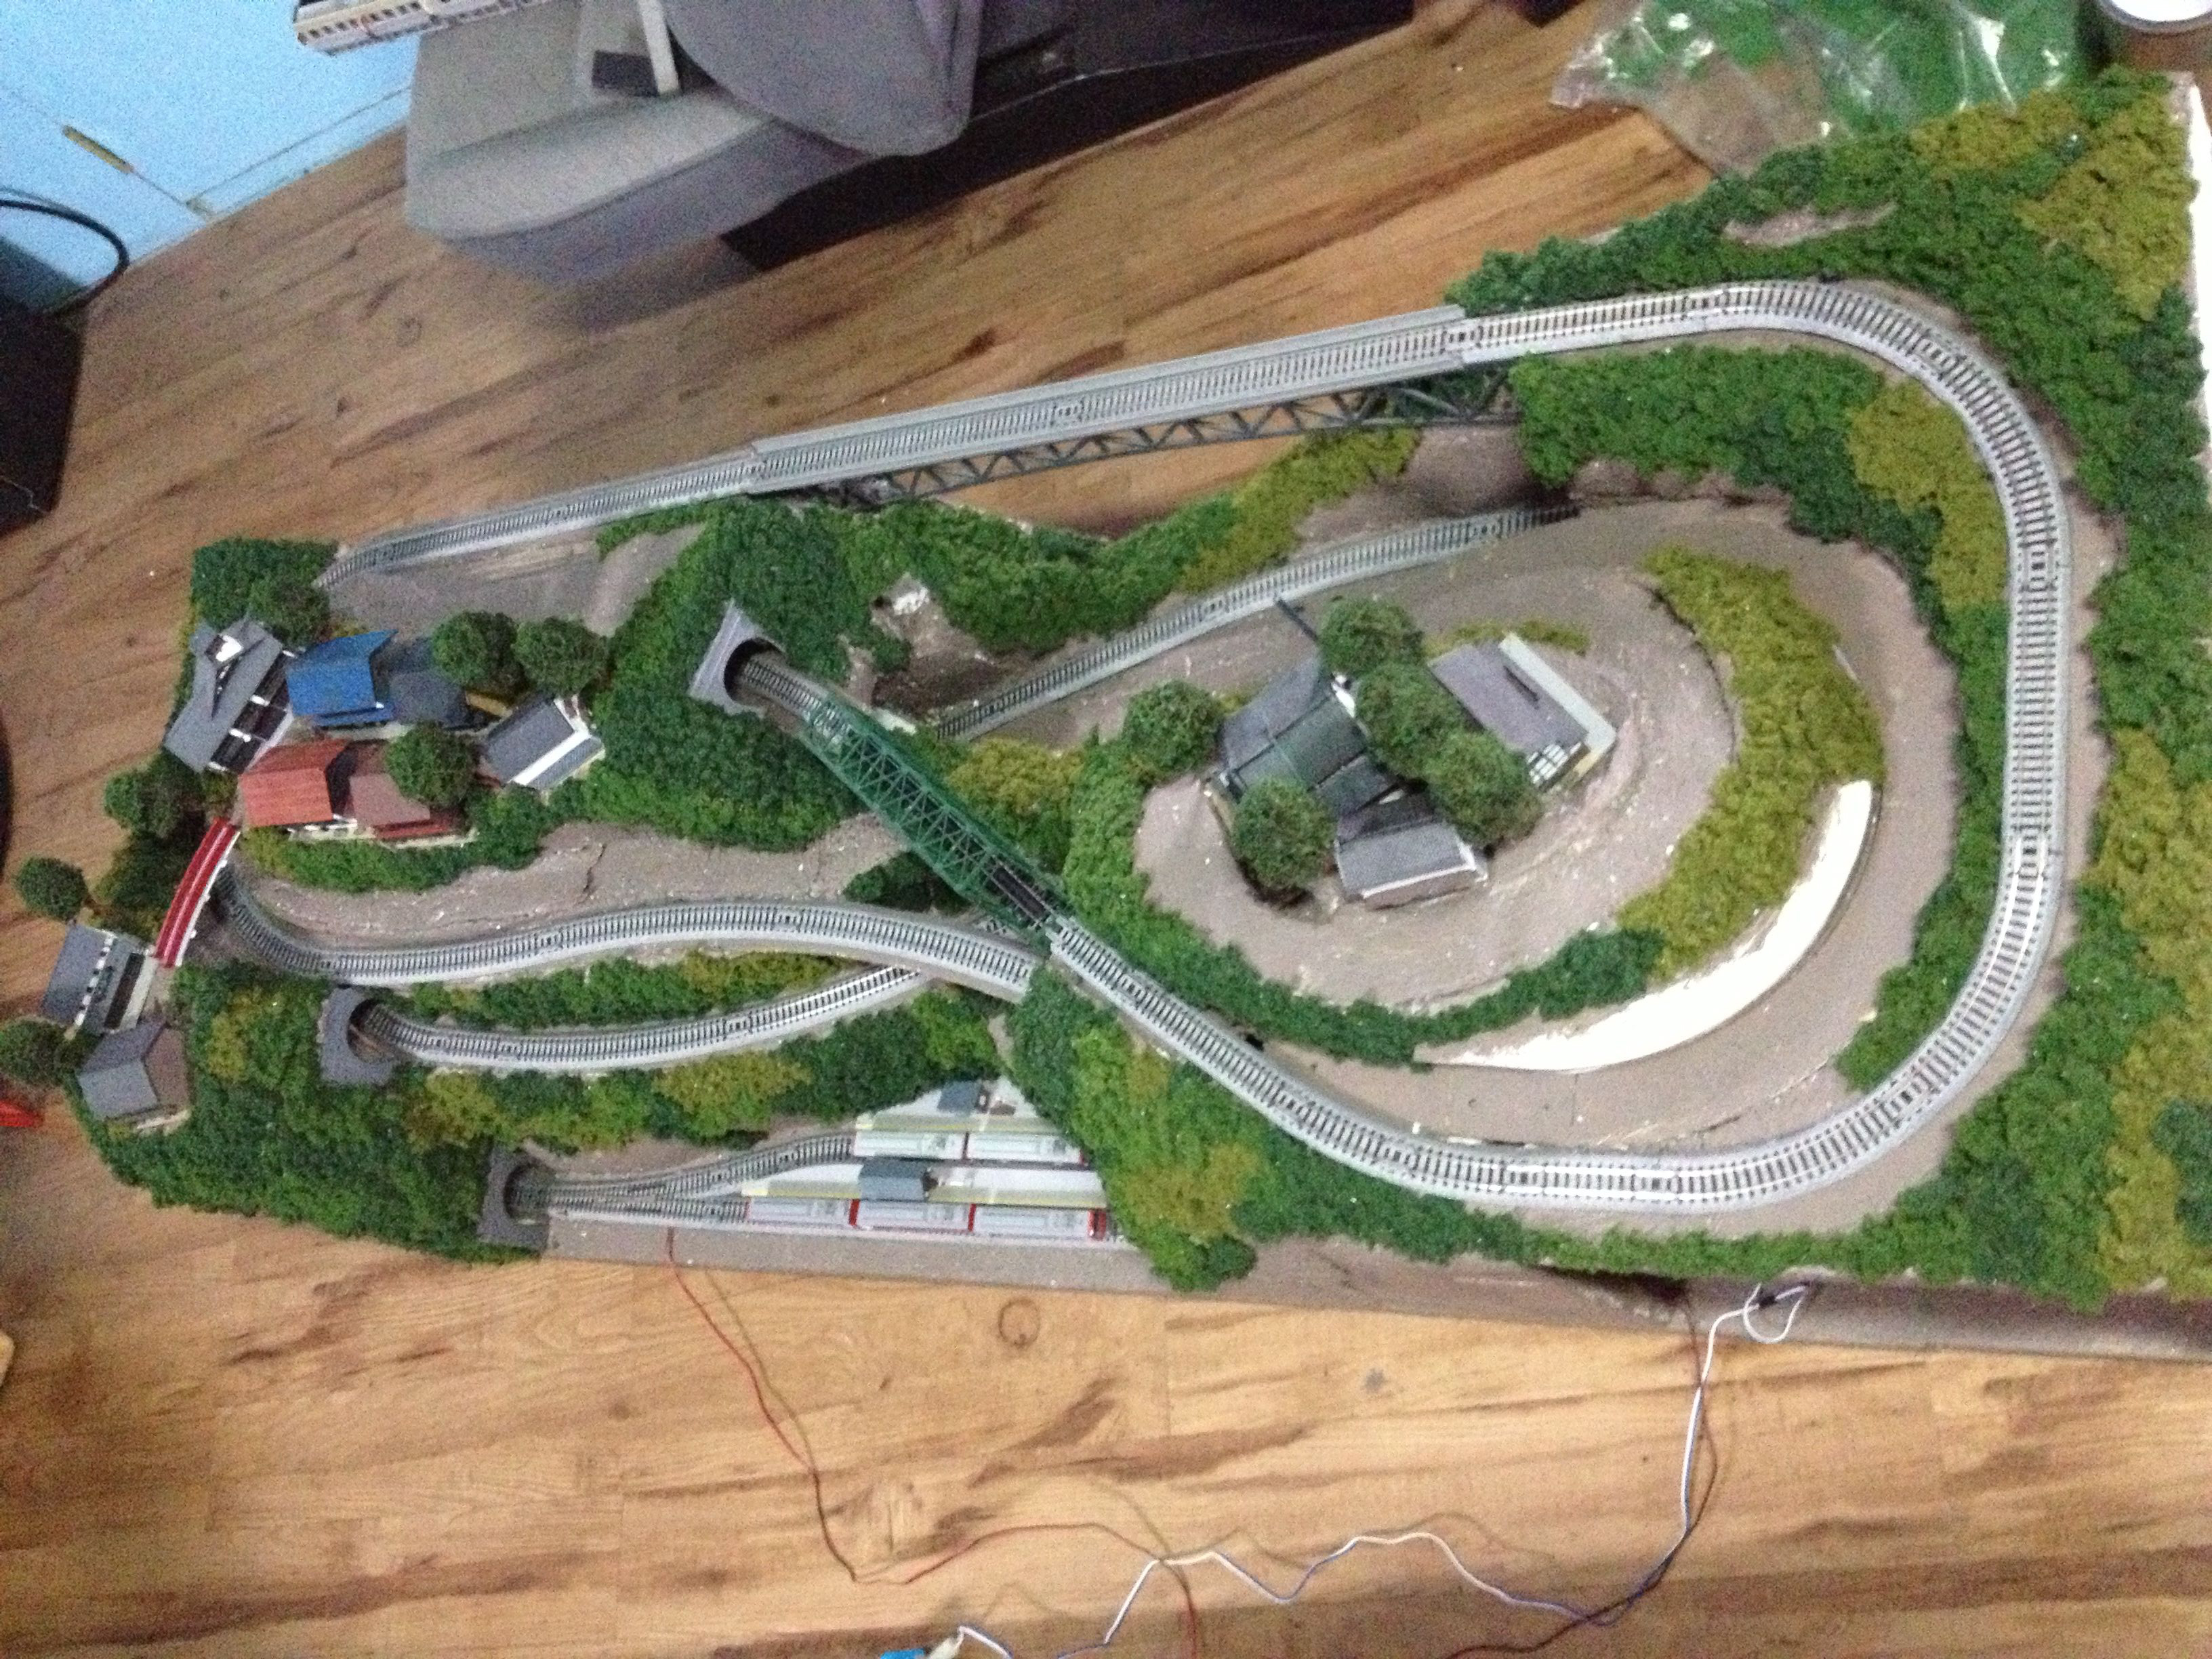
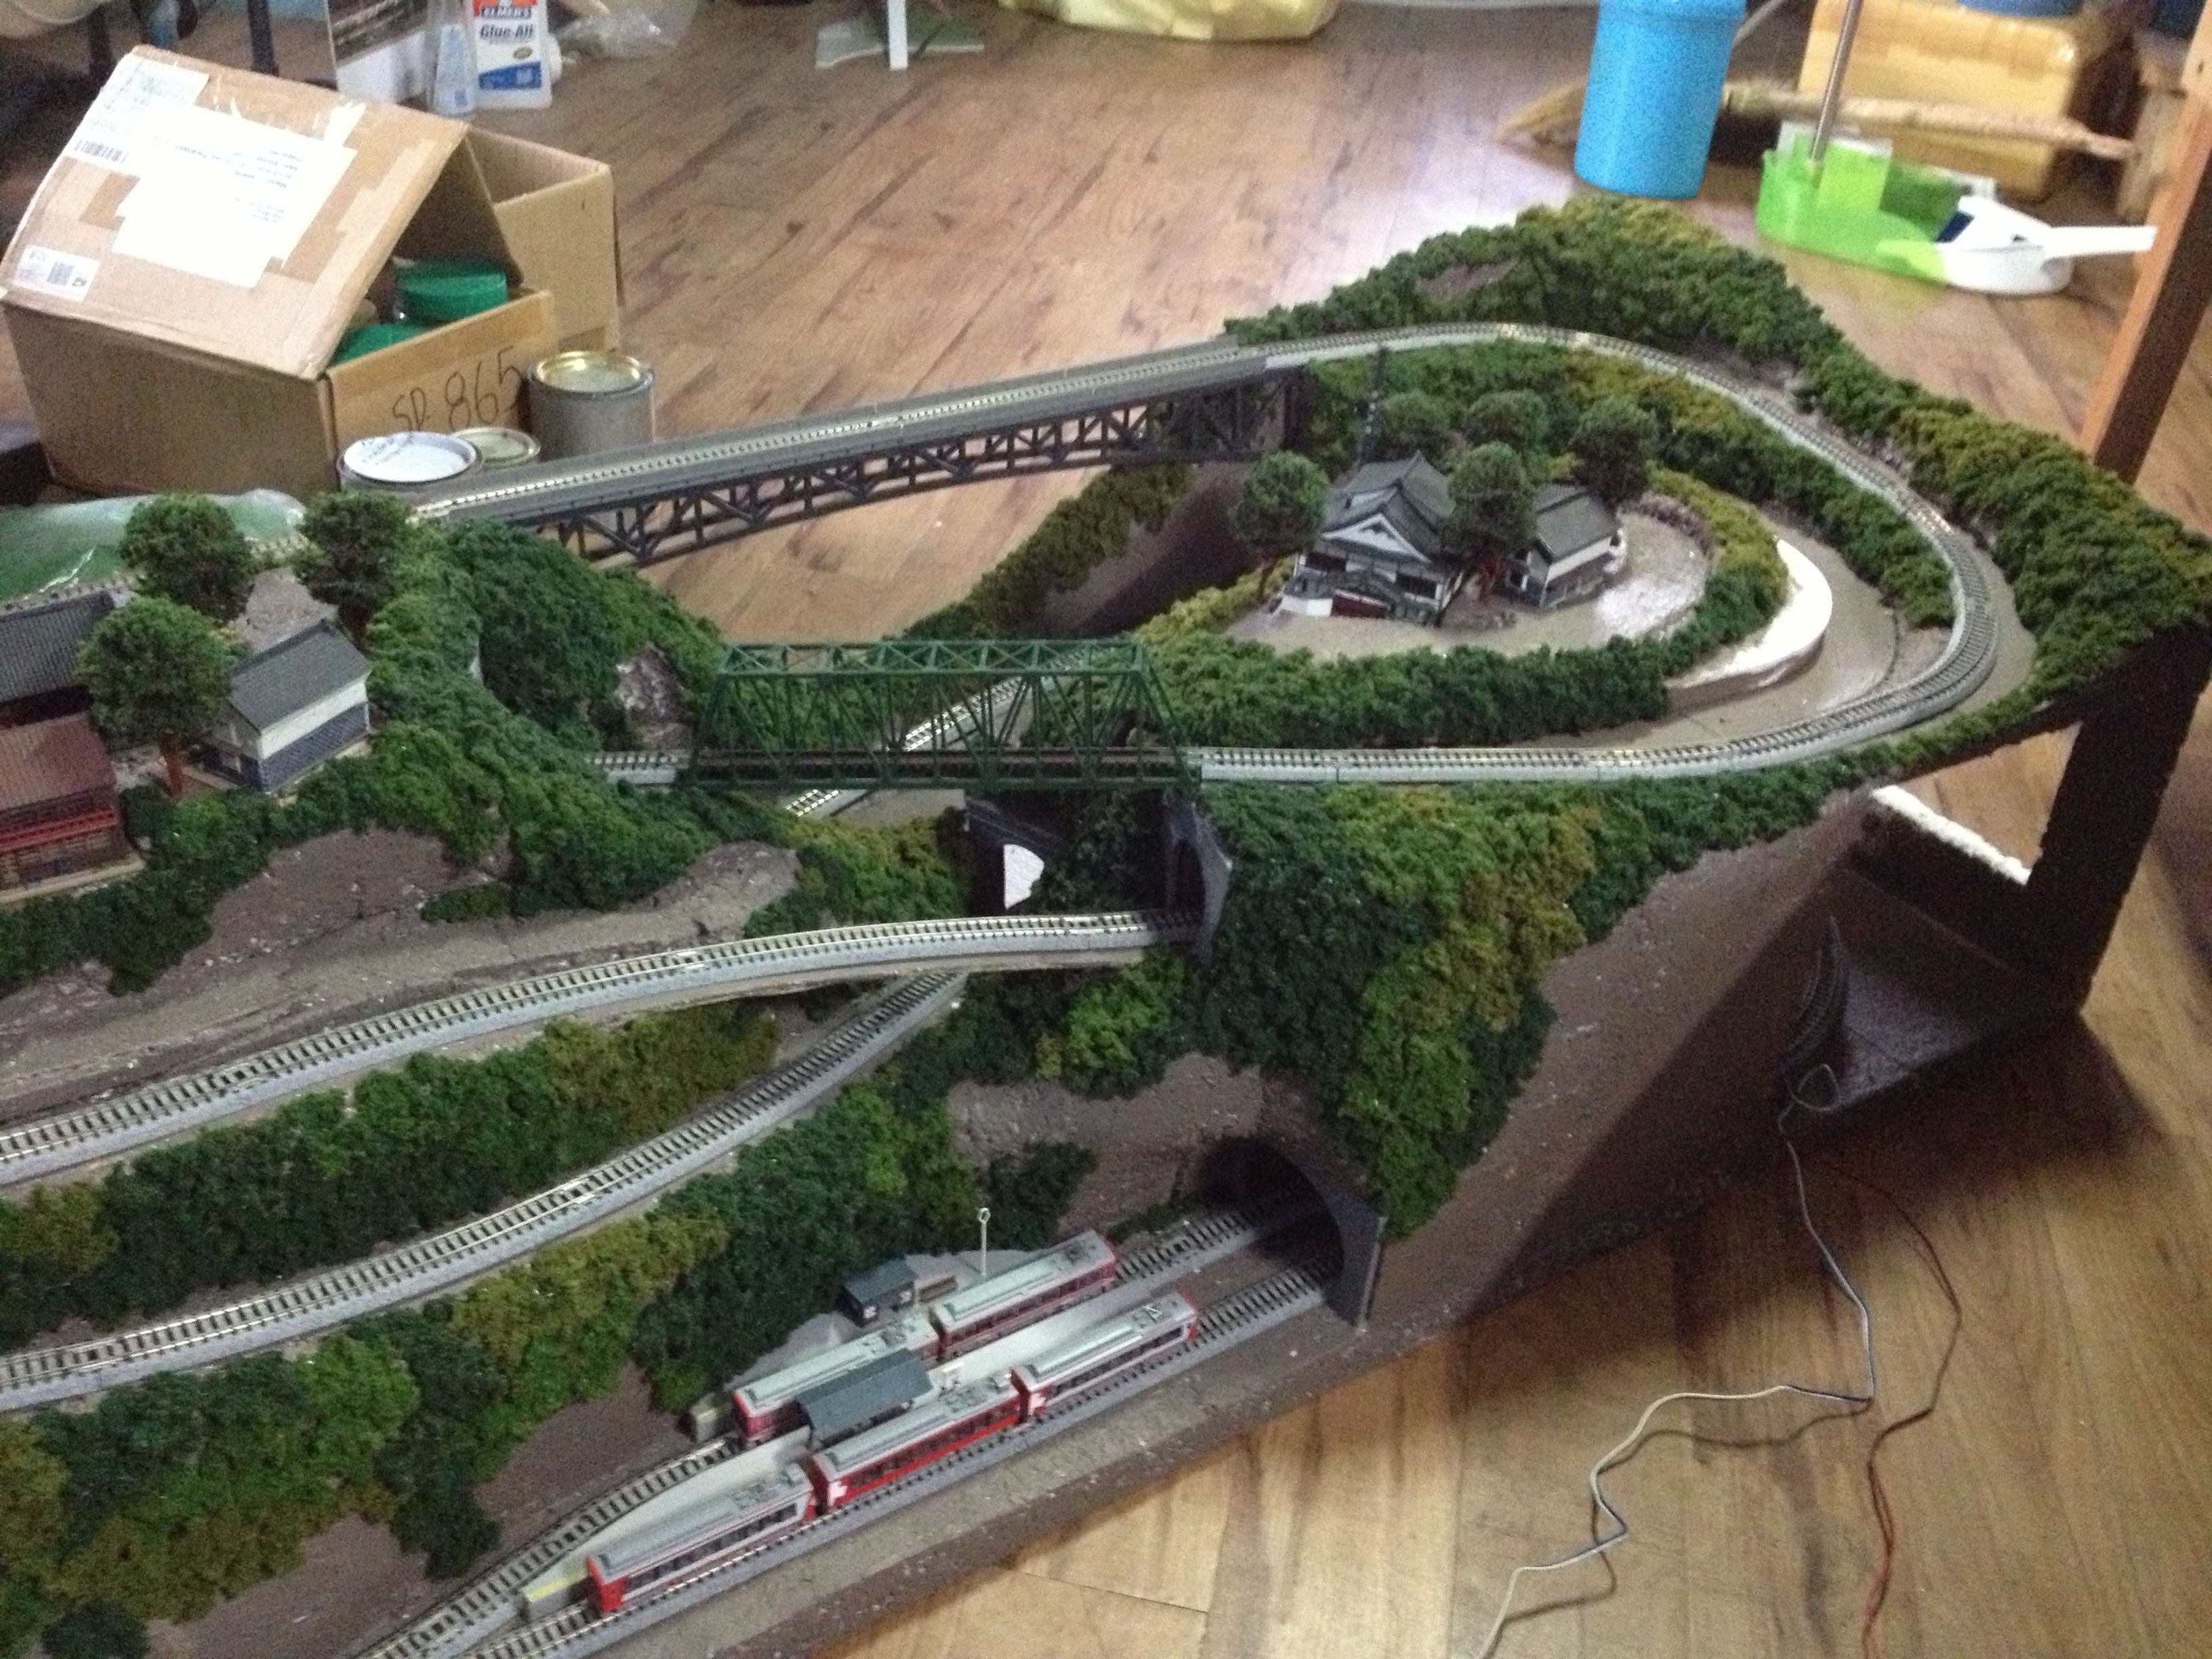
I, again embarked on another “intimate layout” project with the challenge of placing more tracks for a longer run time – but in a limited space. With a footprint of 19″ x 55″, I thought that the only way to go was up to achieve the challenge thus the mountain layout was conceptualize.

Being a member of JNS forum modeling Japan railways, I have always been inspired by the “Hakone-Tozan Railway” – a real mountain railway in Japan utilizing specialized trains to handle the very steep inclines and tight turning radiuses of the railway. While my project is nowhere near prototypical, I did adopt steep inclines and tight radius tracks (R-150mm / 6″). Height of the top tracks is at 14″.

Both Tomix and Modemo brands offer Hakone-Tozan themed trains, so they were perfect to use for this layout.

The whole layout is made out of 1″ thick white styrofoam and was brushed on with “styro-skin” for stiffness. Ground was painted with brown flat wall enamel before applying the foliage clusters. The layout has an open back and open sides for cleaning and maintenance of tracks.

In addition, both mountain tops are easily removable by pulling up to reveal the tracks that are inside the mountain – again for cleaning, maintenance or derailments.

Obviously, there’s still lots more to add like vehicular roadway, people, various grass blends, etc. so this project is far from being done. And While I initially began this project as purely experimental, it certainly has been a very enjoyable experience thruout each process as well as a good learning tool to do on future layouts.

I am enclosing 3 pics for your perusal as well as a video.

Alastair you have done a great service towards our hobby and I wish you the very best!

Mardon”
Big thanks to everyone who contributed – hope you enjoyed this post as much as me.

That’s all for this missive my friends.

Please do keep ’em coming.

And if today is the day you get started on your layout, the Beginner’s Guide is here.

Best

Al

PS Latest ebay cheat sheet is here.


Rod changes a chassis!

“Hi Al,

Never done an entire loco thank heavens, the time commitment must be huge, but I have had to make a couple of simple chassis sort-of from scratch, albeit using commercial axles, wheels, gears etc.

The first was to replace a cast whitemetal chassis block in a loco kit which seemed to have been cast with the sides at an angle to each other, quite unsalvageable. I had tried sending it back as a complaint only to be told the pre-drilled axle holes were “supposed” to be breaking out through the bottom of the casting on one side “to make it easier for you to fit springing”! Yeah, right.

The second one was because a mate turned up with an old K’s kit of a GER tram-engine (like Toby the tram engine) which wouldn’t run. All it was, the body was a little low one end and the cowcatcher was fouling the rails and shorting out.

It just needed a little Plasticard pad sticking onto the chassis mount, so I did that, held it in place for a count of thirty, said “There, fixed it!” and whipped my fingers away – needless to say I had superglued the plastic to a bit of skin as well, and the whole chassis flew into the air, tore the skin loose, and fell to the tiled floor with a resounding bang.

It was one of those old K’s ones with the motor sides and bearings glued together and integral with the frames, so a total write-off (I couldn’t get the motor to run again properly, although I did try). You should have seen his little face, a proper picture, so I had to replace it.

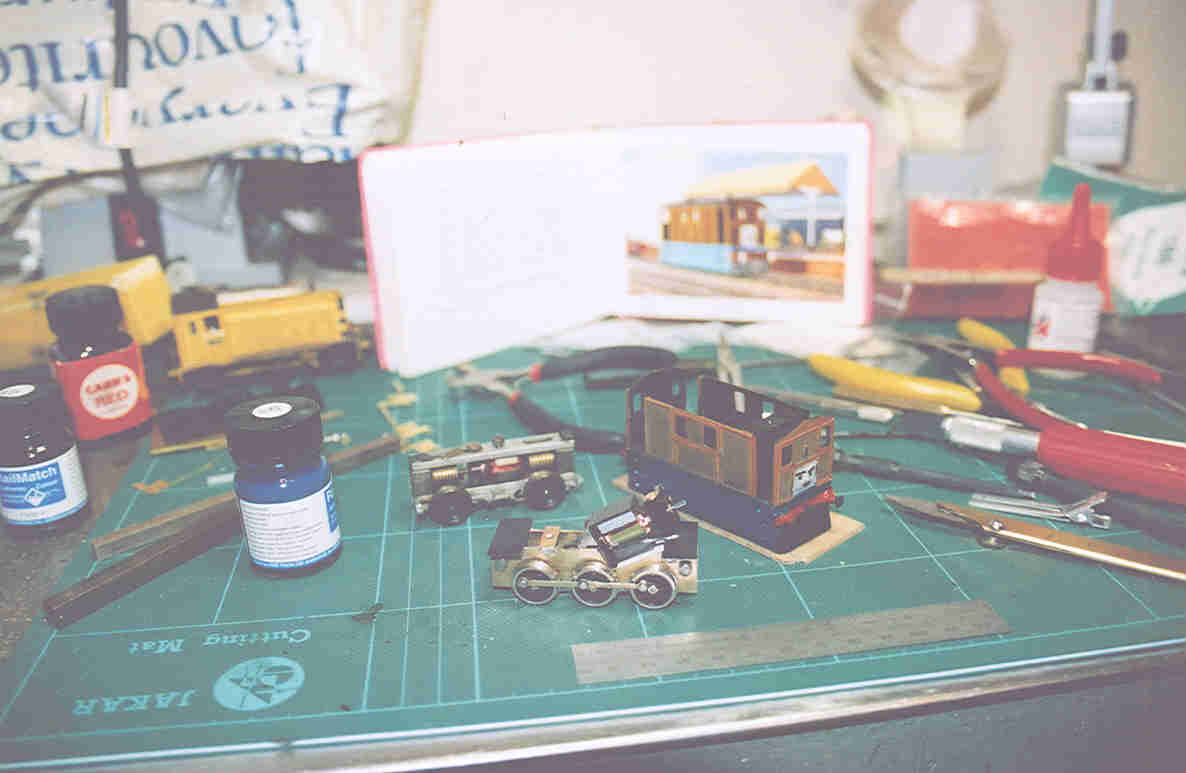
The replacement was made from 16th brass frames, bolted together for drilling of axle positions and tube spacers, and fitted with flanged bearings, reamed for Romford axles.

The old chassis was a four-wheeler but the real things were six-coupled so I thought I’d do it right, although there was no point adding cylinders and running gear as they would be behind the side-skirts.

I used a Branchlines slimline gearbox/motor mount and a Mashima motor, and added little black ‘platforms’ either end to form floors for the driving cabs. For some reason, the model had never had a chimney, I think the real ones were just stovepipe-type but all I had in the junkbox was a cast one for a GWR King, so that had to do, capuchon and all. That was a bit of a departure from prototype, so I painted the finished loco blue and brown and moulded a little face onto the end in low-melt solder, sculpted with the iron and a bit of chasing with a ball cutter in the minidrill – great fun but wear goggles.

The photo shows the new chassis in the foreground, the reassembled old chassis and tidied-up body behind, and a Reverend Awdry book for livery reference!

Rod”

“Hi Al

A short video clip of my double headed Heisler logging locomotives running on my layout.

An experiment that worked out. Was not sure how to get double headers on my DCC system until a friend helped me out.

Many thanks and all the best.

Brian”


I always look forward to Brian’s mails. And what a layout!

Latest ebay cheat sheet is here.

Best

Al

PS Want three times as much as content? You need the Golden Key. See what it’s all about here.

Brian’s logging locomotive

“Here is the reason for lots of power, double headers to push equipment through the snow.

I will send details later on how the double headers are set up on DCC as well as a video of more scenery.

Thanks Al

Regards.

Brian”

“Hi Al, as requested – an explanation on DCC double headed locomotives.

It is not easy to explain how to do a double header with a DCC system as there are many different makes available and each has its own way of setting it up.

I use the Lenz DCC system and have 3 hand held tethered controllers. One with a keypad and two with knob control all with display. I use the keypad one for setting up double headers.

With most DCC systems, one can run two different locomotives as double headers. (You will have to set the speed steps in both locomotives to be the same). You can also set it up the same way and have a lead locomotive and a tail end helper locomotive.

1 – Prerequisites for creating a double header are:-

# each of the two locomotives to be double headed must be called up on the same hand held controller.
# each locomotive must have a given command (that is changing speed, direction or turning on or off one of the functions)
# the speed step of both locomotives must be 0 when they are joined as a double header.

2 – Configuring two locomotives as a double header:-

First, call up the first locomotive (say number 2) and move it to where you want to couple it together with the second locomotive on your layout.

Then call up the second locomotive (say number 3) and move it up to the first locomotive.

In doing this, you make sure that both locomotives called up on your hand held controller has been given an operating command.

NB. Make sure that both locomotives are set to run in the same direction.

Control of the double header can be from either address (locomotive 2 or 3). When running a double header, the operation keys work on both locomotives at the same time. The keys that turn functions on and off work only on the locomotive whose address is shown in the display.

In the display of my hand held controller, an ‘E’ in front of the address is a single locomotive and ‘D’ is a double header with the address of the locomotive shown.

I say again that the explanation for double heading shown here is for a Lenz DCC system that I use on my layout using Tsunami decoders in my locomotives from Blackstone models in the USA.

This is a very basic description of setting up double headers. It took me a couple of tries at getting this right and eventually enlisted the help of a very good model railroad friend and expert at DCC installation and running to help me get mine right. He also gave me a “hands on” on how to do future double headers. But if some of you are like me, it will take me quite a few more tries to get it right.

I hope that the above will be of some help on how to set up double headed locomotives.

Regards

Brian”


“Hi Al

A short video clip of my double headed Heisler logging locomotives running on my layout.
An experiment that worked out. Was not sure how to get double headers on my DCC system until a friend helped me out.

Many thanks and all the best.

Brian”


A fantastic triple bill from Brian – I always look forward to his mails. And what a layout!

That’s all this time.

Please do keep ’em coming.

And if today is the day you grab the bull by the horns, the Beginner’s Guide is here.

Best

Al

PS Latest ebay cheat sheet is here.