Dale’s been in touch with his Christmas model train:
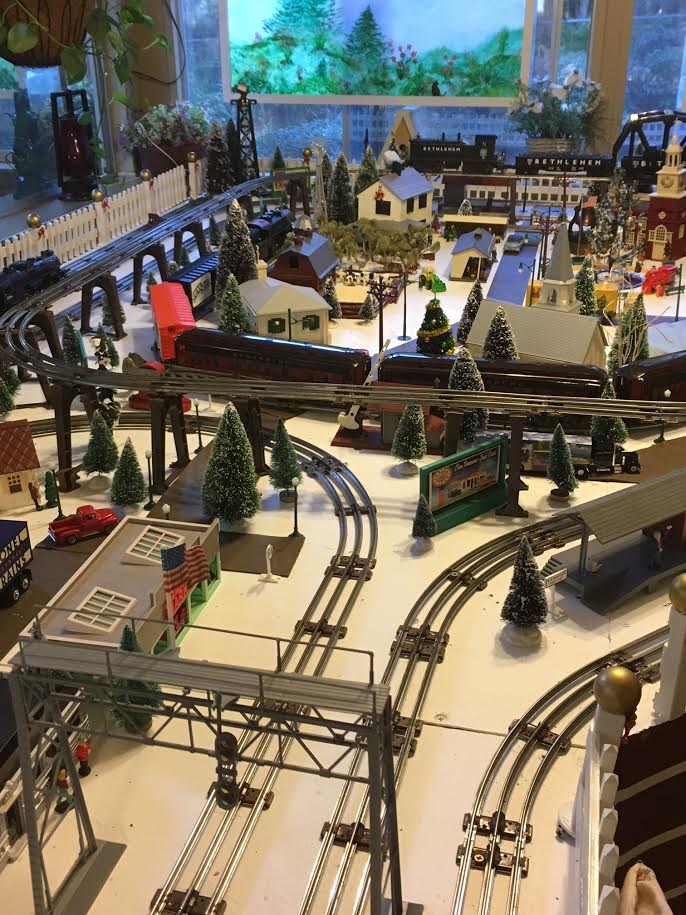
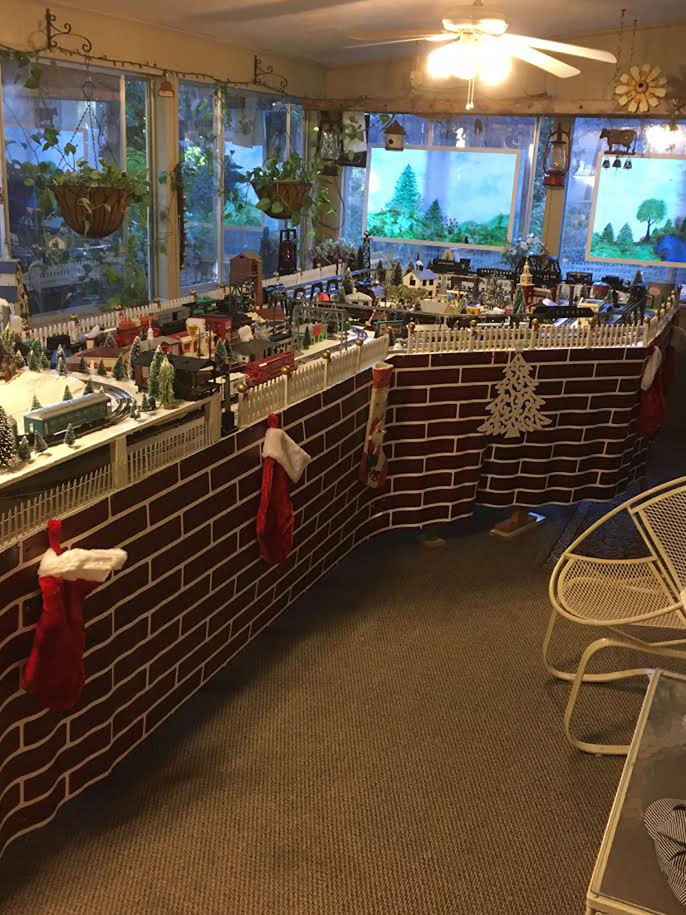
“Most of my trains are from Pennsylvania, Reading and Lehigh Valley. This past year I had six main lines and one bumper car line.
I’ve been putting up layouts since I was six years old. I change it every year but always have the winter scenes.
Dale”
Now on to Boyd:
“Hello Al,
I wanted to take the opportunity to wish you and yours a very Merry Christmas, and all the best for the new year.
Also, a Merry Christmas to all the folks out there that contribute to and enjoy your daily posts.
As mentioned in my last note, I do not get much work done on the layout over the Summer months, and the Honey Do, Daddy Do and Grampie Do lists have kept me busy all fall.
Most of the projects on those lists are now complete, so I hope to get moving again on the next big section, which will include my first attempt at a water feature.
I did manage to get a couple more scenes to the point where they are good enough for now, I’ll circle back for more detailing at some point.
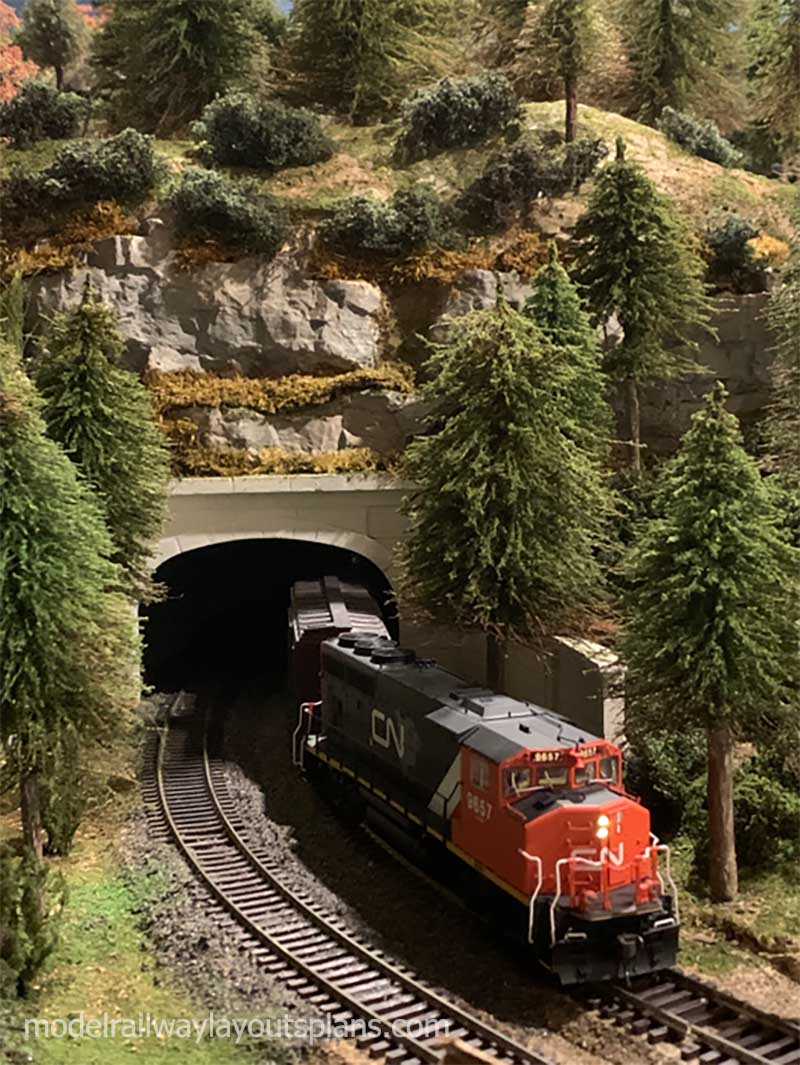
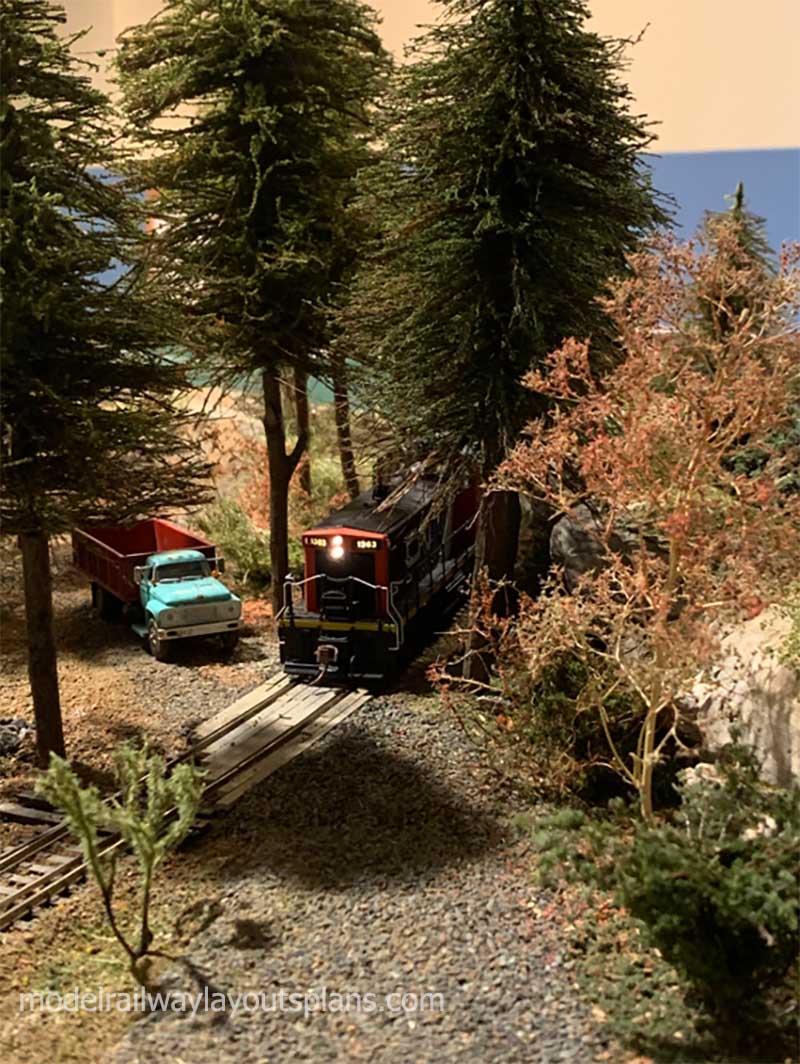
This is the section that leads into the quarry area, it sits above the tunnel exit shown in the next couple photos. I had originally placed some deciduous trees here, but decided it made more sense to continue the evergreens down the mountain, so out with the old and in with the new.
Some scenery details added to the tunnel exit area.
Thanks again for all you do to support the hobby, and hopefully I will have something to submit by Spring.
Boyd”
I can’t wait to see Boyd’s next update his layout is one of my faves – have a look and you’ll see why, his lasp post is here:
Scott has been in touch with his Christmas tree train story.
I’m already feeling very festive, and Scott’s story made me smile so I hope it spreads some Christmas Cheer:
“When the 1970 musical Scrooge was first released, I sat with my family in a very grand movie theater in the Maryland Suburbs of Washington D.C.
My father, who at the time was just getting started in life and probably had to sacrifice a bit for us all to be at the showing, wanted his family to see this side of Christmas.
My dad a couple of years earlier had obtained a massive train set for me at GC Murphy’s — a regional discount department store.
It was a place where he had scored a temporary position as floor help during the busy Christmas season of 1966. Apparently, it was just enough to make Christmas happen for his fledgling family.
I imagine his employee discount and low sales of discounted electric trains were the only reasons I could have received my amazing “American Flyer, All Aboard” train set as a gift.
By Christmas of 1970 we had moved out of a city apartment and into an old house in the country (only about 13 miles from Washington D.C.).
The house had a damp, cold dark root cellar type of basement with an unlit exterior entrance which was even scary at high noon in the middle of August. This root cellar’s back most room was where my electric trains were relegated when we moved into the house.
This is where I spent most of my non-school waking hours in those days. It was there in the dimly lit cellar I became fascinated with engineering, science, and electricity.
The most memorable day of my 8th year on the planet (1970) was just before Christmas. Late in the afternoon of this cold and gloomy day, I was busy playing with my trains in the chilly dark recesses of the basement.
I came upstairs but once to get an extension cord and some alcohol and cotton swabs to clean the tracks. Seeing me out of the inner sanctum, my father explains to me it is time to put away the trains because we are going to the movies. I protested, asking why and what for? He proceeded to tell me the story of an old man at Christmas time with many regrets.
Before I knew it, we were in our Plymouth Fury heading to the Langley Park movie theater. From this moment on, the images and memories are indelibly etched in my mind: The beautiful music, the modern cinematography, Ebenezer’s redemption, everything.
But there was one problem with all of this — I was too young for the terrifying scenes of Scrooge wrapped in chains in his eternally frozen counting chambers surrounded by rats, cold, dark, and loneliness.
So, while thoroughly enjoying the experience, and looking forward to getting home to the pre-Christmas joy of my railroad empire, something had changed.
That evening, before dinner as I raced to the root cellar, my ears felt perpetually pinned back like a cat who hears something from behind.
As I reached to open the haunted door, I found myself checking its backside to see if Jacob Marley’s pigtail might be protruding. After ensuring the door was not haunted, I began the long walk down the hallway towards the back room, I half expected to see a phantom horse-drawn hearse float by wishing me (the Governor) a Merry Christmas.
By the time I made it to my trains, the room seemed (in my imagination) to be Ebenezer’s frozen counting chamber in Hell, and I was sure I could hear the rats. The clanking of dinner silverware being set upstairs sounded to me as if the devils were on their way with my chains.
It was too much for my 8- year-old mind, I banished myself from the root cellar indefinitely.
The spell finally broke Christmas morning when my father, once again, surprised me with more trains he had picked up at a hardware store near his office on Connecticut Avenue and 14th Street. And just like when Scrooge promises to find a cure for Tiny Tim, my father proclaimed to me, my trains could be brought up stairs and set up more permanently in my bedroom.
What a grand Christmas it was in 1970!
Scott”
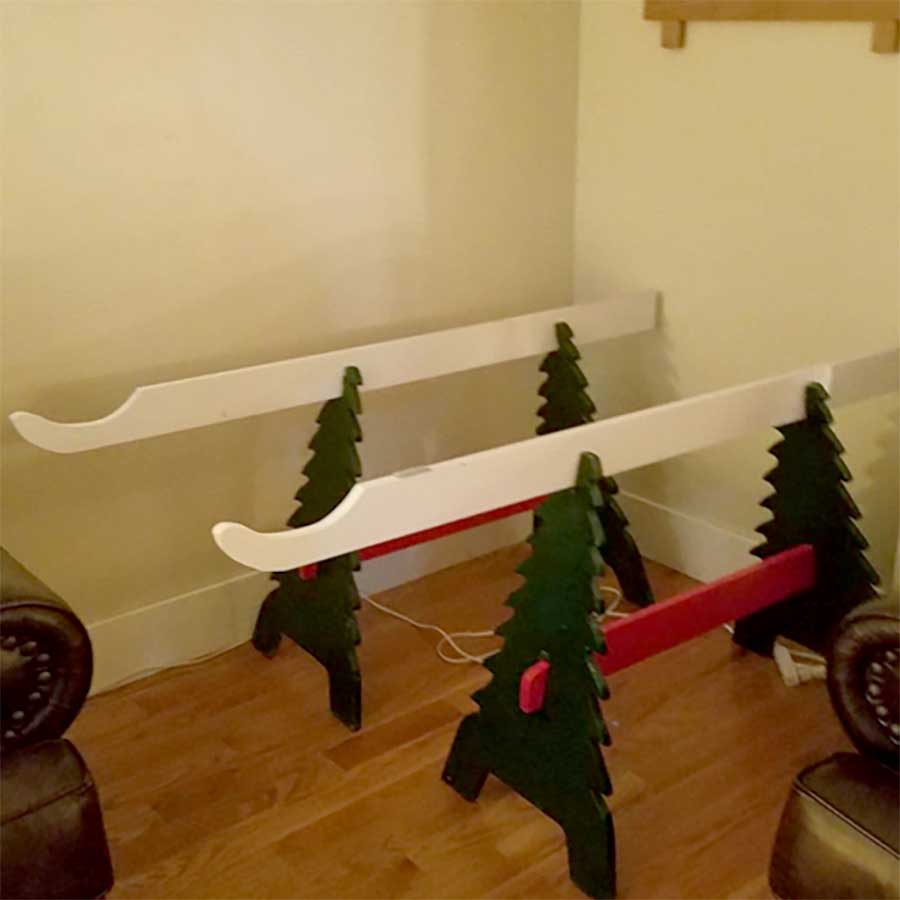
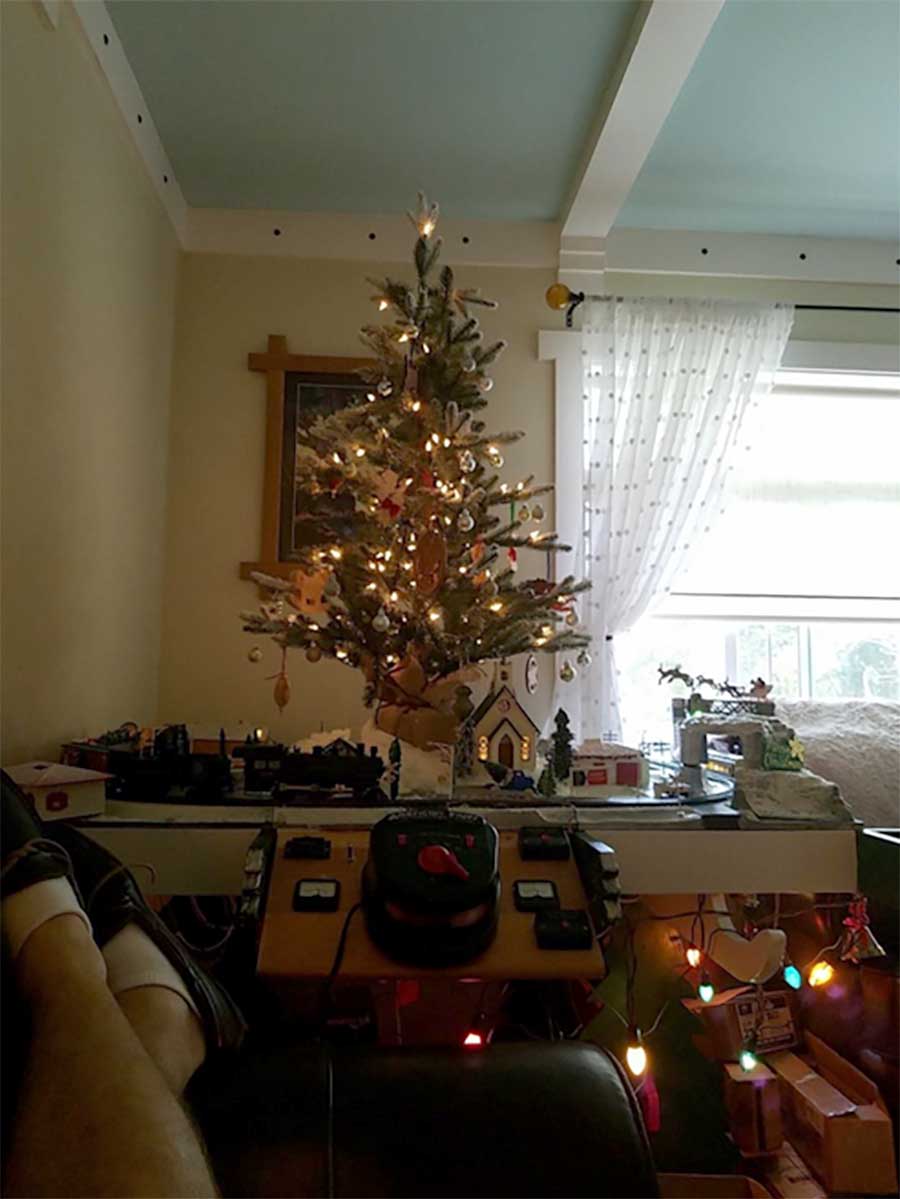
Supporting saw horses shaped as Christmas trees
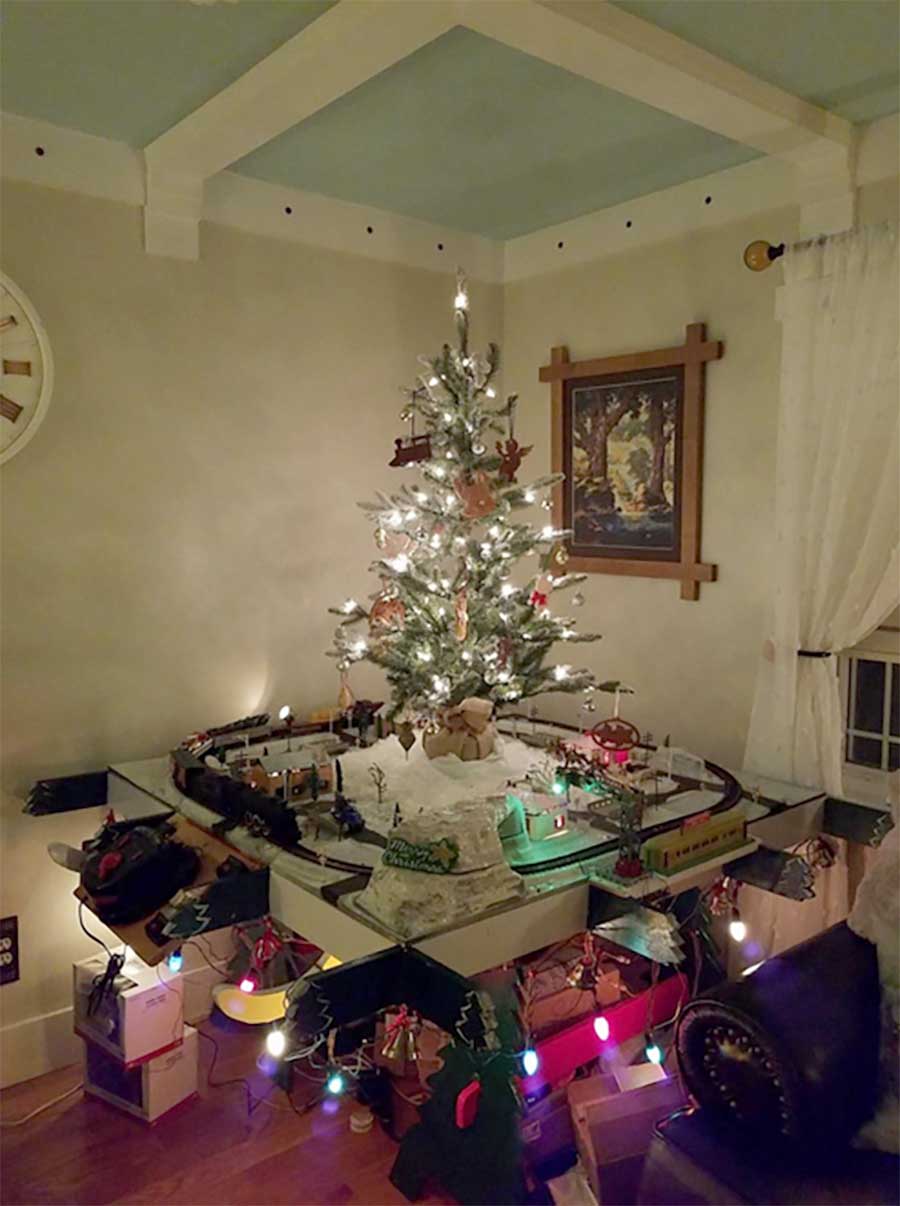
This year the center piece was a Christmas tree train
Christmas tree train:
Also note the benchwork details… the supporting 1x4s are Christmas trees
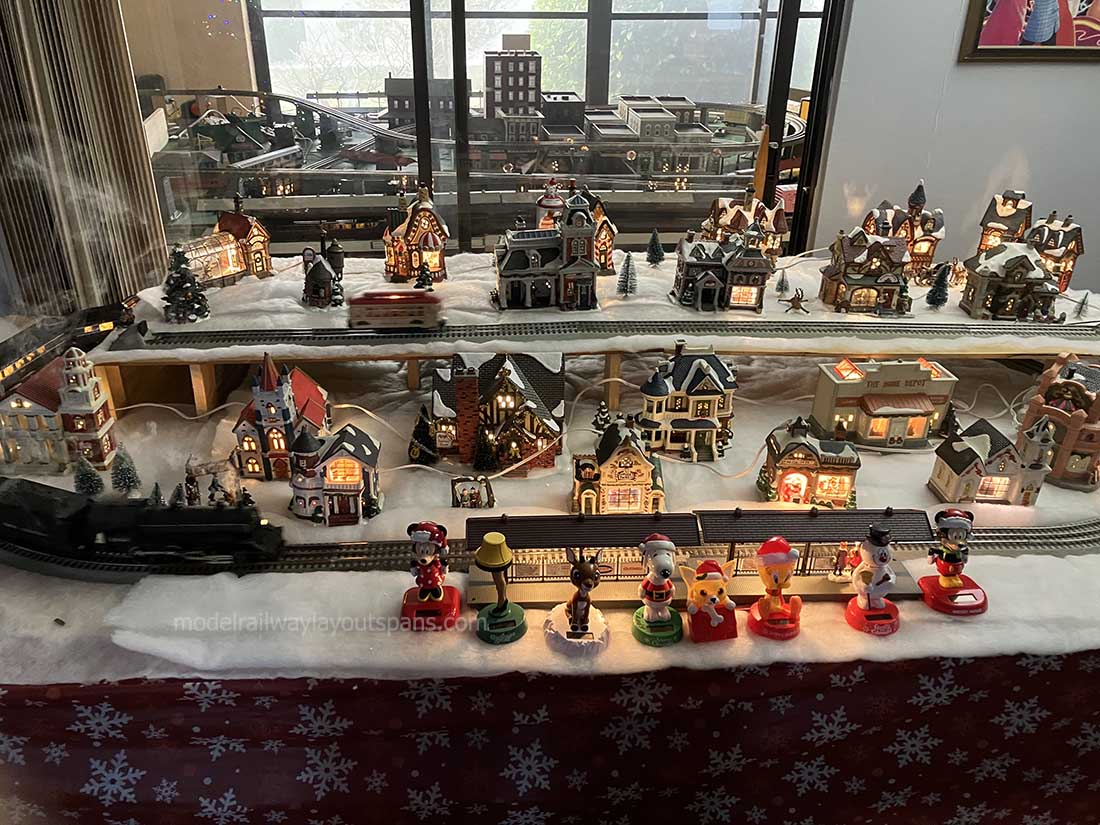
The Mini craft Church from 1953 Complete with Stained glass ablaze awaits Christmas eve worshipers. Control Panel includes 150 Watt Transformer with Current and Voltage Monitoring meters.
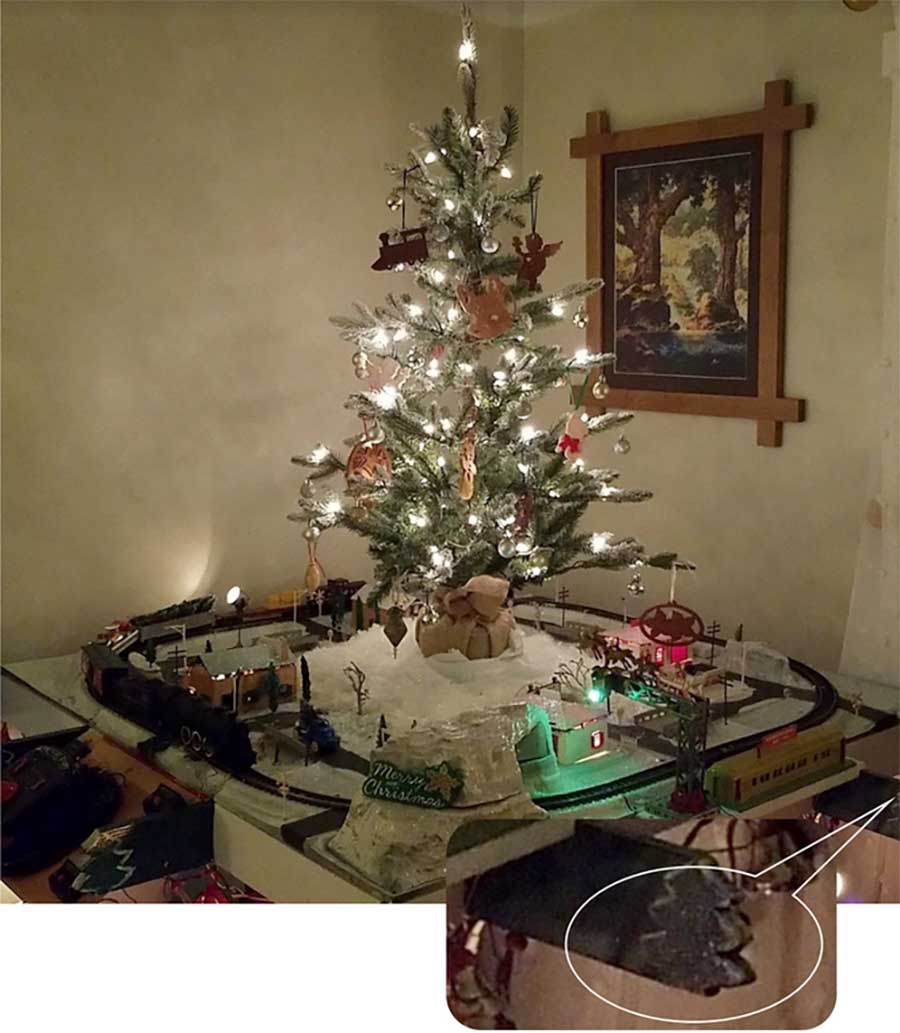
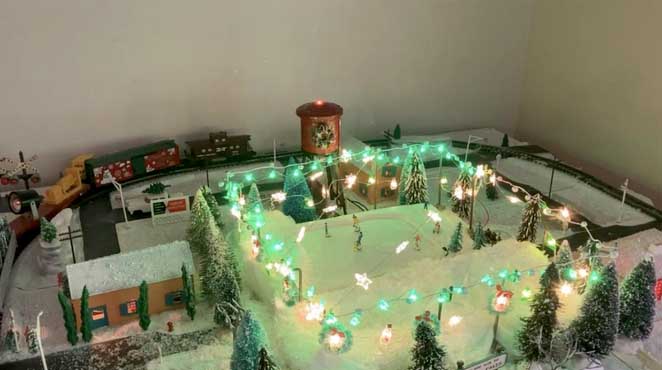
Santa & his Sleigh with team of Miniature Reindeer are visible as a silhouette over the Signal Bridge
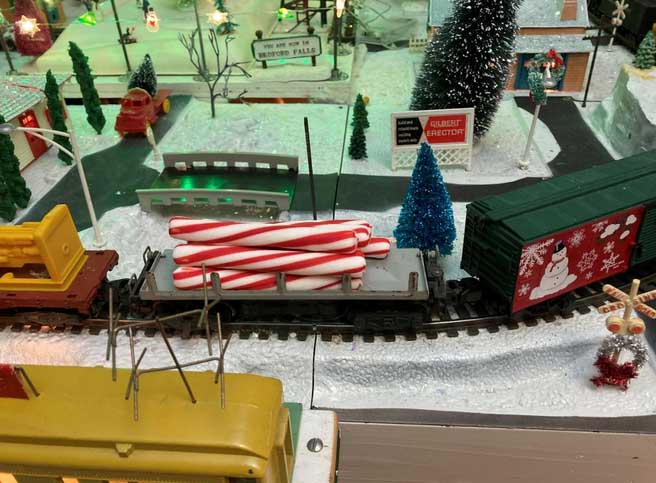
Fast Freight wisping by as Rudolph signals the block is occupied with his “Nose So Bright”
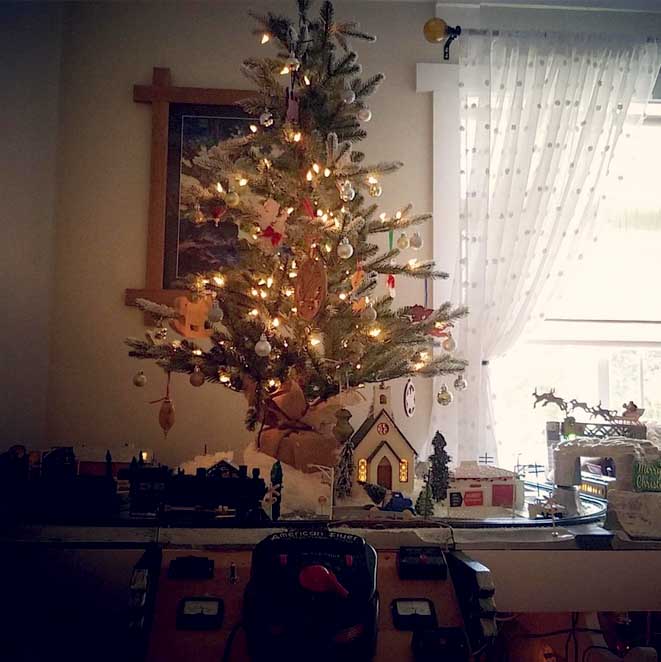
Christmas Candied Canes out for Delivery
A big thanks to Scott for sharing his Christmas tree train story.
It’s that time of year again – thought it’s time for a Christmas model railroad edition!
“Hi Al,
This is Judy from Wyoming and I enjoy making scenery for railroads of all sizes.
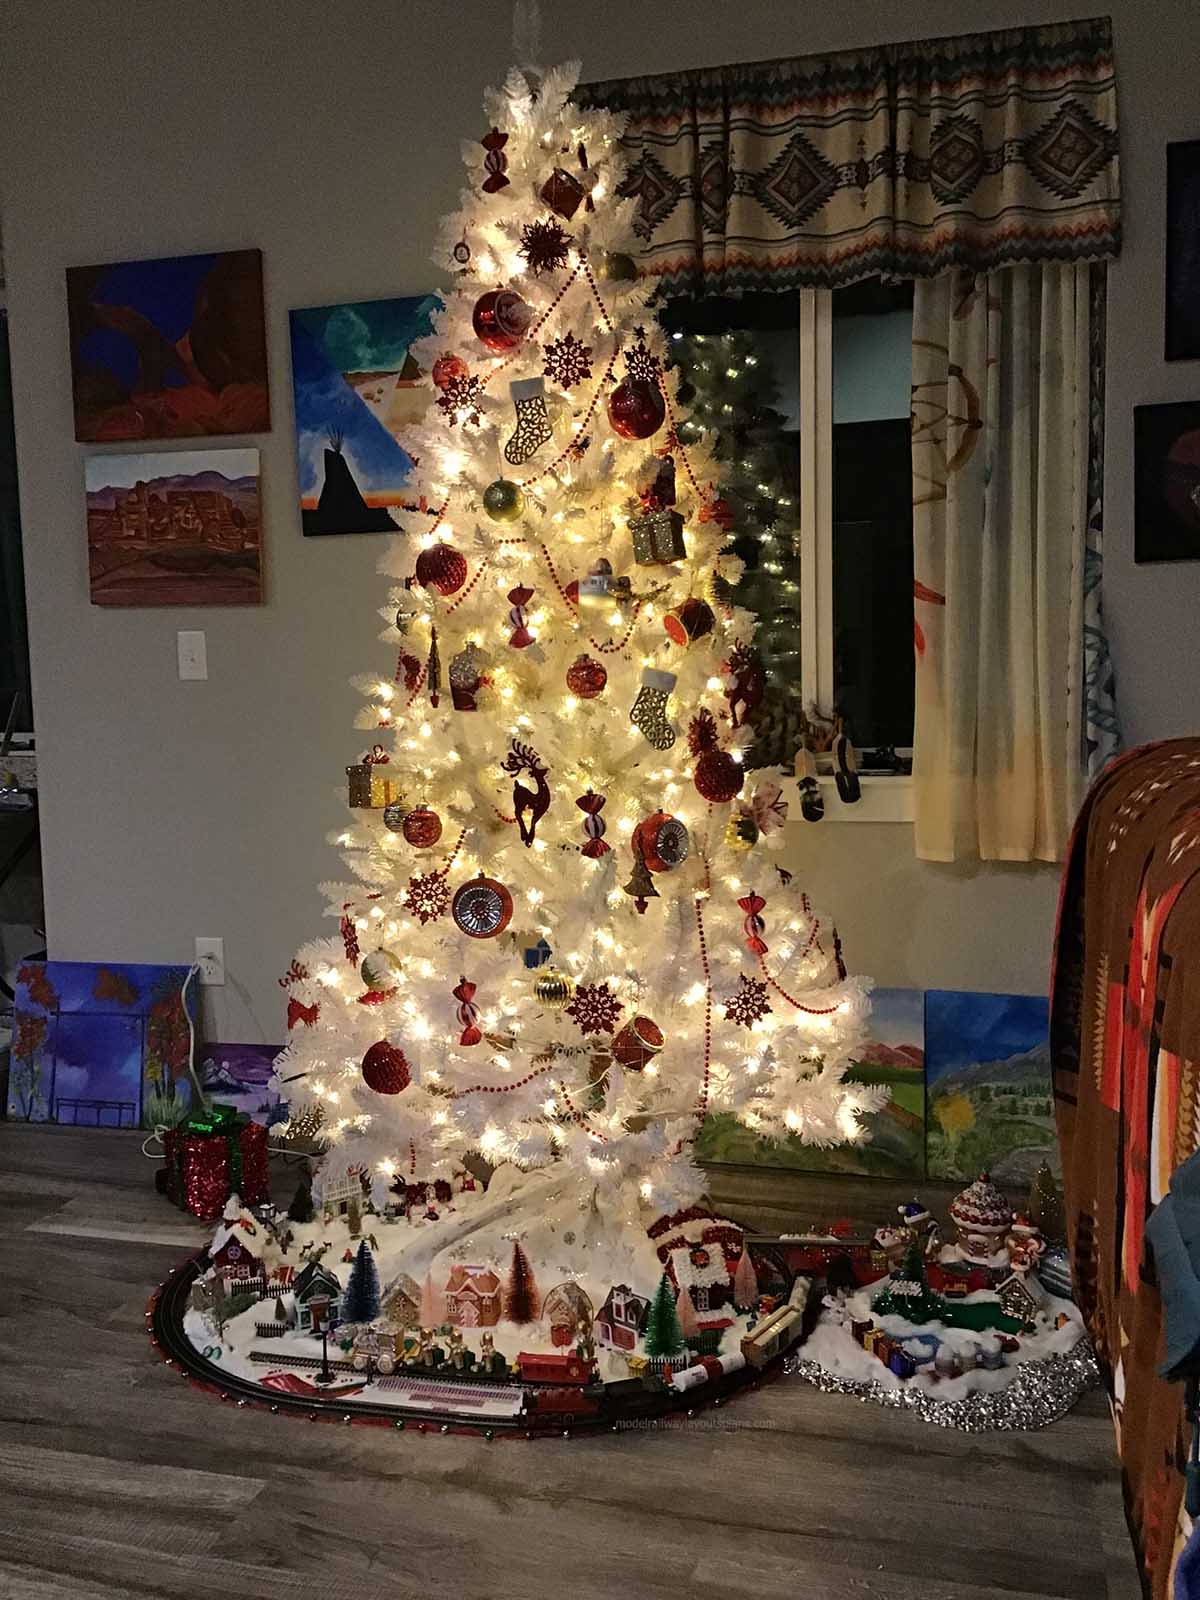
This is one of my latest after we got the Jingle Bell Express train for under the Christmas tree.
I made sections on foam board, then placed them in and around the track, under the tree.
Judy”
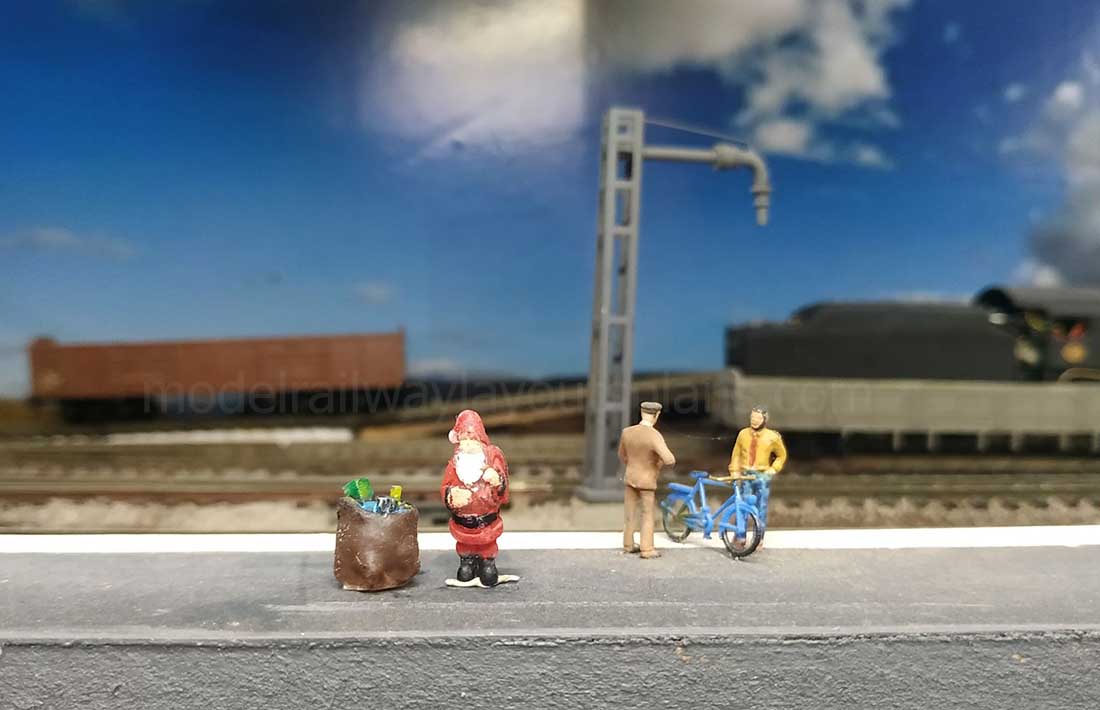
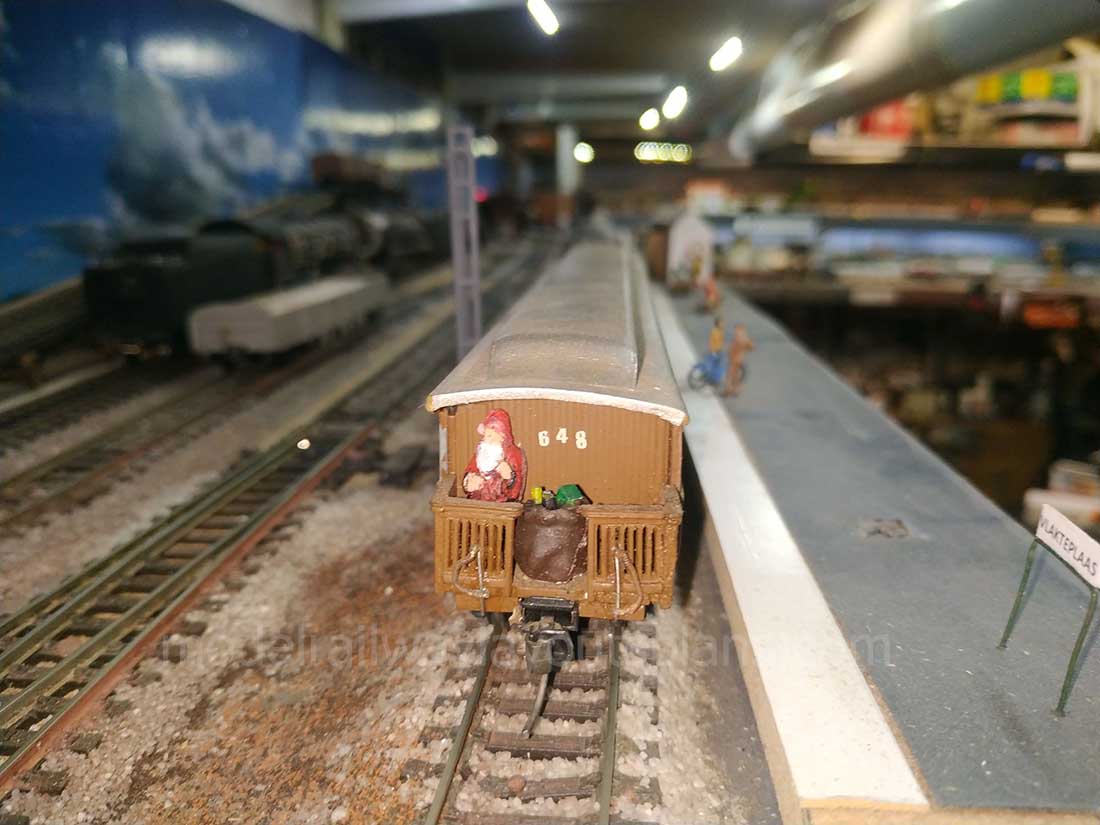
“Hello Alastair
Wishing you and all our fellow modelers a very merry Christmas and a prosperous New Year.
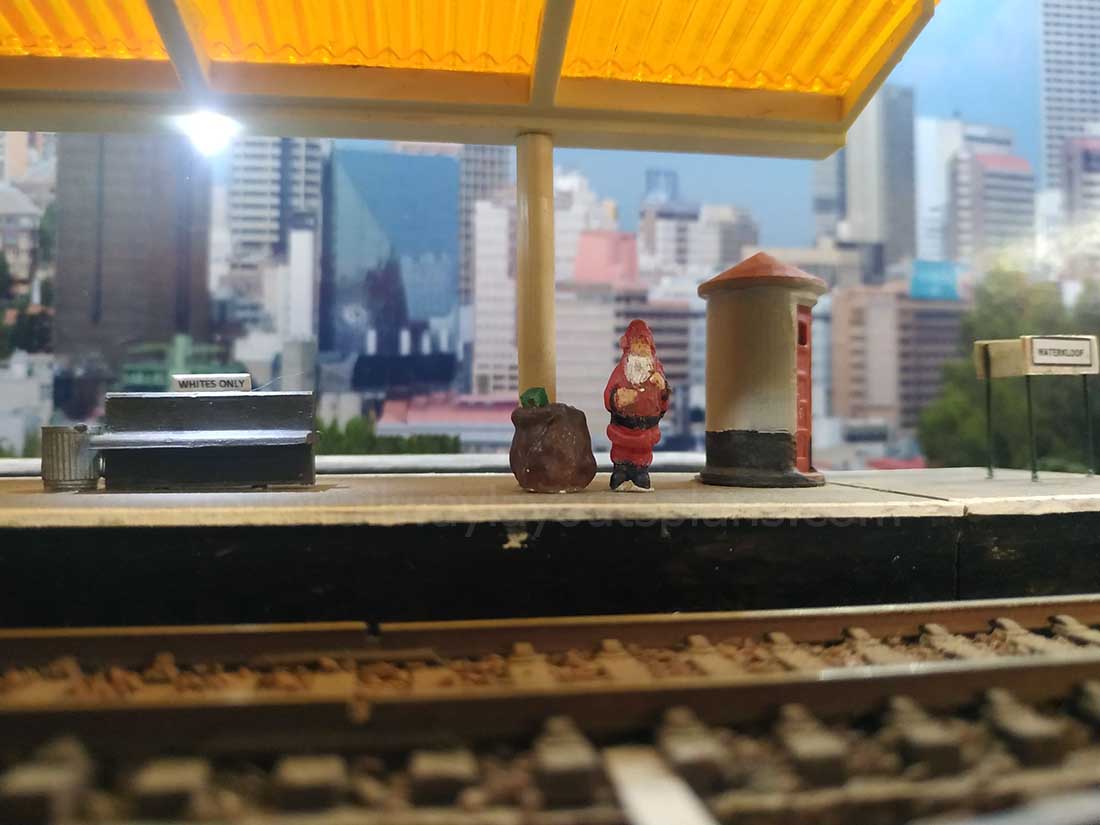
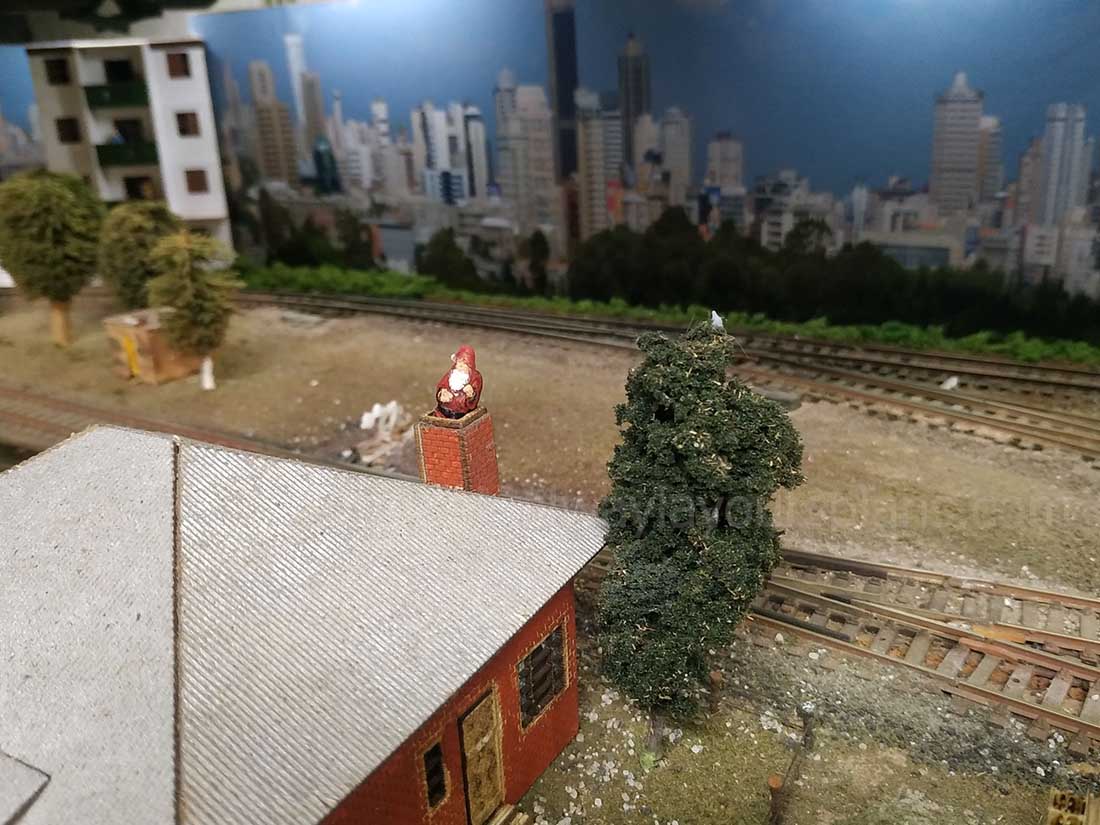
Here is just a bit of photo fun I had on my layout, when a man in a red suit and long white beard suddenly appeared, took the train from one station to the next and then was seen going down a chimney…
Henry”
Christmas model railroad:
“Hi Al!
I know it’s not up to par compared to other layouts, but this one encourages me to do more with the layout you see in the background.
Eric”
Eric has done a great job because it’s all about making that start.
You can look in wonder at so many brilliant layouts, but do you know what? They all had to start – at some point, they made their first layout.
Now on to Dan:
“Dear Alastair:
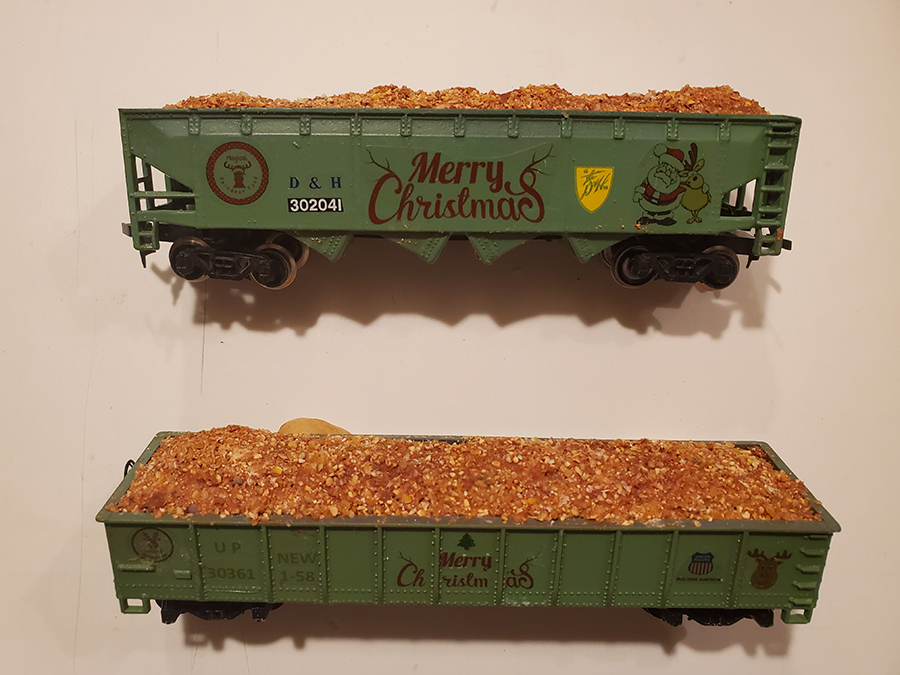
Enclosed is a shot to two cars I did, one for me with the Delaware and Hudson livery, the other for my brother in law who models the Union Pacific. These answer the question,”How does Santa get his reindeer food?”
I created the decals with the same process as I describer earlier on the pumpkin cars. As to the reindeer food, it is a dry sifted proprietory pig food mix donated by my nephew colored with some diluted raw sienna pigment.
It has the look of distillers grains, which is the by-product of making ethanol (US gasoline has 10% ethanol) from corn. It is used as silage. Ground-up rabbit food or any other dry material would work as food, including sawdust, which may even be preferrable. I top coated the loads with a flat medium to seal them.
If you can’t post, no worries, but thought you might enjoy a look.
Thanks, Al, and best wishes for the continuation of your wonderful site.”
Over the years there have been lost of Christmas layouts – here’s another:
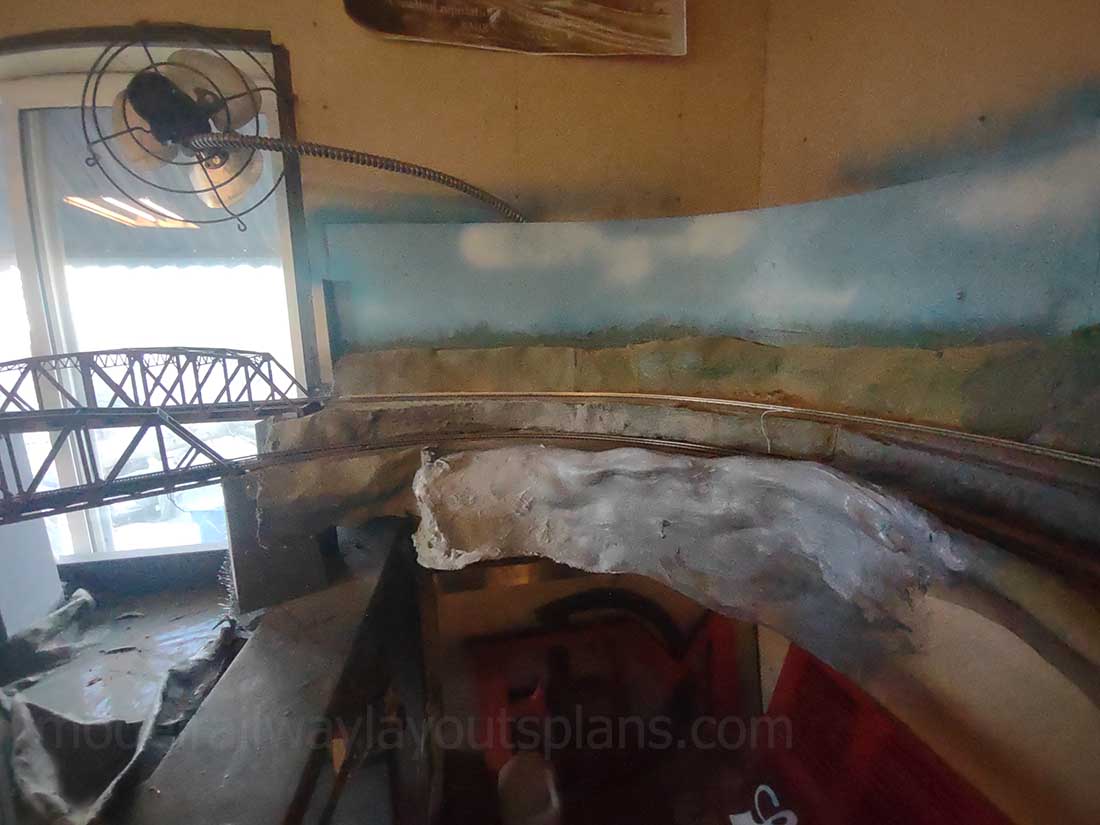
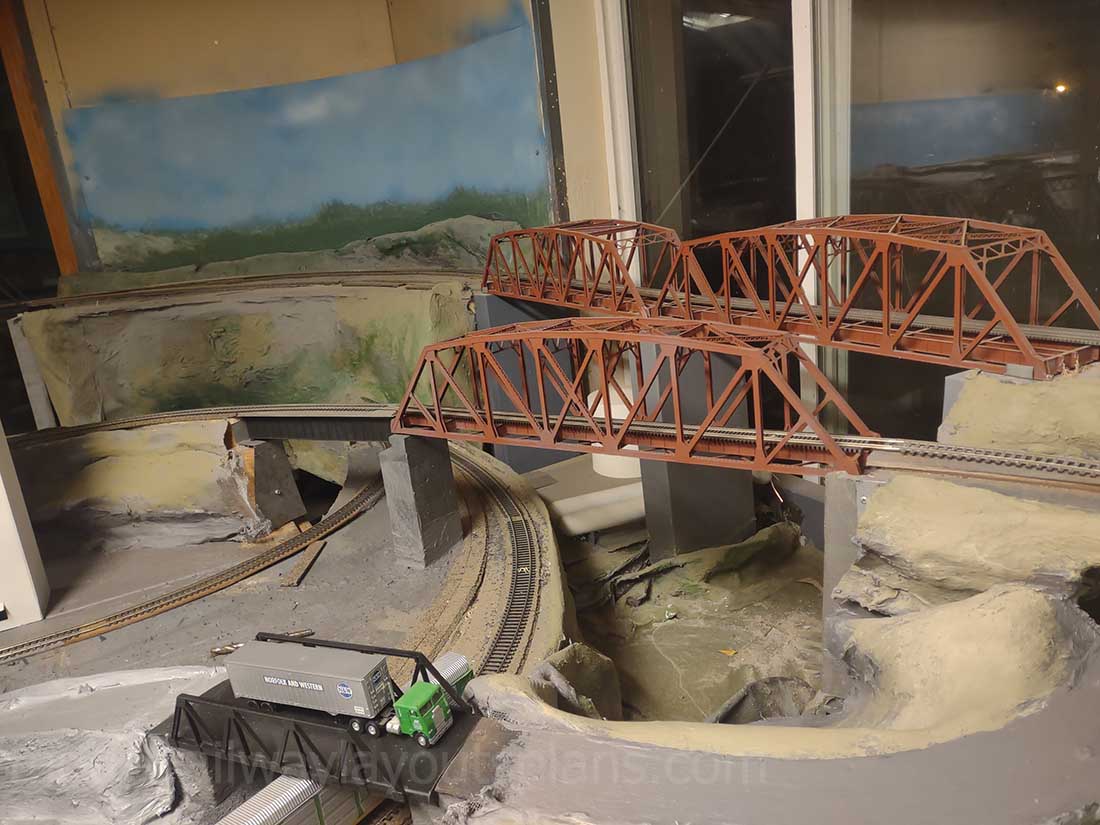
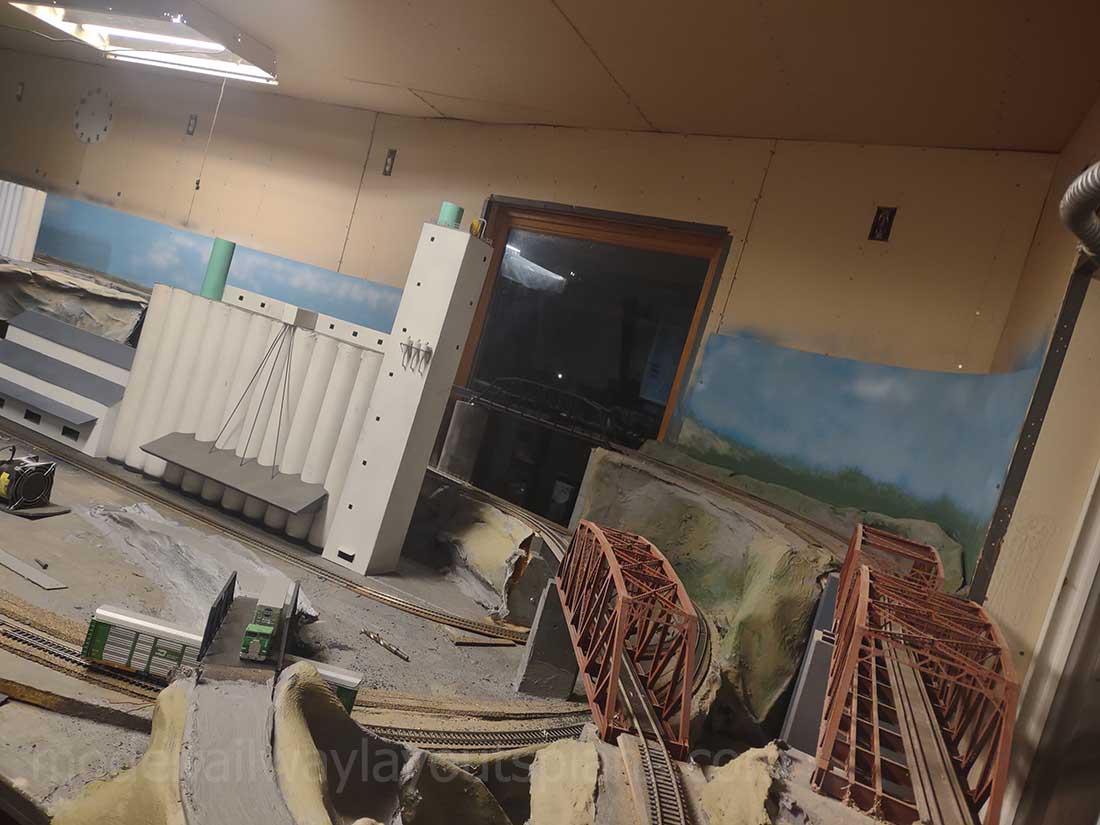
He’s not making a Christmas layout, but it looks like it’s going to be good:
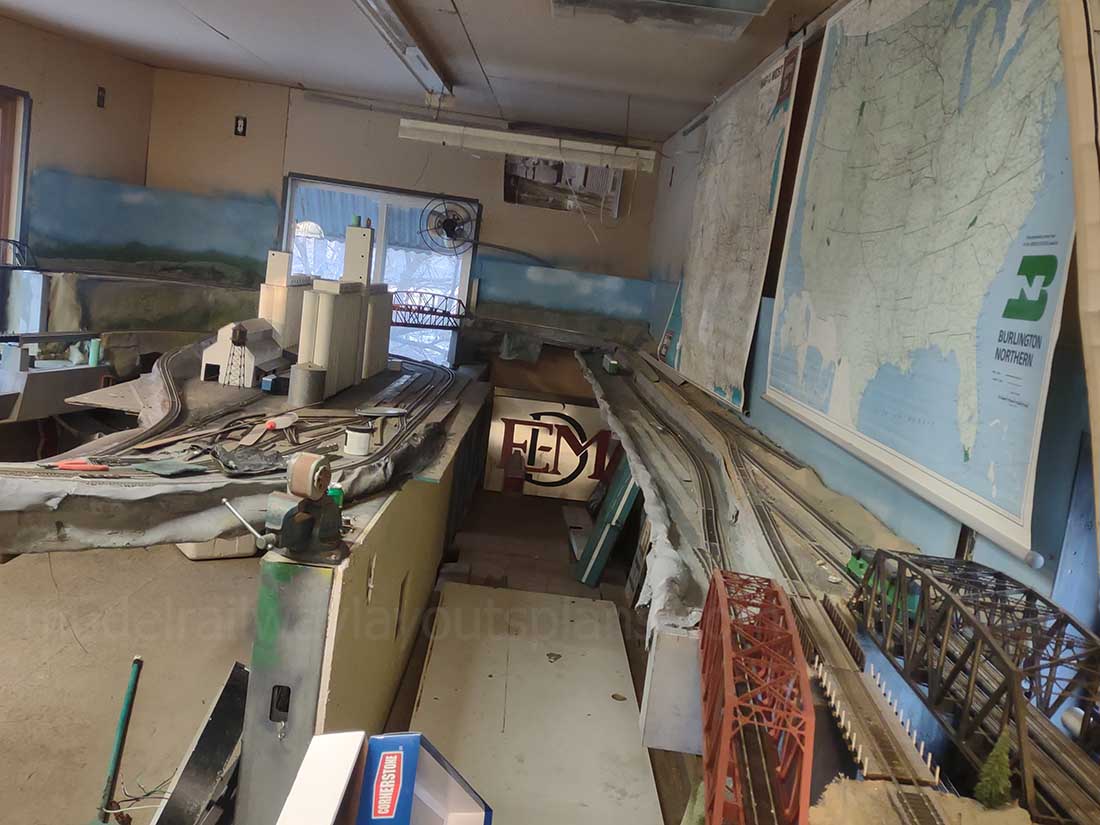
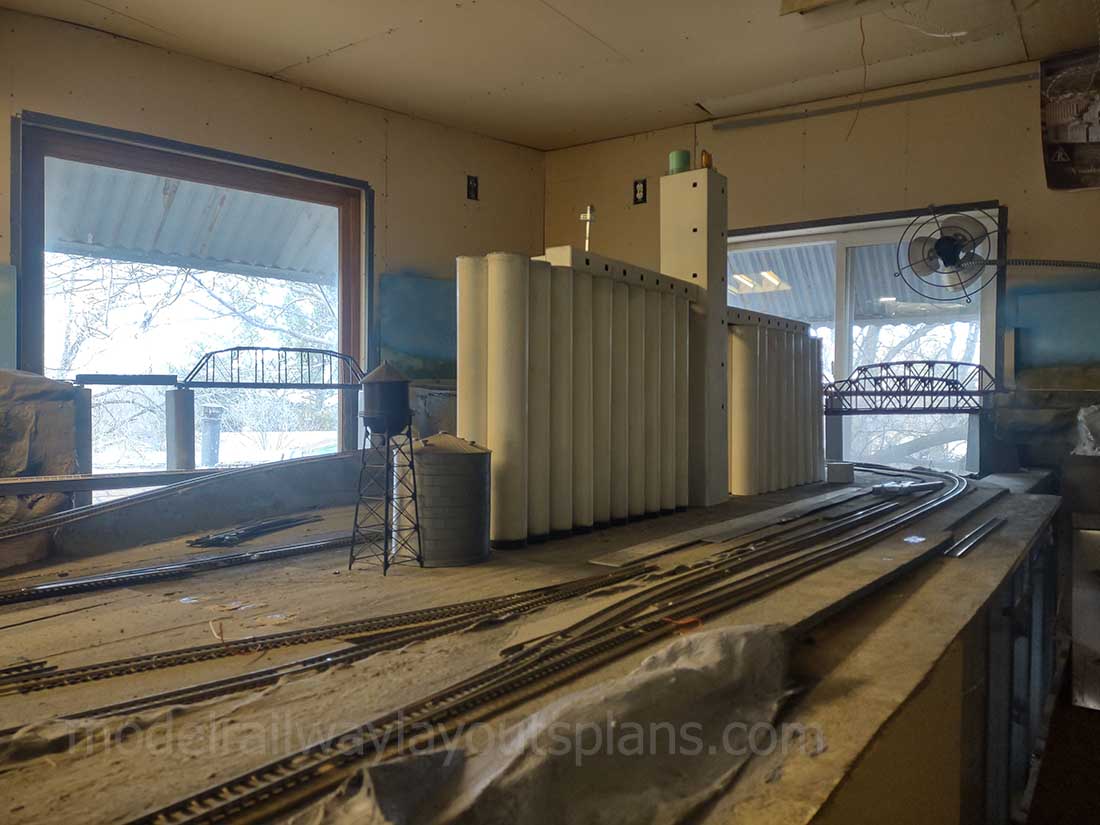
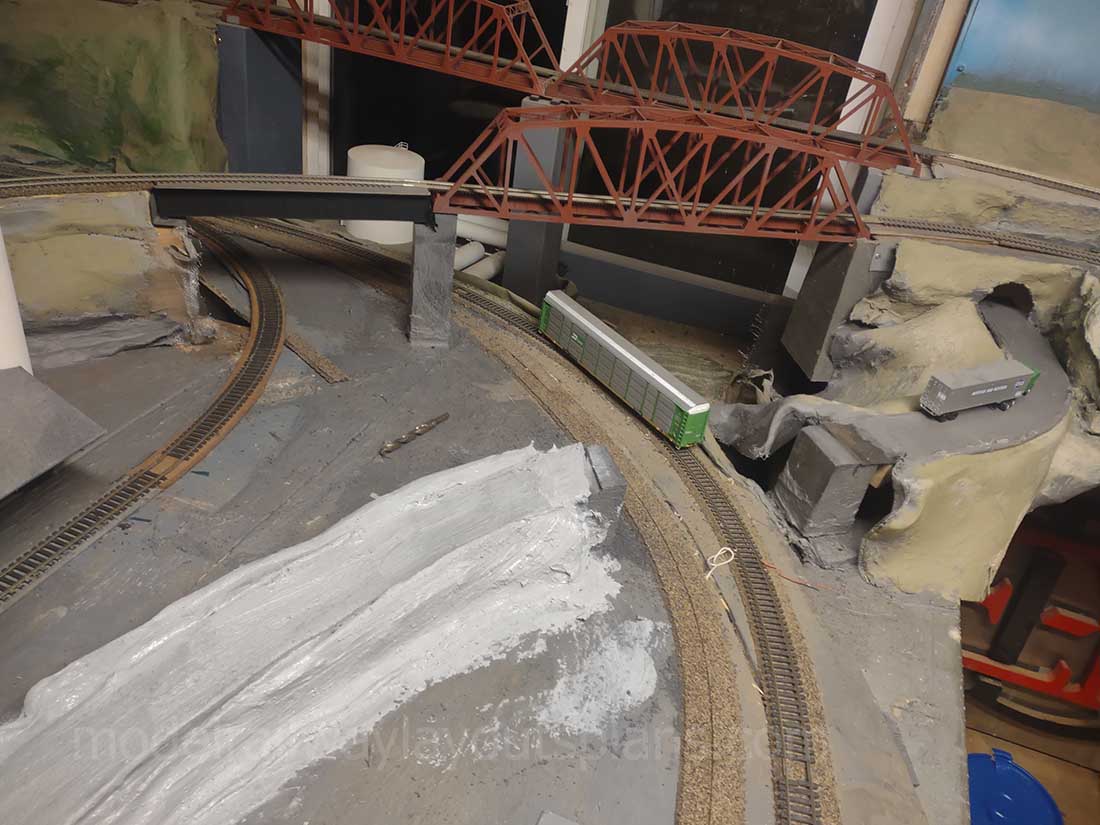
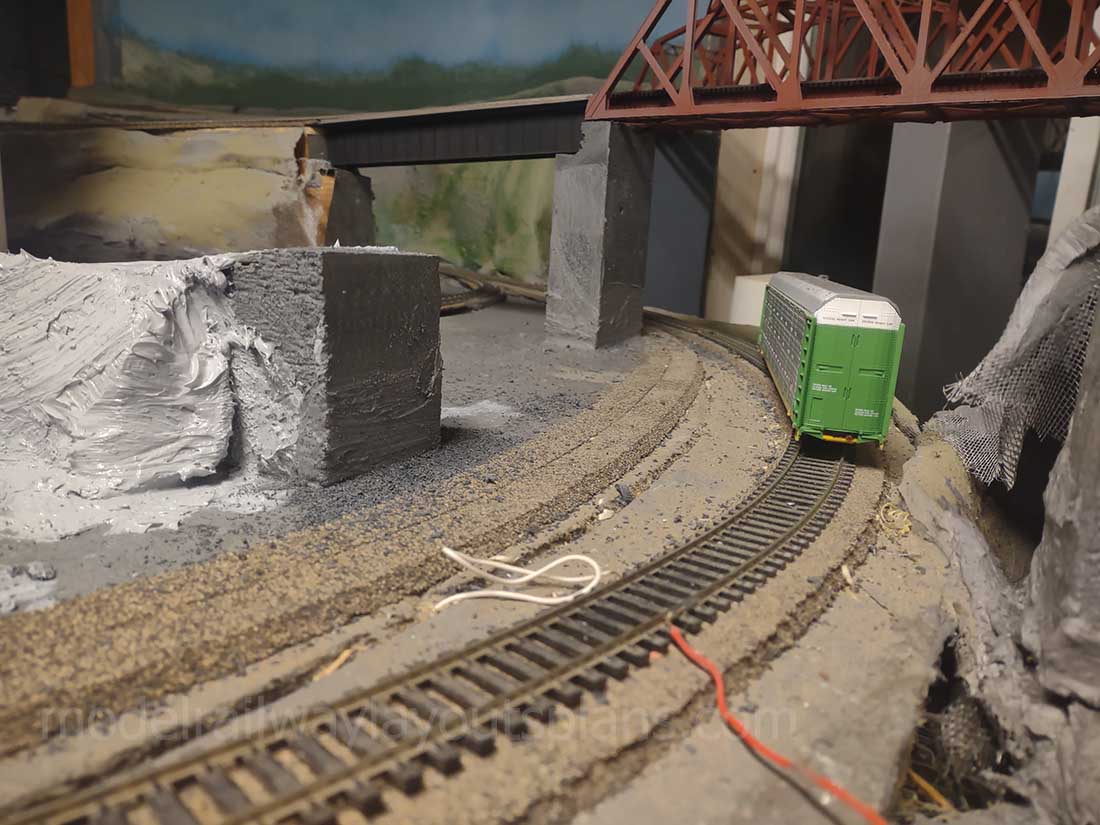
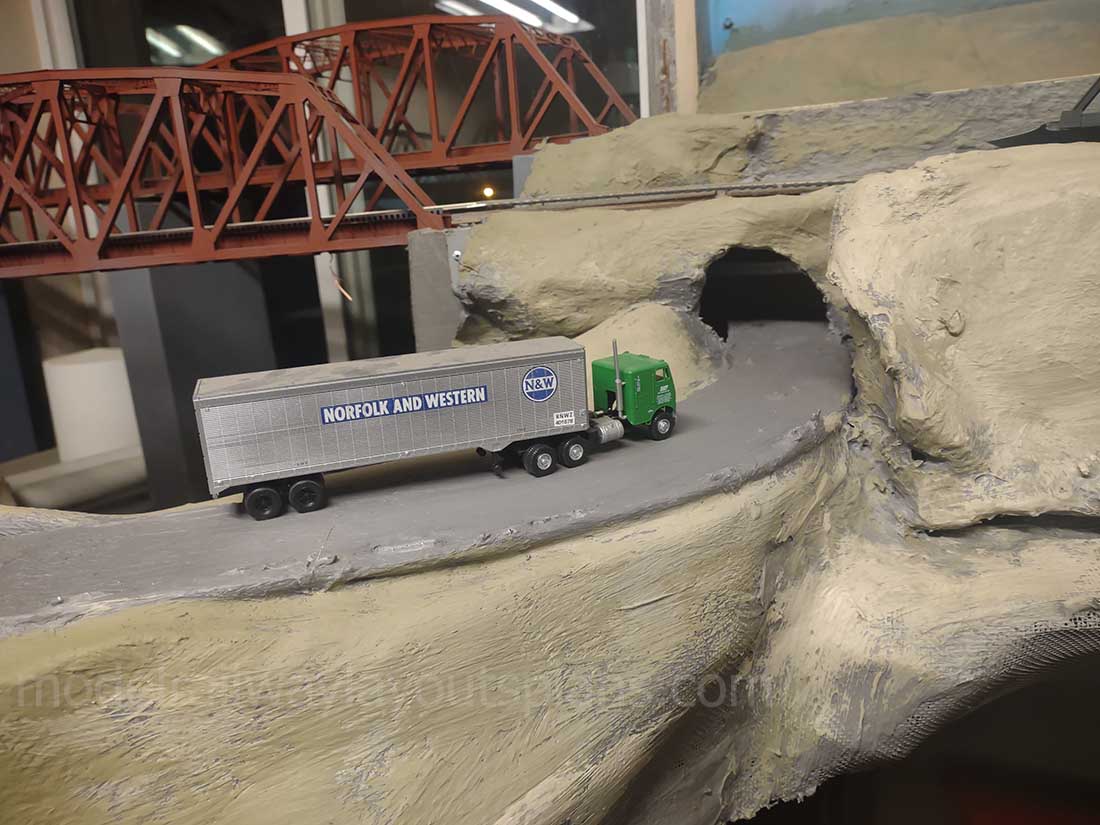
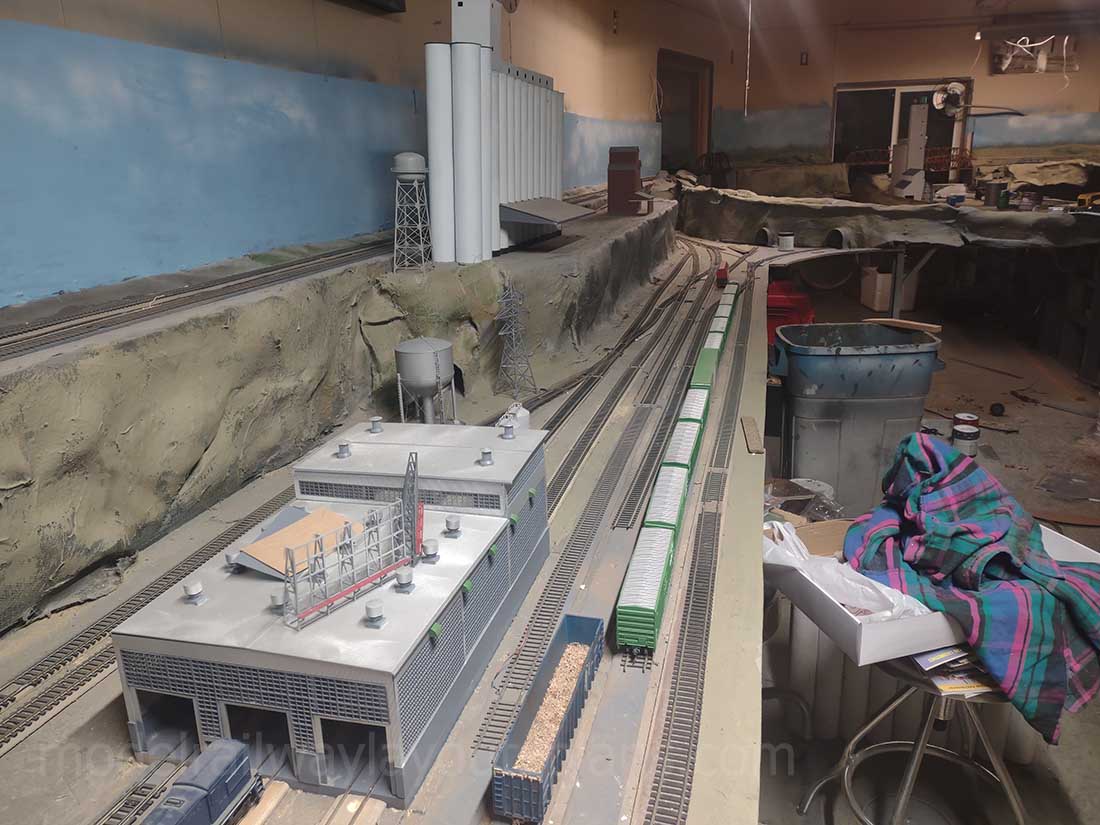
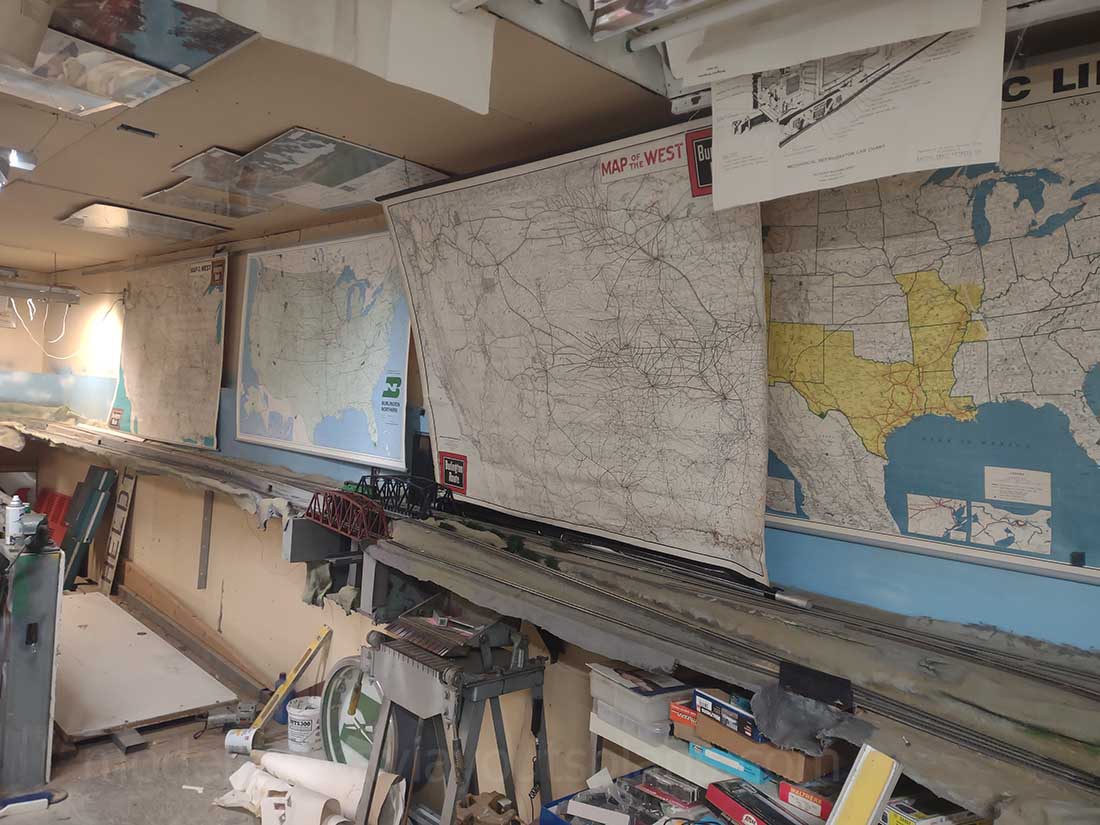
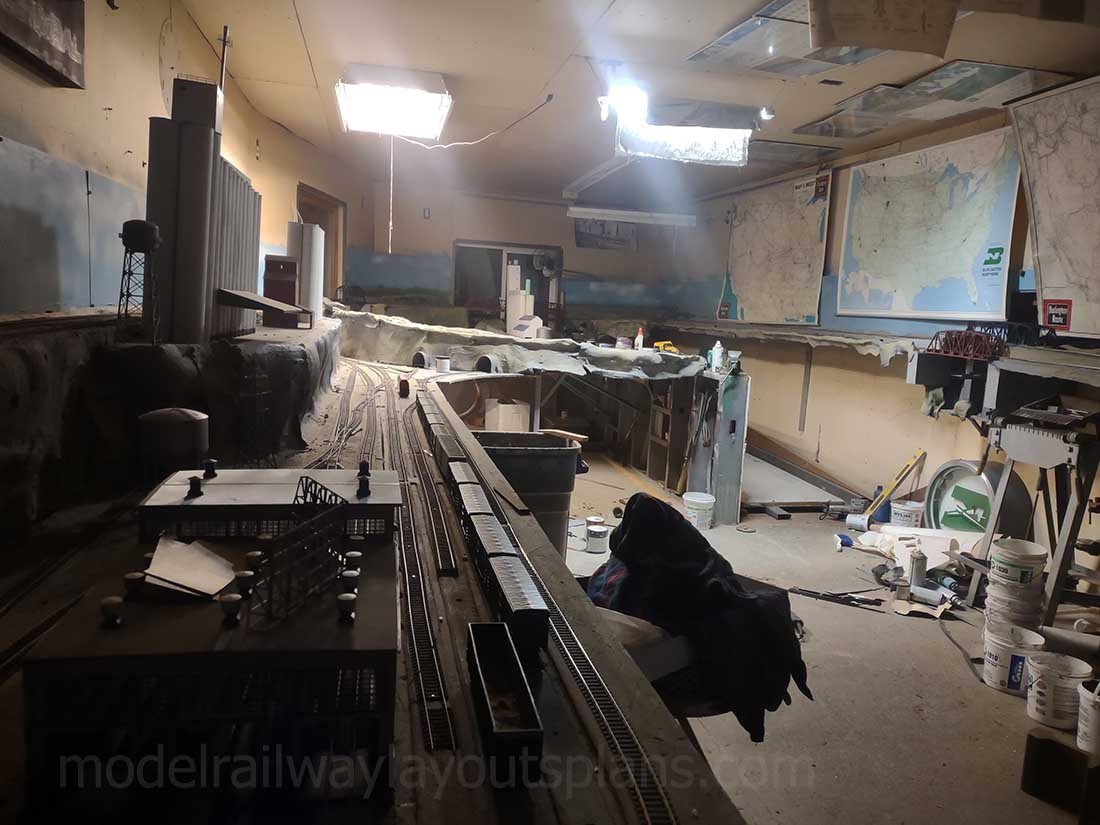
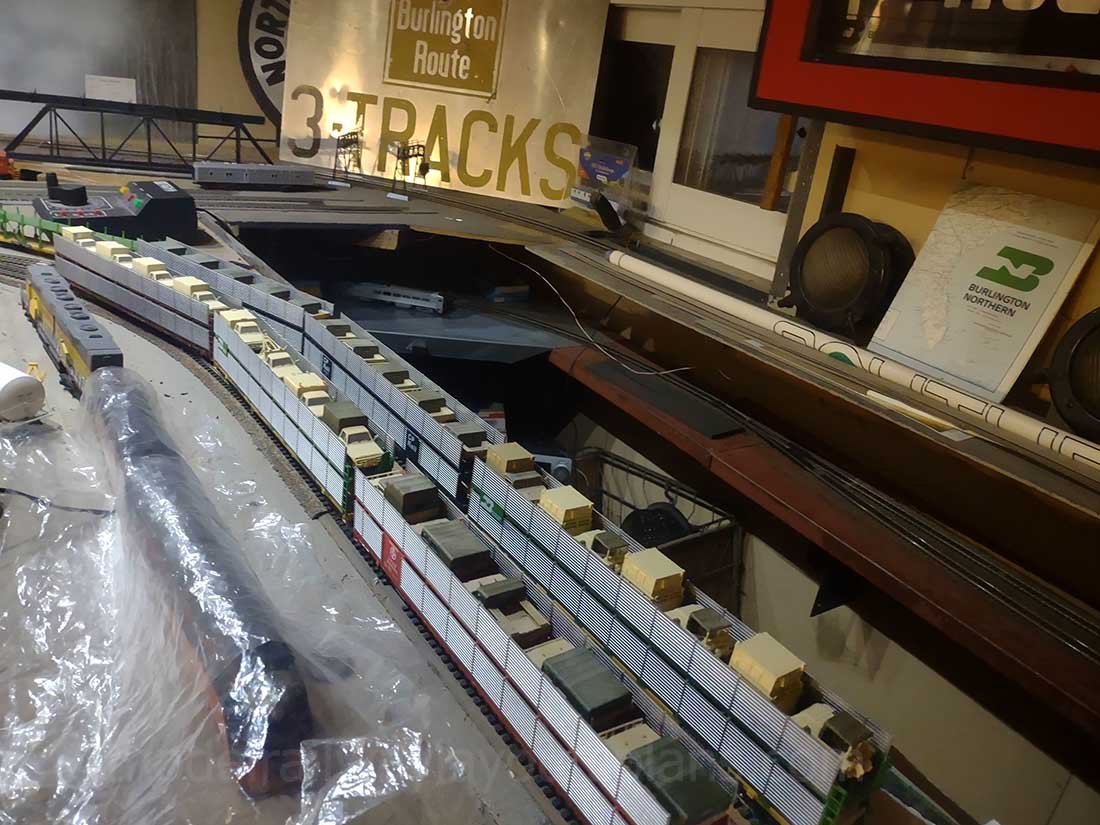
“Good day to you al I have been wanting to send you some pics I just don’t know alot about hi tech devices. Let me know if you need want to know more about this layout ho scale 36×14 midwest theme.
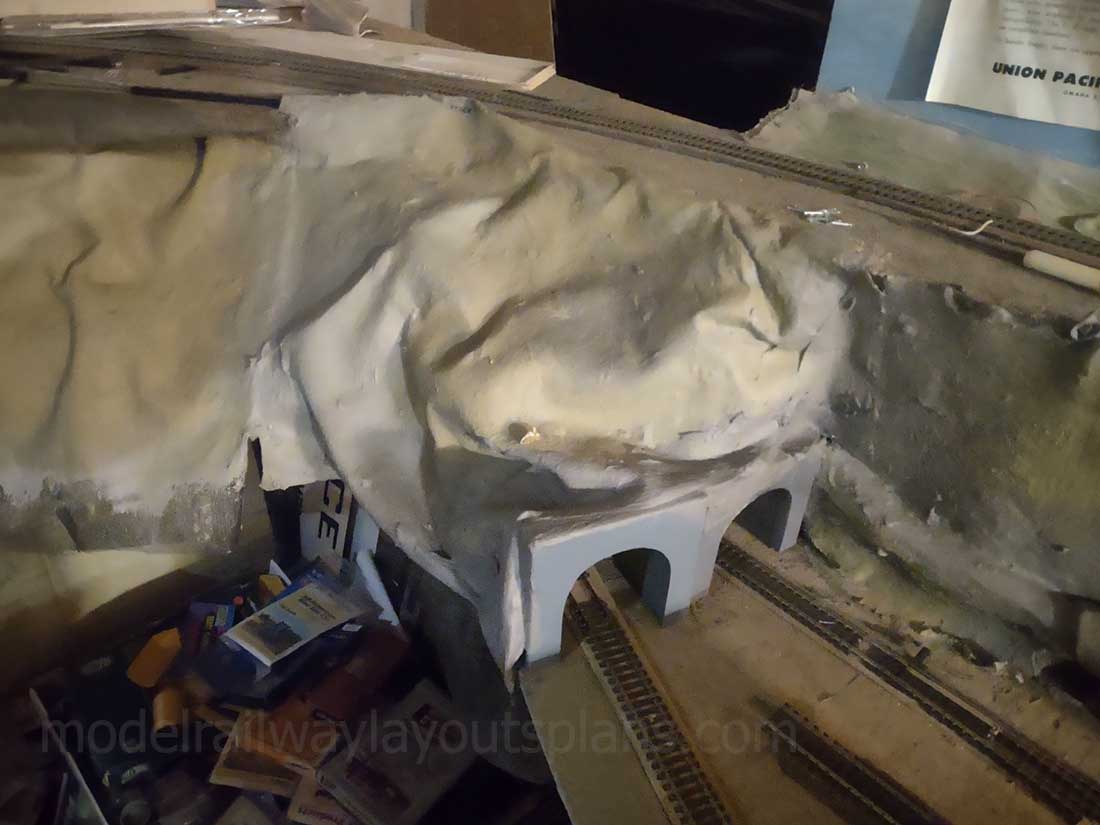
I use duct sealer for my scenery very pliable just spread with a brush and paint there you go water clean up piece of cake.
Have a great one!
Todd”
A huge big thanks to Todd.
I always get mails asking why I post ‘half built’ layouts – it’s simple because that’s where the fun and the magic is.
What’s more, it shows that every layout is just a mess at first, so never be afraid to get going and make a start.
Hope you enjoyed the Christmas model railroad – should I post a few more? Please let me know in the comments below.