Got this in from Tom – and have added it an earlier post I found from him – what a layout!
And judging by the comments below, you lot enjoyed it just as much as me:
“Al here a couple of the Narragansett RR. I talked to Bob Brown last week he made my head swell, he remembered Bruno’s garage, like it so much he made a copy for his layout.,
Later Tom”
He’s a man of few words, but the picture speak for themselves. A real stunner!
Here’s his original post:
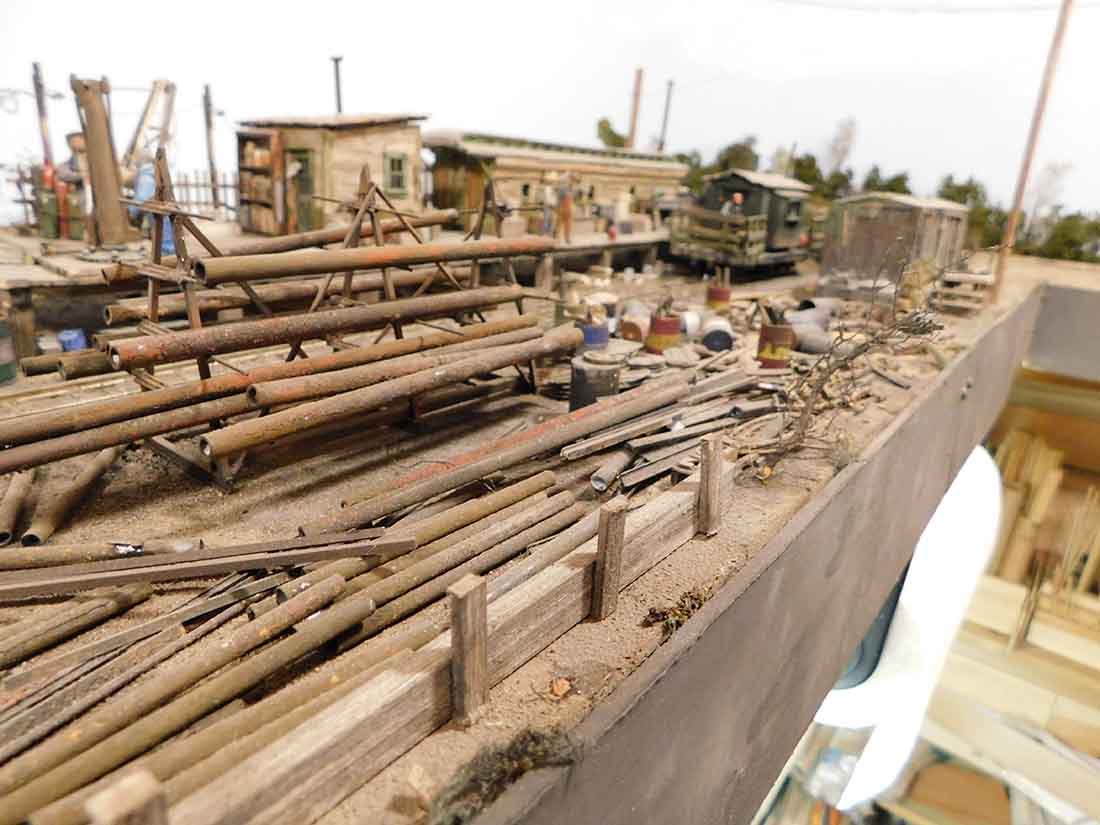
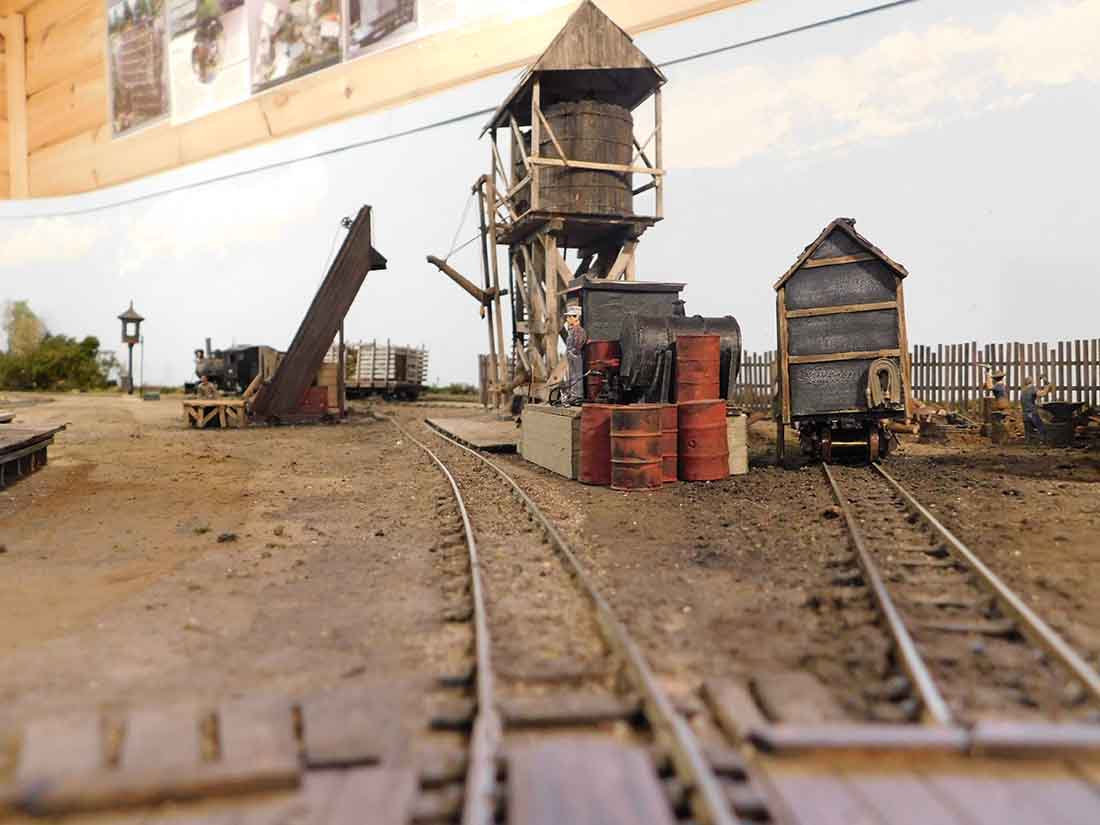
“Thanks for all the hits and updates, thought I’d include a bit of my On3 for you to view.
Tom – Pres. CEO & mostly janitor … Narragansett RR”
Kim’s been in touch again, this time with a great step-by-step: how to make HO scale sidewalks:
“Hi Al.
These are my sidewalks .They are not tacked down yet or painted yet.
I used the shelf trim with the glue side up to walk on.
Then i used coffee stir sticks to stiffen it and to raise it up. When glueing the sticks, stagger them to keep it stiff.
I added a strip onto the bottom and attached to the stir stick’s to act as water guttering (warning Al, don’t use white glue as it wont stick well). I use instant glue.
To turn left or right with the sidewalks, place sticks left or right as in photo.
When you finished a section, take fine sandpaper and run it along the road side of the sidewalks yo make it square and smooth. Then glue a small strip to make the guttering.
Now for the 1/100 scale or Ho scale bike. I used left over Led posts ya cut off. If you are really interested in how to make those bike’s i will send in a more informative way to make them. Was pretty easy. But i think you agree and use the word dang it’s small, honestly Al.
I think my bikes look more realistic than any plastic bike you can buy at this scale, if you can get them and i dont think ya can. Seat and peddles will be added later.
Im trying to make a sort of jig to follow how to make a mass amount. I could see a bike race on the road with these. I also attempted a kids bike. Now understand,this is my first tiny bike, so wont be perfect.
Tell me what ya think.
Can ya see a bunch in a bike rack in front of a store or something, or a bike shop?
Kim”
“I have a tip,i make a lot of stone walls,i first coat the screen or surface with plaster. after its dry i mix another batch with what’s called rainbow cement color (its cheep) comes in black or red,a little black makes gray.
I then coat the surface with almost smooth surface.
Let dry and take a small screw driver and drag across the surface to make bricks,the red really looks like brick.the screw driver goes through the red or gray layer and makes motor joints.
Mike”
“I use the plastic sprues left over from a model. I take them and use them for metal piping for oil refineries, gas stations, rooftop vents, etc. I also use them for scenery, pipe loads.
I cut them down to the size of the load, I also drill out the ends, and then paint them whatever color you need to give it a more real appearance.
I don’t have a pic handy, but I just made a fuel island for my truck stop. Hope someone can use this idea.
John”
Some fine tips as usual. Thanks to everyone. A big thanks to Kim for sharing his how to make HO scale sidewalks.
There are some sidewalks availabe in the printable buildings range too:
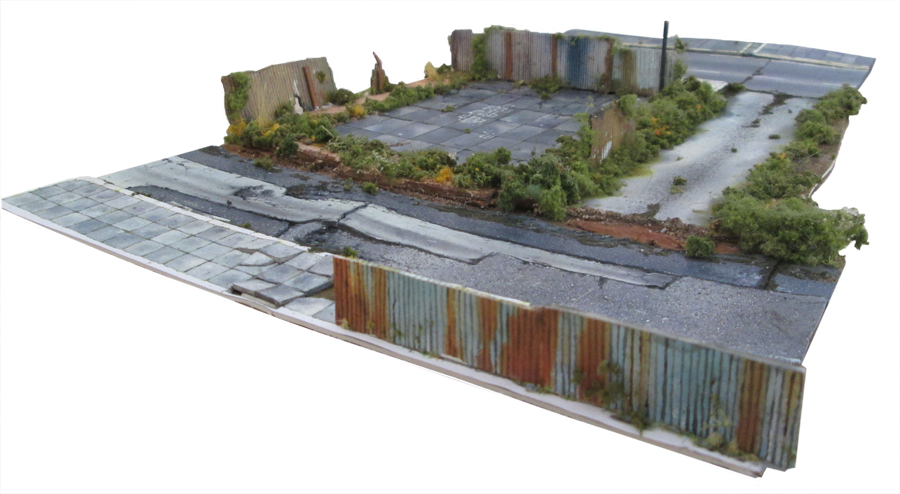
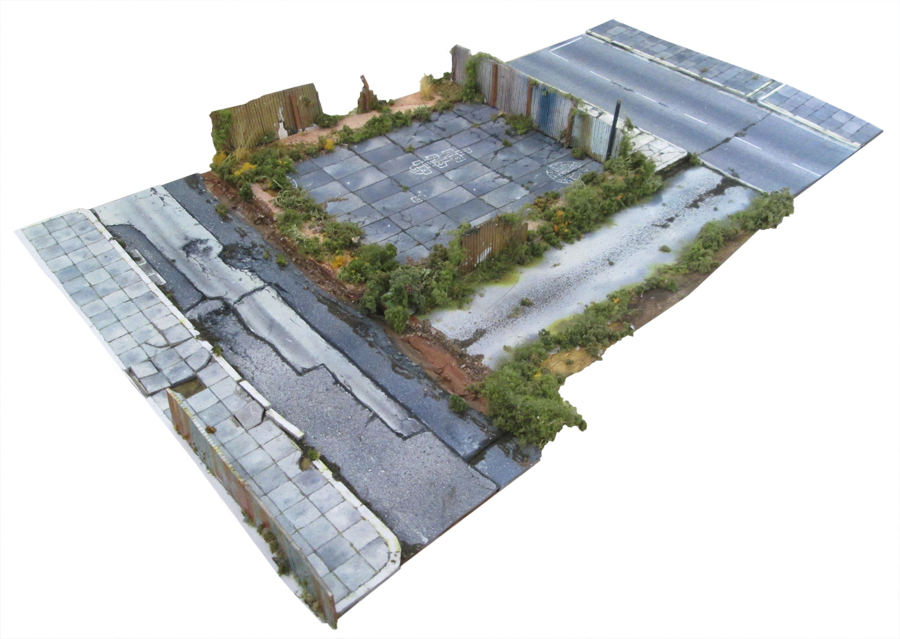
The prints consist of 4 roads, 4 sidewalks and 4 tarmac tracks – giving you a limitless combination for your layout. In fact, it’s only limited by your imagination.
John kindly put the below together just to give you an idea of what you can come up with. Here it is:
Just like every building in the store, it’s all made from print outs. Here’s his video. Hope it makes you smile as much as I did.
just a photo to let you see how I am progressing, I would like to install street lights but without drilling holes in the baseboard, any ideas please?
Starting the scenery now and will keep in touch.
regards
Alasdair M”
“Hi Al,
Here are some more photos of my new railway under construction.
As you can see in the photos, some scenery has built before track was laid.
Also in the photos track laying is well under way. I am using trackrite underlay, which can be purchased from hobby shops and ToyWOrld stores.
The underlay has to be modified to go under points, but can easily be cut using sharp scissors
Paul”
“Color Coding
I have 5 or 6 different sized, diameter and thread, screws I use frequently while modeling. To make things easier, I color coded them so it was easy to identify the tap drill and tap as well as the screws for them.
I bought some cheap fingernail polish in different colors. On a particular drill and tap set, the same color of polish is painted on each. I have small zip-close bags for screws. The same color represents a particular size. For example, all bags with 2-56 screws, the bag has yellow polish stripe. Drills and taps for 2-56 have a yellow painted band around the base. 1-64 screw bags, drills and taps all carry a blue stripe or band and 0-80’s a red stripe or band.
In instances where I have both tight and loose fit drills for a particular size, the tight fit drill will only have the appropriate color for the size while the “loose fit” drill will have a second band of silver on it. Thus, the drill for a 2-56 for a loose fit, probably one where I intend to use some sealant to make it permanent, would carry the yellow band with a silver one beside it.
Not only do I store my screws in zip-close bags, but the drills and taps too are stored in them and the bags are all identified accordingly.
This makes identification easy and when several are left laying on the work bench, it very much simplifies sorting and putting them away.
Dick”
Loved this color code tip!
What a clever lot you all are.
That’s all for today folks.
Please do keep ’em coming – it’s all getting a bit thin on the ground this end.


")