Model railway layout – Cameron’s

Cameron’s been back in touch with his model railway layout.

And what I love about it most is his ‘common mistake’ as he calls it – but he doesn’t care because he’s having fun and that’s what it’s all about:

Make a start, and have fun.

“Dear Alistair,

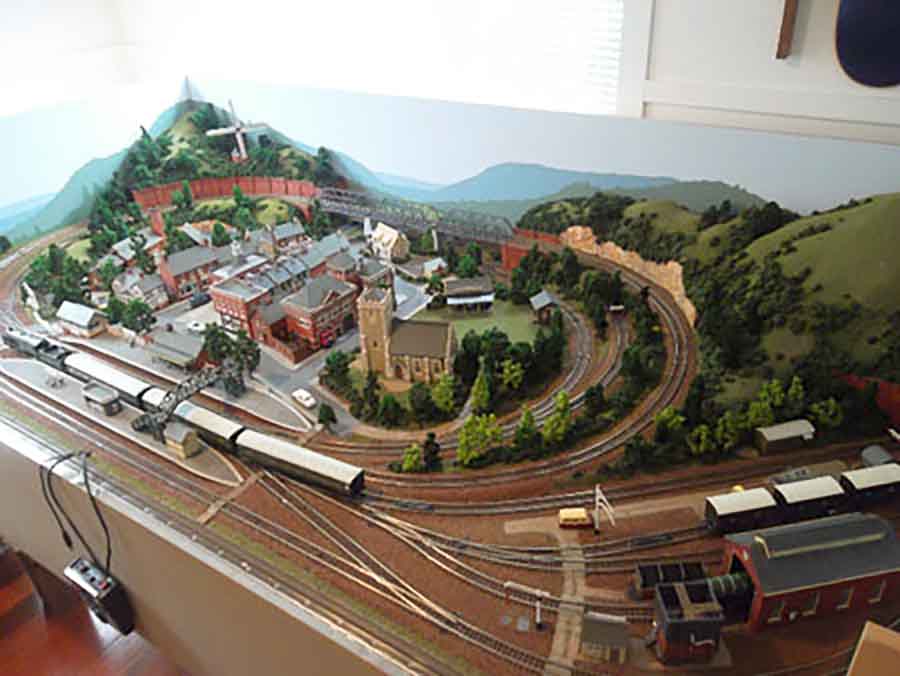
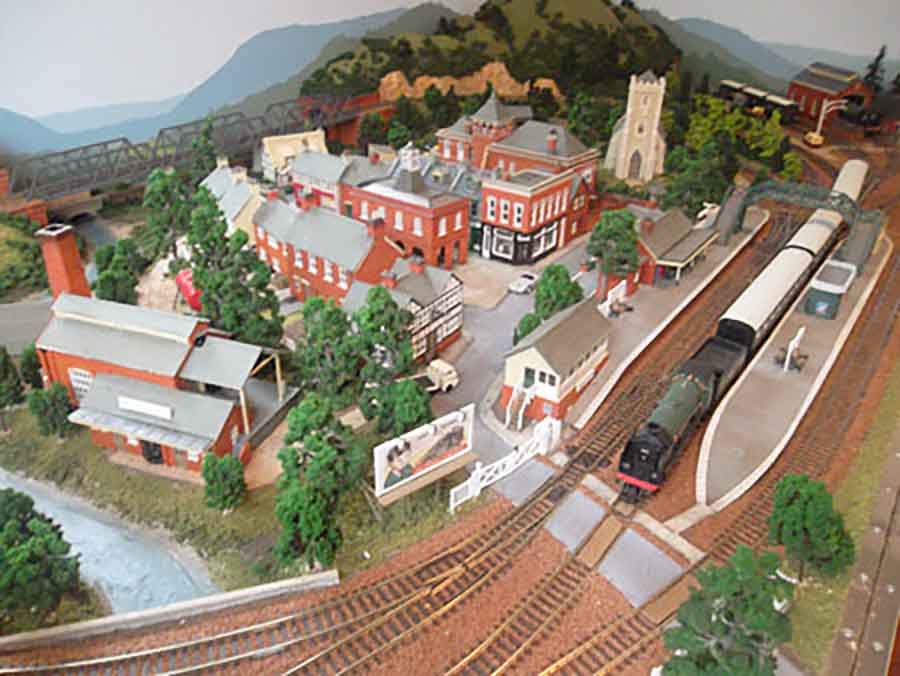
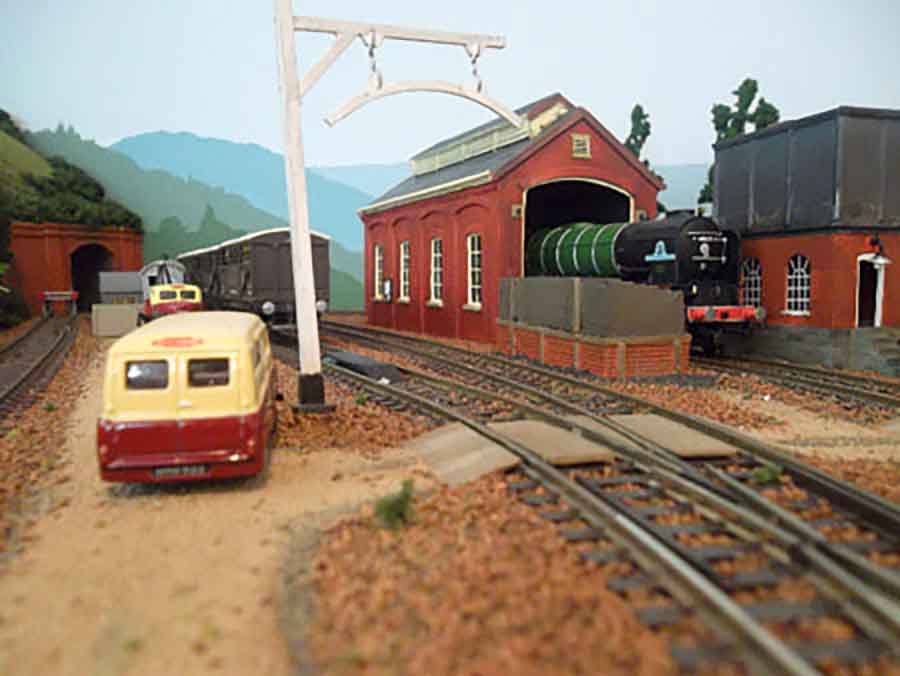
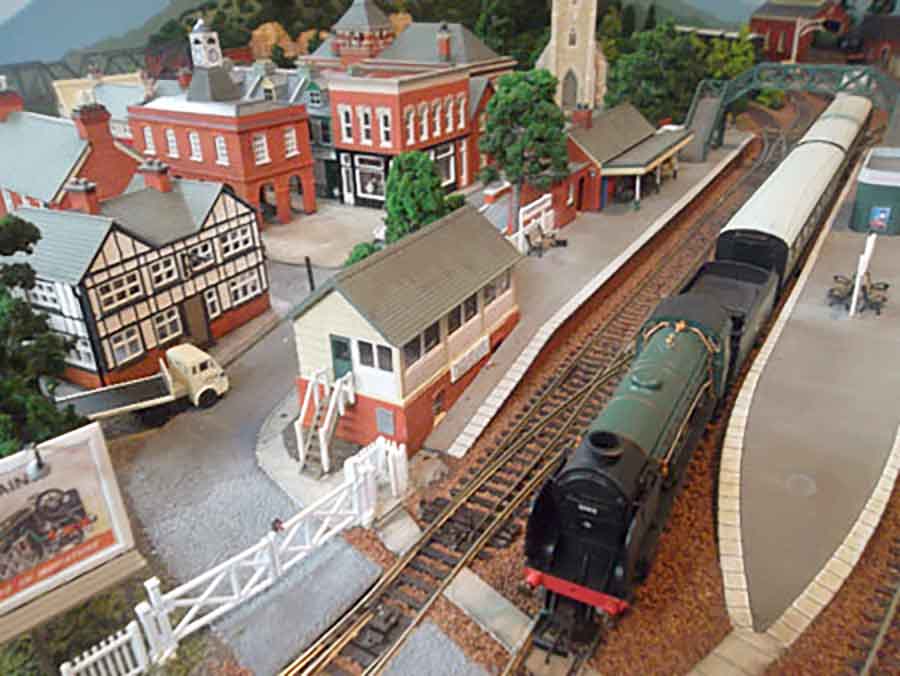
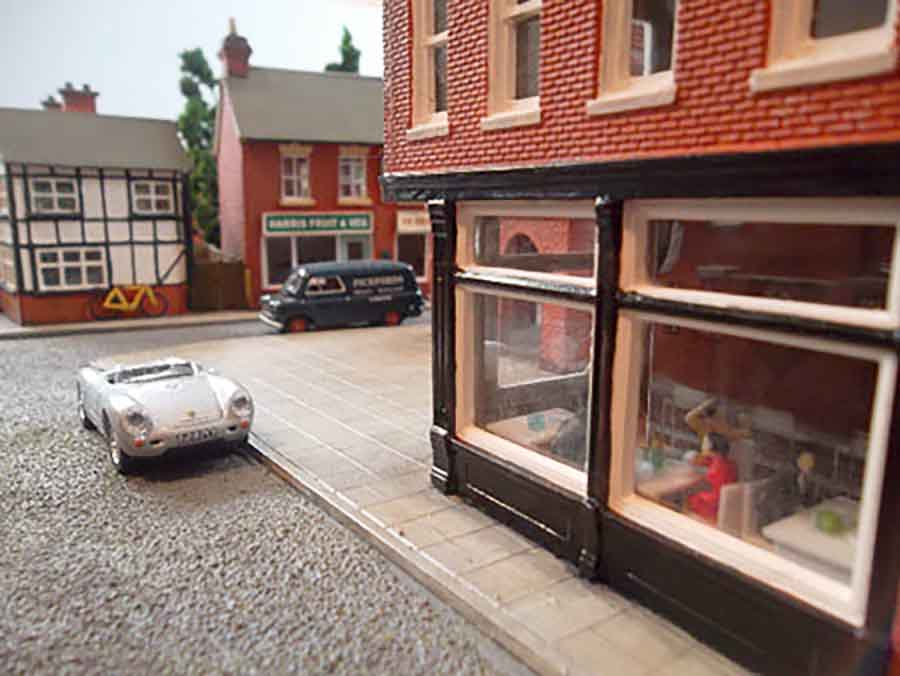
This is where I am up to with the layout as of today. It has taken me one whole year to get this far but is still holding my interest.

Fortunately “She who must be obeyed” has now come around and seems to quite like the layout.

This is a good thing as I don’t plan on moving it in any foreseeable future.

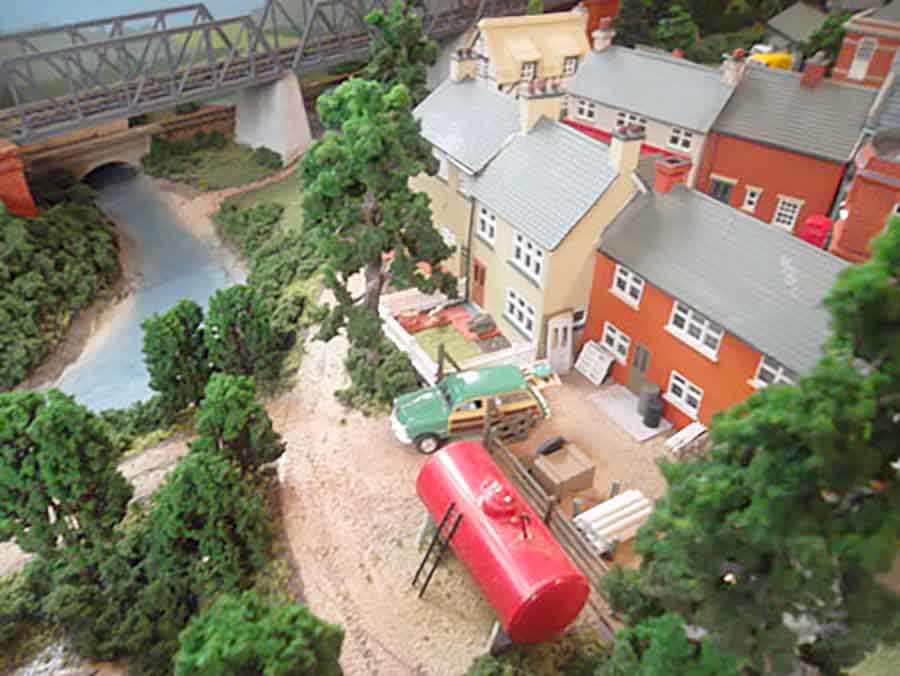
It is probably a bit over crowded which I know is a common mistake but I for me the enjoyment largely comes from constructing it and running of trains.

Trees
The trees on the layout are the cheep wire and foam ones you buy on Ebay. They tend to be a bit brightly coloured so I have dipped them all in a solution of ‘burnt umber’ acrylic paint and water. I used a few photos of the English country side to help inform how they were placed on the layout.
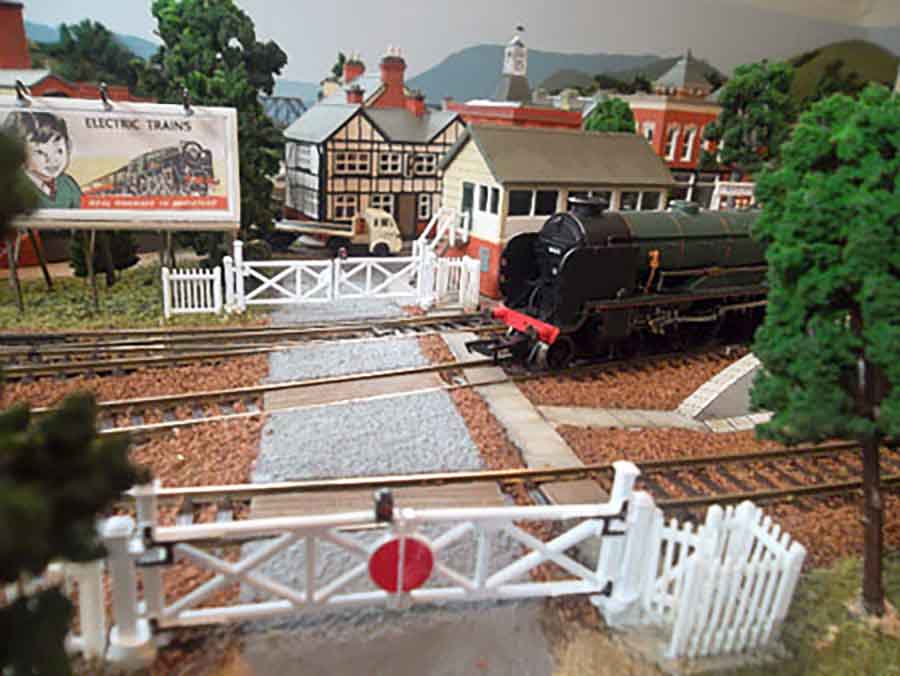
Backdrops
The backgrounds are painted shelving boards. I found that you don’t need to put too much detail into the backgrounds as long as the colours are accurate. The simple silhouettes of mountains disappearing into the background were quick to paint and tell enough of the story.

Most of the scenery is complete now and I am embarking on the wiring of the points and some building lighting. The next post will be a few weeks off I suspect.

Bye for now,

Cameron”

double loop model railway layout

model railway platform

model railway engine shed

model train platform

model train houses

model railway layout church


model train road crossing

model railway layout street

model railway layout curves with embankment

model railway layout engine shed overhead view

model railway town scene

model railway layout town scene

A huge thank you to Cameron for sharing his model railway layout and tips.

I love seeing the progress of a layout, especially when it’s from a bare bench to a stunning finished piece.

Few of us have the time and talent Cameron does, thankfully there’s this.

Oh – and if you want to see more of Cameron’s layout, you can see much more of it here.

Just have a look at the comments below too. Stunning stuff.

Best

Al


Cameron’s stunning layout update

Here’s the next installment from the talented Cameron:


“Dear Alistair,

Thanks for posting my last diary entries and to your readers for their words of support, encouragement and further tips. I have just got back from a camping trip so thought I should get in a couple of posts for your mailing list before I get back to work.

Phase 8 – Kit Bashing

Making buildings for a layout was a time consuming but rewarding process. I put together a small work tray that I could sit on a coffee table and make buildings at night while watching TV. There hasn’t been much on TV worth watching for the last year so I was able to get through quite a lot of buildings. Plastic kits can be quite expensive so I bought job lots of rough second hand ones on Ebay and at the local model train show and rebuilt them. For new kits I found the Dapol kits quite inexpensive. I only scratch built two buildings as this takes a lot more time. A couple of the kit bashing buildings that your readers might be interested in are as follows.

Municipal Building
This Municipal Building is made out of a second hand Life Like Fire House and some Wills brick & roof tile sheets. All up is cost me $12. I used all the kit walls for the front and kept the walls at the back quite plain. This gave me twice as much building for the cost a single second hand kit.

Factory
I looked everywhere for a cheap Brewery kit with no success.
Ironically had most of the parts I needed in the regects bin. The
final factory was kit bashed out of a new Dapol Engine Shed kit, a
second hand Airfix booking hall building an old piece of Hornby
Platform and some Wills brick sheets. Aside from the Dapol engine
shed the components were all surplus materials from other purchases.

A couple of tips I have for the buildings generally are as follows:
1. I noticed that a lot of the second hand buildings I bought (that
didn’t have bases) had deformed at the bottom of the walls. To stop
this from happening to mine I glued a base to the bottom of all the
walls. Hopefully this will stop them for deforming in the long term.
2. Drill the layout base and the bases of the buildings for lighting
before you glue them down. When you are drilling from underneath the
layout it is hard to judge where the hole ends up.
3. If you have a town it is easier to make it up in large sections of
multiple buildings all glued together on a single base. This way you
can take it off the layout to work on it and not be bent over the
layout for long periods of time.

Next post I will be putting on the trees.

Cheers

Cameron”


Another superb ‘how to’ from Cameron.

Course, I’m biased, but I think the print out scenery below is rather good too!

And don’t forget to click here for the latest ‘ebay cheat sheet‘. You’ll be glad you looked…

Best

Al

Arnie’s layout video

The talented Arnie has been in touch again.

(If you missed his earlier missives, they are here).


“Hi Al,

I responded to Cameron’s work directly, but I wanted to say to you that his submission was an excellent selection on your part. The step-by-step process in model railroad building is invaluable to modelers, especially those wanting to get started in the hobby and who may be daunted by what can seem to be an overwhelming endeavor. And great tips from Cameron on creative solutions to various parts of the creative process.

I also wanted to submit to you for publication consderation a follow-up video I did to my recent night scene video you recently published of the New York Central’s “20th Century Limited” passing through Susquehanna Station. I wanted to make a more comprehensive video showing how my SV&GS layout can automatically transition from daytime to nighttime operations. It’s about nine and a half minutes long, I apologize, but I think the readers would enjoy it: It shows a sampling of the automatic lighting and sound effects on the layout including the burning building.

Again thanks for showing my previous submissions and the great asset that you’ve created via your website for modelers and spectators alike.

Arnie”

Latest ‘ebay cheat sheet’ here

A wonderful video! Thanks Arnie.

Please keep ’em coming.

Best

Al