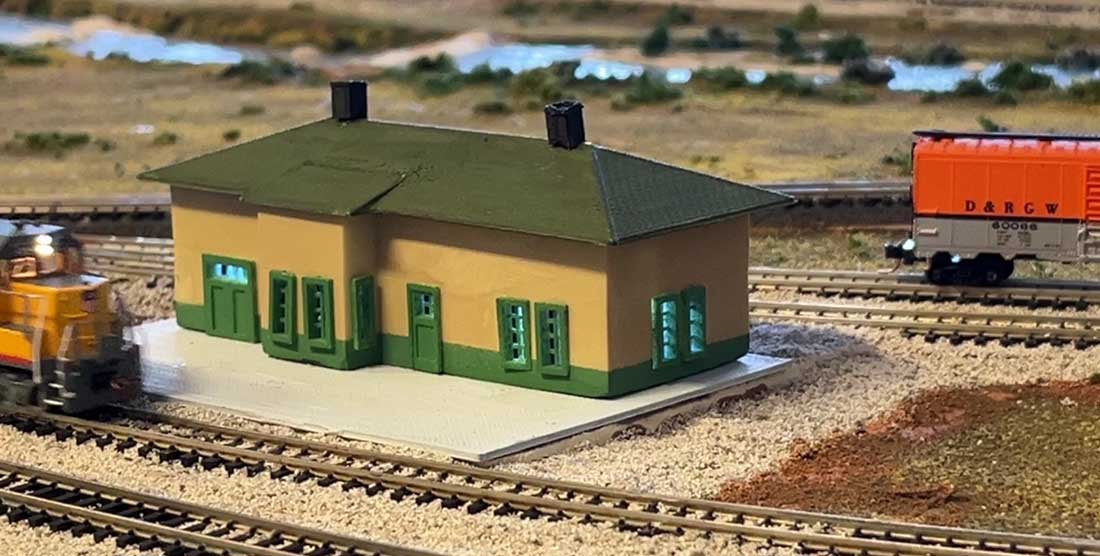
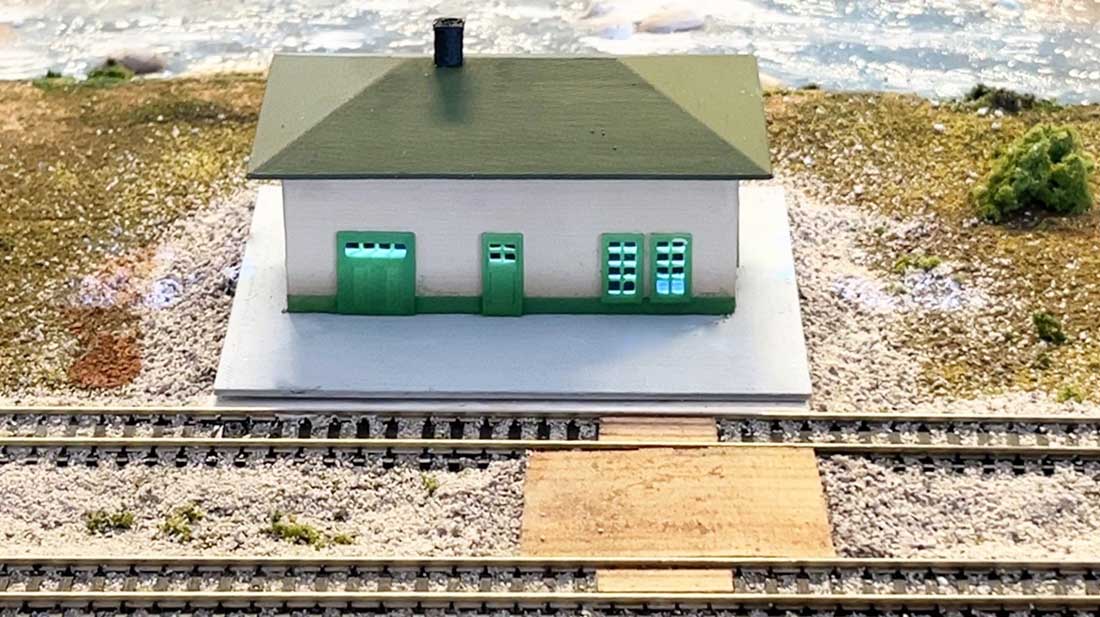
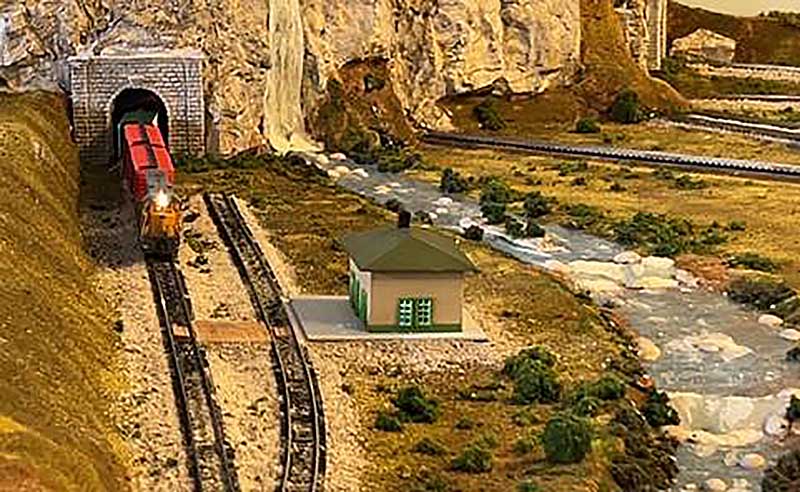
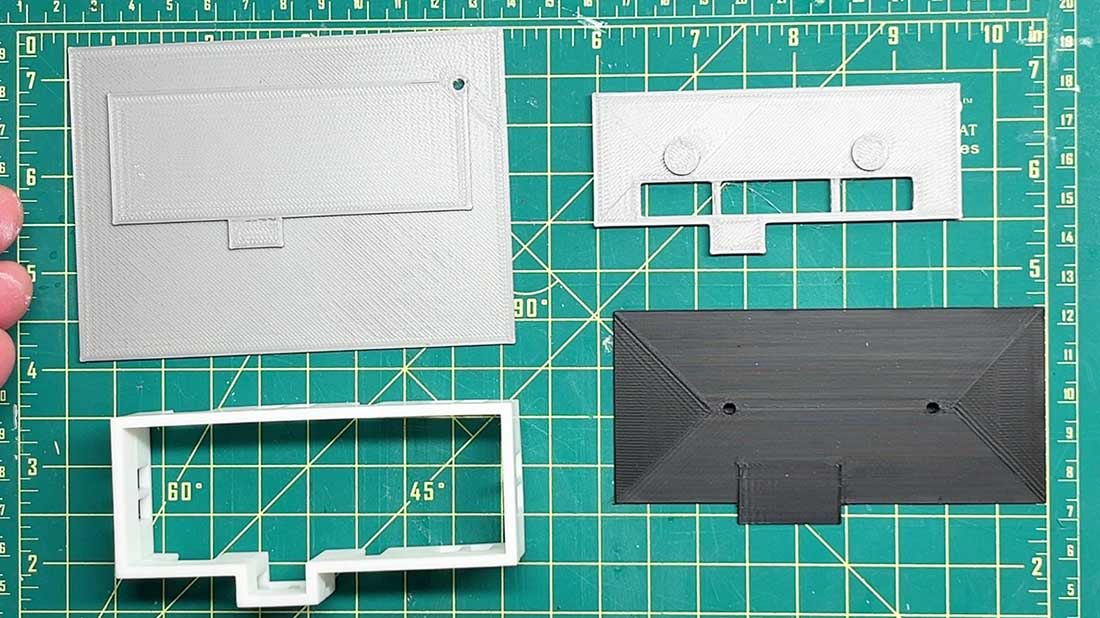
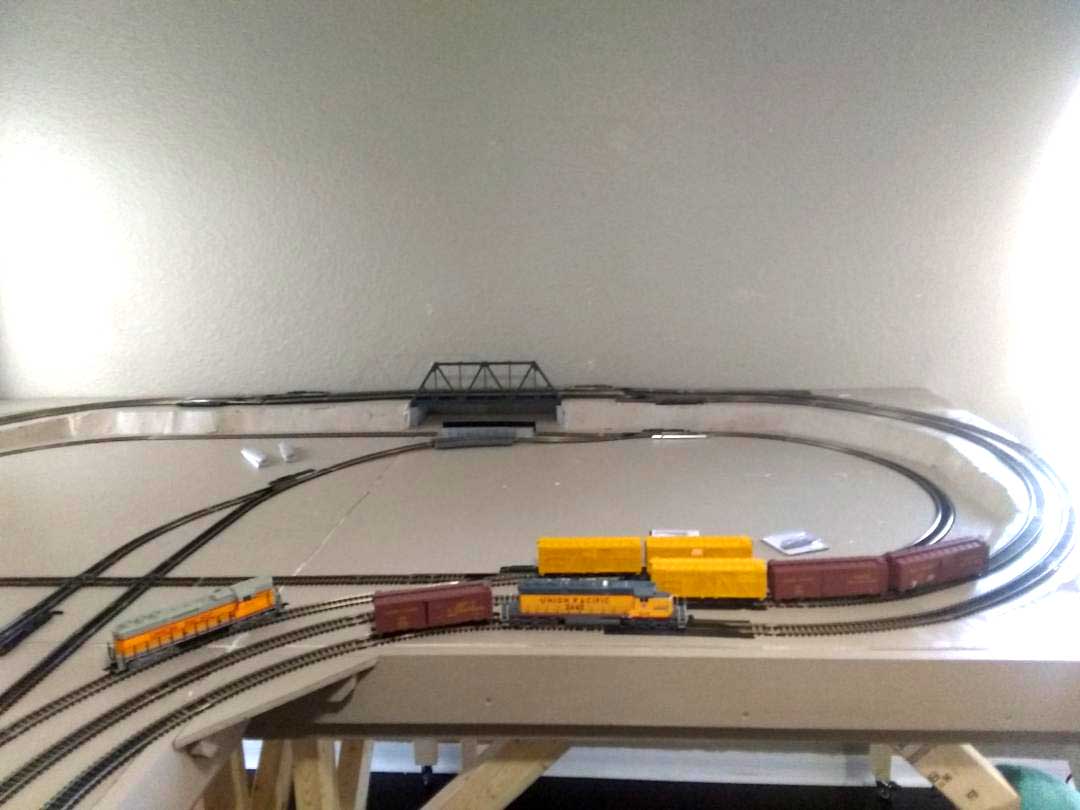
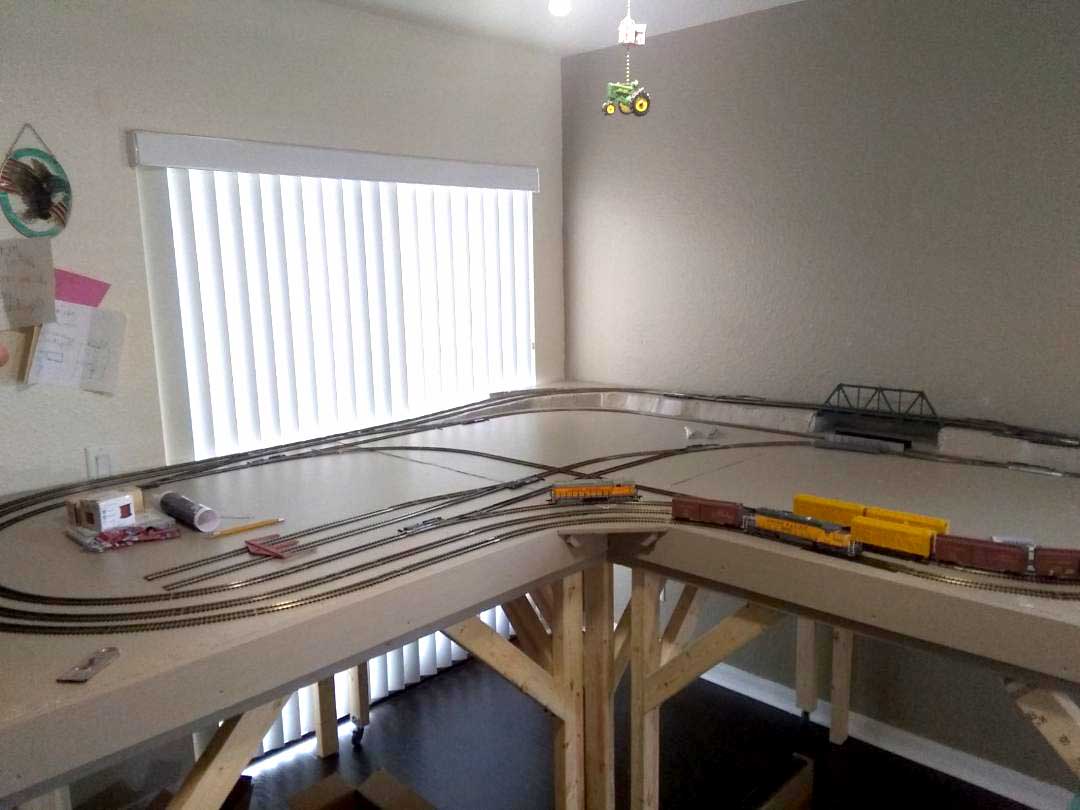
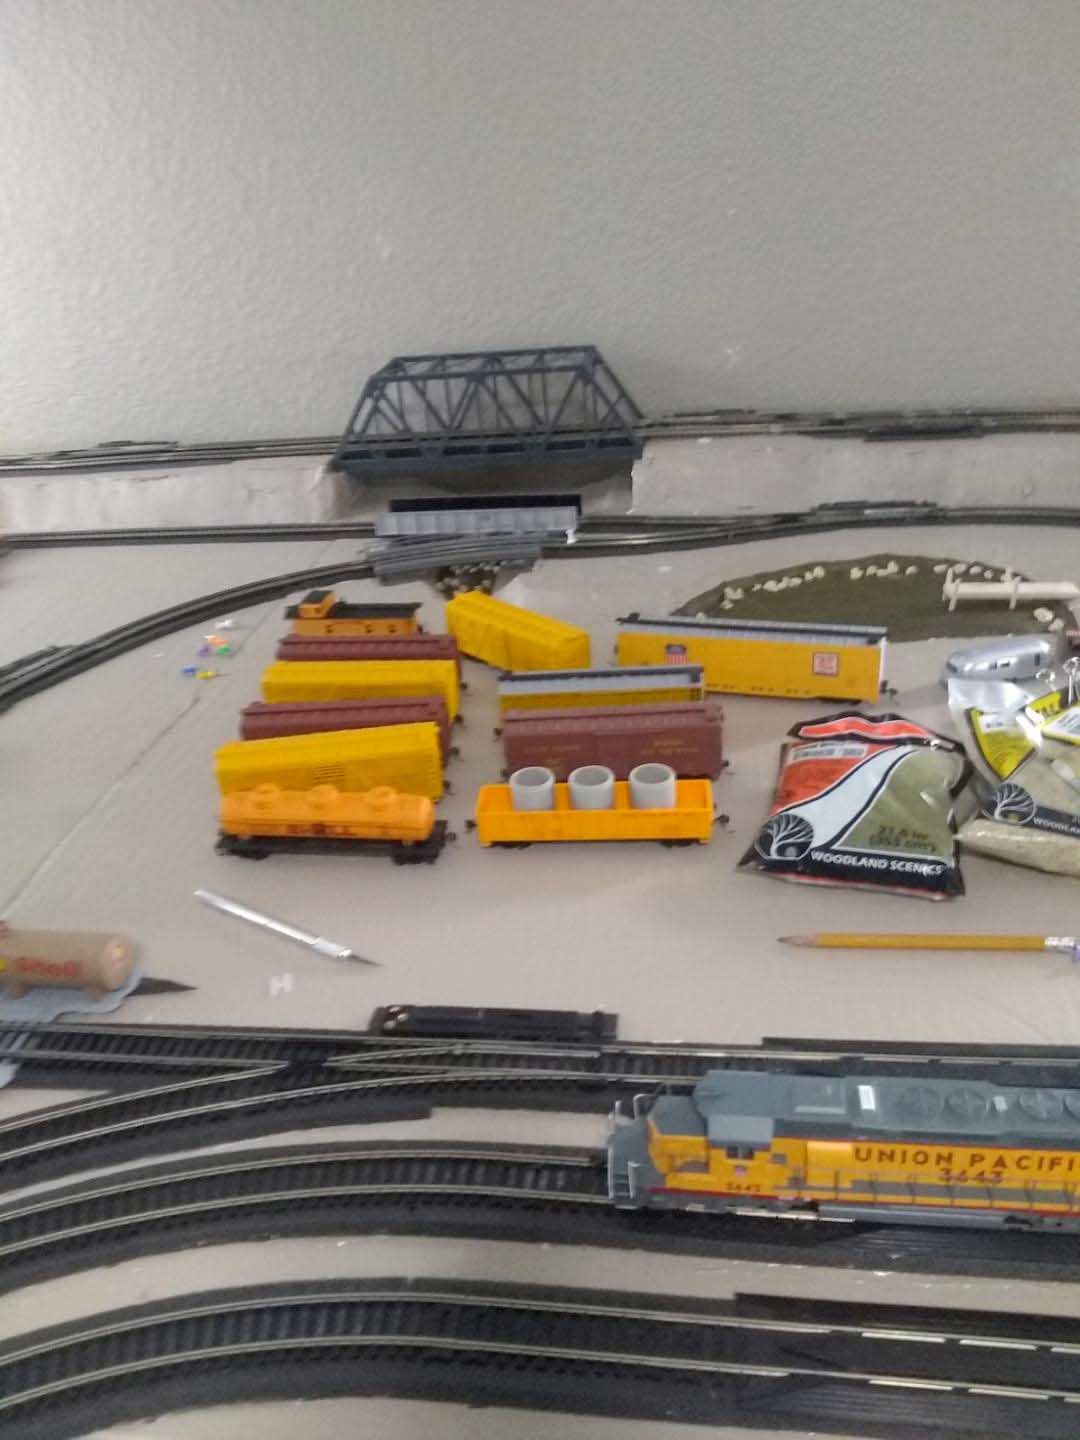
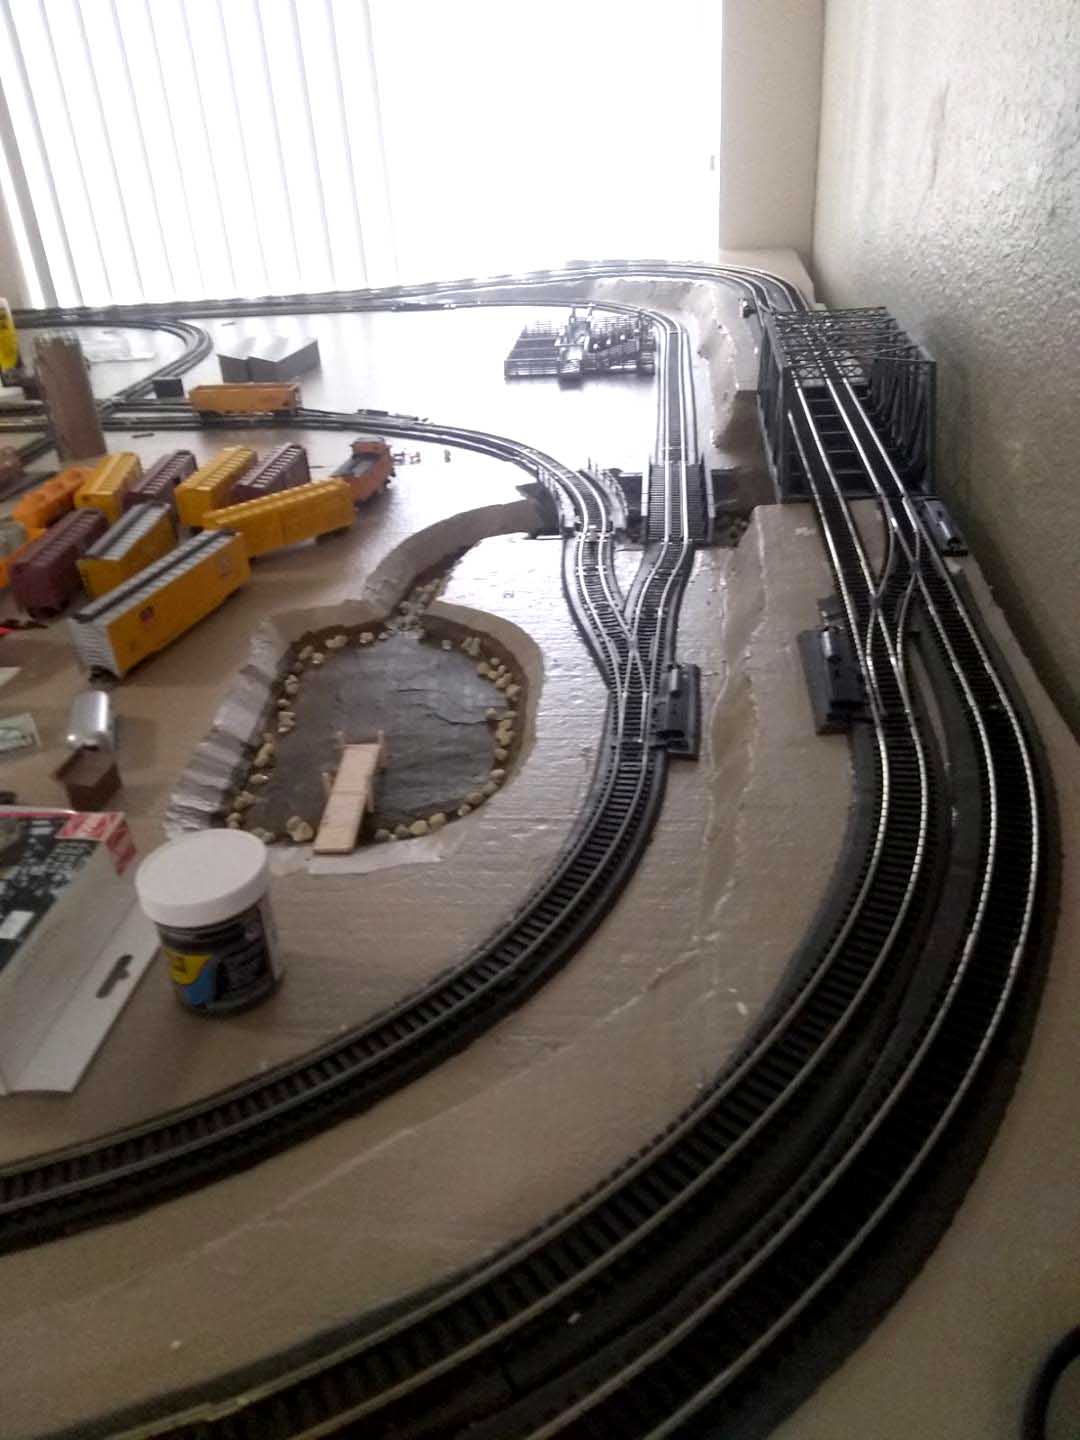
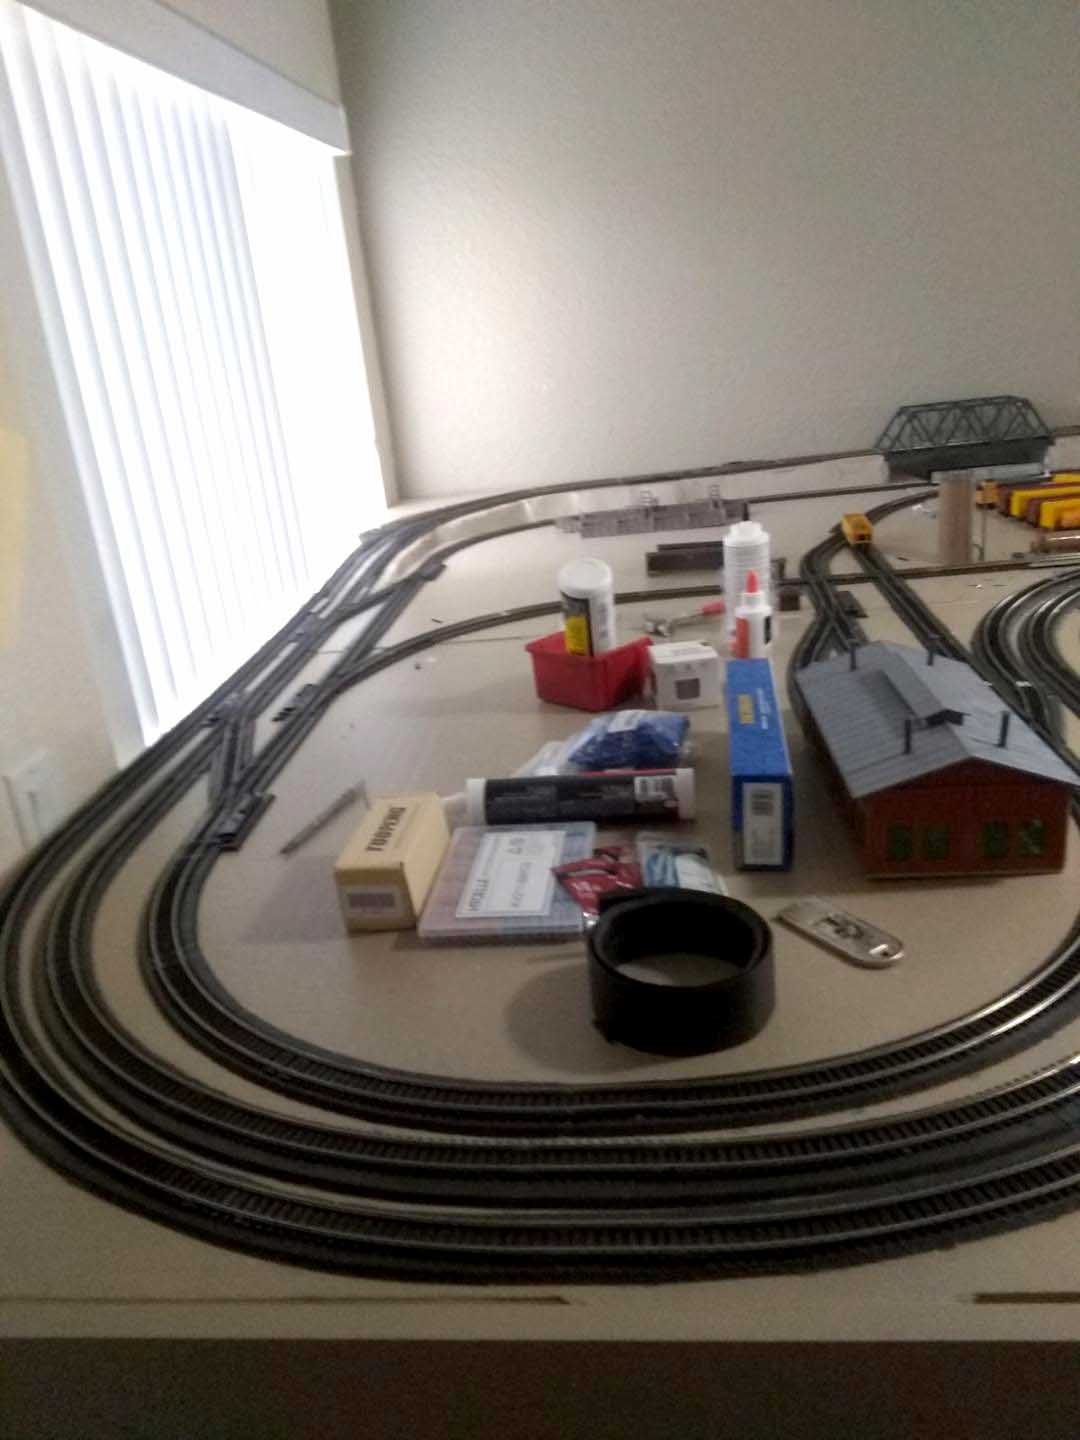
Frank’s been in touch with a question that comes up alot on the blog: How to build a model train table.
He’s also been kind enough to record every part of his model train journey – it’s a real delight to read:
“Hello Al,
I am Frank, living in Surrey, British Columbia, Canada and am 76 years old.
I found your site a few years ago and the information from you and your MANY readers has made it possible to actually start building my layout as you’ll see below.
There is a long backstory to building this railway, going all the way back to when I was a child, so I have broken it up into 4 sections.
I have ALWAYS liked trains, but, because of my father’s career in the Canadian army, we moved every 4 years, and I was never able to complete a layout.
The only operational layout I ever had was a Christmas Hornby OO train set and table my parents bought while we were living in London, England for 18 months, in the late 50’s. A friend in London had some Marklin trains which we set up on the floor of his home, but no fixed layout.
After returning to Canada, several layouts were started but all sputtered and none were completed.
The current project finally got started as a result of three things.
First, was a large format book of track plans; second was your site with it’s wealth of layouts, causing me a great deal of envy seeing the magnificent layouts built by others, but the final push was in 2021 after visiting a friend with an operating N scale layout.
Although I had always planned in HO, this showed what could be built in N scale.
Years ago, I had purchased a second hand book titled, "King Size Plan Book, HO Railroads you can build" (using Atlas track parts) published in 1982. I was inspired by the "Apex & Hypotenuse" track plan from that book.
I have embellished, modified it and converted to N scale.
The name of the D&L Railway is taken from the first names of my son and grandson but nowhere will you see the full names printed. All the place names are those of various friends of mine.
Winterburg was inspired by an article in the 1989 issue of Model Railroader called, "Christmas in Pine Hollow" and allowed me to also have a winter area and a colourful fall scene. But, because of space limitations, Winterburg had to be physically located above the main table. The problem was how to get up there?
A helix seemed the only solution but that occupied too much space, space I don't have.
The solution came to me one day when I saw the picture of a railway on 3 levels on one of your blogs. (seen below).
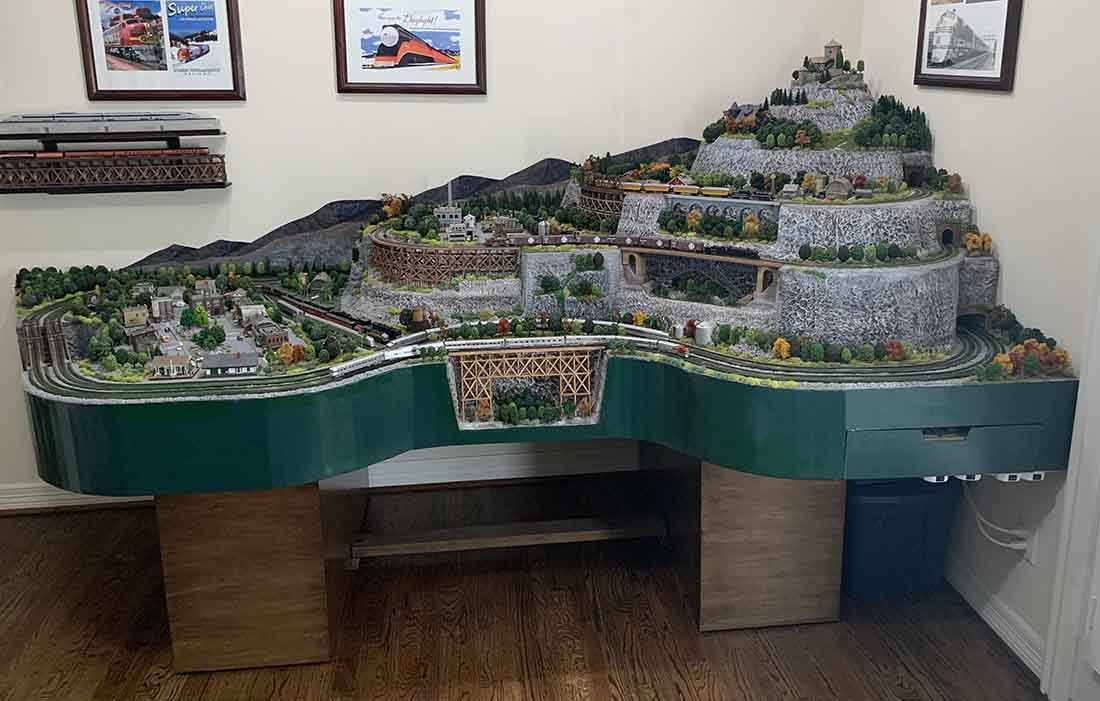
(You can see the above layout – Bob’s – here: N scale layout.)
Although the track is on separate levels and unconnected, I realized that a spiral would look great and could be built to minimize "lost" space. Hence I have a spiral that has tunnels
and viaducts to climb but also has a lumber camp inside the bridges.
Because of Winterburg, I had to do a lot of pre-planning before I could actually start putting the pieces together.
This process took over two years and the danger was, as you very accurately put it, "paralysis by analysis".
So, to start and see if my plan would actually fit, I set up tables and with a large sheet of paper, put the Kato (N scale) track pieces together. I then marked the track positions on the paper, along with the part number so I could replicate it later. IT FIT!!! (So I thought. More about that later.)
Also, because this layout will have to move later and I don't want to have to destroy it, I am building it in two parts. This creates significant mechanical, wiring and track issues, both now and as it expands.
It was a lot of paper work and planning but I hoped to avoid future costly and time consuming mistakes, mistakes that others on your site have frequently warned us about, and, for that, I thank
everyone.
I am building it in several parts and phases and NOT rushing (too much). That comes from sooooo many warnings.
Part 1 will get me started – How to build a model train table:
Phase 1 building the table
Phase 2 installing the Main Line (the green track), Away yard and yard extension.
Phase 3 building the Neilsen Yard at lower center.
Phase 4 building the Neilsen Town, Coal Mine and Generating Station.
Phase 5 building the electronics and control panels
Part 2 will also be done in phases:
Phase 6 building the fourth level and preparations for the spiral.
Phase 7 detailing the logging area, mill, dam and quarry
Phase 8 building the spiral
Part 3 Winterburg
Phase 9 Winterburg
Phase 10 more scenery
Phase 11 more details, scenery, etc.
The first part of the plan is a "main line" which is my connection to the rest of the world. The fiddle yard is named "Away", which is a Newfoundland term meaning "from somewhere else" and a little joke on my part. The base of the layout is a sheet of 1 inch foam over a half inch plywood and half inch of homosote (for sound deadening) and a frame, with, of course, the mandatory river.
Below is the beginning track plan.
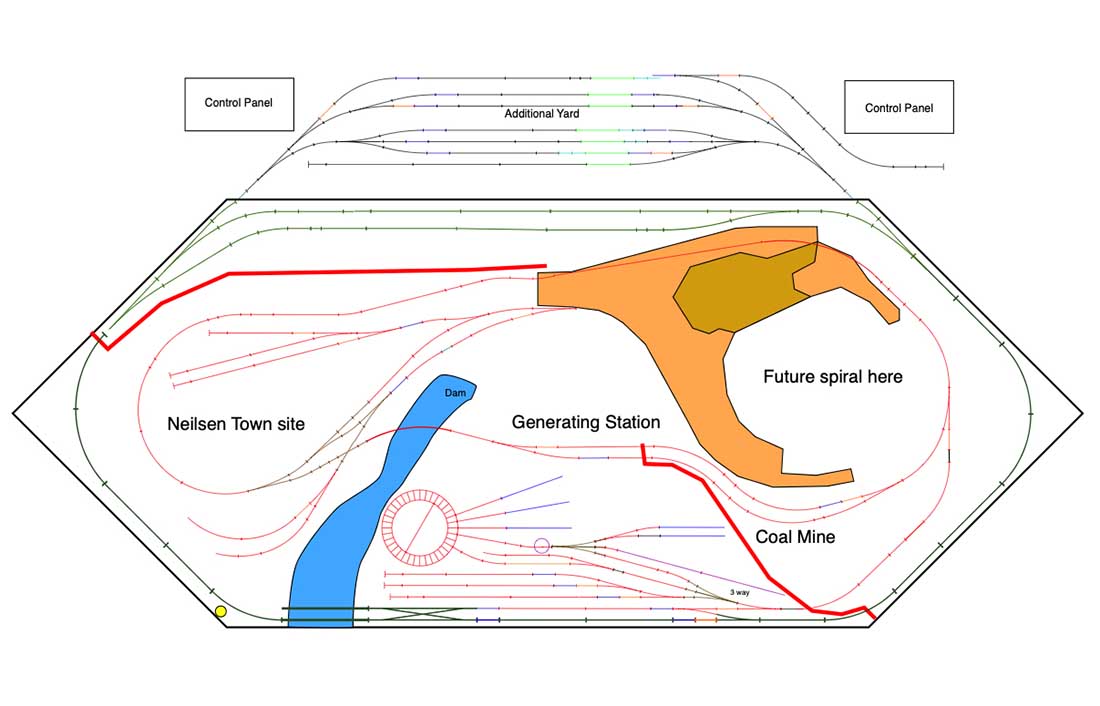
A "tunnel connection" between the generating station and the coal mine allows empties and full cars of coal to be "moved" between the two locations so I don't have to move the coal back to the mines, which seems so silly anyway. A similar arrangement is planned for the future logging and mill sections.
The table construction is a story in itself. Last summer, I am wired a friend's new house and he has very graciously allowed me to build the tables in his (unfinished) BIG two car garage. I have started construction of the table as I now have all the parts and the space to work.
As the first part is a bit lengthy, I have split it up into 3 sections. As of this writing, the table is partially assembled.
Thank you for your ongoing support of this fascinating, engaging, sometimes frustrating, but always fun hobby.
Respectfully,
Frank
Surrey, BC, Canada”
A huge big thanks to Frank for sharing his journey so far.
If you want to have a look at the layout that inspired Frank, it’s here:
Bob’s N scale.
But there’s more…
Let’s wind the clock forward and go straight to Frank’s next missive, which he sent to me at the same time as the one above, so I thought I’d post them at the same time.
Here it is:
How to build a model train table.
“This is Frank from Surrey, BC, Canada, back again.
So, after several years of planning, drawing and redrawing, rethinking and redrawing again, and again . . . and again, I was ready . . or so I thought.
Al, you are constantly telling us to MAKE A START!!! Well, I have finally started building the D&L Railway. While my new home has space for a finished table, I very quickly discovered that I needed a lot more space to actually build it!
This is partly due to the number of problems, restrictions and limitations I imposed on the build, the most important part being that it will HAVE to be moved at some point in the future and consequently, it has to be built with a number of sub-assemblies.
Fortunately, I was wiring a friend's new house in the summer and he has very graciously allowed me to build the tables in his (unfinished) BIG two car garage which has LOTS of space.
Before starting my table, I needed to build a work bench (the taller one in the photo) which will remain and eventually become part of the HIS work area.
Then, I stated Part 1, Phase 1 of the layout, the table.
To save me a lot of costly mistakes, mistakes that numerous readers have warned me about, I had to first resolves many issues, including:
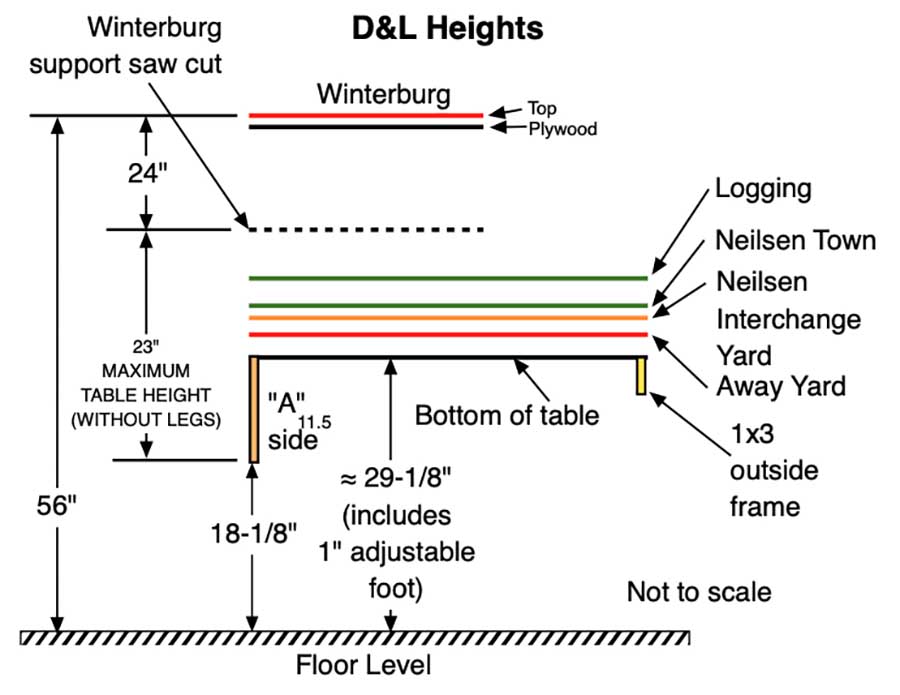
1. To move the layout later, the height (without legs cannot exceed 26 inches (the maximum width of all standard doors and the one leading out of the current "train room" is 28".
2. Also, to move the layout, the table, which is 10 feet long and 4 feet wide, has to be able to be split into two prices but has to be stable at the connection point.
3. The (future) Winterburg supports also have to be split to allow future moves and keep the table height lower, but at the same time, it must provide a strong and stable connection to the table
frame!
4. As the Neilsen Interchange Yard straddles the split in the table, it would make too many track and electrical connections necessary, so it is being constructed on a separate sub-assembly
that drops into place.
5. At 75, I did not want to have to crawl under the table to access the wiring and electronics so I am putting them into "electronics bays" under each table in a drawer that pulls out for easy access (The wiring will still require "ducking" but it is minor compared to all the components and connections in the drawers and I am using a mechanics dolly for those "under table trips"). (more sub-assemblies)
6. I did not want the front control panels to get in the way, so they are attached to the top of the electronic bay 'drawers". That way, they fold away with the bay drawers for transport.
7. All majour (low power) wiring connections will be made on "BIX" telephone blocks for ease of access and troubleshooting.
8. All track power blocks are individually brought to the bays and on barrier terminal strips to facilitate trouble shooting.
9. Wiring between the tables has to be connectorized as there are far too many wires for any other method so I will use Amphernol 50 pin connectors where possible and heavy duty connectors for the few track circuits that bridge the table split. Here again, I tried to minimize the number of blocks that straddle joints.
10. After a comment from a friend who looked at my (modified) track plan, I realized that the AWAY (fiddle) yard was too small so an "Additional" yard was attached to the rear of the table, which too, has to be removable but has to be strong and stable enough when attached (more sub-assemblies).
This is a drawing showing the various table heights and constraints.
How to build a model train table:
The table shape was inspired by the "Apex & Hypotenuse" track plan from a second hand "King Size Plan Book, HO Railroads you can build".
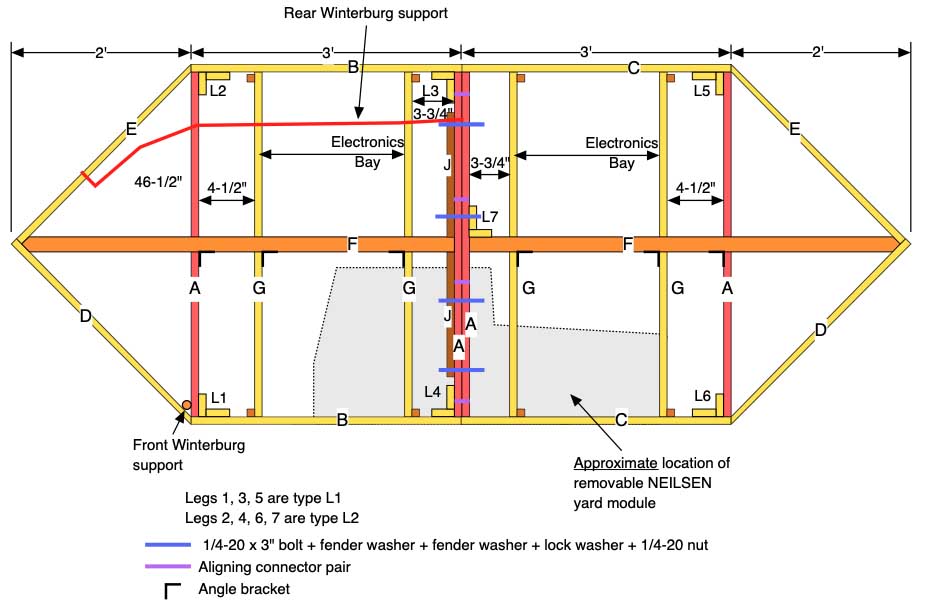
The 2"x3", labeled "F" in the drawing is used as a stiffener for each end of the table rather than having another leg and it looks much better too! The end parts "A" of each table are 3/4" plywood, just deep enough to keep the electronics bays off the ground when the legs are removed.
How to build a model train table:
One of your readers, Desmond commented in a recent post, "Make a start and then you can make corrections as you go." Having solved all the present and future construction issues, I was confident that I would not have to make changes. Foolish me for thinking it would be so easy!
So, finally, the table parts were cut in June.
After all the warnings and advise presented by various readers, I was sure that I wouldn't make any serious mistakes! WRONG! No one mentioned until Scott did in a recent post, probably because they didn't make this mistake, but, when buying plywood for the table, I made the mistake of buying some second grade plywood.
I had to replace several pieces of 1/2 inch cheap plywood because it wasn't strong enough and/or it was warped. "Penny wise and pound foolish". A word to the wise, which seems to be everyone but me, don't skimp on material quality. It WILL come back to haunt you, probably sooner than later!
One other minor issue. It was suggested, and I apologize because I don't remember where I got this piece of advise, was to put adjustable castors under the table legs to make moving the table around easier. A very good idea.
However, one warning. Make sure the wood at the bottom of the leg is a hardwood, otherwise the first bit of pressure will pull the castor out of the leg. (don't ask how I know this.)
The fix I used was to use Gorilla glue AND put screws around the edge of the T nut. Given the weight of the tables, I hope this will work.
(I assembled the tables WITHOUT the castors, so that issue will be dealt with later. If the castors still wont work, I will still be able to put adjustable feet under the tables.)
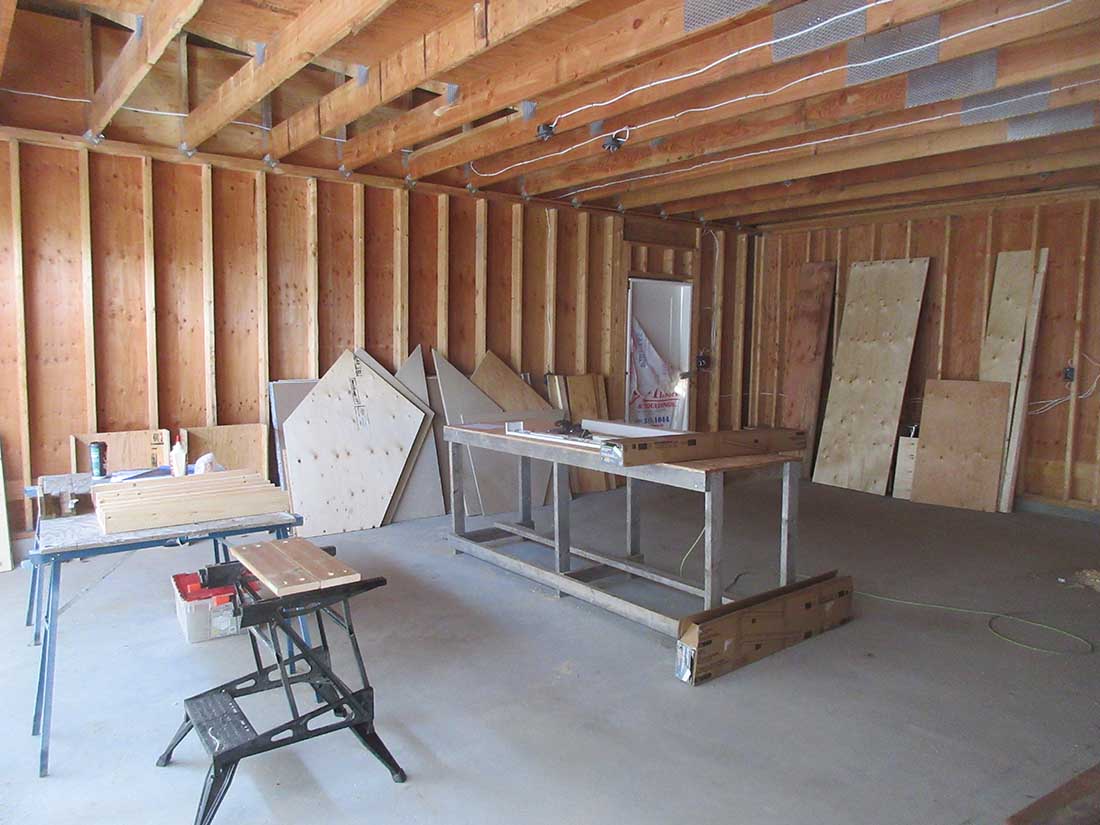
This is the new work bench in the garage with the lumber in the background.
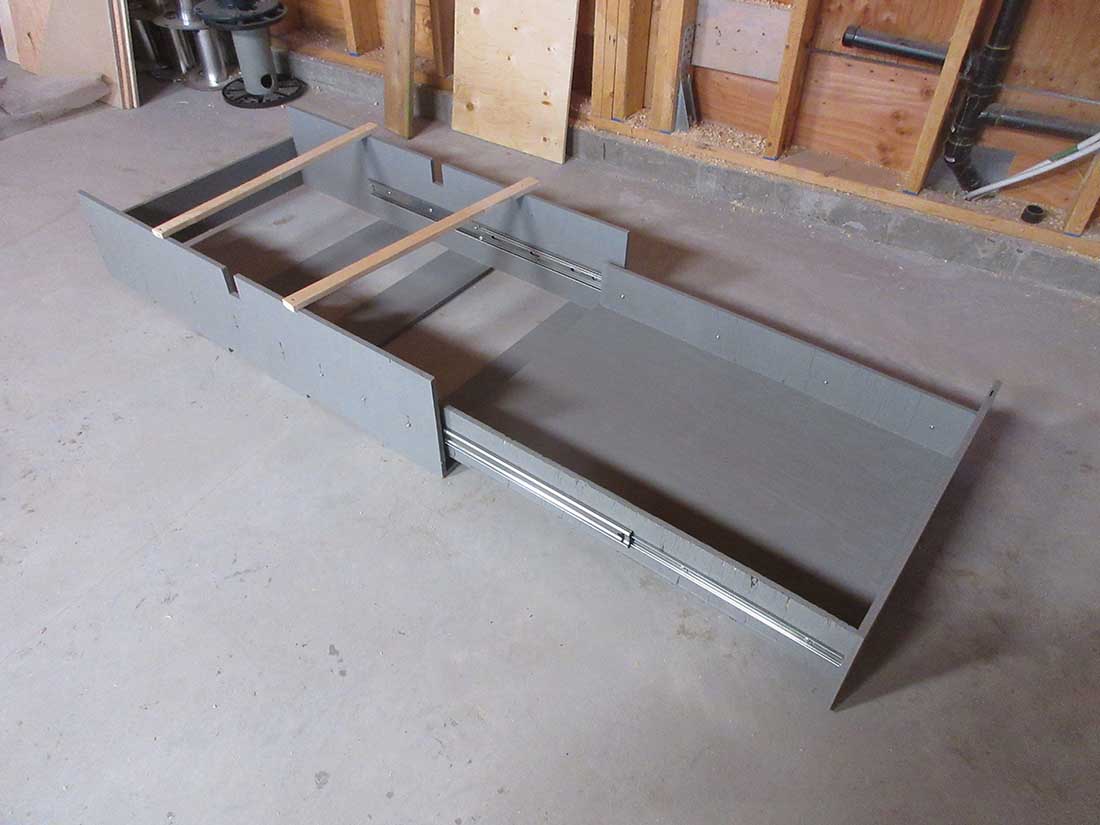
The next picture shows the assembled bays with the drawer pulled out. A recent comment by one of your readers concerning the colour of the front of his layout going from a bright green to a light grey prompted me to paint everything grey before assembly. Thank you to that gentlemen for the suggestion.
How to build a model train table:
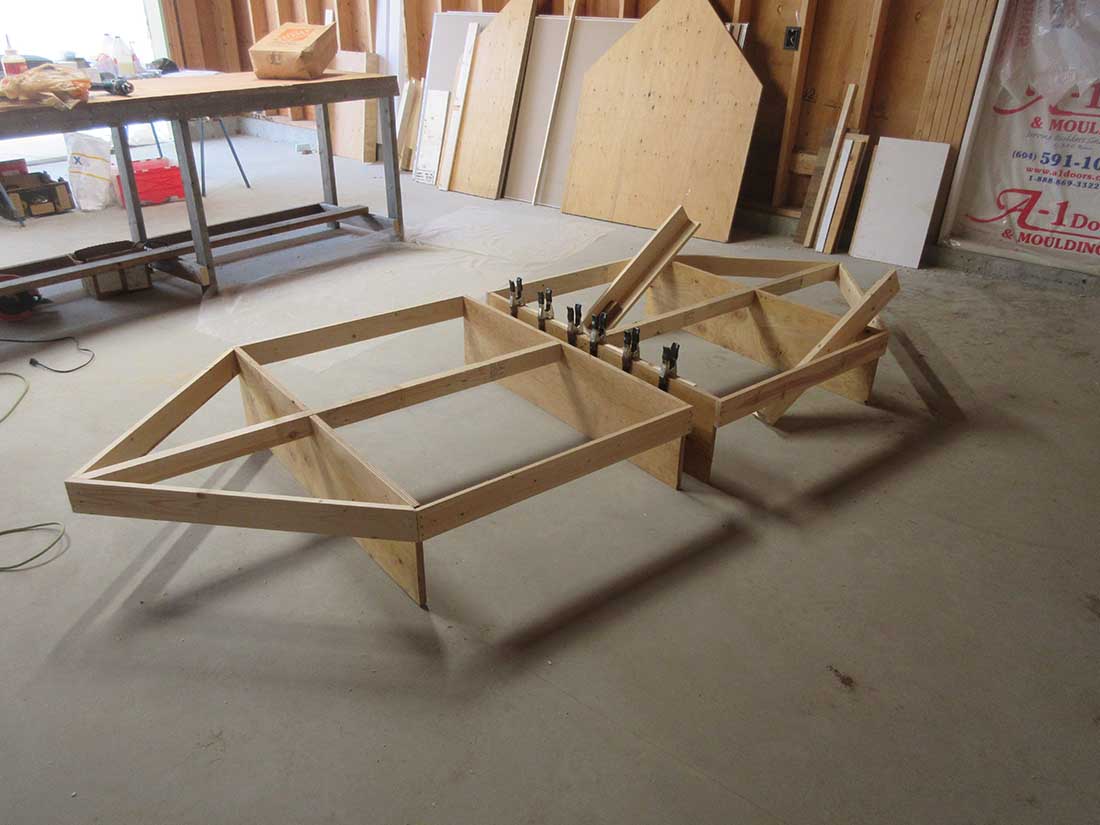
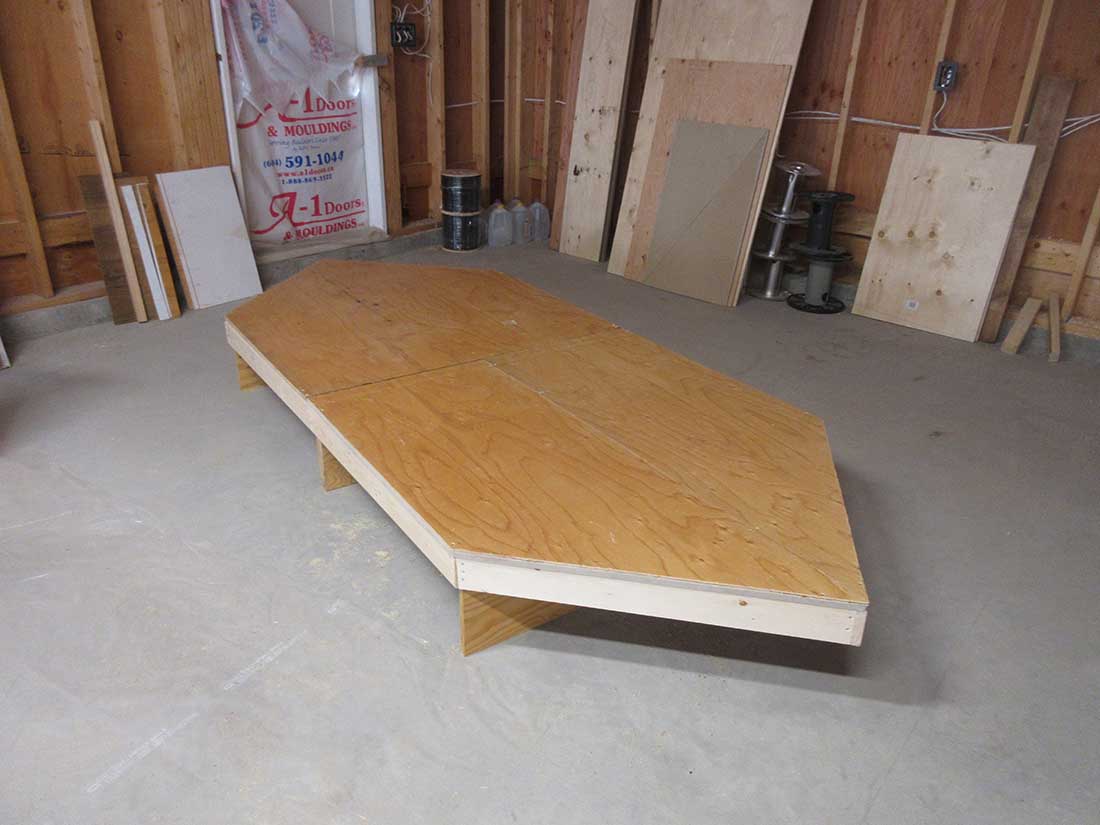
Next is the bare table frame and then the table with the top installed to confirm the fit. The Homosote makes the tables quite heavy. A better base would have been to use only 1" foam board under the plywood. (I later rebuilt the Winterburg module for that express reason.)
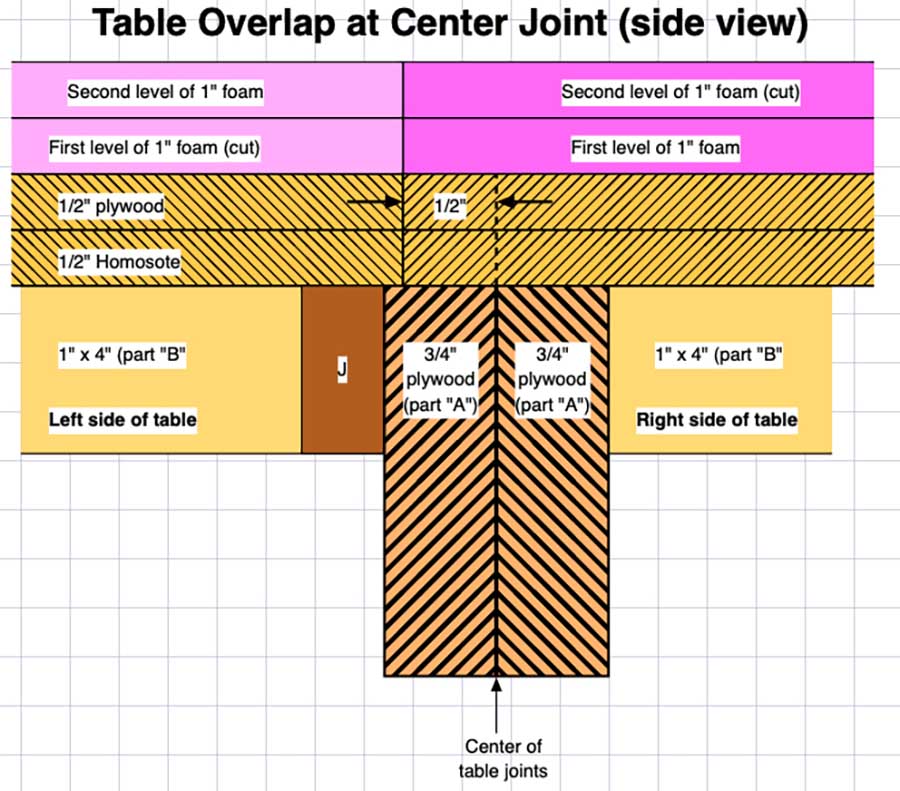
To ensure the tables were vertically secure when attached, one table overlaps the other by 1/2" as shown in the drawing below, as well as having locating pins and bolts between the tables. I am sure I over engineered the tables, but, better over than under when it coms to stability.
How to build a model train table:
The original paper track drawings were then used to mark the locations of the track to ensure no future troublesome issues as a double check (That's not really necessary . . . right???). When I put the track in place on the table top, I discovered that, guess what, it didn't fit!
The table is about a quarter of an inch (about 6.35 mm) smaller than the paper table. Whatever the reason, some small adjustment fixed that problem.
I'm an electronics technician, not a carpenter . . and it shows. Of course, a lot of filler also works well to hide my mistakes. Hopefully, scenery will later hide my other gaffs.
Next is the two linked tables with legs and electronic bays installed and painted. Because of how Winterburg will later become part of the layout, it's supports had to be built before anything else was attached to the table top. This was a bit of a messy setup as it all had to come apart of travel.
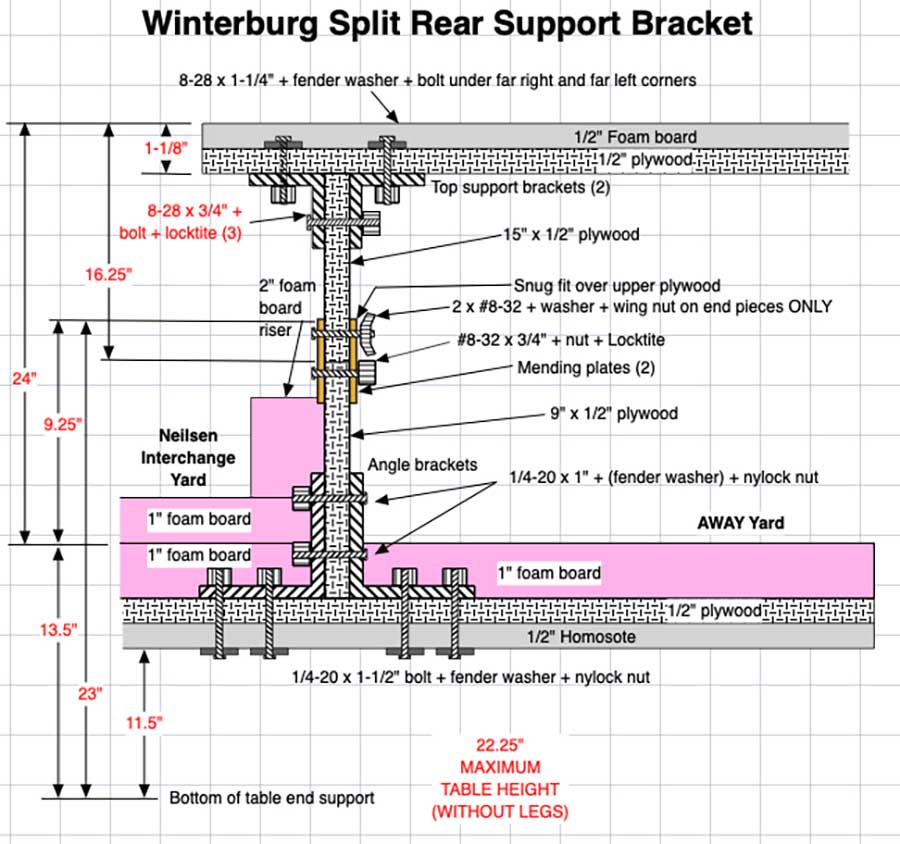
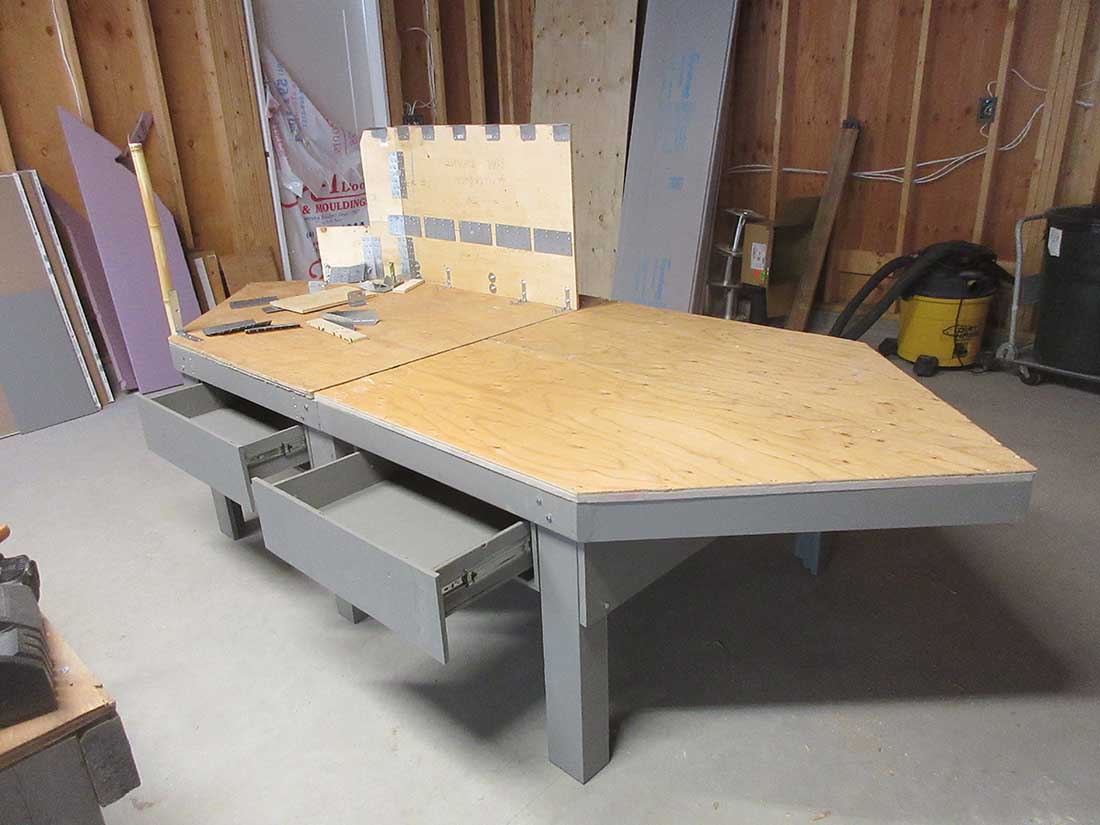
The vertical plates are at the locations the plywood was cut to make a curve as the plywood was too stiff to bend. The horizontal plates in the middle allow the top to be removed to keep the table height (without legs) within the specified limits. It is tight, but it does fit.
I placed some of the riser foam and to see what it would eventually look like, some of the lower and Winterburg track was put in place. As mentioned earlier, I later scrapped the top and built a new one using half inch foam instead of the very heavy Homasote.
The front Lucite support works as it is ALMOST invisible. It sure looks like a long way down to the table . . too far, as I later discovered.
A printed mountain scene was placed in front of the rear support, again to give me an idea of the final look. I like it! Part of the interchange yard is in the front center and the plywood divider separates the mine on the right with the power station on the left.
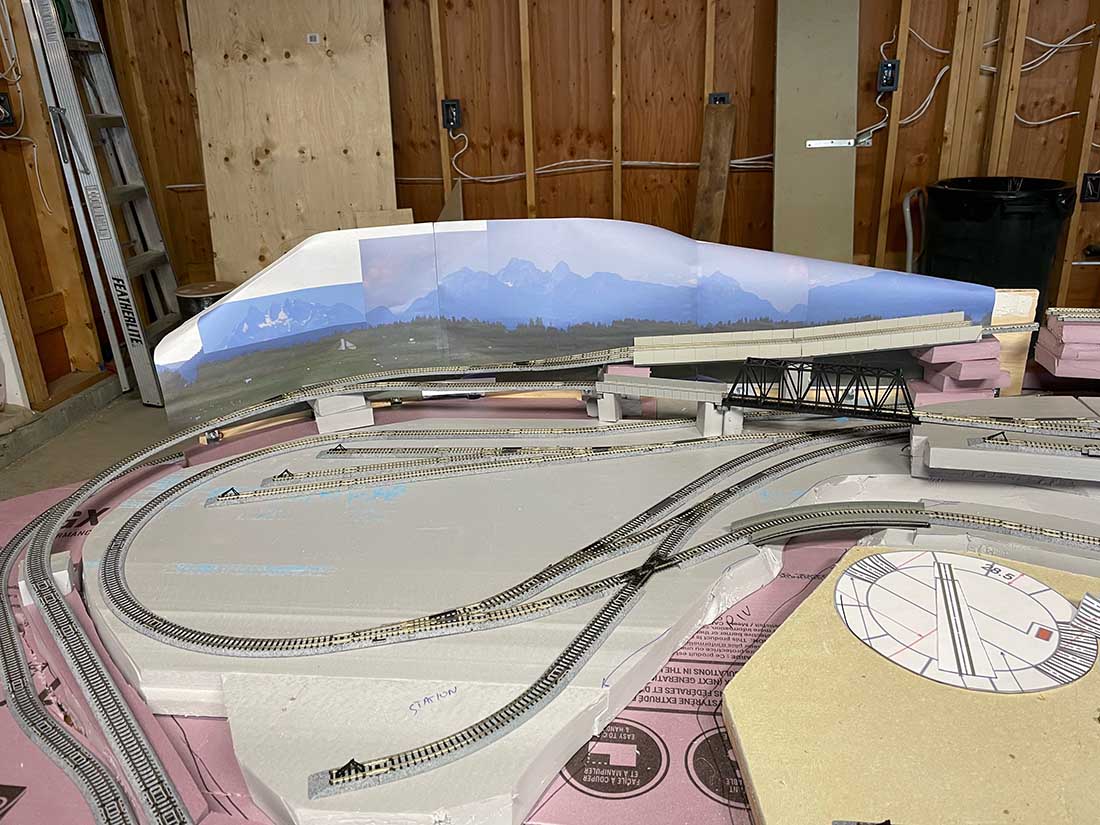
To make sure I wasn't trying to get an elephant into a Volkswagen Beatle, I set up the track again to check it out. (The truth is I wanted to see how it will look.) Things are a bit rough, but it give me an idea of what is to come.
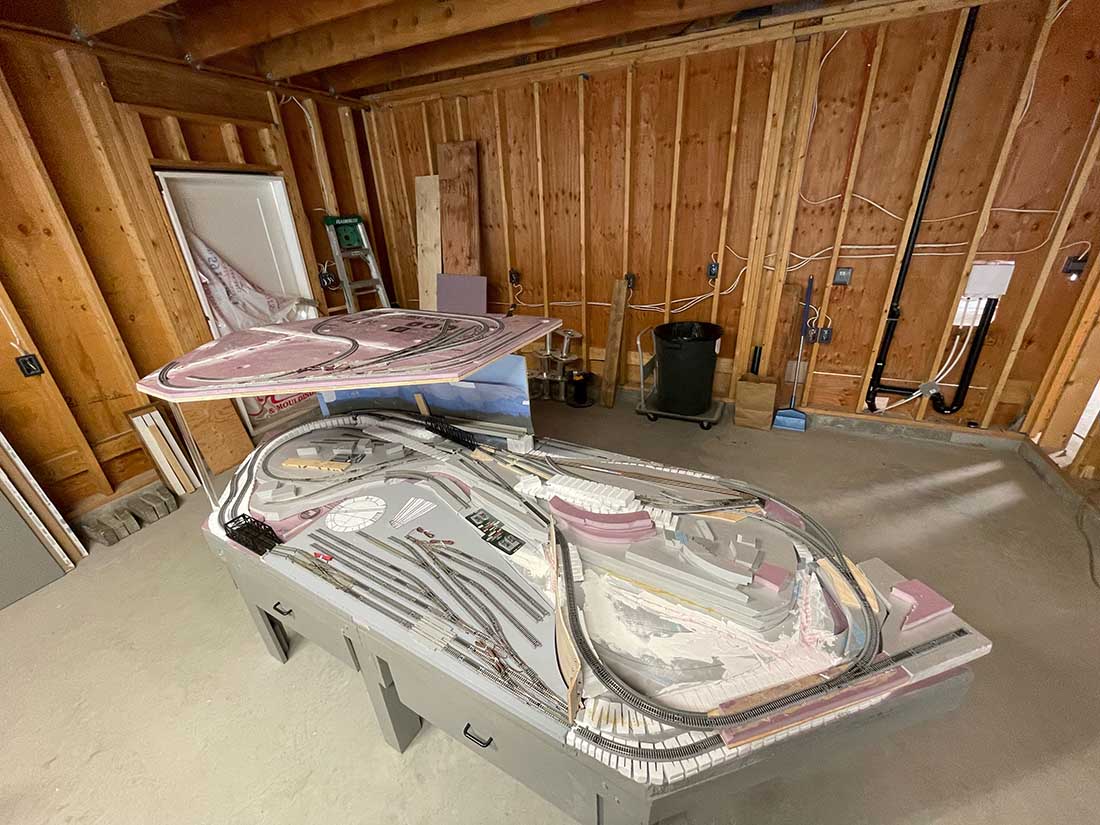
The first few layers of foam are in place with the grades between Neilsen Interchange and Away in place and the river dug out. Neilsen Town, the mine and generating station are one half inch higher to differentiate them from the yard, so a one and a half inch piece of foam is used behind the yard which can be seen in the above picture.
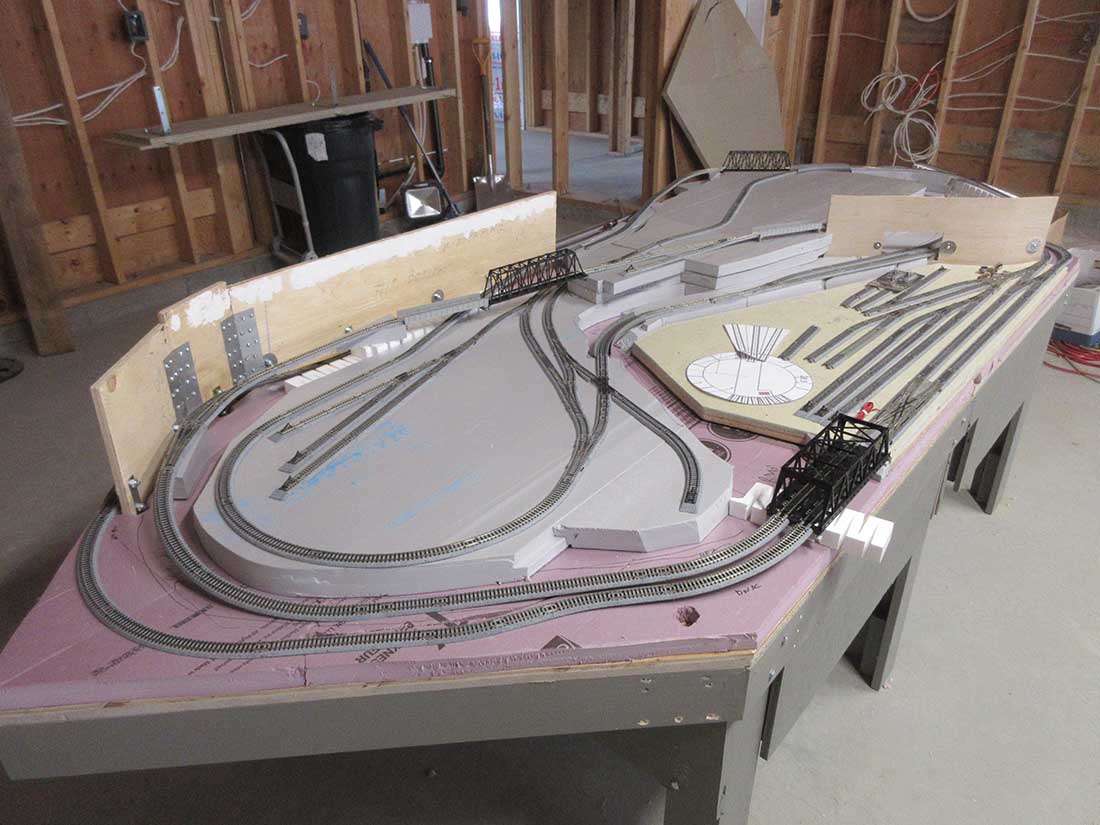
I HAD to see how the spiral would look and to see if I could actually look into the middle for the logging scene, so I stuck things together to try it out. There is enough clearance to see into the spiral, but the interior will have to be finished before it is built.
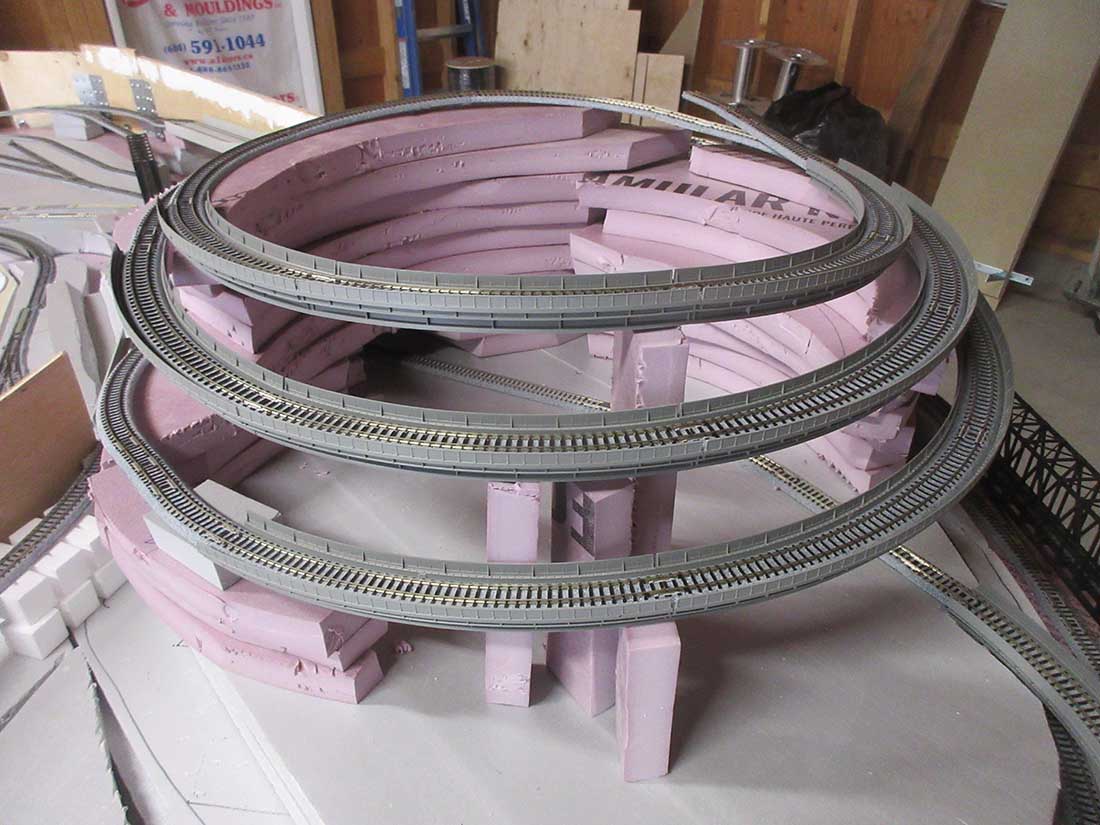
Putting the spiral into place brought home a small discrepancy. The top of the spiral is only 12.75 inches above the baseline, which is the Neilsen Interchange yard. I wanted 24 inches under Winterburg to be able to get into the area and appreciate the scenery.
This necessitated a radical, but interesting, redesign of Winterburg, which includes a second spiral level UNDER the Winterburg module. An opportunity not to be missed. To ensure that everything fit, I did build the Winterburg base, track layout and support structure. I didn't want to get any nasty surprises later, like finding out that it didn't connect, but, more on that later.
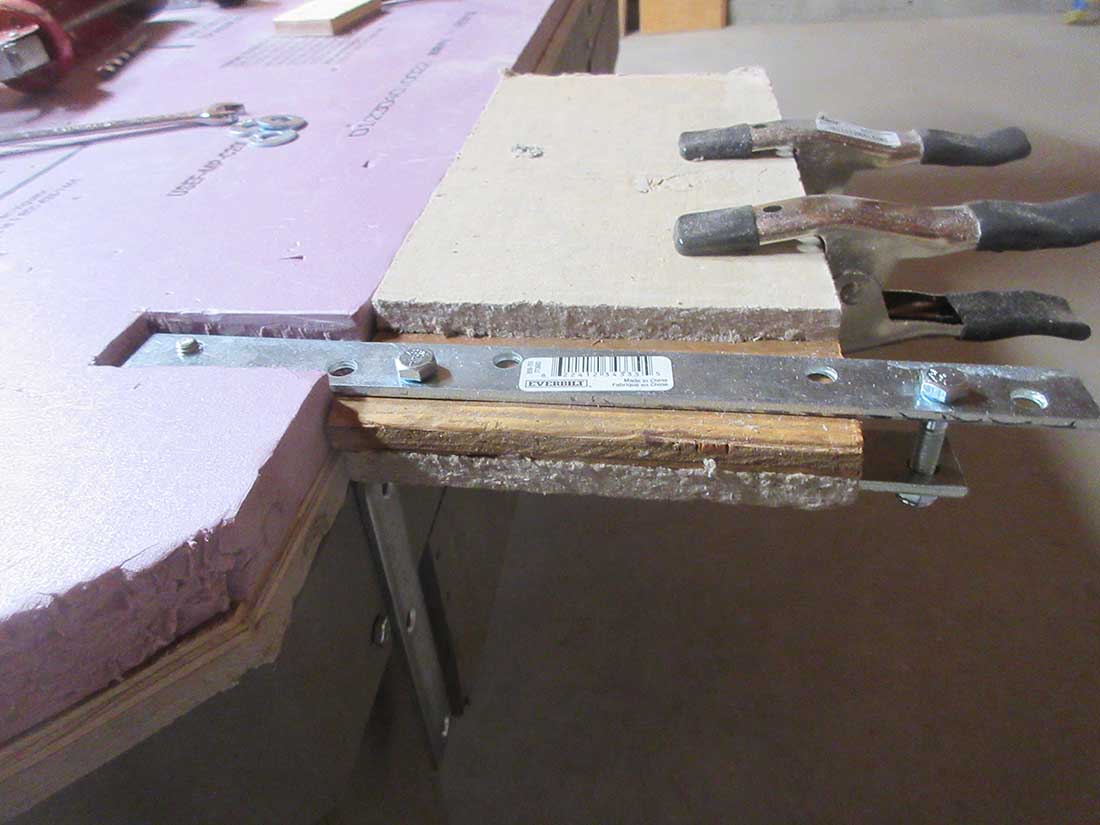
My original fiddle yard was to be 4 tracks but that was too tight with the Winterburg supports so it was reduced to 3. Still too tight, so down to 2. This was too small, so, an external, additional yard was added, attached to the rear of the table. Being N scale, the shelf had to be secure. That was the next challenge.
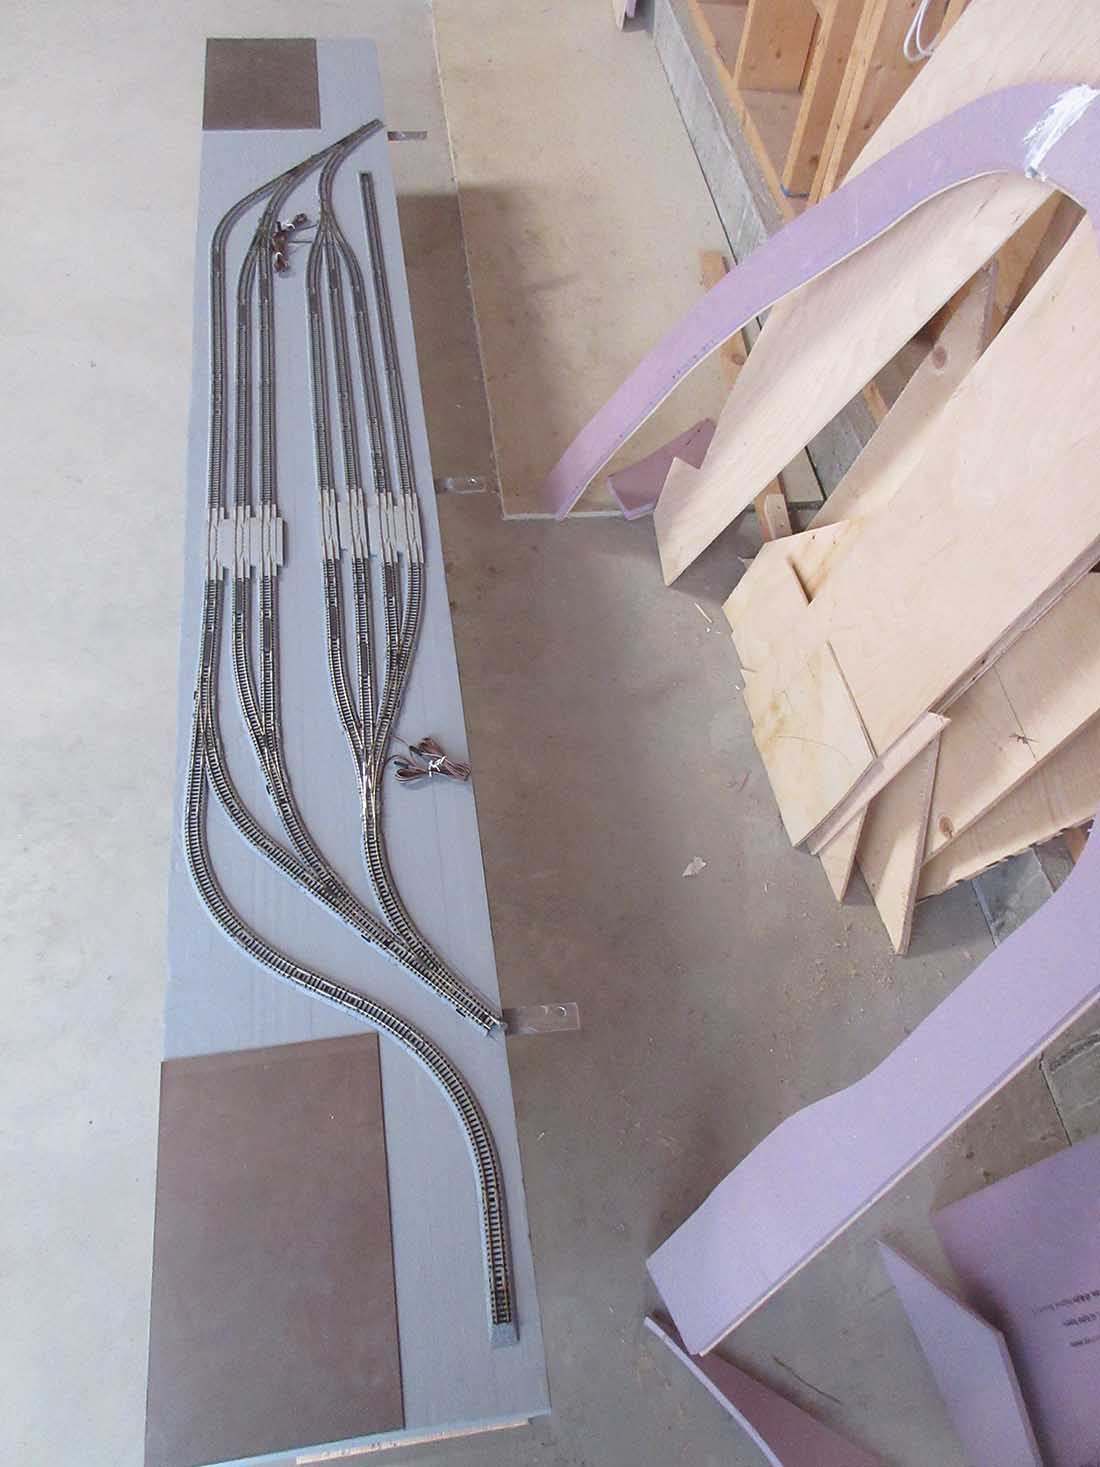
While the yard support is six feet long (plus a bit more for the control panels), by the time the yard switches are included, some of the tracks are only about two feet long, but, this is N scale and even the "main line" trains are not going to be 50 car trains. (If there are long trains, I'm sure the railways will schedule them at night and I won't see them, so I'm not worried!)
The AWAY Additional Yard support was my next problem. Making it removable AND secure necessitated three bracket and two small piece of removable/adjustable Kato track. Again, the original used Homosote but it was too heavy and a new one using 1/2 inch foam replaced it.
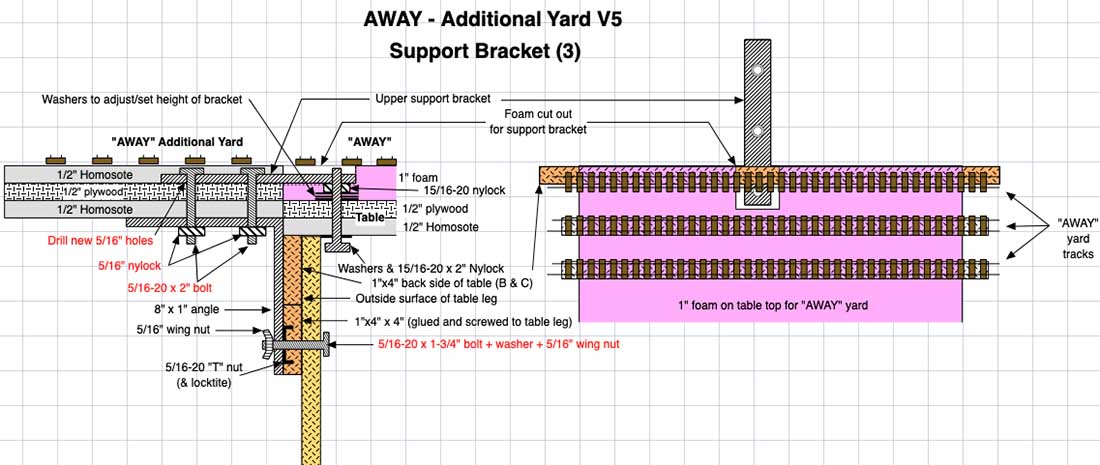
And this is what it looks like (the homosote was later removed and replaced with 1/2 inch foam.)
How to build a model train table:
At this point, a few words about Kato track. It was designed to be set up and taken apart multiple times and in this it is superb. However, it NEVER seems to fit everywhere! I have to fiddle to get it all to connect, but, after all, it is a "fiddle" yard (pun intended).
A second item worth mentioning is that all new Kato track has a "sharp, rough" end, presumably because of the way the rail is cut in manufacturing. Gently, using a small flat file on the top and sides of each rail will get rid of the sharpness and make for a much smoother and more reliable operation.
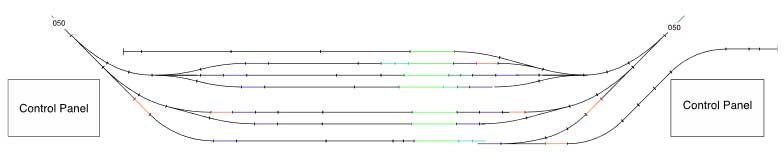
I have to complete the risers. Then I will temporarily install the main line, Canadian Pacific and Great Northern (the green track) Away and Away additional yard; the Neilsen yard and then a LOT of testing. That part will be fun.
After any bugs are found and fixed, I will remove the track and install the first layer of scenery (plaster cloth) and the primary electronics. The control panels are still in a planning stage
For the moment, as the layout is being constructed in an unfinished, UNHEATED garage in the "winter" (it's a lot warmer than the rest of the continent, but it is still too cold to paint or glue), construction has "halted for the winter".
Frank
Surrey, BC
Canada”
A huge big thanks to Frank for sharing his take on how to build a model train table – he’s done a terrific job of documenting it all.
But do you know what? There’s even more. Frank is like the gift that keeps on giving – he’s already sent me another update. Clearly he’s been sitting on them for sometime and that’s fine by me – it’s a real treat to read about his journey.
That’s all for today folks.
Please do keep ’em coming.
And if today is the day you stop dreaming and start doing, just like Frank, the Beginner’s Guide is here.
Best
Al
PS More N scale layouts here if that’s your thing.