Dan’s been in touch with his Santa Fe passenger cars and as usual, some more good tips:
“For this post I will concentrate mostly on details and how to use leftovers.
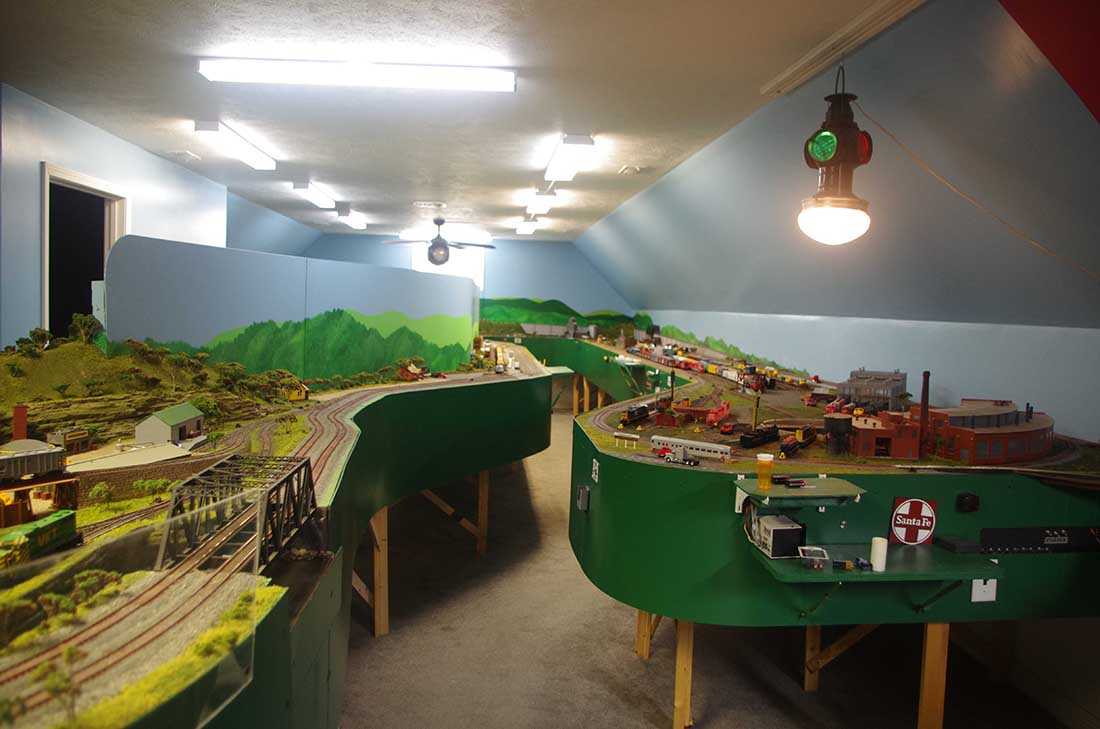
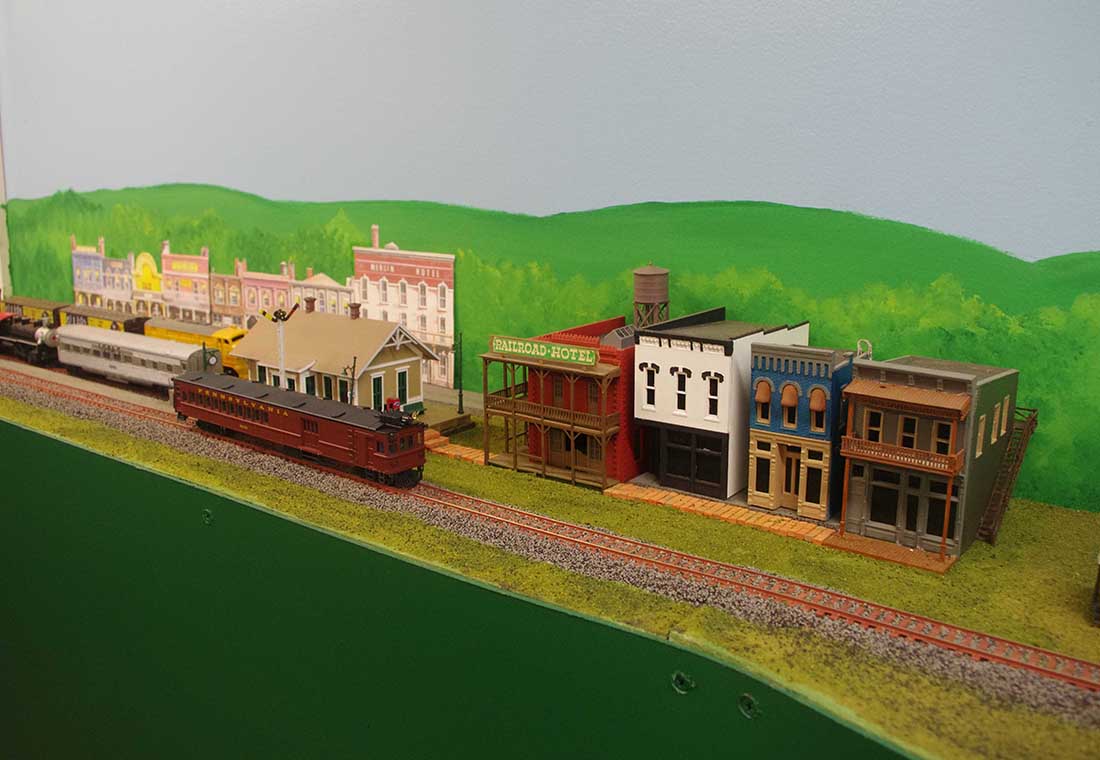
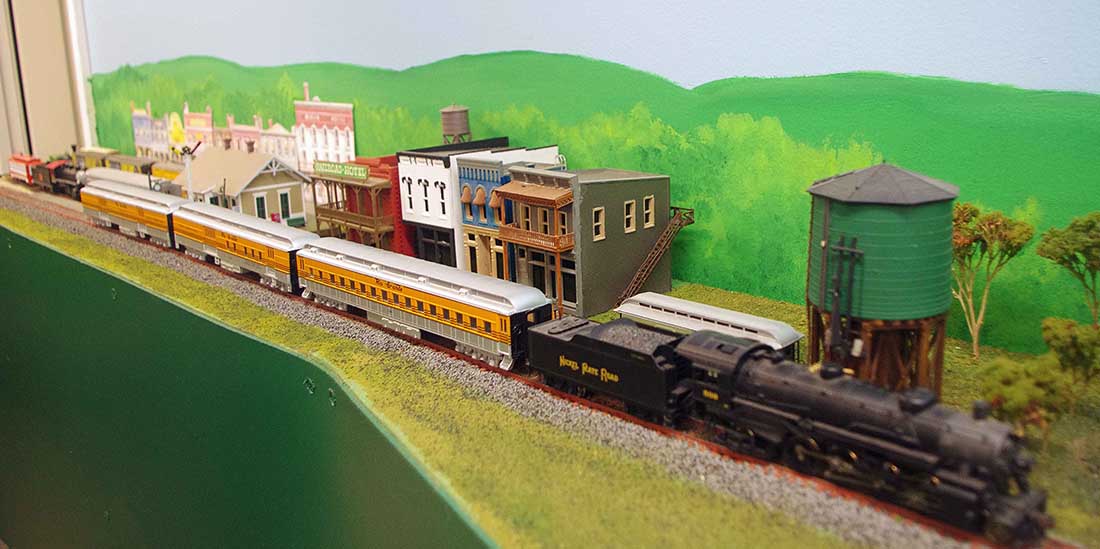
Another look at the finished layout of the Mainline Railroad.
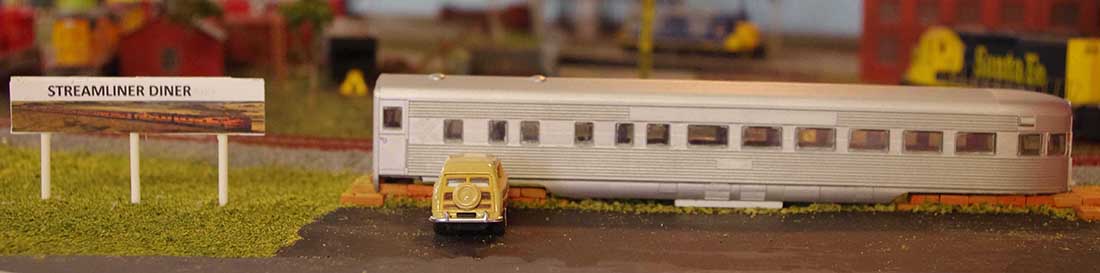
Here is an old 1960’s Athearn Santa Fe passenger car. It is now the “Streamliner Diner” near the engine house at the main yard.
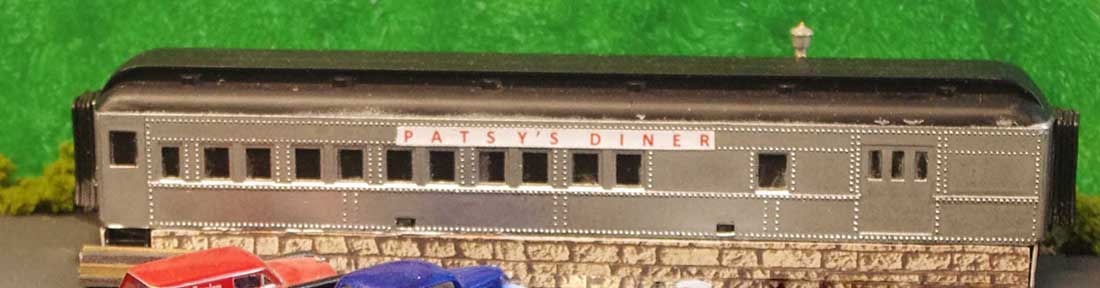
Towns have to have a place to eat. Here is another old passenger car that was picked up at a train show and it was in rough shape.
The covered hopper became a salt company’s distribution center. The car was in a junk pile with missing trucks and couplers.
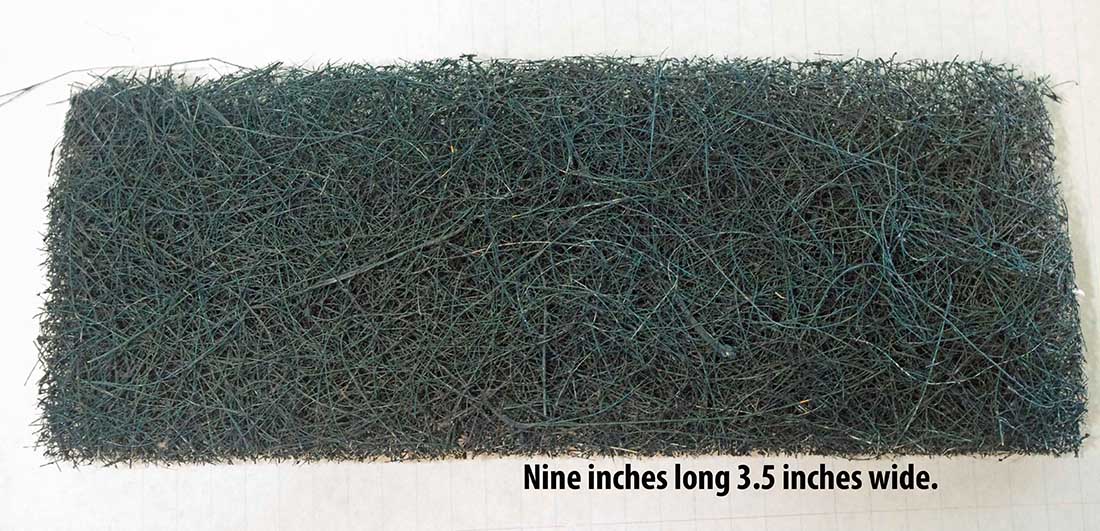
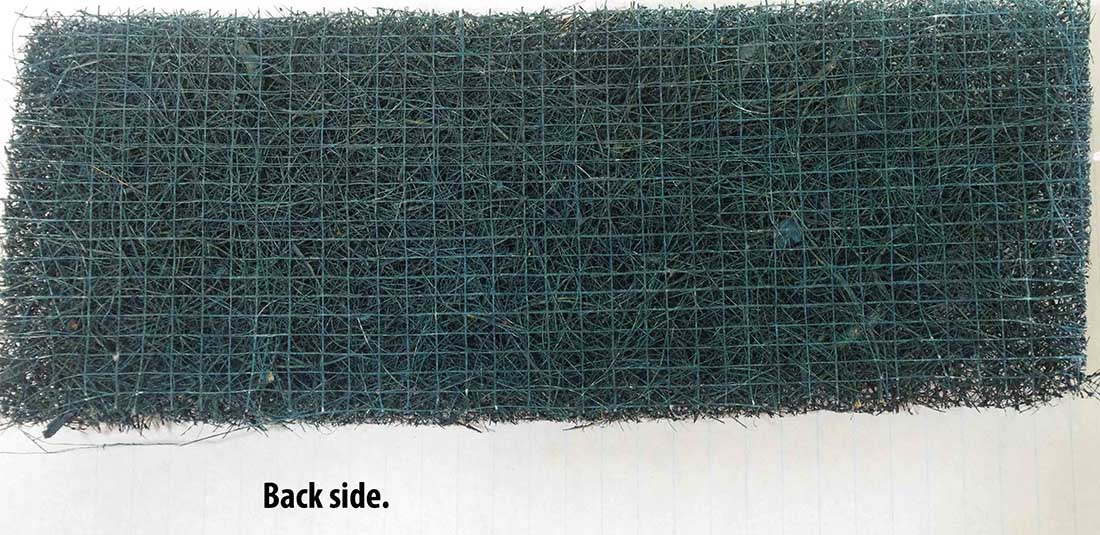
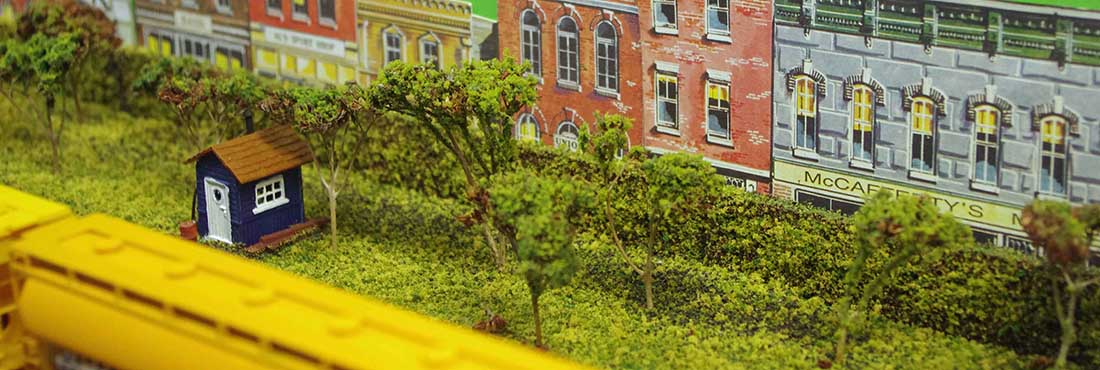
I have mentioned using furnace filter material as hedges or weed patches. Here are two photos of a fairly firm filter material.
The photo shows the size to show how dense this one was. I wanted to have a well defined manicured top for this hedge. This provided a “natural” view block to hid the fact that there is no street between the trains and the city.
I sprayed the filter with a quick spray of brownish paint. If any ground foam misses a place it looks like stems. The I sprayed glue over the filter and sprinkled ground foam for foliage. There is a smaller hedge in front of the taller one and is using a larger size ground foam. This just adds depth.
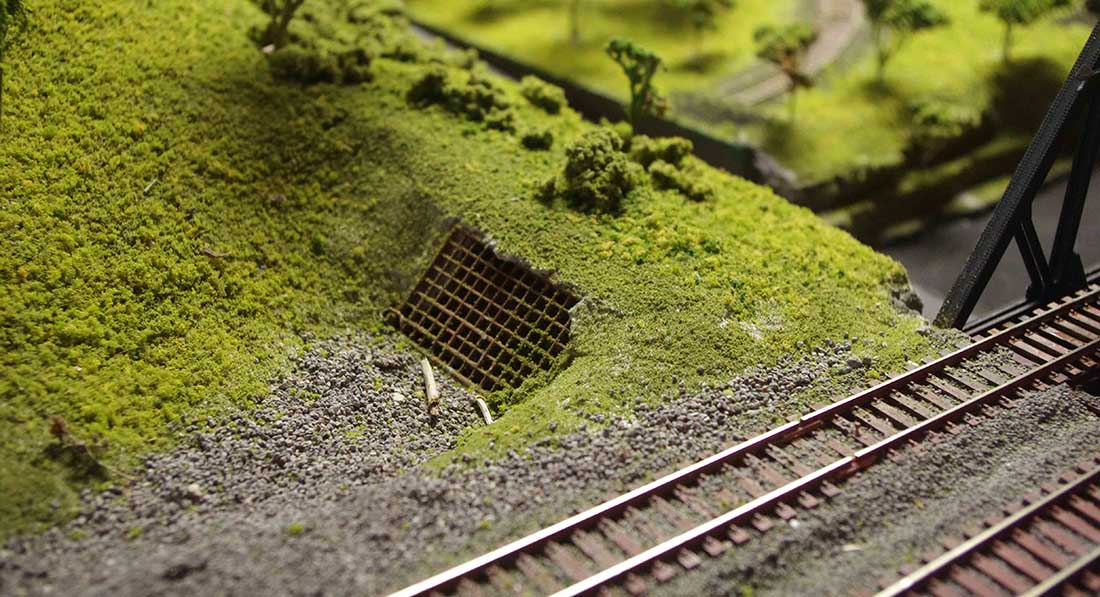
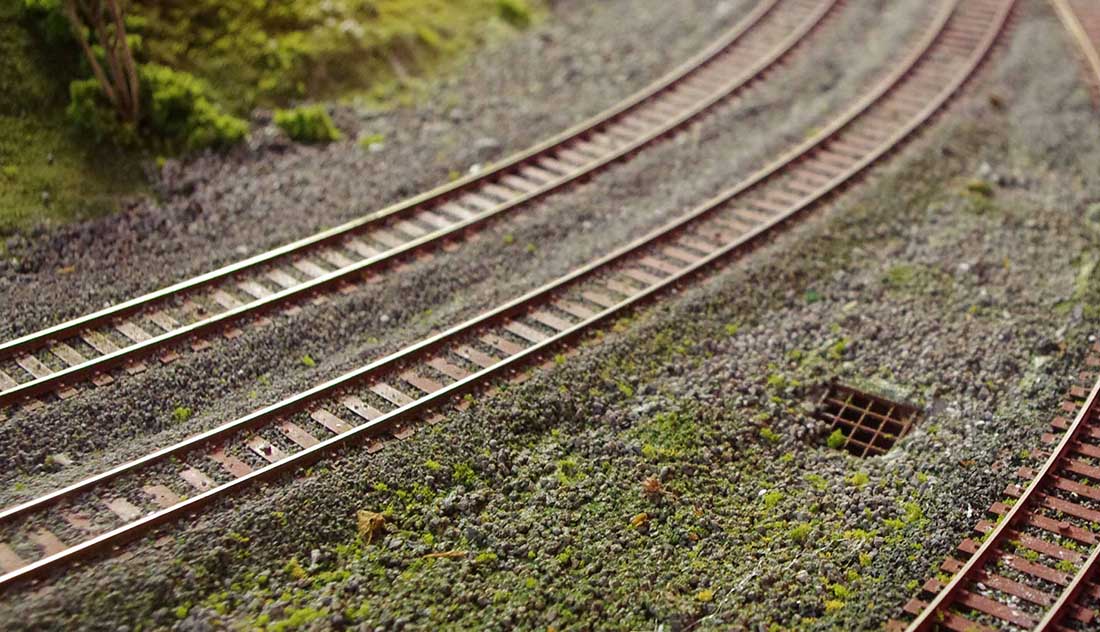
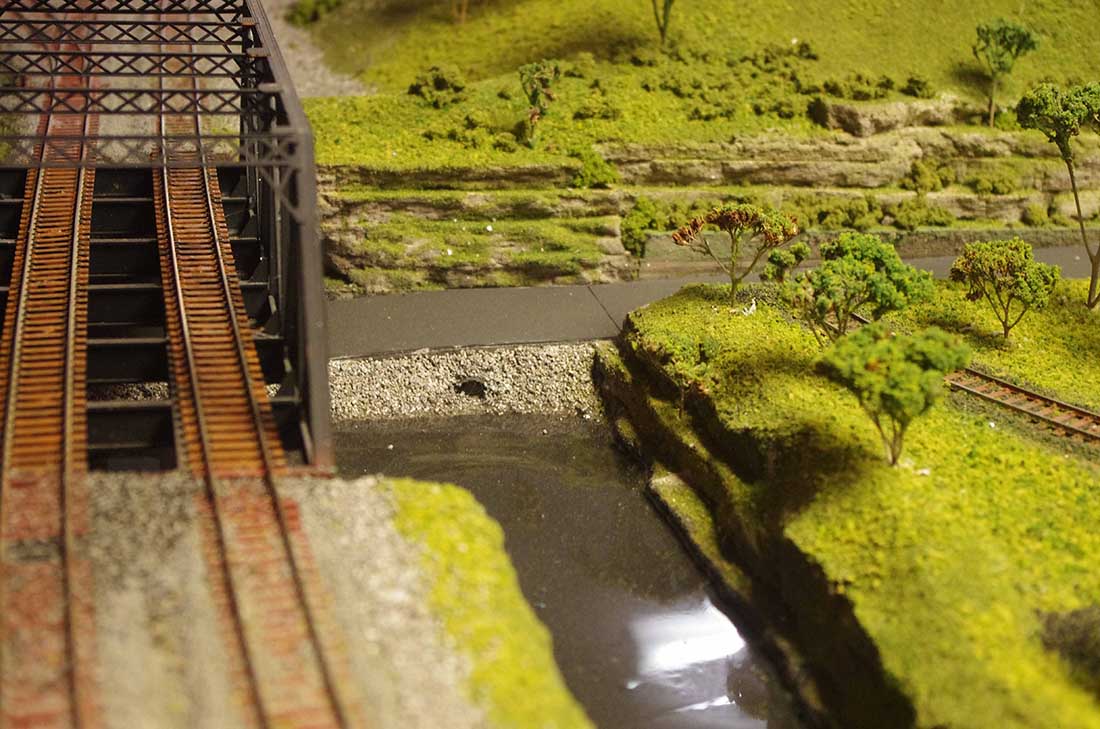
Here I used a leftover industrial window as a grate to prevent large debris entering the drain and then into the river.
Here is a smaller window to do the same thing.
Here is the outlet from the larger grate in photo #8. That kitty litter as rip rap to prevent erosion.
This photo was used in the first post. The houses were in a box of old junk. They had been removed from various layouts, again at a train show. I cleaned them up and fixed them as best as possible. (They would be about 2 to 2 and half feet away.)
They were painted to match each other because they had bee the “company” houses for the coal mine. The one different one was a supervisor’s house I guess. They are now gentrified and have individual ownership.
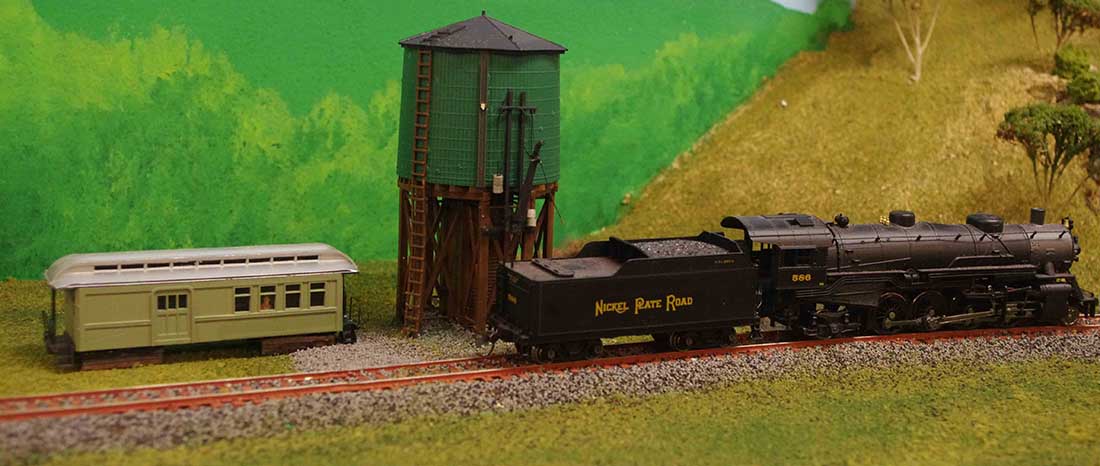
The layout has an old time western town and museum. This is the yard office and water tower. Tower is a new kit and the office is an old time passenger car. This was recovered and repurposed.
The museum is made up of old equipment. Some in good condition ans some waiting for the museum workers to get them fixed up.
I hope you find some ideas in this post.
SantaFeDan”
A big thanks to Dan for sharing his Santa Fe passenger car pics.
Dean’s been back in touch. This time he shows us how to run a model train bus wire:
“Al, cheers from Dean in New Mexico.
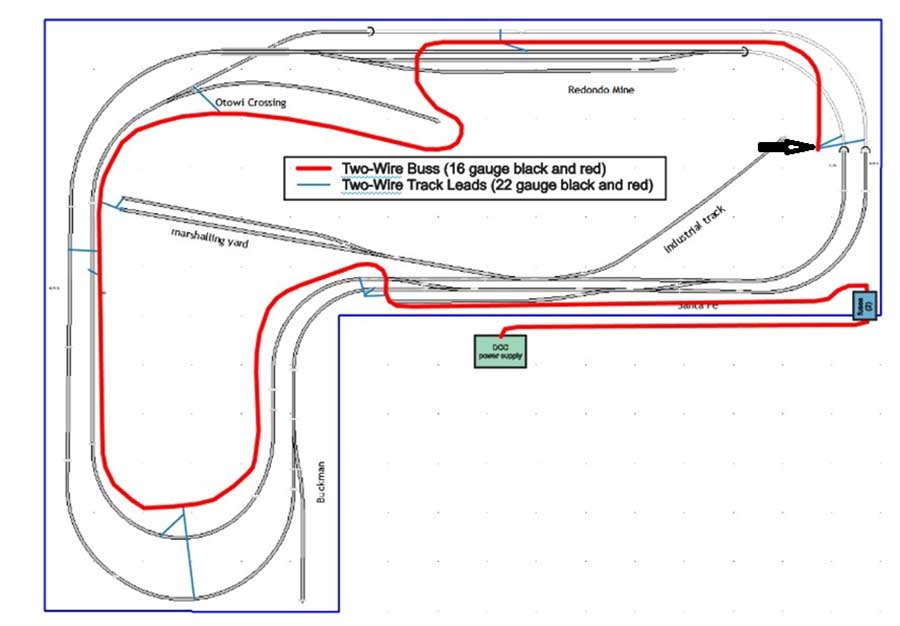
I’m moving ahead with my current N-scale layout, the Santa Fe Northern, with a new and improved wiring system.
When I first started running trains on the layout, I got away with just two wires between the DCC power pack and the rails. This worked fine, but I knew that with the length of the track in the layout (loop is about 60 ft long) and the number of rail joiners (close to 50 with the Atlas flex track), I would eventually have problems with operations coming from loose joiners.
In my YouTube video referenced below, I talk about different wiring systems for model railroad layouts using either DC or DCC power. The ideal way to improve the wiring is to use a wiring buss with multiple feeders running to the track. With this system, you use a pair of larger wires (12 to 16 gauge) following the main line.
Then you add several pairs of smaller gauge (18 to 22 gauge) feeder wires to the track every few feet. There are some modelers who prefer to wire a set of feeder wires to each track length, but I feel that is overkill.
If you count the feeders in the next diagram, you’ll see I put in 11 sets. In the future if I have problems with a piece of track, I’ll just add feeders to the problem length.
You can see my wiring diagram below. The Santa Fe Northern is a double loop, up and over, layout. It has a length of 102” and a width of 72”. I used 16-gauge wire for the two buss wires (shown in bold red) and 22-gauge feeder wires (thin blue lines).
The total length of the buss is around twenty-five feet, so, the total resistance of both buss wires is about 0.2 ohms which is small enough not to cause too much of a voltage drop.
Actually, the system is much more complex since you have the rails and multiple feeders—the resistance is very difficult to calculate, but 0.2 ohms is an upper value. Note that if I had a larger layout with bigger locos in HO or O scale, Iwould use a larger gauge wire for my buss.
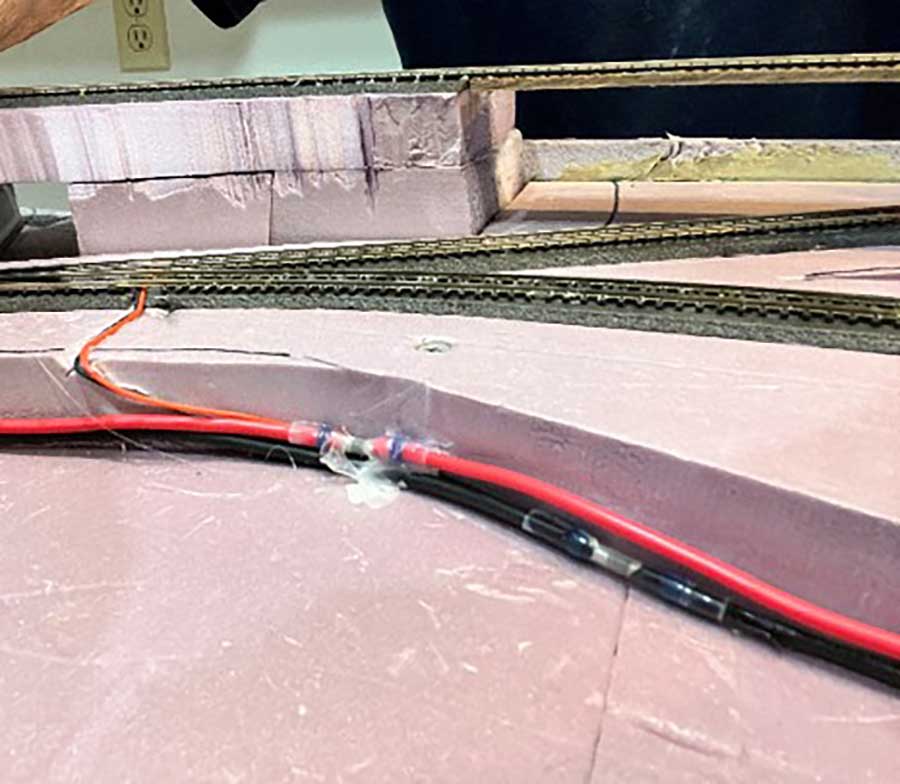
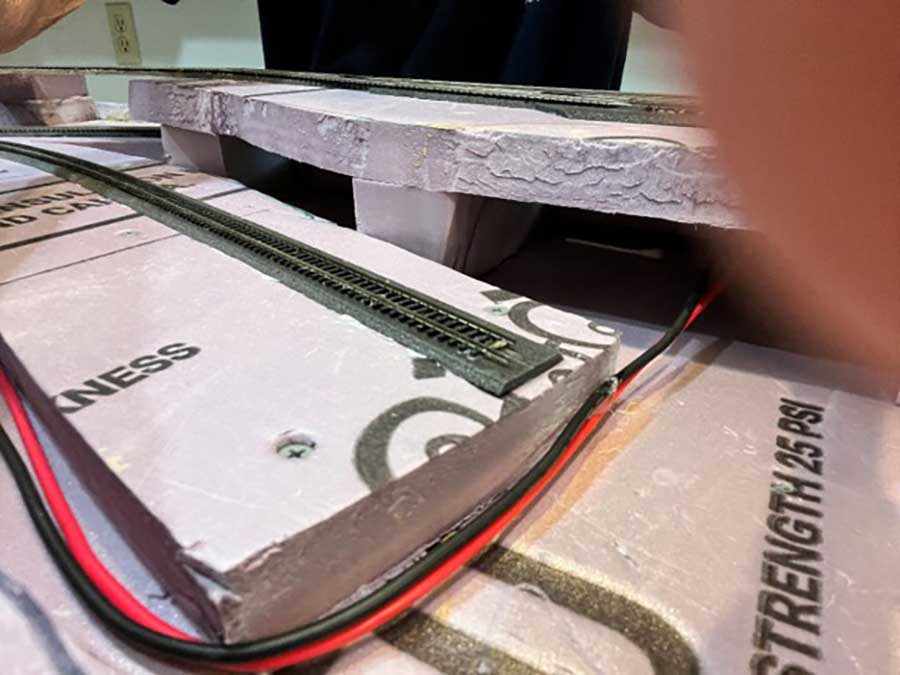
You may remember from my previous videos on the Santa Fe Northern that I used two layers of construction foam to support the layout. The lower 2” baseboard layer is flat, and the upper 1” layer, which is cut, rises and falls to support the track. You can see that in the next photo.
I don’t like to run anything under the bottom baseboard since I’m too old to be working upside down on the floor on my back.
You can also see the buss wires which run along the top of the baseboard and the smaller feeders running to the track.
These will eventually be covered with scenery as I progress but will always be accessible if I need to add more feeder pairs.
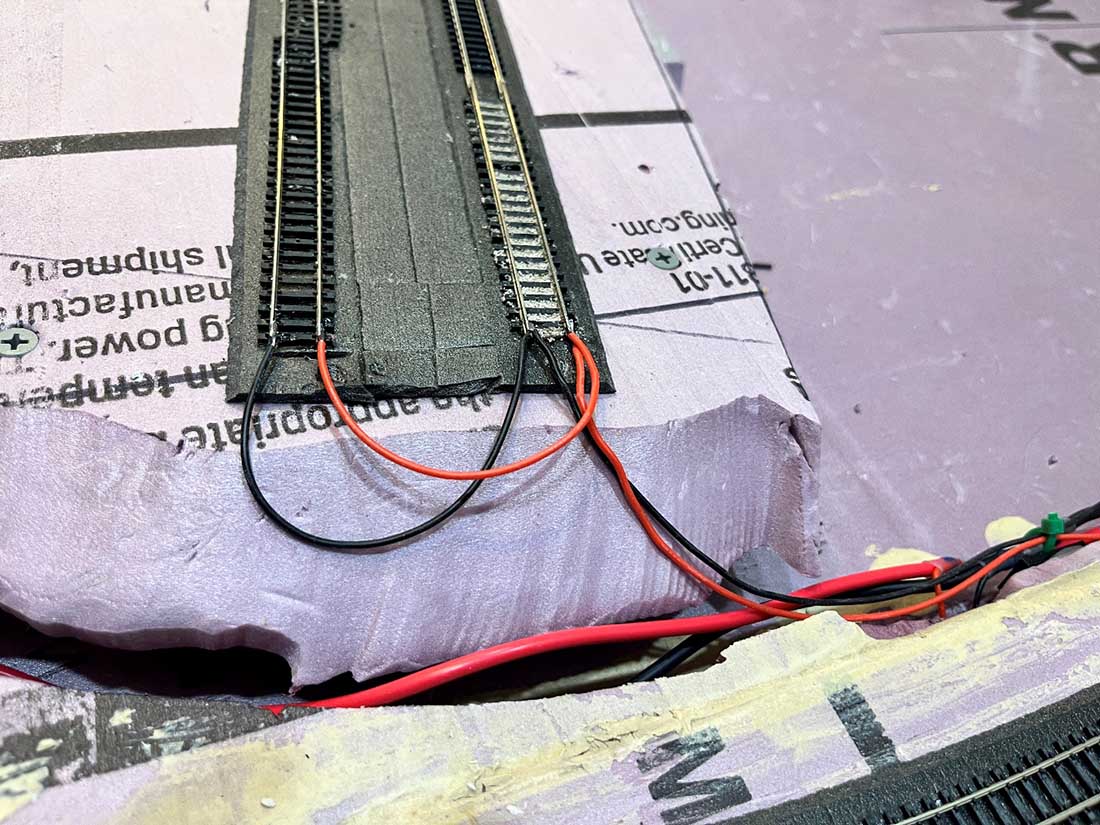
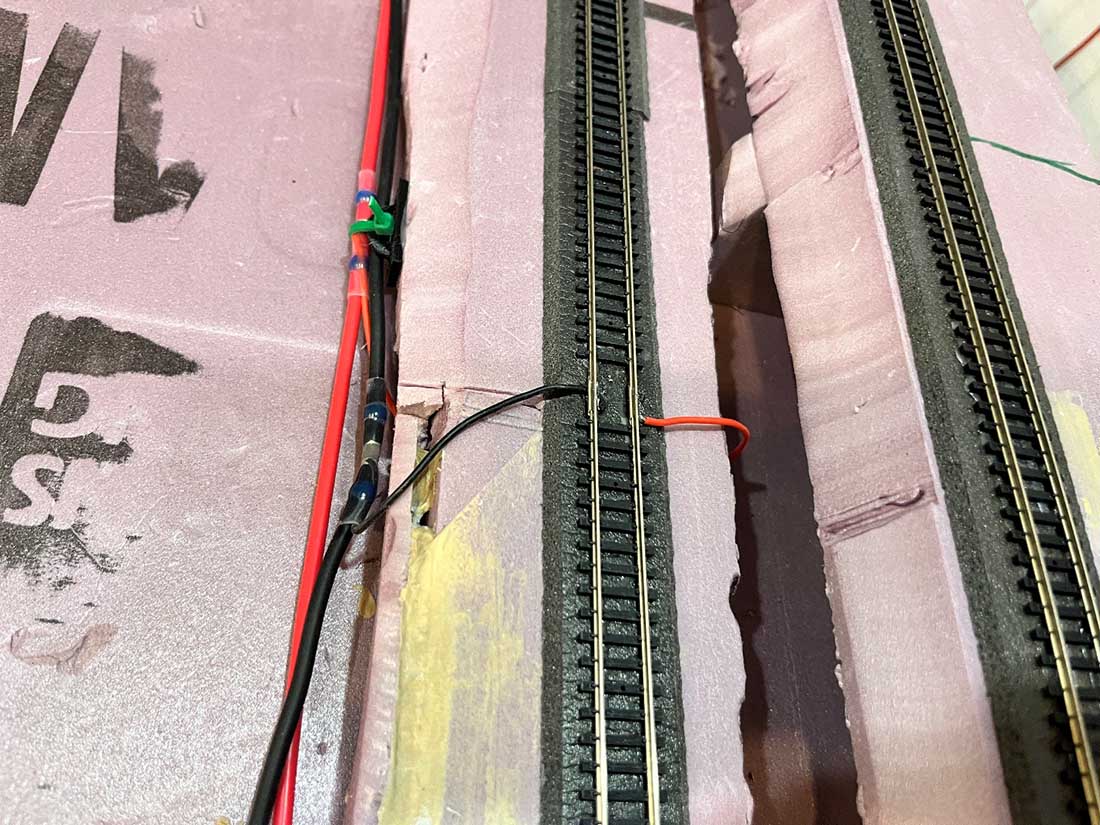
I used red and black wires consistently for all wires to keep from making wiring errors—the red buss and feeder wires are attached to the outer rail of the track with the black wires to the inner.
In most cases the feeders were soldered to the rail joiners as I lay down the track. In that way, they will be invisible after I ballast.
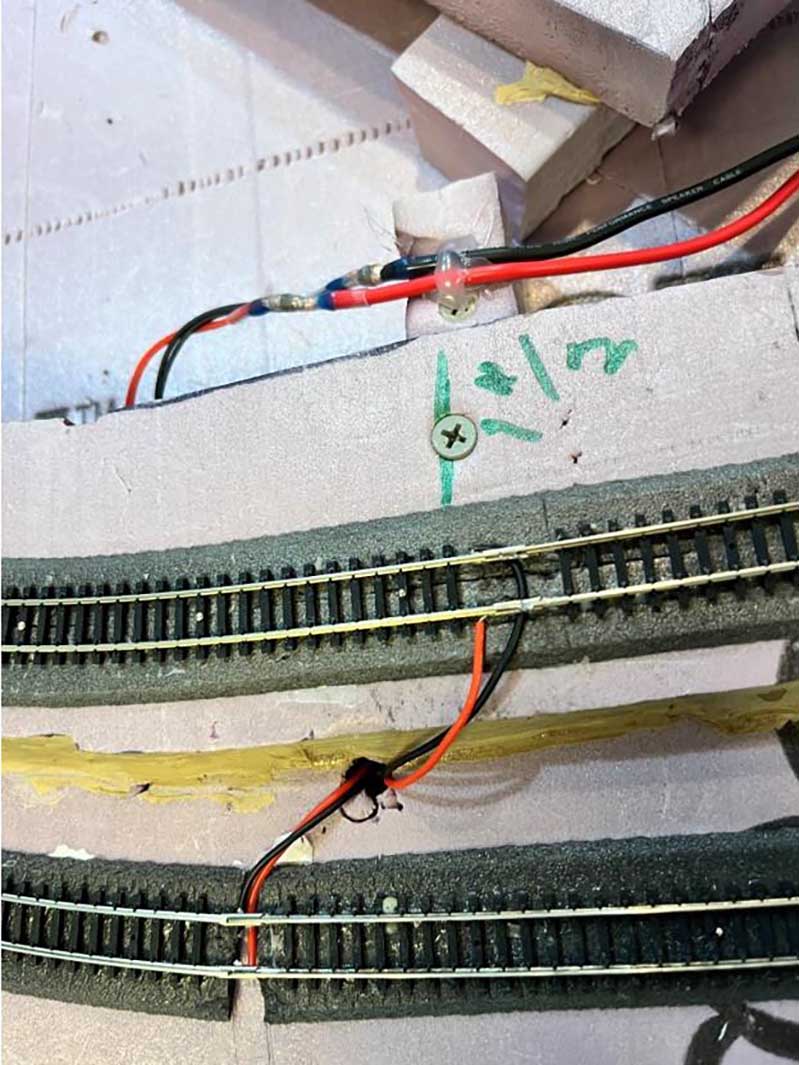
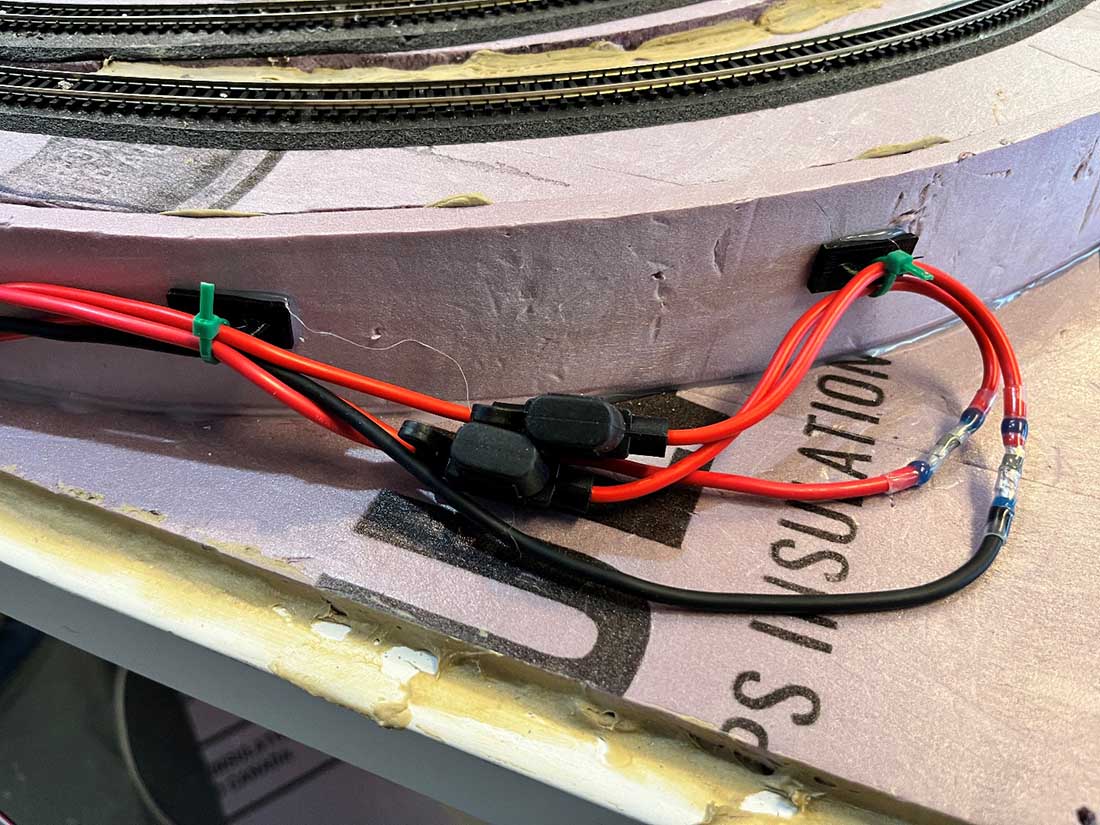
The feeders were attached to the buss wires with TICONN connectors which are shrinkable connectors that solder the wires together as they are fused. You can buy these, and a heat gun, from Amazon.
The red feeder wire always runs to the outside rail. Each time I added a feeder, I checked the resistance between the wires with a volt-ohm meter. If there was a very large resistance (megohms) between the red and blue wires, I knew I was ok.
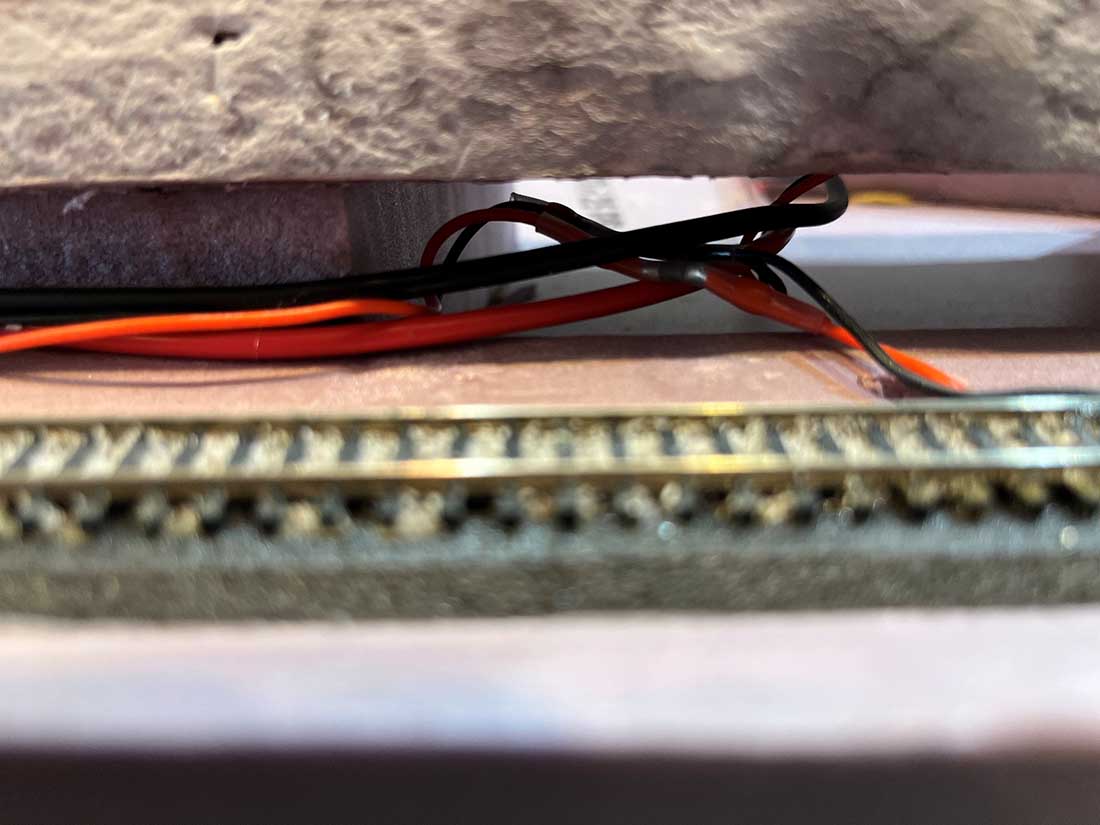
Next is a picture showing the wires at the start of the buss system (arrow in the first photo above). At this point both tracks will be inside a tunnel, so I didn’t hide these feeders. As mentioned, the feeders were soldered to rail joiners as I laid the track.
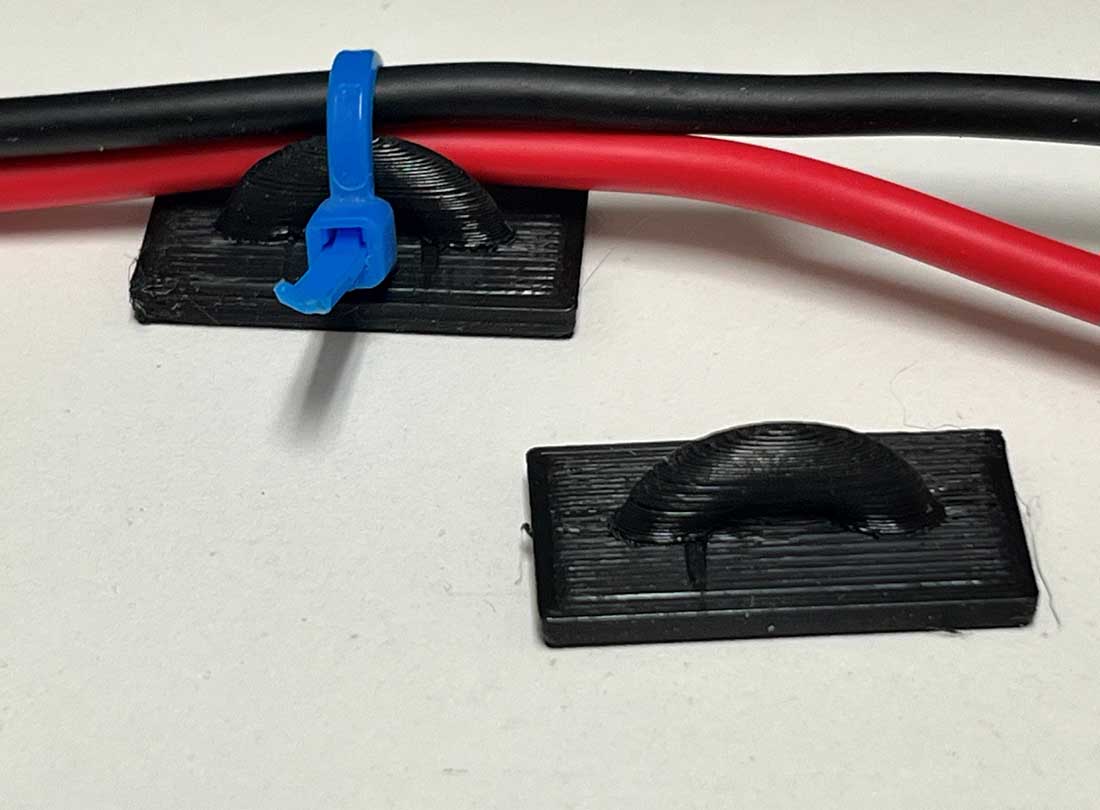
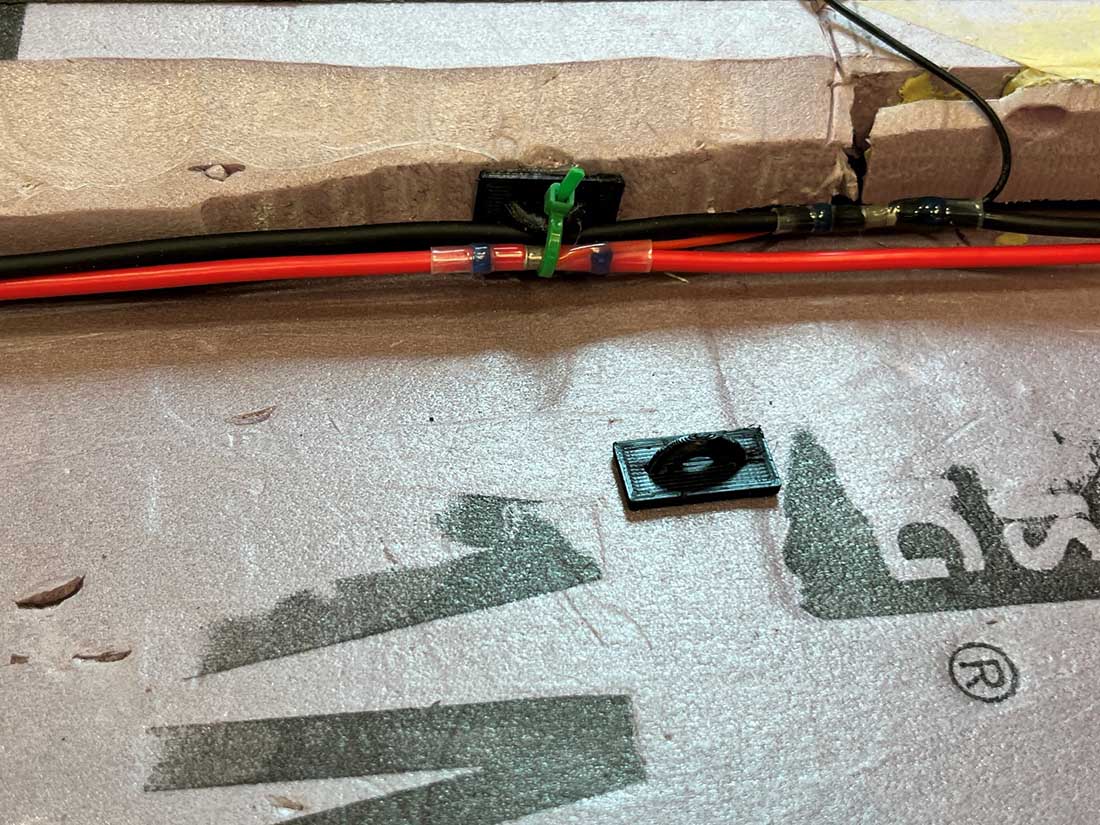
As you can see in the photo above I first fastened down the buss wires with hot glue. Later I used the black holders along with zip ties (blue) shown in the photo below. I printed out these holders on my 3-D printer and they were attached to the foam with hot glue. I whipped out the design for the 3-D parts in a few minutes using Tinkercad. Once I had the 3D file I could print these out in a few minutes on my 3-D printer. If there is interest, I will put the .stl file on the internet so that readers can print their own holders.
In this photo you can see how they neatly hold the buss wires.
More photos of the wires: Two groups of feeders tied to the buss (will be inside a tunnel accessible from the back of the layout).
Buss wires passing around a siding at Otowi. I plan to put a river to the left of the raised area and siding.
Wires from the two sidings going to the buss. The feeders were soldered to the ends of the rails in this case and the wires will be covered with scenery.
More wires soldered to rail joiners. These wires will be hidden in cuts to the roadbed and foam.
My DCC power supply cuts out if there is a short. However, for added safety I put two 2-amp auto fuses and holders, one in each of the buss leads. As shown in the original wiring diagram, these are in a space that will be accessible behind a facia board. But I don’t expect them to ever blow
I hope this shows you better my approach to wiring. In my YouTube video
You can find much more info as well as links to videos on TICONN connectors and soldering techniques.
Thanks, to all of you who are following progress and to Al.
Dean”
A huge big thanks to Dean for showing us how to run a model train bus wire.
Nige has been back in touch with an update on his multi level model railway N scale:
“Hello Alastair..
It’s been a long time since you had an update on my multi-layered N Gauge analogue layout based on an Alpine theme.
In fact when I started tracking back (pardon the pun) it seems it was over two years ago since my last post which I have to say is somewhat remiss of me especially when you consider that I retired some 14 months ago and should have had a lot more time to spend on getting on with my layout, however things didn’t quite work out that way.
Retirement came in March and a good holiday was the first thing on the agenda which was taken in May, then there were all the projects around the home and lots of time being grandpa to my now two and half year old granddaughter involving lots of trips out and about, which were just wonderful !
With all this going on it became a bit of a non-event in terms of progressing with my layout which actually turned out to be a blessing in disguise.
Although no real progress was made with the layout I did do a considerable amount of thinking in terms of what I was wanting to achieve and how I was going to go about it, ultimately this resulted in me making some key decisions on how I wanted to develop the layout and importantly prevented me from making some big mistakes going forward.
In my last missive I had completed the lower deck staging areas along with the gradients upto the main level where the scenic area of the layout was planned to start and I had fitted some backscenes on three sides of the layout.
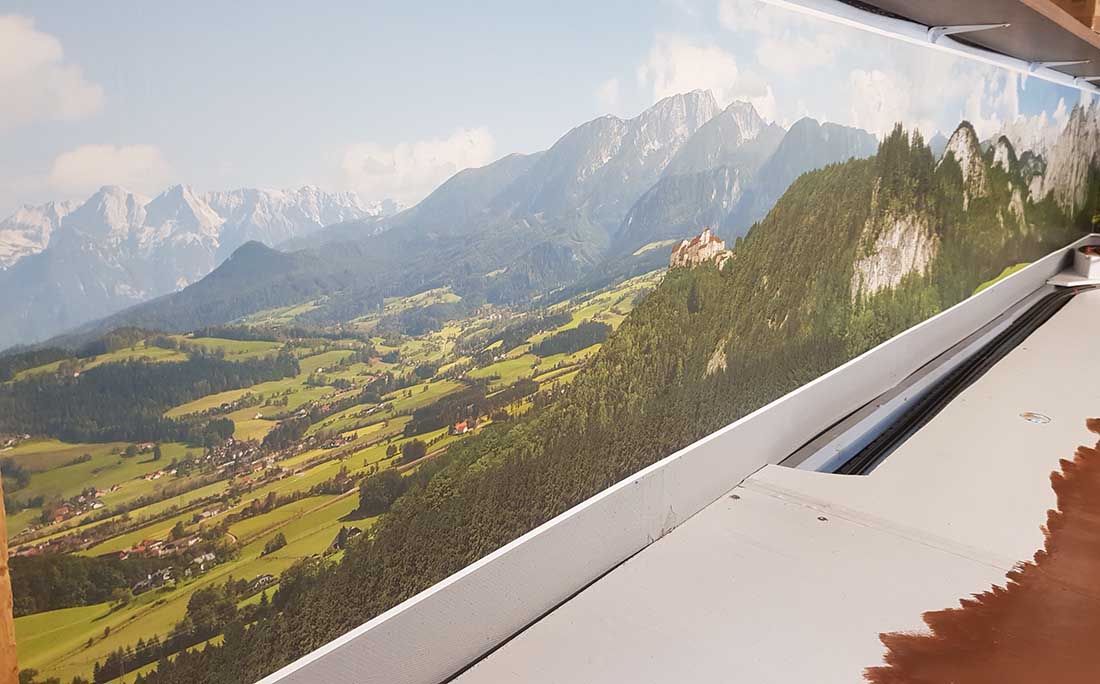
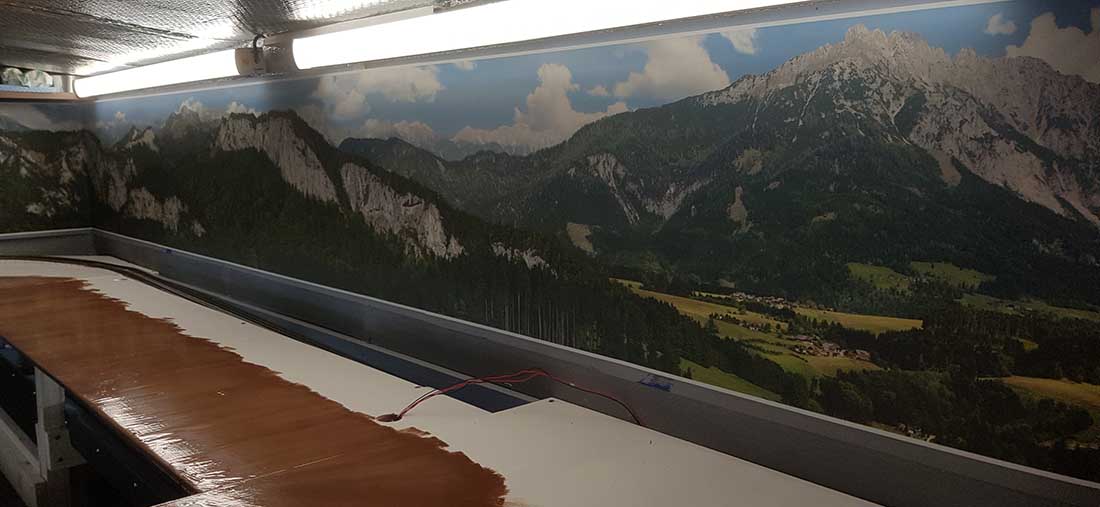
I realised that i was not entirely happy with the backscenes, when I purchased them I was unable to get what I really wanted which was Alpine mountain scenery, so I opted for what I thought was the next best thing available which happened to be the Rocky Mountains !
In summer last year I came across a guy in Austria who could produce a continuous wraparound Alpine backscene without duplicating any of the images, so with the help of google translate and a few emails the backscenes duly arrived and were successfully installed early this year.
When that initial phase of the lower level had been completed I only had a very rough plan drawn up on how I was going to get four mainlines running around the scenic section of the layout.
After a great deal of soul searching and some ultimate common sense being applied I decided that my initial plan of four mainlines was neither practical or realistic in respect of the ultimate result I was trying to achieve ( I ended up asking myself ‘where have you seen four mainlines in the images you have seen of a swiss mountain layout ?’ ) .
So the decision was made to have just two mainlines but to have them going around the scenic part of the layout three times gradually climbing as they went, to fulfill my wish to be able to have four trains running at the same time I decided to have two power districts on each line thus allowing two trains to run on the same line at once.
One of my other concerns was trying to avoid the layout looking too congested and again un realistic.
My original intention was to gain the required height to make the three loops using just gradients but I started to ask myself how this would look and importantly would it be a true representation of what it was like in real life.
So bearing in mind ‘ what goes up has to come down ‘ as the saying goes ‘ so I decided to have a helix to obtain the height, this was possible as I had some unutilised space near to the door entering the shed which afforded me enough room to fit a helix with 2nd and 3rd radius curves and then various gradients to get back down.
This resulted in me having 50% less gradients than I originally had in mind which ultimately would avoid the layout being too congested, it also allowed me to set the gradients no steeper than 2% and in most cases avoid having them on curves. I have also tried to conceal some gradients in tunnels again factoring in the realism aspect.
In respect of the tunnels ( of which there will be quite a few ), I have tried to avoid having them too long as access will not always be easy and there is always the concern of trains getting stuck, unfortunately with the design of this layout there will be what I would call ‘Black Spots’ where access will be either difficult or not possible at all obviously I am trying to minimise these as much as possible.
With all these factors in mind I managed to get a workable plan down on paper at the beginning of this year and after fitting the new backscenes things started to move on with the construction of the helix which was completed in late April just prior to the arrival of grandchild number two, a baby boy..!
Multi level model railway N scale
We are now in the middle of summer and further progress has been made, testing of the helix has gone very well, I managed to set the grade just over 1.50% which is allowing me to be able to run long trains ( including my longest passenger coach sets of up to eight coaches ) without any issues, obviously the up line is on the outer circuit (radius 3).
The helix, which can be accessed from one side and the top by removing a loosely fitted lid, takes the layout from base level to just over 10 inches in height, the descent back down will evolve over various gradients and bridges as the tracks loop around going over and under in places back down to the base level.
The track coming up from the lower level through the planned station area and into the lower part of the helix has been laid and the first bridge at the top of the helix is fixed in place with the track going across it, all track is laid on 2mm cork with neat PVA which I prefer to pinning especially given the fiddleness of N scale track pins.
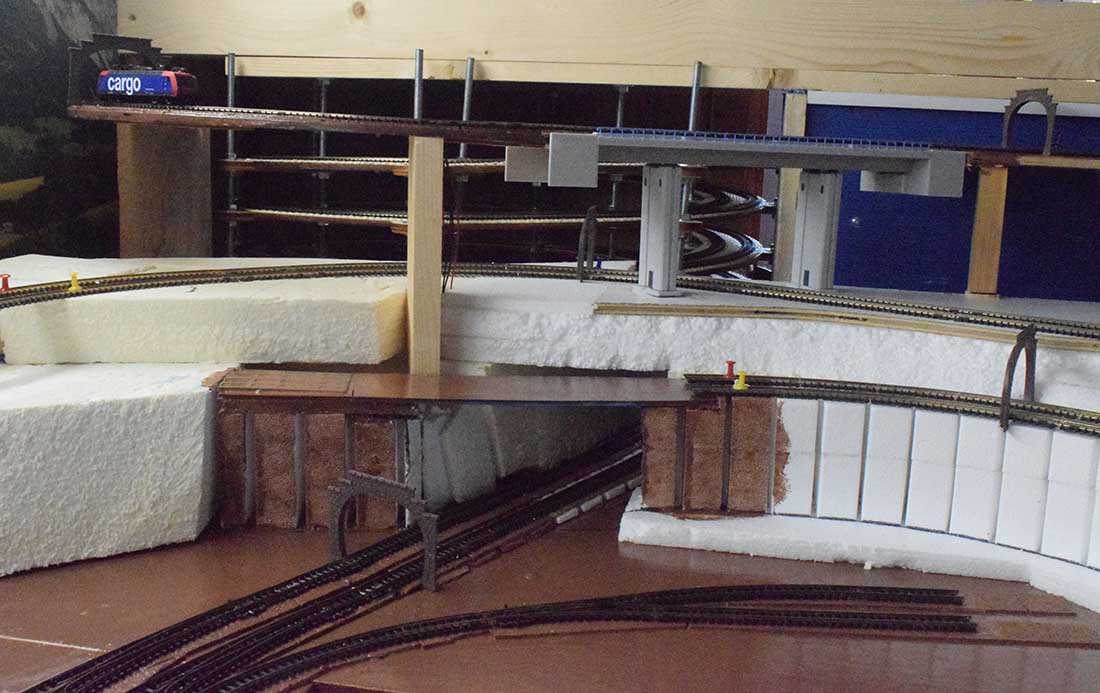
You will see from the pictures I have included the predetermined position of some of the tunnel portals on the layout and the first of several gradients which show the start of the climb upto the top of the helix, at the time of writing the inclines were fixed in place with PVA and the track loosely held in place with push pins.
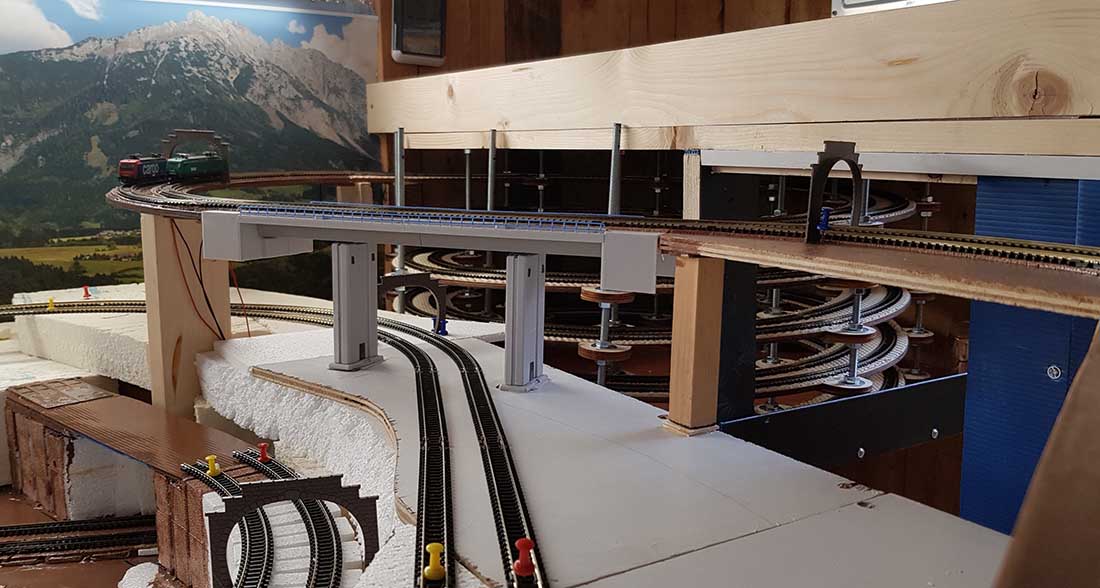
The station will have three platforms that will be able to receive 8 carriages, there is space for an engine or two in short sidings either end of the station. .
Entry to bottom of Helix and Top with Bridge across track on a lower level
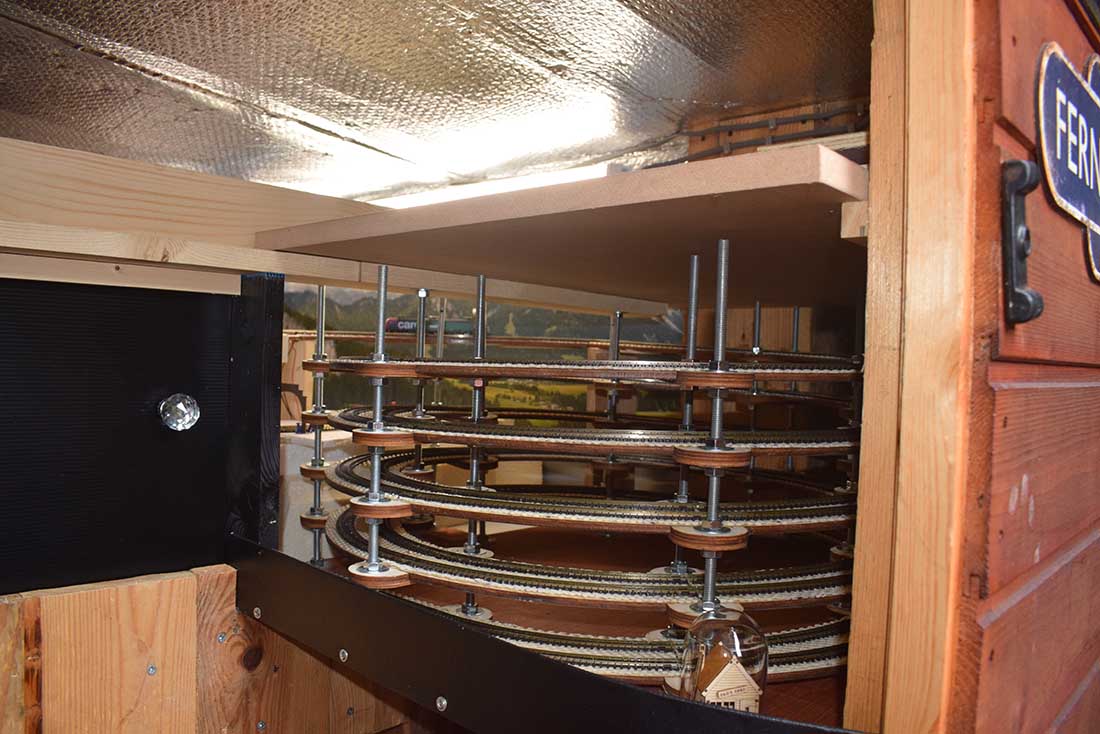
Helix end of Layout
Helix just inside the doorway
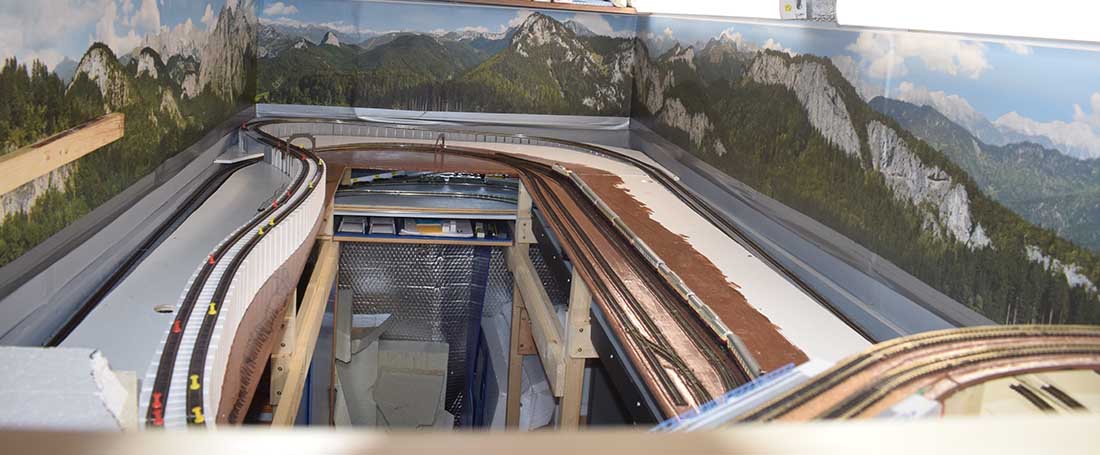
Image showing the various levels prior to landscaping at the helix end of the layout( one level still to be added between the top level and third }
View of Layout from top of the Helix.
In the coming months the plan is to press on with constructing the basic form of the landscape using both polystyrene and timber and getting all the bridges constructed and in place.
I’m hoping to try and get all the track laid and tested with trains running before starting any scenic detail however I’m somewhat unsure whether this will be possible as I get further into the build, we will see how this goes I guess !
Hope you enjoy the update and pictures now things are moving along somewhat. I feel confident more timely updates will follow in the future..
Kind Regards
Nigel (N Gauge Nige)”
A big thanks to Nige for sharing his multi level model railway N scale update.