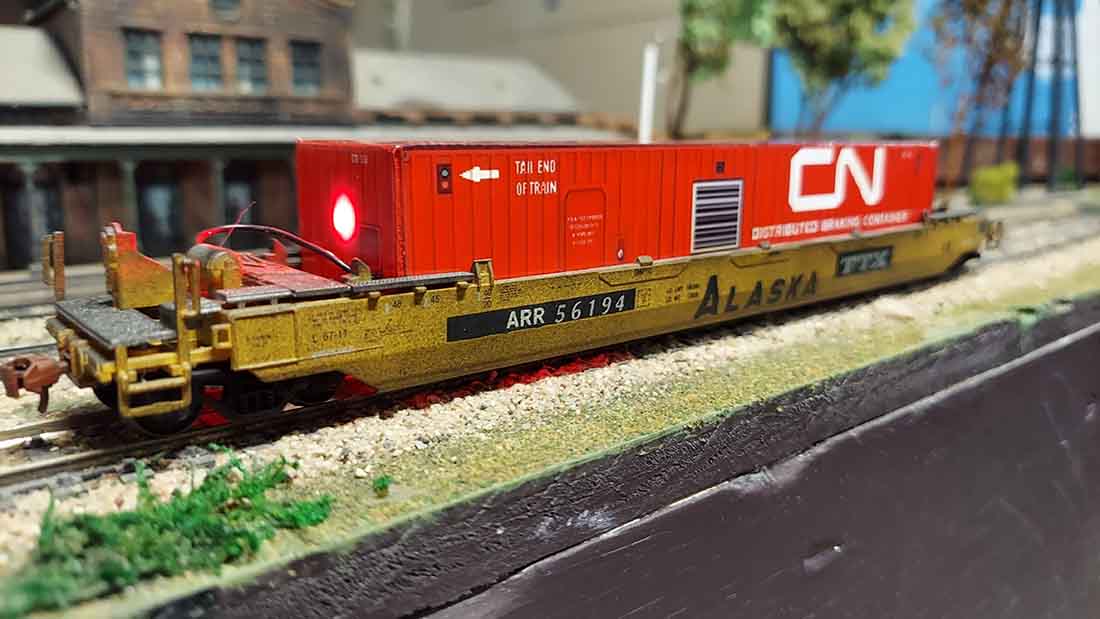
Greg’s been in touch with his model power CN freight train cars – they look fab:
“Hello Alastair,
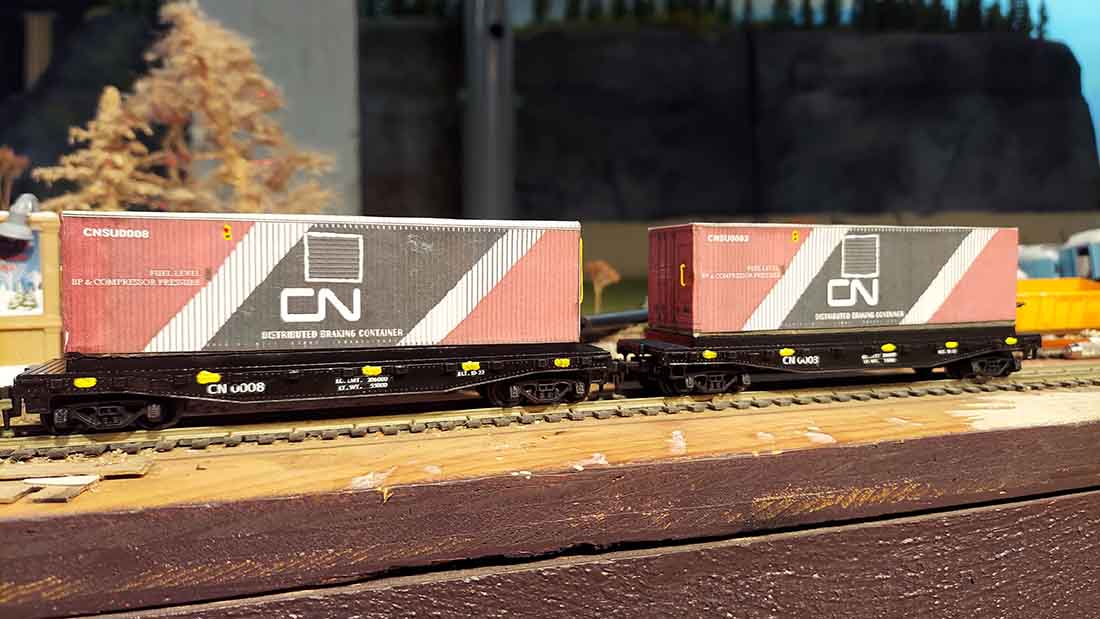
A few weeks ago I was looking up some details for a model railroad car I was working on and discovered the Distributed Braking Containers that CN railroad uses in the winter to supply air pressure in place of an extra locomotive.
After I finished the project I was working on I started working on building these.
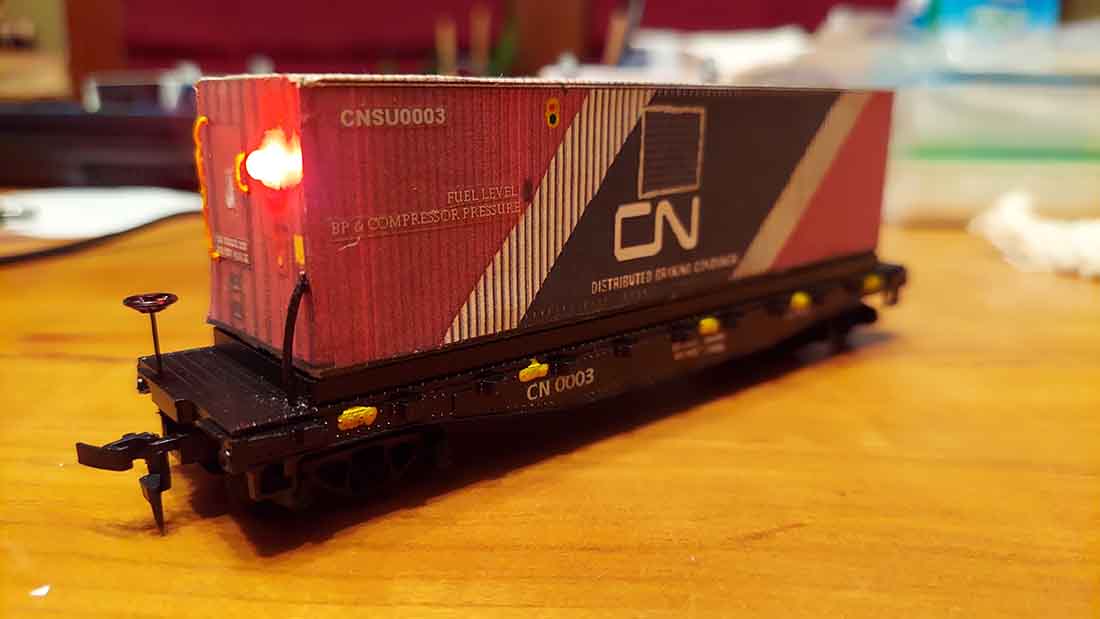
I even wired a red led into them for end of train lighting.
I showed them to a few fellow railroading friends and they bought all the ones I had made.
So I’ve been hard at work making more and trying to stay ahead of orders on these. They add such a nice detail.
Greg”

Now on to Dave:
“hI Al, just uploaded this video showing the CMX track cleaner, how it works for the cleaning of the tracks and also the liquid I use for this.
Also I have tried to show and explain how I used the Green screen method of editing to put myself on to the video, not the easiest of explanations to do, but hope a few can get a idea of how its done, maybe there are easier ways and some of the members can give advice or better still a video showing how this is done…
Regards
Dave”
Now on to Tom:
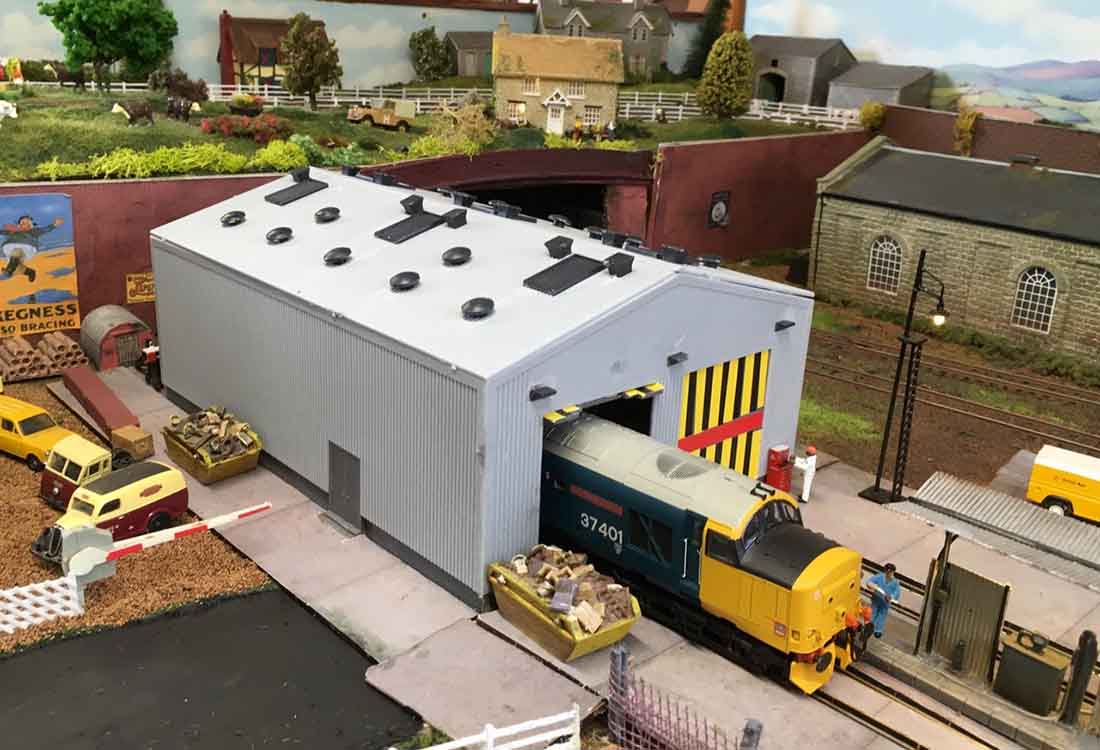
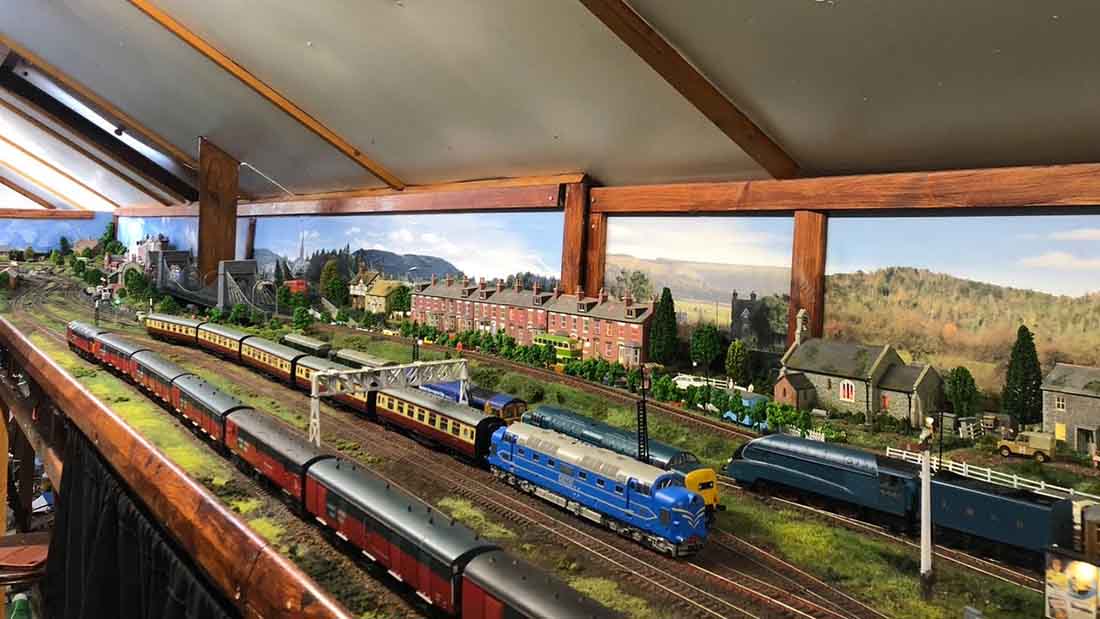
“I just started this layout in January this year.
It’s on two 4×8 sheets off plywood and foam.
Tom”


A big thanks to Greg for sharing his Model power CN freight train cars, and to Dave and Tom too.
Please do leave your comments below – I’d love to know what you think of Greg’s braking containers.
That’s all for this time folks.
Please do keep ’em coming.
And if today is the day you get started on your layout, the Beginner’s Guide is here.
Best
Al
PS More HO scale train layouts here if that’s your thing.
Need buildings for your layout? Have a look at the Silly Discount bundle.

Thanks Al – some good offerings today! Dave’s explanation of how to use the CMX track cleaner and his editing tutorial were both very helpful.
Thanks for sharing, all of you are such talented
engineers
Have a wonderful Holliday
Dave. Thanks for the track cleaning tips. But especially to see your trains running. Always a treat on your railway.
Tom very nice design , it lends great usable space . One can see you’ve got an eye for detail , look forward to seeing more as you progress.
Dave,
With that technology I suspect that you could put a complete (he’d to toe) picture of yourself standing on a platform waiting for a train. That would be so cool.
Regards,
Bob in Horse Country NJ
Guys
It is critical that the first thing you state is the SCALE ! I know you are enthusiastically into the theme but the reader gets distracted when he is struggling with that because it is important info.
Greg- nice work, did not know about brake containers, but it looks like G scale,
Dave-We all know you are OO and many thanks your thoughtful videos.
Tom
Nice work BUT!
Sorry to be such a Poop but I really want to know ALL about your stuff .
Interesting. I knew about the need for air pressure, of course, but never really thought about the need to distribute the sources along the length of the train, and therefore hadn’t considered that one might prefer to simply add compressors when extra motive power isn’t required. Thanks for sharing!
I totally agree with Bob from NJ, having Dave on the platform waiting for a train giving commentary would be fantastic! That’s for showing us how that technology works, and that even us older gentleman can make it work is very helpful. Also many thanks for the track cleaning demo, it was new information for me.
As always, love your videos,
Rob Schweitzer
St. Goar and Murren Scenic Railway
Ann Arbor, Michigan. USA
Awesome Layout? I hope mine turns out that good.
Very interesting photos & info; Greg’s braking containers. First time I heard of these. Dave’s cleaner car & operation video, nice. Tom’s layout photos show a nicely laid out layout!
Way to go guys!!😊👍
Dave, what is the editing software that you are using?
Greg how can we buy them off you please.
Well done! Dad was from Manchester – came here in WW2 – married a local girl (who was from Scottish parents !!) and set up a complete HO gage layout in the dining room in about 1955 – did it all after I went to bed – had it all prefabbed in the basement (which was of course OFF LIMITS months before Christmas Day – what a surprise on that morning! Thanks so much for sharing!
George, sorry about the scale part. I model mostly HO but do also make decals, and custom painting in other scales as well. The containers in the pictures are in HO though.
Heather – You can email me for more information @ midwestmodelrailroadz@gmail.com
Greg’s modeling is great. It would be nice if people who are posting would mention what the scale is. I assume Greg’s distributed braking containers are HO scale, but that’s just an assumption. I’ve seen N scale as detailed and could be S scale.
If you need to add weight to the old Hornby track cleaning cars, just take the roof off and fill it with marbles, works a treat
Thank you all for your comments .. Don I use Power director for my editing , fairly easy to follow … Dave
awesome all the wat around
Dave, it is always a pleasure to watch your videos. Very informative video on your green screen discussion. Love the ‘growling sound’ of the locomotives running. Nice to see your trains running at a realistic speed. All the best.
Brian – the HOn3 guy from Knysna RSA
good idea, thanks.
Dave, like the idea and your demonstration of it.
Wow- very well done!
Robert Amling sure hit a home run with his idea of u standing on a station platform
Some information about train air brakes. In the USA, container trains can be up to 4.8 KM long. To apply brakes in emergency, the engineer opens what railroaders call ‘the big hole’ the brake pipe by hitting an emergency button, or selecting EMR on the brake handle – releasing the brake pipe charged to 90 psi freight – (110 for passenger). Same thing happens if cars uncouple, or derail and open the brake pipe. The EMR wave travels back through the train at about 180 meters per second, and cold air is more dense and can carry water more easily than hot air.
Now, the rear end of the train is pushing the engine and the front of the train as the EMR wave has not reached it yet, and will continue to push the cars with full brakes applied for nearly 30 seconds. Having an engine in the middle or on the end of the train DPU’s (Distributed Power Units) and the end of train device which dumps air from the back of the train helps, but still has portions of the train waiting for the EMR news. CN has added air supply containers to assist in charging a train (releasing brakes to get moving) and for replicating the engineers brake commands while going down the tracks, cheaper than placing a radio controlled engine in the train if more horsepower is not needed. By the way, DPU”S also place 200 ton weights in the middle of the train which also has to be stopped.
Dave and Tom, great job on both layouts ! Dave has a few years on his layout but Tom’s is really good as well you can always change things on layouts. That’s the fun of it! Thank you guys for sharing your pics and videos. Chris-Michigan
Greg, nice job of weathering on the well cars and containers. Was just wondering if the end of train lighting is prototypical on the containers.
Tom. Great start on your layout. I like all those houses. They’re quite unique. The owners have a lot of grass to mow. 😎
Jim AZ
Very interesting all around. I thought I’d seen distributed braking containers before, but these are better than any I have seen. Great video Dave! I especially like the green screen demo and CMX track cleaning car. Wow! Who knew Goo Gone was good for model railroad tracks? And if I understood the video, running your train and cars behind the track cleaner also cleans the cars’ wheels? And John from Baltimore: thanks for the excellent explanation of how emergency braking works.