Brian’s been in touch with much more than just a model railroad rock mold.
He shows’s how to make a mold for many shapes – walls, logs, workbenches…
In fact he shows us step by step how to create the molds.
So whether it’s a model railroad rock mold or whatever, here’s how to do it:
“Hi Al
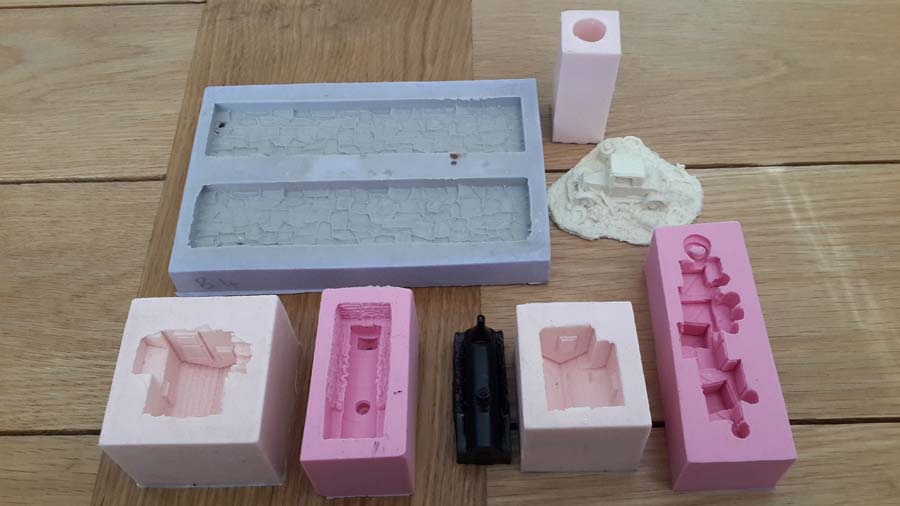
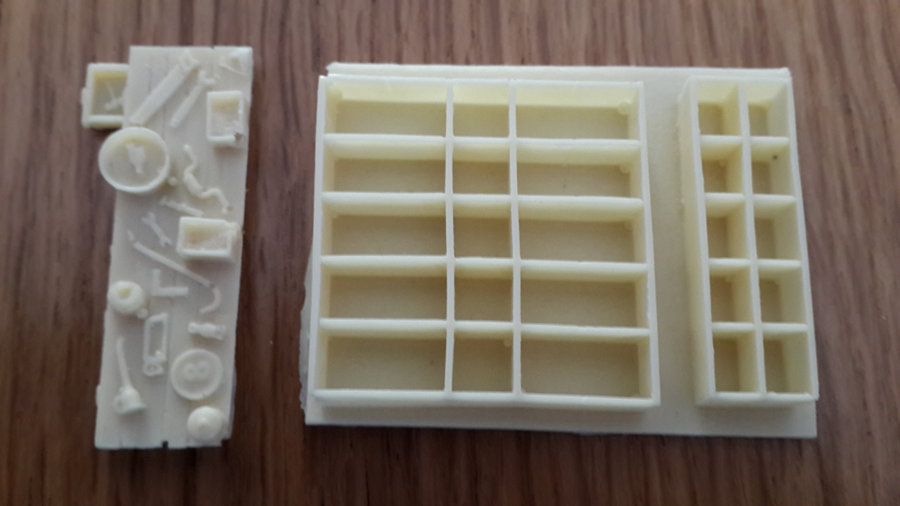
Here are photos of some of my rubber moulds (I must have about 80 different ones) the small trackside shanty moulds, I have about 4 or more of these as they can be put all around the layout and I can never have enough of these, just paint them different colors.
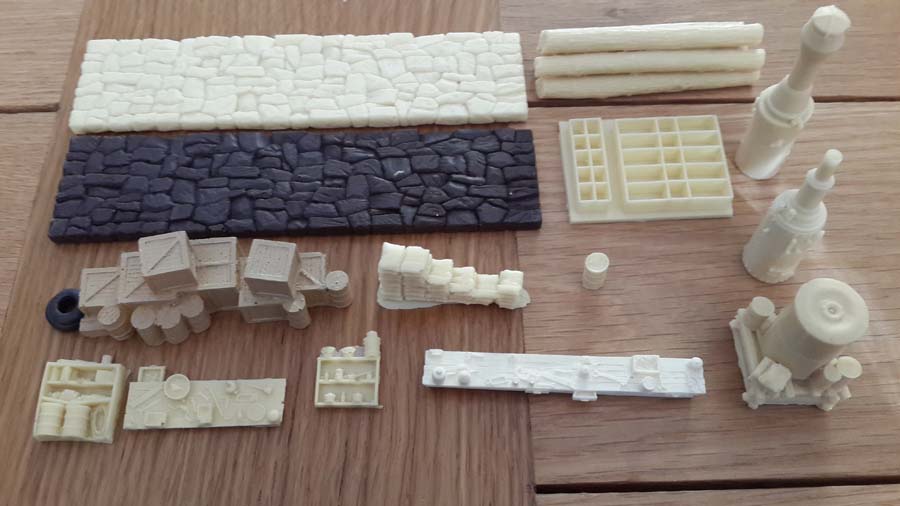
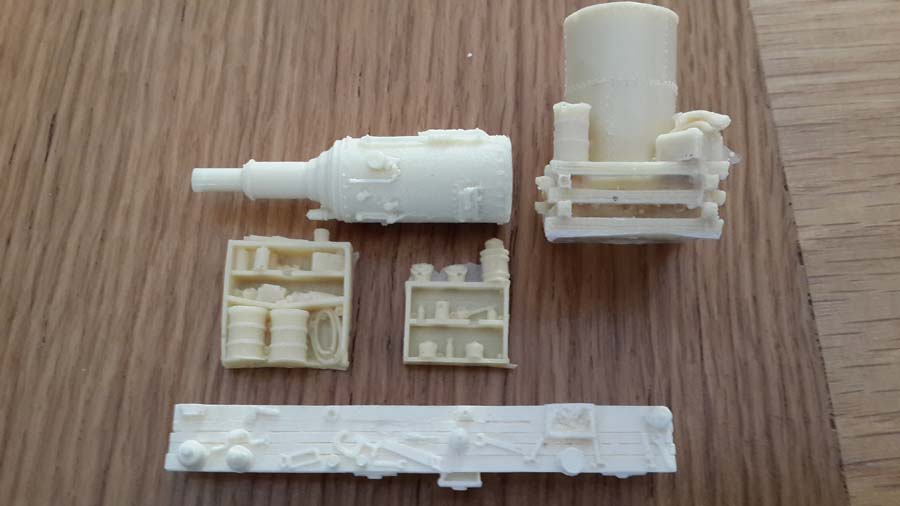
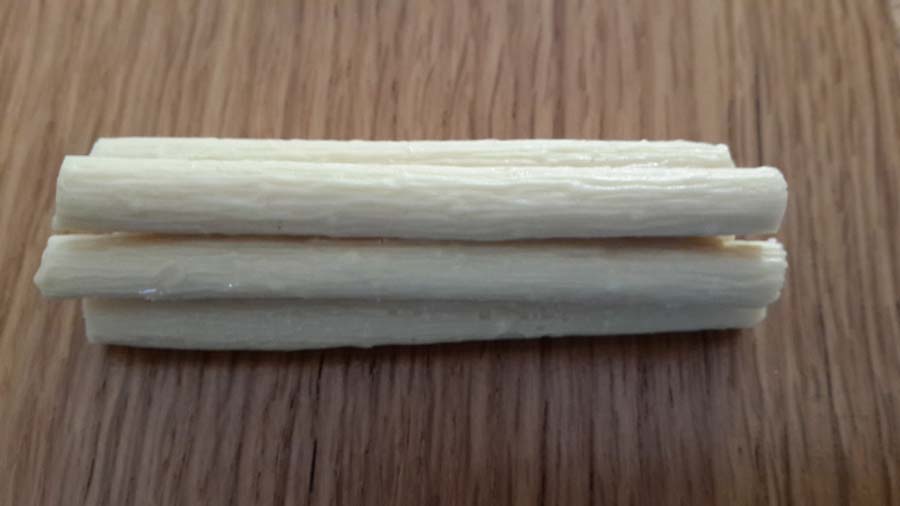
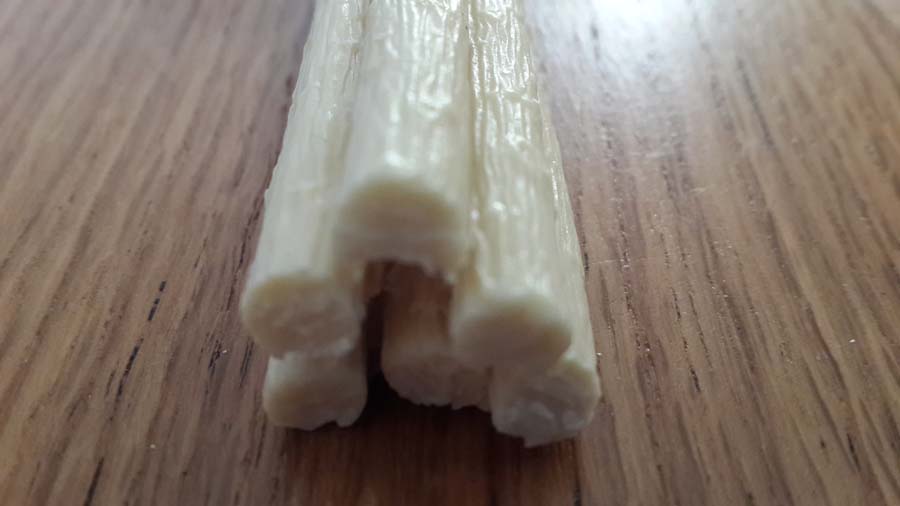
The items shown in the rest of the photos are:- vertical boiler, black horizontal boiler next to its mould, rock walls, shelving, drums, logs for my log cars and used at the log loading area, workbenches and wall racks to name a few. Will send photo of the shelving filled with odds and ends.
This photo shows 3 of the items made in my rubber moulds that have been painted and placed on my layout. I have different ones all over the layout where required.
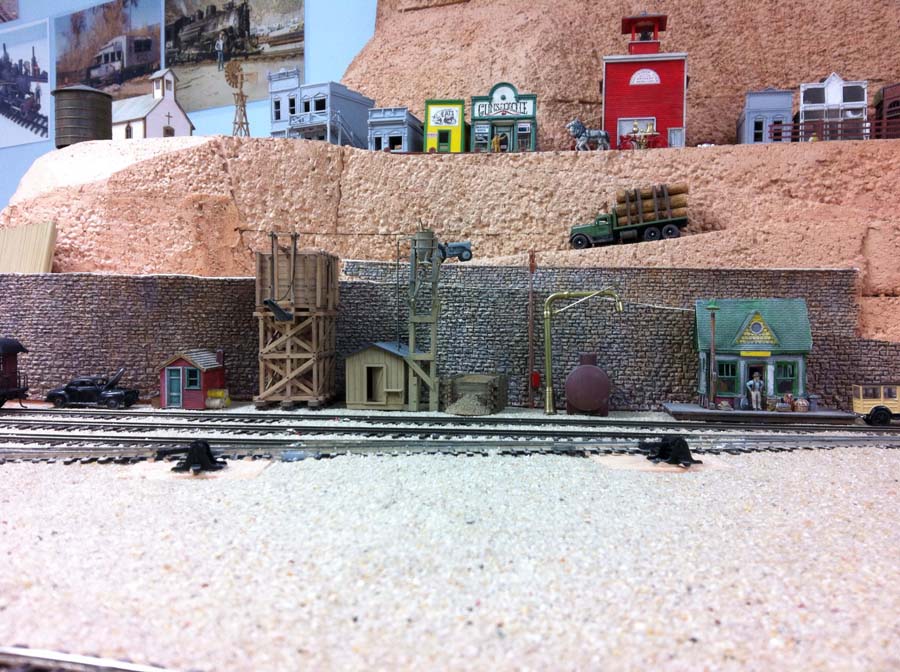
From L to R, a small trackside shanty (red), a small sand bin for the sand house and an oil tank carrying oil for my oil fired locomotives.
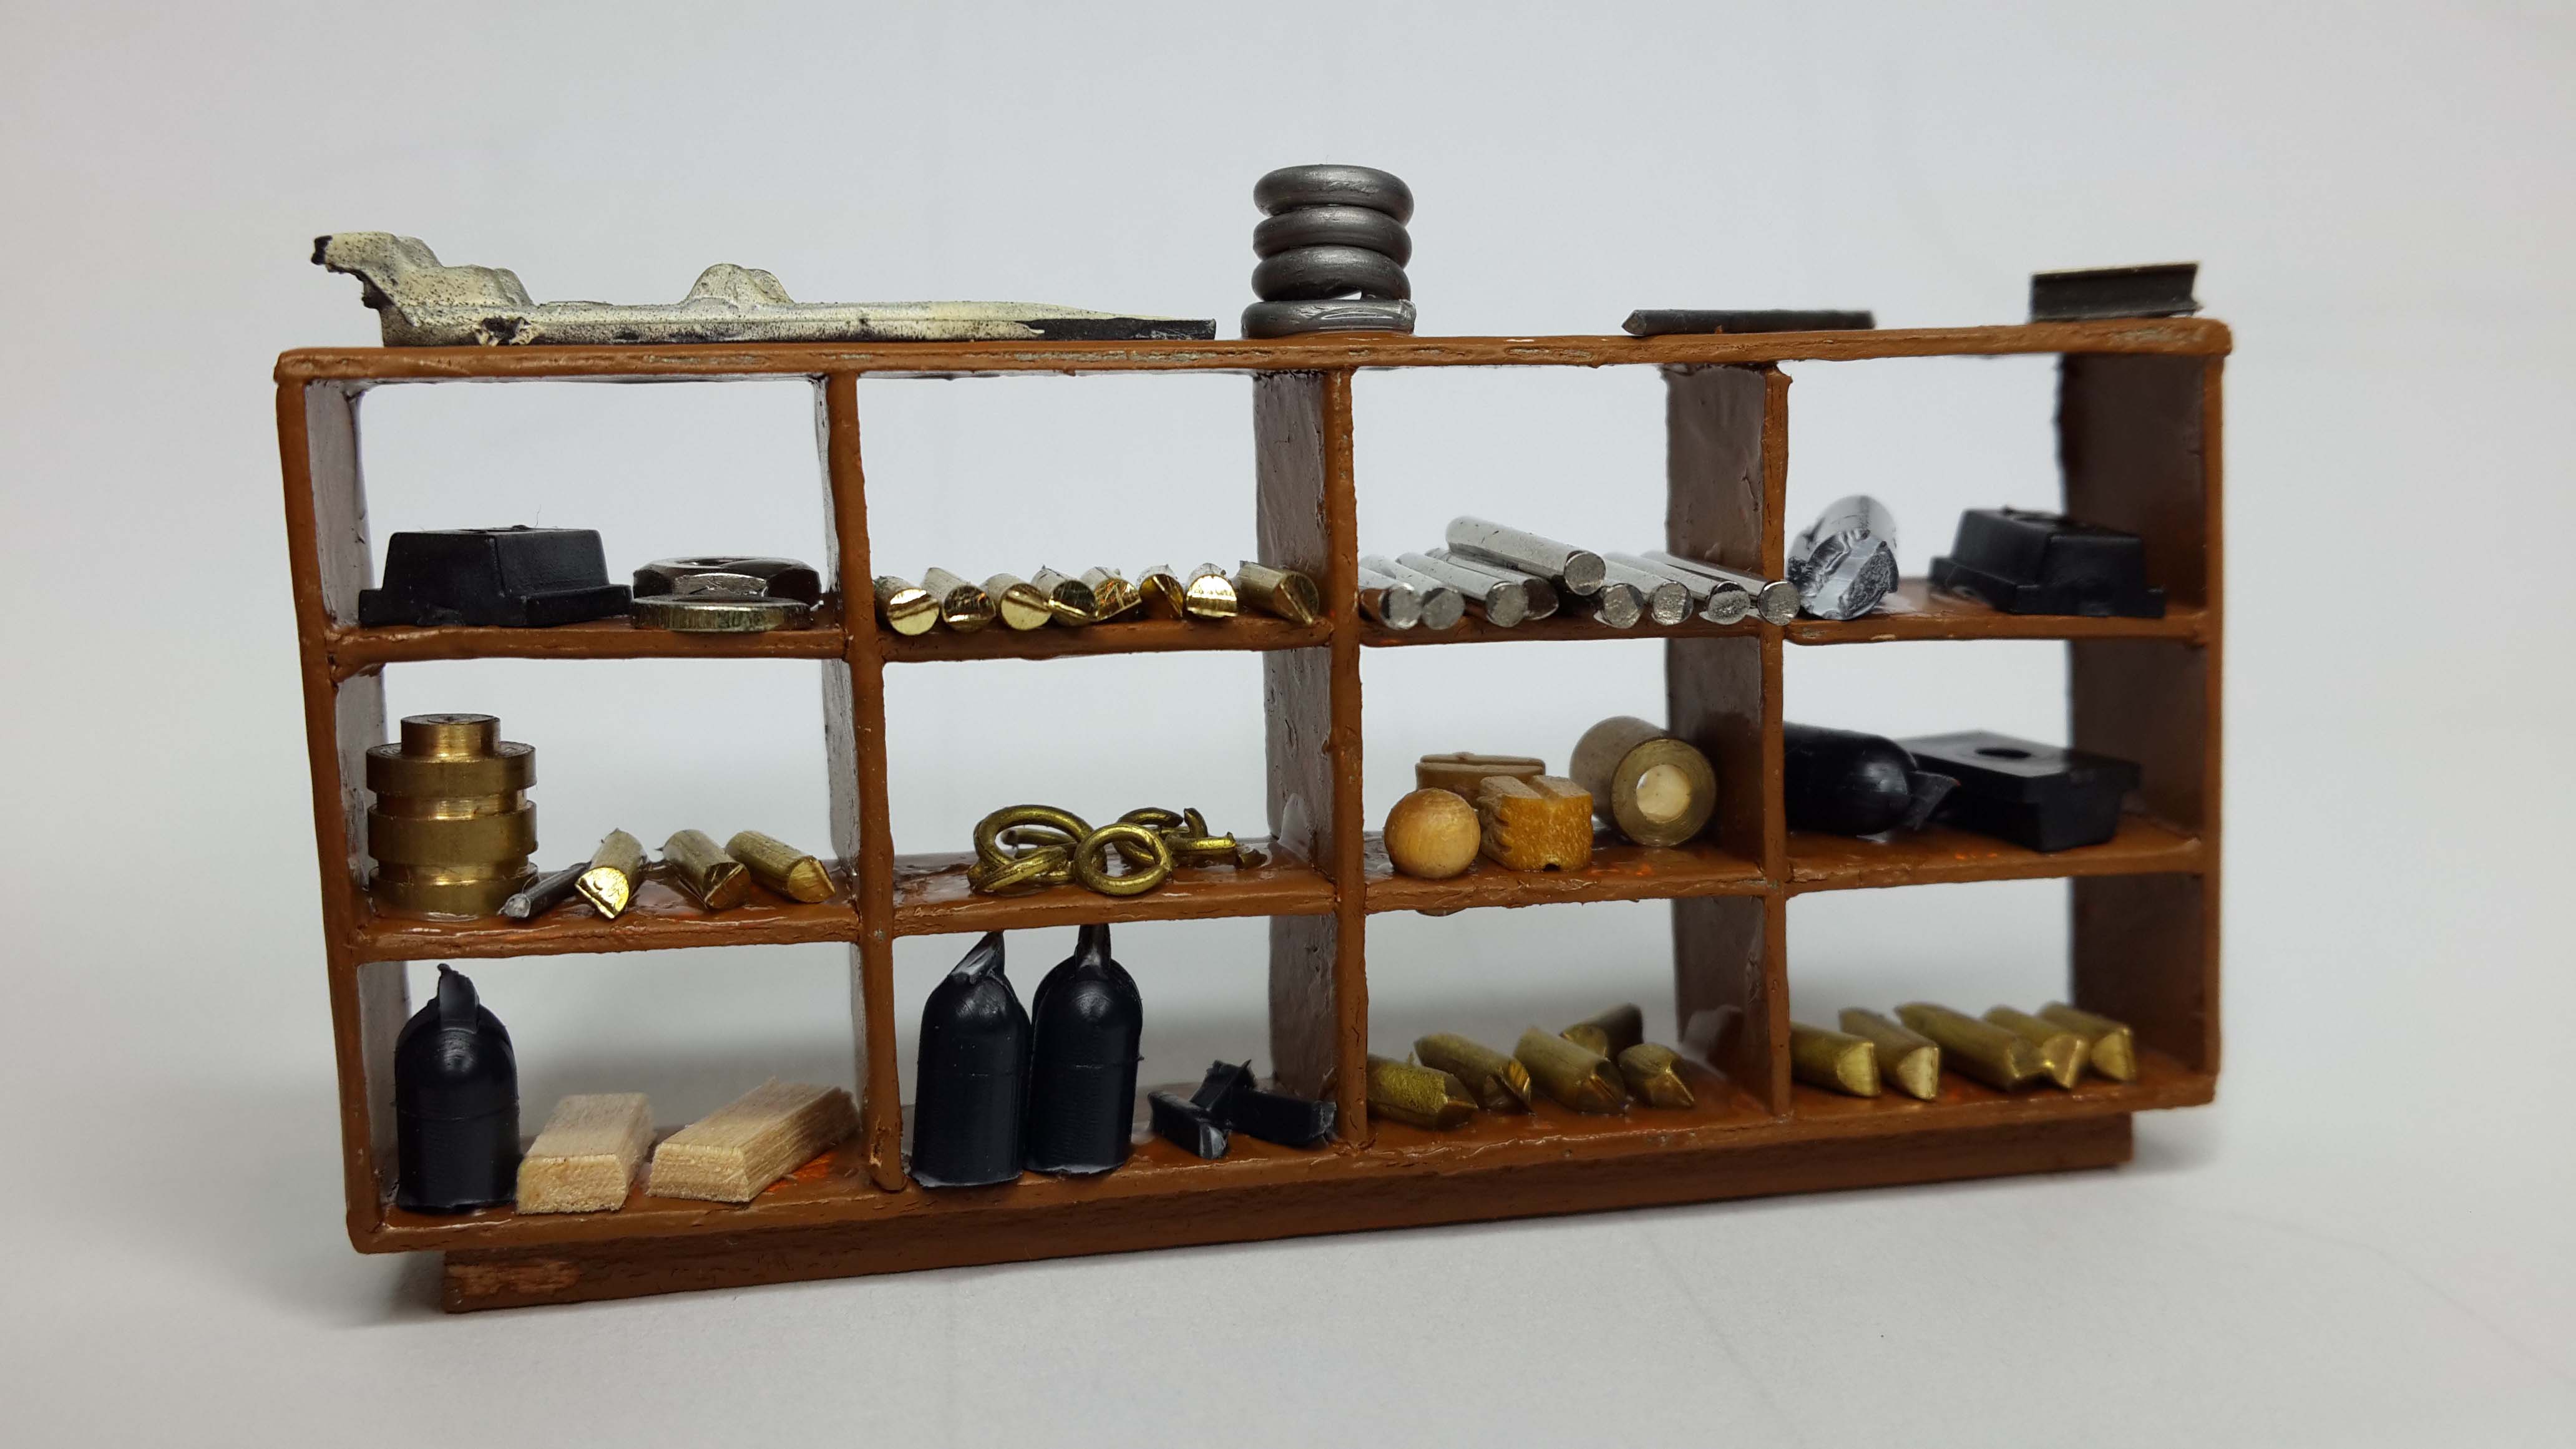
A resin cast shelf rack filled with odds and ends and some of the details (castings) inside a 2 stall engine house.
Everything on my layout is in HO scale in case anyone asks.
Making molds
Method 1: the cheapest one with readily available silicon.
Once a master is made – does not matter of what material it is made of, I mount it on prestick (blue tac) usually, to any flat surface (I use a piece of glass). I bevel the bottom edge up towards the master. I normally have a few masters ready for this process. Helps when waiting for the silicon to dry.
Use a paint brush and paint a thin layer of Vaseline over the whole master as well as the blue tac and be sure to get it in all the crevices. This acts as a release agent for the silicon.
I use clear silicon (bathtub sealer) from a tube and squirt it (starting at the bottom and work it in with a lot of pressure) all around the master working up to the top and seal it across the top. Put it on fairly thick all the way up and on the top. Then play the waiting game for the silicon to dry (usually about 3 to 4 days).
Once the silicon is dry, it is very easy to peel it off the master. (Vaseline).
I use mainly plaster of Paris to fill the mould and make as many products as i see fit. The mould will last indefinitely (I have some from 30 years ago and still as good as new). The use of plaster of Paris allows me the put dents (if for instance if it is a motor vehicle and remove fenders, bonnets, doors etc. It is also very easy to stain or paint as required.
Method 2: a more expensive way and not so readily available product.
Use a 2 part silicon (pink) usually bought in 500mil tins with the equivalent hardener. Be careful of shelf life.
Again mount the master on a flat surface and build a box around it leaving about one inch all around it as well as above it. Make sure that it is ‘watertight’. When this is done, mix up the two part silicon according to the specs of the product and then pour into the mould box right to the top of your box. This usually takes about an hour to dry. After that, remove the box completely from the master and you will now have a mould.
You can fill these type of moulds with a 2 part epoxy or plaster of Paris. Be aware that these moulds do not last as long as the ones described above if using epoxy.
I will try to find the photos of some of the moulds that I made and send in for posting.
Hope this help in making rubber moulds.
Many thanks and keep up the excellent work.
Cheers for now
Brian”
A huge thank you to Brian for showing us how to make a model railroad rock mold or any type of mold.
Now take a look at the ebay cheat sheet, and look at the price of some of the scenery – I think Brian really is on to a winner. And it looks stunning too.
I hope you can all see why I put Brian in the hall of fame. He was also very helpful with the guide too.
What’s more, Brian is really quick off the mark when it comes to answering questions. So feel free to post some below.
Best
Al


Fantastic and so easy. I think we will try a few this weekend. Thanks for sharing.
Thanks Brian. I didn’t realise you could just use bathtub sealer straight from the tube. Useful information for so many projects. I’d be interested to know what you make your masters out of though.
Mark J
Hi Mark, my masters are made from various materials such as plastic card, putty, stripwood (a northeastern scale product from the USA) and sometimes strathmore board (thin cardstock). I even use the sealing foil from the top of champagne bottles. All that I do is think what I need to make and then look around me in my scrap box, normal office supplies, household items or anything that could be modified. I will also kitbash models to make a master for what I need. The small trackside shanty master is made as a model from plasticard or wood and a shingled roof on it. The mould for it is shown and described above with a photo. Brian
A big thanks to Brian for sharing these excellent moulds.
The instructions are VERY ckear.
Keep them coming.
LEO
Great thanks to Brian for sharing this excellent how to with us. Some of the materials used I would not have thought about using.
Everyday I find just one more genius in model railroading. I guess Brian is the one for today. What results he has from his hard work. Fantastic.
Al
Now THAS some interesting and useful information Brian
and in all my years of modeling Ive never tried to make a mould in this fashion
so easy and (slaps forehead) “wow I shoulda thoughta that”….!!!
I love making scratch models….
thanks for the information and Im trying it all out soon
keep em runnin fellas
Envyyyy! I could use this for so many things, just in ordinary plaster, if only I could get the silicon rubber moulding kit.
So much I could make, in 1:144 or 1:148, for aircraft extras & airbase details: huts, Grd. Support Equipment [starter cards, rolling toolracks, stuff covered by lumpy tarps, etc] – not to mention my wife’s expanding soap-block business….
Excellent technique and very well written instructions. Thanks for sharing!
-Louie
Being from the other side of the pond, what is Blue Tac?
Thanks for sharing your knowledge. Much appreciated.
BigBill (K2CZD)
great work Brian, could you clarify the “bevel the edge up” comment please.
great moulds thanks for sharing.
You are really onto something, keep up the good work!
To BigBill, blue tac or as we know it – Prestik (made by Bostic) in South Africa. It is available in office supply shops, supermarkets. Schools us it to post paper, photos and the like on walls and anywhere else. A very helpful tool for modelers to hold things in place while building something.
The bevel edge on the bottom of the item to be moulded is as follows, place a piece of blue tac (rolled into a ball) on the surface that you are working on, flatten it out to about 6mm (1/4 inch) high and then place the item to be moulded on top of this. Use your fingers to “bevel” the blue tac from the item down to the flat surface that you are working on. My reason for doing this is when ready to use the mould upside down, it forms a funnel like entrance and easy to pour in your plaster or resin without spilling it on the larger moulds. Brian
Thanks so much .I have been waiting for a tip such as yours. Fantastic Idea.
Dave F.
Great post Brian.
I have experimented with silicon but I have not tried Vaseline as a release agent. I will redouble my efforts.
Now that is a very handy tip. Thanks
Great Tip. I also use bathroom silicone to make moulds. To get the silicone to set quicker you can add a very small amount of acrylic paint. This helps the silicone set in the absence of oxygen.
Cheers
Cameron
Great idea. Unfortunately it begins with “Once the master is made.” How does that happen? All the molds shown are flat enough to look like they are right out of a box, yet the creation of the square sides is omitted. As such, all molded pieces must have a flat side. So how do you get the 3 dimensional boiler? How are the two sides turned into one cylinder without massive cracks down the side? Are the two sides different? Or duplicates from the same mold? What does the master have to be made of to stand up to the Vaseline, pushing, compacting, (“with a lot of pressure”), peeling without removing features?
Not sure how it might work, but I remember years ago, my father told me to use WINDEX brand glass cleaner when working with silicon, to keep it from sticking where you did not want it to. He was a finish carpenter all his life, and made his living remodeling kitchens and bathrooms, so he would have had experience with silicon products. I did have some success with the method when I was installing cultured marble walls in my home bathrooms some years ago. It would be interesting to try it as a release agent for the silicon mold making process.
Great work Brian! Working in G Scale there is not a lot of accessories available (at a reasonable price anyway) so I’ve often considered making molds to reproduce items. Thanks so much for this great “how to”, I’ll be using it. Cary in KY
Hi,
Do you have any agents or shops in South Africa where I can purchase moulds for model railways houses and structures. If I order it from you the postage is more than the actual price, and it is killing us.
Thanx
John.
Great ideas, my question from Georgia, US, with 3D items, is the silicon flexible enough to remove the master. Thanks
An excellent post, will give it a go, I have a few half empty silicon tubes,
Answers to: John B, I do not think nor have I seen any ready made moulds for what you require, hence why I make my own. The shops cannot cater for the moulds that us modellers need.
Ian Campbell: there is no silicone “kit” as such. As explained, you either purchase a can of silicone in liquid format and hardener to make the mould or you purchase a “tube” of silicone sealer at most hardware stores.
Rodger J: I make a box like structure with 4 sides to hold the contents of the mould. One can also use Lego blocks to make the box to any size and height that you require. I have used these blocks in the past as well.
Joe Black – yes the silicone is flexible enough to remove the items from the mould.
Brian – the HOn3 guy – Knysna RSA🇿🇦
Brian, Thank you for the excellent tutorial on mold making. I an saving this post for future reference when I need some details I can’t go out and buy.
Pretty Kool. I like the design; Like that it make your setup look more real. Iam doing that on my setup too.
How do you make the moulds? Or do you buy them?
It’s all good, my question is how would I get a hold on any of these moles they would really come handy, please advise if it’s at all possible thank you in advance for any assistance that you can provide me with Mr. Benny Rosario.
Brian hi it’s Heather & Jason here in Ipswich, QLD, & this is something we have never done before nor know where to start & Jason would like to have a go at do things like this can you help him on how to get started & where to get the rubber for the molds from please, he really wants to try it so your help to get him started would be great thankyou.
To everyone we have been quite on the side reading all your feedback to which has helped us a lot on our lay out although we don’t get any thing like you all can do ours is just a family thing we have made together for the first time & I don’t have any photo’s yet because there is nothing new to report however we are looking at a airport (small) & a container wharf, cattle yard & petrol station along with rail stations too all on the3rd leg of our U shape layout. The second part is half way done with a crane lifting a big beam into place for the elect company along with a servo & train café ect then over the line to KFC & a truck bay with take away food then down to the cattle yard & that will be the finish of the 2nd stage we will then start on the 3rd but hope we have some more photo’ before then, also a big thanks to the man himself for keeping this site running for with out the feed back from the group we would not have known how to do a lot of our layout so it’s thanks to them all for the feed back but most of all it’s 3 cheers to you for all the behind the scene’s so to speak you do to keep us together thankyou Al.
I am a slow learner with a memory issue, I can see what you have done but visualizing it could be better if you made a YouTube video of the process. You could include a material list with links to where we could buy them and anything else you wanted..
Everyone, if you were to look on YouTube you will find plenty of videos on using molds to make masks or to reproduce items and for creating props.
It’s not a new thing. Now using the silicone or bath and tile caulking you can readily purchase from hardware stores is a cheap and easy way to go. You can also buy a small cup or a tub of spackle. For mask or prop makers on a budget, plumber’s putty is popular.
If you have a hobby shop or a place such as Michaels, they sell clay and plaster but they also sell polymer clay and the cool thing about that stuff is that you cure it by heating it in an oven. For safety, you should just buy yourself a small toaster oven and use it JUST for baking polymer clay.
Polymer clay can be smoothed by wetting your fingers, it can be sanded wet or dry, carved and you can build a “thing” in parts. Every time you add a new piece it can be baked again. You can also glue pieces together.
You can use it as a mold or buy their special clay specifically meant to be used to make molds. And you have the choice of buying it in all the colors or mixing colors or you can just paint it when you’re done. You don’t have to “get into the hobby” as they sell the clay in little blocks and a glass jar and anything you can use to shape or carve the clay is all you really need.
The cool thing about Model Railroading is that it seems like so many other crafts and supplies can be used or adapted.
Frank in Orlando
awesome article. I di not know you could use bathtub sealant. Did you use the clear or the white silicone?
do you thin the Vaseline at all?
Again awesome, easily the most useful posting in a while with clear directions as well.
Ed