Cal’s been in touch again with how to build a small train layout.
He’s also kindly answered some questions on his last post too.
“Hi everyone.
Thank you for the generous comments.
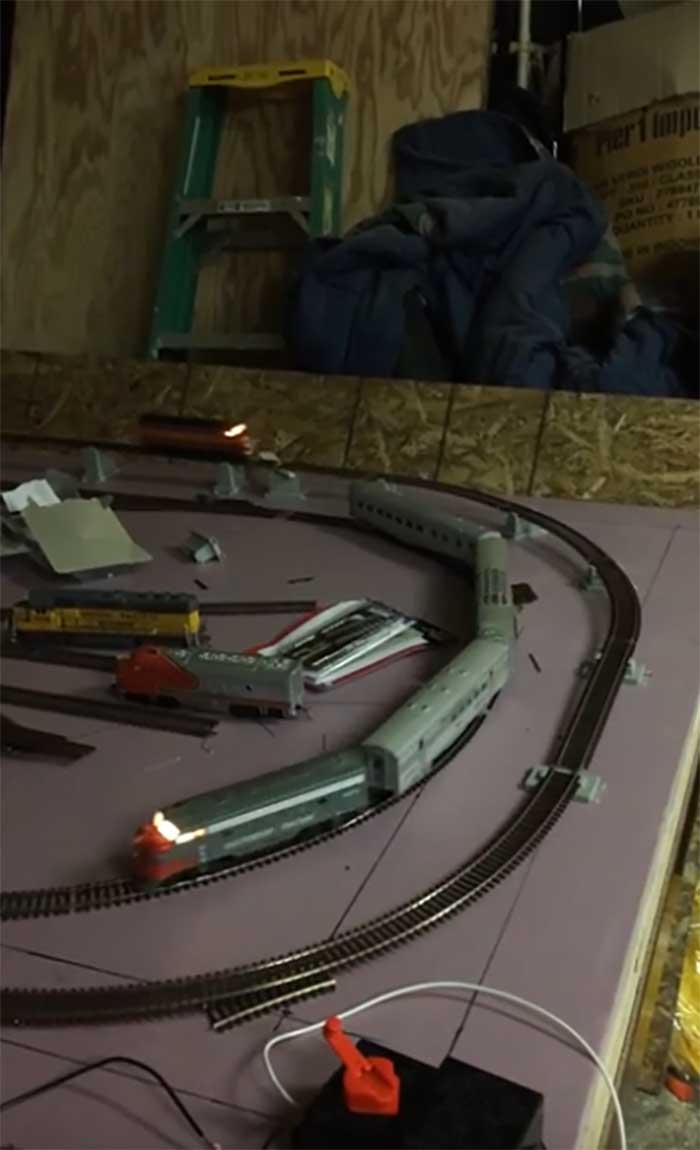
I am still working on the Disneyland station.
I cannot find a “real” model of it. I just found a paper model and it’s very difficult to construct because of the small details.
I plan on entering it into our local model train show in November.
I still have lots to finish, like additional lighting, a fire scene, some landscaping and additional detailing. I have a scenic backdrop ordered for the wall behind the steel bridge to tie both mountains together.
As far as Gilligans island is concerned, I do have all the castaways represented. The nudists are sitting on a rock above the ravine on the left side of the layout.
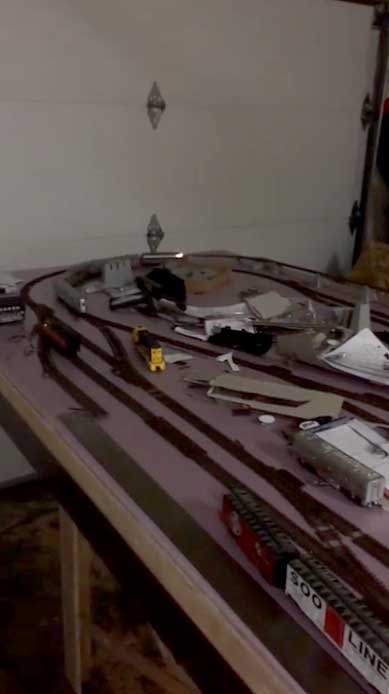
I will post my track plan at a later date.
I started with a basic track plan and it morphed into what it is now.
My design completely changed from my original design as far as the town goes because I had planned for the town to be completely different than what you see.
It changed into that configuration when I was buying the buildings on line and I took the dimensions of the buildings I bought, made blocks out of foam and arranged how the town would sit by placing the blocks in various locations until I came up with the configuration I was happy with.
I know I filmed the entire video rather quickly as I wanted to avoid people from getting bored as there is a lot to see.
My ultimate goal is to build layouts professionally for those who want a layout but cannot build one for whatever reason. Thank you all for enjoying my little Railroad. Here is the layout when I finally layed the first loop before I started the landscaping.
Cal”
Thanks to Cal for his ‘how to build a small train layout’.
Now on to Dave:
“Al,
I just subscribed to your ebook and site. Was scanning through it, some great tips and ideas.
I am looking forward to getting back into model railroading after many decades of abandoning it for work/family, etc.
I am now teaching science at a local High School. and have a bit more time available, especially in the summer.
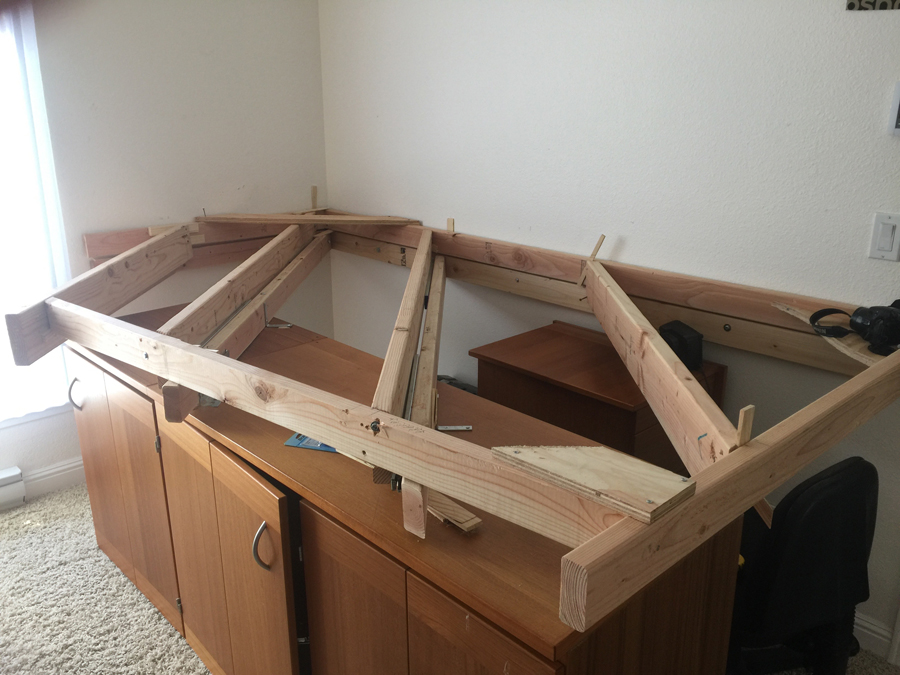
This past summer I built my platform from some scrap lumber in the garage, plus a sheet of plywood I had to purchase.
(Pictures attached). It is made to raise to vertical. There is a stationary shelf 10 inches wide along the hinged side (rear), and a 12 inch shelf along right (also stationary). I hope to run some sidings to store trains when raising to vertical.
Now I am looking at layout plans and ideas.
I am also wondering how I can engineer a pullout piece if and when I want to raise layout to vertical, and how I am going to fasten everything to take all that vertical stress…challenges to overcome.
Thanks for your site, and ideas. I look forward to any tips, or feedback.
Best regards,
Dave”
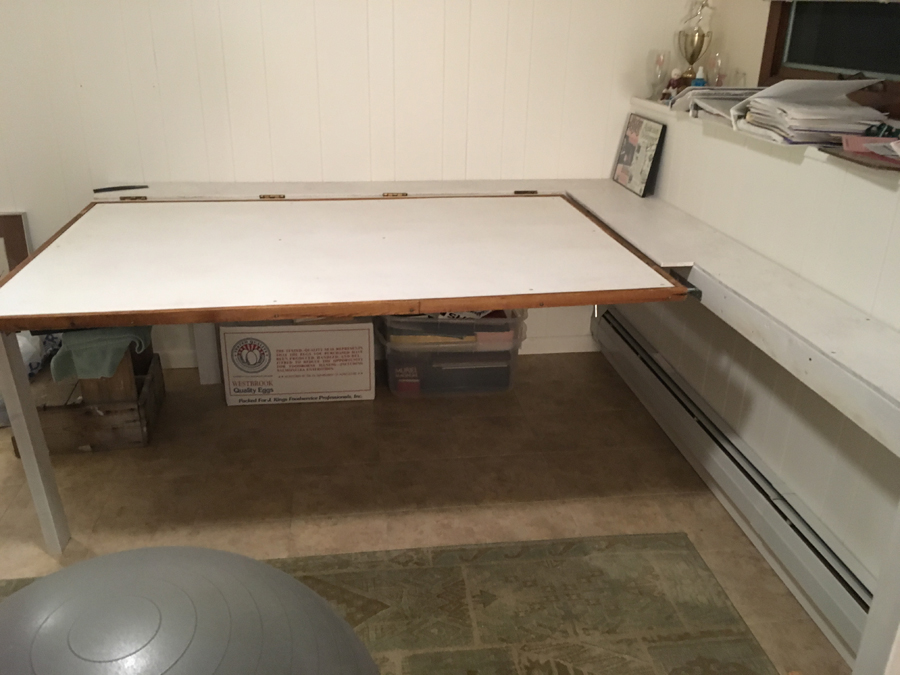

I thought I’d post Dave pics for three reasons:
1) Can anyone help him with his clever idea of keeping the trains on the shelf when he puts the table up?
2) It shows how a little planning can go a long way.
3) And most importantly, although there’s not a lot to see, it’s all about making a start.
And on that note, have a look at what Bill’s done, some very clever planning here:
“Alastair,
I have been on your email list for many years and find the information you distribute most interesting and many times useful to me personally.
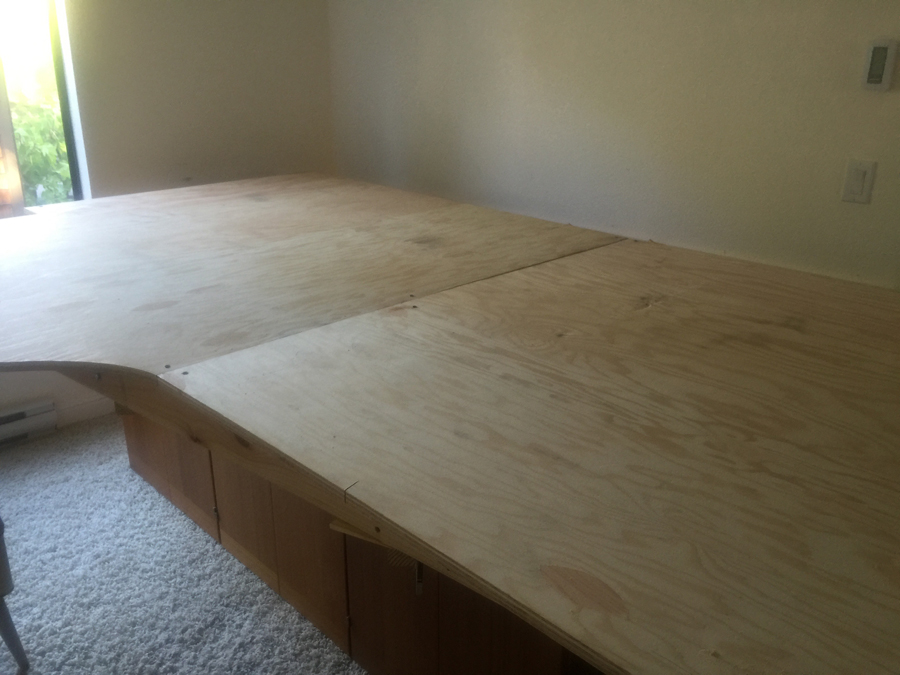
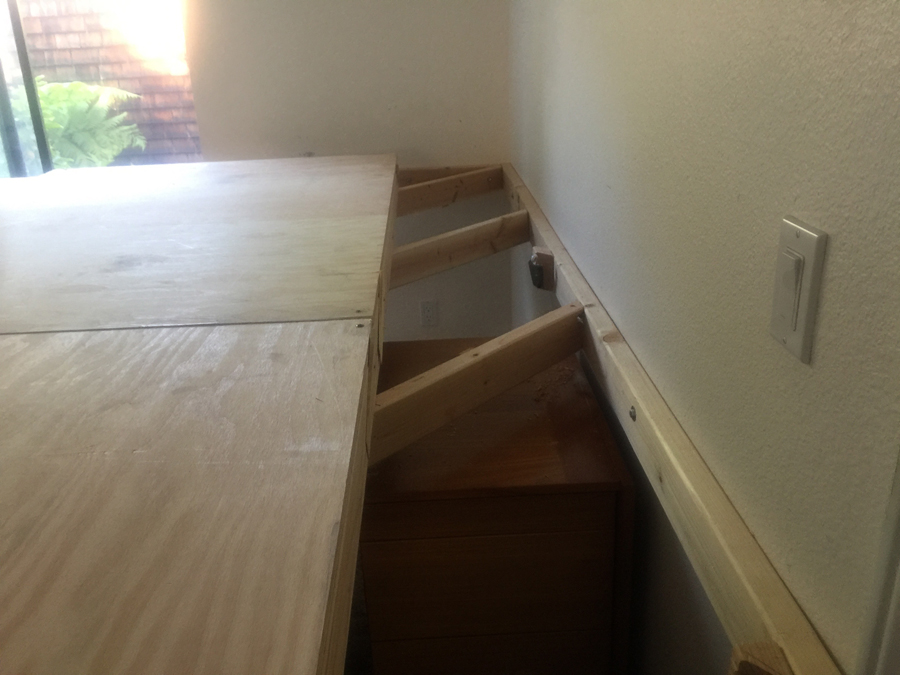
I started modeling with Standard gauge trains at age eight (82 years ago) and just recently decided to model with N gauge. I have built a platform 102 inches long and 66 inches tapering to 56 inches wide which abuts two walls (photo 1).
I devised what I think is a novel way to be able to access all sections of the layout. The 1 inch plywood platform is mounted on four 2 x 6 beams which slide along side four parallel 2 x 4 beams attached to the base support and the walls.
The slide mechanisms are heavy duty drawer slides (photo 2). Since all these beams are mounted at a 45 degree angle to the back wall I am able to easily slide the platform 18 inches away from both walls to access the rear and left side of the layout (photo3).
Bill”
That’s all for today folks.
A big thanks to Cal for sharing his take on how to build a small train layout.
That’s all for today folks.
Please do keep ’em coming.
And if today is the day you get started on your layout, the Beginner’s Guide is here.
Best
Al
PS Latest ebay cheat sheet is here.
PPS More HO scale train layouts here if that’s your thing.


Bill,
Your pullout idea is ingenious. I have never seen that before.
For Dave: I’ve toyed with a hinged layout idea for many years and finally gave up. It’s a good way to save space but has a lot of drawbacks including the height of buildings and mountains on the layout. I tried the standard removal track section going from the main board to a shelf in the rear and many times have forgotten to remove that section before tilting the table up. Result: bent track. Obviously it takes time to reconnect the track both physically and electrically before the train are ready to roll off the shelf and onto the table.
The depth of the shelf also determines how high your buildings and mountains can be and still allow the table to rise to the full vertical height. (and that can be a pain if you’re modeling Rocky Mountains or the Alps! If you remember the old “pop-up” children’s books where buildings and scenery lay flat until the book is opened then that might be one way to limit stress–although I’m not sure exactly how that would work with plastic buildings etc.
I can’t tell from the pictures if the ledge on the right side connects with the ledge in the back but if it doesn’t it should..then you could use that ledge as storage track when the table is vertical allowing you easy access to rolling stock etc. It would also add extract space on the rear ledge for buildings/scenery etc. The main problem I found was that when completed,, the whole thing was so heavy it was hard to tilt up. Obviously counter weights would help but that’s a whole other problem. Good luck and I’ll be watching for other comments and solutions.
Bill – very clever!
Appookta – South Carolina
Al, You always send the most useful posts. Cal’s post shows the ideas for a layout to change/modify no problem.
Dave’s post shows unique ways to make the best of the area for the layout and Bill’s post using drawer slides has given me an idea for a access area on part of my planned layout.
Keep them coming
Cary B
I use a removable section of flexi track about a foot long to go over a baseboard joint at a shallow angle to avoid problems with any slight misalignment. I’ve never had any problem with current transfer through the fishplates or from that bit of track ‘floating’ a little; yes, you have to remember to take it out, but you could post a pre-lift checklist on the wall where it’ll be hidden when the layout is raised.
Rod
I have considered doing a layout in the garage that would stay level as you raise it to the ceiling. My thoughts were using a system similar to a garage door and remote contol. You would need all four corners to be attached or secured to a pulley system. My two car garage is deep so it would be away from any vehicles. You could raise or lower to any level you like, standing, sitting, eye level, whatever. Also easy access to wiring underneath. Just a thought!
Thanks Al, for the years I have been with you all fellow train lovers but it’s time, the train is at the station taking on passengers. Ones body dictates. God bless.
Kind regards Ron (from down under)
your storage depends on your useage. For daily store then you need a stay flat yard. For occasional store, you can get by with a box. Engineer in the store when laying track and before scenery. You also need to do wiring, switches, Dcc etc again when laying track. Good luck. Build it to suite your ideas.
Thanks for the thoughts on my drawbridge style platform. I like the idea of a piece of flexible track that can be removed. At the rear is a stationary platform and the right side fixed platform is connected to the rear. I am hoping to use the fixed platforms to store rolling stock while raised.