“Good Day
I was a baker for 45 years. I found that using what is called a pastry bag or decorators bag to apply plaster or spackling compound, gives you a little more control in it’s placement. You can use the tips, they are the mental or plastic cone shaped fittings that are placed in the end of the bag. These items can be purchased at several stores, Michaels, Hobby Lobby and Joann Fabrics. Wilton is the trade name most are listed under, oh I forgot about EBAY. The bag can also be folded over and used to store unused material. You can color the spackling compound with any acrylic color. Using brown you can create a base for bushes and hedges, sprinkle some ground foam on.
You can also use the bag to fill in gaps and add material in your scenery.
Richard”
“Long ago I was taught to use denatured alcohol to lower the surface tension of the ballast before applying the glue. Works great and evaporates a lot quicker than soapy water.
I have found an easy way to create highway grade crossings. I use wooden shims, available at most hardware and lumber stores. Cheap and they work great. Just cut them to fit your layout.
Vic”
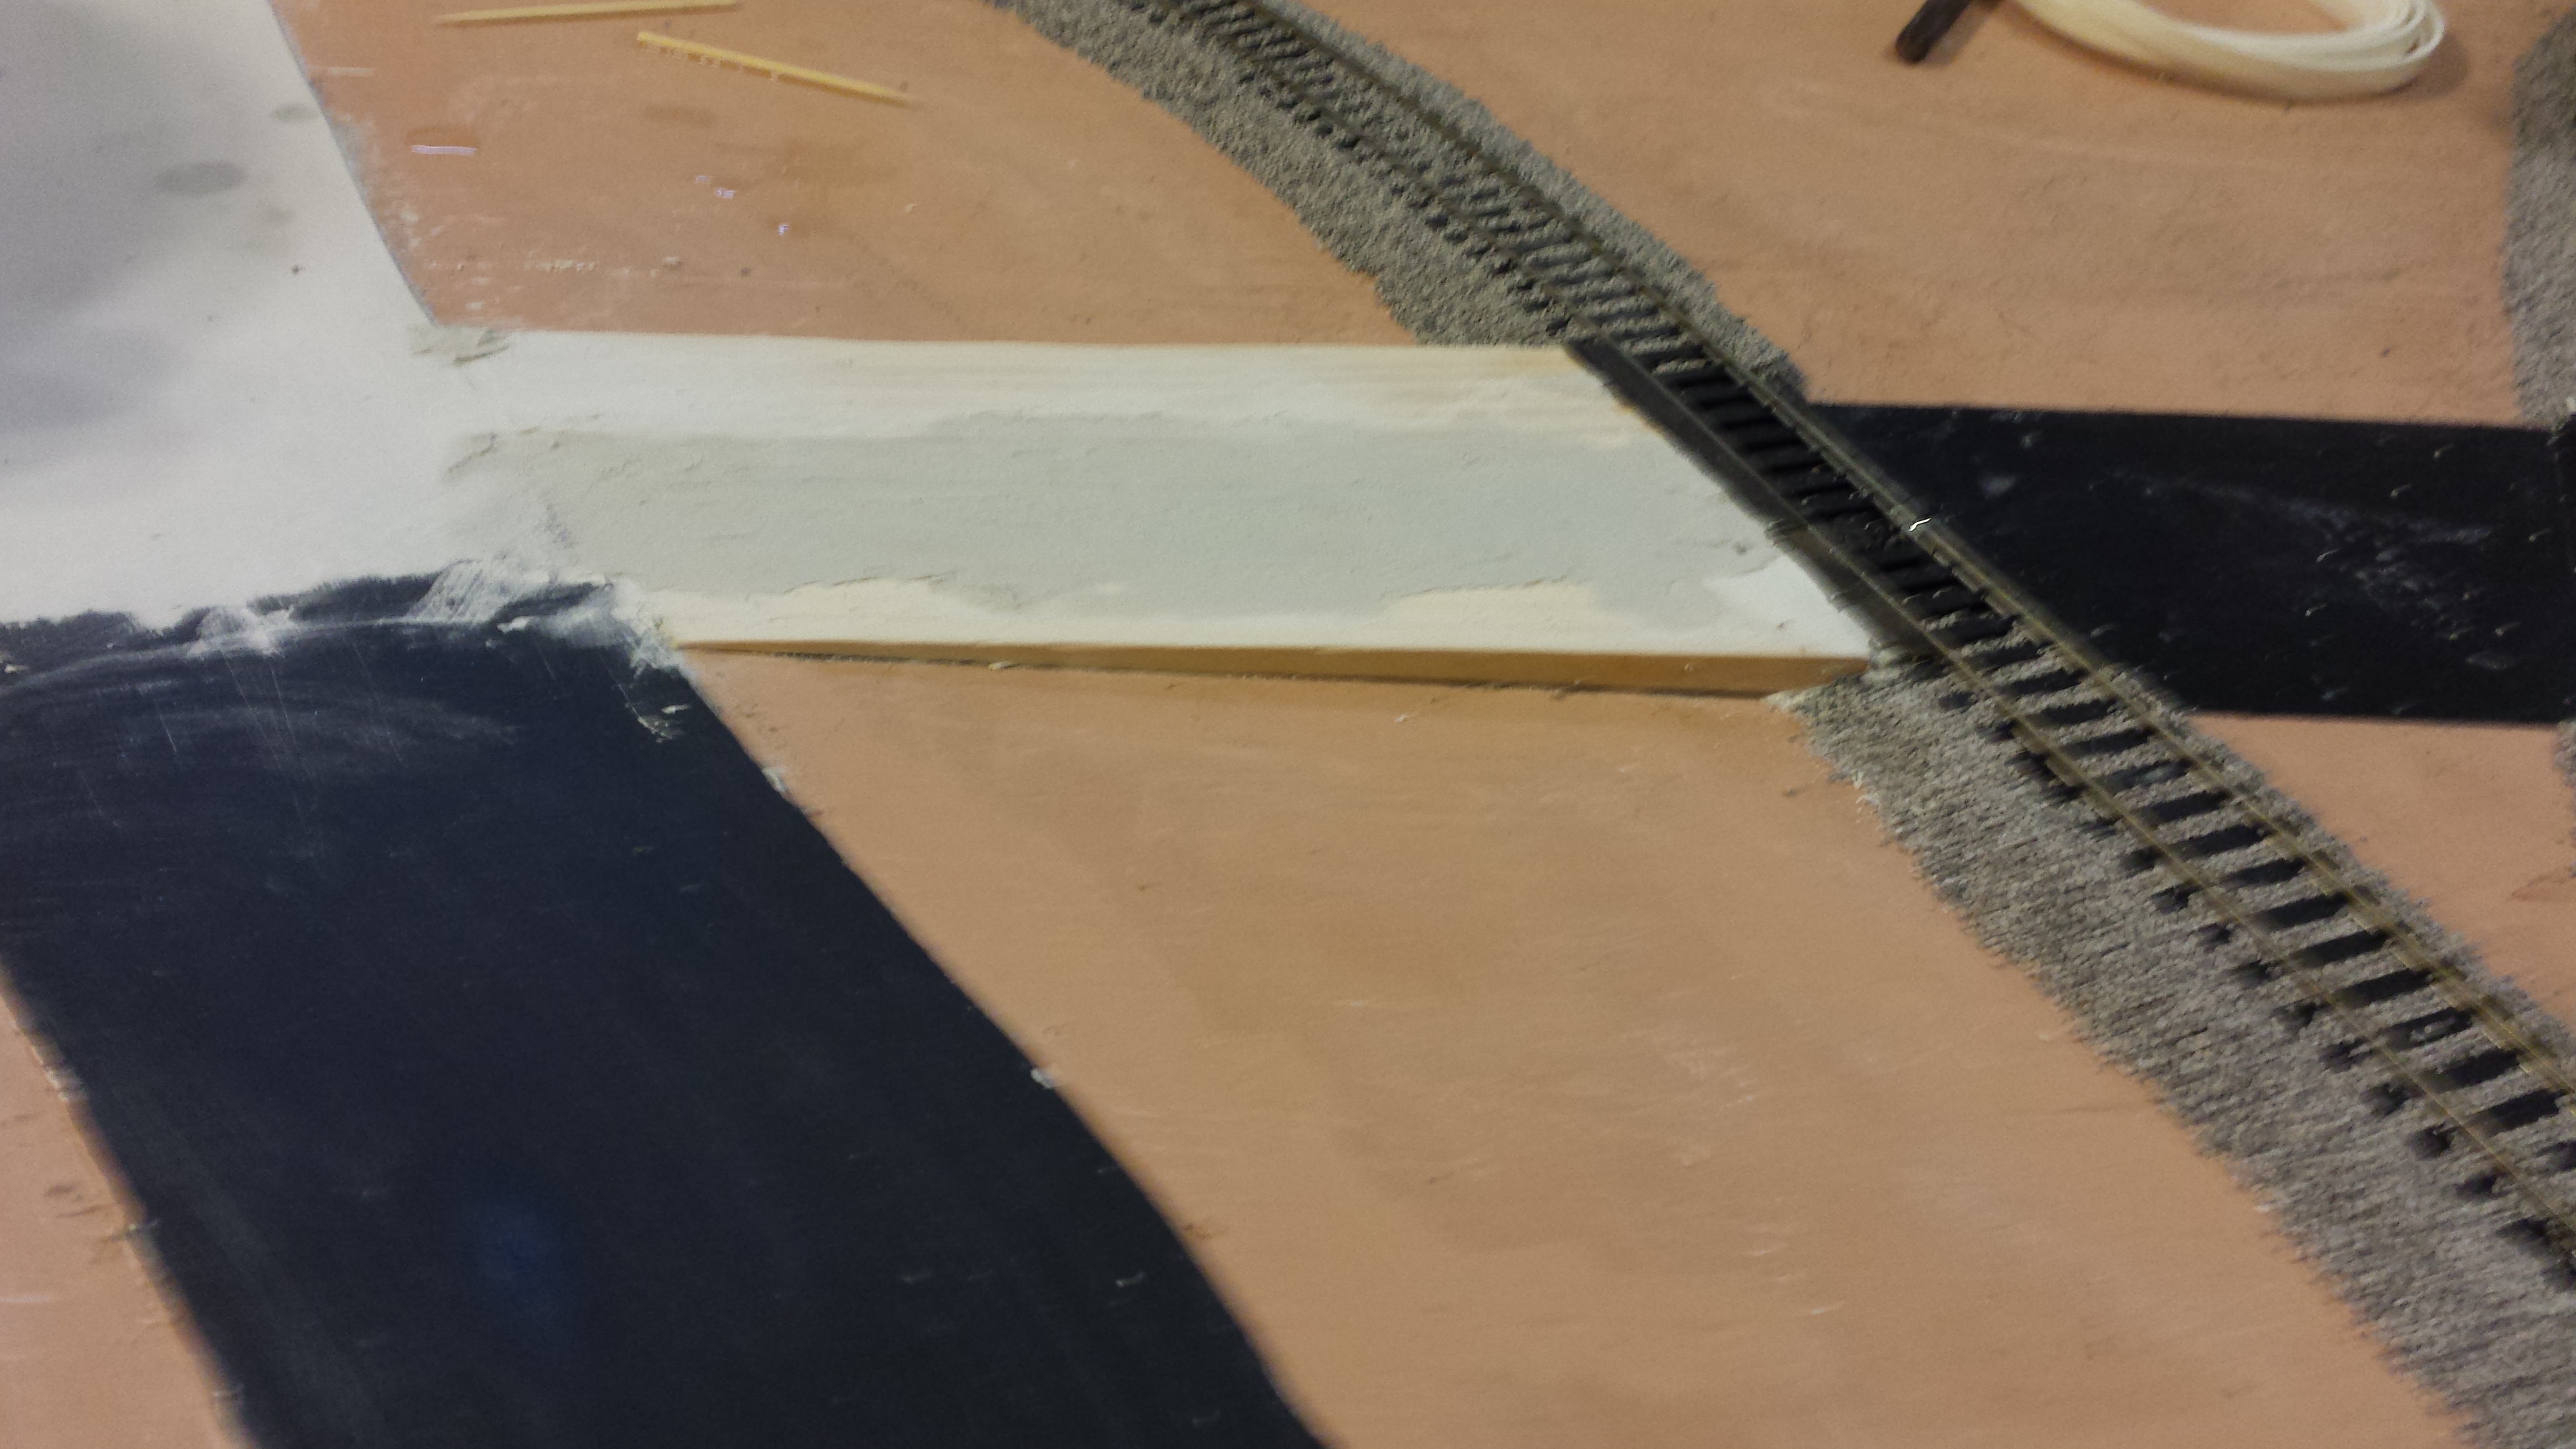
Lastly, I just got this in from Dave. Really shows you how he does his stuff!
And don’t miss the latest ebay cheat sheet. It’s here. Lots of good stuff at the mo.
Keep ’em coming.
Best
Al

I am planning a garden RR (G Scale) for next spring – I am looking for the easiest way to lay track. I live in NW Montana.
Any tips
I know Dave is a Master Model Railroader and I have learned much from him but the volumn in his videos needs to be increased. Maybe a microphone would solve the problem. The sound effects are loud enough but not his voice, Sorry to be an old complainer.
I’m a semi-retired contractor and master builder. I never thought of the shems! Great idea!
Hi Dave, how do your locos double head.?
Mine sometimes stalls and wheel spins
I too find it a bit difficult to hear Dave speaking in his videos maybe something can be done to increase the volume when he is speaking, other than that he is terrific with what he puts out there and has given me plenty of Ideas for when I start assembling my railroad
Hi All I have to say the problem occurred again the following day unfortunately, but I then went and bought some Peco Electrofrog Points ( the guide rail is shorter) and touch wood all is OK again , will load a video showing these and hopefully the scenics back to what they where …as for the double header , you need 2 identical set cv`s for speed on the Loco`s , and then match them as a consist from your controller , I find that they behave well then , but if you have one thats faster than the other you will get problems …Dave
what a fantastic layout dave, I’m dying to start I’ve just bought a shed 20 x10 but I’m a bit lost as how to lay the track out.
any ideas
JOHN
Re Daves de railing loco, at the risk of stating the obvious, did you check the back to back measurements on the troublesome axle? This is always a problem with Hornby and bachmann r.t.r. Locos. The points were probably fine.
Hi Alan,
I think part of Daves Problem is that he is sometimes to far from the microphone when he is talking, which doesn’t afect the volume only the clarity of the sound. If he was to look into getting a Bluetoth Micr and Hearring piece, it would improve the outcome of his sond recording along with his videos, as the sound would become much clearer. I hope this will be of some assistance in the future as Daves imput is always welcomed by so many of us modelers as we”re always looking for different ways of doing things and saving money.
Stemar, (Downunder)
For what it’s worth, I had a similar problem with a couple of points – which which are a different make from the others. The loco derailed as it left the points as did some coaches. I couldn’t work out what to do and kept blaming the points. As I am building a new layout, I was only using one locomotive to test the track. One expects proprietary locos to be fine but eventually I worked that the problem lay with the locomotive that I was using and also with one or two specific coaches leaving the track at the guides. I checked with another locomotive and it too derailed but only occasionally which seemed to depend on its speed.. Eventually I got a pair of inside calipers and discovered that the settings of the wheels were not perfect and some were too close together so mounted the guides causing them to derail. I adjusted all wheels and no derailments. I am gradually adjusting all my rolling stock and so far have had no further problems.
If the problem is with particular vehicles, and even more so if it’s a particular axle every time, it’s usually the back-to-back dimension between the wheels that’s the problem. There are various standards for this dimension according to your chosen scale/manufacturer, but the usual minimum should be 14.5mm for OO gauge. Not all locos are easy to adjust, if they have a narrow gear wheel mounted on (or built into) the back of the wheel, then as well as spreading the wheels to the correct dimension you’d need to add a washer on the other side of the chassis between wheel and frame, otherwise the extra slop could allow the gear to come unmeshed and maybe chew up the corners of its teeth. For ordinary wagon/coach wheels that are stiff to shift, I find a tack-lifter very handy. I grip the axle firmly in a pair of hefty pliers, leaving just room to get the tack lifter in alongside, with one prong round either side of the axle, then I squeeze gently together the handles of the lifter and pliers, using the leverage of the angled head of the lifter to press the wheel out along the axle in a very controlled way, with the pressure centred on the wheel back either side of the axle so it doesn’t bend. Works a treat!
By the way, the bits Dave refers to as “guides” are properly called check rails, and on some so-called ‘Universal’ points with plastic check rails I have found I had to add a thin shim of brass to the running face of a check rail to ease the wheels further over away from hitting the nose of the crossing (or “frog” as it’s often called here) and this is something you can try quite easily by bending the ends of the shim round the ends of the checkrail, it’ll stay in place well enough like this while you decide if it helps and before you fix it in place.
Rod
TO: NW Montana
Great to hear your starting a Garden RR! I’m starting to lay track but can’t say my method is the easiest. I dug a 6″ deep trench, lined with landscape fabric and filled with small gravel my quarry calls “manufactured sand”. I’ve let the gravel settle through the winter. I’m using LGB track and plan to run powered track for a 15’X40′ layout. I’m joining the shorter sections in my garage into 6′-8′ long sections I can carry out to my layout. I’m soldering a jumper wire across the short sections and, once on site waterproof wire nuts to connect the longer sections. I’m using small brass screws to hold the track sections together but mainly hope ballast does that. Al can send you my contact info if you want to get in touch. Happy modeling! Cary in KY
Hello to Dave… always enjoy your videos. I was a model railroader a long time back and I am always intrigued at the ideas many people come up with, as well as experiences shared. Like Dave’s problem, during the video I noted you only ran the locos one direction during your testing. I am curious if it happened in the opposite direction as well? GOOD LUCK… it the little challenges that make big successes…
I put down 900 feet of HO track on spline road bed did zero rework or repair for 17 years. It takes extra time but in the end you spent less time and trains run, you pay for ever with a bad foundation. Can not understand stand fast and cheap
Bruce:
I live in Nebraska and this is what works for me.
1 Cut 2inch pink ins board to fit the width of the track.
2 Dig a trench to set the ins board level with the soil. or slightly lower
3 lay fine crushed recycled concrete for ballast. It comes in three grades in Omaha
4 brush in dry Portland and spray it with a water bottle. make sure it is smooth and level spray again if necessary
5 Lay your track
6 brush in dry Portland and spray it with a water bottle. Again if necessary
7 top coat the ballast with chicken grit and again brush in dry Portland. spray with a water bottle.
You will soon fine the right order for this process.
as Hunter said “It works for me”
Hint ship lap the insulation joints by about 3-4 inches overlap
any heaving from winter frost will raise the track at a quite even level and in spring it will settle down again.
The recycle concrete has the ability to bind quite well with the dry Portland as it concrete to begin with.
John
Dave love your videos but just like some others I can only understand about every fifth word. Have a Happy, Healthy New Year to all.
Well Dave you’ve done it again! Keep on keep n on!
Love the show and commercial free too.
Hey Dave sub titles might help our North American friends with the accent with your video skills no problem !
Three talented guys. And I thought I was the only one having a difficulty hearing. THanks guys.