John’s been in touch with something he needs help on: Model train layouts for small spaces.
Thanks to you lovely lot, there are some very helpful comments below already.
I was in two minds whether to post John’s mail. There’s not a lot of detail – he just sent in a very short mail, and a few pics.
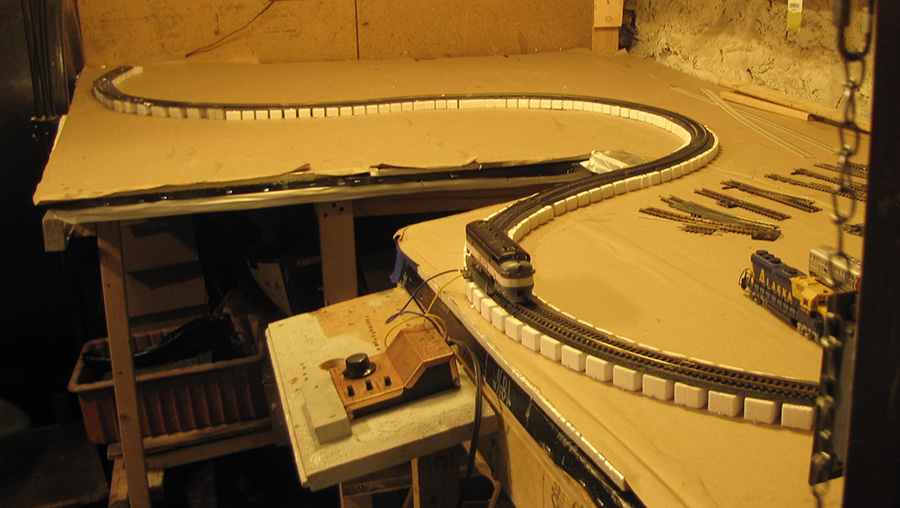
But when I pieced the pics together in my head, I saw the problem: John’s run out of space.
My first thought was that a little planning would have gone a long way. But then I thought, hang on, this chap’s rolled his sleeves up and made a start, which is what it’s all about.
What’s more, who hasn’t run out of space at some point?
So who can help John? Please do post a comment below.
“I am hoping for some guidance on what to do next. I have zero space for expansion.
Any recommendations will be well received
Thank you,
John M”

Now on to Dave:
“Hi Al,
bit of a anything goes video showing some of my Steam Loco collection, and of course could not resist showing 1 of my Deltic blasting out that deltic sound…well just could not resist…
Just like to say could not believe the viewings from last weeks video , shot up to just over 10,000 in just 1 week , thank you for posting Al ..
Regards
Dave”
Latest ebay cheat sheet is here.
A big thanks to Dave for sharing his issue of Model train layouts for small spaces. Please do leave a reply below if you can help.
That’s all for today folks.
Please do keep ’em coming.
And if today is the day you get started on your layout, the Beginner’s Guide is here.
Best
Al
PS Latest ebay cheat sheet is here.
PPS More HO scale train layouts here if that’s your thing.


For Johns space problem. I see a real cool bridge spanning that deep chasm!
Instead of snaking around the indentation in the table tops adjacent to the power pack, he should bridge over it. Doing so would allow the current ends of the track to join in a graceful curve at the far end. Also, why is the track elevated? Keep everything basically on the flat table tops. These changes will allow better space for switching opportunities and for possibly a reversing track. David
Hi John,
You could build a mountain across the back and have more height and another loop.
Cheers Paul.
Looks like he could take the part at the back, reverse the curve, and add a bridge to make a nice figure-8 if he’s interested in continuous running.
I agree with others, use the cutout as an opportunity to build depth in the layout. See the bridges I have on my layout as an example in the “hall of fame” section of the site. I also agree that the track should be on the table unless there’s a reason to elevate it. I see plenty of room for tracks, scenery and operation. Some thought for a elevated section and a double loop adds long train runs without the train coming back to the start for several minutes. Yep, there’s a lot that John can do in the space available.
John from Baltimore
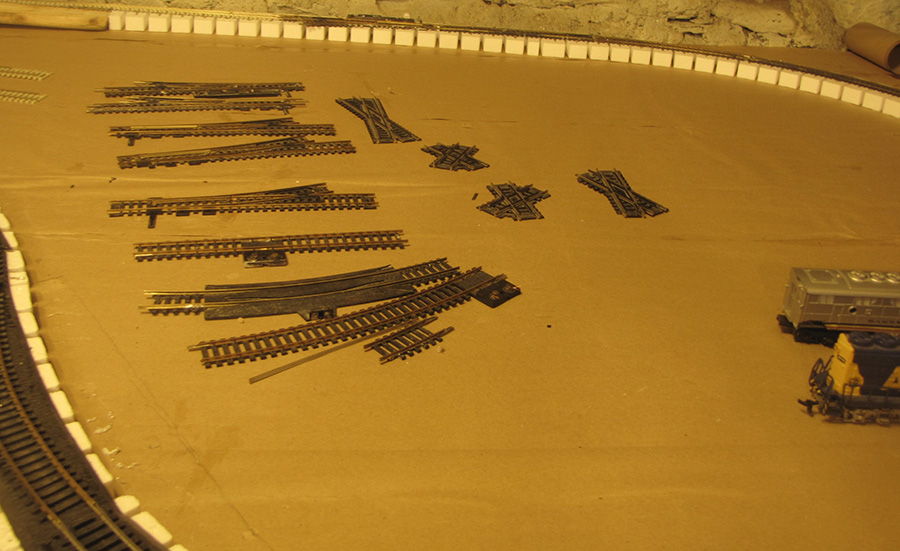
It appears that John is not fully committed to any particular layout at this point. The tracks are merely just laying there. It would be helpful if we knew what the size of the work area is and what he hopes to dedicate to the layout. The placement of doors and other obstructions in the room would help to define what we have to work with. John should, at this point, step back and let us know what he hopes to have as a layout and whether he would like it to be flat or with changes in altitude. There are too many loose ends right now to come to any conclusions.
Great job Dave really looks good
As suggested a figure of 8 would fit and serve the purpose ..continuous running ….Dangerous Dave
have the middle curve go back to the back wall, then get max radius on the left section (will look like a w). Create a rise on the outer curves up to one long bridge set or two smaller bridges over the mid section along back wall. After that I’d look to build some sidings in the left and right open space linking into the mainline using some curved turnouts (plan these in at the start and grab some to put in before you start pinning anything. I’d also get rid of the foam on the front track area, you don’t need it there.
You have no idea the trouble you will have ballasting that elevated track, trust me it is a nightmare. I have a short section on my “in progress” expansion and I wish I didnt. Also, dimensions would be nice as it looks like aing reach to the back for trackk cleaning.
I had the same problem when I started out which is why I switched to benchwork… benchwork adds a lot of opportunity for a variety of elevations that lend well to less space .. my layout now has many new features without losing features i wanted in the tabletop. I added a loop that takes the train through a tunnel below the original layout and brings it back out at the opposite end. Not only did that add the visual illusion of a bigger layout (longer travel time) but where I re-entered the opposite end I was in a position to add a small depot with a bypass. There are other features but the point is by adding the dimension of going vertical (up or down) I’ve probably doubled my layout. It started out 4×8 with one level and (before I expanded to my current maximum space allocation of 4×16) it went to 4×8 with three levels.My lowest point on the layout is 40″ and my highest is 45″, so it doesn’t take much to make a huge difference. I agree with a previous comment, lots of room for awesome bridging and rock cuts. Also, I devour every issue of Model Railroader and when I see a cool idea that might work on my layout, I don’t just admire it, I USE it!
If John is not heavy into HO, with locos and rolling stock, he might consider switching to N scale.
Make a figure eight in the shape of a double dog bone. That would allow more straight track for switching. If you need some elevation use it on the crossover.
Q
I’m trying to figure out why he has that odd gap in the middle there. By appearances from the photo he could lay a board in there to fill it in, or as someone suggested build a bridge over it. That is what throws out his curve in the rear area. But if that is a door that one walks through to get in then he is kind of stuck and I would look to another design. Make templates of the track and you can lay stuff out and re-arrange it easier. I took several pieces of curve laid them on my copier and copied….did the same for the 9 inch straight and the assortment of smaller straight. also did a left and right turnout on one. after that i used those copies to print out several sheets of each on a thin card stock. cut them out and you have an easy life size template that you can easily move about. A lot easier then connecting and reconnecting pieces of track and bending up the connectors and putting finger smudges on track that may impede smooth travel in future
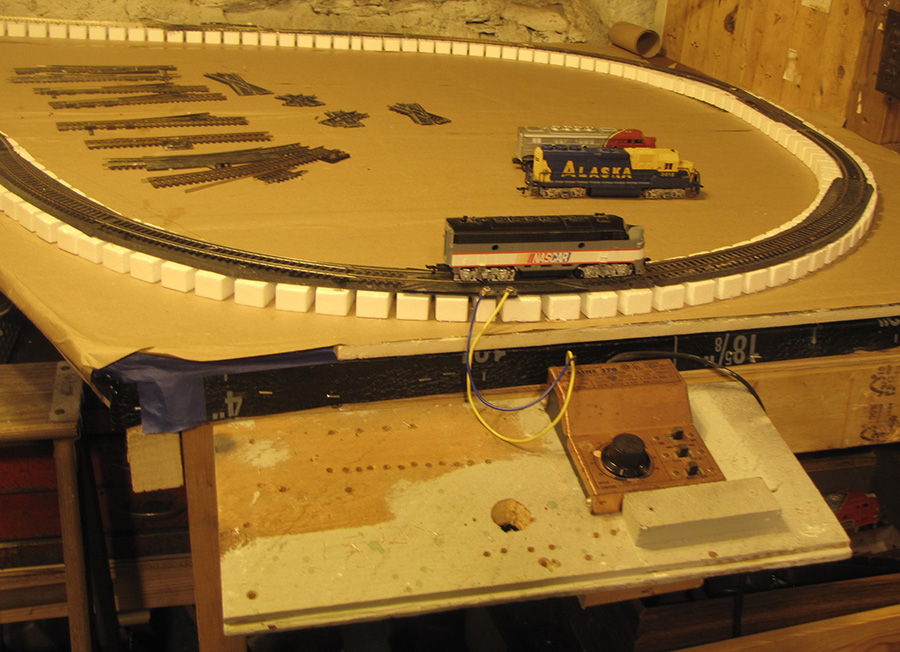
I would suggest to fill in the bench work where the s curve is. Run a couple of mains around the layout with left and right switches to go from one track to another. The shape of the mains would run around the edge of the layout. Then work inward from there with outer lines. I’m thinking that the blocks are just for temporary layout design. A softer table base on top of the plywood like homasote wound be better. Then use roadbed under track. Track nails go in so easy with a push tool. The s curve design doesn’t work on this layout. Radius’s will work if you do a slight redesign.
Good luck. It is a fun hobby. Just try to make it easy to put track down. Straight edge all of the track runs when you can. Your Loco’s and rolling stock will love it..
Just like in the real world- you have to have alot of real estate to have a railroad. Getting close to 55 yrs in the hobby which started with a piece of plywood that slid under the bed. Now I am building a 40ft x 40ft building for my collection and not all too sure if that is gonna be enough. Never say never. View some track plans on line and see if something looks like it will work and go from there.
John
I be a similar problem
I am pro with O gauge and had a 11/12 room. My solution was add a second level . So I have 4 now and a helix as the second connection the base 30” and the 44”inch level we are with the real world when we will U.N. out of space
Used the upper level for the 72” diameter scale track and added a second loop just for fun last year
Helix, reverse loop, second level? There are many possibilities but it might just be time to walk away for awhile and put the thinking cap on. Walking away from a problem for some time to think has always worked for me.
From the looks of the track being used, it is just off the shelf pieces. I would suggest using flex track to allow for smaller radius. However, be sure not to exceed the minimum radius required for the engines.
I remember my first layout it was a joke.liked to have never gotten a track pattern I could live with. Went through several different ways to run track
My suggestion is this Decide just what you want the layout to be
Like maybe a countryside setting or a cityscape get yourself an idea of any mountains and tunnels bridges and roads I put down masking tape and label the placement of different buildings and features then I lay down my track to fit the tape that way I can make any adjustments to the placement of the tape nearest the tracks
Once everything close to the tracks in place I start filling in the rest of the scenery
Seems complicated but as a beginner this works best for me GOOD LUCK
A lot of good suggestions, here. Why not just use the risers coming up to the center of a figure 8 with one crossing under the other. Hopefully, the risers are not glued down, yet. Stickpins first then glue at the end. Otherwise, rip them out, smooth out the surface and start over. Also, I think I see some switches on the table. If they are used don’t have them anywhere near the risers.
Switches have to be on a completely flat surface to work properly (voice of experience speaking).
Mike
The same solution I am using, buy a lottery ticket and wait for a winner.
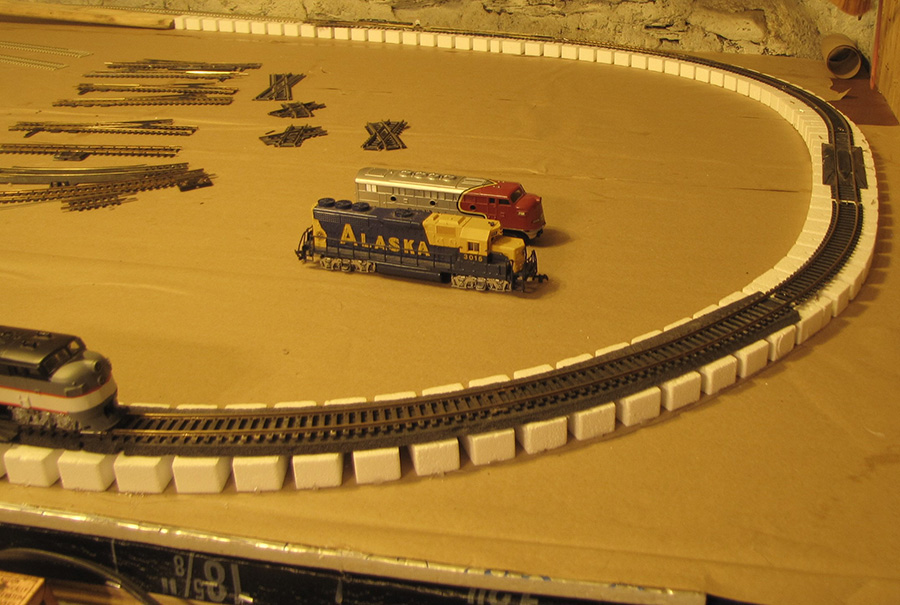
First let me say I noticed the two locomotives — Alaska RR and Santa Fe, two of my personal favorites. I agree with the others about bridging the gap to get rid of that serpentine curve and give more space in the middle for yards, etc. Another possibility is to go a little bit vertical — make the stretch in the back a tunnel run through a long mountain range, which allows for an additional run of track on top. Just be sure to put access holes through the table under the tunnel — kind of hard to deal with “in tunnel” issues if the only access is via the end portals. Of course (and this may not be an acceptable solution for John), last time I had to deal with serious space limitations, I switched to N scale (and I’ve never gone back).
I find it hard to understand why there are so many blind suggestions without finding out what John wants to achieve and how healthy his budget is. There is no info regarding the size of the room or if there are certain considerations that effect placement of the layout and access to areas for maintenance. We should all wait to hear from John in regard to the above. I suggested to Al that I wish he would put a notice on the site to refer back to previous blogs that you commented to and see if there are replies to your comment that you should answer.
This is inline with the mountain idea.
Mount some shelves on the wall and run
Some track on there with loops at each end.
Also, add a second level or partial second level.
Suspend another 4×8 sheet of plywood from the ceiling. Use pullies to raise and lower it as desired.
Another twist on the shelf idea is to use zig zag pattern to rise up different shelves and then have a “look out” at the top overlooking your layout.
Add a second tier,you can always go UP if you can’t go OUT
John: Why is all that track sitting on what appears to be the same level of Woodland Scenics foam roadbed? As suggested before that will be a nightmare to landscape. The only time that should be used is to create an elevation change. Also, that gap in the platform should be closed or bridged to create more room for track curving. By putting most of the track on the platform you will get more opportunity to create sidings and other trackage for moving around a small city or industrial area. Suggest sketching out possibilities on paper before trying to lay track, etc.
Ray Z USA
Hi John,
Depending how much hight you have, Build additional track bed on eleivated levels. You can use a sprial track bed arrangement with switching track to allow train to access the next level. You can just build independent levels. You can enter switch tack to a tunnell and travel up one elevation or down one elevation. You may be able to use a verticle lifting bridge to go up evelation.. You could even rig the bridge with pulleys and fishing line or steel wire to rais the bridge. Just think out going up. you must have head space, You can just build elevated track with the equivalent of tressels you fabricate from wood.
I agree with the commenter that asked ‘What does John want’. There is power in those words. John has a lot of real estate yet and a number of switches and crossovers he can use.
John what are your interests?? You’ve gotten a lot of great suggestions but what makes you smile when you think of your layout and what you want to do?
I think the only real message for John must be — learn to take the time to plan.
This reminds me of the pictures I saw posted here, a year or so ago. The modeler hadn’t even proofed his design with the test running of a single engine, and he was already half-way through the scenic and structure building phase. His entire operating system was build around an 18 percent gradient !!! There is no locomotive made (outside of the Fleischmann rack-and-pinion cog system) that can handle anything more than 4% grades with a short train. In other words, his entire layout turned into a disaster, due to lack of planning and research. Model railroading isn’t only about running your trains. With that mentality, it’s best to wait until you take out the Xmas tree to set things up. Research, baby!
My thing is, if you run out of room, go vertical. Build a second level to go on to, and come down. The suggestions about bridges is good, but take it one step further, go to a second level.
It is almost never to late with planning tools. I wanted to go nuts in N scale with 36″x120″ to work with. First step was to think 3D, Then two 3D layouts mashed up but not connected. Then left and right exits along with pass thru and access from the pass thru. This was fun until I could not visualize what was going on. Sooo spent 5 years with AnyRail and a good psychologist. No matter what you do, it is great to go a little nuts.
figure eight simple
I have an HO layout in our garage that I converted by epoxying the floor, painting the walls and ceiling, and adding a mini-split so I could stay out there summer and winter. My tables are freestanding ( not against the walls and the layout is approximately 11×13 feet my problem (challenge) is that I need an opening so we can access the attic. 2” foam on .5 plywood.
For Johns space problem. I suggest studying the legendary John Allen’s Gorre & Daphetid original plan. It was expanded later, but he started with getting quite a bit into a small space.
Looks good and it takes time for perfection
i an figuring an over under figure 8 will work out. get a copy of 1 of the rail planning software and do a trial and error on the computer