David has been in touch again, and he has very kindly taken the trouble to answer your questions on his HO scale elevated train track.
If you want to get up to speed, and see his first post, it’s here.
“Hi Alastair,
Thanks again for your blogs and also to those that sent me such kind comments.
I notice that there were quite a few questions, so will attempt to answer some of them here.
I have included some more pics which may assist with the below explanations.
“KARRAWIDGEE” uses Peco code 100 set track points ( turnouts ), some set track pre-formed pieces and flexi track.
The layout splits lengthwise down the middle and runs along front side of loco shed which created some problems with joins to get track into loco shed on back half.
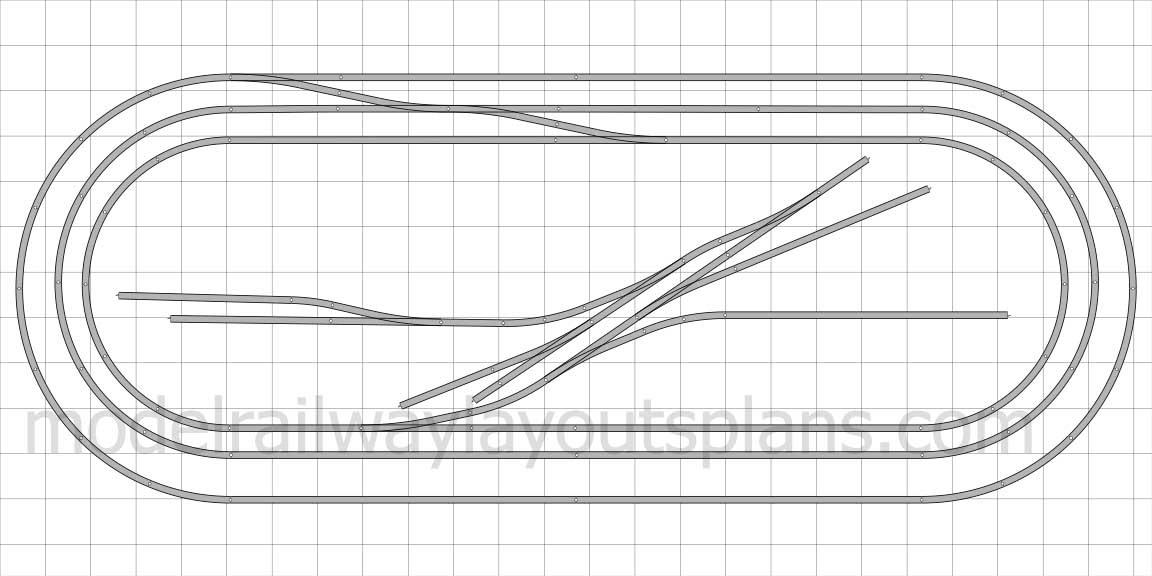
The track plan just evolved. Initially I had one outer oval, then played until eventually it all fitted inside the first oval.
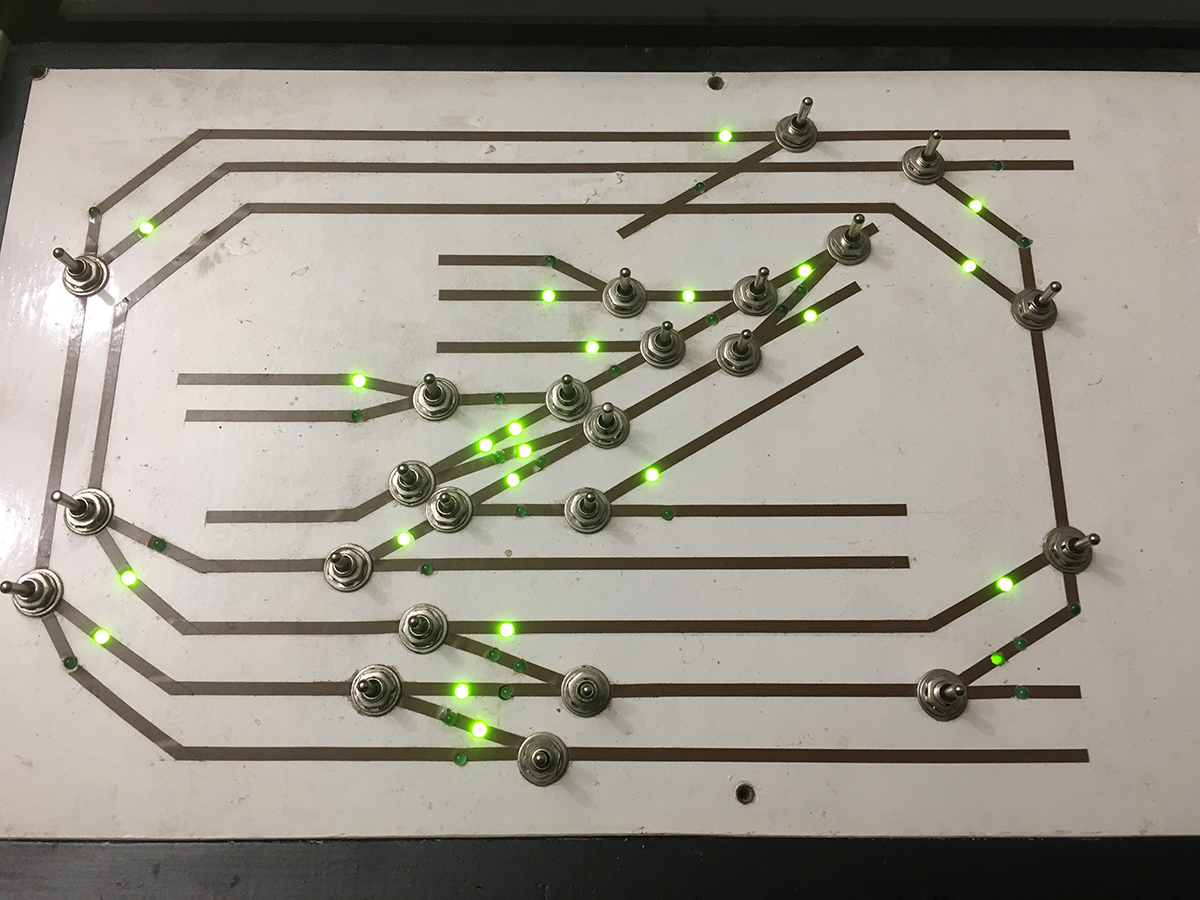
The smallest radii ( curves) I used was #2, 438mm. I was amazed at how many configurations would have worked. See photo of control panel for track plan.
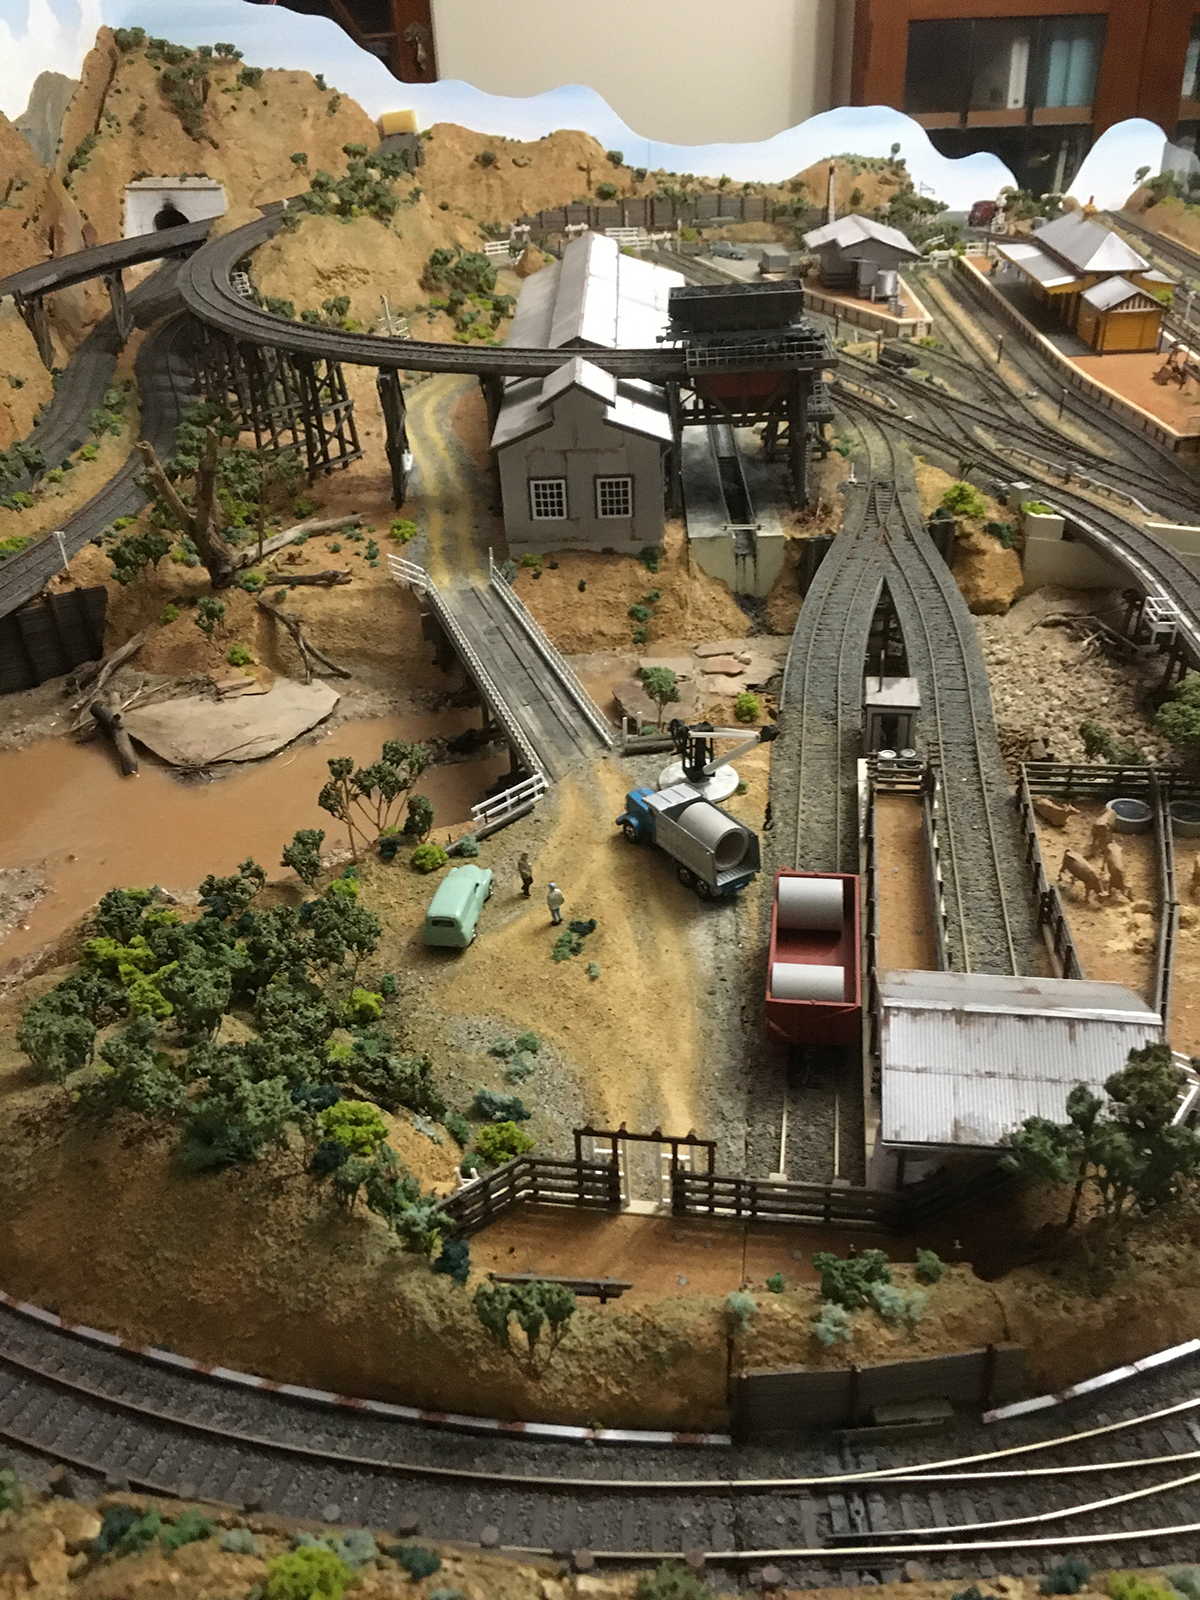
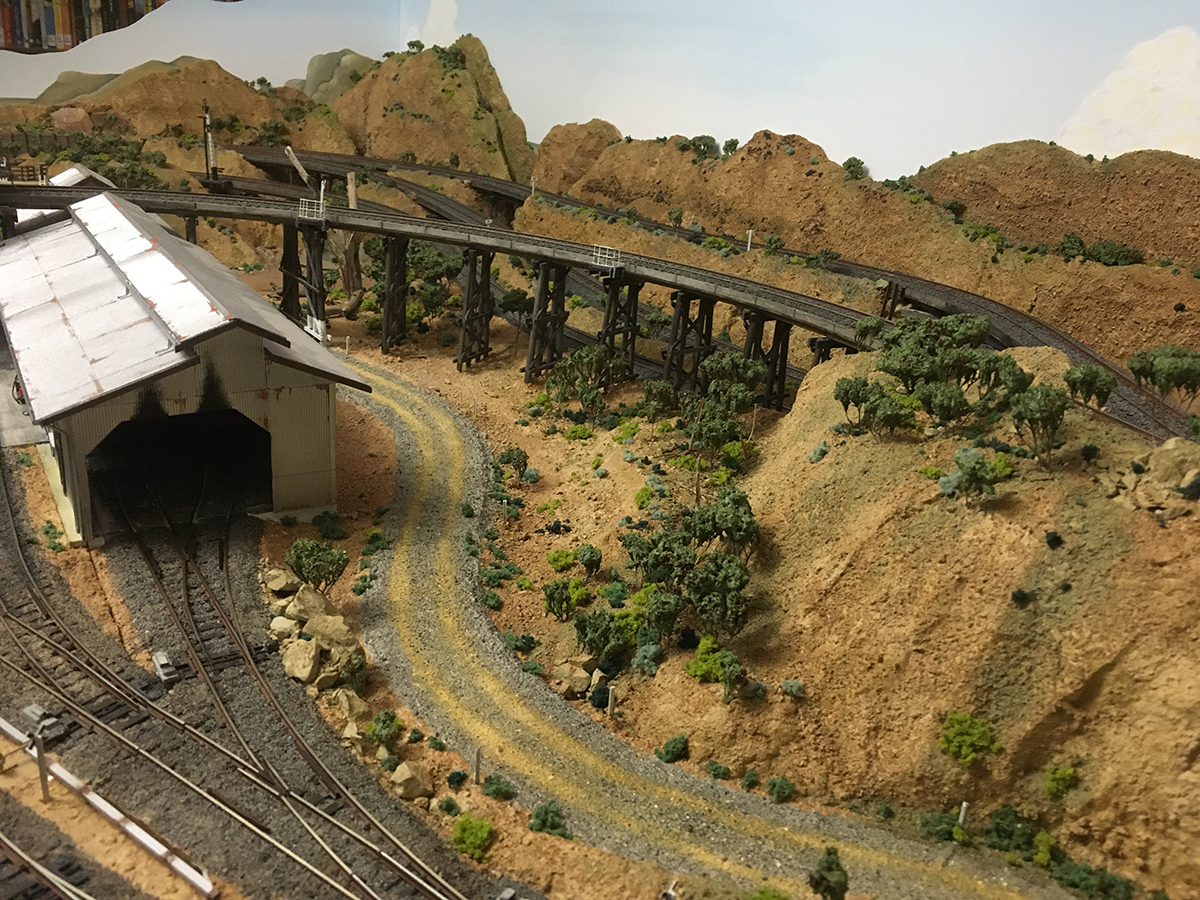
I was determined to have an elevated coaling facility and the result over loco shed was the result, as nothing else would work, no room below. That’s how I ended up with my HO scale elevated train track.
The 4 dead ends on the right hand side are intentional, designed for further expansion of the layout. Because “KARRAWIDGEE” occupies the space needed for the next layout it had to moved on and the new owner will use those dead ends to connect to his other larger layout.
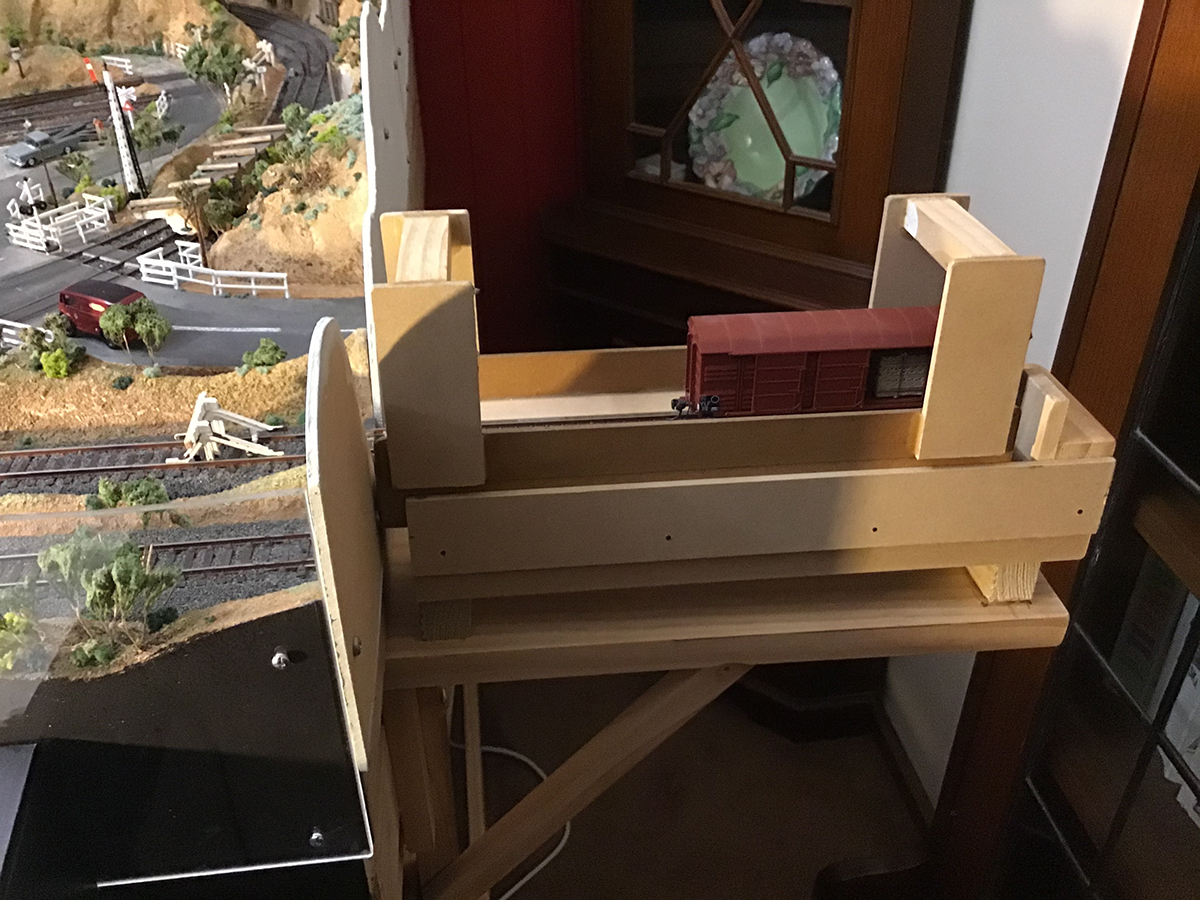
Because I could not fit a turntable on the layout, one track on the right was used to provide loco turning and transport to programming track via a “loco lift”
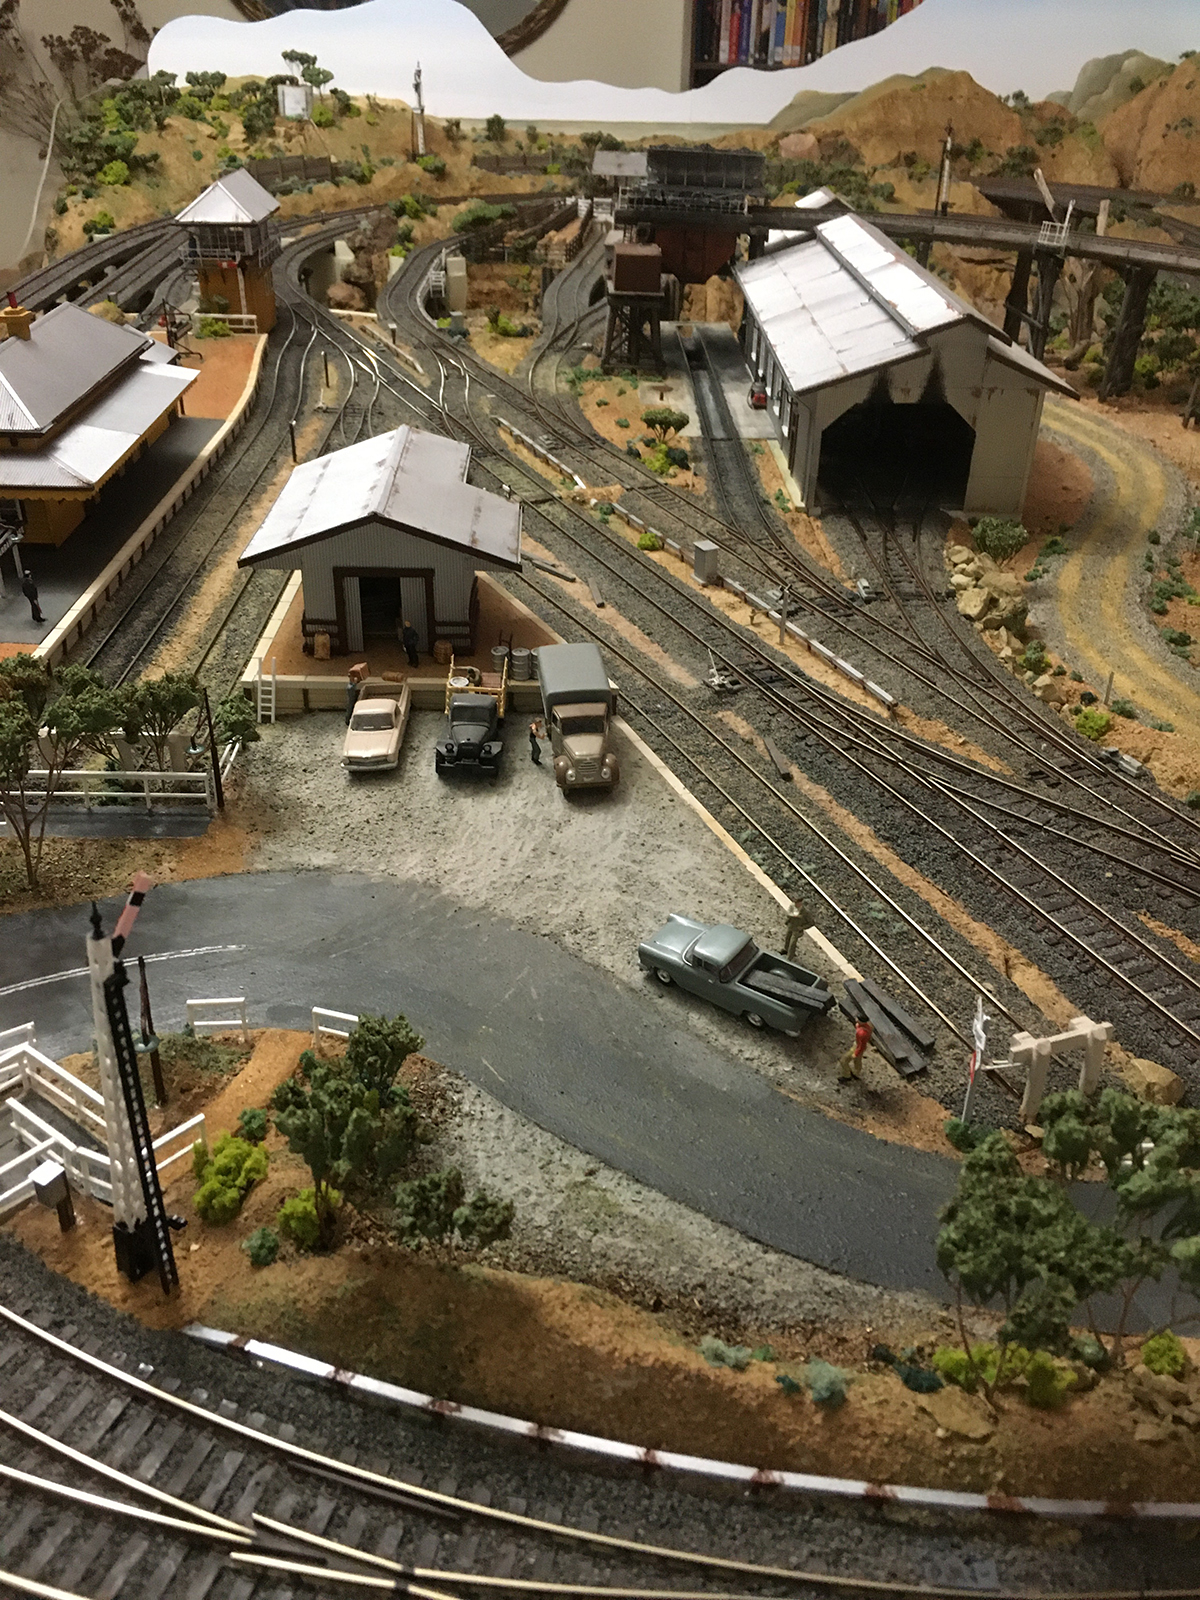
The back dead end in tunnel I used as a loco shed to store a loco out of dust. Wig-wags flash and sound is genuine 1950s bells.
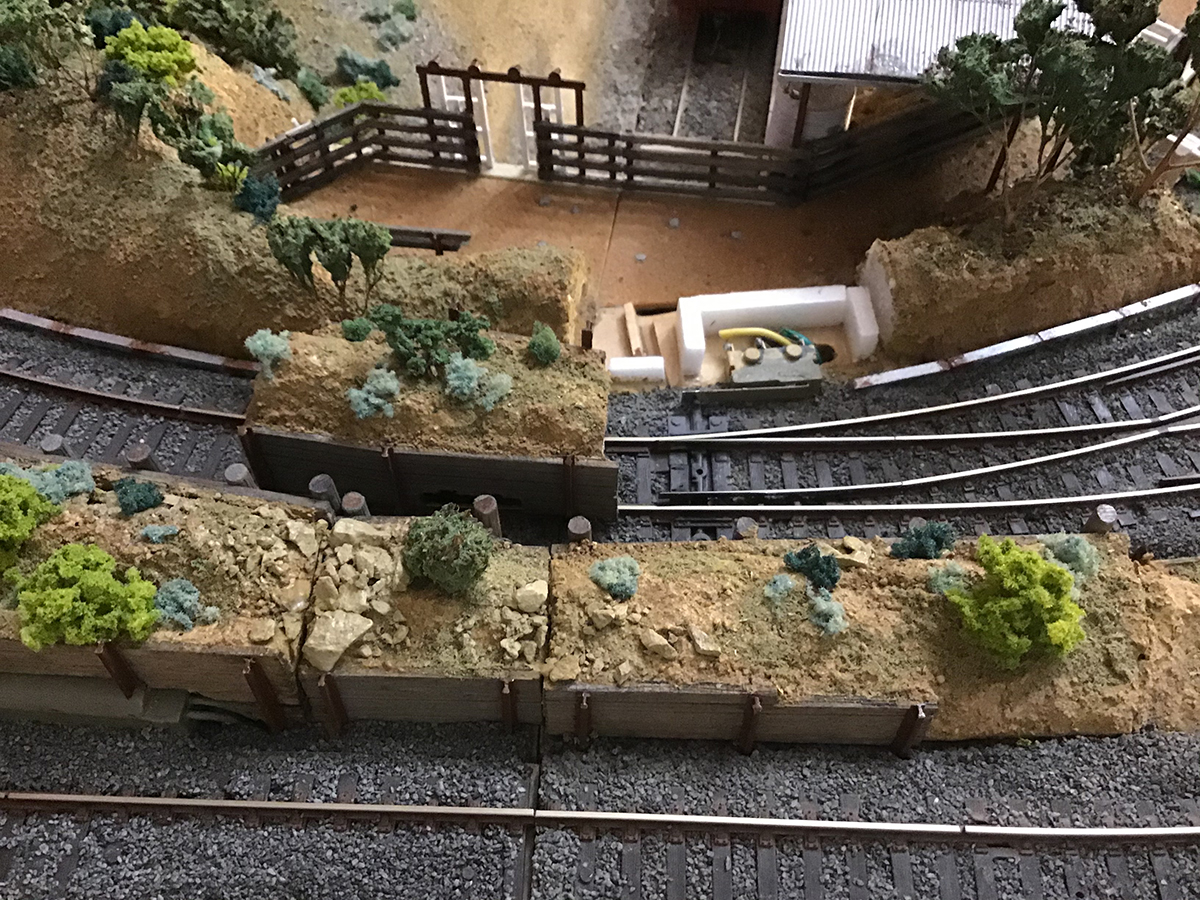
The white fencing at the pedestrian track crossing is how any Victorian Railways uncontrolled crossing is designed and this is still in use today but made from galvanised iron not timber. You cannot go straight ahead onto track but must deviate left or right and return to cross track.
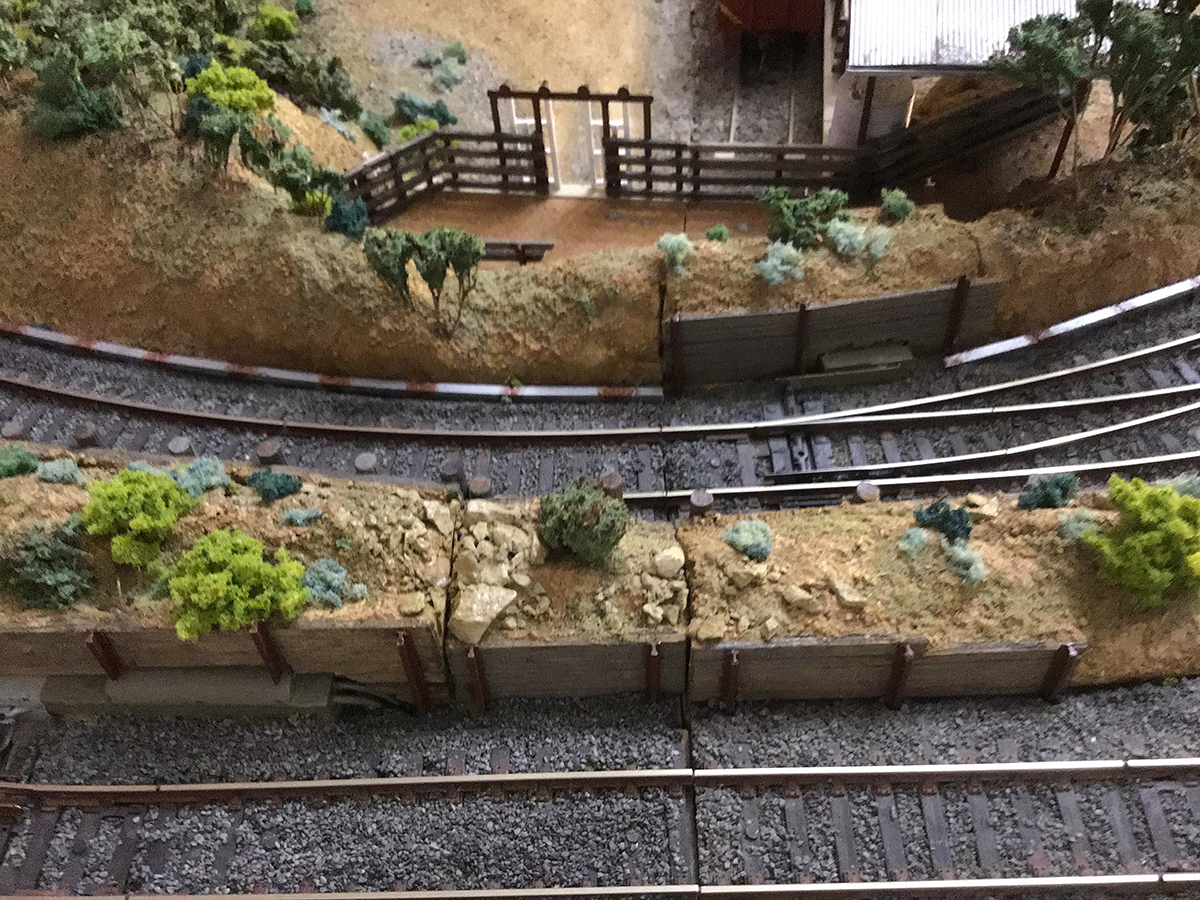
The track work is all ballasted including the bridges, faithful to the Victorian Railways method of bridge building.
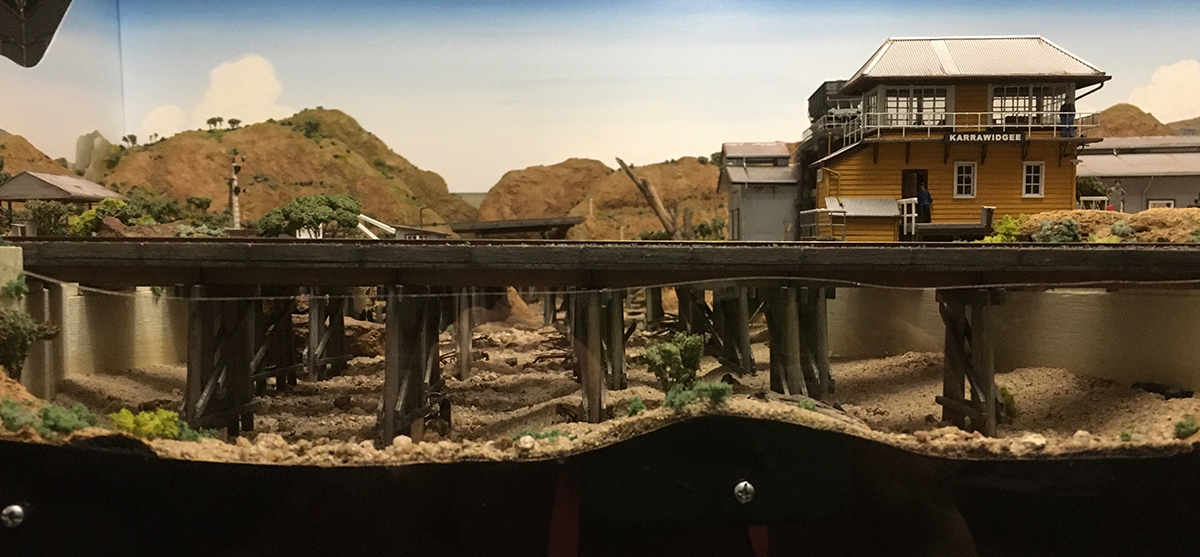
They decked the top of the timber trestles with side boards and then laid the sleepers ( ties) on the deck, then ballasted. Other states in Australia did not use this method.
All the electrical components are hidden, if possible, the signal box and timber platform extension are hiding switches.
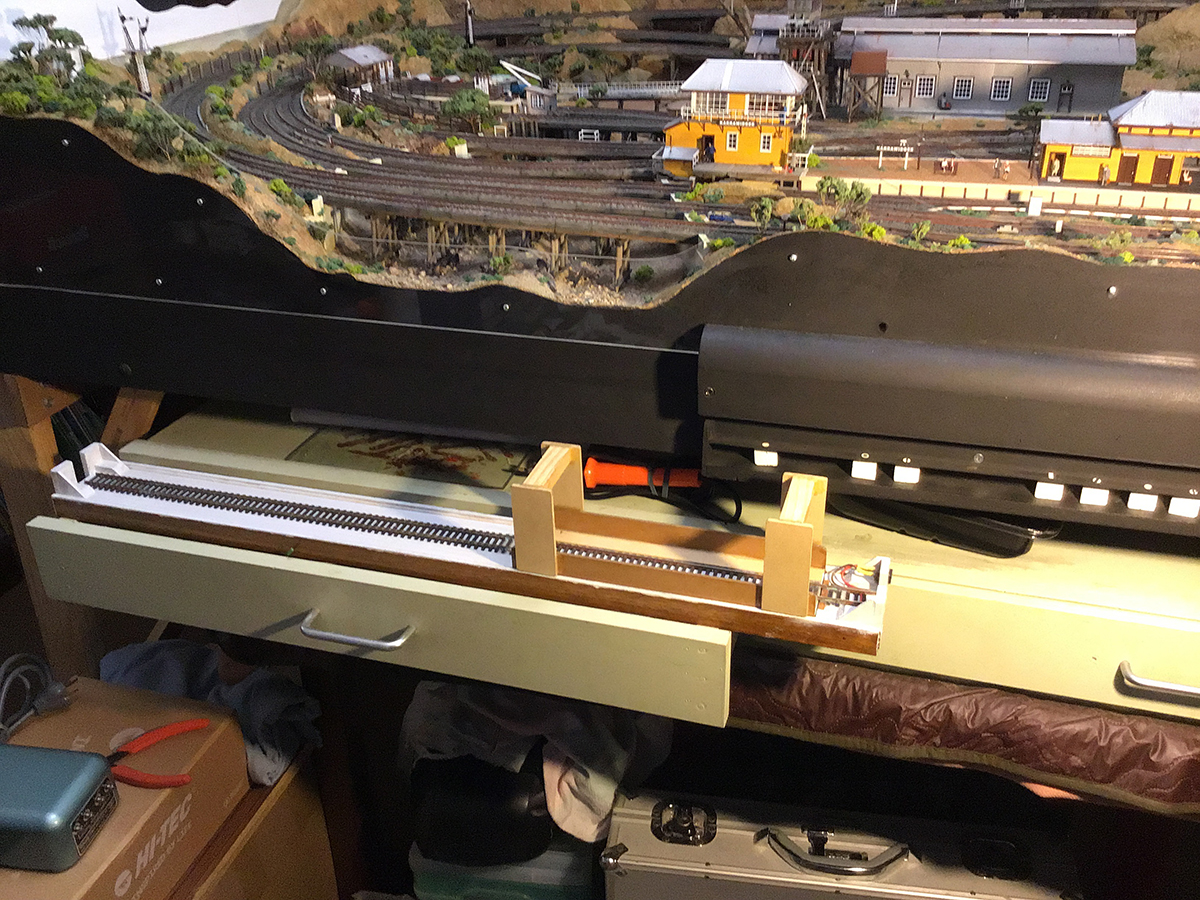
The photos show the method I chose to gain access, if needed,
by having lift out panels.
The backdrop lifts off if needed and the sides and front (clear acrylic ) are what I call” anti -damage barriers” as I have found it so easy to do damage when leaning over the sides. I have knocked the signals repeatedly.
My signals are now held in place by drilling up through the baseplate and another matching hole in the ground into which is inserted a piece of bus wire and signal inserted on top.
This gives a loose fitting which moves if knocked and has so far served me well, as against a rigidly glued item.
The vegetation was all individually planted and colored out in natural daylight with acrylic paint.
The trees are made from the CEDUM plant which bears a strong resemblance to our Eucalyptus trees.
The shrubs, bushes and groundcover all vitamised foam rubber. The terrain is white styrene packaging foam, usually got for free (see lift out panel photo ) smeared in Gapfiller, hot wire cut, shaped etc.
I do lots of experimentation with techniques and materials.
The loco shed is the only building illuminated so you can watch to park your locos on the 2 roads.
I hope this may have answered some of your questions.
Cheers,
David”


A huge thanks to David for sharing his HO scale elevated train track – it really is fab not just seeing a layout like this, but also knowing how it came about.
Hope you enjoyed it as much as me. It reminded me of Wayne’s: Elevated model train track.
That’s all for this time folks.
Please do keep ’em coming.
And if today is the day you grab the bull by the horns, the Beginner’s Guide is here.
Best
Al
PS More HO scale train layouts here if that’s your thing.
Need buildings for your layout? Have a look at the Silly Discount bundle.

Dave thanks for the update. Your layout is exceptional. The attention to detail is outstanding. The quality and tone of the surfaces in particular the ground cover is again exceptional. Keep the coming please.
Well Dave Guess you covered everything,Great job sir!
The Critic
I like the look and the FEEL the layout gives you. Hard to imagine that you were able to have so much in such a small layout. Very nice.
Excellent information! Thanks for sharing!
Love it! Very creative.
Well Done Great Layout.
Dave a wonderful layout, it is so well done.Ilooked at the pictures again and again. THANKS Dave for you information on. You great layout.
Very clever coaling “tower”. Nice attention to detail.
I have wondered what could be done to turn passenger trains on a point to point layout. Your idea to turn your engines has given me the idea of a movable siding. It could turn 3 or 4 at a time. Being longer it might be on wheels.
Great job on the scenery, great realism, with the grime and grit of an industrial setting. Inspiring, thank you
Good job “not seeing the layout”.
Looks Great!!! It is great to see the Level of Detail you achieved in Building this. Thank you for Sharing.
Awesome!! exceptional lay out. Gave me great how to ideas
Hi Don Kadunc,
A few people here in Australia that have end to end layouts use a turntable that takes small train loads on one end with 3 or so tracks. You can also use a “transverser”, that is, have your tracks parallell to each other and made so you can slide the trackwork back and forth across your layout to select the load you want.
You could still have a “loco lift” for locos and Guards vans (Cabooses) to transfer to head and end of the train leaving back onto layout.
Hope that helps, these ideas are not mine, but gleaned over the years.
Cheers, David De
Hi I have 2 ho trains I set up for the holiday’s. Every year the same problem I’m having now. One working fine other not nothing but problems. Inner good outer it runs good half way other half it slows down. Now I gotta a brand new engine with same problem. But also the plate form made out of wood is 40 years old and it is warped. And not leveled right. I have it leveled the best I can do. Could it be Plat form problems. Also the track is an easy track layout.
Liked the tones of the soil.It all looks real to me as I’m from Victoria Aus.All layout is very good and clean looking
One of the best layouts I have seen, must be a candidate for the Hall of Fame.
Andrew In Oz
What a delightful layout . Great detail and scenes . Very true to life aspects and great ideas . Thanks for sharing you work and ideas … very helpful to see these different concepts for those of us that are novices . I Really enjoy your layout , very pleasant and easy on the eyes .
Very nice layout with excellent scenery and interesting track configuration. Great work David
Love those muted colours. I might not even run trains here… just spend my time looking! Fabulous layout!
Well done!
Great scenery with awesome colors and blended backgrounds. Some great modeling skills on this layout. Your photos and lighting make it look lifelike with great detail.
Jim AZ