John’s been in touch with How to build a model train helix without the pain and anguish that usually follows:
“hey Alistair
howzit goin man…greetings from the Left Coast of the United States…
Mark StJohn Jones here from Long Beach Calif…
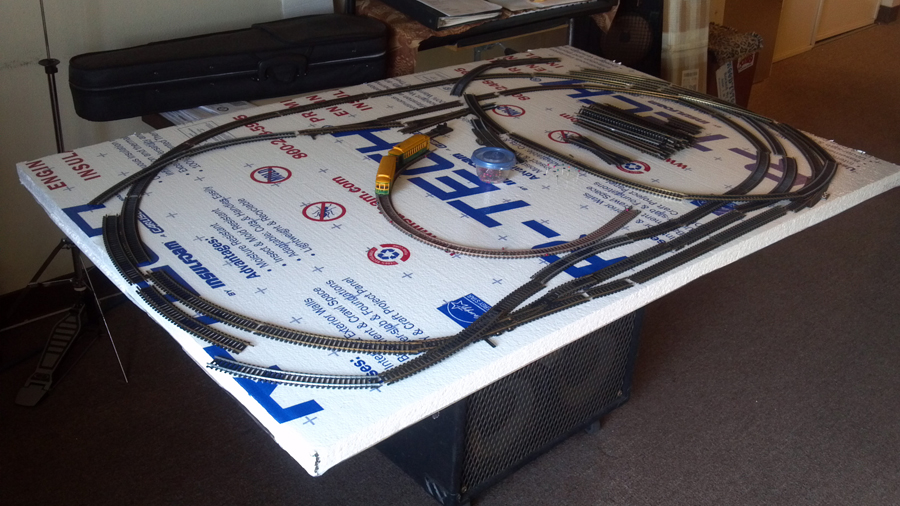
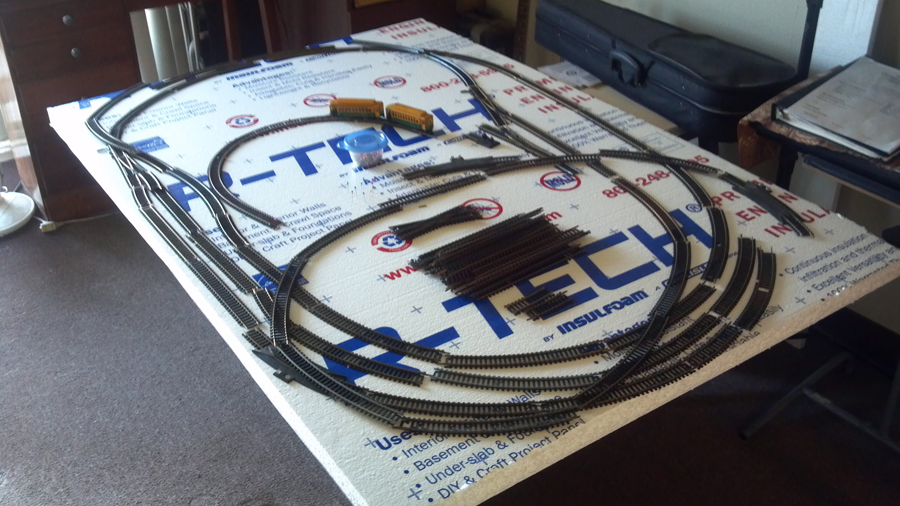
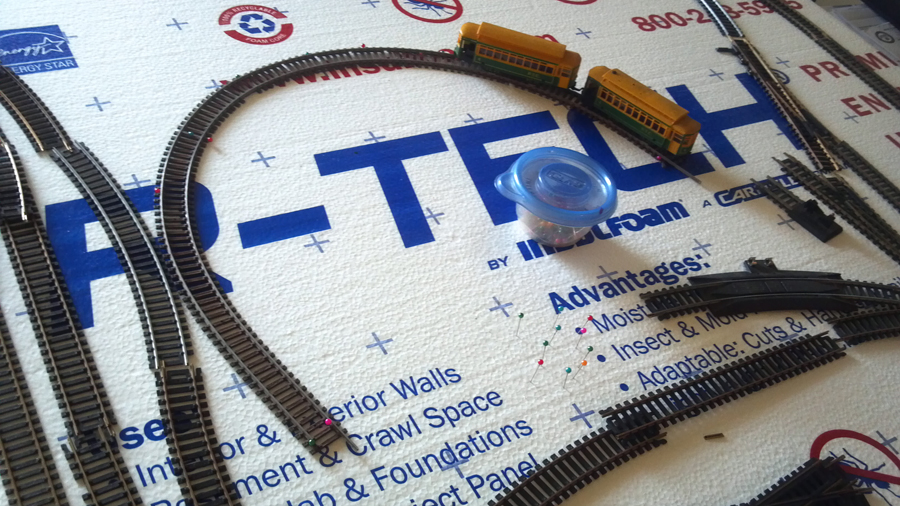
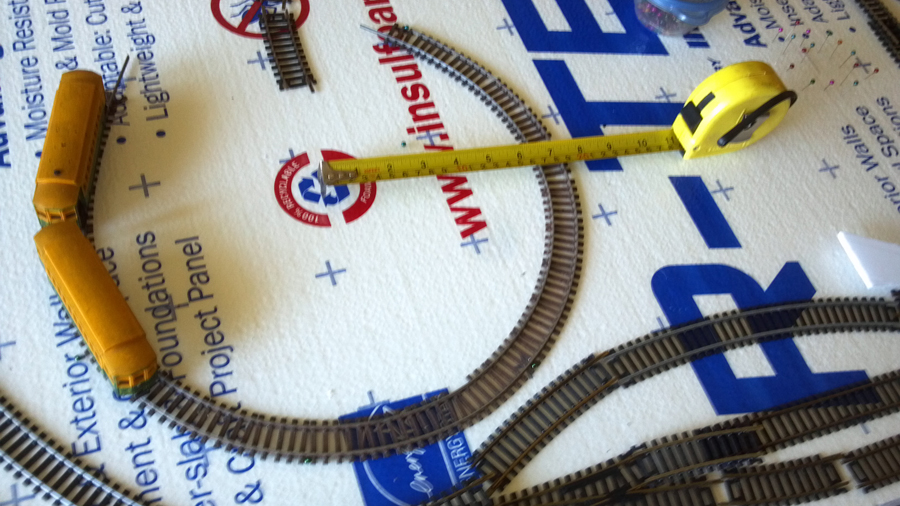
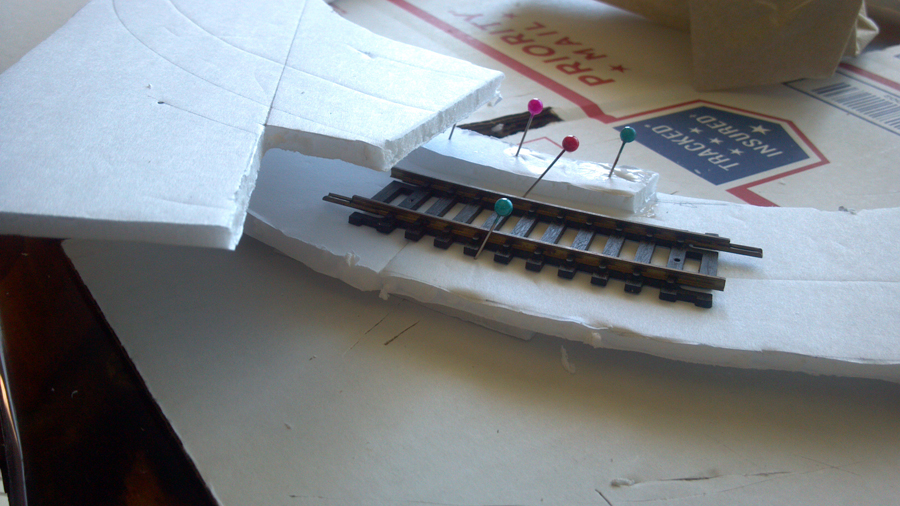
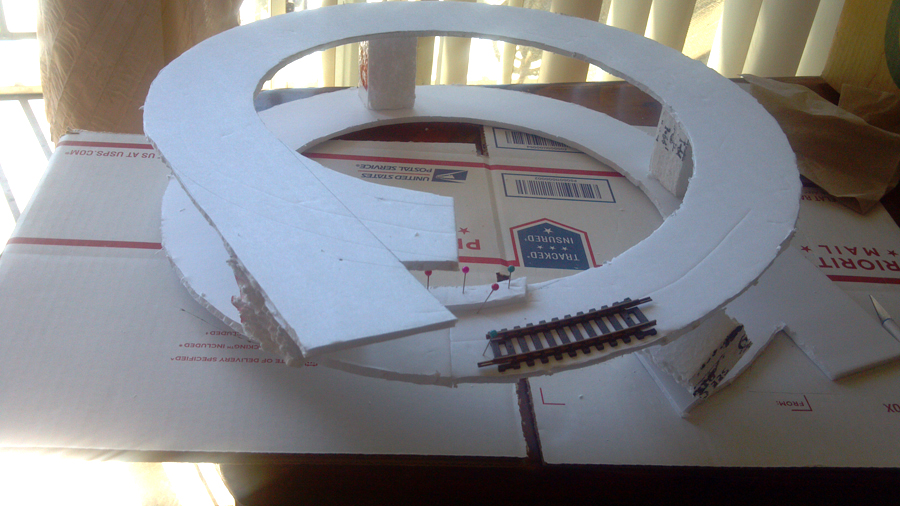
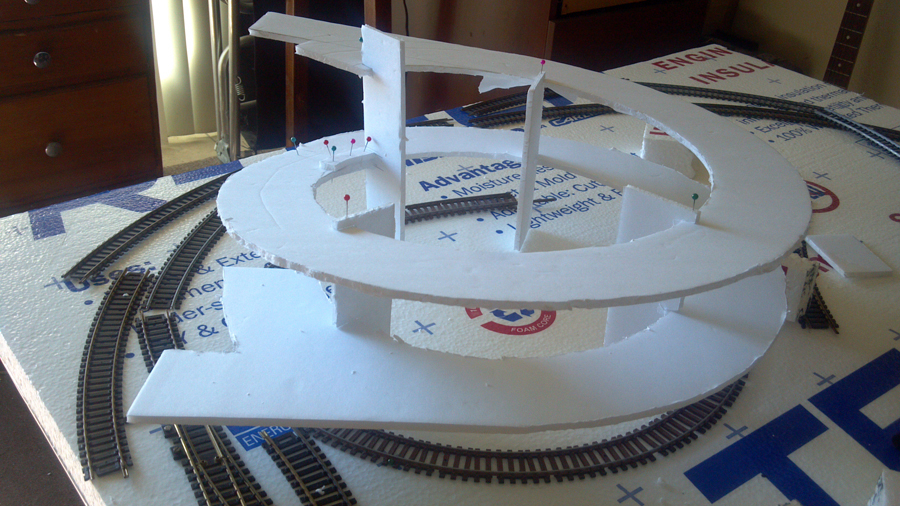
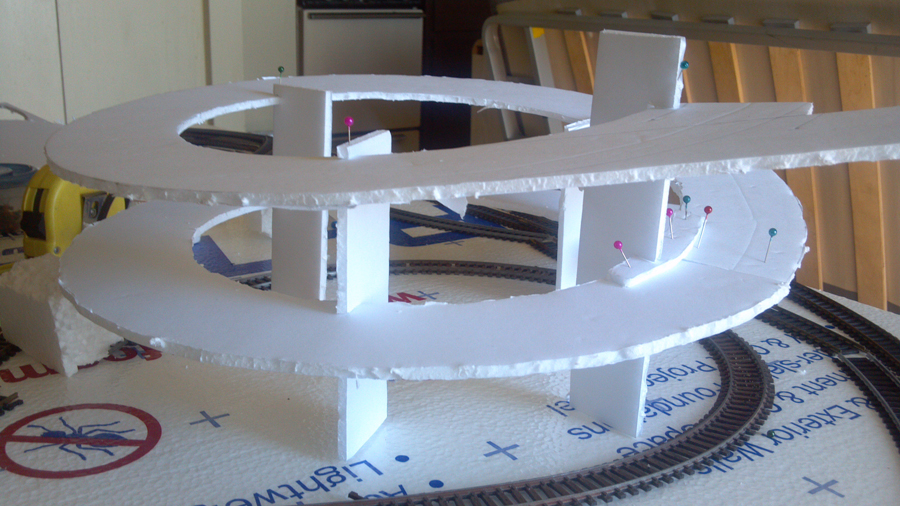
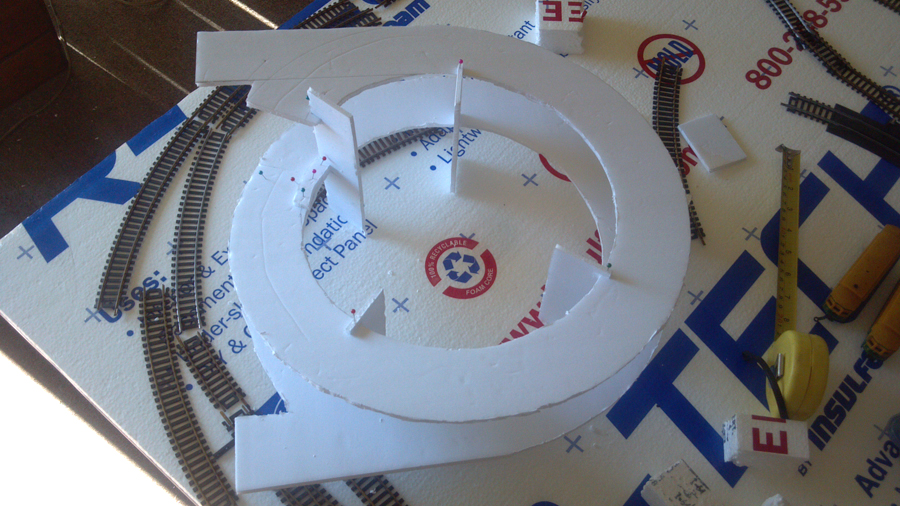
here’s some pics of my ‘prototype track laydown’ and the FIRST elipse I’ve ever tried to construct
its just a prototype model I’m “engineering” ….lol
it’s all HO gauge and the ‘proto’ elipse only has an 8 inch radius and way too tight for much of anything except small stuff, it’s just a ‘model’ for study….
just testing my engineering skills and playing with it
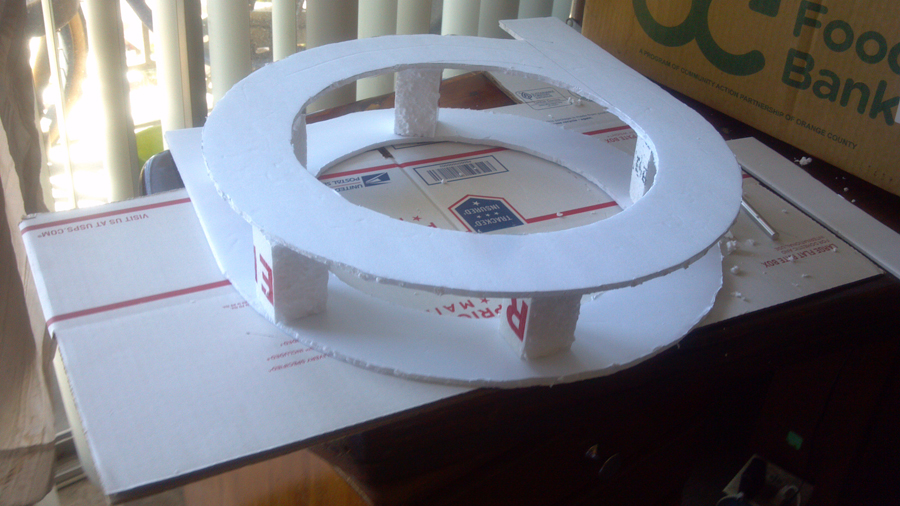
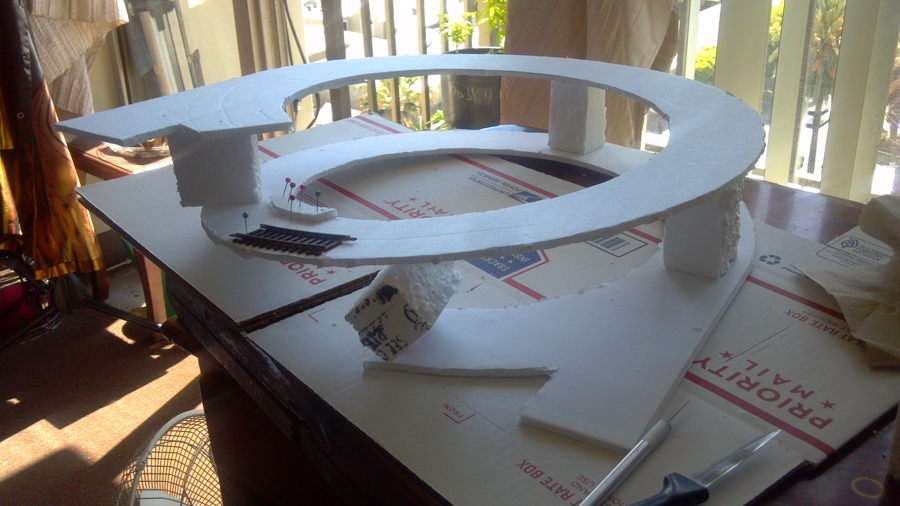
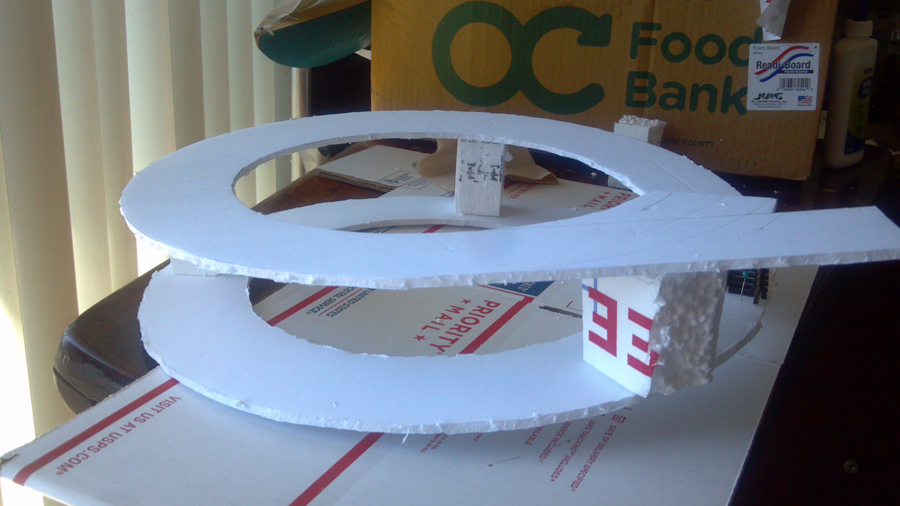
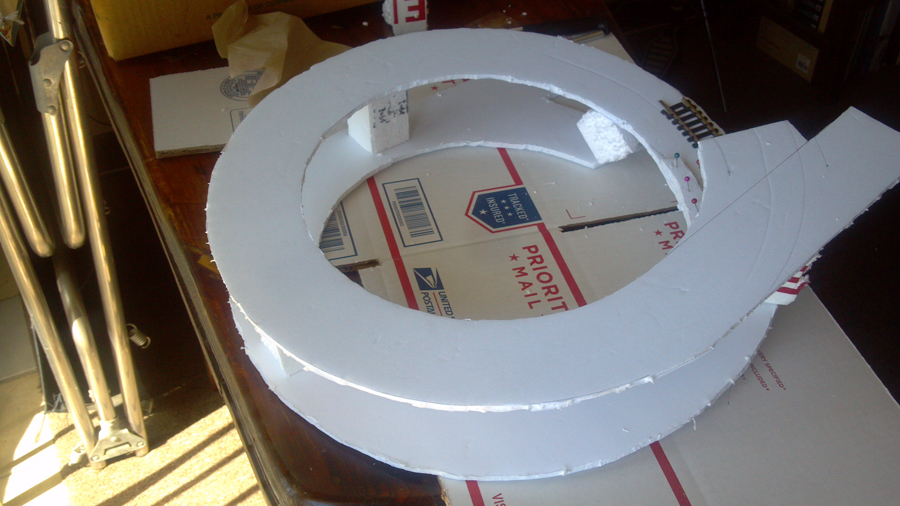
the actual Elipse for my layout will have a 10 in radius (still kinda tight) but when you see my 48in X 60in layout you’ll see why it’s all so ‘tight’
I reside in a large studio apt and don’t have a lotta room to spread out like Dangerous Dave so I have to ‘Stack ’em Up”
with that kind of room It has to be three levels tall and I have to make it tight
it will have a ‘turn of the 20th century look’ when I finish
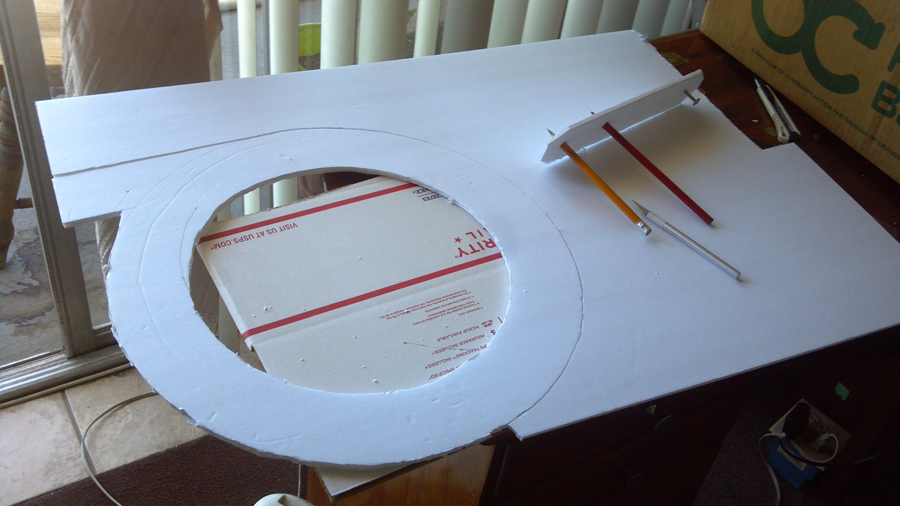
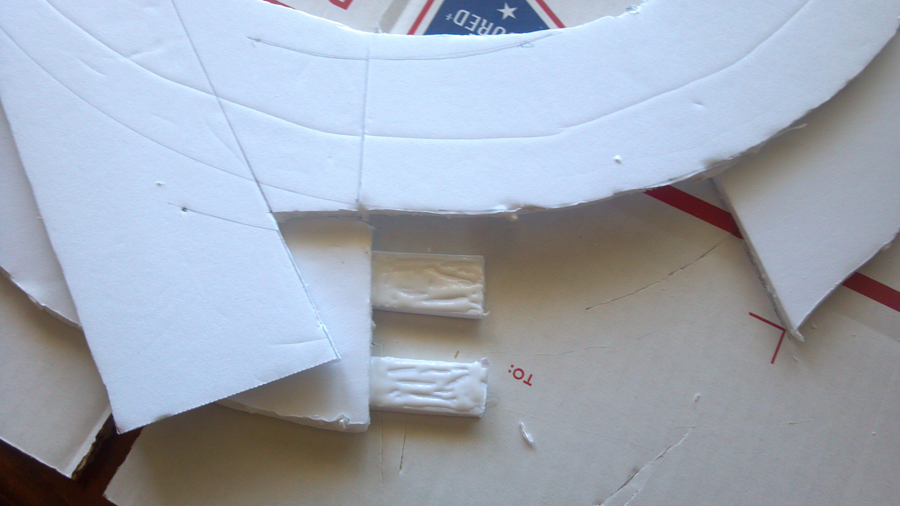
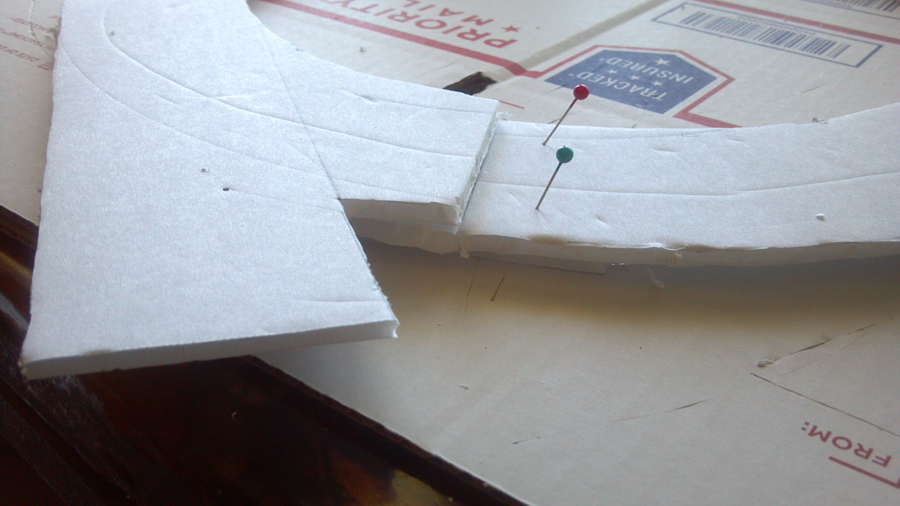
I’m also utilizing a ‘self-engineered’ version of the Woodland Scenics styrofoam risers, roadbed and technics..
never thought the difference between building with wood and styro could be so much fun……
more to come as I continue my build ….
your column rocks Al….keep up the good work
cheers
StJohn in Long Beach Calif”
A huge thanks to John for showing us how to build a model train helix the easy way – I do love seeing what you are all tinkering with, and your different ways and methods.
Looking forward to seeing how this progresses.
That’s all for today folks.
Please do keep ’em coming.
And if today is the day you get started on your layout, the Beginner’s Guide is here.
Best
Al
PS Latest ebay cheat sheet is here.
PPS More HO scale train layouts here if that’s your thing.


What is the slope on that going to be??? Even at 10″ radius, I imagine it will be rather extreme.
I think you are constructing a “helix”, not an elipse.
I think John means an HELIX rather than an ELIPSE.
It is worth a look at “The worlds biggest little railway” to see a massive track helix. It is in part 4 from memory. The design and method of construction is very interesting. Worth a watch if you can find it.
Not being picky but you have an oval there, an ellipse has no straight lines in it, comprising a varying radius from the long axis to the short axis usually drawn using a pencil in a loop of string across two centre points.
Hi StJohn
That is sure one tight helix.,
Tramcars and short wheelbase models should be able to climb that.
I find if if allow for the tightest curve for the wheelbase and a 1:30 rise the load pulling power is about halved. I have not made a full helix and my tram layout with the tight radius is level as I was not game enough to combine the two.
I’m curious as to how the helix, oval, elipse performs over time being made of such lightweight materials. If it is reliable, that will be a huge weight saving! Best wishes for a happy ending!
I think this should be called an extreme helix, will need a lot of pulling power to use and one going down will fly, don’t look like 2%.
Eric (Leeds) UK
Greeting from Upstate New York!
I think that looks very cool! Obviously 3/4″ Ply won’t bend the way you need. I’ve done something similar with 1/4″ Luan. It will make the bend up. Once you’re satisfied, start laminating the Luan. I used a stack of three pieces, staggering the joints. All glued with PL400 construction adhesive, clamped and screwed top and bottom using 5/8″ drywall screws. The neat thing about using Luan is, it’s easy to move. Take out the pillars, it will collapse down on itself, for an easy move. Pull it back up, insert the pillars and there you are!
Something to consider: The radius of the helix governs more than the space it takes up on your layout, it also controls (or should I say increases) the grade required for each circle. Because you have to fit the consist under the next level and provide some forgiveness headroom, tight loops dramatically increase grade.
I built a two-level helix in n-scale and in order to preserve a grade of 2% with good overhead clearance, I needed a 20″ radius. Your grade in HO on a 10″ circle must be enormous because the clearance needed is double and the track length is Pi times the diameter” (so 31.5″ to rise the height of the train vs. my 63″) needed to rise half as high. Is this a cog railway?
Am really waiting to see your amazing results John ~ so please keep the updates flowing. Thanks for sharing.
You’d be surprised what will bend, I made a gradient in chipboard by slicing down both sides with a jigsaw and just gradually tapping in risers across the resulting slot under the rising section. What’s Luan please, never heard the term before?
Rod
Good layout for a tandem trolley set lol
What is the grade on that curve? It looks like 12% or more? I can’t imagine
a low-geared engine managing that ascent, even with only one trailer-car in tow. This looks like it would require a rack-and-pinion track system, like Fleischmann offers in N-scale. Have you actually done a successful equipment test yet?
I’ve used the paper backed foam board on a part on my layout where I needed a thin layer between track below. I found the adhesive between the paper and the foam to not hold up when putting down the track bed and track – the paper tends to peel off. So, I removed the paper and used foam tack glue (Woodland Scenics). I also have structures on top of this. I am working with the lightweight HydroCal to emplace structures on stilts because there is no depth for securing into the material. While I’m succeeding to in using the foam board, if I had to do it over (too far along to rip it out), i would have used thin luan.
Good to see a post from someone who lives near me…
After reading the comments… Here are some answers and additions…
Luan is a type of of plywood… Another common name is “door skin”. Luan or door-skin is very thin (roughly 3/8 inch)…
Paper backed foam board which is also known as foam-core seems to come in at least two levels of quality; the cheaper board seems to have a glue that does not stick to the foam well and especially if the paper gets wet. The more expensive board does not seem to have this problem in my experience.
The grade on the helix looks very steep… You may find it disappointing.
My God, How steep is that grade, and I don’t know if you can even run a trolly on that tight radius. Rocco from Haskell, New Jersey.
Hy Mark, before you go any further, I would suggest you glue down a piece of track to your Helix and see what can run on it. My rough calculations suggest you are at 6% grade and a finished helix probably wont run much if any thing. I personally prefer a spiral helix made with a single piece of thin plywood. For this start with a drill of 1/2″ diameter set in the center of a 48″ x 48′ square. Then wrap a few turns of carpet thread around the drill and tie a marker at exactly 24″ from the drill. Start at one side and draw spiral circles twice wrapping the thread as you go. When it looks right, cut on the line with a jigsaw and you will have a perfect spiral helix.
for all, my comments on why a spiral helix. 1) only the top loop needs to clear a consist height and that can be a bridge with a thin base. 2)Trains are exposed on all levels. 3)Easy train access if problems. 4) easy scenery to look like a real mountain. 5) Inherent smooth track base. 6)Easy support under loops with blocks of almost any material. 7)Economical uses only one piece of plywood, possibly even the main layout board.8)You can watch trains climb up the levels which is what we all want. The size of the drill could be as small as 5/16″ which would provide a 1″ track base. Anyway, have fun. Bob
On the Los Angeles Junction Ry there’s an 85 degree curve (10″ R HO scale) Laid down 1/4 circle of 10″ R. Ran Athearn CF7 & Atlas S-2 plus 40′ boxcar many times both directions with NO derailments! But don’t know if they would make up that steep of a grade. Did the OP ever figure what the distance & rise was to figure the actual grade?
Rod Mackay —- Luan is a thin veneer of wood commonly used on hollow core doors. If you look at a thickness of plywood you’d see it is made of several layers of wood all glued together. Luan is like just one of those layers but has no knots, etc, and thus great for doors and cabinet faces.
Mark StJohn — it looks like you are going to have two tracks on your helix, but they appear to be so close together that the trailing corner of each car on the inner loop may overhang the outer loop enough to collide with cars on the outer loop.
N-scale!!!
Your 4 by 5 is way too small for HO scale. N-scale would be perfect for that. Kato track in N-scale would be absolutely perfect! DCC too. You can run long N-scale trains, multiple at the same time with DCC and Kato N-scale. Kato has 15 curve radaii to choose from and their turnouts are UTTERLY RELIABLE!
Dear St.John.
I think there’s probably a good reason why HO track makers don’t sell sectional track in less than a 15-inch radius. You may squeeze in some additional track by building such a tight radius helix, but I suspect you will have trouble achieving any sort of reliable operation. Sometimes less is more… Another option I’ve seen is to build three levels, but not connect them. That way, you don’t need the helix or steep grades. Good luck with whatever you decide to do.
I also have an ho scale layout. Mine is biggerewith a footprint 10×16. I installed 5’x 5′ hix double tracked. My inner radius is 24″ and my outer is 28″ my helix has 3 levels starting at 40 ” and 48″ when it exits. I think you may run into problems with too tight a radius in ho scale. I know your going torun small equipment but I still think it won’t work. I had issues with radius that were 18″ and I changed to 22″ minimum.
Chuck
Clever!