Before we start with Gerry’s post on building HO layout, here’s a quick missive from John:
“Dear Al, just wanted to say how much I appreciate your efforts.
I got my 1st train set in the 50’s. always looked back on it w/ fondness.
Then when I had children I decided to build a layout for my 2 boys. I didn’t know anything, but I went ahead via model railroad magazines.
I built a double train layout so both my boys could drive a train w/o waiting turns. I think I did fairly well for a total novice.
But the real pay off came one night when I came home from work late. Went into the kitchen to get a soft drink and there on the dining room table was a note. Writing in childish block letters it read,
Dear daddy thank you for the best train set ever! Love Andrew and Marshall.
Ty, john
ps planning to build something for me, please continue w/ the wonderful tips and advice.”
I never know what’s going to pop up in my inbox, and John’s mail really made me smile.
If you have a similar story, please do mail me or leave a comment below. I’d love to hear it.
Now on to Jerry:
“Hi Al,
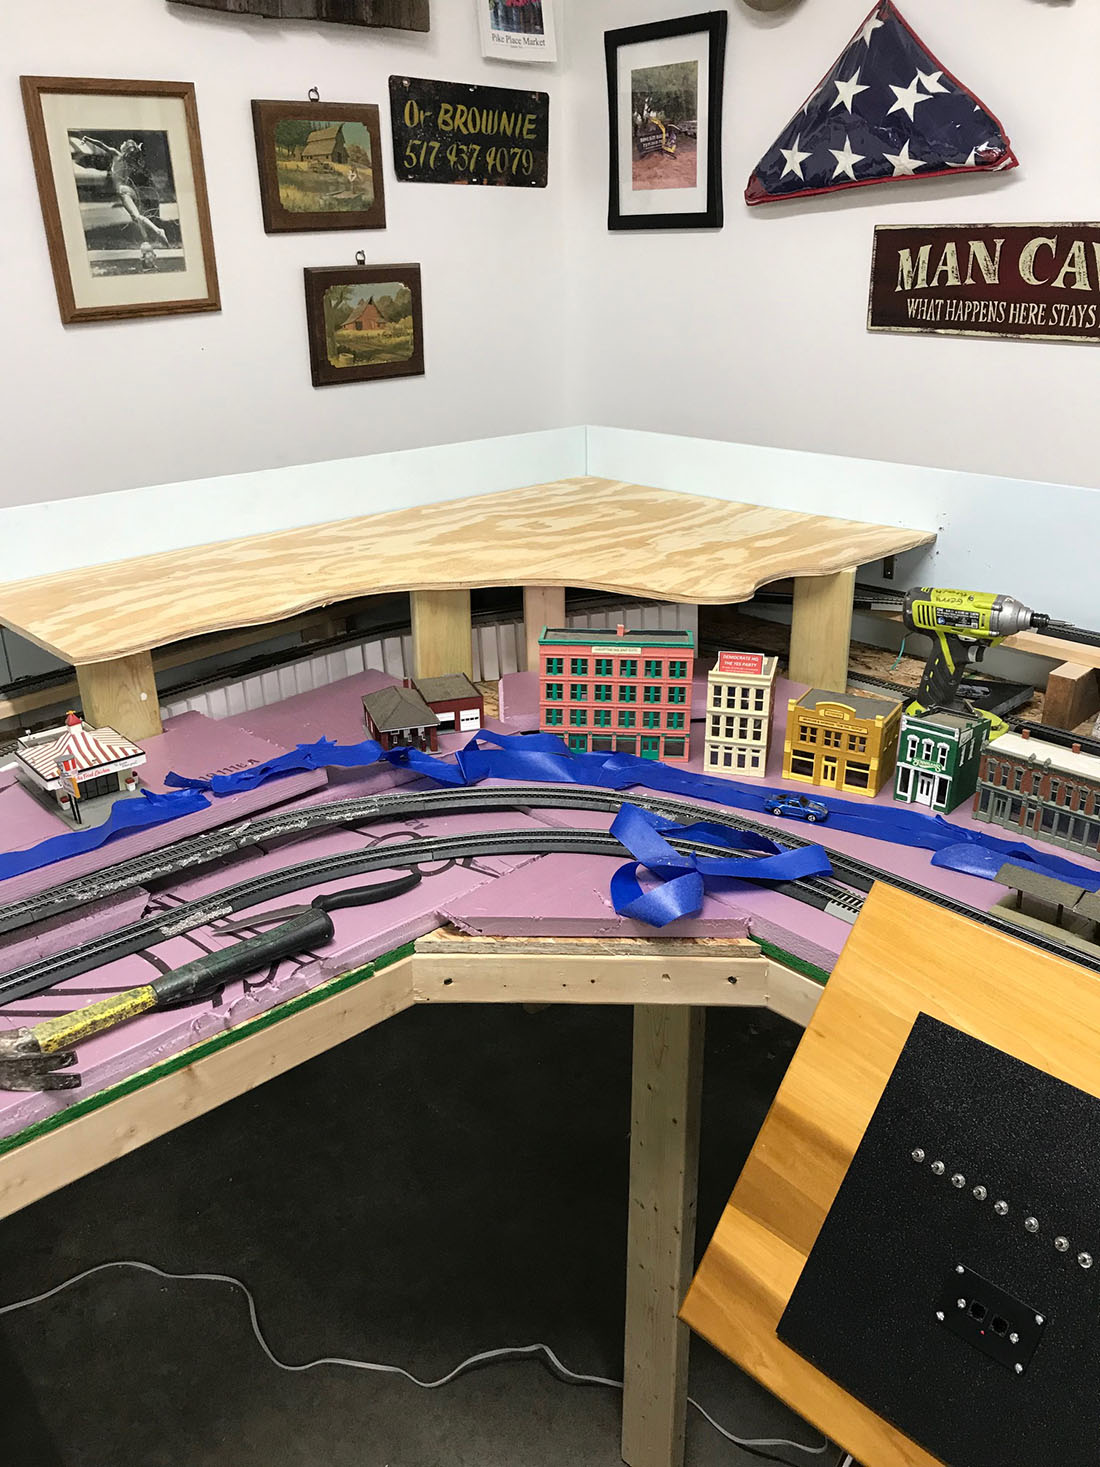
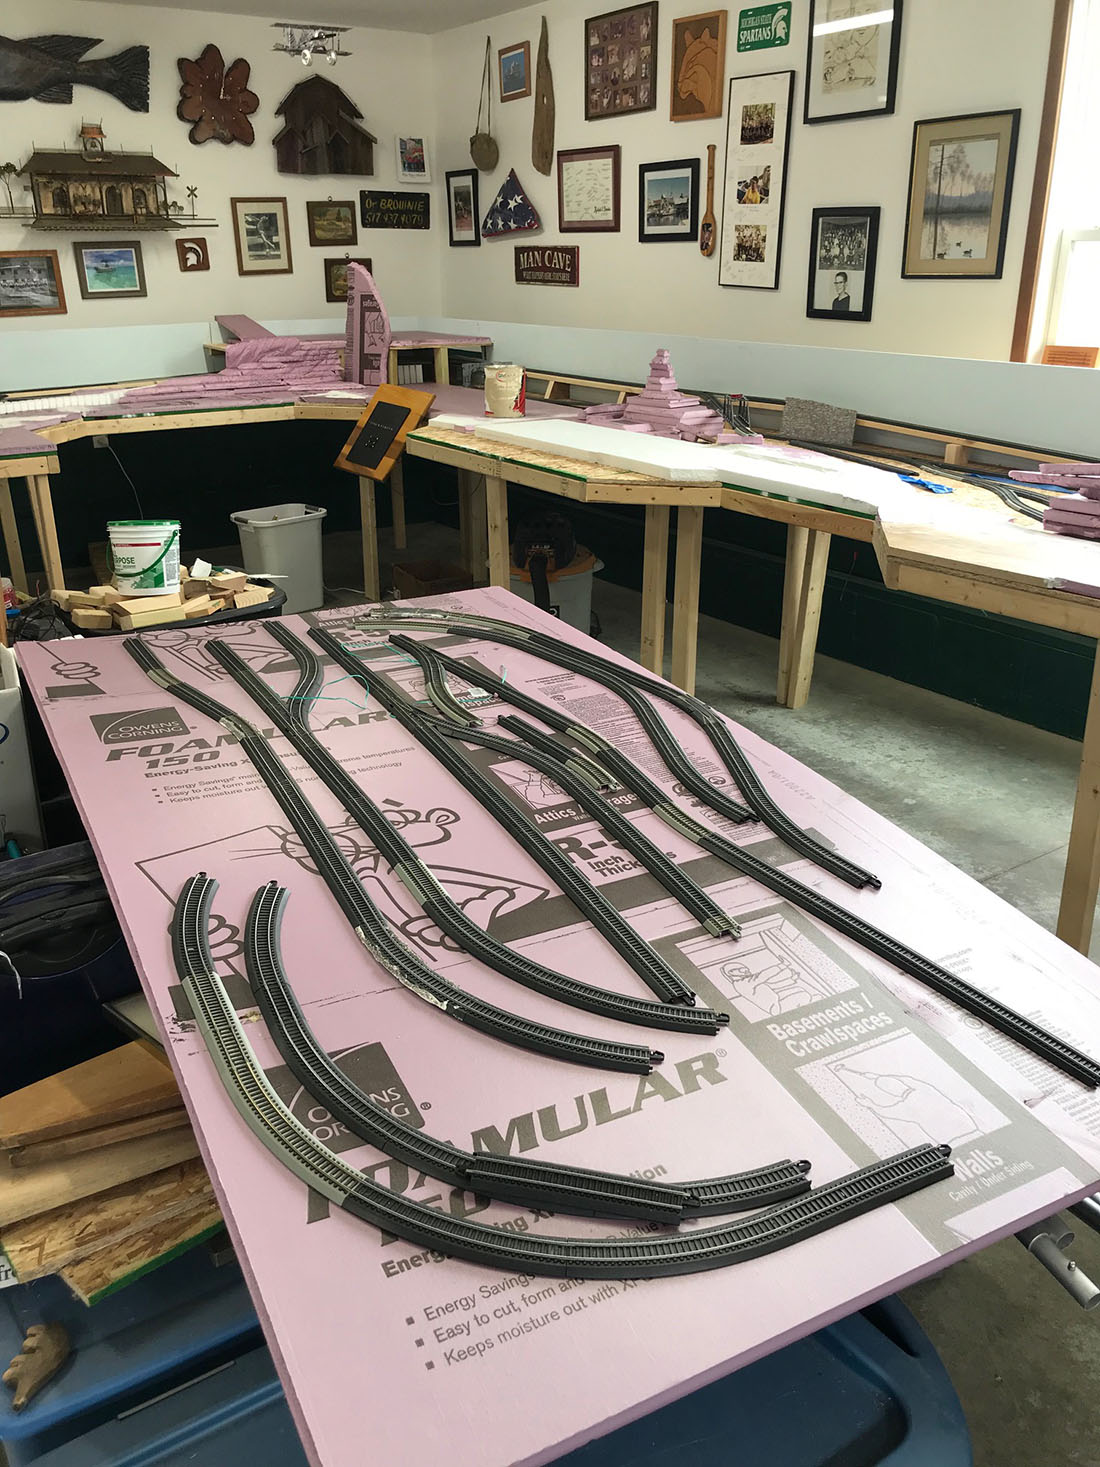
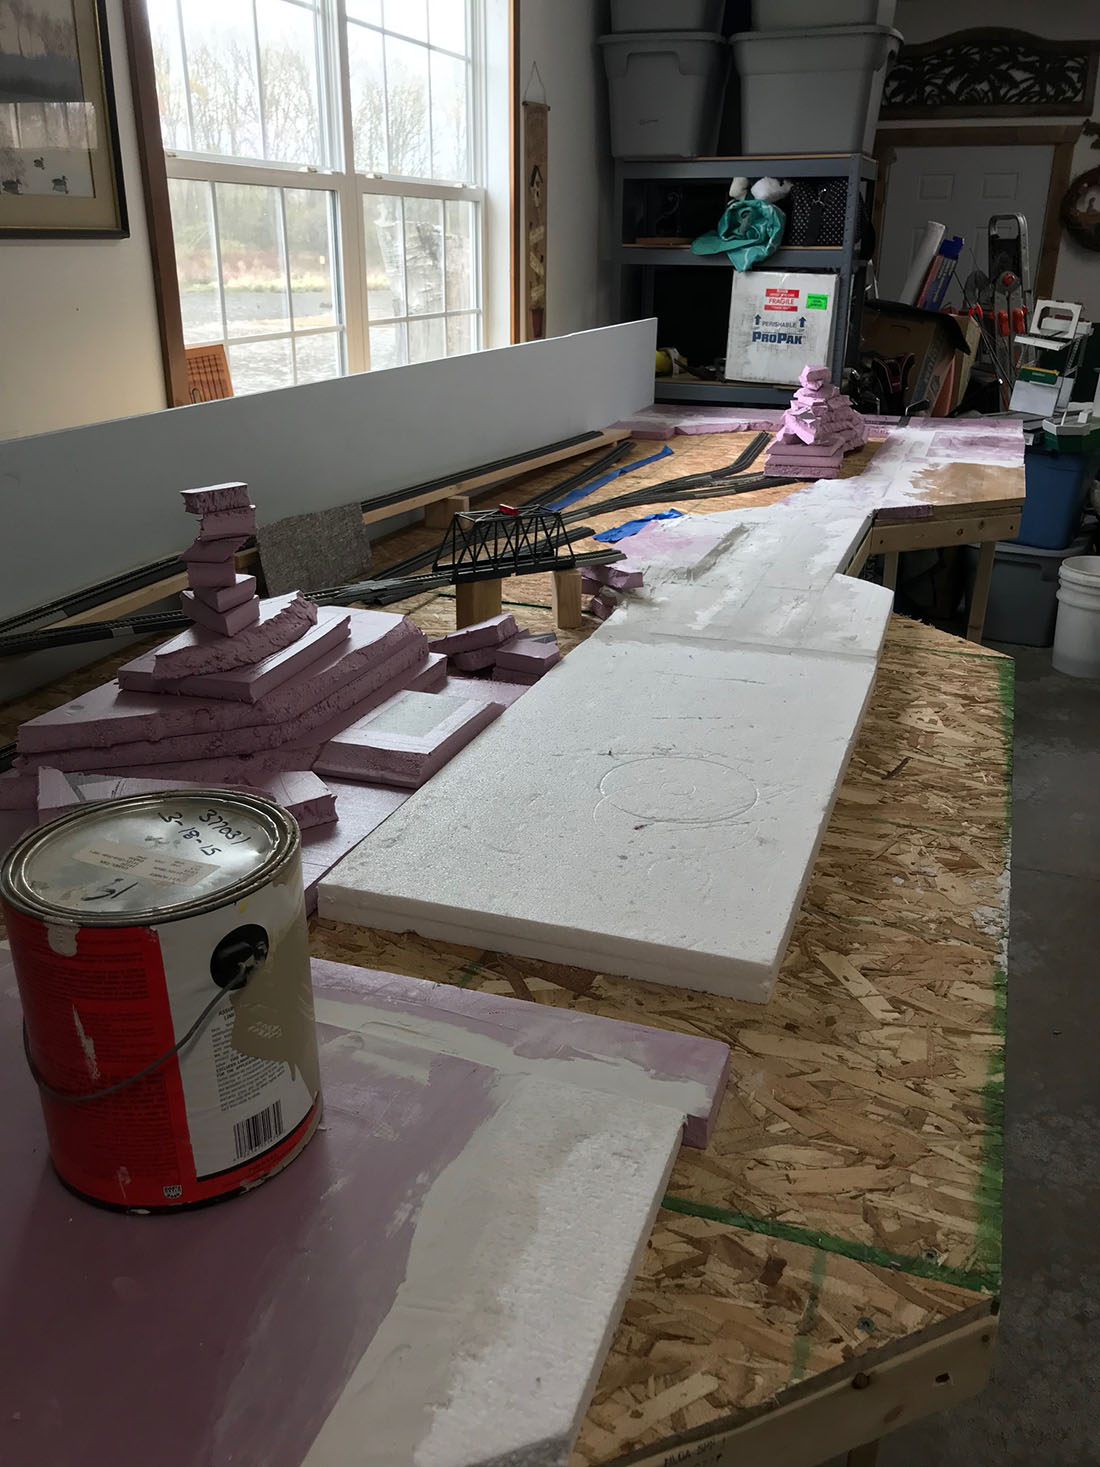
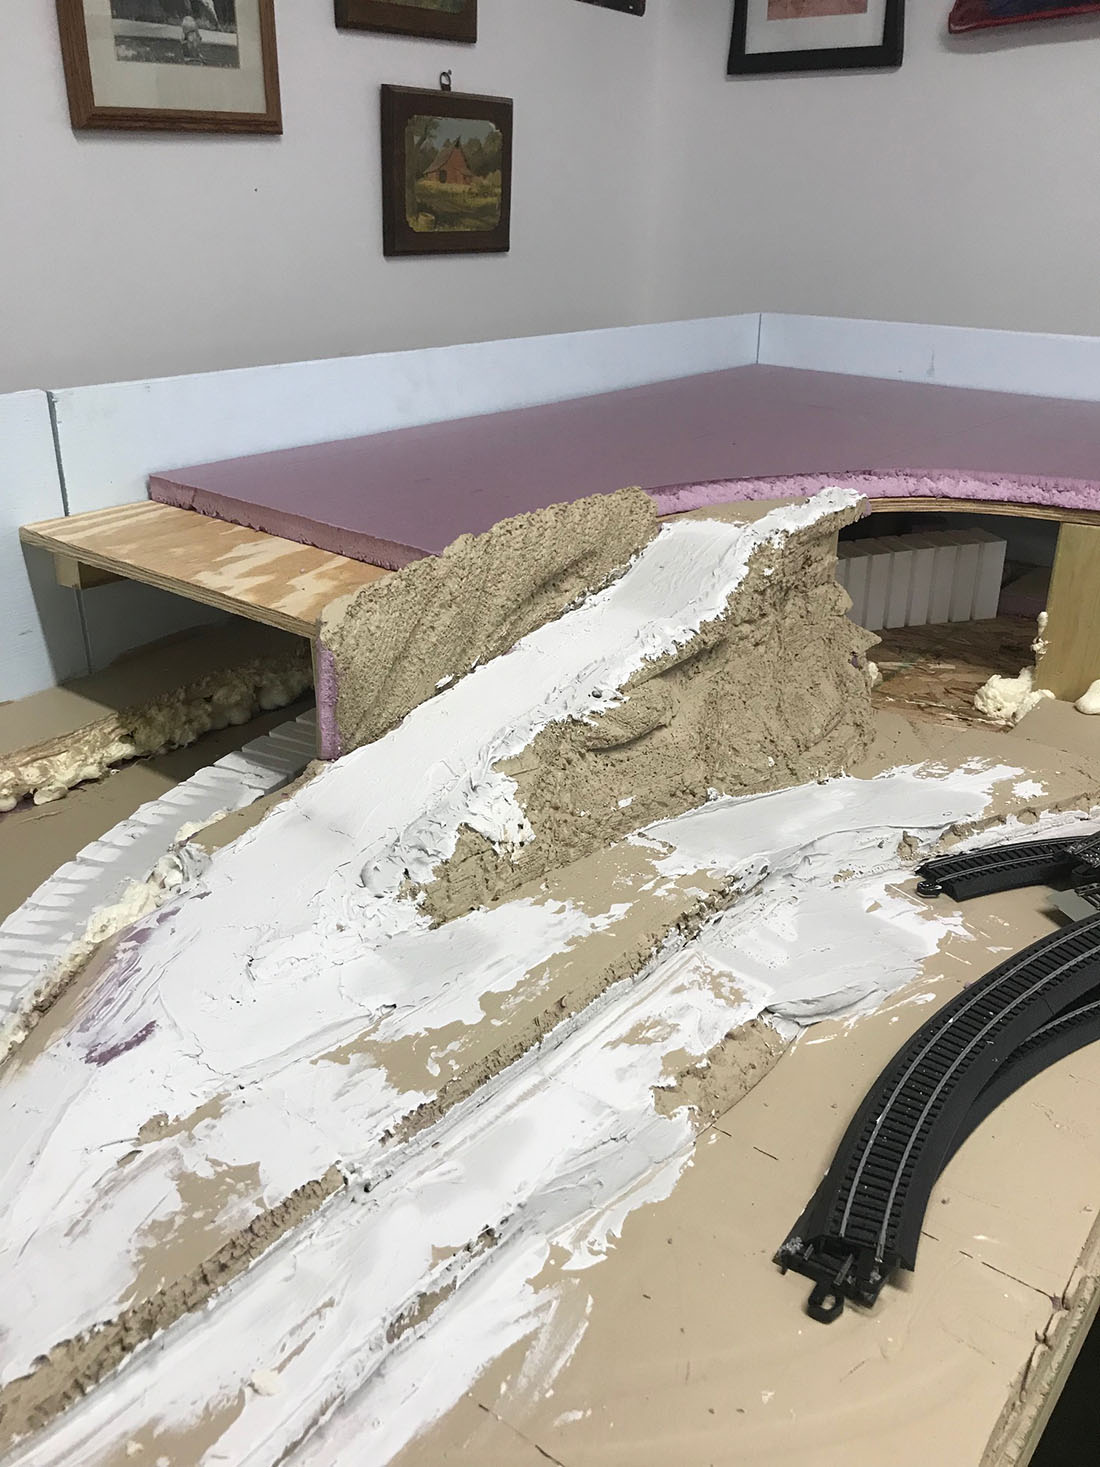
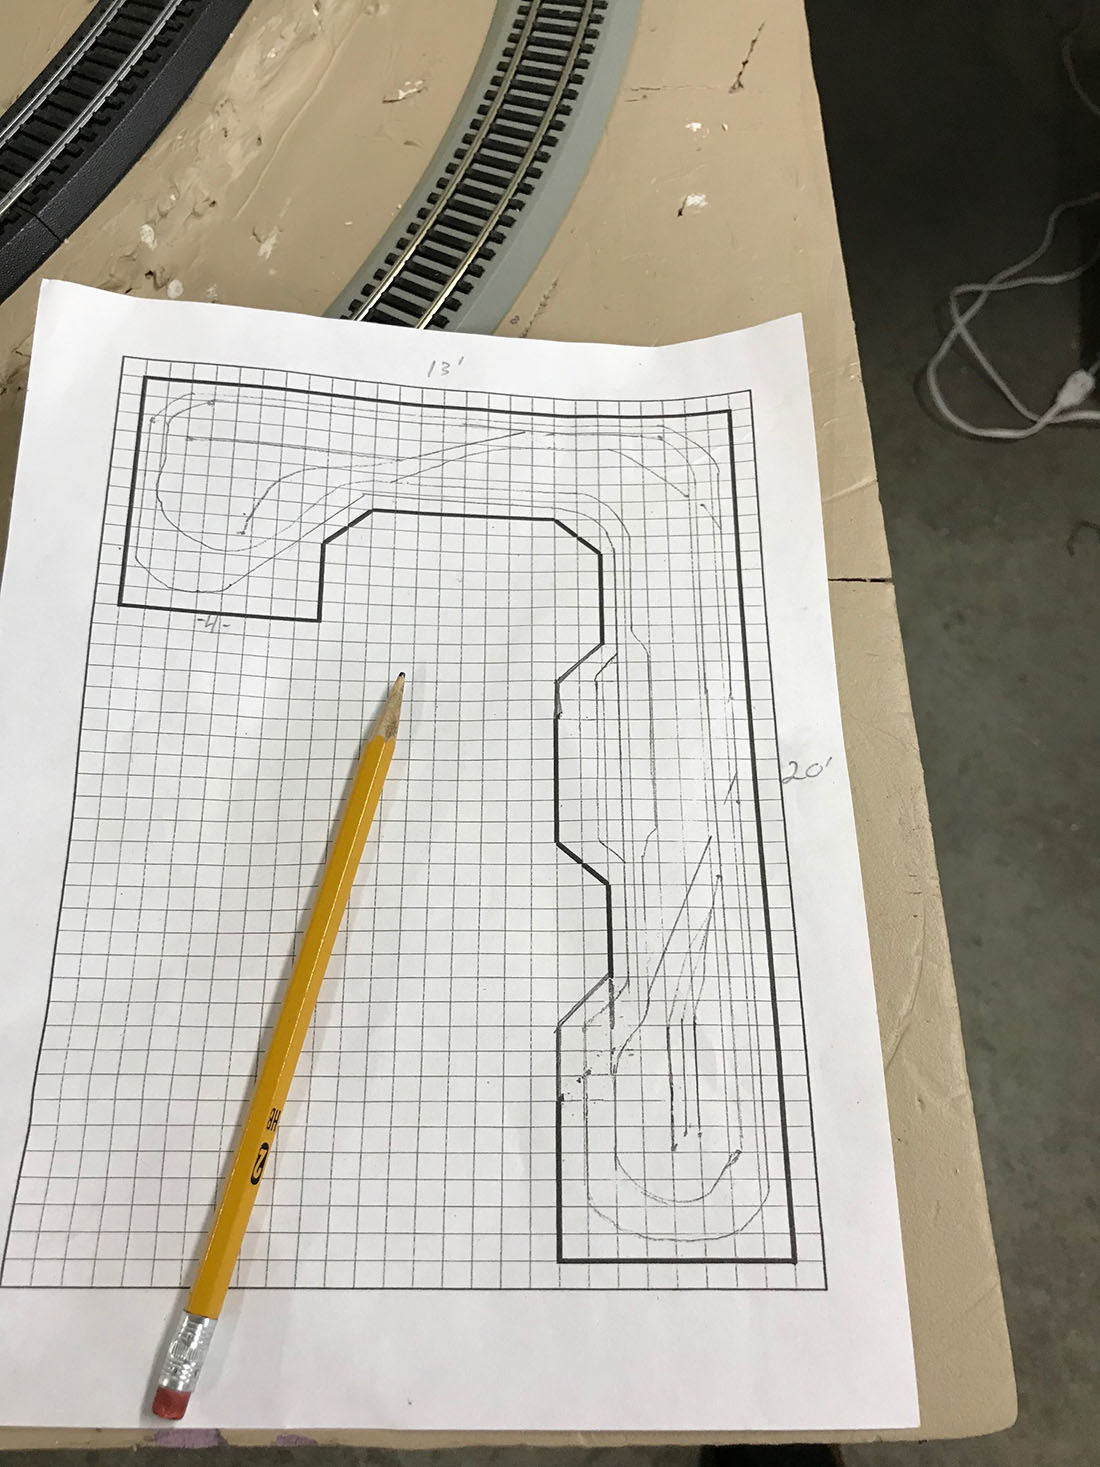
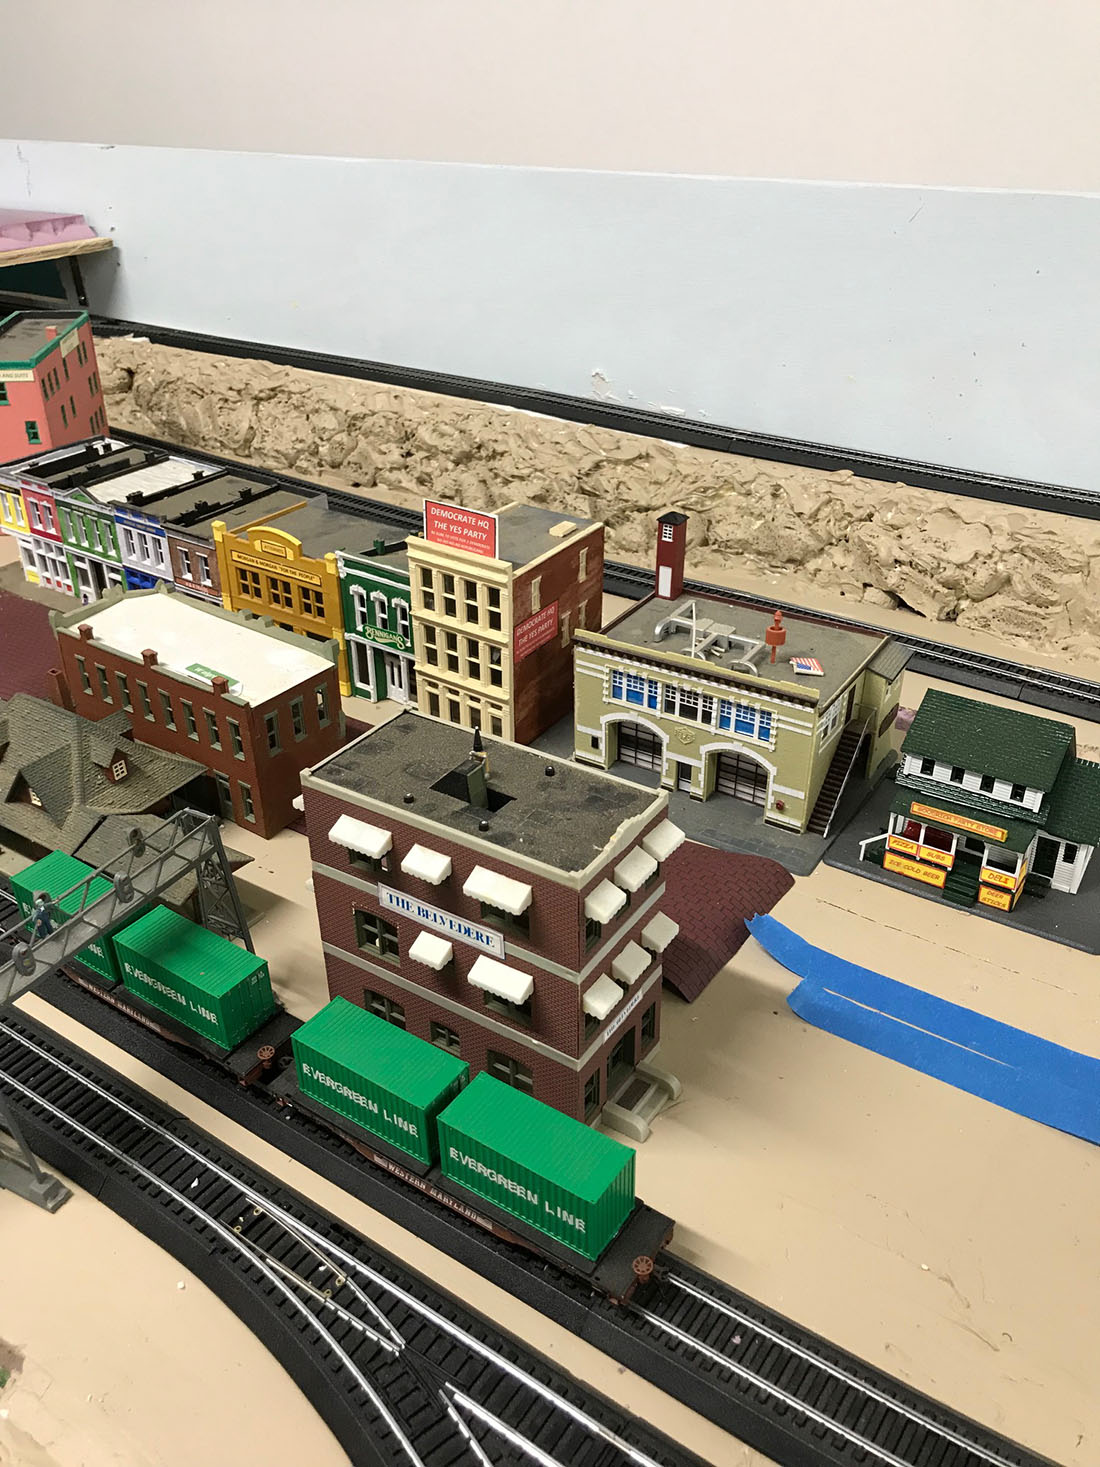
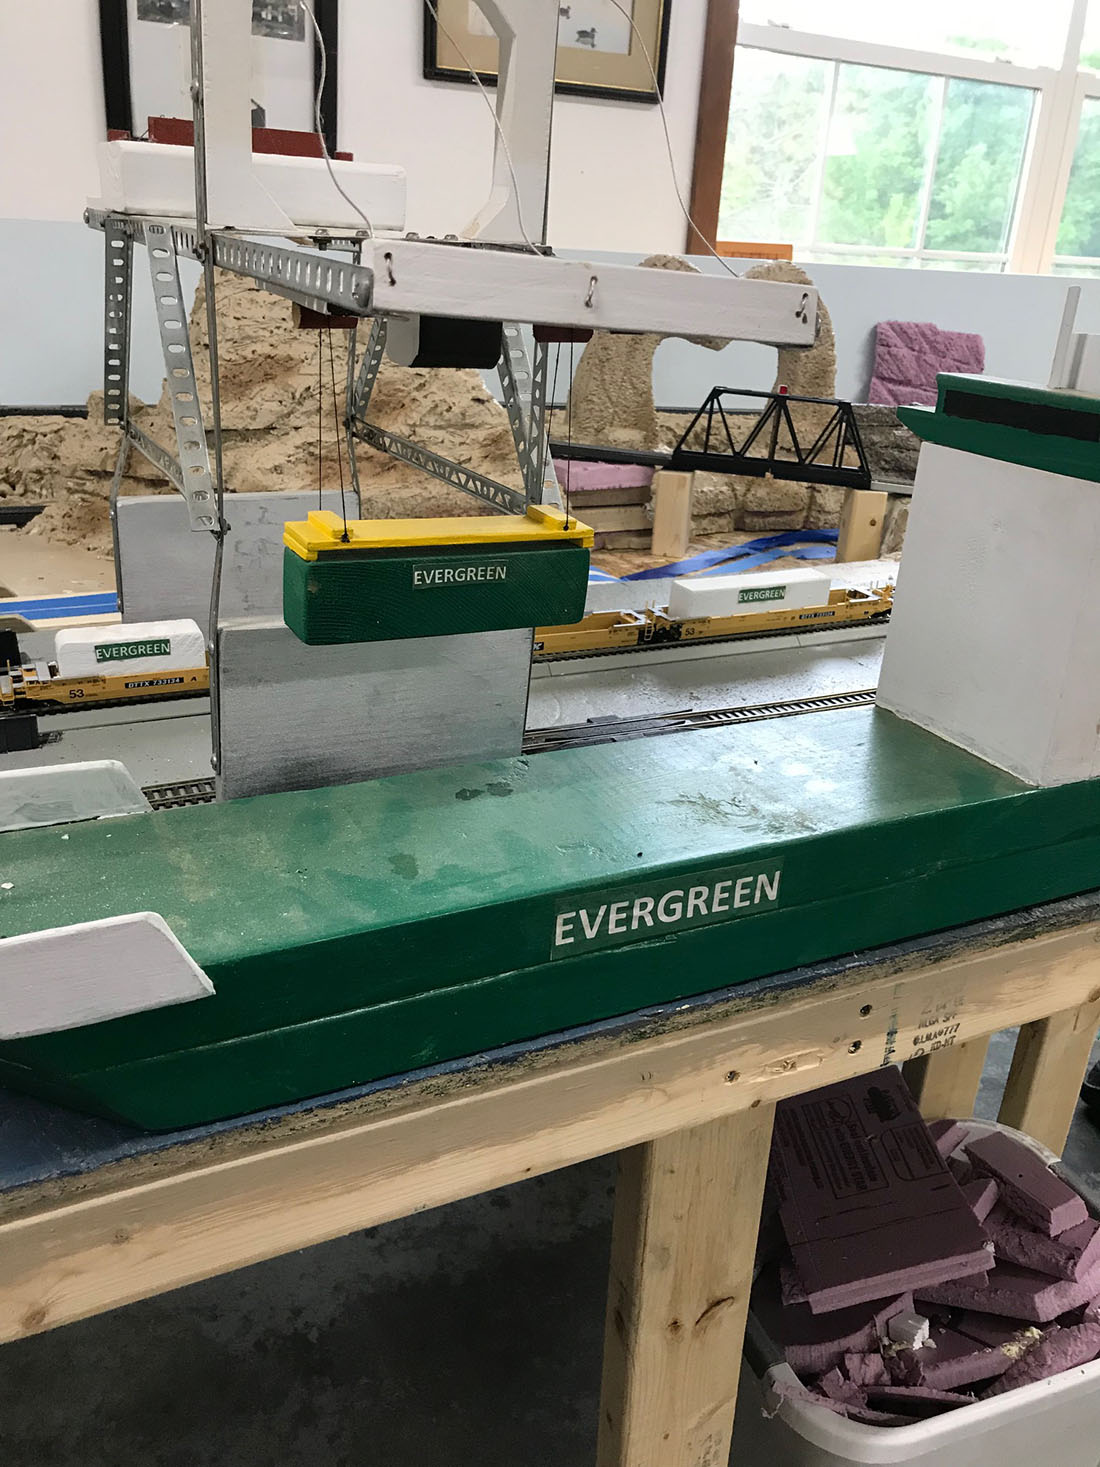
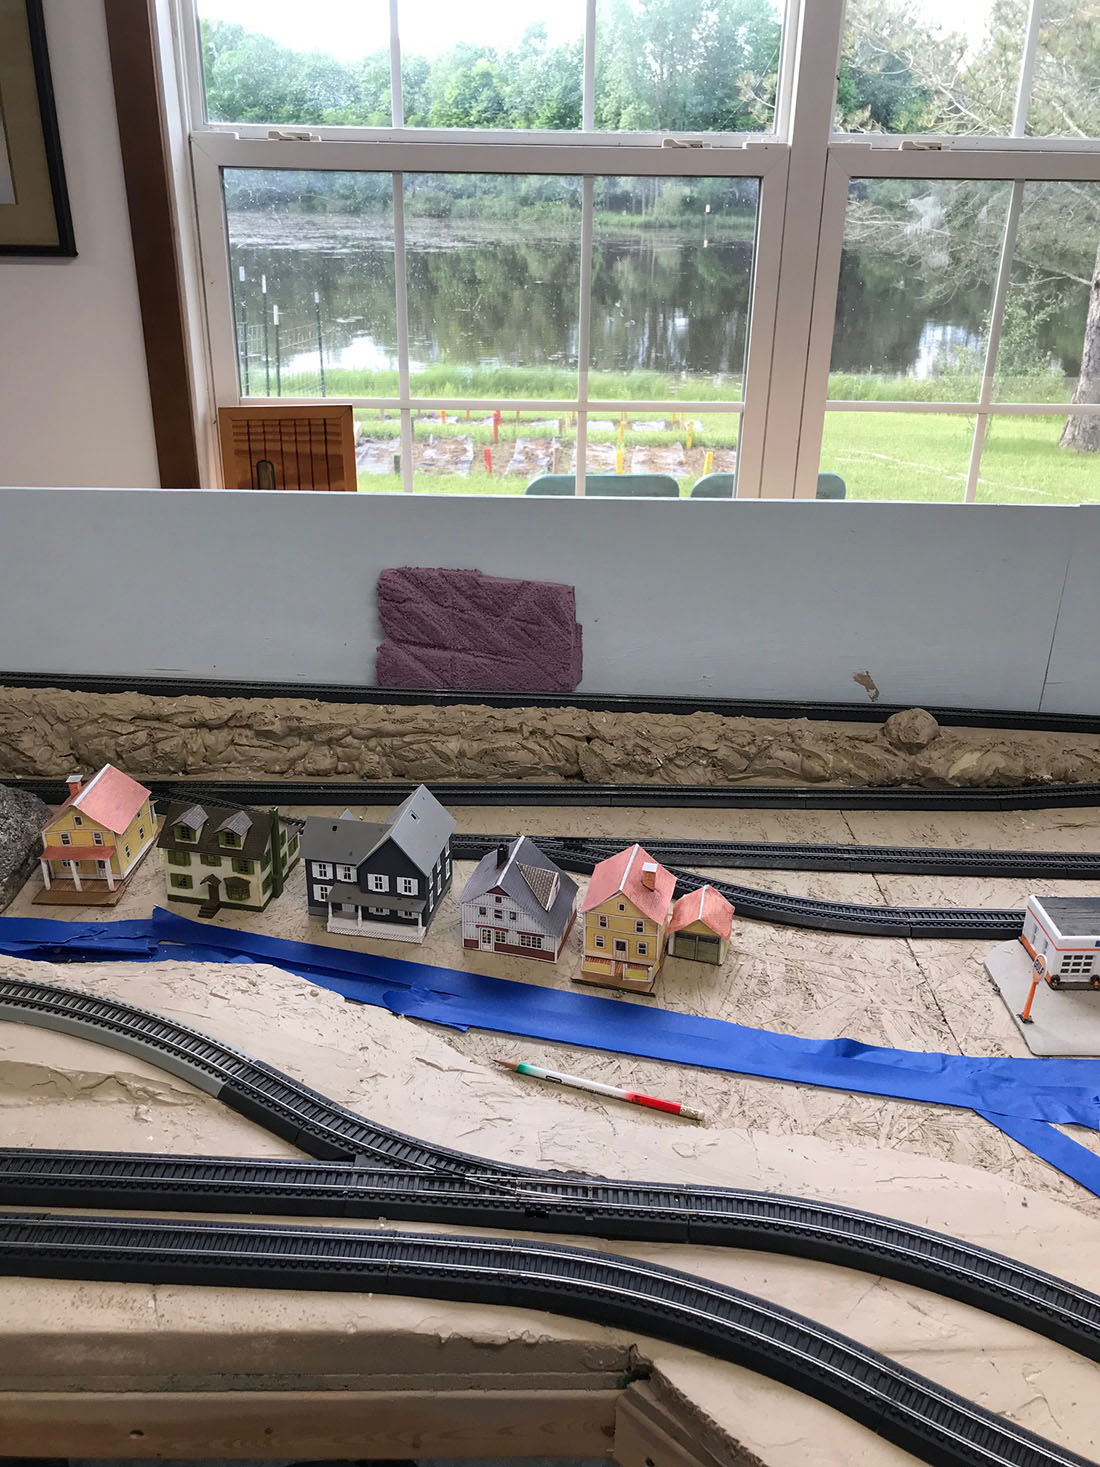
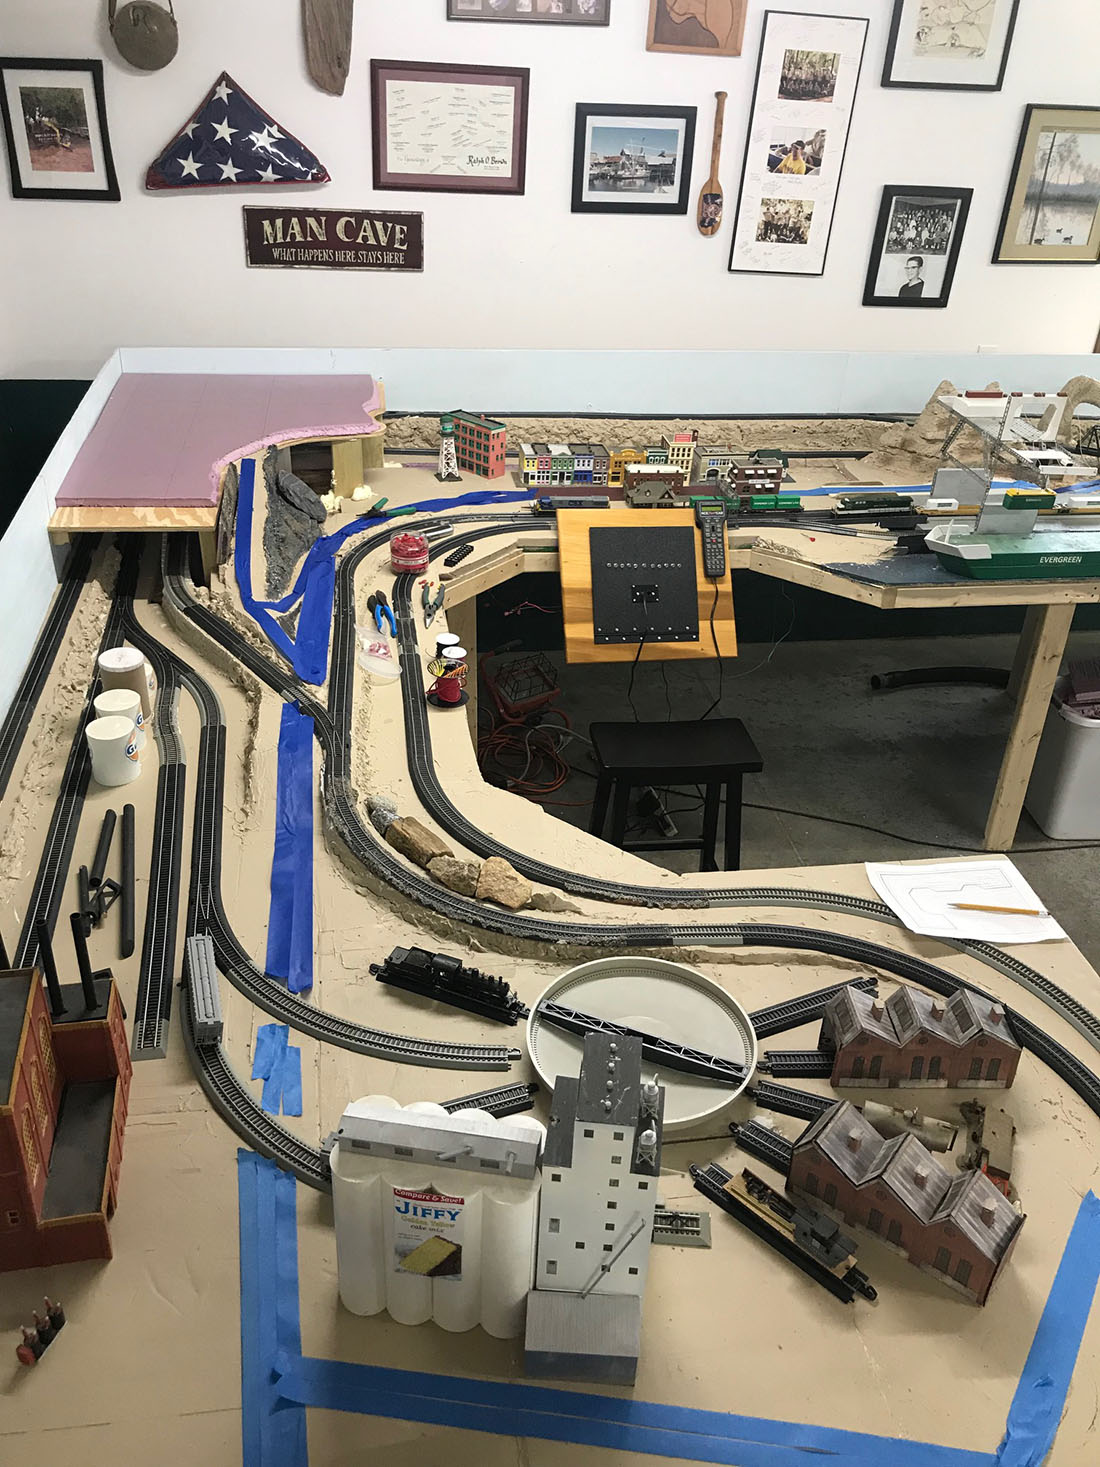
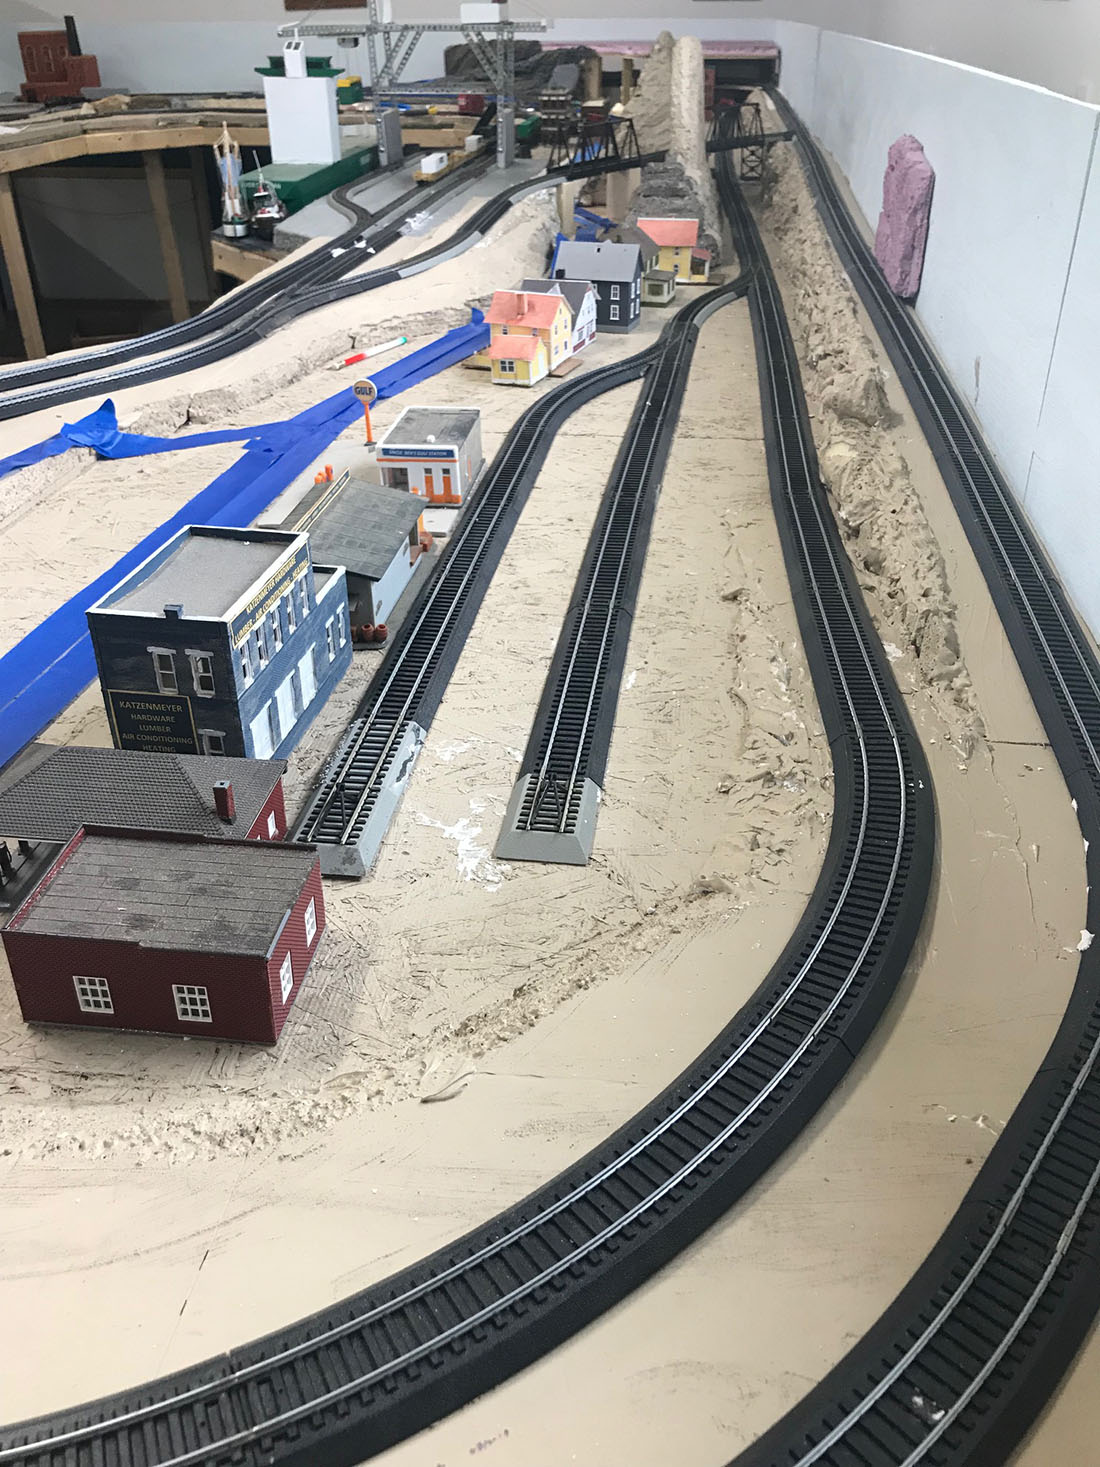
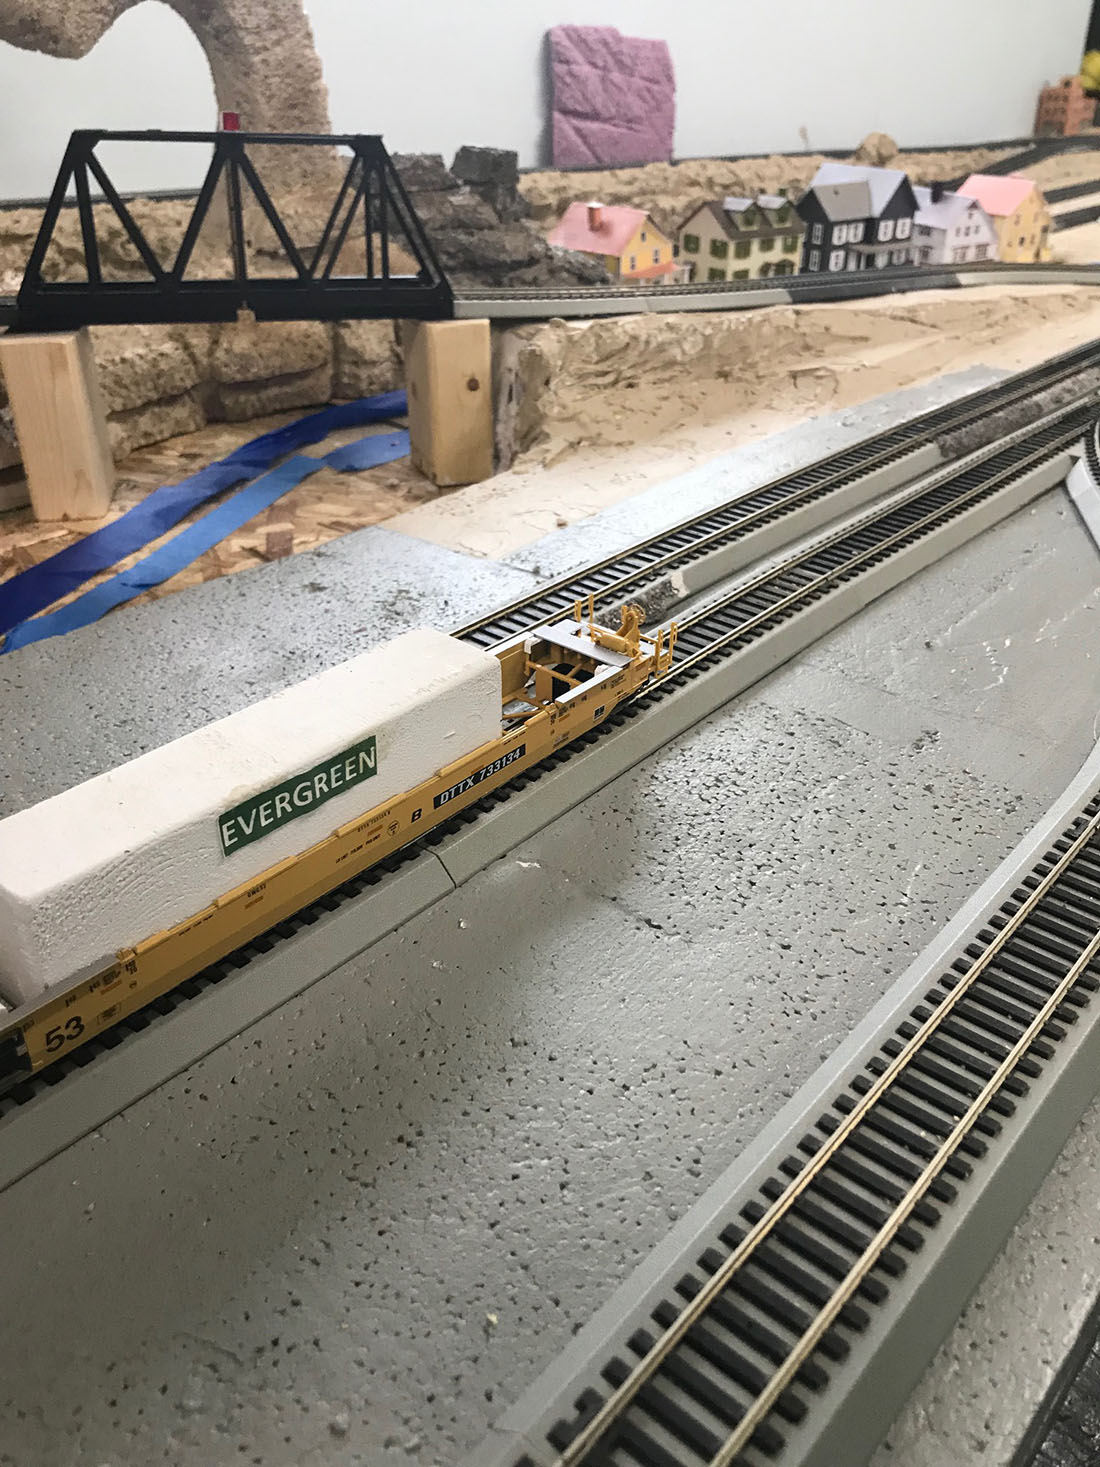
I have been slowly building a new HO layout which is just now ready for electronics work as all base painting and landscaping is done.
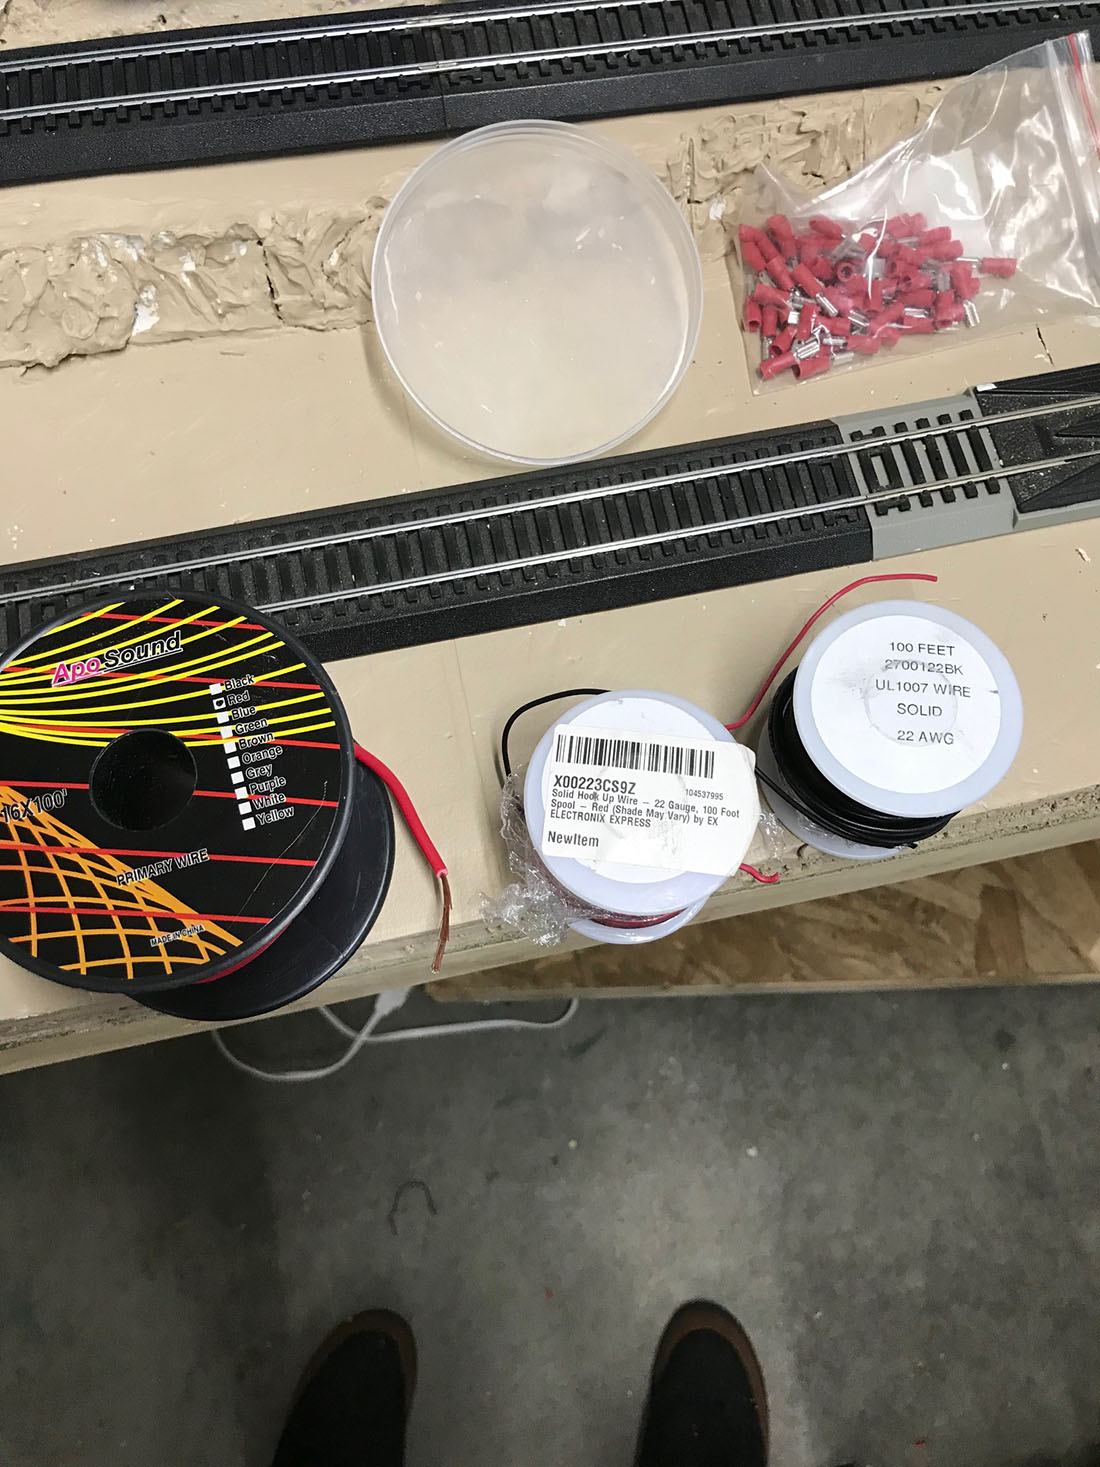
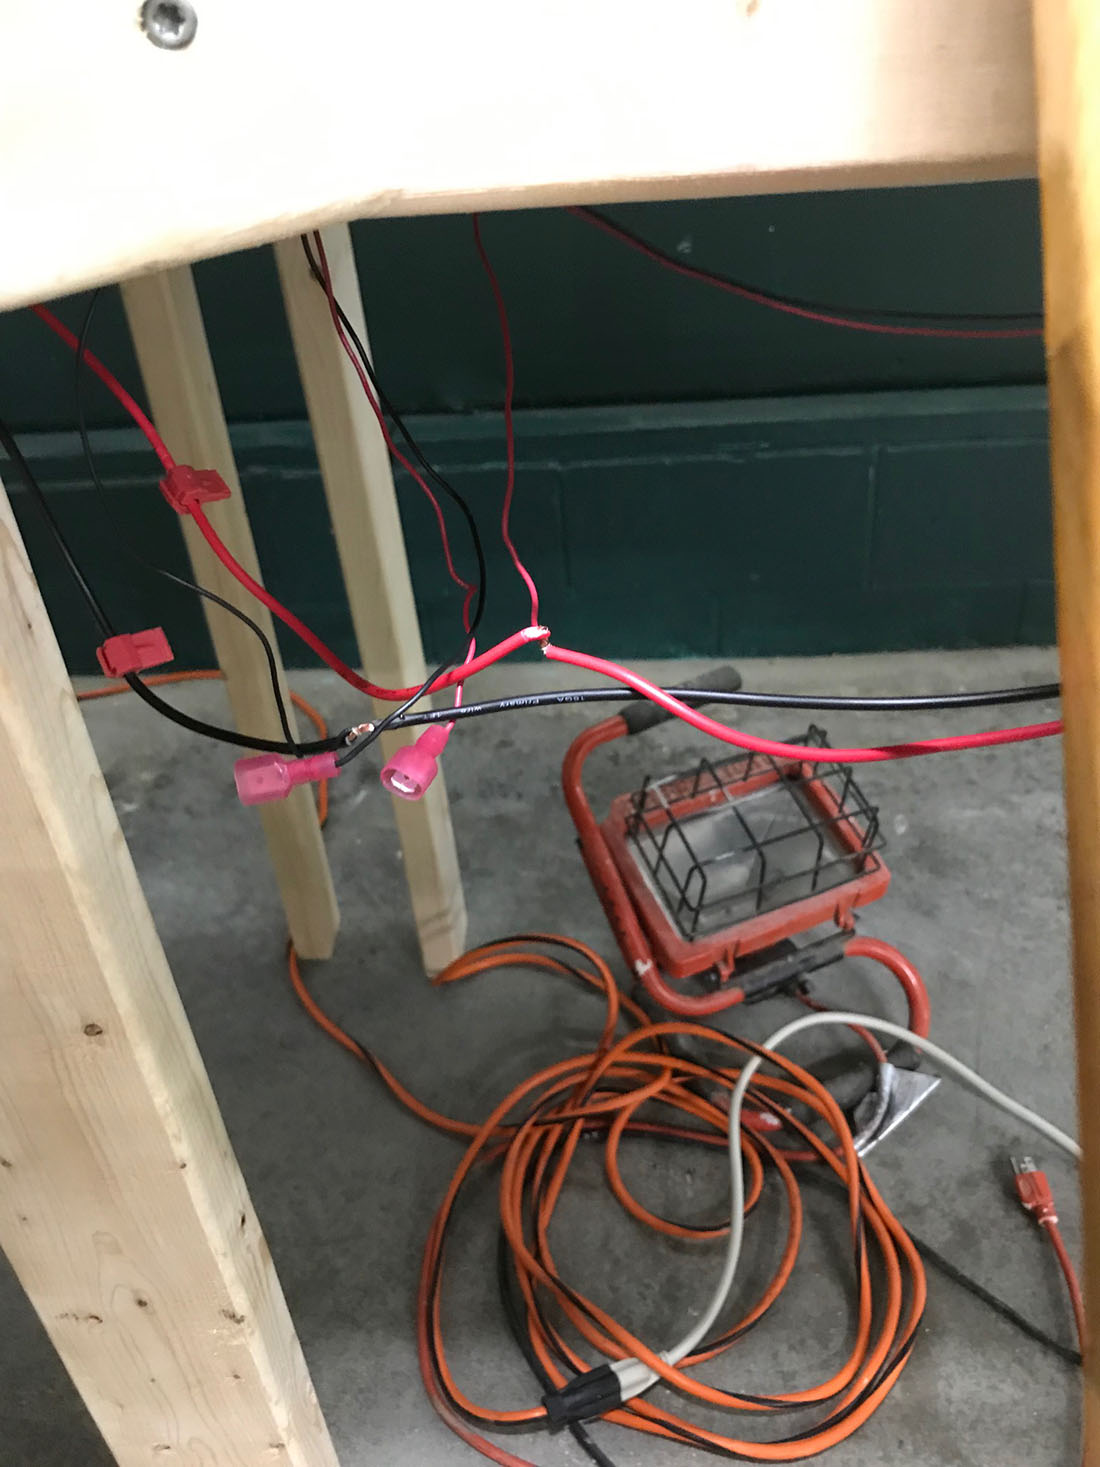
But big problem as my first attempt to attach feeder wires off a bus line has resulted in cross circuits. Need help!!!
So need to get locomotives running before doing detail work on every square inch ovt next 10 years…
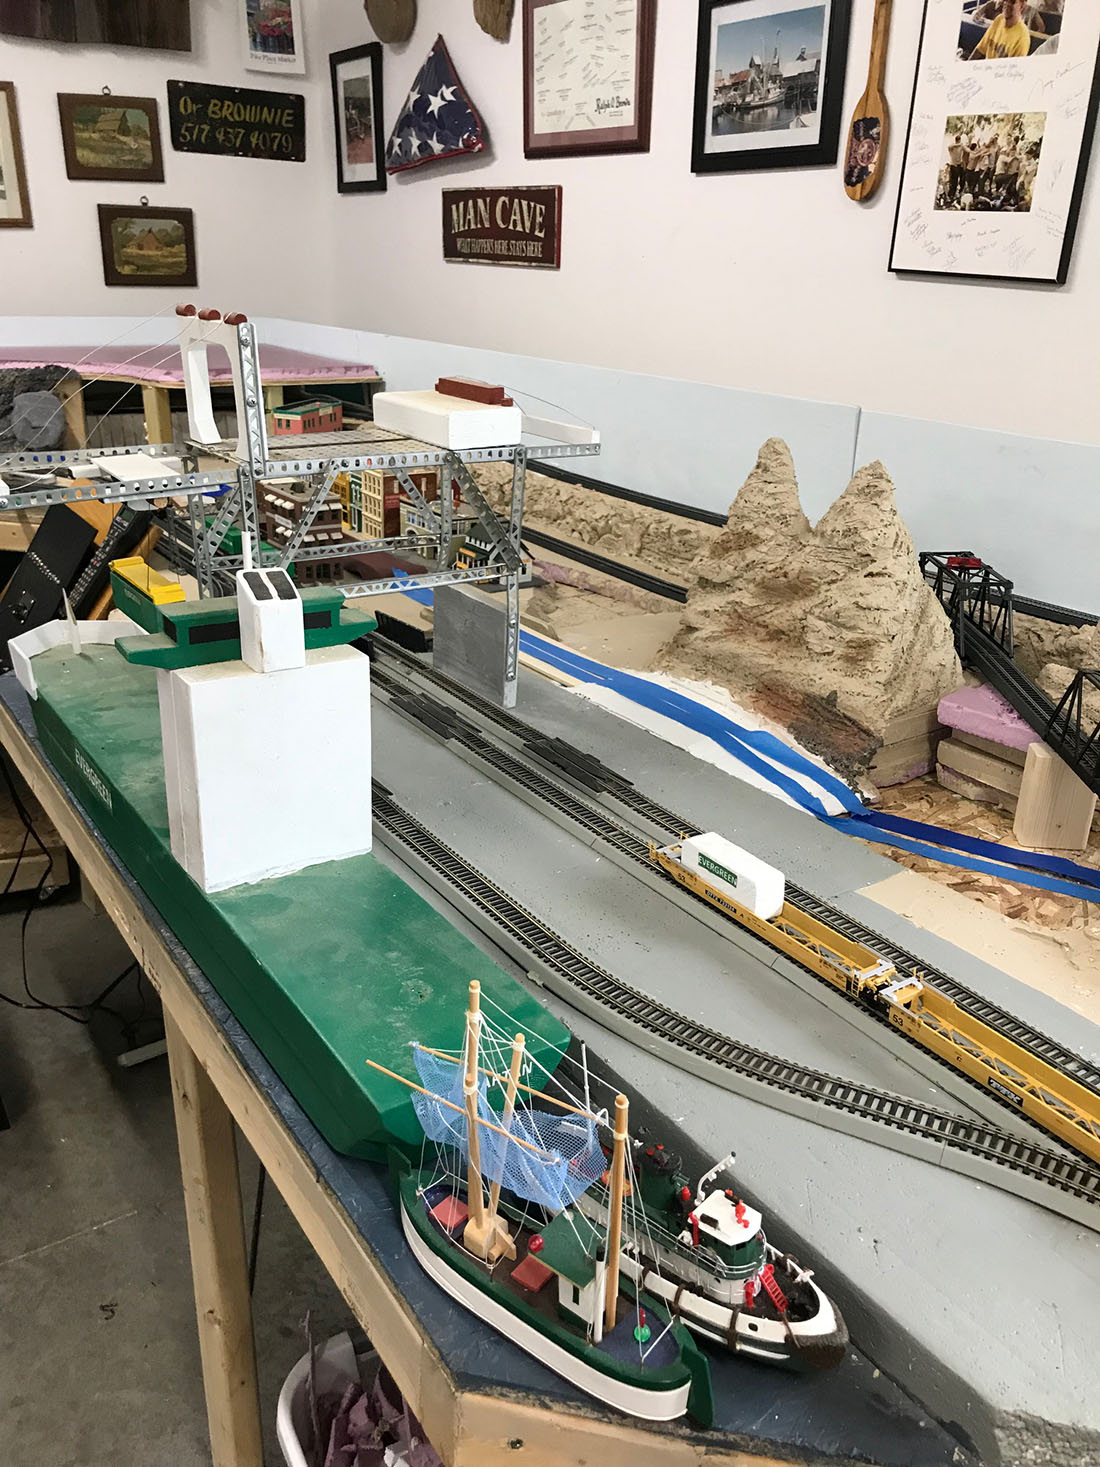
Had just 2 inches to spare to get boat in the garage and close the door…!
Thank you AL for your blog as I really enjoy it and Johns paper buildings keep me busy in winter as we return to Florida for winters.
Thanks.
Gerry.”
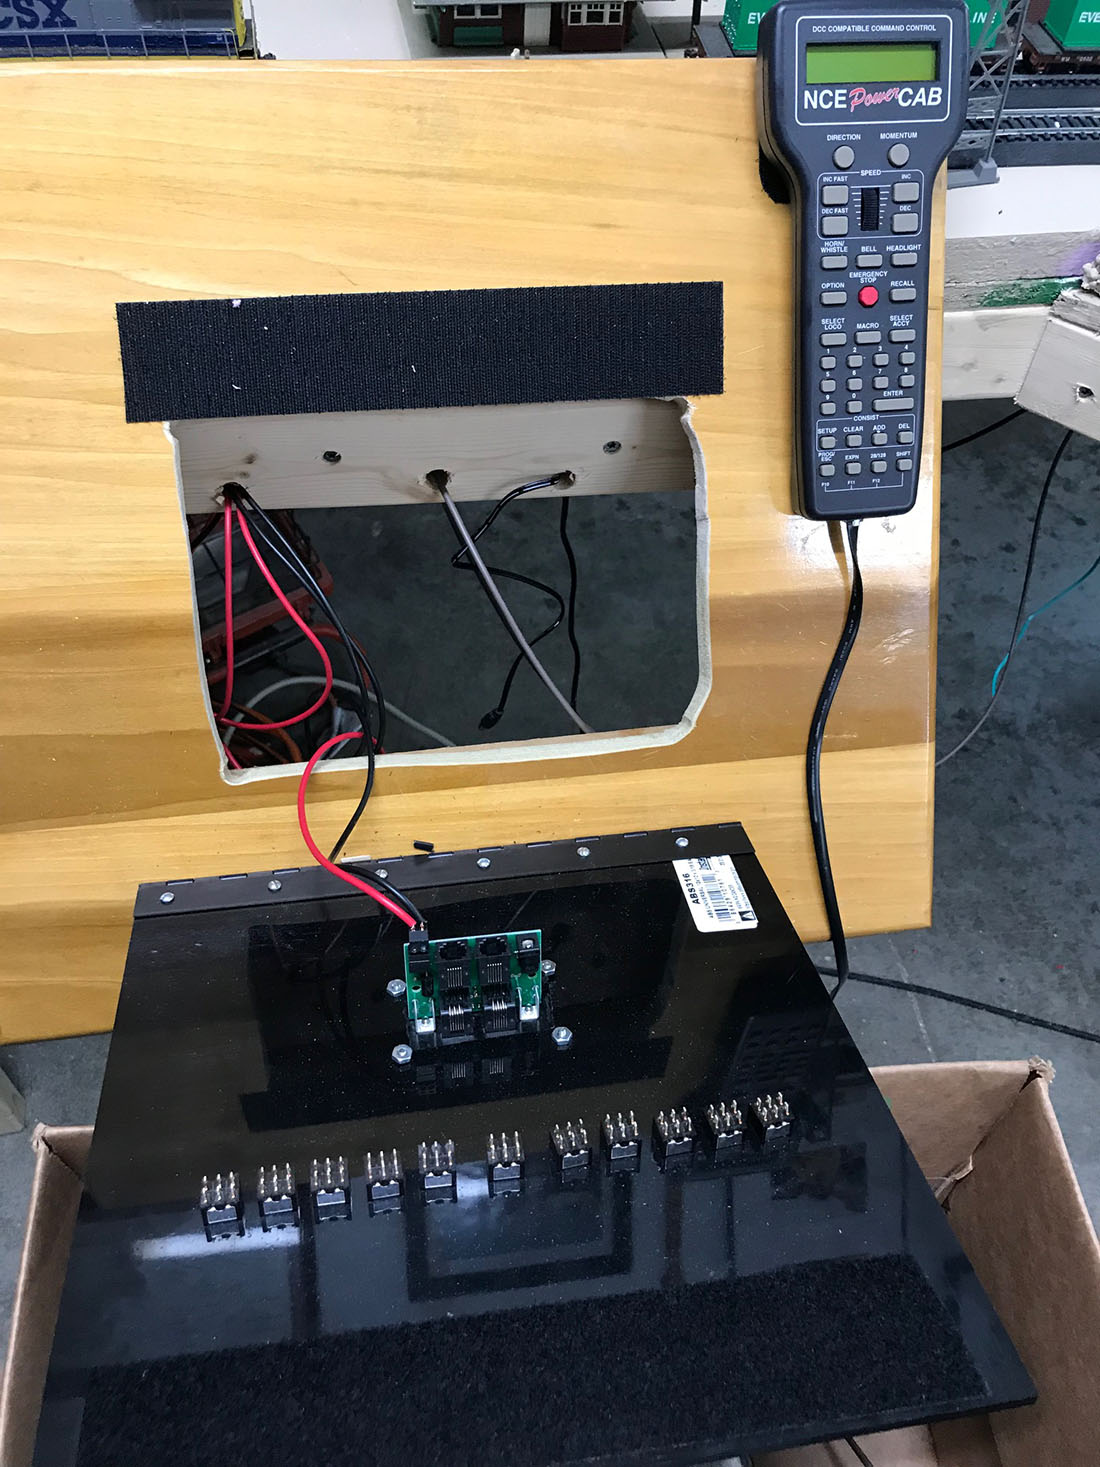

A huge thanks to Gerry. Please leave a comment below if you can point Gerry in the right direction on his feeder wires.
That’s all for today folks.
Please do keep ’em coming.
And if today is the day you get started on your layout, the Beginner’s Guide is here.
Best
Al
PS More HO scale train layouts here if that’s your thing.
Need buildings for your layout? Have a look at the Silly Discount bundle.

Gerry thanks for sharing those wonderful railway layouts.
It takes an special person to share his/her knowledge.
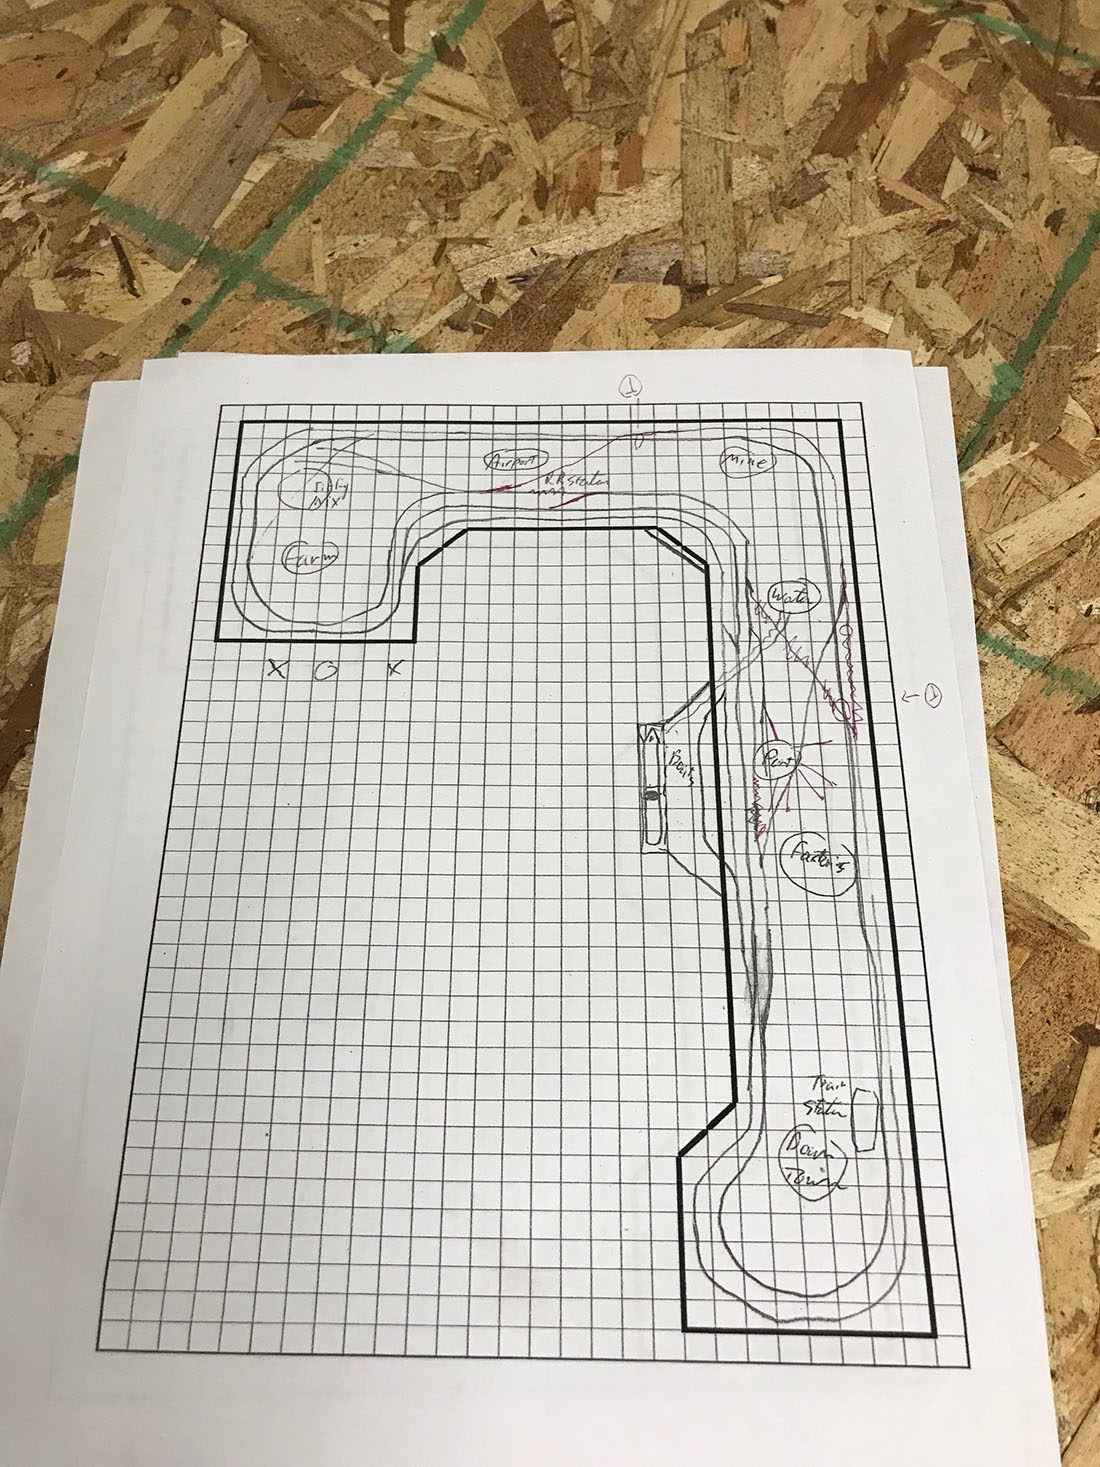
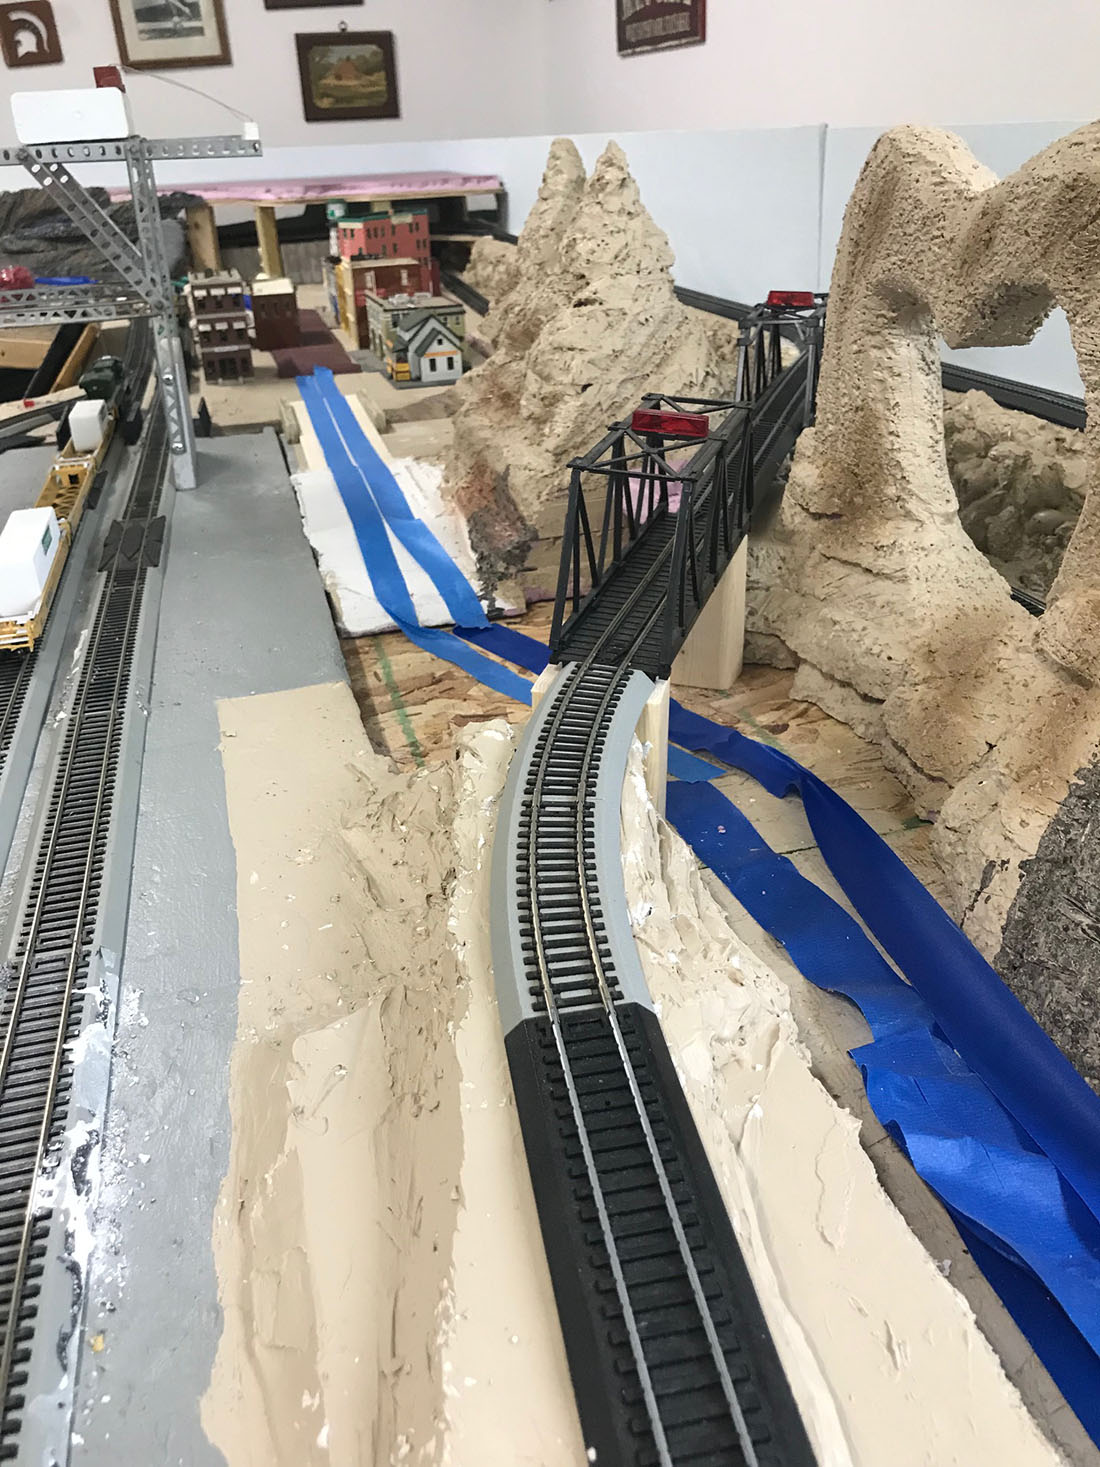
Your reversing loop might be the source of the short.
Hi Gary I started out with a bunch of Bachmann EZ track if I remember right it seemed like the turnouts weren’t DCCC friendly if they were going straight they were okay but when I switched them in the train ran over it everything’s stopped and short it out
Hi Jerry.
The diagonal rail, seen in the last picture, is the problem. It’s creating a reversing loop which is causing your short. Test this by disconnecting the track along this section. There are many how to’s showing how to deal with this if you google reversing loops. Good luck, Luen.
As far as I can see from your layout diagram you have two “reversing loop” tracks joining the two opposite sides of your track circles. These require use of “reversing loop modules” to automatically change polarities. As I found if you trace out your track feeds on your layout diagram you will find when the red meets the black
Ok you say 10 years. Thats cool. The reversing loop is the biggest culprit, but i have a WAY better idea…
Dump all of your inferior track into the trash and replace it with the best track there is. KATO! They have 15 different curve radiuses so no more sloppy double curves. They are all grey and most important of all…THEY WORK!
KATO is bulletproof, especially the turnouts. They just plain WORK.
Everything they make is intelligently designed and reliable. No shorts, no failed switching.
Take it from someone who has 3 different track sets.
Btw, they make an outstanding doubletrack crossover. 4 turnouts operated by one switch, either straight or crossover in both directions. KATO is smart.
Although the track plan drawing isn’t clear enough to me, I agree that a reversing loop might be the problem. With your NCE dcc system, the solution is to add a reverse loop control module. There are several makes & models. I had four Digitrax AR-1’s on my N scale layout, and they worked great with NCE. Good luck.
Pretty Neat; I hope my board turn out that good.
From a first look at the trackplan you have a least one reversing loop. Put in some isolators to start with and then look at installing reverse loop electronics.
I’ll glady help you if you provide me a detailed track plan.
Hi Everyone; Nice Layout comprising of the most desirable elements. Thought of Sharing an Idea that I already put to use.. Most of the Layouts I have Scene, use a Lot of Wood for the Tabletop of the layout.. The Cost of Plywood and CDX Board is Shot Thru the Roof.. I built a Christmas size 4 ft x 4 ft layout.. I made a “box” that measurement from 1/2 inch x 1.5 inch white pine lumber.. Then I used the 1 Inch Blue Board Insulation material.. And cut it to fit between the “wood frame” I made. The Result is very Light Weight.. Yet Strong Enough for H.O. Or N. Scale Model Trains. Buildings, etc. Use 2″ x 4″ for legs,… Cut in half width with a table saw for the Legs… If you have to Store Or Transport it. it is very Light Weight. Especially when you remove the buildings off the surface. ~ Mike in N.H. U.S.A.
Gerry……that’s a lot of work…..great start……it is going to look good.
I like your creativity–your unique personal touches.
Correct Typos… SEEN for Scene… OOPS… Didn’t have enough Coffee. ~ Mike.
Dear Al, Thank you for what you do. I have archived every post. I am a retired
industrial electrician with a couple suggestions. 1) The wiring is too casual. Much
better are straight runs and right angle turns with equal spacing between positive
and negative and with nylon clamps every 18 inches +/- It makes troubleshooting
much easyer. 2) Set your volt/ohm meter to 1000 ohms. Isolate a section and
check for shorts. The volt/ohm meter will show almost zero if shorted. 3) All
switches (turnouts) may need to be modified or replaced (sorry). This may seem
to be long and tedious but it will beat the “shotgun” approach every time. I hope
the above will be of some help. You will discover a lot of new things..RJ PS
Gerry, Building a first class electrical system can be fun!!!
Gerry:
What a gorgeous layout. A lot of done, a lot do. Keep up the great work.
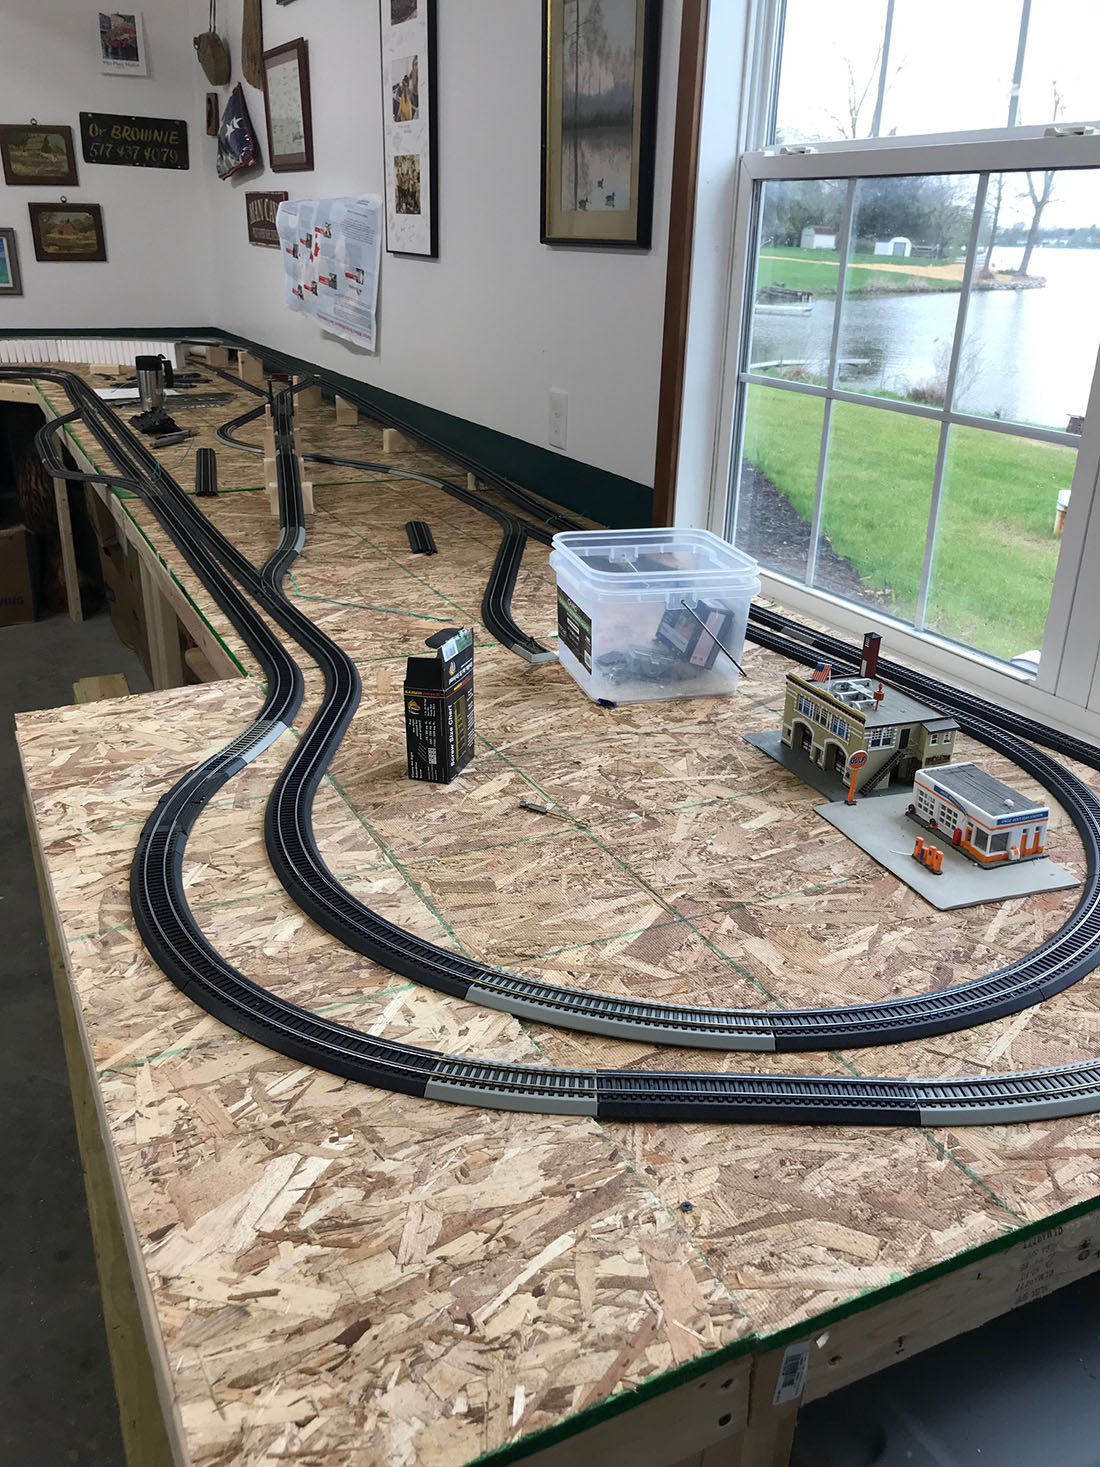
I see what I think to be a possible problem on your 13′ section. It appears you have your inside loop going across the midsection and joining the opposite direction on the 21′ section against the wall. If I see this right, you created a reverse loop which would create a short for that section and your buss.
I would first isolate that whole section to test the rest of your layout. If that solves your problem, have fun and install reverse loop equipment for that section. If still shorted, I would disconnect all feeders from buss and start by terminating outside loop first. If not short, run some trains and have fun. Next start on the inside loop. If that works, terminate others until short appears. It appears you are well organized and the problem will surface without a lot of work.
Thanks again to Alastair for all your hard work-and to all, happy railroading from California.
Bud
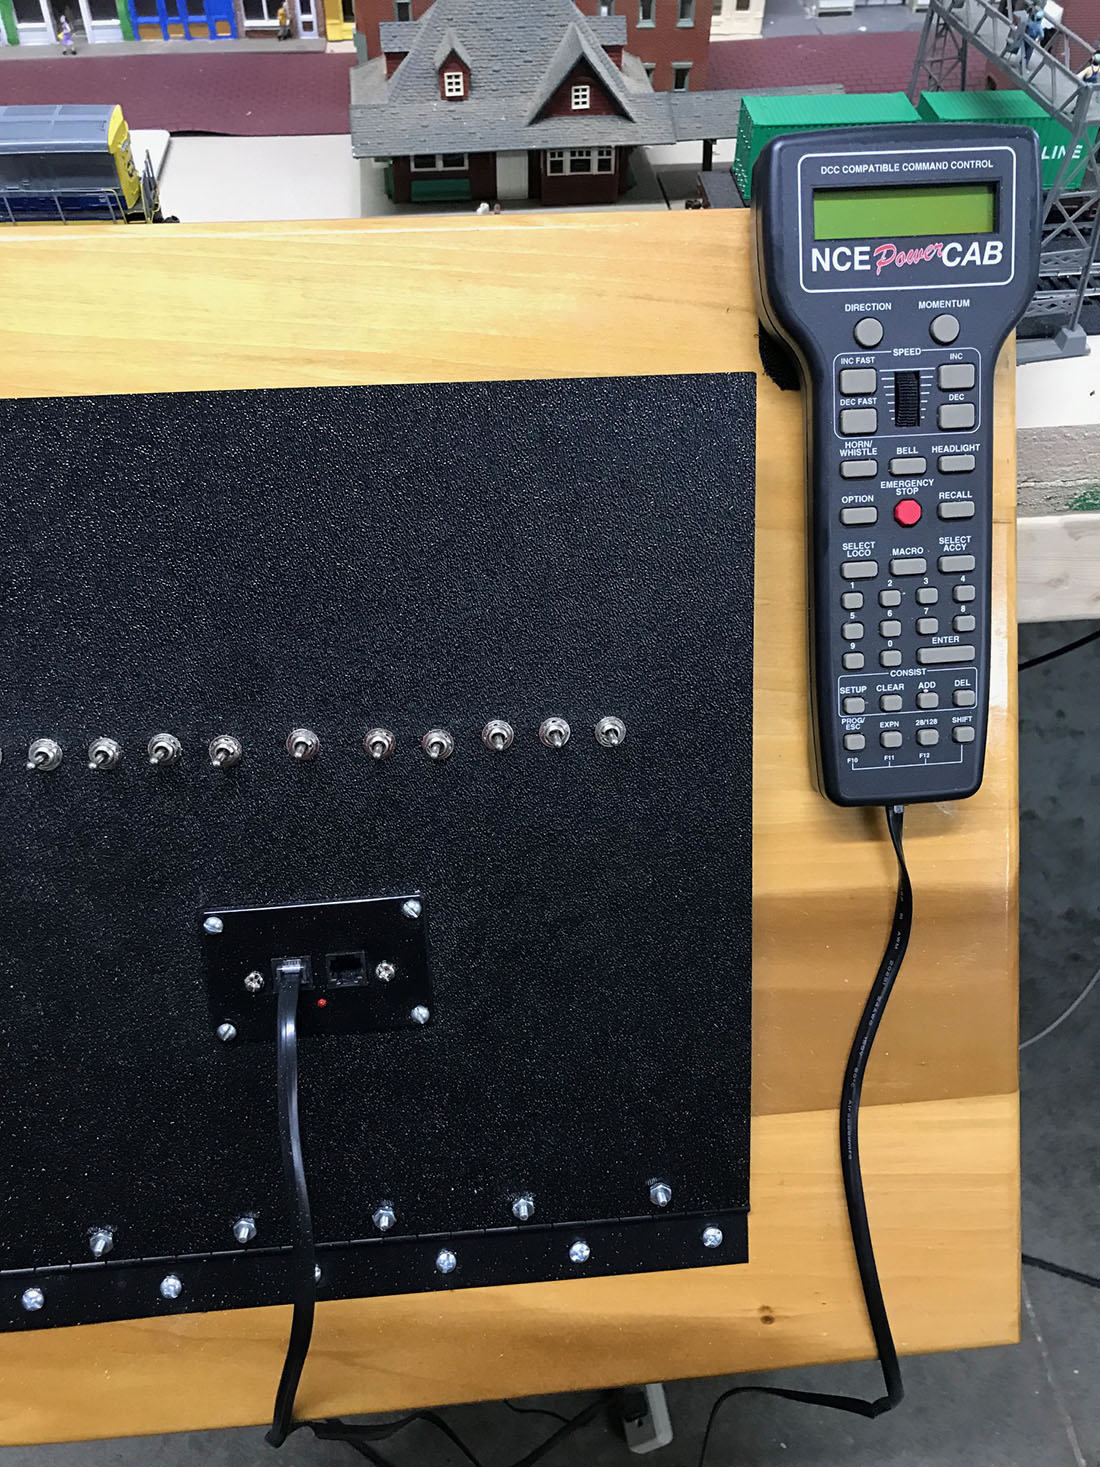
Yes, reverse loops are your first problem. you will need to isolate the loop with insulated joiners and add an automatic polarity reverser in each loop. AR1’s do work (most of the time), but they are old technology, the new ones are far superior in operation and most all of them now include a built in circuit breaker. The PSX-AR from DCC Specialties is getting the best reviews. A simple reverse loop shaped like a cartoon speech balloon with only one switch controlling the entrance and exit into and out of the loop is the simplest to isolate/wire. if there is additional switches in the loop, then you need to research the wiring procedure.
As to your DCC buss, with a shelf type layout such as yours, a simple straight buss pair of 12 ga solid wire running down the center of the layout should suffice. loosely twist the 2 wires together to reduce possibility of cross talk and just insulate the ends of the wires so they can’t accidentally short out. DO NOT CONNECT THEM TOGETHER! Run a feeder pair from the NCE plug in panel to each of the buss wires at the closest convenient place to form a T shape. Suitcase connectors or the new lever connectors can make the connection simple and solderless. Then just bring your feeder down and connect to the buss (the lever connectors are desirable here, rather than the traditional suitcase as they work well for joining 2 or more different size wires without requiring soldering, and have a snap in holder with a screw hole for attaching to the bottom of the layout, reusable. Amazon sells them: product # 15V12B58D1MY .
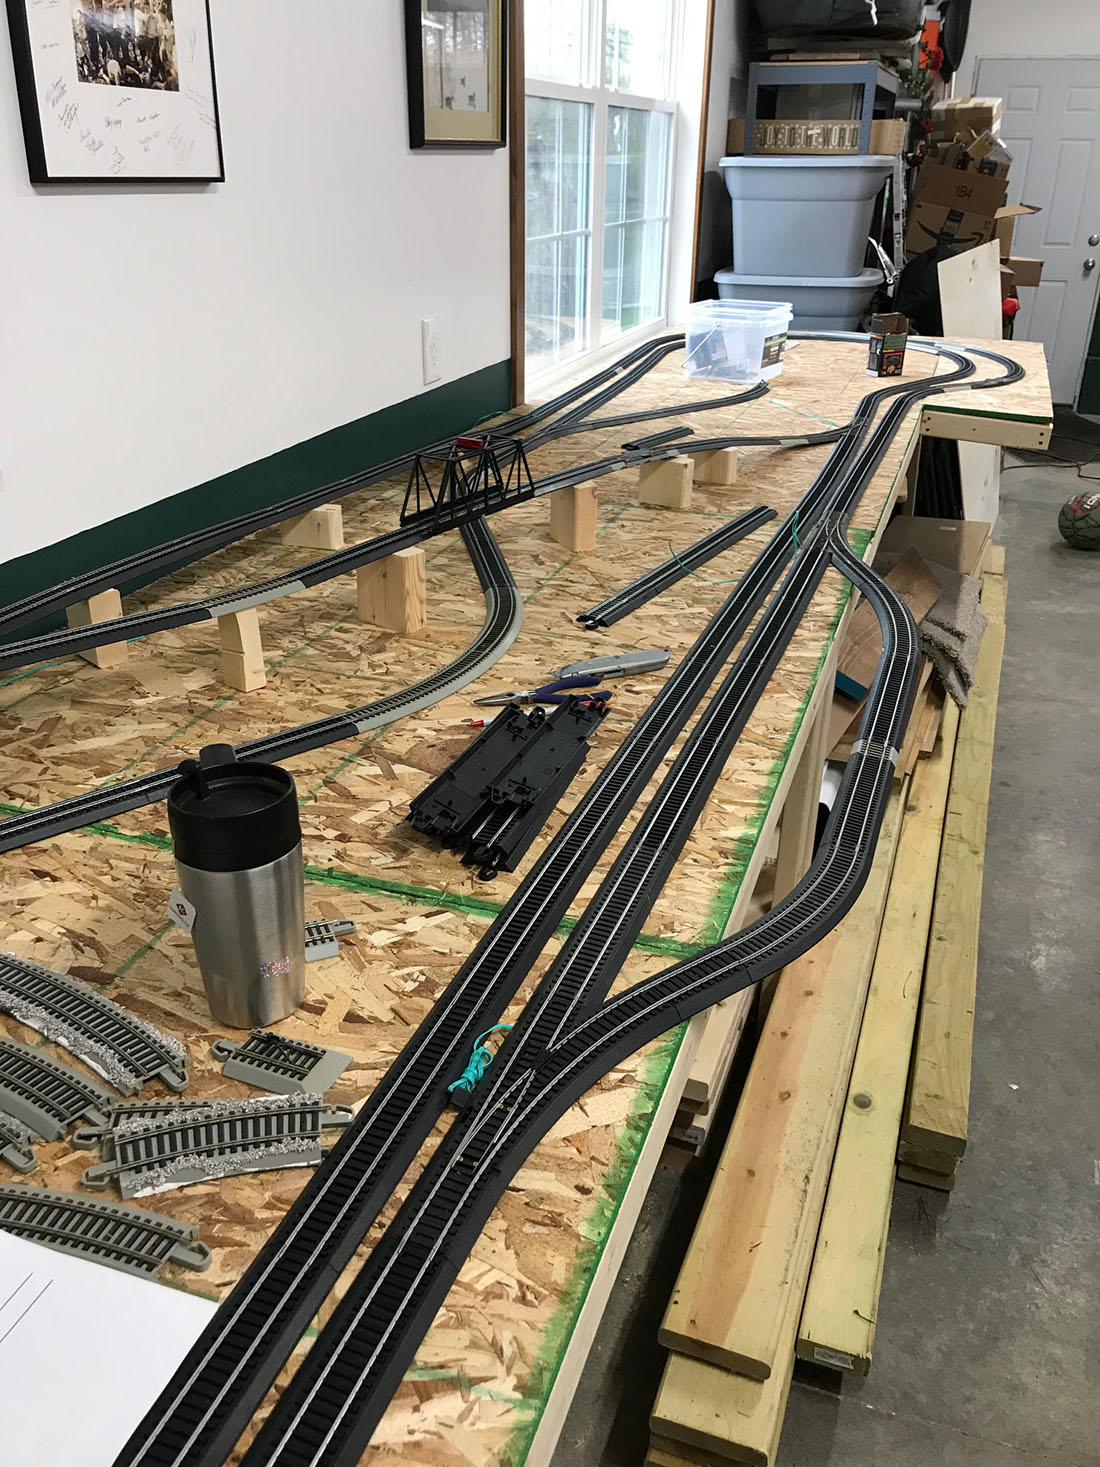
Unfortunately Bachmann turnouts have knocked the Atlas snap switches out of last place in quality (and are not DCC friendly). I would strongly recommend Peco turnouts and using flex track rather than sectional, ESPECIALLY there in MI where the weather and humidity fluctuates greatly, and you say it will be idle for months at a time. each section of flex can eliminate 3-6 pair of oxidation prone connectors, and each only needs one pair of feeders. Also much less expensive than sectional when bought in bulk. the little extra time to glue down roadbed and track will be more than offset by the ease of aligning and unlimited paths of flextrack and the hours of time you will spend chasing electrical gremlins each time you want to operate the layout.
I see two reverse loops. They will need to be insulated to prevent shorts.I’m not knocking anyone or any item, but be aware that track of any quality will not prevent shorts due to reverse loops. Analog is simple. Run trains in one direction around the loop. Insulate the loop completely,then when the train is in the loop, reverse the mainline polarity.
I love it so much good work, maybe I will finish my tiny HO layout soon. At 77 i better get on with it before the rain floods everything. Is the east coast of Australia the only place that is coping it? Maybe a fllod scene would be appropiate
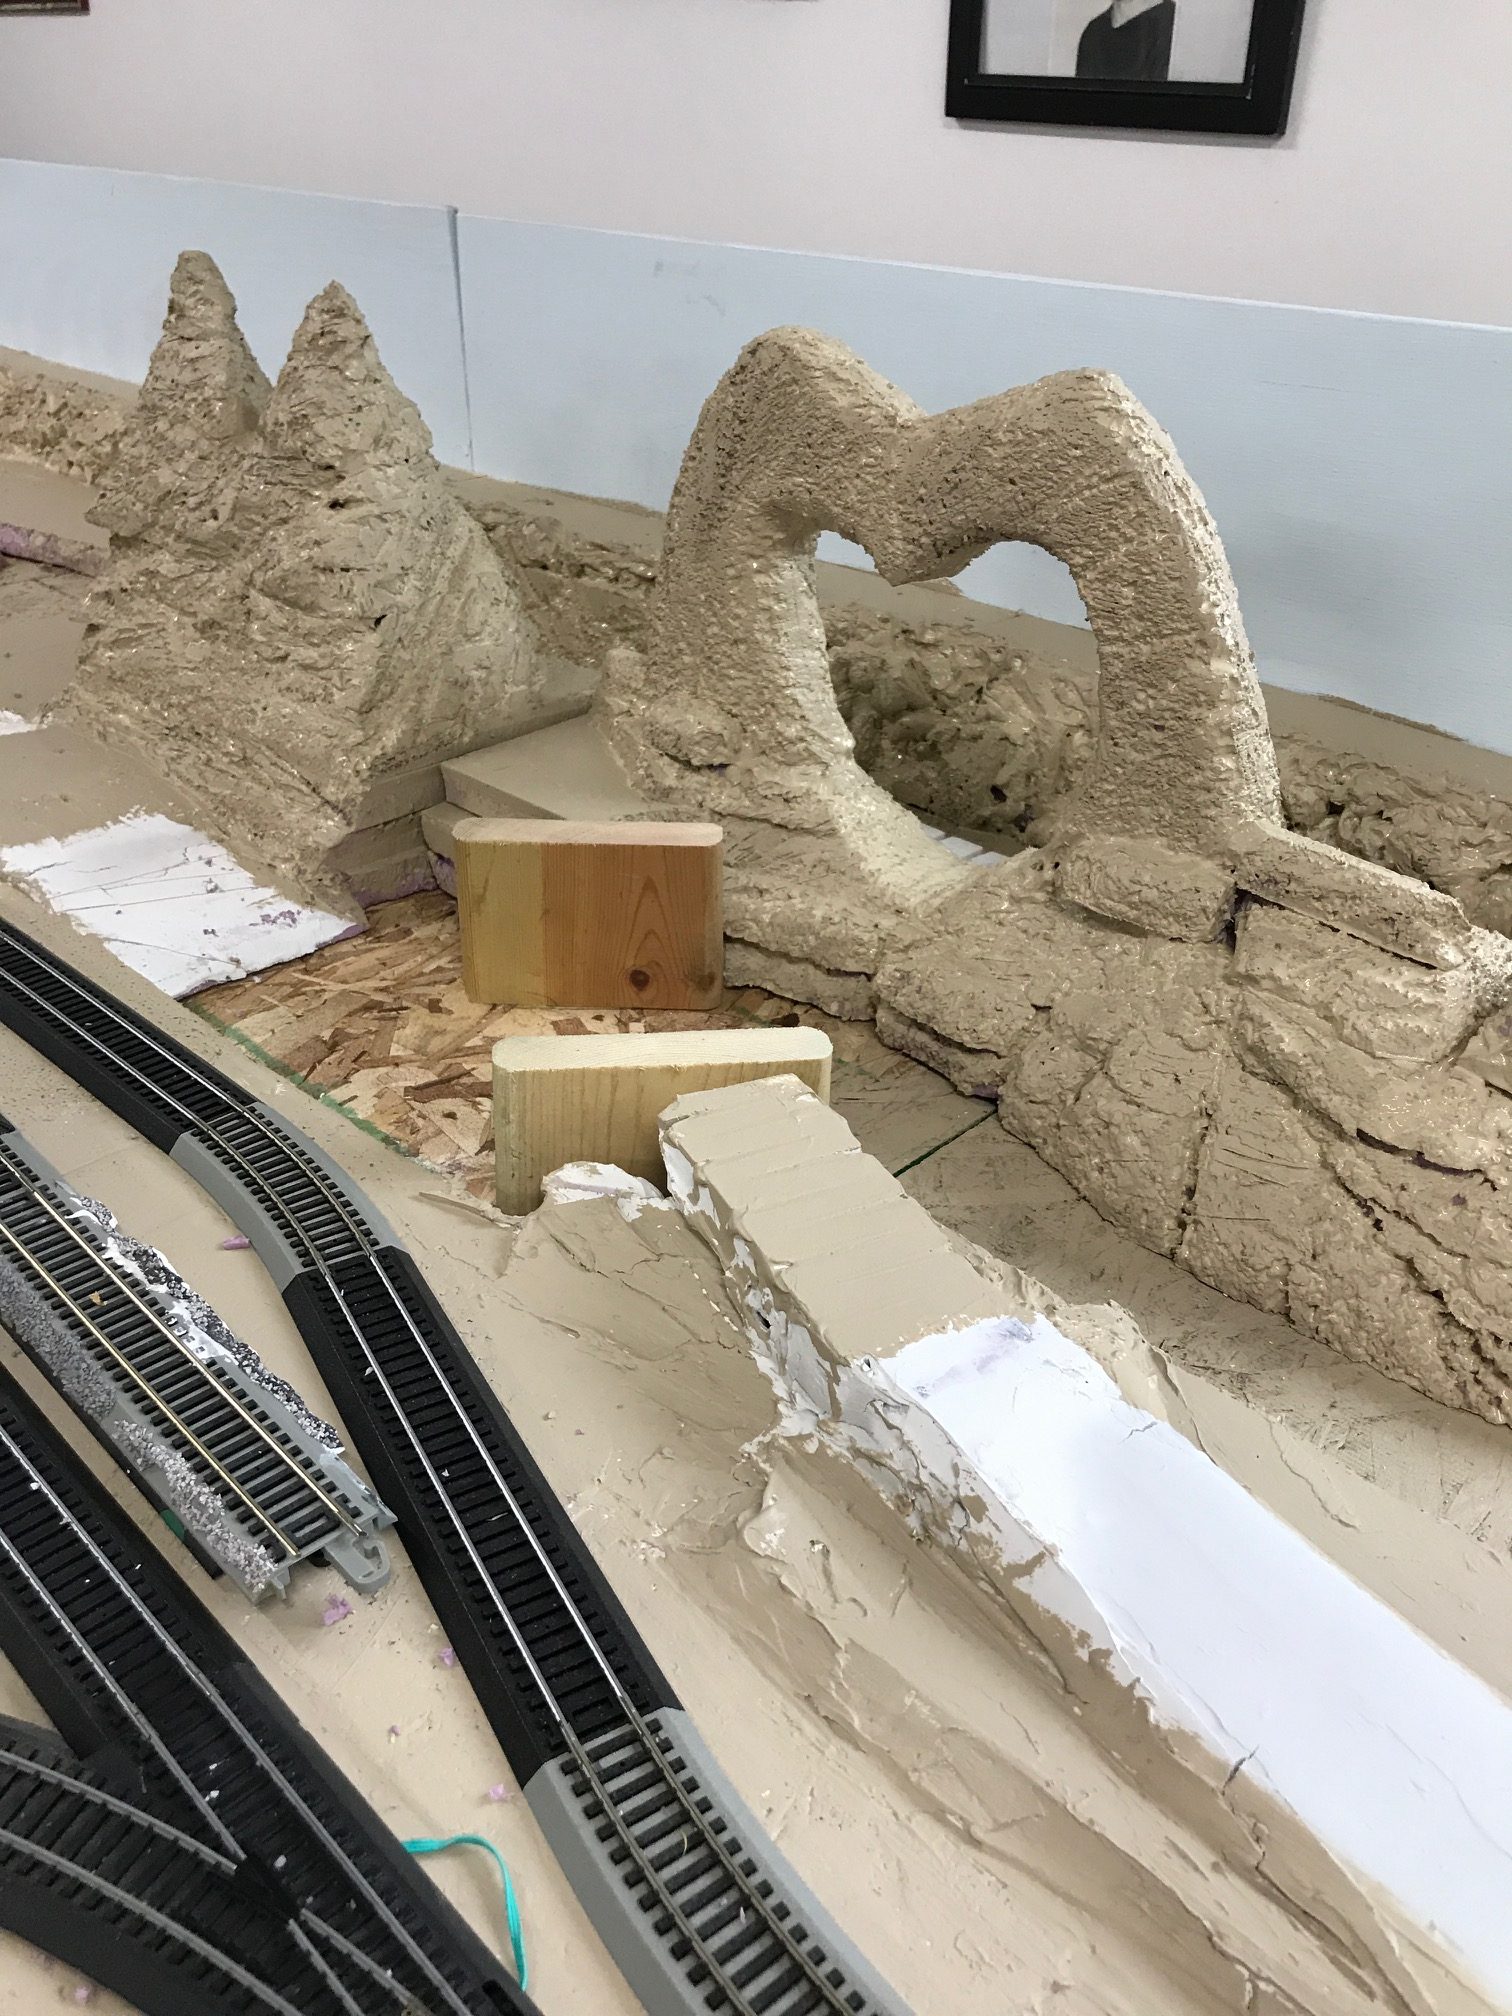
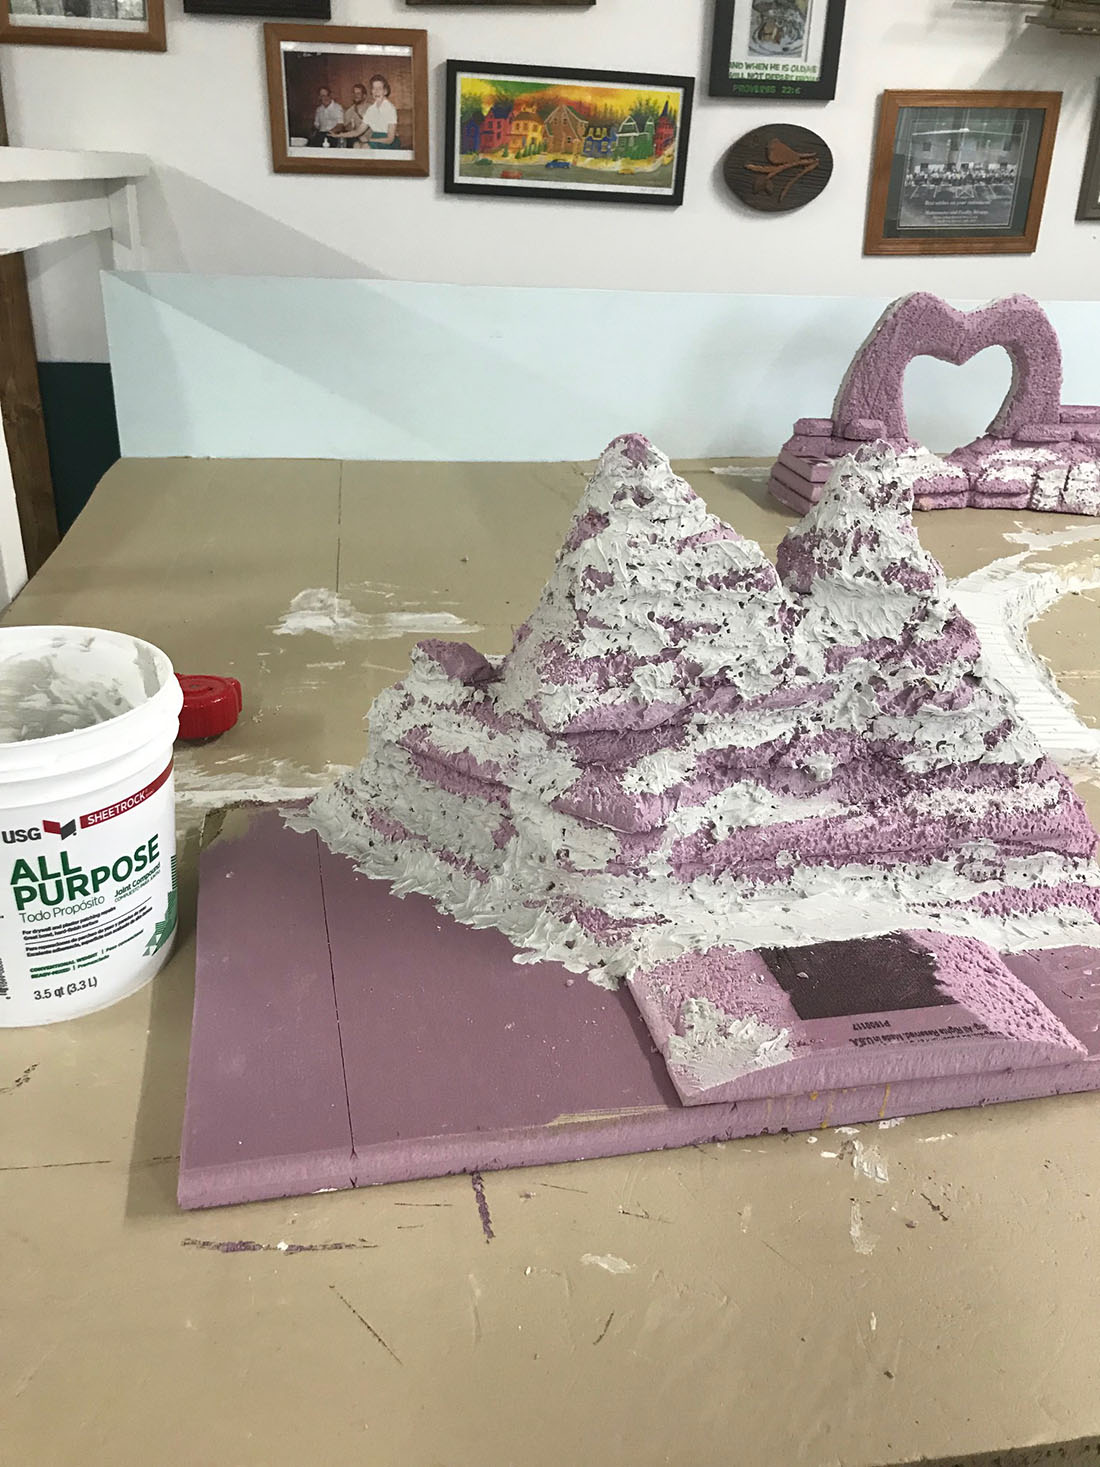
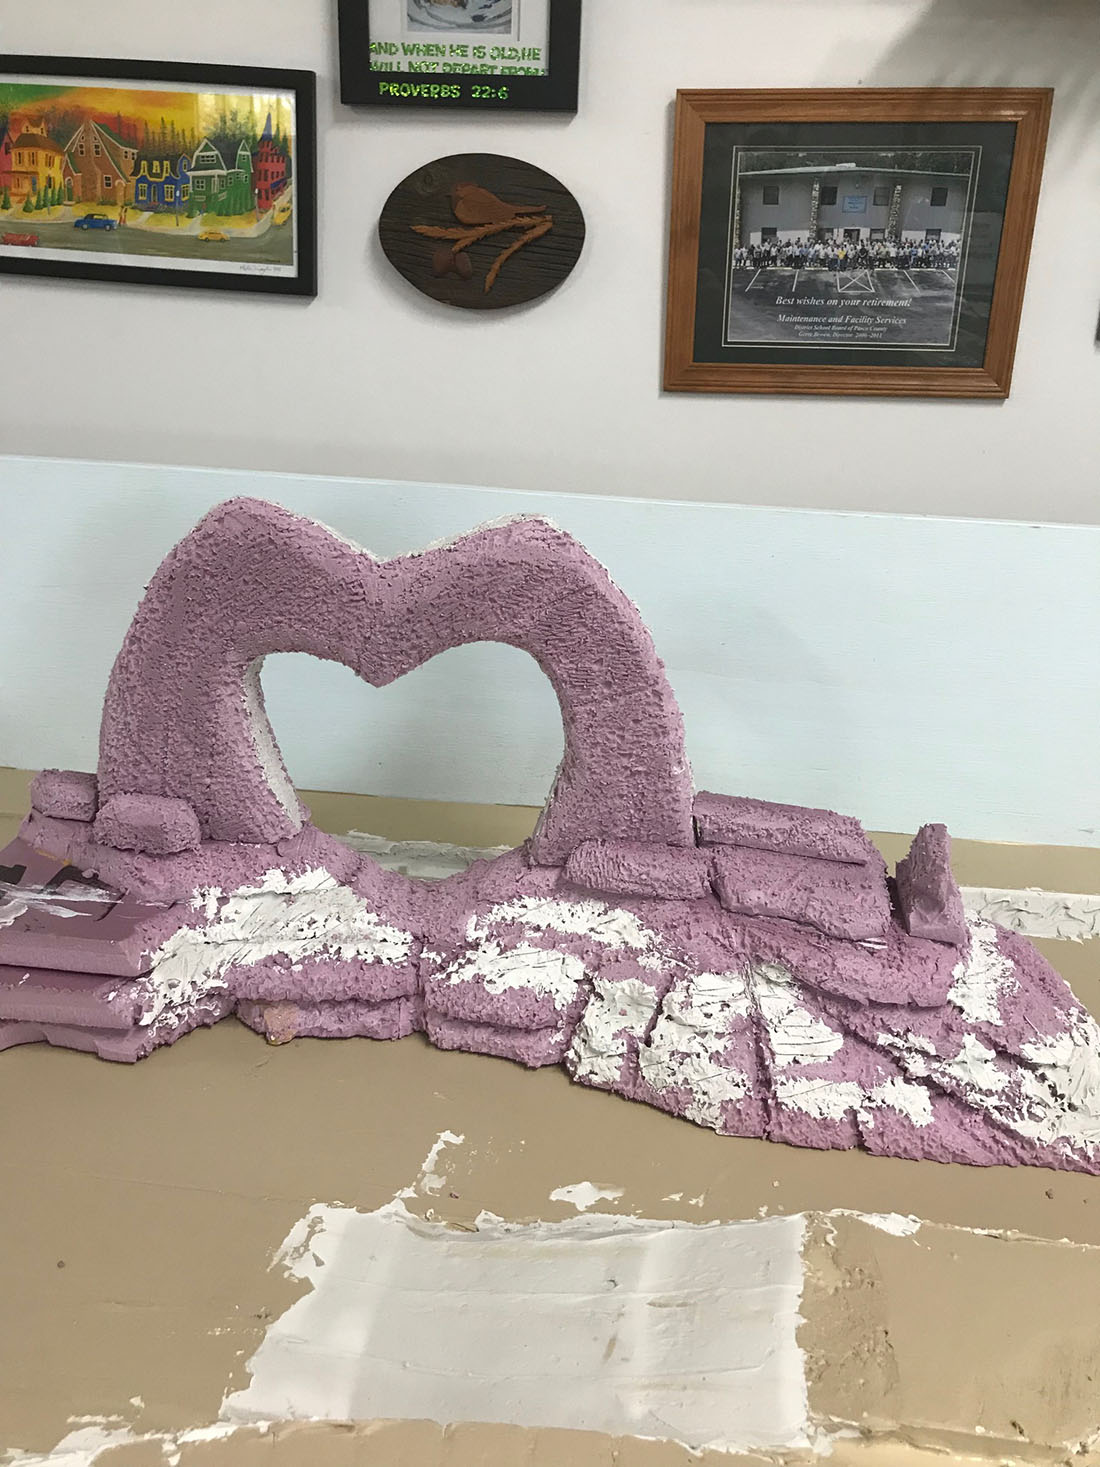
Very neat layout, the heart-shape formation is for real, saw someplace. An old method for connecting wires and shorts…
1) procure lamp w/socket, leads and 2 alligator clips for same voltage testing.
2) connect this in series with questionable connection.
3) if short- bulb will light full brilliance.
4) correct connection, bulb will light dimly
5) remove of coarse after confirmation.
The old wood mills in Maine would operate with what’s termed Delta connection at transformers (no ground in system). Would set up dual series lamps for each main phase coming in to token/floating ground. A short would light up bulbs full brilliance for particular phase, not a problem as yet. Needed looking into… to test ungrounded phases a screwdriver was used to ground out phase… full wattage lamps showing meant system OK.
Example: 120V lamps would not work on 480V circuit, addition series bulbs were needed or proper short circuit voltages. Should see a house when that looses working ground/neutral lol.
HY, Tio find a short use a flat car with one end different from the other. run it around and look for spots where the car is now backward. To make cuts take a high speed rotary and use a dremel metal cut off disk to cut both rails. The cuts should be 0.040″ or less, Stick a light capable of 14v iin series with your power source and iif iit lights then you stilll have a short. Keep looking for shorts and cutting untill the sereis light goes out. Now install AR1 rev loop units to handle switching the tracks when you run trains. The light could be an LED in series with a 1K resistor and a diode. Good luck
Hy again, additional comments on buss systems. I use a coil of romex 4 wirre # 14 awg wire for a four wire buss. I made blocks of 0.5×0.5×2.0″ and drilled four holes in the blocks. Then I feed the wire thru the blocks and atttach the blocks to the underside of the layout. To make connections, I use automotive tap connectrons which slip over the wire and then are pinched closed.with the extra wire now available to connect to the track. The whole system looks neat and is easy to folllow. My extra two buss wites I feed + and – 12vdc. The buss wires are unbroken with this wiring. Good luck
Looks good.!!!! I just hope mine turns out that good.
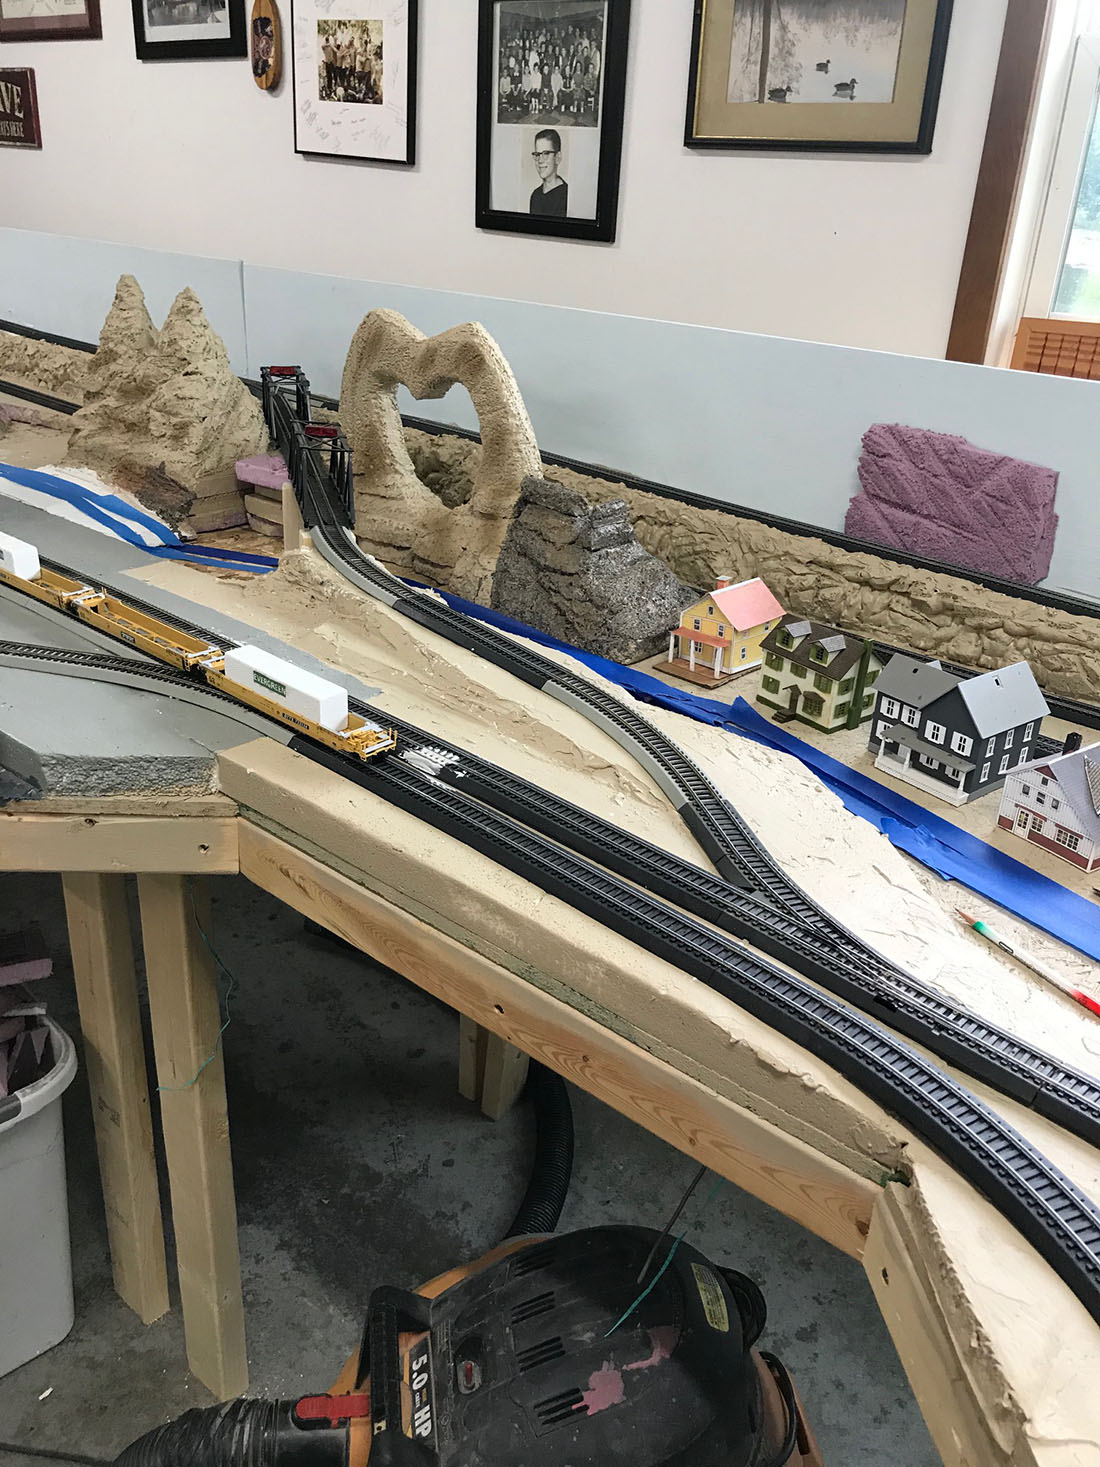
I like your layout, I am working on one myself that is on an 8″‘ x 24’ table. It is large because I am running 3 rail O gage trains. Yea I’m not a purist model train guy. I an too old to try to build anything small like HO gage models or smaller. (shaky hands) Anyway, I love the idea of the arch rock sculpture, it reminds me of Arizona territory. I do have one question, there is a grade which shows up in picture 25 between the turnout and the overpass that looks spooky steep to me. Are you going to have Shays for pushers there?
My advice: Sell the Boat.
John Daily. Pres. Daily D Railroad. (Jim Kelly)
Gerry
Very creative work. Just a side comment about what appears to be OSB board on large sections of the layout. This material may retain moisture for long periods, causing edge swelling or even eventually rot. In a garage environment, moisture control may be difficult.
A dehumidifier might be helpful to preserve your wonderfully crafted work.
Ken
Because of your perspiration, we get… inspiration!
Gerry
The comments made before have merit. My concern is too steep slopes and they are hard to fix because you either have to decrease clearance, or headroom, or increase the length of run which may be impossible.
Take a straight board and with one end on a table thats level, raise the the other end so that at 4 ft from that end it is one inch high- see where the bubble sits on a level. Put that level where you have a grade and you’ll see how much you are off by seeing where the bubble sits. 1 in in 4 ft is ideal. Now try one inch in 3 ft. That should be the max for freight trains that arent too long. 3 ft to 1 wont work for passenger trains.
The incline into the bridge by the heart is my concern and it has a turn which further exacerbates the problem.
Resolve the reverse loop issue and the slope issue -which is a bear to assess and agony to fix- and you’ll have a mighty fine running layout. Good luck and do keep us posted because we need to see videos just like Dangerous Dave’s and they should be yours .
Big Al
Loved John’s message. Keep pluggin’.
Molte Grazie
Can wait to see it completed. I can’t comment on the reverse loop situation because the thought of it gives me a headache! LOL. I avoided the reverse loop by making my layout a gigantic loop that was folded over a couple times with trestles, several sidings and a freight yard. So I never had to deal with isolating sections. Go Spartans!!!
What great detail of all the tracks you have laid out. I am only sorry for you that you are not able to show us the trains running as I am sure it will be just as great. Continue to update us as I am very interested in your layout. I am like I am sure like most others, just trying to get past the track laying part to the grounds, hills,, and mountain laying of my 4 x 8.
once completed it will be awesome, love the bridge that goes thru the unique mountain pass
The first story id swear was me and my great grandson were in my garage when he found my old 1950 HO steam engine. His first question was can we put it together and run it not knowing if a 70 year old train would even run but we started it and it ran with a little push now and then but it ran and with a little patients it’s runng like it did when brand new much better than the trash Japan is suckering today’s new train lovers into buying. I bought a new set for Christmas and it’s already quit running going to send it back to Bachmann and get it fixed want to bet I get a new piece of trash them saying my original engine couldn’t be repaired the model trains have sure gone down hill from back then when the engines were meant to run 70 years or more !!!
It’s obvious that you have done a great deal of planning for this layout. And you have some very good scenes to build. Aside from the reverse loop issues, I don’t think I would have used EZ track. I’ve used it for a small layout under the Christmas tree. And I know it’s easy to use. The downsides can have some issues. Tracks have specific curve radius and can cause limitations on the flow and direction of the line. Also there are many rail joiners in nine inch sections which could cause electrical issues. I think you’ll like the clickety clack of the wheels going over the rail joints. I don’t know if you are gluing or nailing the track sections but if loosely laid, track cleaning could be a problem. Wired rail joiners could be used to connect to the main bus wire. And when you start adding ballast, I would suggest you use fine gravel as there isn’t much space to cover the rail ties and the plastic roadbed. I truly envy the space you have and I hope you enjoy the journey of building your layout.
Jim AZ
Gerry, I think you will probably end up with a fantastic layout… You are smart and you are talented! The negative side of this is that all of your buildings are
fresh out of the box which lowers the viewing value…. Get your track working and then focus on Detail…. I build all of my building from ground up. This gives me a chance to belend with the background….
Now working on a diorama of my parents place in the woods of Wisconsin…. Once finished, back to my train diorama….. I felt I needed to build diaromas to understand layout technique….
One thing to remember is that in a loop, the inside track will be in outside track on the back of the loop when looking straight on.
Jerry et all,
I noticed your holes through the crossmembers for wiring. As I was building my “modules”, I drilled those holes before I assembled my modules. Since then, I came across an idea that seems to have a lot of merit.
Instead of fishing wires through holes, I now fasten PVC pipe straps to the crossmembers, screwing only one side. You can pull the open side down slightly and slip your wires in (or out) anywhere along the wire.
Tom in Mississippi
Sounds like you got a reverse loop somewhere. Maybe you can start from the dead short n trace the wiring to the power pack/ transformer!? 🤔