Glyn’s been in touch, he’s added to the HO track layouts on the blog, and it’s a stunner too:
“Hello Al
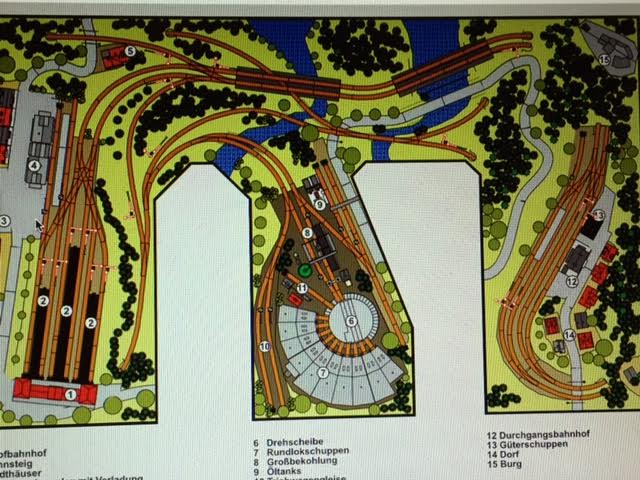
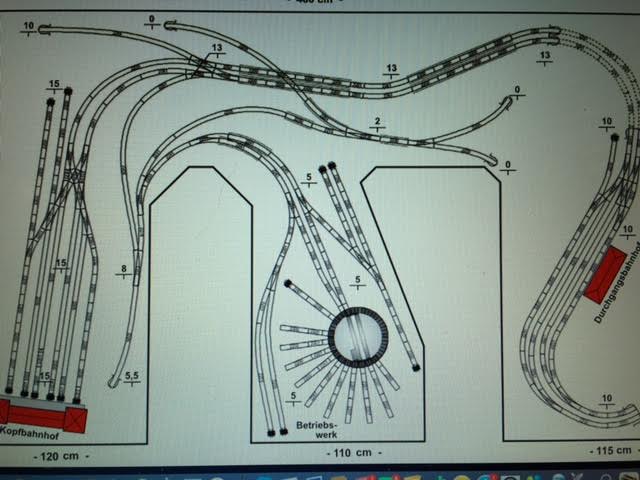
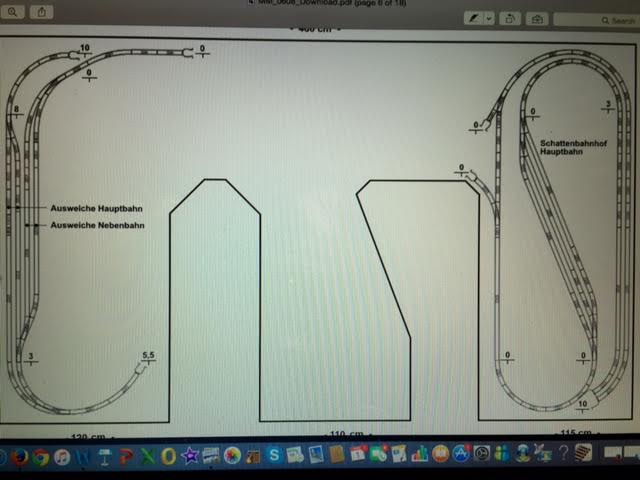
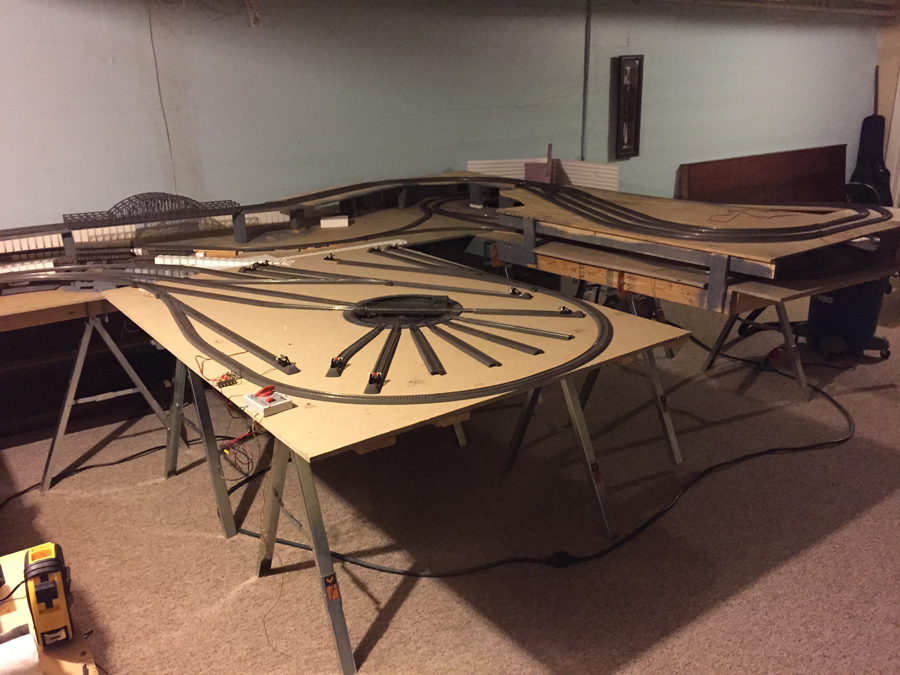
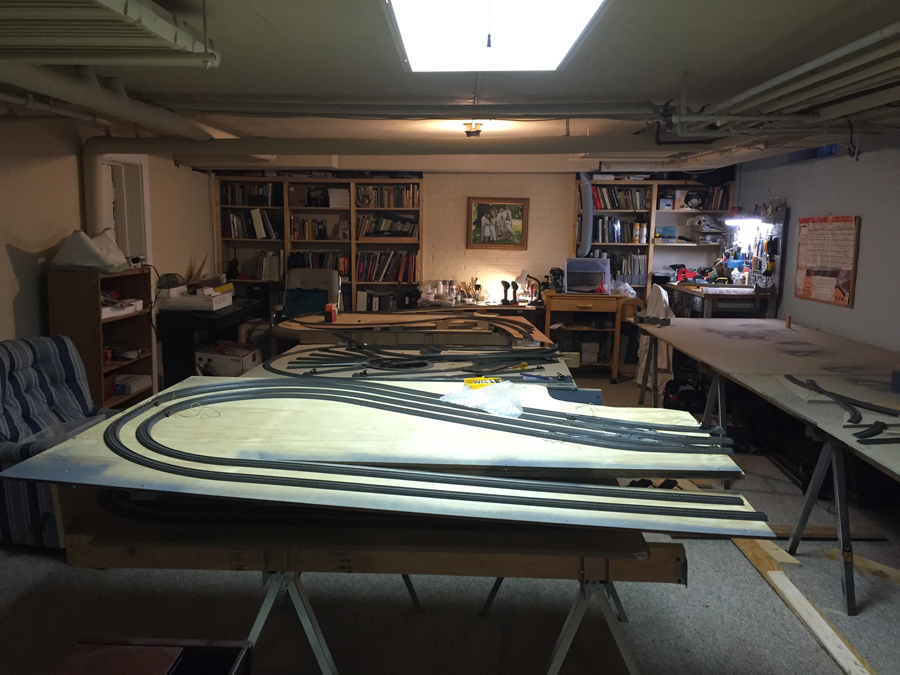
Thanks for your reply and here are the first images of my layout. I’m attaching 3 images of the original track plan taken from the Marklin Magazine several years ago. The layout is constructed in a 16’x11′ W design.
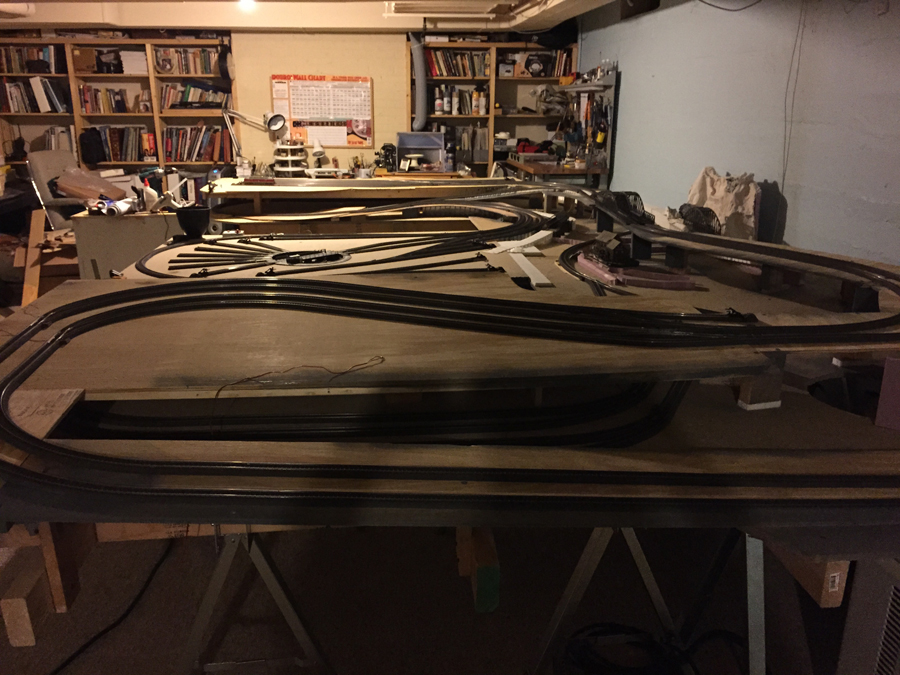
I built the base on sawhorses from Home Depot with 2″x4” horizontal supports and bracing in between – very simple and sturdy. This was overlain with Homasote for sound deadening. I cut access windows where needed with a Dremel saw with side cutting drillbit. The modular design allows for subsequent dismantling in sections when I retire and move south of our current location in Illinois.
The layout utilizes 3-rail AC Marklin C track with digital operation from the Marklin Central Station CS-2. All locomotives are digital and the points (turnouts for US readers) are digitally operated which makes wiring almost non-existent apart from a bus wire with feeder wires to the main tracks every 2 metres to boost power to all track blocks. I’m an electrical simpleton so I need all the help I can get. Digital makes wiring so easy that even I could get it right!!
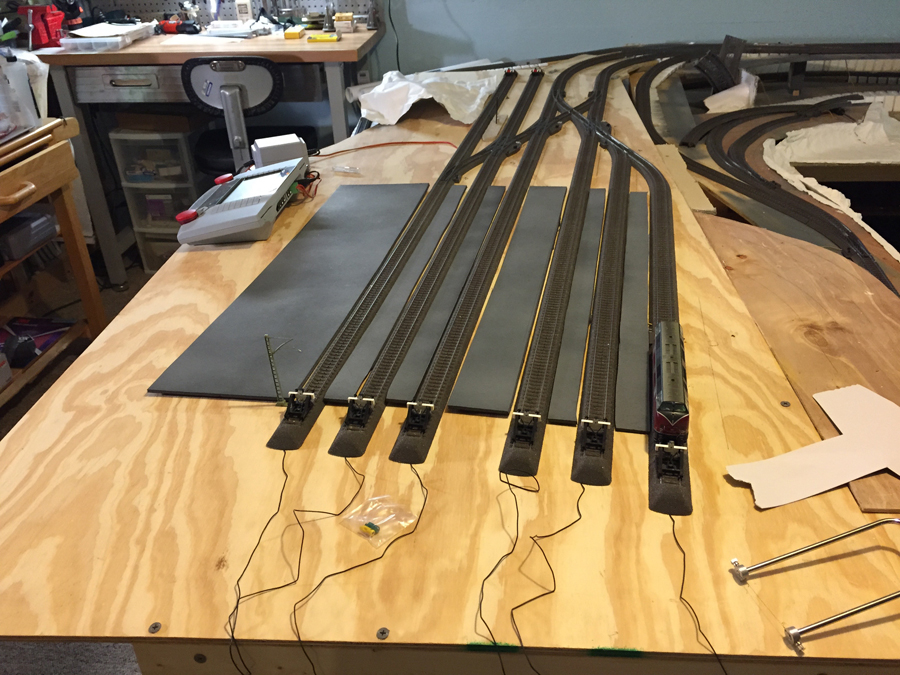
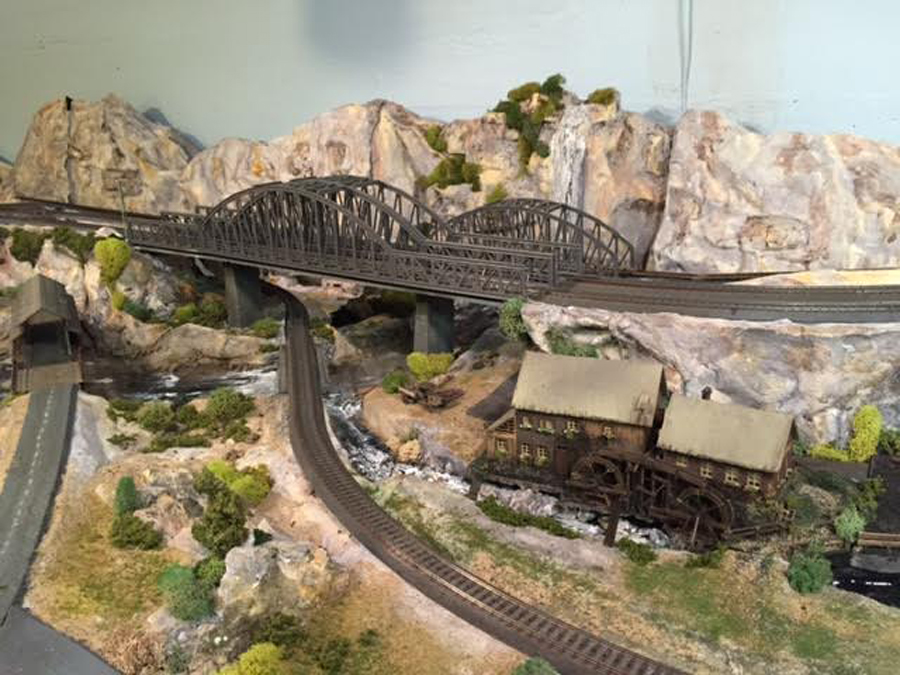
I liked the concept of a mainline station with smaller rural through station and a large marshaling yard. The two stations are connected by extensive curving double mainline tracks running over several bridges crossing a river and there are multiple hidden storage tracks beneath each station. I modified the plan somewhat to add extra track in the marshaling yard and also widened the curve in the rural station area to allow for more surface area for the rural town to be expanded. In addition I ultimately lengthened the end tracks in the main station to accommodate longer train consists. Getting the track levels correct was difficult. I eventually resorted to Woodland Scenics styrofoam inclines which proved invaluable.
I wish I had used them earlier and noticed that “Dangerous Dave” had incorporated their use in his layout revision. They make incline construction so simple. I had to pull all of the base boards apart and re-lay multiple areas of track in order to achieve smooth operation but the final assembly shows the end result with successful test runs over the entire track plan.The attached images of the undeveloped layout in pieces then assembled, show the sequence.
I was given my first small Marklin layout at age 5 and was fascinated by it. I developed a longstanding interest in the German and Swiss railroad systems and began collecting digital locos in the 1990’s after a lengthy break from the hobby. I was also intrigued by some of the legendary US locomotives like the UP BigBoy and the War Bonnet Sante Fe diesel passenger trains, so had a bit of a problem as to which systems to model, having collected both. I planned to build the layout in the basement and did not have enough room to build 2 separate layouts, so opted for a fantasy design running both Swiss-German and US trains on 1 layout, The rivet counters will be horrified but I just want to enjoy running my trains in a beautifully constructed landscape, so a blended system it is!
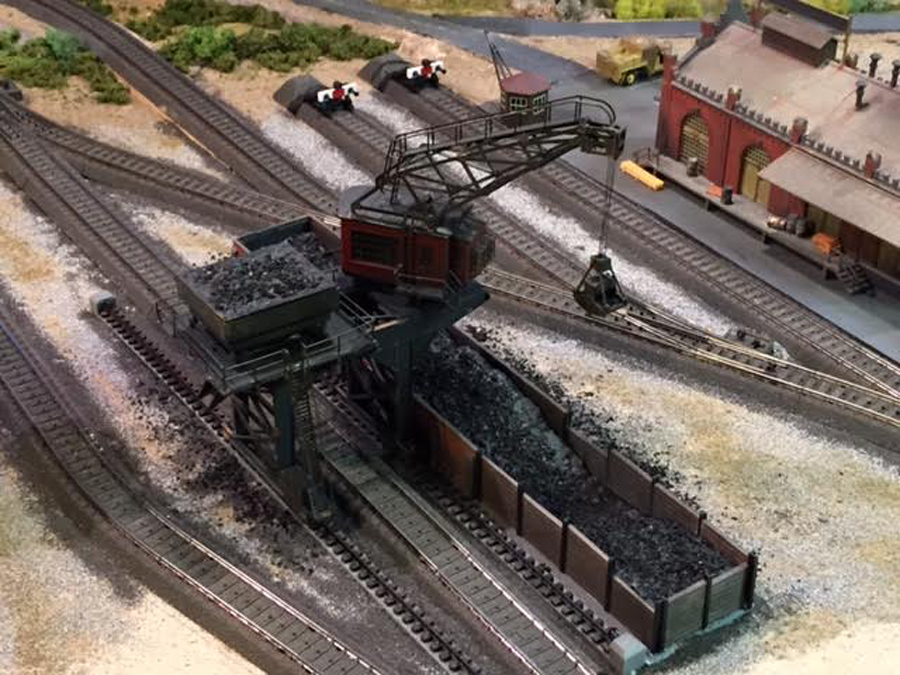
I can’t remember who said it but one of your readers suggested landscaping the layout in stages so as not to feel overwhelmed with the magnitude of the project. Given the busyness of my daily surgical schedule, night call and academic writing, I had relatively little time available and thought the advice to work on creating small vignettes in stages rather than tackling the entire landscape in 1 mammoth operation a good one. I began with the river and expanded from there. I will send further images of my progress starting with making the mountain backdrop and then the river scene. For now I enclosed the most recent image of the river crossing area and a close up of the coaling station in the marshaling yard to indicate how it has progressed since the humble beginnings!
Again I so appreciate what you are doing for the hobby and hope my simple contributions will be of value to those contemplating building or looking through HO track layouts.
Best wishes
Glyn”
HO track layouts:
A huge thank you to Glyn for adding to the HO track layouts – great pics and a wonderful narrative too.
And it just goes to show there is some great advice shared on this site. Why be overwhelmed when you can do things bit by bit?
Keep ’em coming.
An If you’re still mulling over making a start, the Beginners Guide is packed with sound advice.
Best
Al
PS More HO scale train layouts here.
PS Latest ebay cheat sheet is here.
PPS More HO scale train layouts here if that’s your thing.



I am very close to starting a brand new layout (approx 10′ x 5′) that is to be hung from the ceiling and your layout has certainly given me food for thought. Thank you; I think your layout is brilliant. I might even increase the size of my board and re-think the layout.
At the moment I am still working on a pulley system for raising and lowering, then after that it should be building the board and all systems go.
Great stuff Glyn,
Regards,
Peter
fantastic work Glyn looks brilliant
Terrific layout and detailling – used the space to an advantage.
What a great layout, just wish I could have the space. I’ve only got a small layout up at MO, but yours is great.
Great track plan. The buildings are impressive. The land forming is good too. Nice work.
Glyn,
Outstanding layout, do you accept visitors? I would really like to discuss some of your techniques as I am in a very similar mindset as you are on layout design.
Beautiful layout Dr. As far as having mixed equipment, remember the old model train adage, “They’re MY choo-choos and I’ll run them any way that I like!” I’m going to rethink the digital wiring scheme. Very little wiring is much more desirable
than the rats nest that can happen if you let it get away from you. And we all do…….often
……………………………….Thanx
………………………………Fitz (from near Philly)
That will be truly something.
BEAUTIFUL!!!!!!
Super layout. Track work, operational scheme, and scenery are wonderful. Thank you!
Great Scott! Space used is great
Great layout but I don’t see any continuous loop that would keep it going. Is that a possibility in the future? LN
wow Gwyn what a monster layout….
and your detailing is superbe…
keep em runnin fellas
StJohn in Long Beach Calif
Glyn,
Your layout is terrific, great!!!
A very nice looking layout
Paul
Great layout, however… I believe that we all would like to see more. You build a masterpiece and give us just a tiny taste. I would hope you would share more of your work. It looks like you put a lot of time and effort into it. I had a similar layout ( tracks only ) when I was stationed in Europe. I always wondered how it would look if I added just a few features to it. Your layout far surpasses anything that I could have done back then and even today. So, please share more photos if you have some spare time. If I’ve missed other photos in the past then I have missed out completely. Thanks for sharing!
Impressive to say the least. Like your approach and the detailing in the final scene. A round of applause for your efforts.
that is awesome. stupendous like a divinci of model railroading!!!!!!!!
Thanks so much for the encouraging comments from all and sundry. Just a comment to LN regarding the loop – the end station is always a problem for us modellers. In this layout there is a large dog-bone incorporating the multiple sets of hidden tracks in the 2nd layer beneath the main tracks so it does allow one to keep trains running continuously. My dream would be to have entry-exit block signals run digitally but I feel like I’m too much of an electrical dunce to pull it off! Marklin offers all of the signals and decoders etc but I need to get adventurous and try it on a small section of the layout first. It would allow me to have trains entering the holding tracks and stopping while others leave to maintain variety. Any advice would be appreciated.
By the way I would be happy to have visitors although not sure the layout is worth a visit! I hope to share the techniques I used (such as they are) with all of you, although many are ideas I picked up either from this site or in web searches. Hope the tips I share will be of value to those of you embarking on new construction.
Regards
Glyn
NICE!!!
I am impressed with your layout and attention to detail. Very good workmanship and design!
Very nice layout, I’m just in the process of building my room and then hopefully start on a small layout myself, this has certainly given me some inspiration. Thanks for sharing.
Great photos ! What software did you use to produce your track plan ?
Thank you for posting this. It gives me insight as I begin my layout.
Nice plan, with the terminus-to-return loop basis, and digital control, you can really play at the station, turning them round for departure, while the last couple you sent are still en route.
I had a visit to Germany to see something of the last main-line steam in about 1970 and was very impressed, very slick operation and some heavy trains, even their shunting seemed to be done with twice the zip of ours. We visited Rheine, Koblenz, Heilbronn and Crailsheim, and saw pacifics on expresses, prairies on suburban passenger trains, the 3-cylinder 44s on freight and the lighter 50/52 class 2-10-0s on just about anything from a Panzer troop train to a two coach rural local. Fascinating variety.
Rod
at the start you said 3 rail then the picture was ho was that a miss print I am working on a 3 rail I liked your lay looked very good
Hi Glyn. Really nice looking layout. I really like the fast flowing water effect that you have achieved, so please tell. How did you do it. All the best. Keith
great layout .some really good scenery a lot of time to get it looking just right. keep up the modelling cant wait to see more.
what a layout. am highly impressed and yea,, it is your choo-choos, so do what you do well.
Very nice layout. As others have asked… so you accept visitors. If you are in Illinois we are close. I’m in Champaign.
What a magnificent job. I’m pressed by the workmanship of your layout.
i envy your design using American and European trains. Hooray for you.
I model in Z scale and pack a lot of action and locals in my layout but Glyn certainly proved that scale does not hinder the track packer attitude. His various points of interest and the separation he gives them is masterful. Structures and scenery have plenty of space to “show their thing”- so to speak. Very nice design and a fun place to PLAY TRAINS.!
Mister Dave
Wow what a job you did on that bridge and water / brook scene, Gorgeous.I wish I had that talent.
The Critic
Glyn
When you want something done -give it to a busy man. WOW! Great job and artistry. Its your layout and you do what makes YOU happy especially when you are talented. Please keep us posted as you continue and Bless you for noting the specs as so many people think we can read minds. Let us know how the wiring turns out.
Be well & safe
George from LI, NY
Kool layout.!!!!!! I wish i had that much room.
Wonderful Layout! John I believe Marklin is 3 rail as they have pins in the ties and sliding pickup shoes to gather power as opposed to our rollers which glide on a full center rail.
To Larry Nystrom : in my lifetime real railroads never had continuous run loops or ovals. They are all point to point, so models made point to point are more realistic. If I ever get the right of way acquisition,my railroad will be point to point.+
Your surgical background shows up in the detailing on your layout. I use scapels for my modeling, but I have to buy my own. Like you, I too combine European with American prototypes. Basically my layout is American, but I justify the use of European trains as “borrowed equipment for trial use on American tracks”.
Glyn, Although I haven’t done so yet, I intend to run all wiring above the platform (due to age, 88). I want to lay wiring flat to the board, cover with tape and cover that in turn with ground cover, grass, gravel, etc. My layout is constructed and runs, but turnouts and other wiring is still to be done. Everything fits in a room measuring about 12′ x 11′ with liftout panels where I can walk to service track. The liftout panels are independent of the track work and are part of the rural background where all the buildings and scenery is located. In this way, I can take a liftout panel (approx 2′ x 2′) and work on it separate from the layout. All this has been designed taking into consideration my inability to crawl under the layout and be able to work seated at my workbench or in my mobility scooter. When people are disabled like me, I have to first design the layout to accomodate disability before building can begin.
Beautiful layout, and superb track laying. One thing that I would want is for the layout to be higher, say 48 to 54 inches, but that is not a criticism just a preference. I had Mianne benchwork on an older layout, made to order. Saves time, and no mess.
Looking good ! 👍🏻
good ideas, nice layout.