Glyn has been kind enough to respond to your questions about his layout, and specifically the rock molds model railroad.
(if you missed it, it’s here).
“Hi Al
Several folks have asked about the techniques I used to landscape my layout.
I thought I’d make a few comments about basic approaches to landscaping and then start with how I developed the river system as it was the lowest point of the layout and I worked upwards from there. It gave me a real sense of excitement with its physical variety and provided a meaningful impetus to move forward with construction.
First, I had used the traditional technique of plaster covered papier mâché as a youngster and found it unbelievably messy – I got the stuff everywhere, often not where I wanted it! When I researched newer techniques several things came up:
1: cardboard strips covered with plaster soaked newspaper of paper towel
2: balls of rolled up newspaper covered with plaster soaked papier mâché
3: insulation foam or styrofoam carved with a hot knife
4: landscape aluminium mesh
5: Woodland Scenics shaper sheet coated with liquid plaster
I tried several of the earlier techniques and found them messy and difficult to work with quickly as time is often a problem for me. When I tried the Woodland Scenics shaper sheet I realized I had hit pay dirt! It is simply fantastic.
All you do is buy rolls of 9″x72″ or 18″x72″ shaper sheet, cut off a piece larger than you think you need, then scrunch it up to whatever shape you desire. Simple as that. I stapled it to plywood supports or insulation foam for rigidity. The you just paint on a liquid plaster slurry and it dries to a rock hard shell in a few hours.
The sheeting is not cheap (US$10 for 9″ wide and US$22 for 18″ wide roll [I used the latter always]) but a little goes a long way and it is worth every cent. It can be lifted off intact or re-shaped as needed. To plaster it you can use expensive Hydrocal at $10 a box, but I found that a $10 20lb bag of joint compound from Home Depot was just as good and 10x less costly.
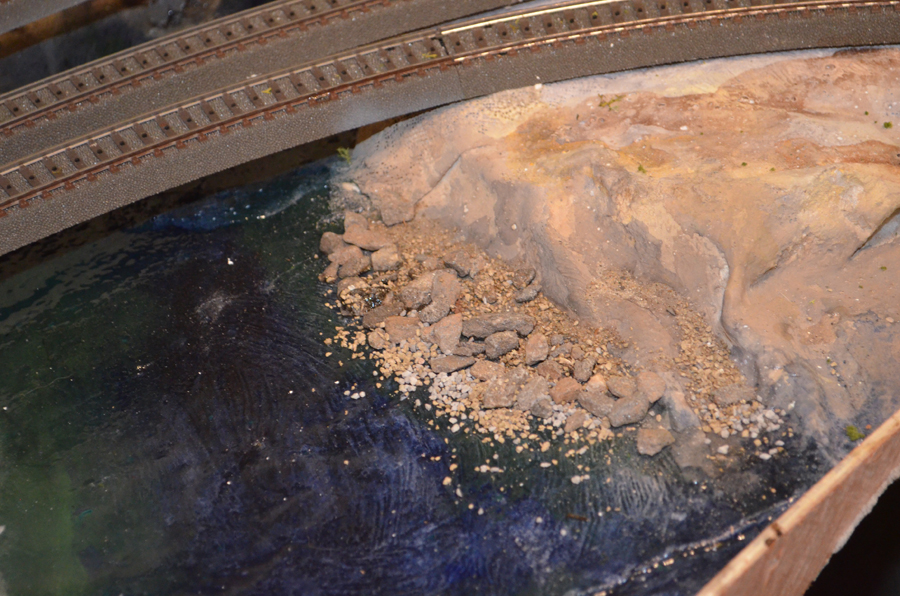
Once I had the basic shape in place, I would add rocks. These I made from Woodland Scenics silicone rock molds – buy a few different shapes and pour your own rocks as needed using the joint compound plaster. They dry overnight and can be peeled out of the molds easily.
Placing them in different orientations creates fascinating realistic rock formations. The rock molds are anchored by layering a thick paste of joint compound slurry to the back of the rock and then sticking it into place on the plastered shaper sheet. I blend the edges of the rock with plaster slurry as needed.
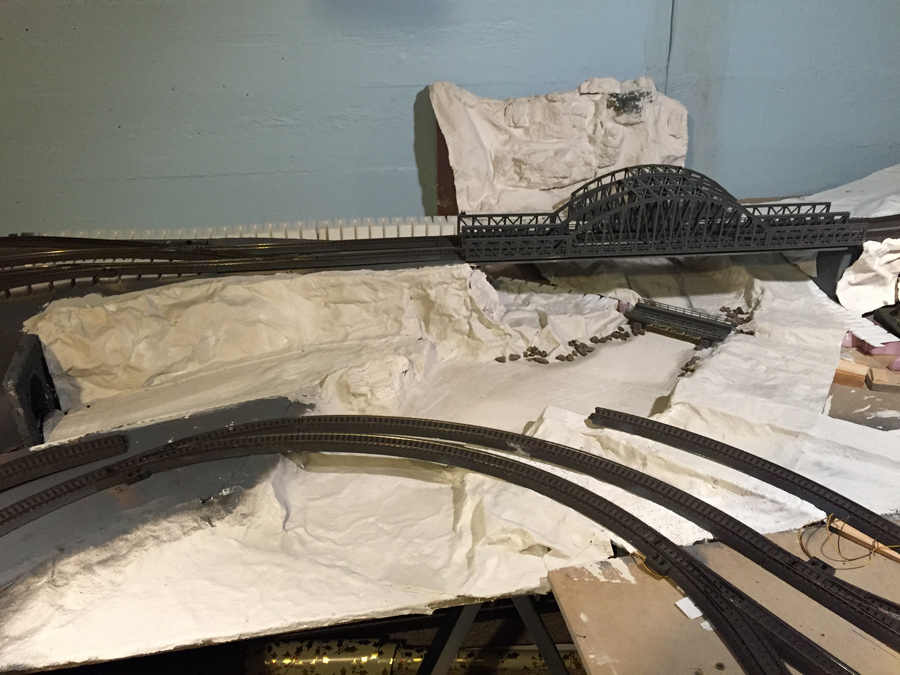
Anyway back to the river. I created river banks by shaping pieces of 1” thick insulation foam to build the banks of the river course. Then I overlaid shaper sheet over the river bed and banks, scrunching it up to create the desired contours. The sheet is then painted with the plaster slurry and allowed to dry.
Once dry, the river bed is painted appropriately with artists acrylic paint – darker blue-green for the deeper water and greeny blue for the shallower water. Small pieces of real rock chips or gravel are placed to imitate boulders and fine talus can build up finer rocky deposits and sand banks to imitate river bends.
I had a bag of playground sand in the garage and it makes a perfect size to imitate river sand and fine dirt as well. Small broken twigs form the garden act as fallen logs and river debris washed up on the banks of the river.
Prior to pouring liquid acrylic water, the banks and hillsides should be painted using the Woodland Scenics “leopard spotting” painting approach – – 3 water-diluted mixes of acrylic black (produces gray), burnt umber and yellow ochre. More of that in my next post. Below are images of the steps leading to the painted but unfinished river bed.
Glyn”

Rock molds model railroad:
And Mark has been back in touch too. If you missed his last missive, it’s here.
“Hi, Al. Just responding to some of the questions and thoughts about the Wine Train video.
First of all, a big THANK YOU to everyone for all the flattering responses to the video. I am humbled and encouraged to continue! And another big THANKS to Al, for all of his time and effort in promoting our hobby!
Q&A The flag assembly is made by miniatronics, part #90-048-01 but the BIG question is “what is the best selling product at the general store on Thunder Mountain”? …hairspray!
Q&A The rock faces are commercially available and made of a high grade rubber, augmented by actual rock gleaned from the garden.
Q&A The layout is HO scale and the ALCO engine is made by Rapido
Q&A …and still trying to figure out how to tap into the wine tank car!
Cheers!
Mark”
A huge thanks to Glyn for sharing his rock molds model railroad tips and to Mark too. It’s great to see how they do what they do!
Ebay cheat is more than pulling its weight at the moment, have a look, it’s here.
That’s all this time folks. Please do keep ’em coming.
Best
Al
PS Scratching your head over where to start? Have a look at the Beginners Guide.

this is the VERY BEST ADVICE i have ever read for model railroading: “a $10 20lb bag of joint compound from Home Depot was just as good [for landscaping] and 10x less costly. “
Glyn,
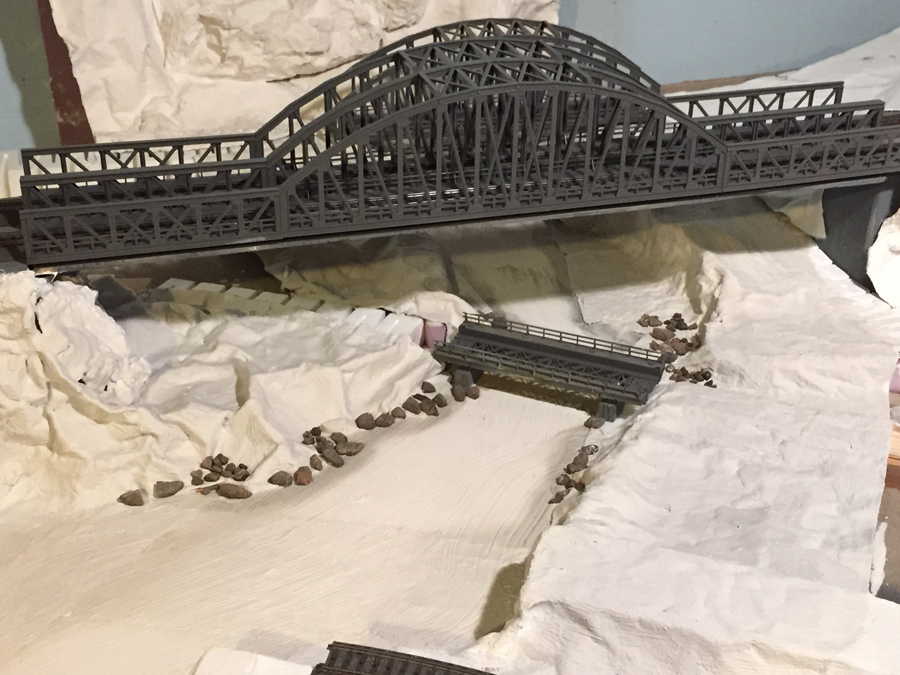
You know that lower bridge is going to get washed out during the next flood. How realistic your river is!
I like your ideas…here’s another you might try…I buy the plaster wrap off ebay…can usually get multi units cheap…I don’t buy the Woodland Scenics…too expensive…Cut in 4-6″ strips…Lay over your forms…Then paint the water on with 2″ brush….The wrap conforms to to the support….Of course you can also dip in the water and drape on too…A little messier…
WOW how informative and inovative the river construction is going…
thanks for the info I am going to use it on my layout
keep em runnin fellas
StJohn in Long Beach Calif
Thanks so much for the kind comments and helpful tips one and all. I know … that lower bridge will be awash in a flood. It actually raises a good point: I built the river bed scenery on my homasote baseboard and it was only when I was laying track that I realized I should have created a trough below the baseboard for the river course. I could have made the river deeper and had more bridge clearance! Too late now but a good point for those planning a river feature. More on that in the next installment:)
Glyn
i was wondering what is the best advice for wiring a track, i know nothing about it, as for as haveing trains go in multiple directions
Great lesson in landscaping, thanks!
Thanks for the encouragement guys. The question about wiring and having trains running in different directions: As I’ve said before I’m a complete klutz when it comes to electronics but digital train control simplifies everything. You simply connect the 2 wires from the track (Live and Ground) to the appropriate connectors on your DCC controller /transformer Marklin’s Central station has a powerful built in transformer) and away you go – multi train operation, forward/reverse etc in minutes. If your layout is larger, you should rather connect the power supply to a long live/ground pair of wires (the bus wires) running beneath the layout. Every 2 meters or so splice a short pair of feeder wires into the main bus lines and run them up to the nearest track section and attach or solder them to the appropriate live and ground connections. This distributes the power more evenly along the entire layout thereby preventing power loss and sluggish performance as you get further away from the main power source. I used snap on suitcase connectors to splice the feeder wires and they worked perfectly although I know some folks find them less reliable. Digital (DCC) control is more expensive up front, as are the locos, but the benefits are huge in the longer term and it makes wiring SO easy by comparison with conventional analog control. – Hope this helps! Glyn
Great articles. Learned a lot from this!!
thanks al and glynn iwill try to router river bed and will use scenic water effect
Looks great
Glyn and Mark……Thank you for that great information and How-To on your scenery. I will use your info on creating a little creek in my layout.
Two things: First of all, I am building a logging motiff scene for my HO layout and so I need a conveyer belt that takes the raw logs and feeds them into the mill.
So does anyone know where I can get a pattern for said function I do not want a ready made one as I am trying to do scratch work on all of my my layout.
Second: Can anyone tell me where to look so I can watch to how to properly
connect the turn table on my HO scale layout? I have a 90’ round table. Also I run everything DCC.
David Butler
Wow that great.!!!!! Keep up the good work.
Al..Thanks again for what you do. The posts start my day right. In this post, the guy
is looking for HO conveyor belt material. .A simple source is a Typewriter ribbin.
Al, …..RJL
If you want to make rocks ask your dentist for leftover impression materiel. Pvs or silicone impressions last for ever.Alginate makes one impression. It is very cheap.Berniedoc.
good tips. nice work.
Outstanding!!
like bridge give a lot of detail