Scott’s been back in touch with his HO scale module layout.
(If you missed his first post, it’s here: Modular model train layout.)
“Hi Again Al!
Following your post of the Warwick and Western there were several questions in the comments section.
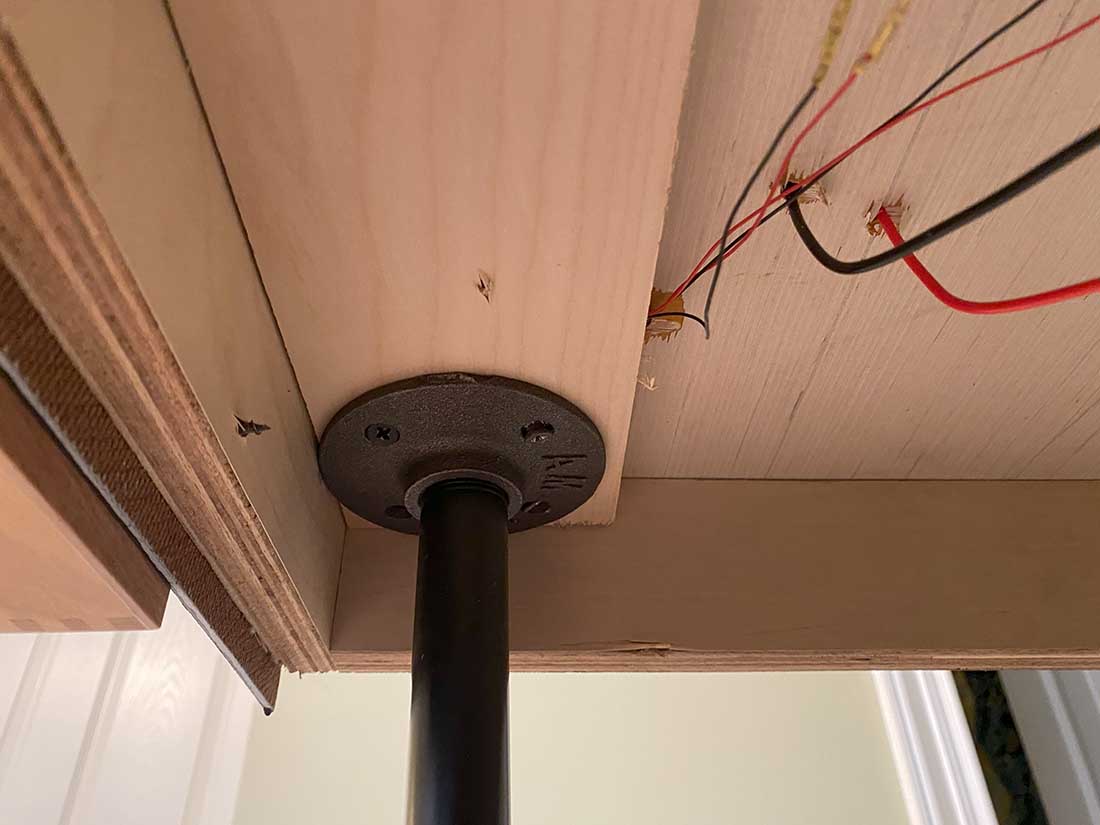
The first group of photos are taken of the under side of the layout. All of the layout section bases are built entirely of sanded Birch 3/4″ plywood.
It is just about the most expensive plywood you can get. But in framing you get what you pay for. If one has access to a good table saw the cut pieces will fit together like a piece of furniture. Not terribly heavy and zero chance of warping when braced.
The cross bracing is all 3/4” plywood. However, I use 1/2” sanded birch plywood for the top of the benchwork. Much lighter than using all 3/4” inch and just as sturdy.
I rip all of my cross bracing at 3″ wide. Pieces are then glued and screwed together with carpenter’s glue and 1-5/8″ coarse threaded drywall screws. No pre-drilling required.
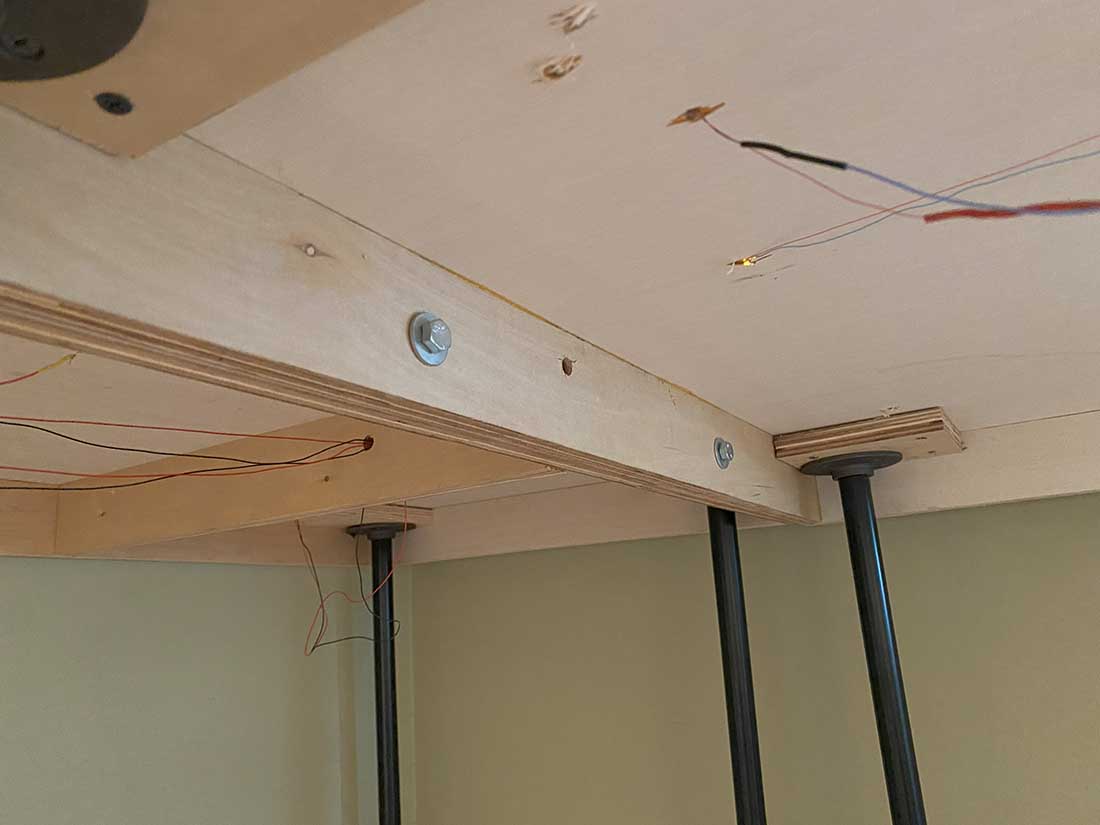
Note that there are simply two carriage bolts holding each of these modules to the next module. I teach a theater scene-building class and due to our sets needing to be 100% portable I use this method for all of our set pieces large and small.
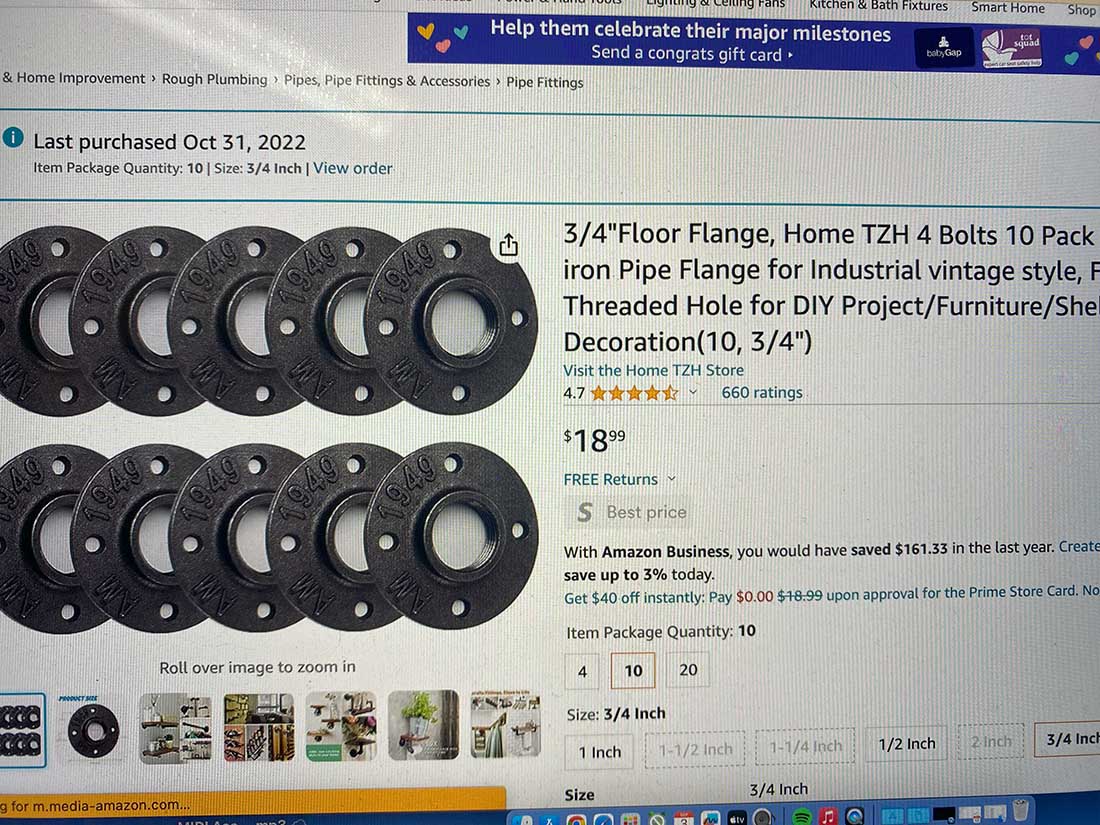
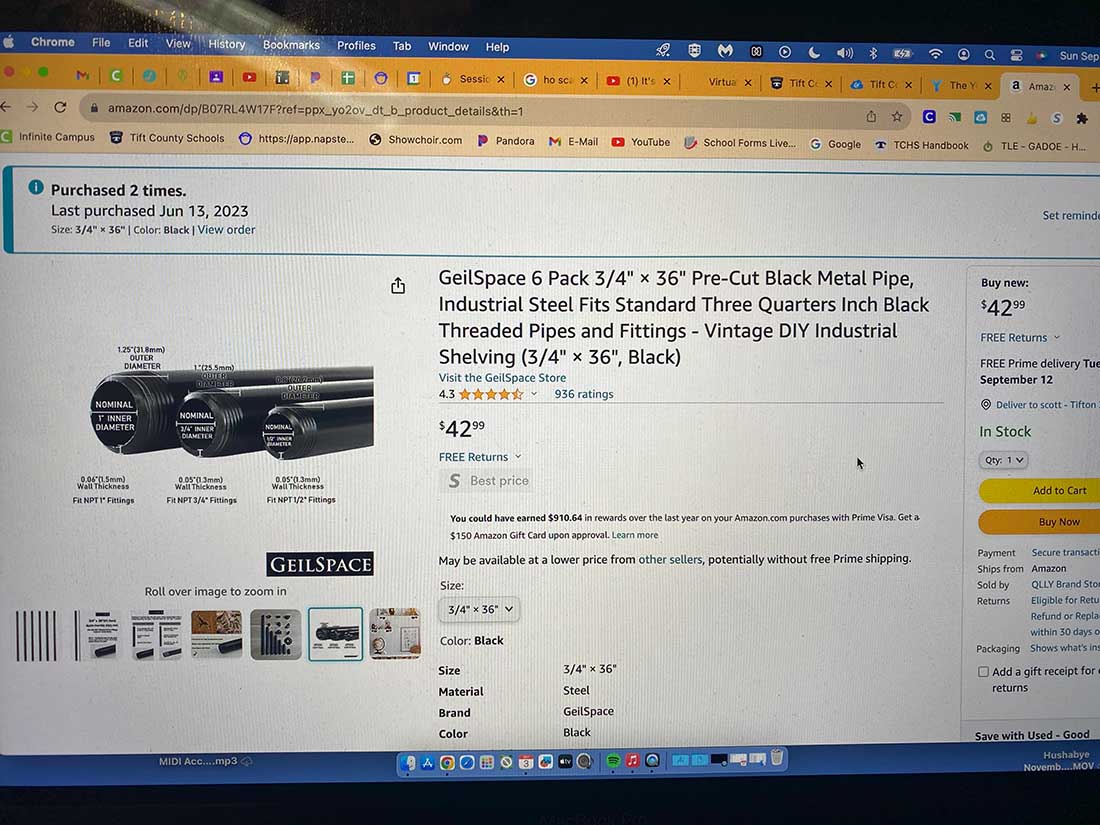
I then attach 3/.4″ steel pipe legs using 3/4” floor flanges. I have included pictures of these on Amazon if you would like to show them. You can’t beat them for portability.
Though I will eventually attach the back braces to a wall when more permanently installed for rock-steady stability.
My current modules are resting on 36″ legs due to the fact that these modules will ultimately sit 4″ lower than the rest of the lower level modules. I will, of course, use 40″ legs for the rest of the lower level.
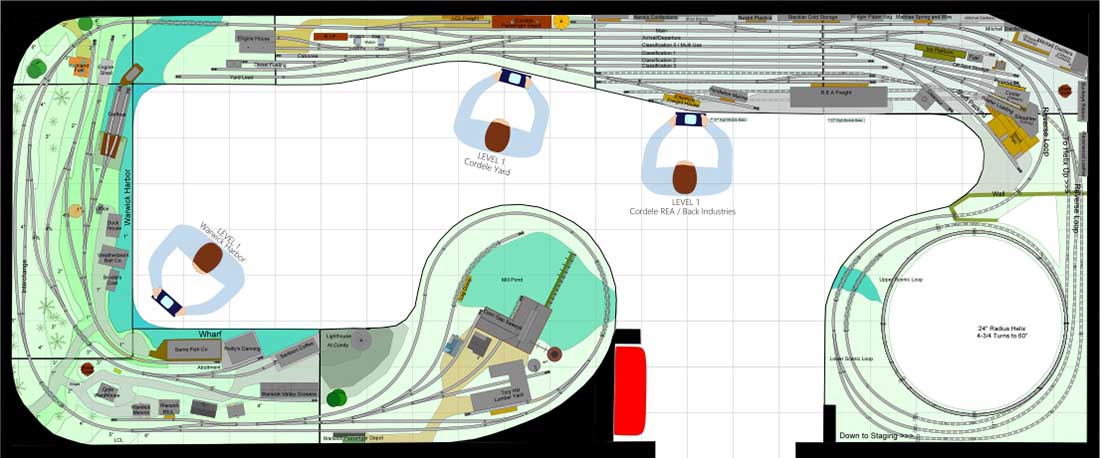
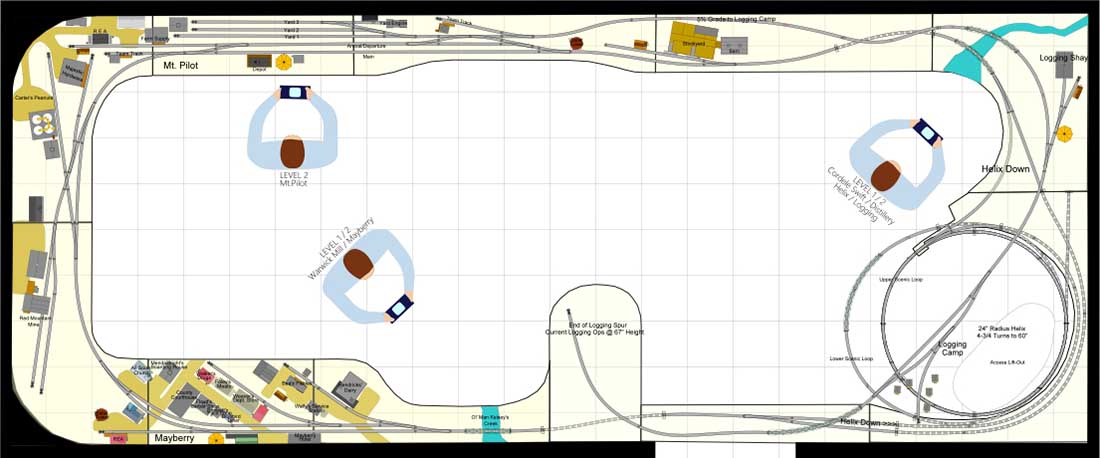
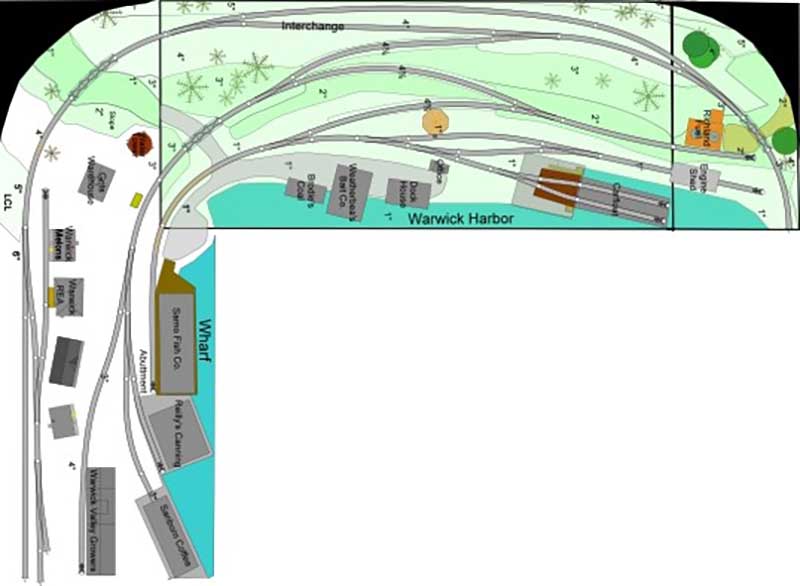
I am also including three photos of the master layout plan. At this point I must give a big shout out to Bart at Dubai Trains on Youtube. For a very reasonable fee Bart helped me tweak my design through a three-month period earlier this year with an eye toward operations. There are a number of his great design suggestions throughout the layout plan.
I think the line divisions in the layout plan are self explanatory as being the individual module outlines.
However, there are bound to be those who look at the helix and sawmill modules and wonder how they are transportable. In short, they really aren’t. Those two sections will probably be the last two that I will construct after the layout reaches its final home.
I will add also concerning the helix module that that entire module will be disguised as a large mountain. I have exposed a couple of runs around the helix so that it is not so much a “black hole” into which trains disappear for an extended time. It also serves as the mountainous region that my logging operation had to traverse as well.
I hope there are some Andy Griffith fans in the audience. If you are a fan of that great television show the towns of Mayberry and Mt. Pilot and their associated industries and landmarks on the second level will hopefully bring a smile.
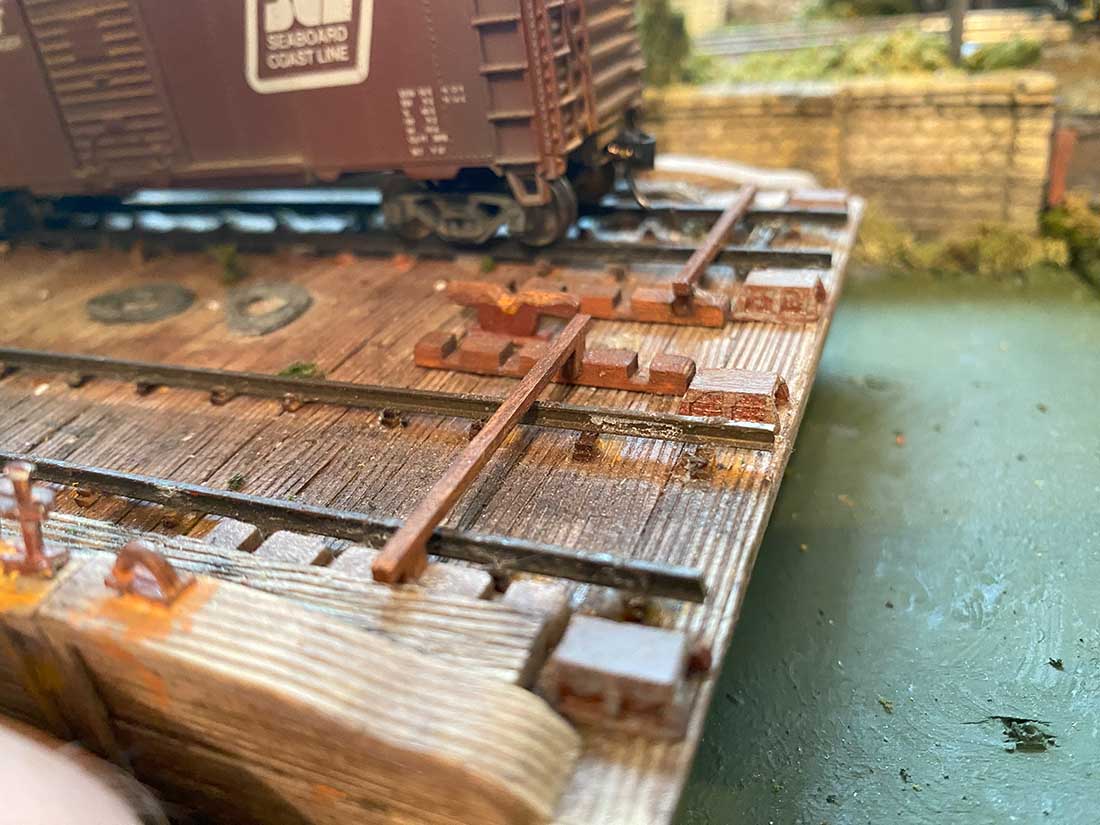
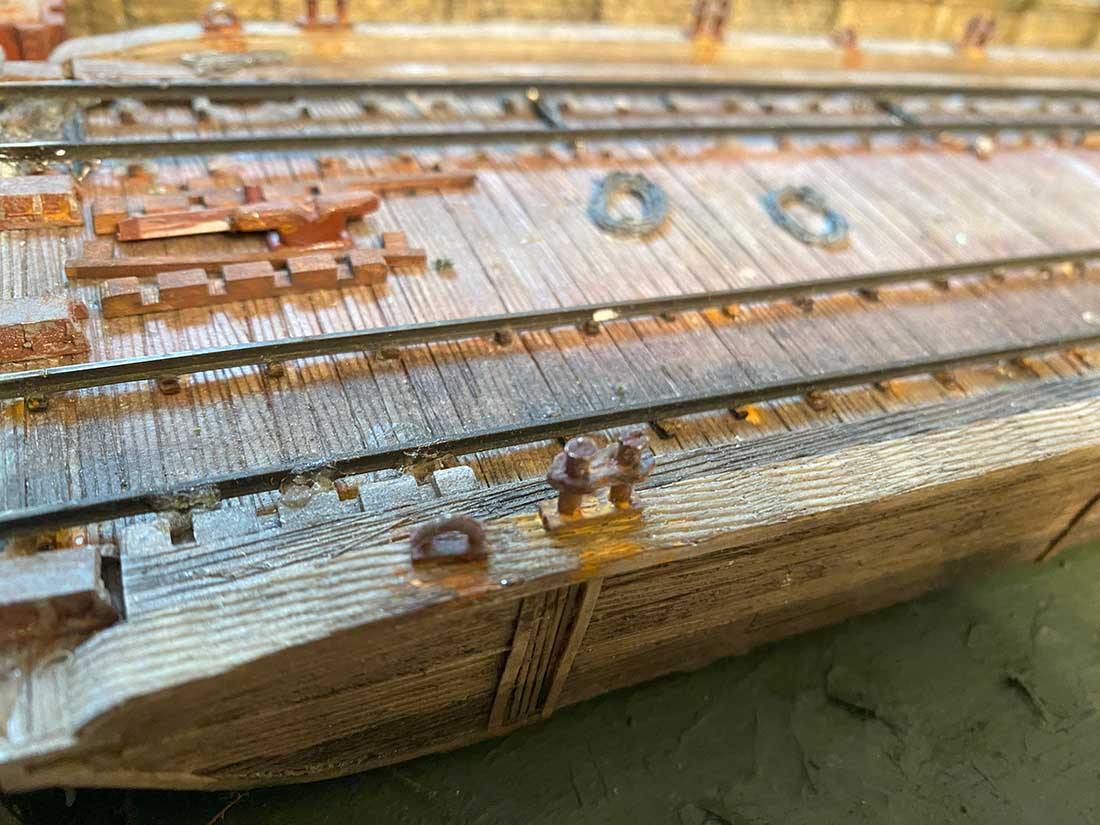
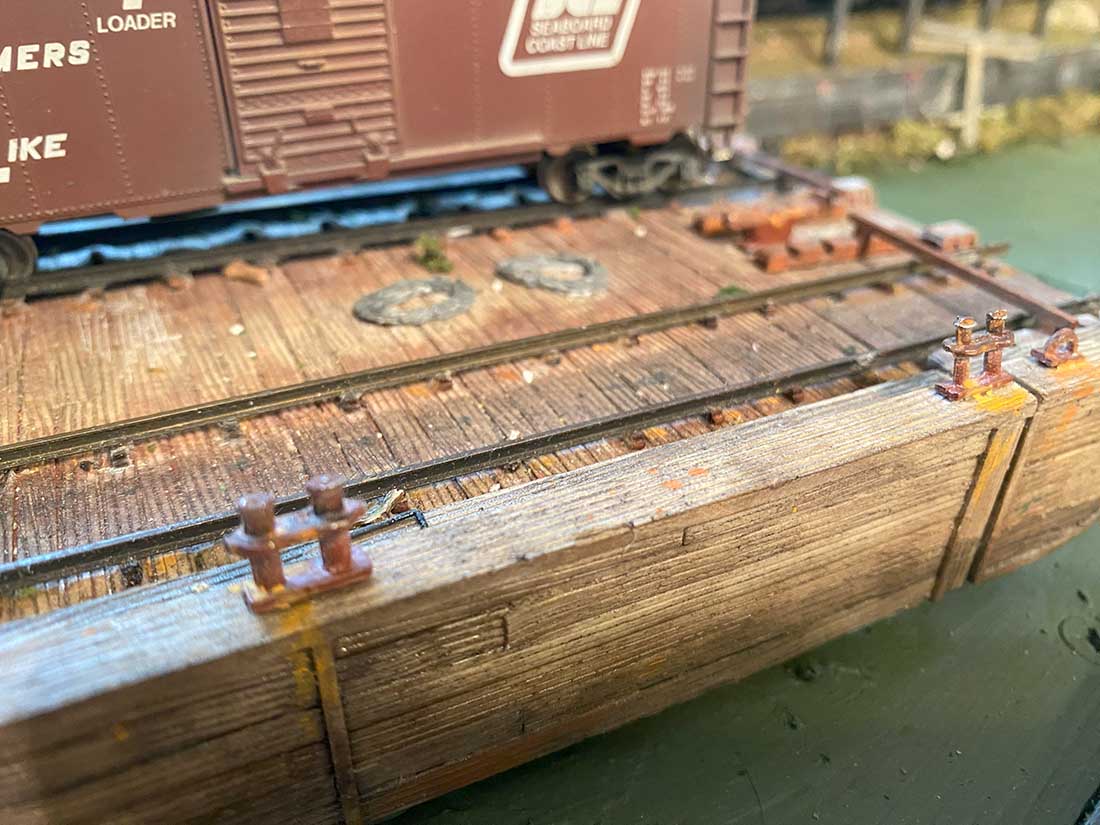
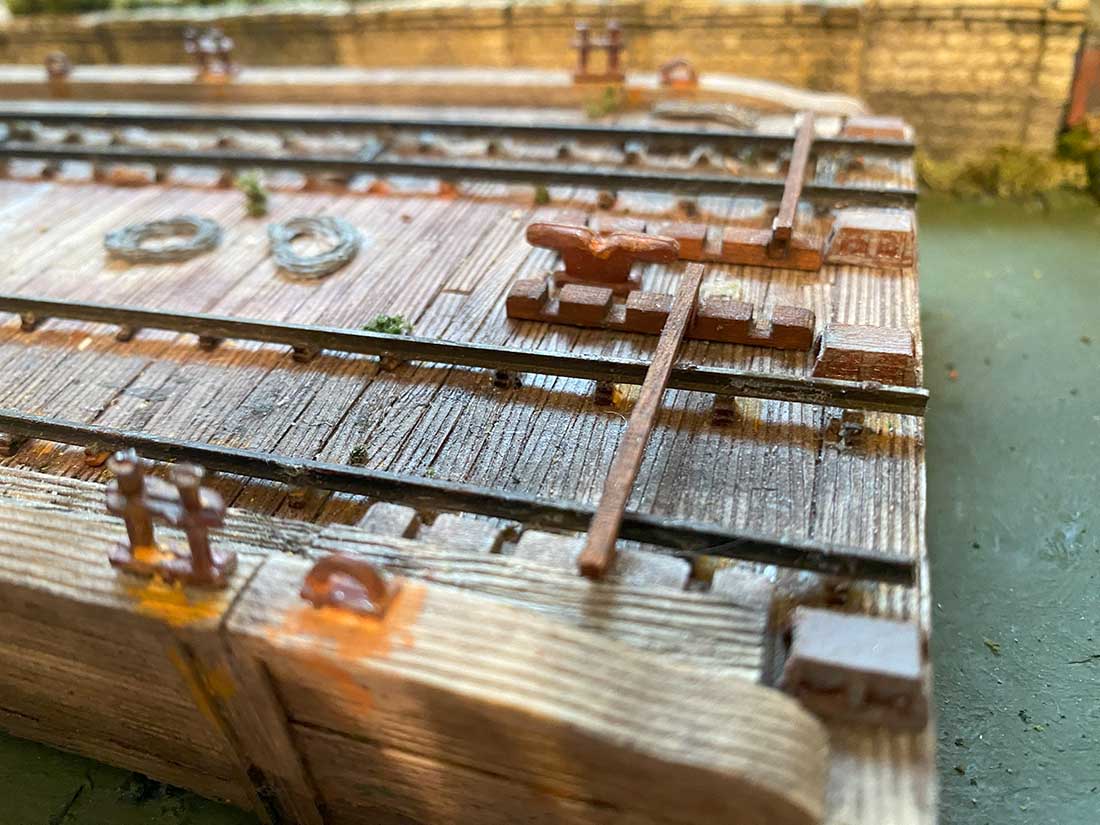
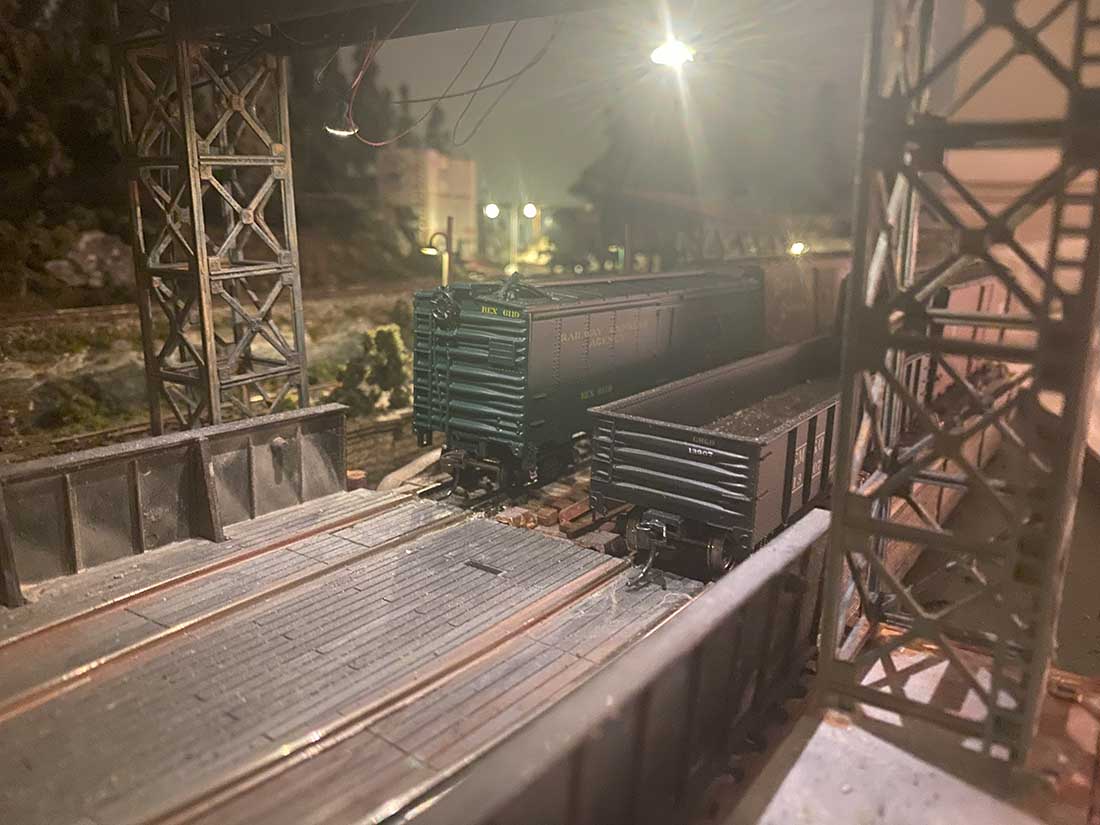
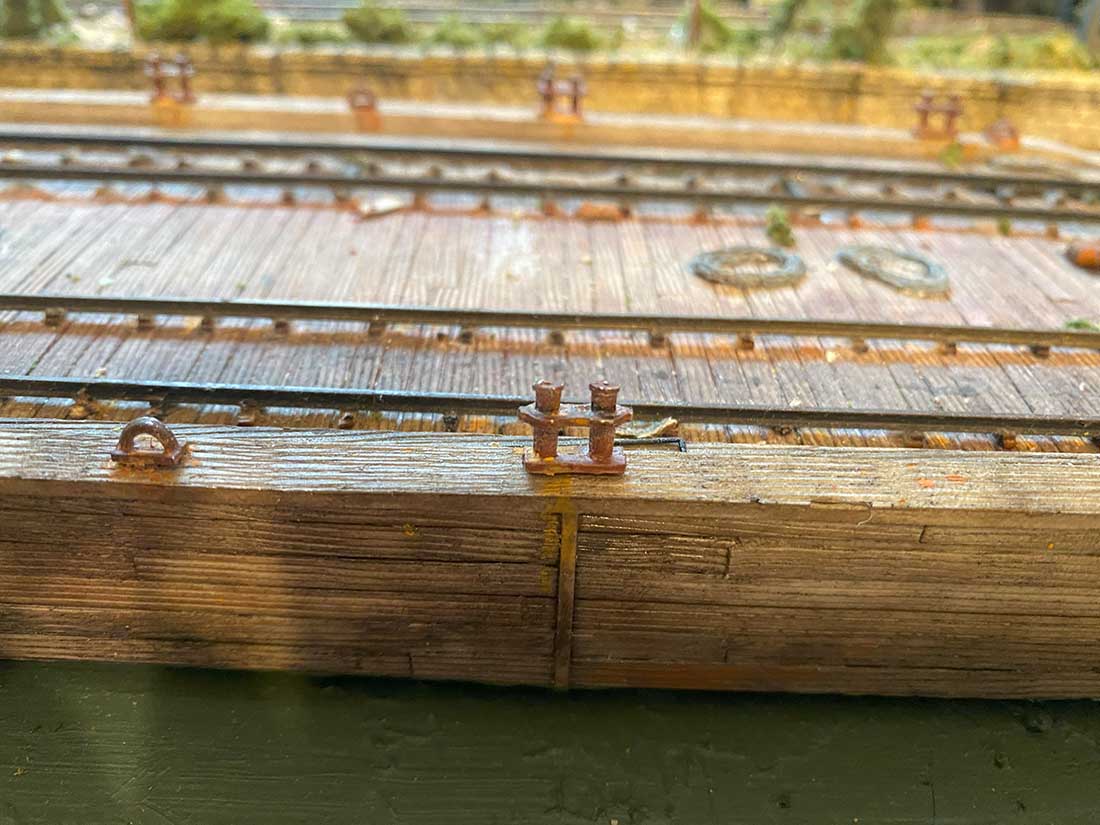
And finally, some questions answered about the carfloat. It is a model by Modeltechstudios.
The model comes in two sizes and represents a wooden carfloat that I felt more accurately captured my vision of the laid-back third-class disposition of the Warwick and Western in the 1940s. I have included a few closer pictures of that piece. Astonishingly there is NO paint (except for the rust accents) on the model. It was such a richly detailed and deeply wood grained model that the entire effect was achieved using only weathering powders.
The carfloat apron is the Walters version that is so popular. However, I had to do a bit of kitbashing to shorten it and to remove the third track in order to fit the Modeltechstudios carfloat.
Once again, thank you for this service that you provide connecting us all and making us all better modellers!
Cheers!
Scott”
A huge big thanks to Scott for taking the time to responsd to the comments on his HO scale module layout.
Here’s the link to his first post again Modular model train layout.
That’s all for today folks.
Please do keep ’em coming.
And if today is the day you get started on your layout, the Beginner’s Guide is here.
Best
Al
PS Latest ebay cheat sheet is here.


Your car float is fabulous as is the rest of your work. That one atmospheric photo really speaks to me. I can smell the water and hear it. Those are interesting wheel chocks. I have never seen any like them. You have done a very nice job of modeling. I also think you have a well-designed track plan, there is a great deal of interest and switching opportunities included in it. Rob McCrain
good ideas. nice work.
Scott
Guys like you that “Give” to the tribe deserve all the credit bestowed on you. Fabulous benchwork! Your teaching skills are stellar and we now know why.
That layout is so interesting and immense. It will provide hours of running & planning routes and the scenery is super.
Big Al
I must have read this 12 times to absorb it all especially the layout plan. If you did this you’d never get done. 😁
Hey, that’s a great idea to hang it from the ceiling! Makes crawling about under the layout messing with wiring much easier.
Genius!
Jeff
I’m about to expand ny 2×4 switch layout set in North Georgia by at least 2 more feet. I want to add some sort of barge for freight cars, good ideas here!
Once again I’m stymied at starting my N Scale layout. I have almost finished cleaning out the basement and unfortunately find my latest stall being a 80k+ wildfire that’s not much further away from my house than 30 miles+-. The embarrassing truth is due to the MANY truly amazing folks that not only seem to be able to manipulate tiny things to perfection but also are able to photograph their work with the same awesome detail! This is in part due to a huge fault of mine wanting to create a layout that I envision that’s well beyond my abilities!!! As Southern Oregon is starting to cool off and the heros contain the wildfire(s) I’ll soon run out of excuses!!!. I’m looking forward to copying most everything I see the many pros on this site create; and I mean CREATE!!!!
Thank you for sharing your amazing layout,…., of which it’s also the design I’d like to mimic.
Thank you again for sharing your HO layout and to everyone else that has done the same! Best regards, Tod- Cave Junction, Oregon
TK, I spent my whole life until now playing around with n scale . I’ve alwYs loved n-scale. But when it came time to “put up or shut up” and finally begin my retirement layout I thought long and hard about scale. I just couldn’t see myself 10-20 years from now still able to see and manipulate that tiny stuff. So I sold all my n-scale stuff on EBay and started fresh with Hoo. I am so glad I did! It was a good decision for me!
Thank you for your input Scott!
Unfortunately I’m fully invested in N Scale to the point of already acquired many (MANY) if not all required track, hardware, locos, complete trains and have even built many custom military rolling stock. At 61, my AS, RA, Fibromyalgia, Asthma is already secondary to my Macular Degeneration….. If I don’t go for it now I don’t think I ever will. I do however see your point, albeit blurry at times) and completely understand that it’s not going to get any easier!!!!
That is a cracking layout I was concerned about your wooden float when you just weathered it was thinking that’s going to rot in the water then the penny dropped it’s not real water.