Brian’s been back in touch with the latest on his HO scale waterfront layout.
If you want to get back up to speed, his last post is here:
“Hi Alastair,
Herewith the continuing saga of the Cascade Creek HOn3 railroad on the lower level of my double deck shelf layout.
I decided that it is time to get moving on the second corner on the lower level of my layout which has had me scratching my head for months on what to do there.
I printed a black & white photo of the corner and started sketching what I would like to do there.
Below is what I roughly came up with.
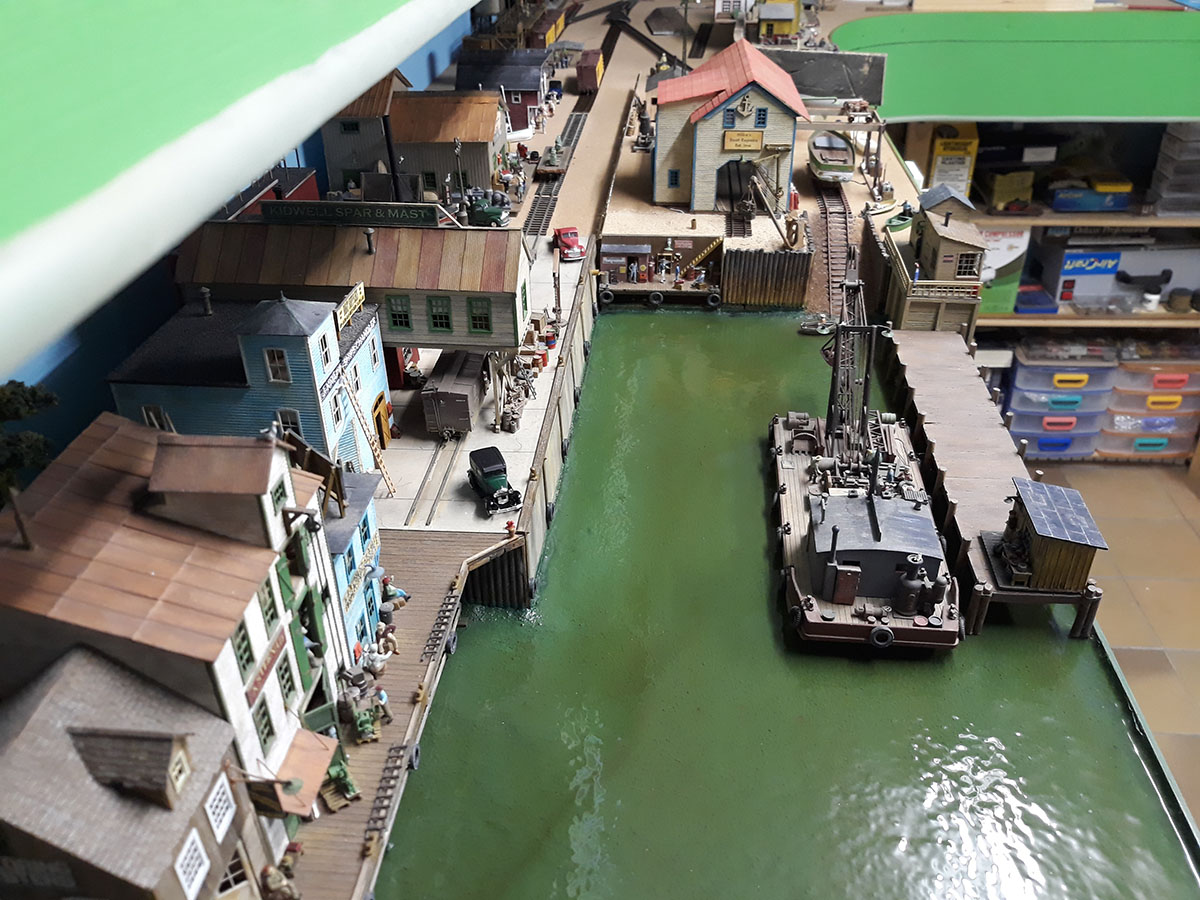
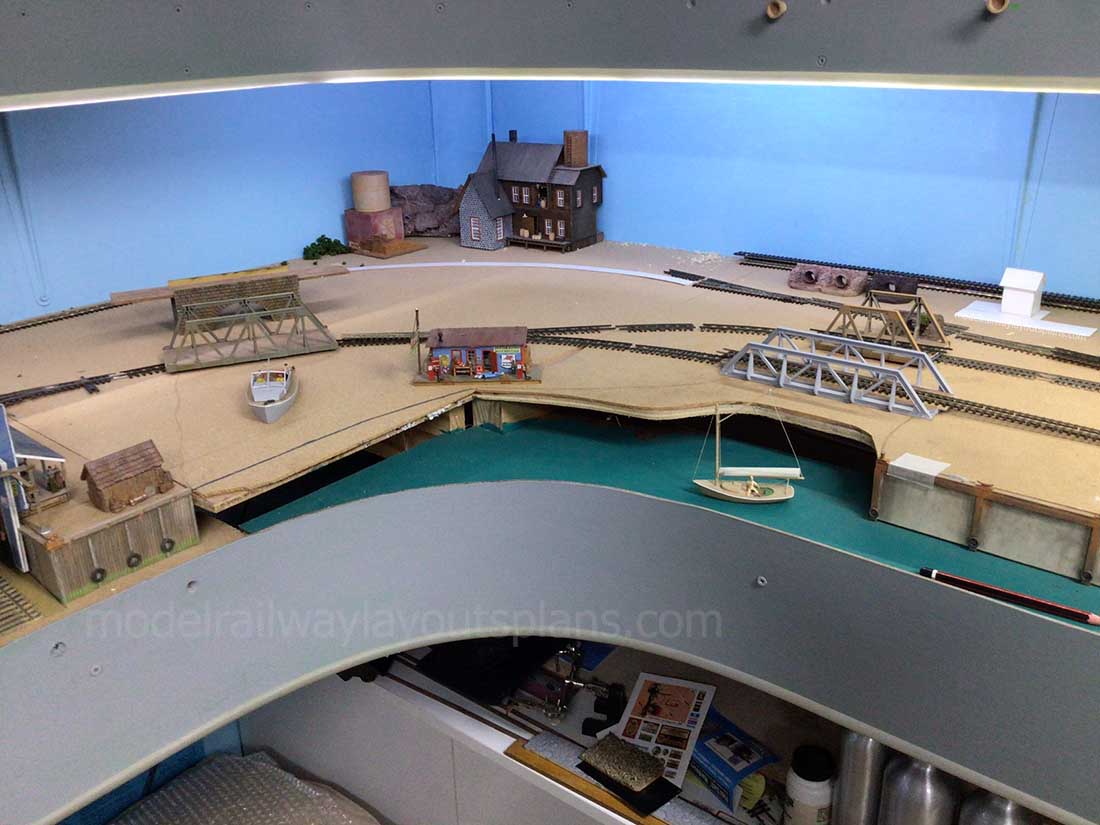
This was the starting point where I would like to have a small river stretching to about two thirds of the way towards the back wall.
In the back corner is a kit bashed Campbell scale Brett’s brewery.

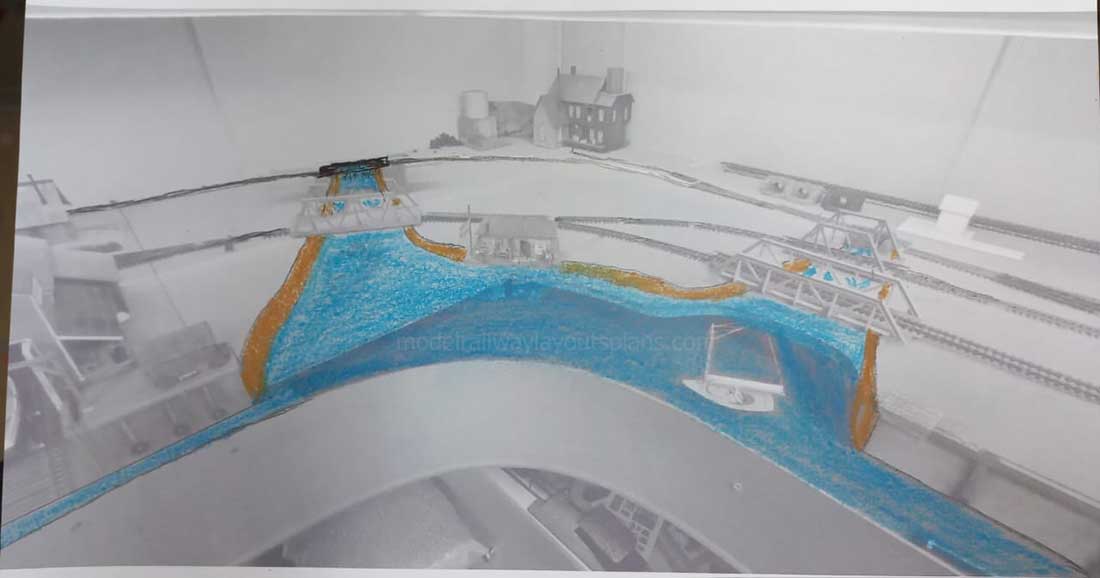
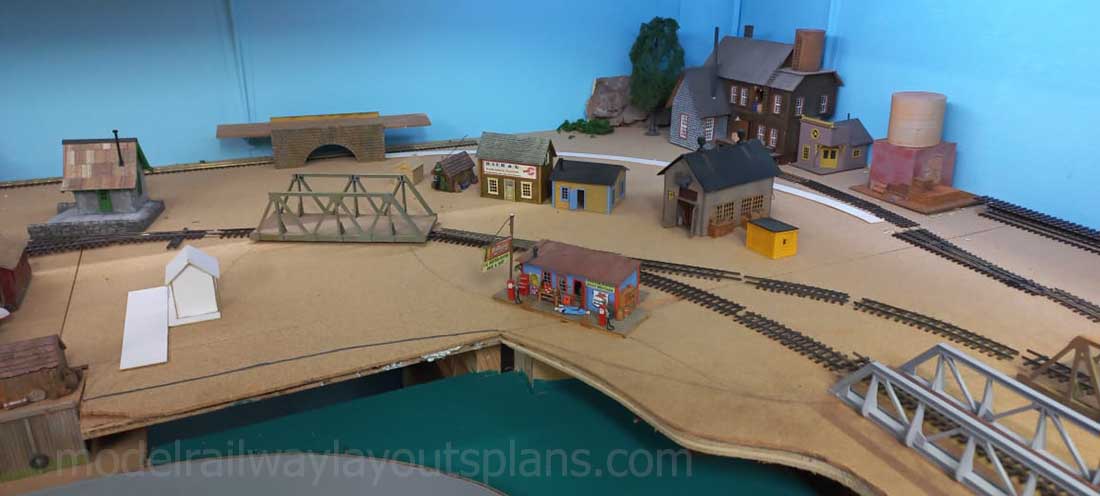
Here is an expanded picture of the area that I am working on. I am going to have another river on the left also going in all the way to just before the back wall.
All the bridges are kit bashed from HO Atlas and Volmer kits.
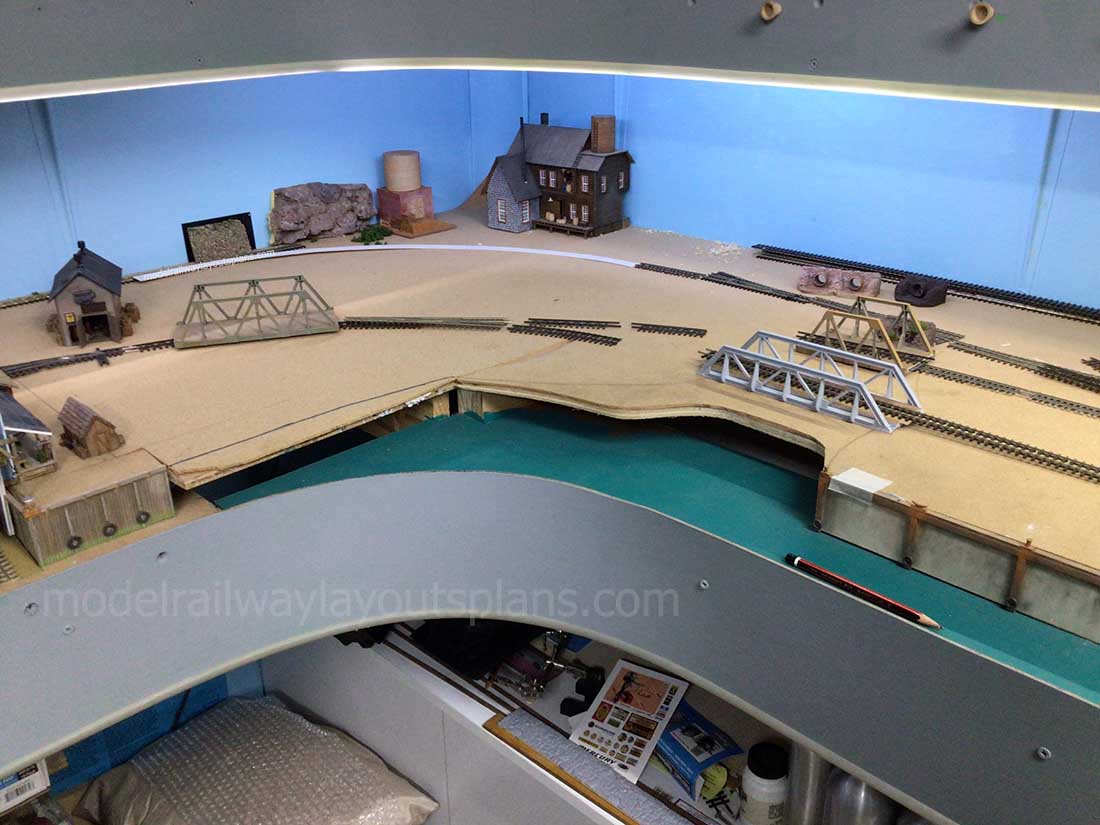
I started marking out where the river has to go and the next part is to cut the baseboard out on the pencil outlines.

Below is where the left side river will be with the rail crossing over it.
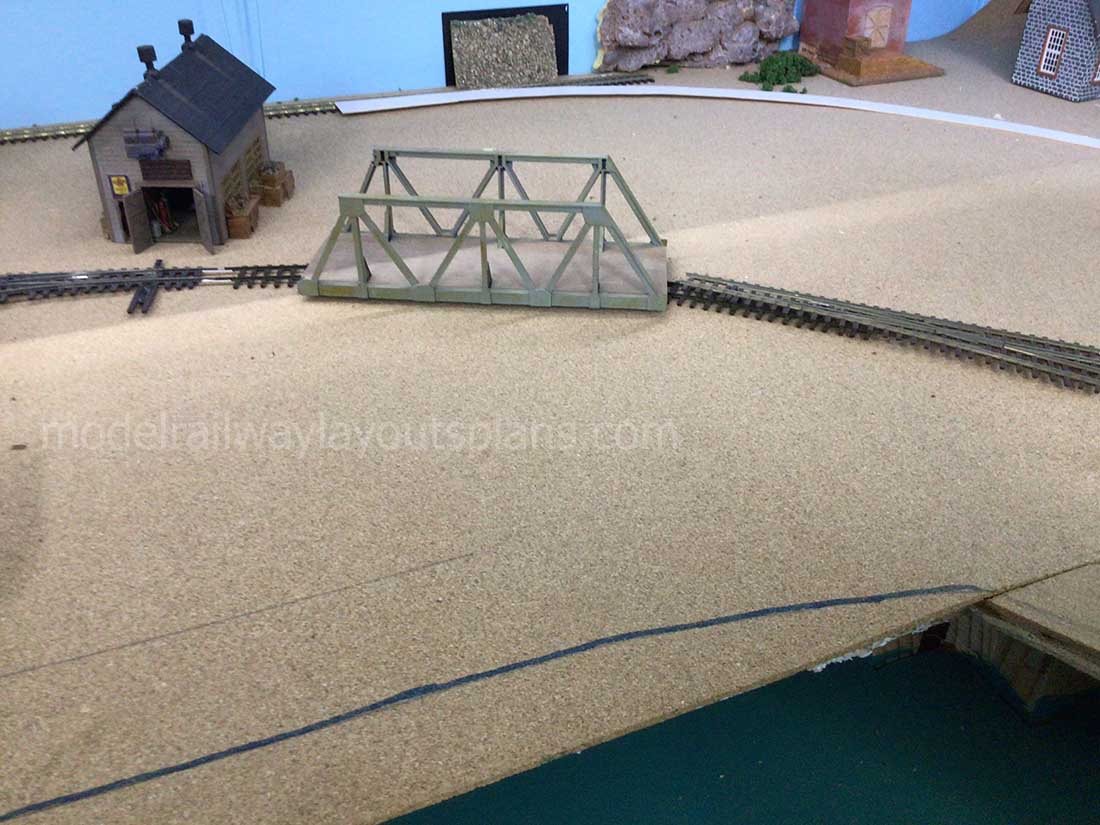
Just behind the rail bridge will be a road bridge to enable traffic to go from the left side to the right eventually leading to businesses, the yard, engine terminal facilities and a turn table.
Here is where I need to figure out what and where the buildings need to placed on the right hand side of this intended river.
The cutting process has begun. I was able to get some splinter free jigsaw blades and managed to cut the board without any vibrations to the surrounding buildings already fixed in place.
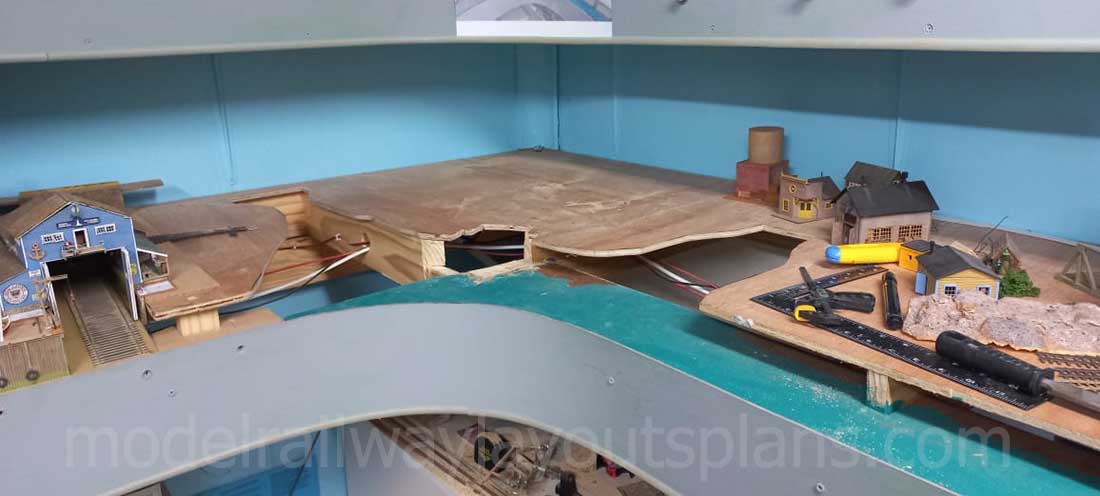
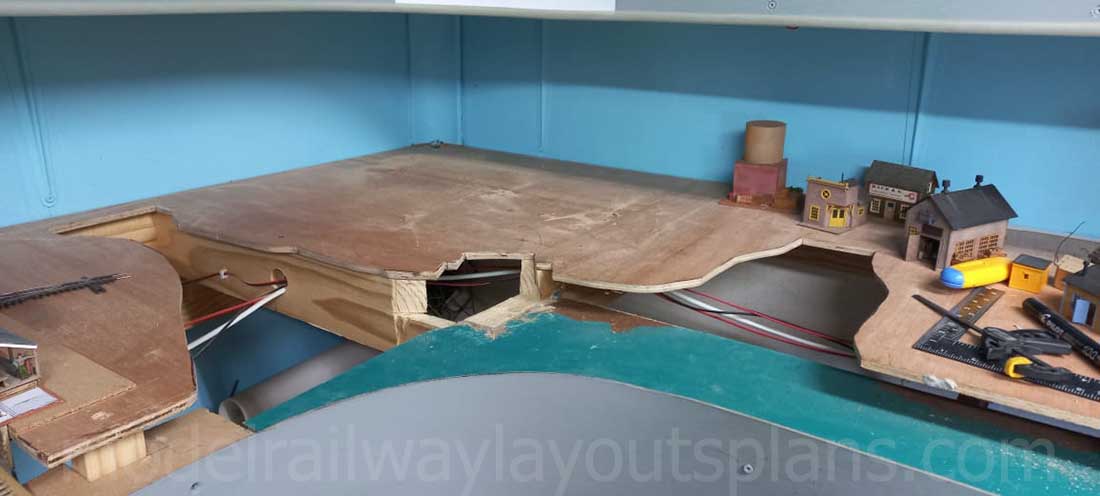
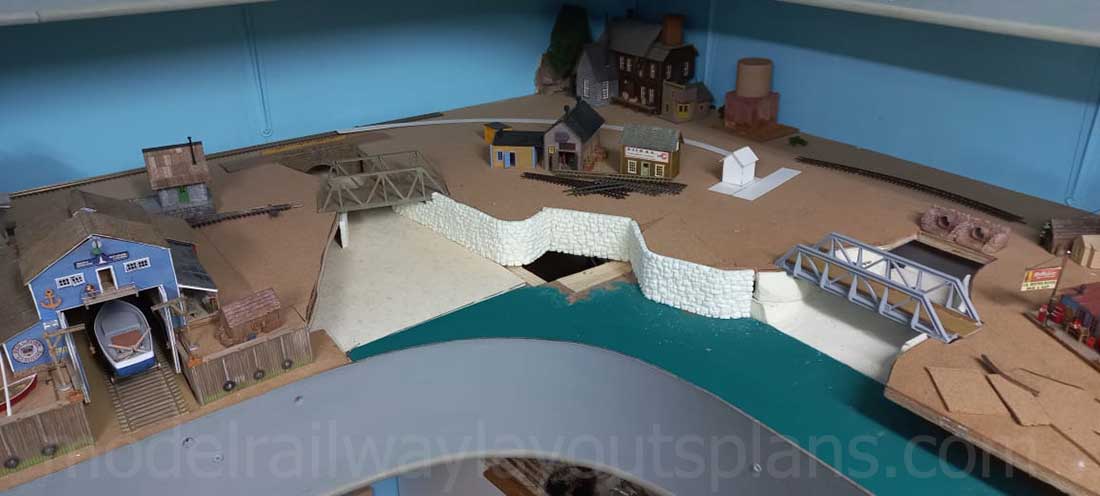
Another view of the area. (The buss wires are visible under the layout) They will run under the river beds. The odd shape cut out in the middle is where the boat hire business will be.
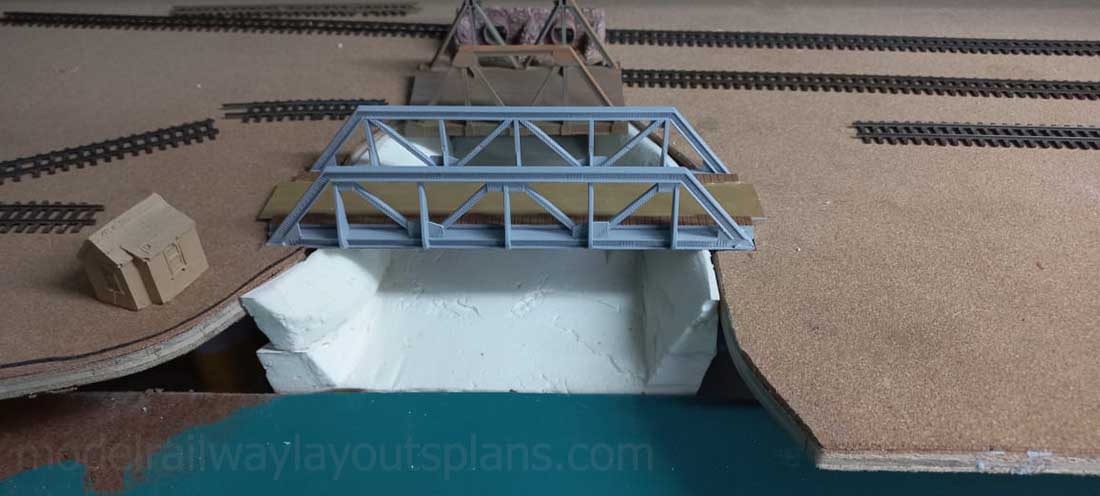
Below, checking the fit and placement of the bridges and the small boat hire building in the middle of the photo.
Note the sketch above the work area attached to the upper level to keep me focused on what needs to be done next.
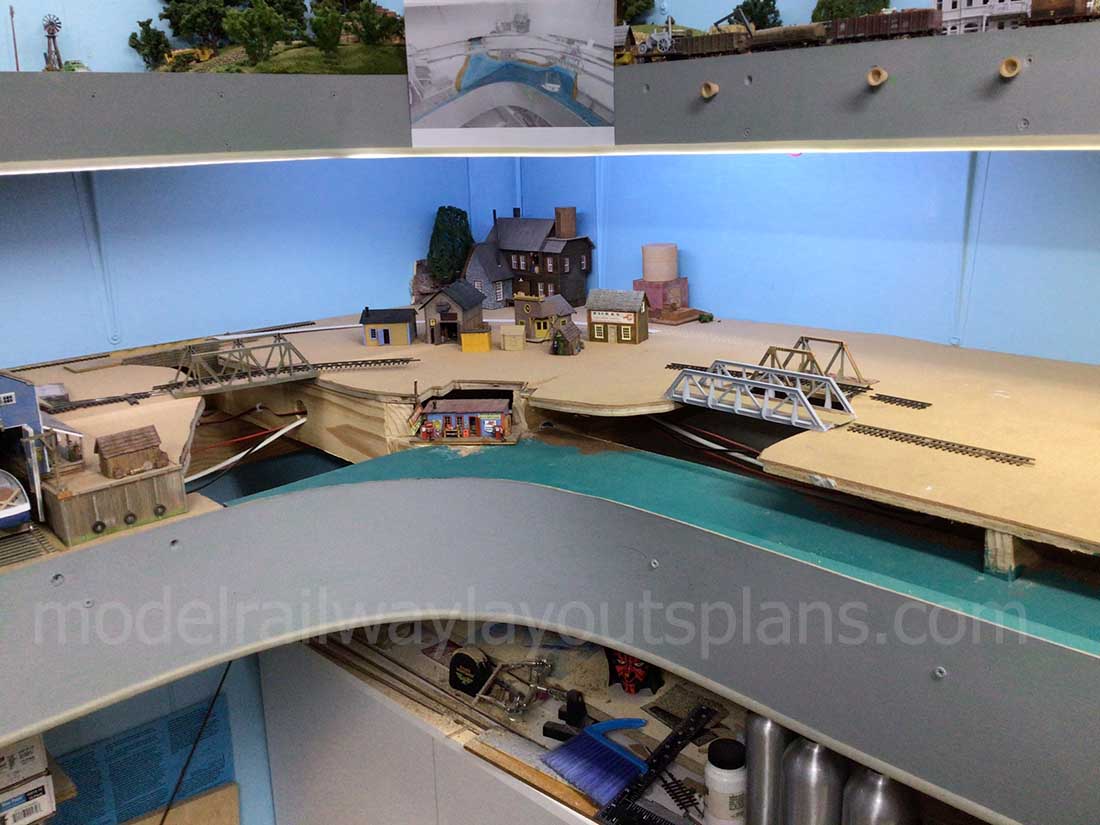
The stone arch road bridge near the back is in place and the track coming from the harbour area (left, out of the photo) running behind the road bridge to the intended yard and engine facilities.
The white card stock building may be a small dock and office on the river. (Yet to be scratch built.
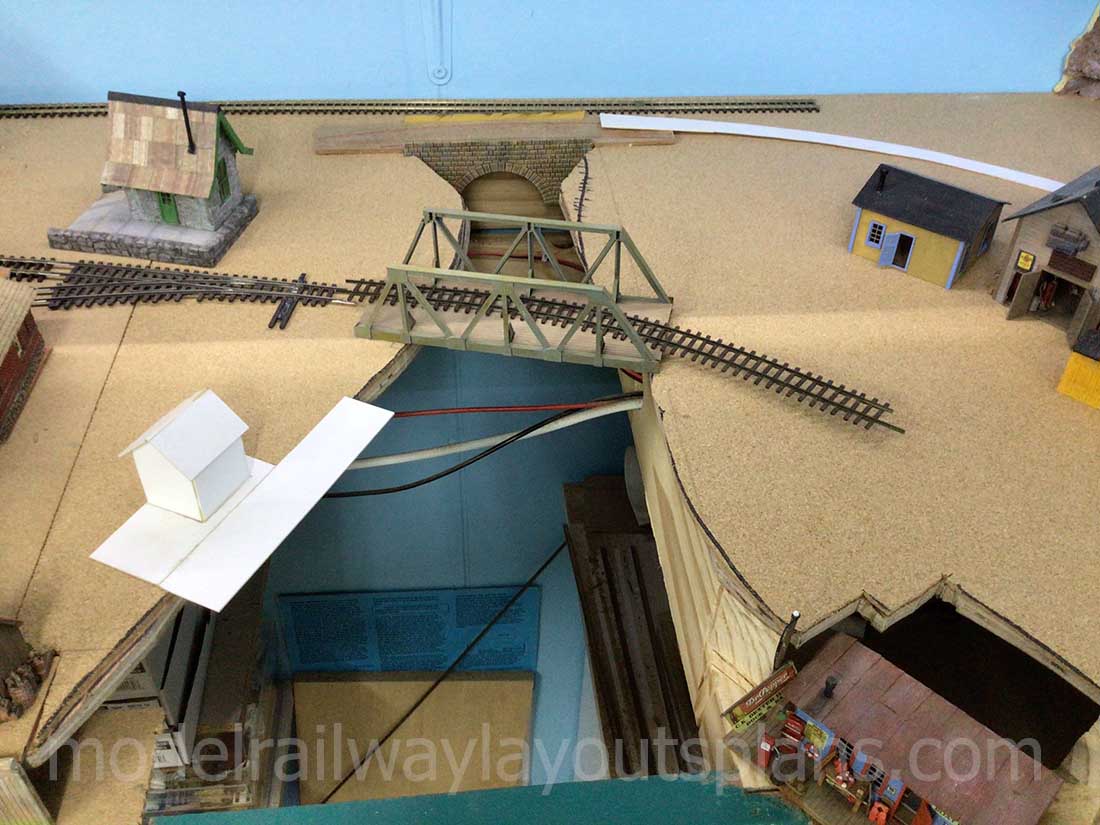
The culverts need to be fixed in place. Water will eventually come out of the pipes into the river.
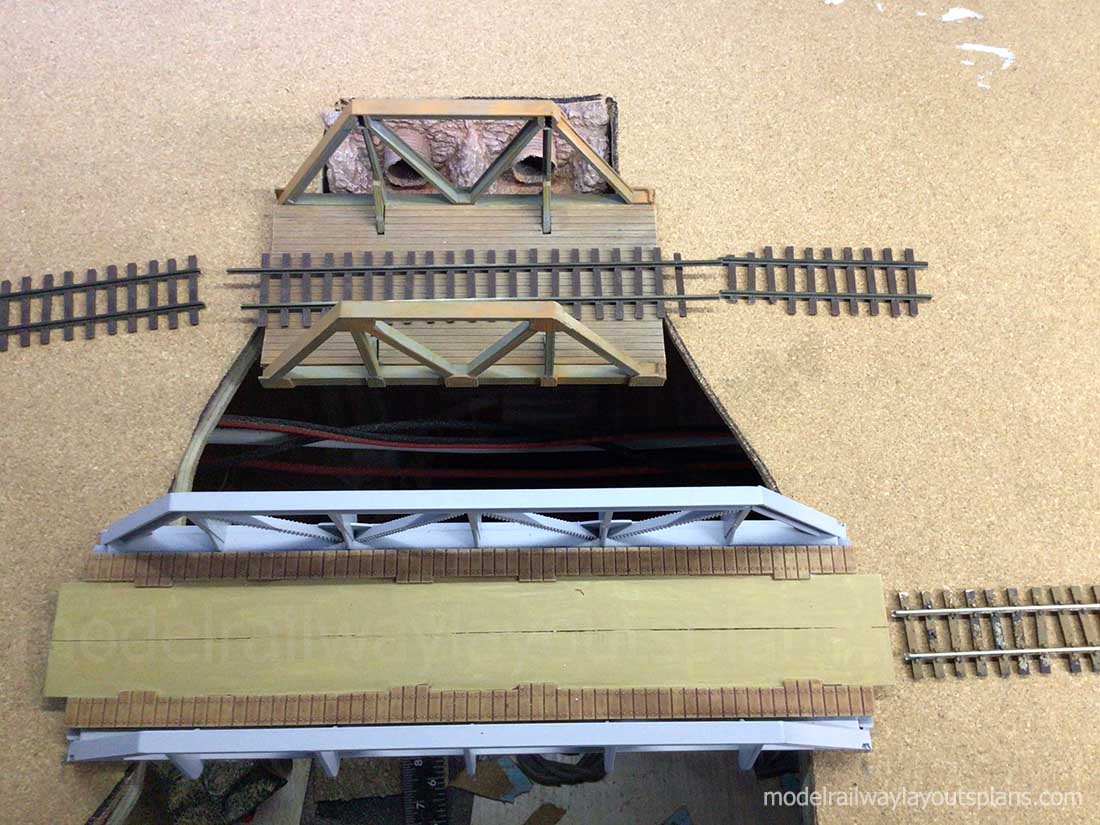
SO board is used to shape the river and plaster cloth will be used to form the banks and the bed of the river.
I used ISO board to pre-form the banks and will be covered with plaster cloth.
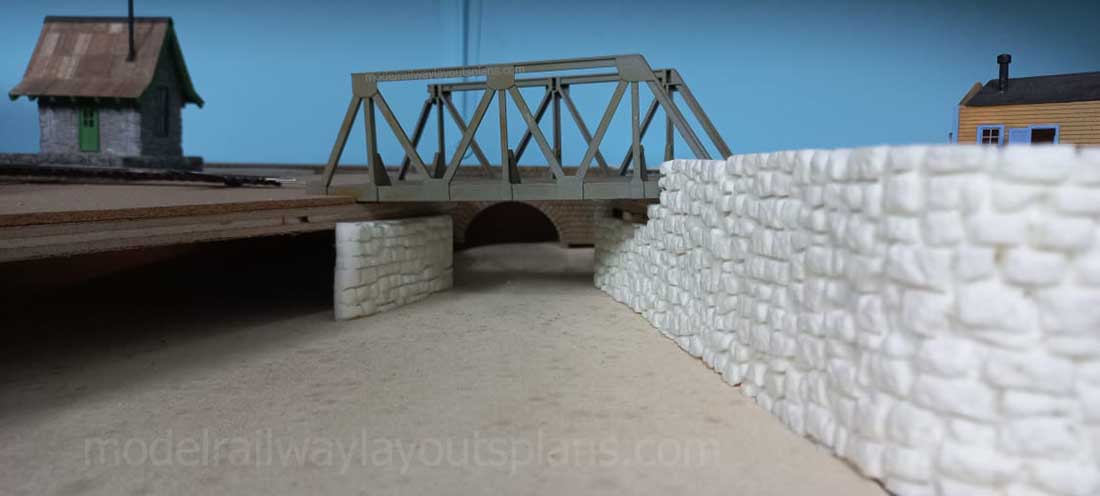
I had previously cast quite a few random stone walls in resin (in a silicone mold) which I am using to line the waters edge shown below. They were super glued (cyanoacrylate) together to form a longer section which I would then use my heat gun to form the curves and shape as required. Tamiya modelling putty will be used to hide any joints between the sections.
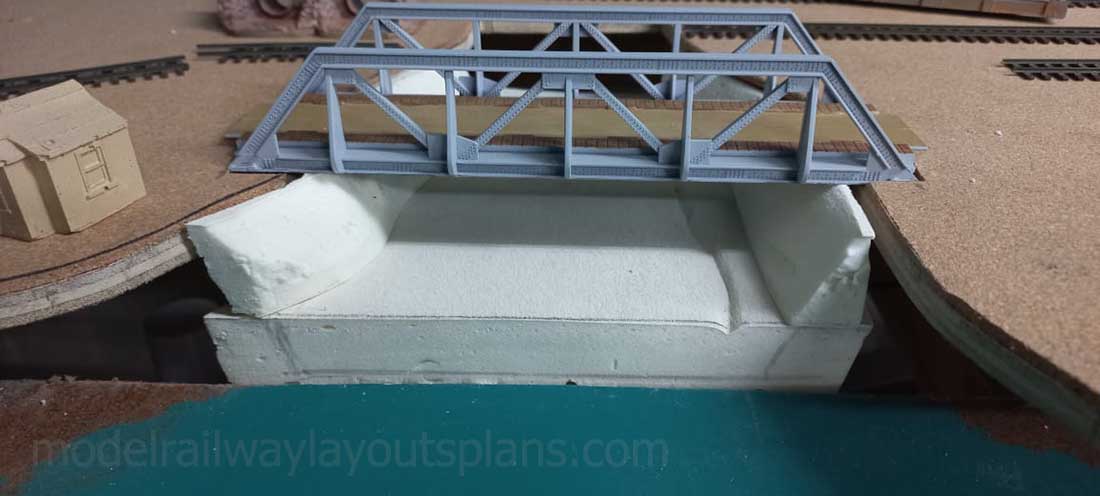
River bed in place and once the plaster cloth is in place, the river bed will be raised, the stone wall support (left) for the bridge will be at the correct level.
Checking the fit of the small boat hire building before bending the stone walls to fit snugly allowing for a staircase from the deck up to ground level.
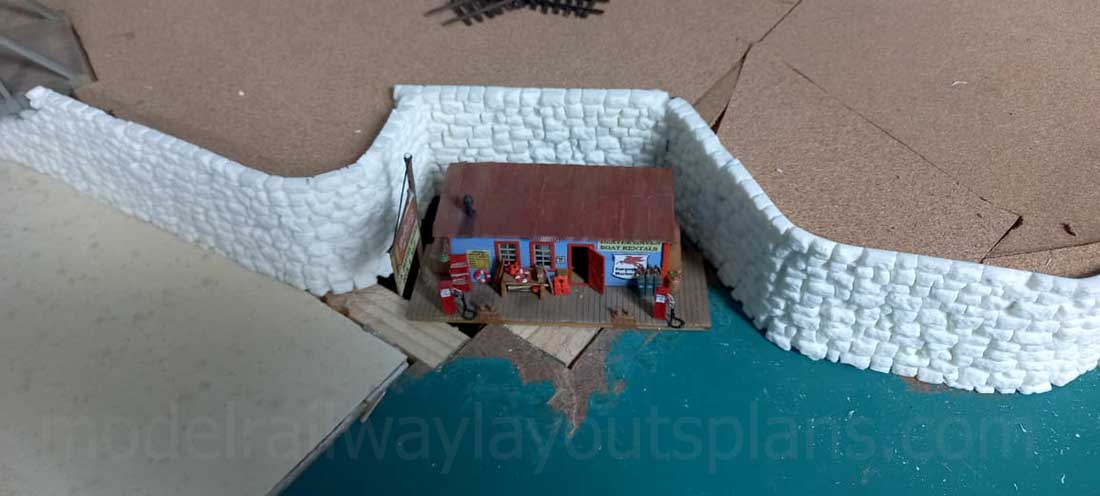
This is as far as I am at this stage. Very time consuming stone work to make sure that all the curves are correct.
I will send more photos and a write up as I progress on this layout.
Brian – the HOn3 guy in Knysna, RSA”
A huge big thanks to Hall of Famer, Brian, for sharing his HO scale waterfront layout update.
Brian’s post reminded me of Sheldon’s (which is N scale):
N scale waterfront structures.
And there’s Rob’s too:
That’s all for today folks.
Hope you enjoyed Brian’s ho scale waterfront layout as much as I did.
Please do keep ’em coming.
And if today is the day you get started on your layout, the Beginner’s Guide is here.
Best
Al
PS More HO scale train layouts here if that’s your thing.

well done & love the river through the town.
Ready anytime to see this finished, water in the harbor is perfect BTW. Anything but blue, also concur if new bridged sector flowage would remain “same color” as now is. Blended in with harbor “green”, it occurs in real life like that. IE- Destroyer piers @ Newport, RI circa 1960’s. Would bomb (drop from ship deck) the jellyfish with nuts and bolts, sinking them right out of sight. The stuff you remember after long forgotten. And no, nothing at all to do with bridge project. 🪼
Once Again, Rich
I enjoyed your river fabrication photos. My favorite part of modeling is the modeling. When the task is completed you sharpen your imagination to create the next scene….nice job Brian.
TJK
Great example of patience and taking things one step at a time. Nice work!
Brian
Always excited to see a Brian missive. This time you showed why you are the modern day DaVinci with an artwork that could be framed and precisely showing your very creative ideas. Very few have that talent. Then you go about assembling a masterpiece of the century. What a brilliant piece of work- small boat sales by the water, dual culverts, bridges, stone walls, on and on. The sales office is detailed already! Wow
Thank you for your time & effort to show us mortals how the master does it.
Big Al
Coffee & Brian- Wow!
A fine mess you’ve got us into Ollie! 😁
Alastair, I am always amazed at many of the posts appearing here. Brian, Dave and others are expert and precise modelers with their layouts. They take a long, long time to complete (correction: no layout is ever complete), and they are beautiful, but oh so permanent.
I look at this hobby more as a hobby and enjoy completing a layout, running it a year or two, and then tearing it down only to begin a new one. You have previously posted photos of my first layout in 60 years begun during Covid, but that has gone now and a new one started. I always liked trains, and most of my family worked for the B&O railroad but I never grew up or lived near any real railroad line, so I use my own ideas and they constantly change. I don’t approach my layouts with any sense of permanence, and love to run the trains.
This is a very unique hobby where everyone approaches it differently and does their own thing. As we get older and the mind begins to slow down, this is the best way I have found to keep it active.
Keep up the great work with this site.
The steel pony truss bridge could be made better if you add some I beams where the vertical posts are under the bridge. The I beams should be a bit smaller than the horizontal I beams. That is my thought.
cool river and bridge.
I have always really liked the harbor scene a bunch the river entering it was a natural addition to it As a teen I lived on the Miami river In Miami I rented a shop building with a small apartment attached to it with a breezeway in back and a dock behind it was nice to sit out there with a brew and watch the boats and ships pass by . I worked at the boatyard after school that was next door put myself thru high school that way
Wow. Great job with a super set of pix to go by ! Big thanks.
Just more precise craftsman modeling. Well done you and thanks for sharing.
I was super happy to see the bit about using the black and white photo to gain a perspective on what to put where. I am looking at a corner behind my roundhouse which sits at one level in West Springfield, MA; then I have the Connecticut River going from left to right behind it. And I want to see bridges and a skyline of Springfield in the distance. My wife is an artist, but I need to show he my vision. This will really help!
Brian really is a master. I am in the fortunate position that I can quickly pop over to Brian and steal some ideas from him.
Brian’s doing a great job! Makes me jealous. But inspired to do more and get going on my layout.