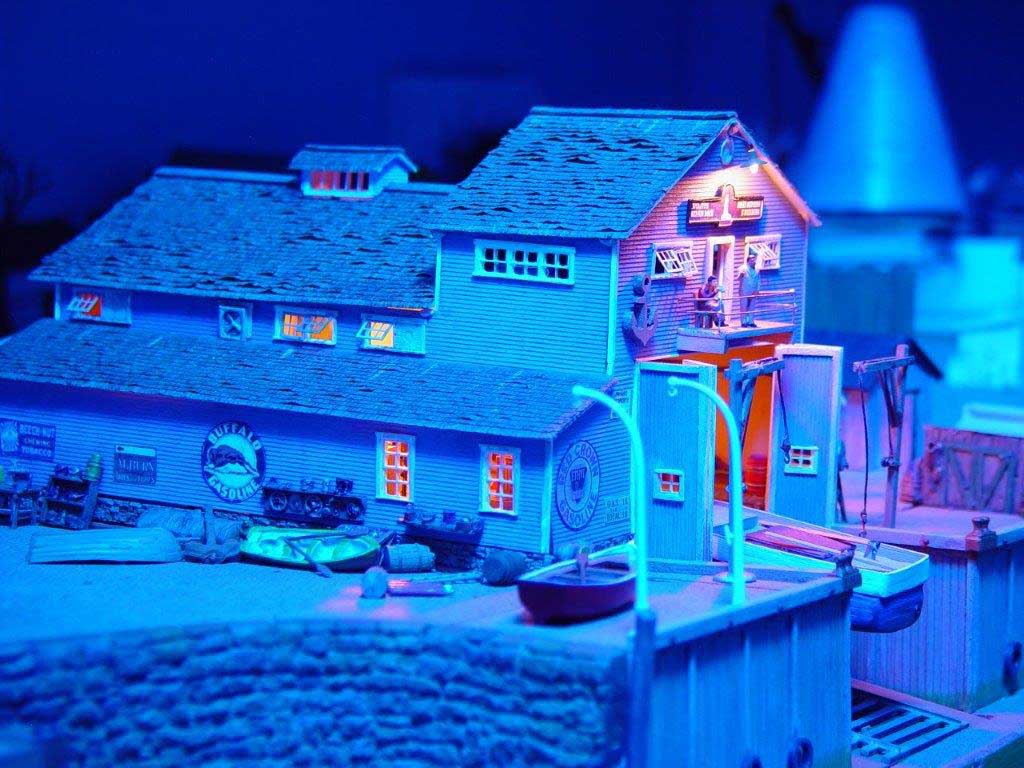
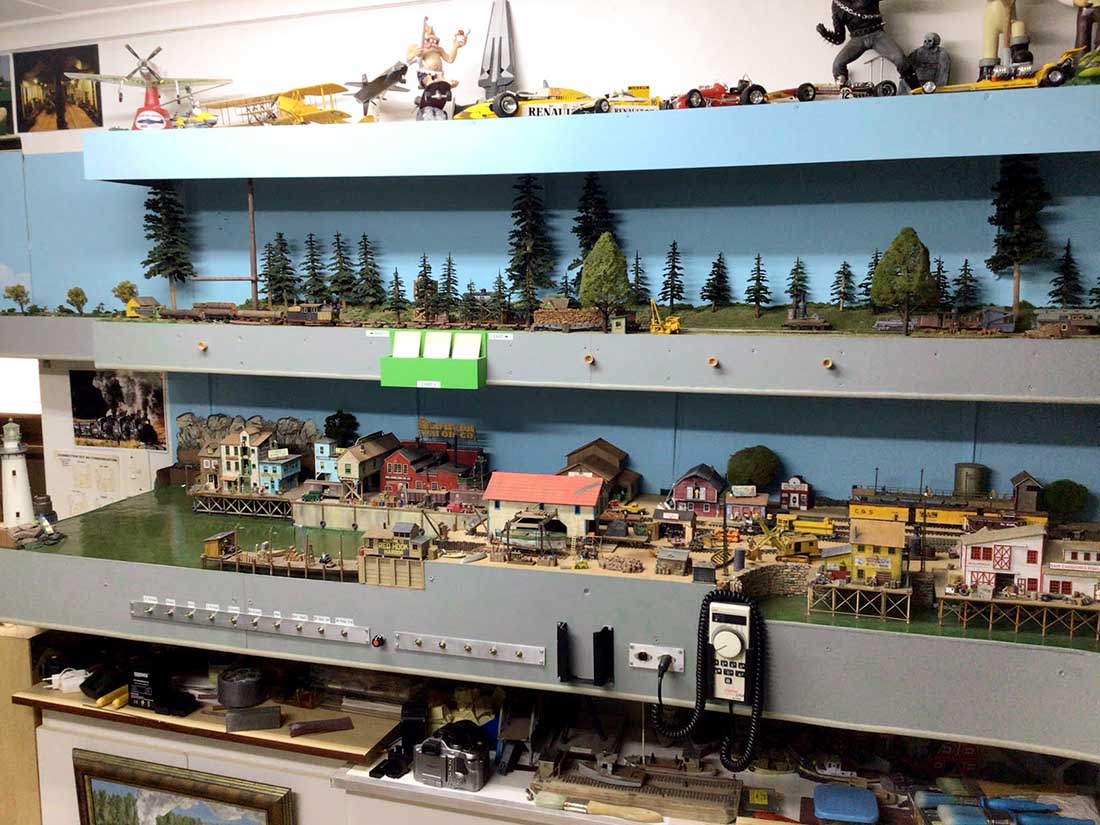
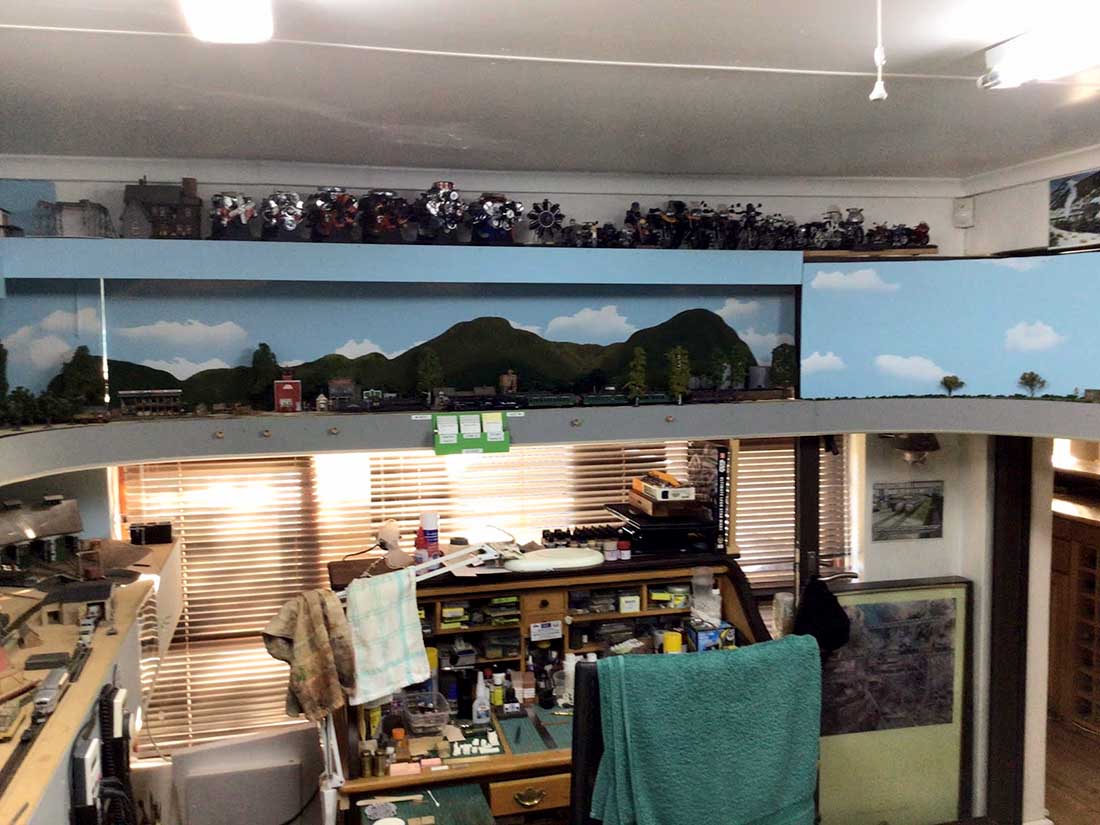
Brian’s been back in touch with his his HOn3 shelf model railroad.
He’s answered your questions from his previous post: HOn3 boat house.
“Nice work! Are the boathouse plans available? – Chris.”
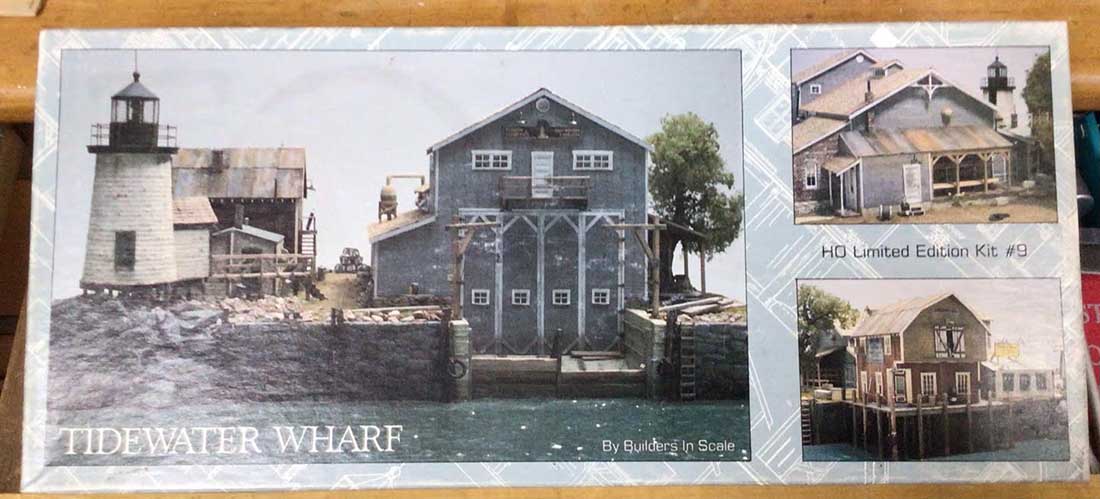
“Hi Chris, I have had the plans of the kit for many years. I had the kit but it was stolen/missing in a move from one city to another.
The kit, (Builders in Scale) is no longer made but you could try EBay for it.” – Brian.
“An excellent building! Although if it is possible some details on how you set up your lighting. – Peter”
Peter, I use 12 volt grain of wheat bulbs (from Minatronics Corp) and use them at 6 volts to get the correct ambiance for my era (1930s). They also last much longer.
A length of brass square tubing cut to the length required inside the building and then small holes are drilled at the appropriate places on the underside to thread the wires through.
These are fed through the tube to one end and then come out at at the back side of the building. They are then run down the outside (hidden from view) to under the layout to the power source (a transformer set at 6 volts).” – Brian.
“Your boat house is impressive. I have 2 questions:
1. How did you get the brick impressions on the office?
2. Any tips on how to make the precise cuts/openings for doors and windows?
Thank You,
Dave”
“1 – I had a section of a brick building left over from a kit that I did not use. I cut it to match the size that was required on the plans. Glued it together using a white glue (I found that this is the only glue that will stick plaster together). From there it was painted with a red acrylic paint, weathered and dry brushed to get the finish that I wanted.
2 – Precision cuts for windows and doors, I mark out on the reverse side of the wood using a pencil and then use a hobby knife with a number 11 blade to score and cut right through the wood working from corner to corner, this give the exact cutout for the doors and windows. (A tip here when doing these cutouts is to put masking tape on the underside where the openings will be, this prevents the wood splitting)” – Brian.
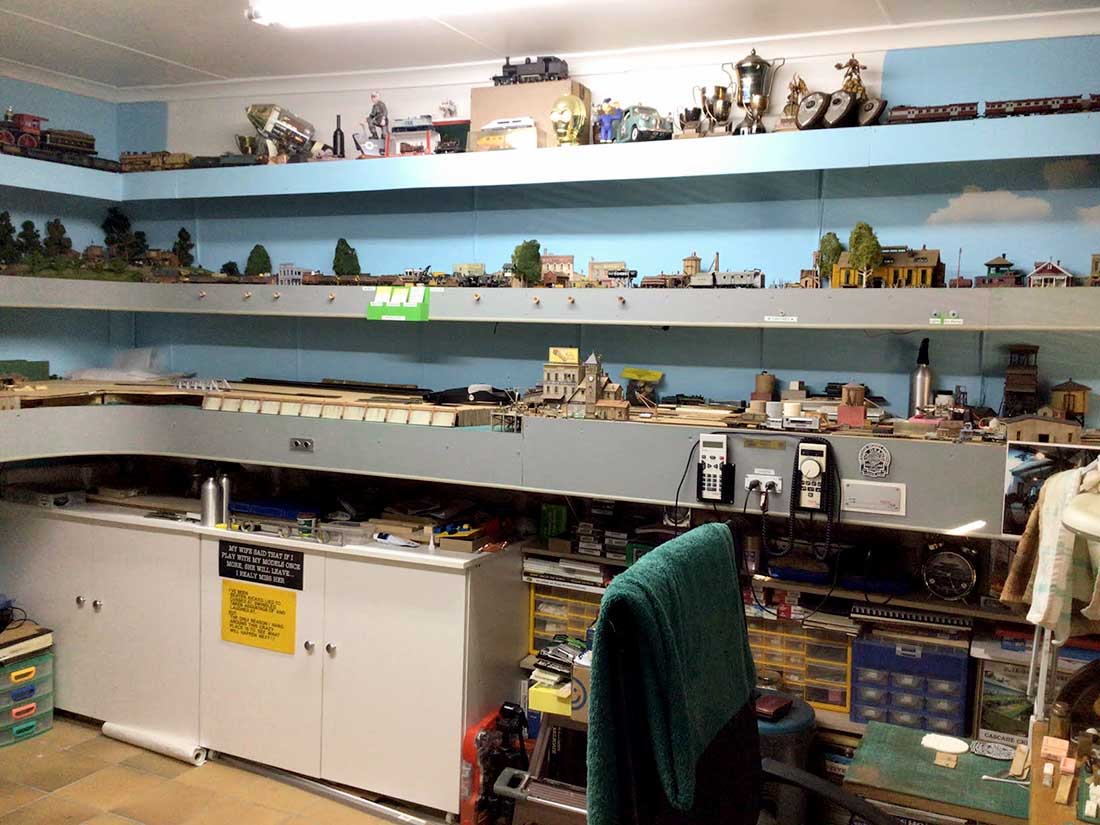
A big thanks to Brian – he also sent in the below.
I really enjoyed it because you get see more of his layout, and there’s just something about seeing a layout in a room that captures my attention.
I know we all enjoy the close up pics of our miniature worlds, but seeing them ‘as they are’ is an overlooked part of the hobby. I’m all for more pics that show the layouts ‘in situ’.
Anyhow, just my opinion, let’s carry on with Brian’s update.
“I hope the above answers help those that asked them. Some changes made to the facia boards.
After a long debate, I bit the bullet and painted the facia boards of the layout from the green to a more neutral grey. Now when entering the train room, one sees the layout features instead of the bright green. I think that it has improved the look much better. (Don’t know what I was thinking years ago when I did the green). Times change as we get older.
Below are two photos of the old colour (yuck!!!) taken a few years ago of my double deck HOn3 layout.


The new look, a more neutral grey. – Much better.
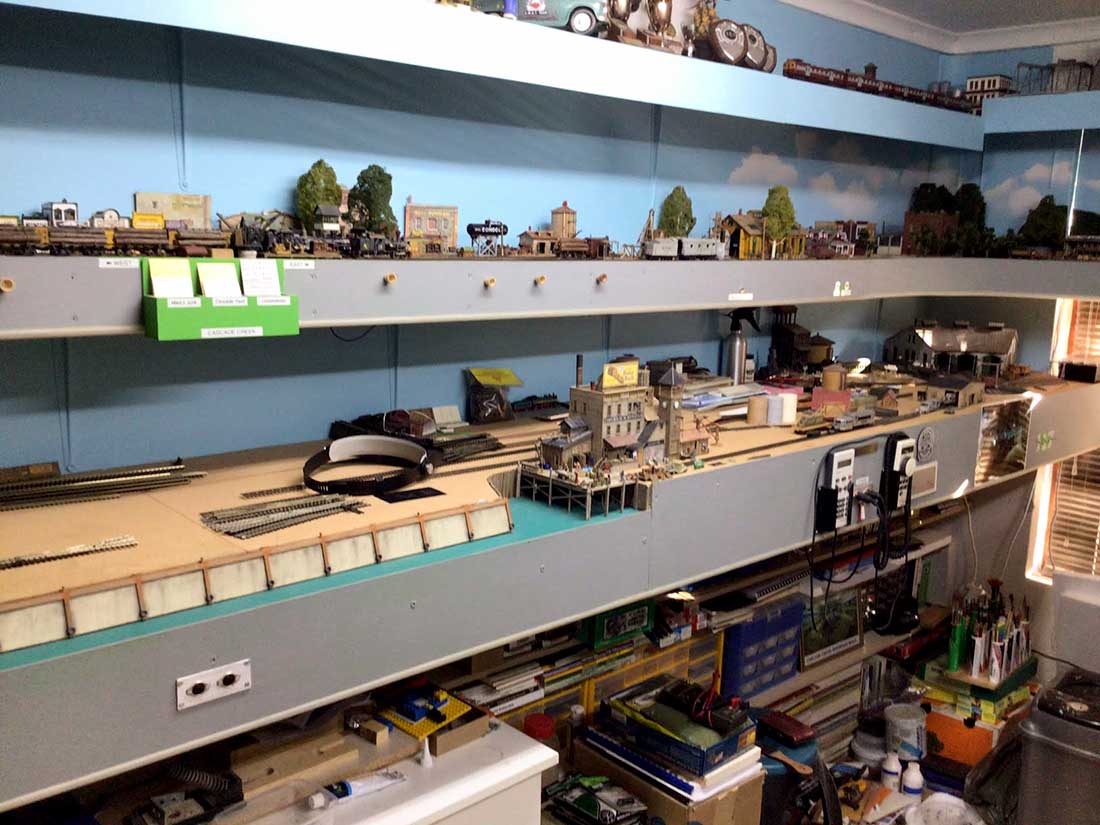
Till next time – keep modelling.
Brian – the HOn3 guy from Knysna RSA”
And now on to Don.
You may remember him from this post: Don’s HO scale.
He’s busy on a new layout and sent in this tip which I rather liked:
“Hi Al,
You recently posted photos of my first ever HO layout, and now I am preparing to dismantle it to build a larger one.
I have learned much more about DCC, and because I have both DC and DCC locomotives, my plan is to have both running on one layout.
It will be about 8′ x 12′ with a fairly simple track plan running both voltages independently.
Still not too good at creating mountains or cliffs, but going to give it a try on this one. Have to get started on it before I find myself looking at the roots instead of the grass!
I can offer a tip that I found useful in my modeling venture. If you place a piece of household parchment paper on your work surface while using any type of glue, the glue won’t stick should you use a little too much on your project.
I had a habit of over-gluing sometimes, and had trouble lifting it from my work surface without it adhering to it while drying. I found that almost any type of glue I used will not stick to parchment paper.
Many of your readers probably already know this, but it always takes me awhile to learn things.
Thanks for your service to the hobby, and keep it up as long as possible.
Don R
Port Saint Lucie, Florida, USA”
Lastly, Tom’s been back in touch.
He sent in a pic that really demonstrates how much of a difference lighting makes when you’re taking pics:
“One shot I just caught in time, talk about making it look real?
Early morning sunrise on the Narragansett RR.
Enjoy this one Al.
Tom da ole guy”
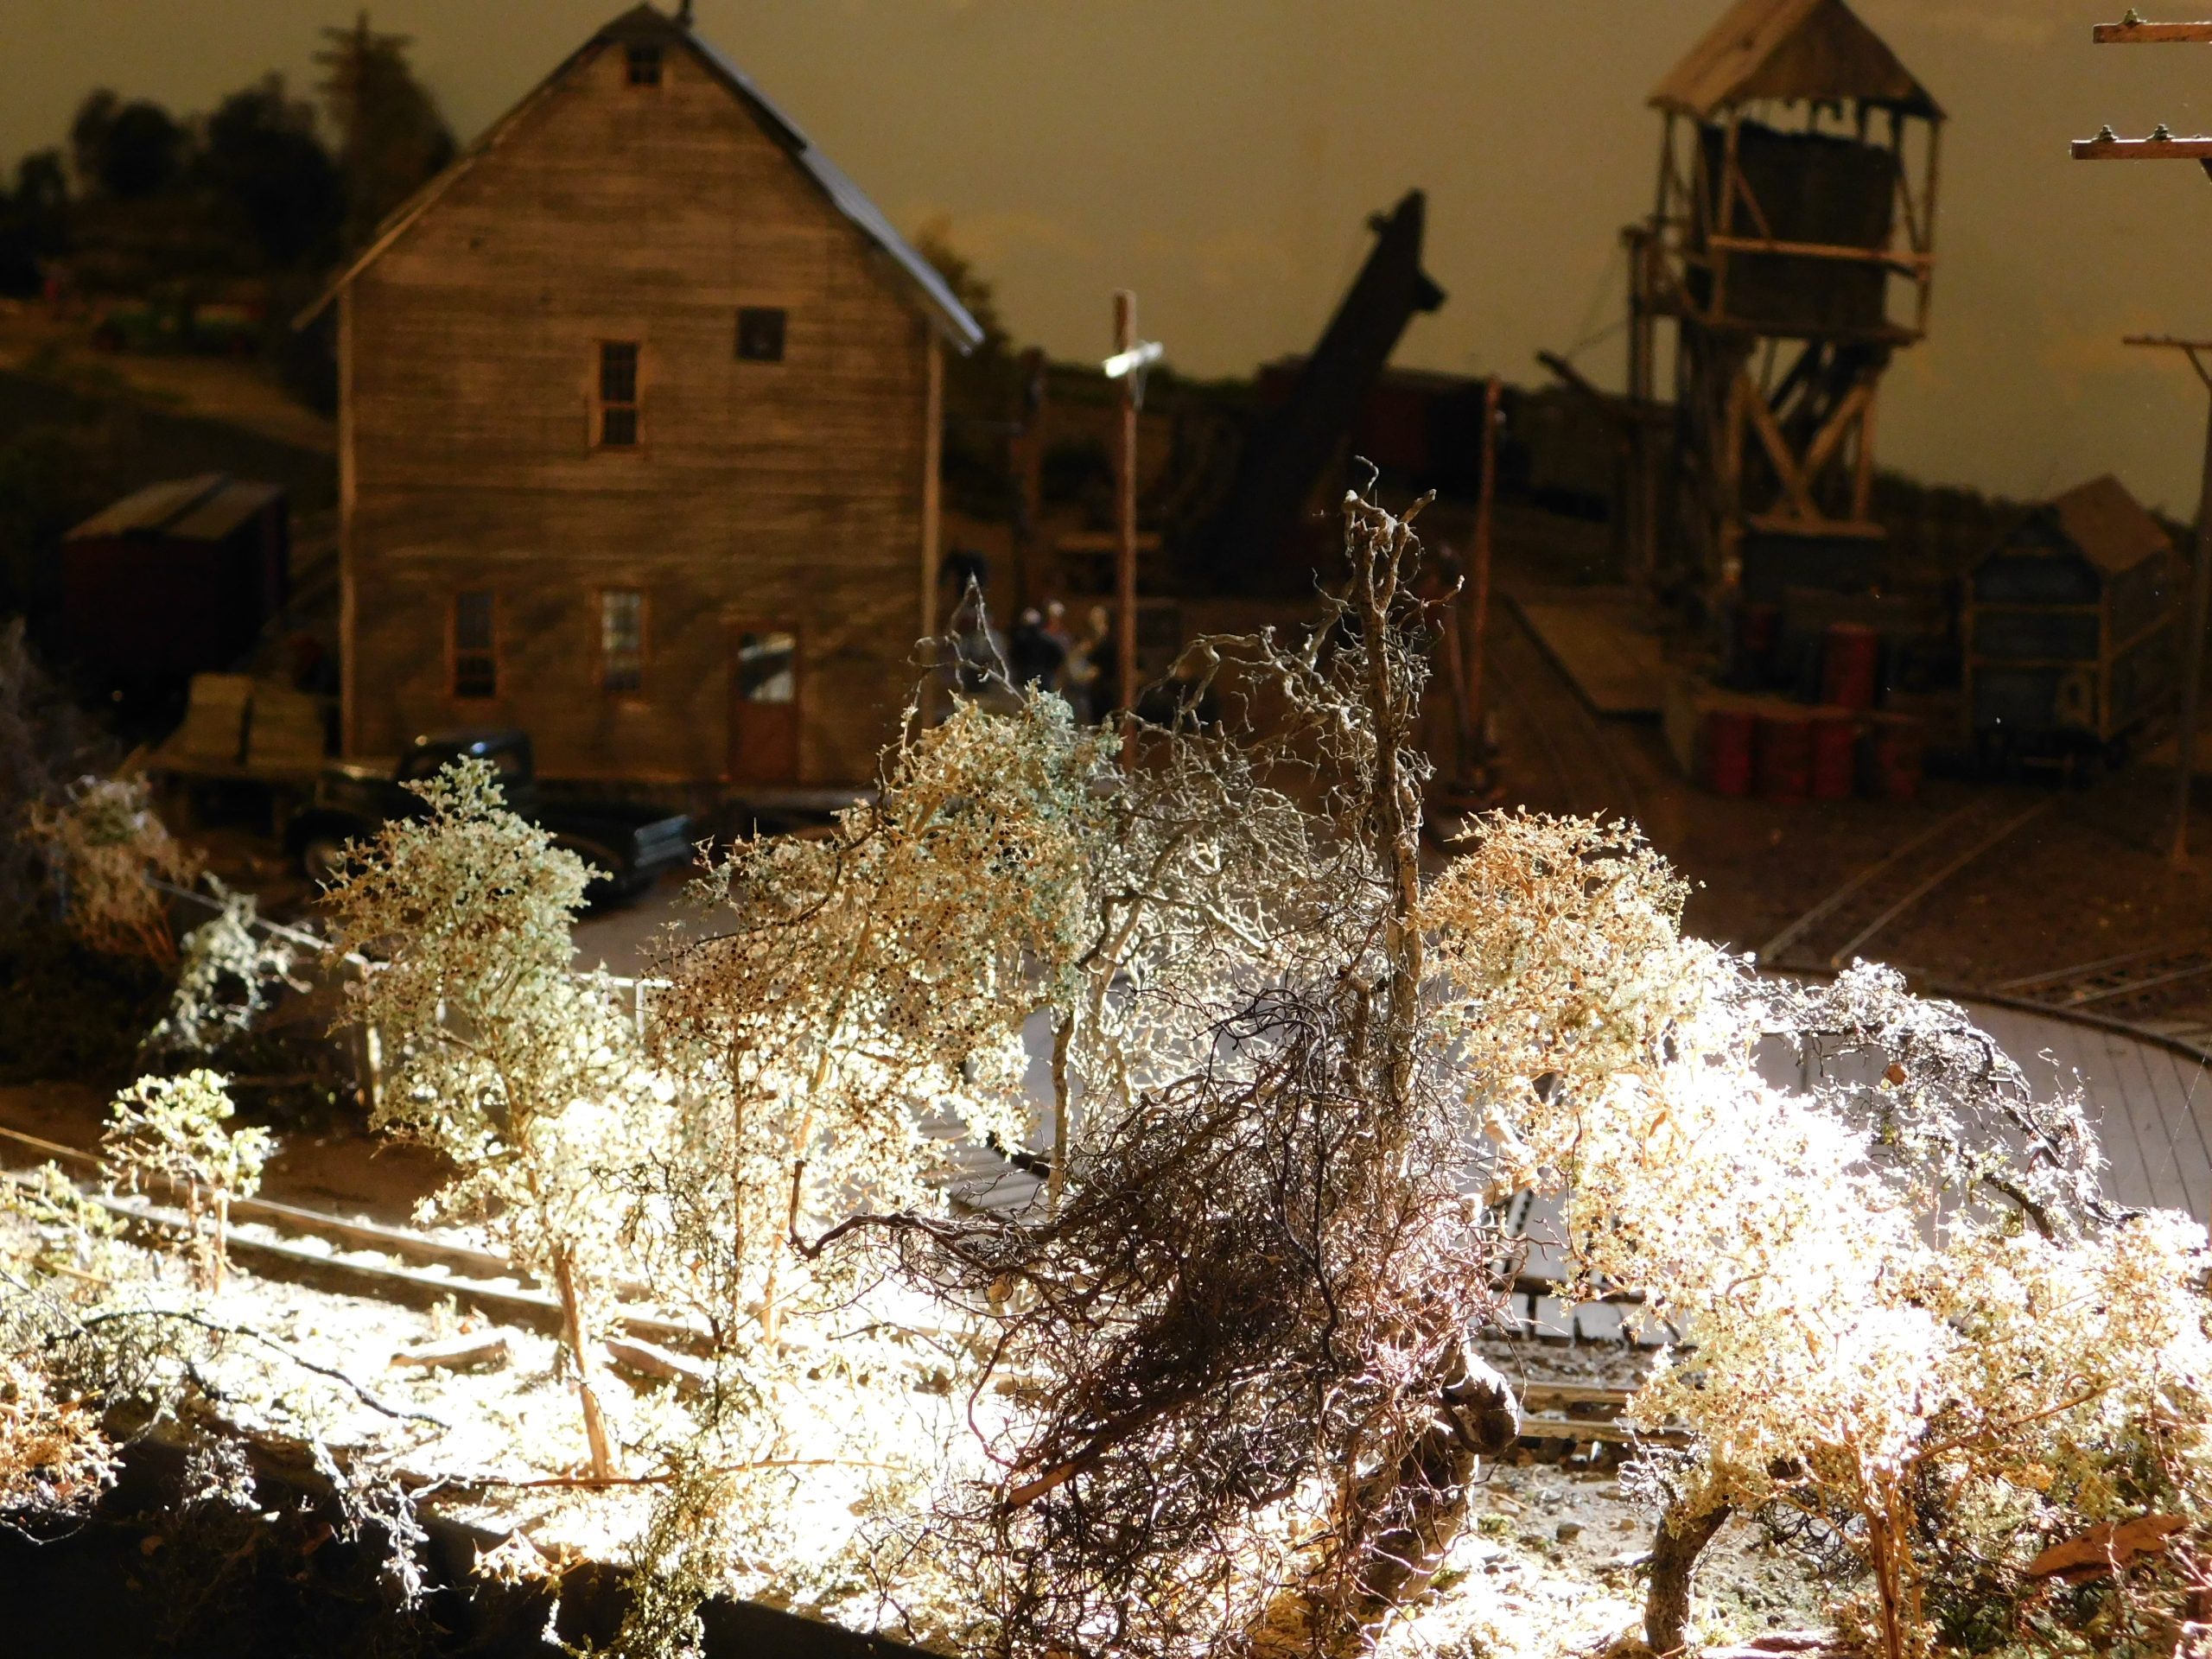
(If you missed Tom’s stunning layout, it’s here: On30 model trains.)
That’s all for today folks.
A big thanks to Don, Tom and to Brian for sharing the pics of his layout.
Please do leave a comment below if you’d like to see more ‘in situ’ pics of the layouts. I’d love to know what you all think.
Keep ’em coming. It’s still jolly quiet this end.
And if today is the day you stop dreaming and start doing, the Beginner’s Guide is here.
Best
Al
PS Latest ebay cheat sheet is here.


Waterfront area on your layout is very cool!
Brian, What a wonderful train room you have built. You have managed to pack so much into it and it does not look overly crowded. Your details in the scenes and landscapes are excellent. Great going, thanks for sharing, Rob McCrain
Brian
You are the master modeller & creator. You’re one the greats that share your talents and experience for us mortals to learn and practice the art of recreating and we cant thank you enough.
Awesome & well thought out room.
Don
Tell us how we dont glue our fingers with CA. LOL – Thanks for the tips
Tom
I can hear the birds singing.
Big Al
My ” situ” is a God awful mess. I blame it on being raised on a farm where everything was a crisis, we knew where everything was, but get it done in a hurry was the modis operendi and there was no time for making nice nice. Its a curse that makes me what I am. So my in situ must not detract from my layout and pics need to be precisely on.
Thanks for your hard work.
When I saw “Shelf Layout” I sure didn’t expect to see this. Wow!
I agree. I would like to see a photo of the complete layout to understand the size of it in relation to 100% size surroundings. Would also like to some of their rolling stock in the photos.
i wish i had this much room and the time to do something like this.very nice.
Absolutely want/like to see a couple shots of the big picture!
Regarding the Multi Level Shelf Layout,,, can you tell us the Distance between the Layout Shelves? Thanks… Mike in New Hampshire, U.S.A.
Al,
Definitely agree with your comment about the desirability of having overall shots of layouts in addition to closeups. Another observation would be that some do not even mention the scale when sending stuff. Sometimes it is obvious, but not always and specifying scale can eliminate some head scratching. Layout diagrams are also welcome.
Yes please for more in-situ shots as it shows the layout in context and will inspire people by showing them where / how they can fit a layout into their lives / homes.
Brian, how do you get from the lower level to the upper ? I don’t see a helix. Great layout !!!