Jim’s been busy with his Atlas track:
“I started a while ago, having retired from a teaching job and wanting to try my hand at inside trains.
I’ve had G scale trains running outside in Southern California since the mid-80s, but that’s a story for another time.
My goal was to learn how to create something in HO scale and see if any skills are transferable from outside to in, and perhaps back again.
What I’ve learned so far is that HO track work can be very unforgiving. Rail joints must be nearly perfect. Even small gaps can cause running problems. It’s faster and cheaper to do it right the first time. I didn’t give enough weight to all of that when I began this project and I expect many may wonder “why not, isn’t it obvious?”
Concept:
I had about a 4 ft. square space and a large piece of foam that had come with a new dishwasher that could be used as a base. I wanted to include two levels in an up and over design. So here was the initial design:
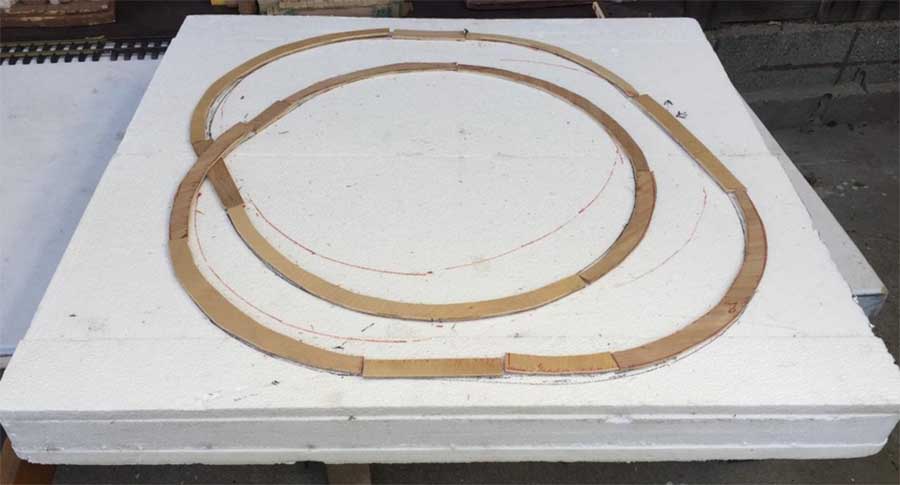
It’s a tight fit and at the time I didn’t appreciate the difficulty I might have matching up the rails on hills and curves.
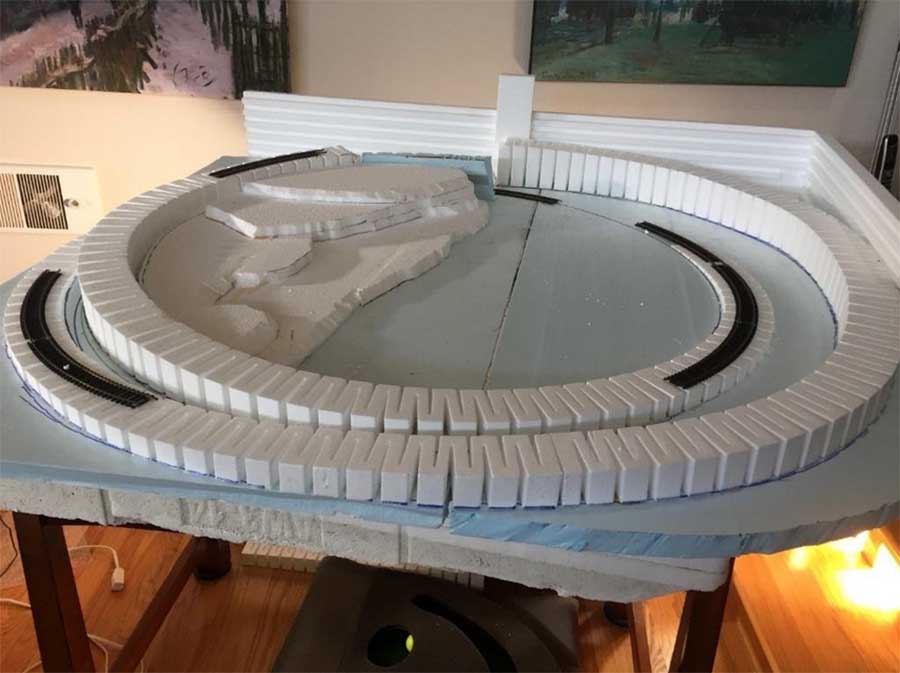
I had a supply of packing foam that I used to build up some hills and used commercially available foam risers to support the roadbed.
After a lot of trial and error and refitting, this was the starting point for track and scenery. The grades running clockwise are 4% up and 3% down. The radius is about 18 inches.
Then the theme for this little railroad came into shape.
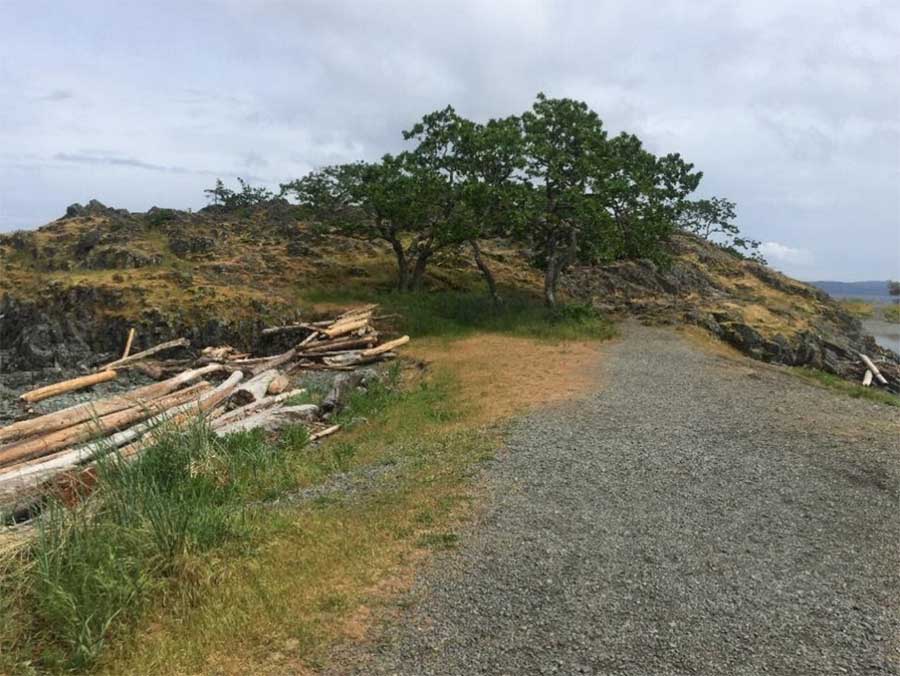
The second photo shows an entrance to Piper’s Lagoon in Nanaimo, British Columbia. That’s my wife Sue’s home town where we’ve spent many happy summer days. This became the “inspiration” for this inside railway project.
To be sure, trains did not run near Pipers but they will in the model. All of the elements here are to be modeled: a rocky hillside, trees, stray logs and water. The Strait of Georgia is in the background to the right and the actual lagoon is off to the left just out of the picture.
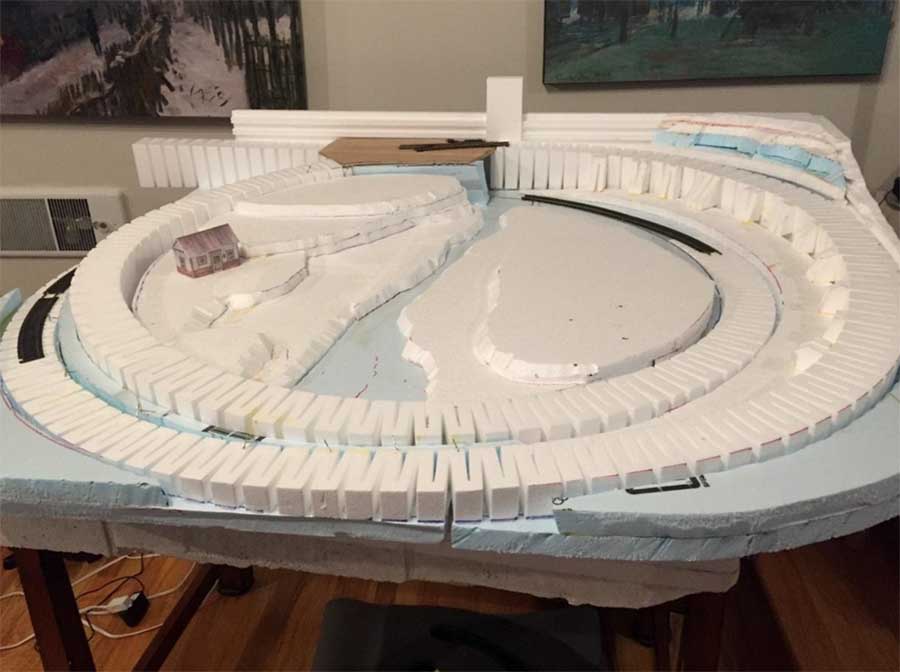
This hillside will be modeled in the top left corner of the layout. I’ve added more foam to create a fictional town for Pipers.
The lagoon has been shrunk down to just a small tributary, a compromise because of limited space. The small shack gives a sense of scale with more to come.
A unique feature of Piper’s Lagoon is Shack Island, a small land mass out in the lagoon. You can hike to it at low tide but it is surrounded by water when the tide is in. For over 100 years, Nanaimo families have maintained and enjoyed camping on Shack Island in old wooden shacks without power or running water.
While working on the foam setup, I also completed several of your print-out shacks and other structures.
After installing the track, I acquired a “tourist train” to serve visitors to the lagoon. The track is a mix of HO flex and Atlas 18 degree-snap track.
The plaster cloth has been covered with some acrylic paint to give a sense of what this might become. I learned a lot about installing HO flex track on sharp curves and grades. That’s something that probably should be avoided when possible.
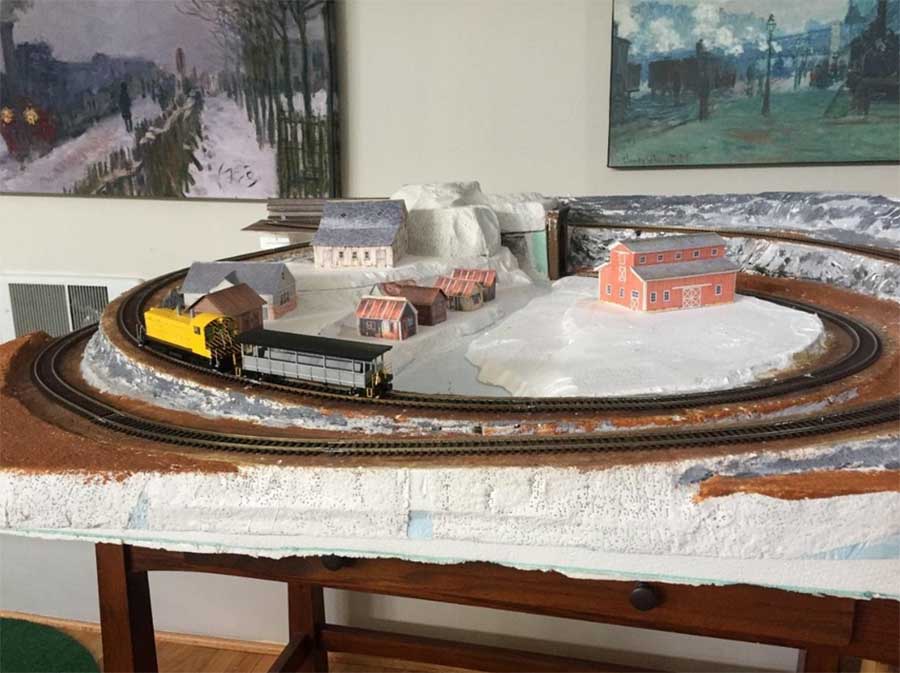
So here’s where things stand today. It’s a barren landscape but in a few months (I hope) we will have trees, bushes and grasses of all kinds.
The track will have ballast and the small lagoon will be filled with water. The colors here are just the foundation as I try to bring Piper’s “alive” with the top left hillside, shacks running along the lagoon and the town of Pipers with a station, hotel, saloon and a few other buildings.
But first, the track needs a do-over. Some rail joiner connections aren’t quite up to standard and there is a kink and camber problem just behind the red barn in the preceding photo.
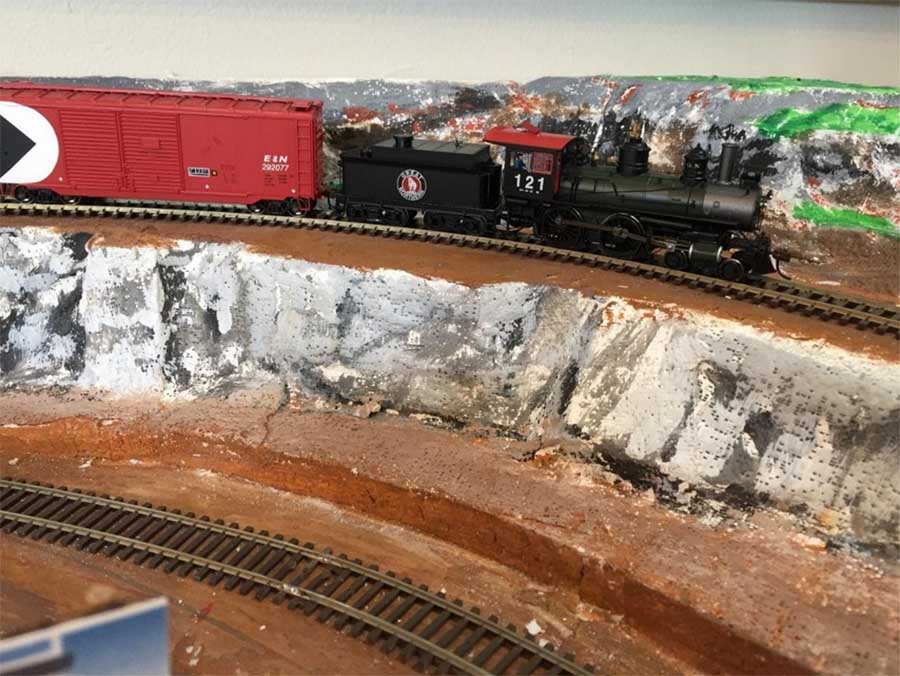
The yellow diesel was quite happy with the track and its imperfections but I had to stop and reconsider after the purchase of a small steam engine exposed these faults.
It would get around the tracks by lurching a bit at the various spots. One of these faults can be seen on the lower track just below the Baldwin 4-4-0 and a second is just a few more inches to the right where this train is heading. Another can be seen in the front track in the prior photo; for some reason, this soldered rail connection is uneven but the Baldwin had no trouble here.
I thought about cutting and adjusting or simply taking up the Atlas 83-pound track and starting over. And that’s what I’ve done.
This time I’m using Micro Engineering flex track that requires some effort to curve to shape but stays in place.
Here’s the first picture of the re-do with some of the rail in place. I can say that this track so far is now level and the rail connections are smooth, as they should be.
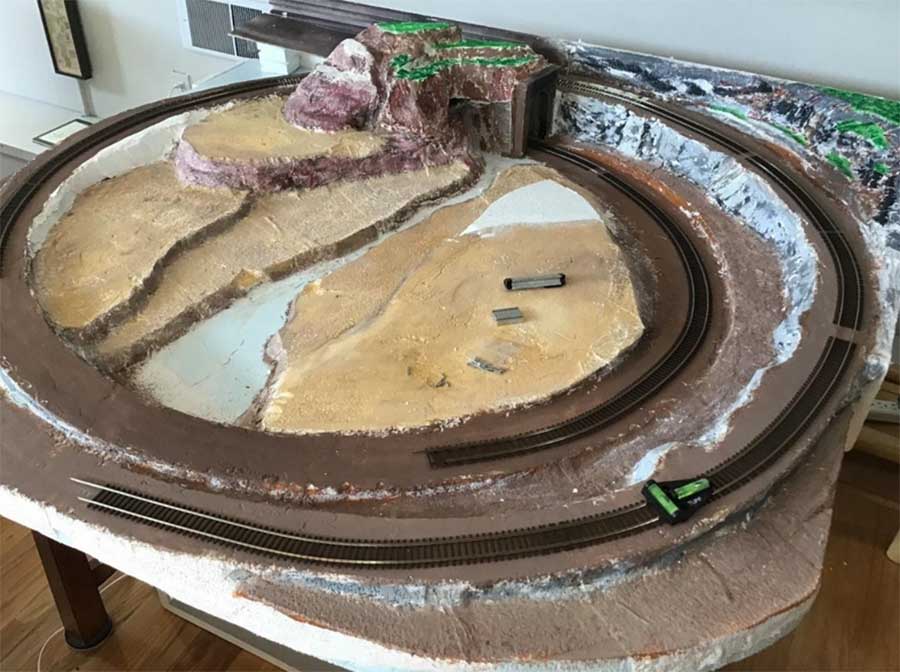
I’m going to leave it here for now. I’ll get the rest of the track in place and test it all before starting on scenic details.
I’m glad I stopped and re-trenched because I know I’ll be better served in the long run.
I could have avoided this do-over by doing some research at the beginning and I’m thankful for the YouTube videos that show a better way to do this.
That’s all for now but I’ll send an update when this is running and there is some scenic detail to share.
Thanks for the opportunity to share this little story, Al. Keep up the good work for all your readers.
Jim”
A big thanks to Jim.
Now on to Steve:
“Hello Al.
I have built and sold many HO layouts over the years.
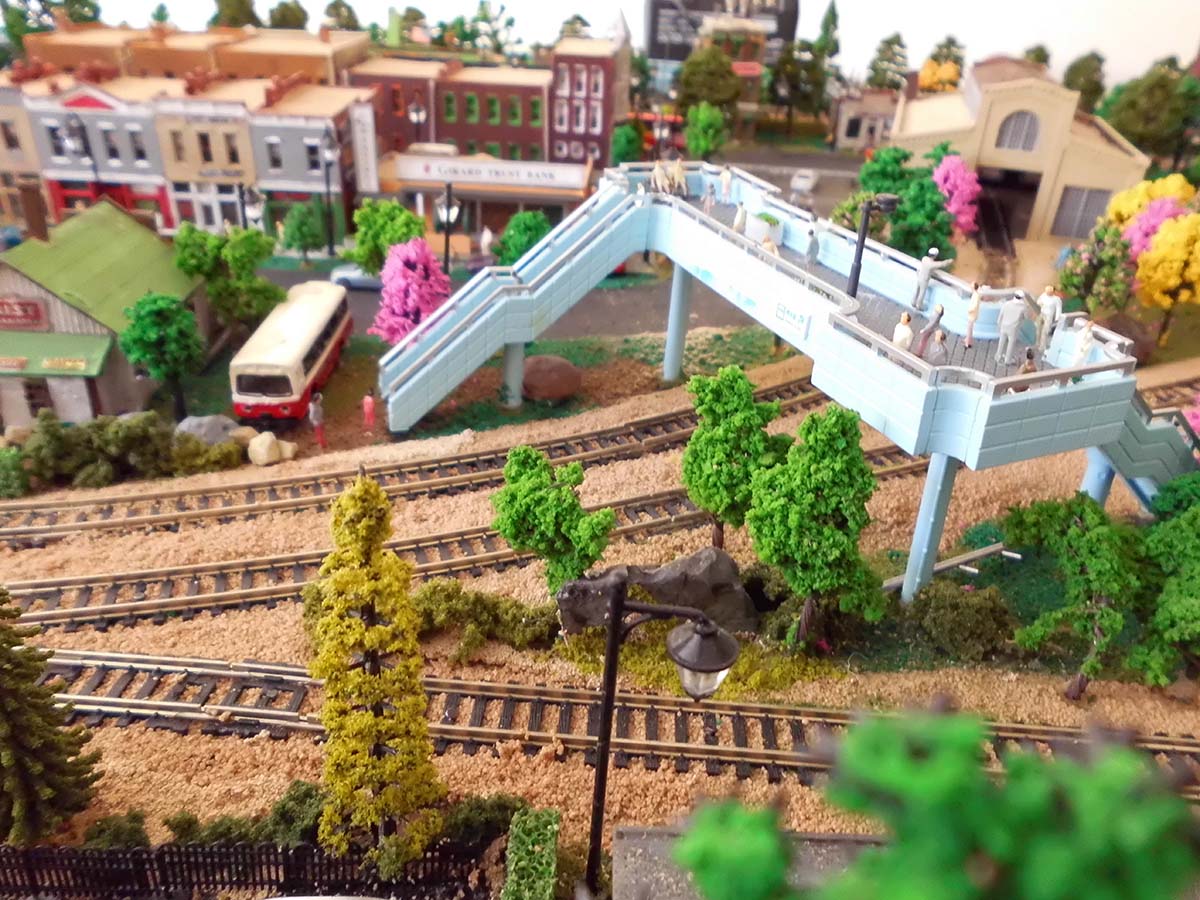
However, this time I am building an N Scale layout for my grandboys.
I wanted to make the train layout very simple for them to operate with 6 switch tracks for a good variance of operation.
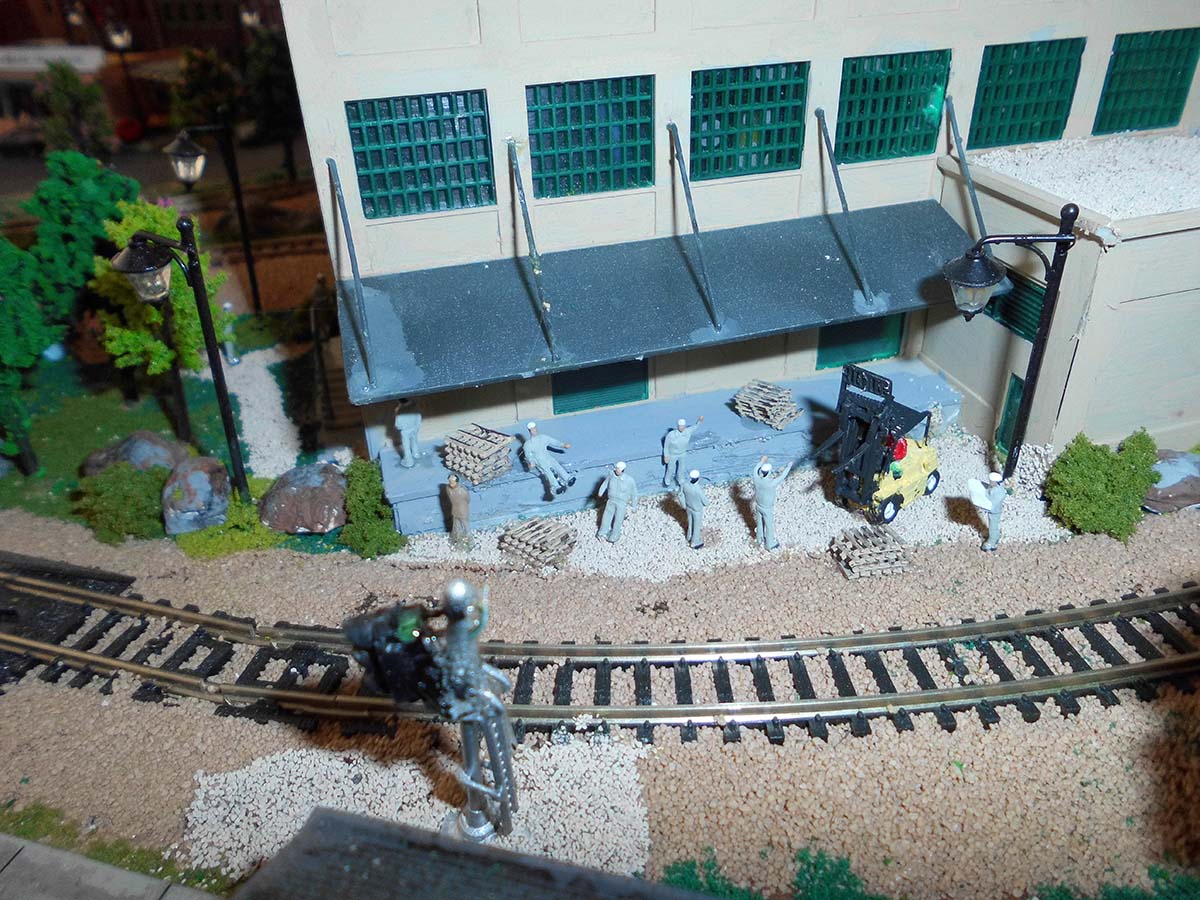
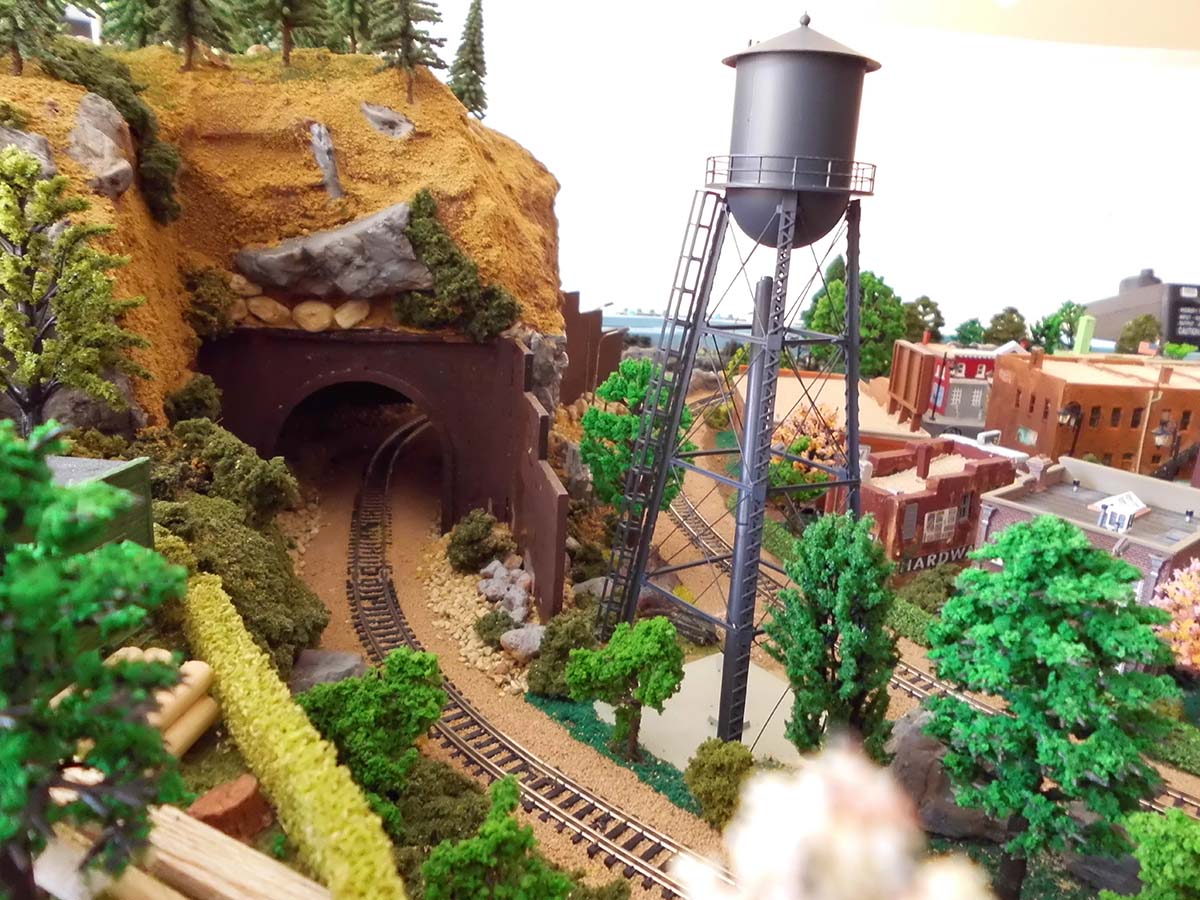
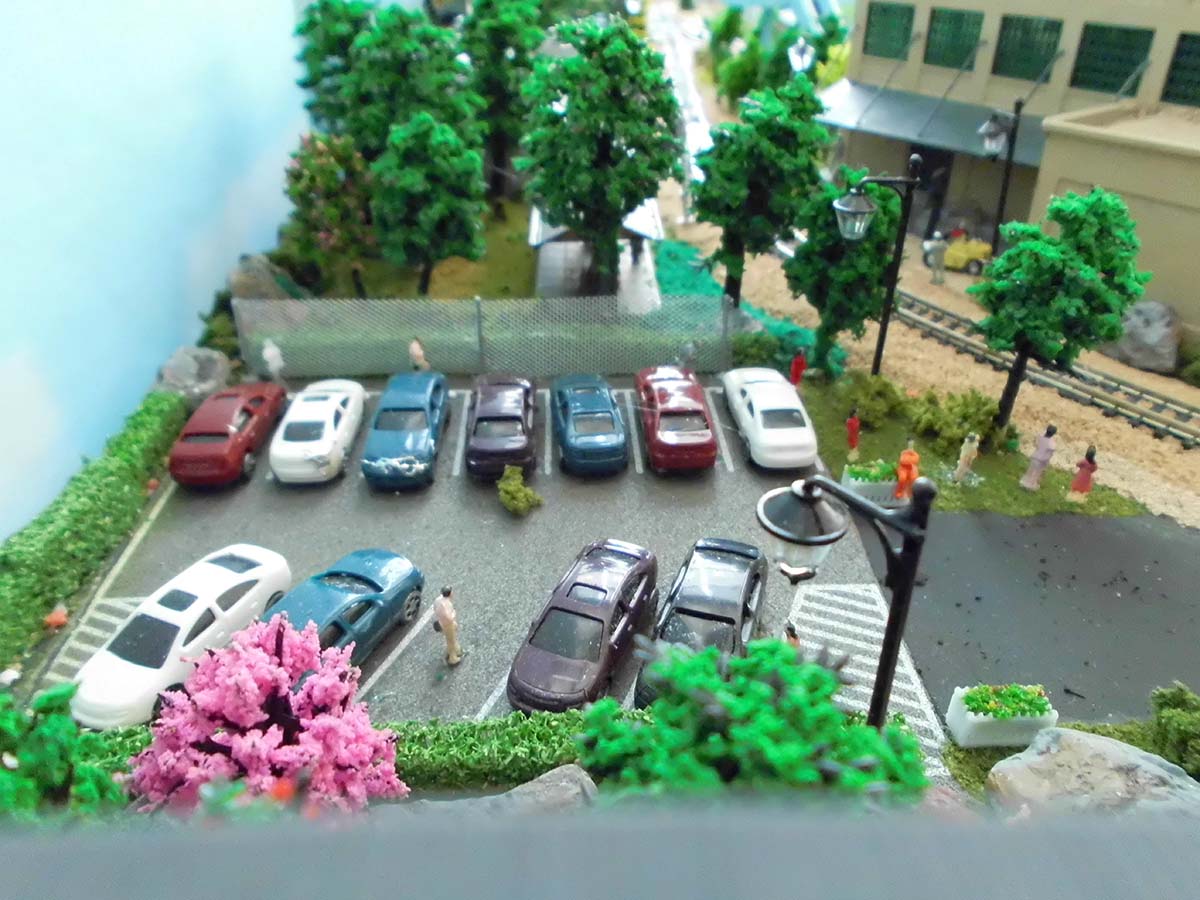
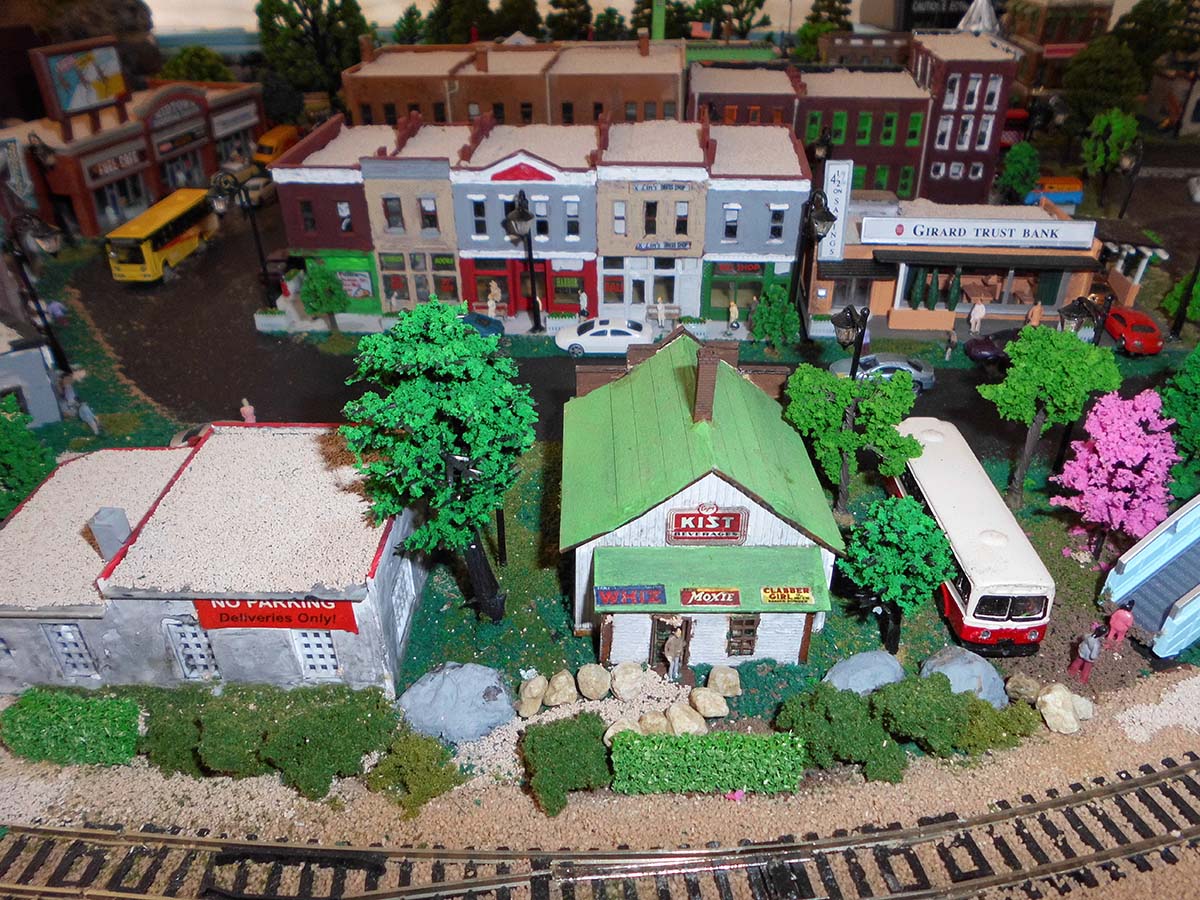
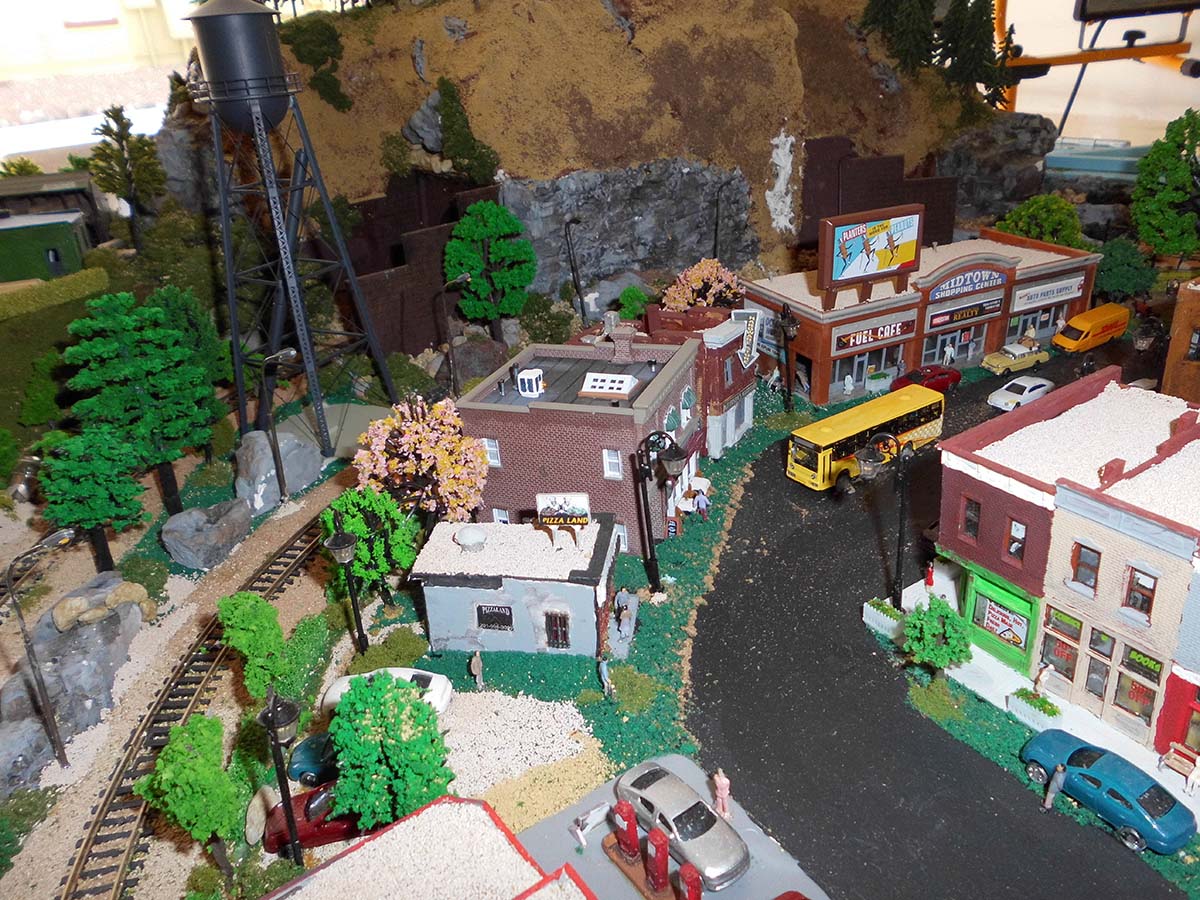
Everything on this layout lights up – all buildings, cars, streetlights, railroad lights, tunnel lights and spotlights.
Again, the operation is simple but the city and decor is extensive.
Thank you for letting me share this tilt table layout.
Steve”
Thanks to Steve.
That’s all for today folks.
Please do keep ’em coming.
And if today is the day you get started on your layout, the Beginner’s Guide is here.
Best
Al
PS More HO scale train layouts here if that’s your thing.
Need buildings for your layout? Have a look at the Silly Discount bundle.

Jim. You’ve taken on a difficult plan using HO scale. Your plan of what you want to achieve is again very difficult in such a small area. However, you appear to be well on top of your plan . It will be exciting to see your progress. Keep us up to date please.
I love the fact that this started out with “I had some leftover foam from an appliance purchase.” It just goes to show that model railroading doesn’t have to be a huge undertaking to be enjoyable. It looks great so far and looking forward to future pics when it’s completed.
Have you tried any super-elevation on the curves? Short strips of .010 styrene under the flex track to raise the outer rail help locos and cars stay on the track as well as give a more prototype appearance to operations. I use cork roadbed and spike the track.
Jim; I too have just started on a 84″ by 25″ over and under, ‘N’ scale shelf-style project. Although in my 83 year, your article has provided me with the extra encouragement I had sought. Thanks!
Dave in the Algonquins of Ontario
Jim; Thanks ! In my 83rd year, I too have just started an over-and-under shelf layout 84″ by 24″ in ‘N’ scale. Your article provided the extra encouragement to forge ahead.!
Dave in the Algonquins of Ontario.
Hello Jim, amazing layout in 16 square feet. I’d say your reworked track is spot on. Keep up the awesome work.
Cary
Pretty Kool.!!!!!
Looks like you’re getting it all figured out! Would love to see the finished project!
Pete in Silicon Valley
Great work Jim – Having problems and hic-coughs and finding solutions is all part of the enjoyment of railway modelling. I am looking forward to seeing your finished layout so please send it to Alastair so he may share it with us all.
Andrew in Oz
Steve… it’s amazing how motivated we become with grandchildren. Good going!
Hi Jim, great looking layout you have going. I feel your pain when it comes to ho track. I built a layout a few years ago using atlas code 100 track with 18″ radius curves. I have since changed those to 22″ curves so that I can run different locomotives that don’t like the smaller curves. I used atlas flex track on my helix and thought I knew what I was doing, of course it was soldered and glued down and I had some many derailment that I had no choice but to tear it up and start over. I used the same track but reinstalled it a section and tested it for no derailment forward and reverse also checking for kinks with a track gauge and then I would reglue it. What a pain. I have learned alot by my own mistakes. Enjoy your retirement and your layout!!!
Chuck
Jim
Keep us posted on your progress. I think that if you had switches in your layout you would have had more problems because you are at the extreme upper limits of slope and curve. Love the theme.
Steve
I cannot get over what you N scale guys can do. I am amazed. Please send an overall plan of your work and whose “stuff” you built it with. DC?
Big Al
Thanks
I saw the crossover from one side of the tracks to the other, up the stairs over and down. I have seen this on many model rr, but no one has given any thought of some one in a wheel chair.
Electrical contacts to track are a real pain. Try this, assuming you are using 3′ flex track for HO. For both large and small layouts, run a 14 gauge power wire directly under the bench work that follows the track above. Then, using a track connector, solder the connector and the two sections of 3-foot track AND and 16-gauge feeder wire together . Then connect the feeder wire to the 14 gauge wire track connection, using a box connector or solder.
Then connect the now 6-foot track to the next section of 6-foot track with just an UNSOLDERED (but slightly crimped) track connector, leaving just a tiny gap between the 6-foot section for expansion, especially in areas where the temperature varies over time.
Then run the smallest engine you have back and forth over both the soldered and unsoldered connections.
But never trust just one powered wire to your track, regardless of size.
.
i like the up grade, nice.
Jim……..great little project
Steve……..love your detail secenery.
It goes to show that small layouts don’t offer the long tracks and spacious properties, but quality triumphs over size.
Some of these small layouts are eye popping and everything seems to add more to the layout because of the attention and passion of the modelers.
Ever since the “Clinchfield Railroad” project featured in Model Railroader Magazine the use of foam seems to be extremely popular for budget builders and for small layouts as well as the most massive railroads.
Frank in Orlando
way to go. use whatever you can get your hands on, my philosophy exactly. nice job.
Al, How can I support your blog? Do you have a Patreon account? Or is buying your printable buildings (Already done once) the only way?
Great job!
Jim
We all get track problems and even the very experienced Dave has shown us some of the derailing challenges he has had to resolve on his wonderful layout.
Let’s remind ourselves that HO is 3.5 mm to 1 foot. A 1mm error in rail connections is over 3 inches which would derail a full size locomotive.
Andrew in Oz
Nice!
Both layouts are inspiring. I recently had to dismantle my second HO layout. So until I can start on my third layout i am living vicariously through this blog and all of your layouts. Thank you Alastair and all who contribute to this post.
nice update.
Great layout and love your honesty. I normally do not chime in on these items, but I just felt compelled to do so. I am 75 years old and have built six layouts in the last 35 years. 2 O gauge, 2 HO and 2 N gauge. After fighting flex track with slopes curves kinks in the rail. I finally decided to bite the bullet and go with Kato Uni track. I’m not here to push one track over the other, but the Kato track is by far the best track I’ve ever used. I now have grades , slopes , inclines, and everything runs perfect with no aggravation.
I love all scales and currently working on blending in HO with N on the same layout. The Kato track is expensive but not having derailments is well worth the money
hi,Dan I’m 72 years young I’m a Model Railroader, i have a HO Scale Union Pacific City Of Los Angeles, my track is Kato , it’s expensive, but it’s worth it
Hey Jim,
Everything becomes obvious in 20/20 vision hindsight. If we didn’t make mistakes (and the good Lord knows I’ve made several) we’d never progress. Just write it off to experience and move on.
Al’s fantastic site is chock full with problems and solutions.
Just remember an old Latin dictum: Relapsus resurgum, or, in English, When I fall I shall rise.
Keep chugging away!
very nice a lot packed in
The first layout shows promise and the second one is very good as well. It was nice to look at them and maybe get some new ideas here and there.
Don’t forget to blend your edges into the scenery beyond. Black, camo, maybe some rock outcroppings. hanging moss… The edges are an important part of the overall scene. Nothing personal. Edges are my obsession…