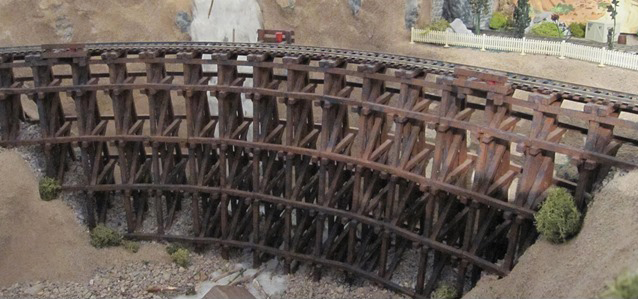
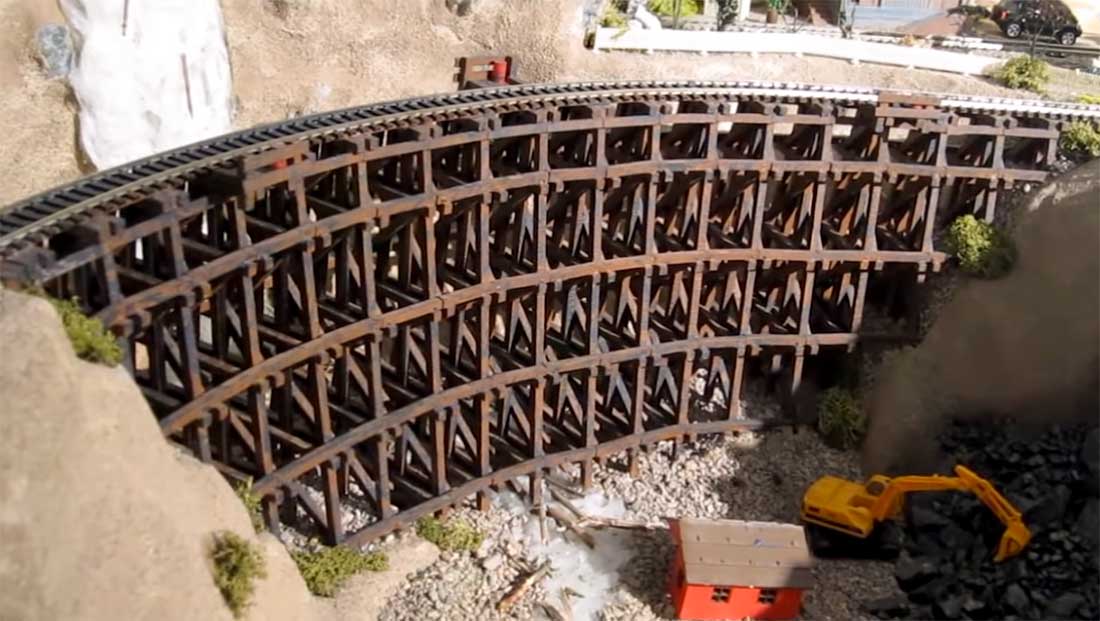
Jim’s been in touch with his stunning HO scale wooden trestle bridge.
“Hi Al.
Jim from Cape Breton, Canada again.
Here’s Part #3 of my model train layout. Using a Canon PowerShot SD960 IS Digital Elph camera in video mode, I originally recorded,about 4 years ago, a DVD of approximately 1 hour in length for my 2 grand sons (one then 8 & the other then 12) who live in Ontario, a province in Canada, which is about 1700 km from where I live.
I have since divided the video into 10 parts to keep them “short & sweet.” In your last posting of Part #2 of my layout, there were 2 questions regarding the layout & I will answer them here.
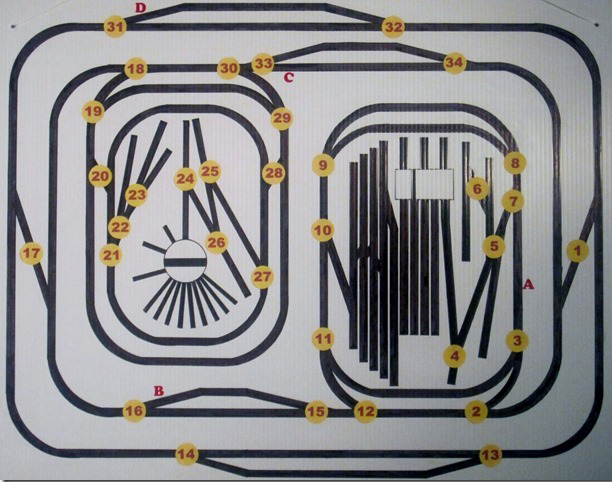
Question #1: Do I have a copy of the track plan? Answer: Yes,there is a track plan picture at the end of this posting. The red numbers are turnouts & the red letters are magnetic uncouplers.
Question #2: Is the curved wooden trestle made from a kit? Answer: No, I made it by first cutting, with a band saw, short pine boards into ¼” x ¼” strips to use for the supports & cross members of various lengths which numbered over 500 individual pieces that were then painted flat brown.
I assembled the trestle upside down on my work table, which enabled me to sit down during assembly & it took approximately 3 weeks of evenings, because of the tedious job of gluing, clamping & drying all these pieces together.
The final assembly was surprisingly strong & was then placed in the finished & waiting quarry & gorge (just like in the real world) in front of the also finished waterfall.
The actual dimensions are 28” long by 9” high & the HO scale measurements are: 204’ (63m) long, 63’ (19m) high, 12’ (4m) wide at the top, 29’ (9m) wide at the bottom. This is by far the largest scratch-built object (other than the mountains) on the layout.
I invite any questions regarding the layout & would like to thank both you, Al, for your postings which I always find very interesting & informative & to all your viewers for their support & interest.
Keep up the great work all you model railroaders!
Jim.”
HO scale wooden trestle bridge:
Now on to another Jim.
It’s always a pleasure when I see his name in my inbox (his last post is here).
“Hello Alastair and all fellow model railroaders.
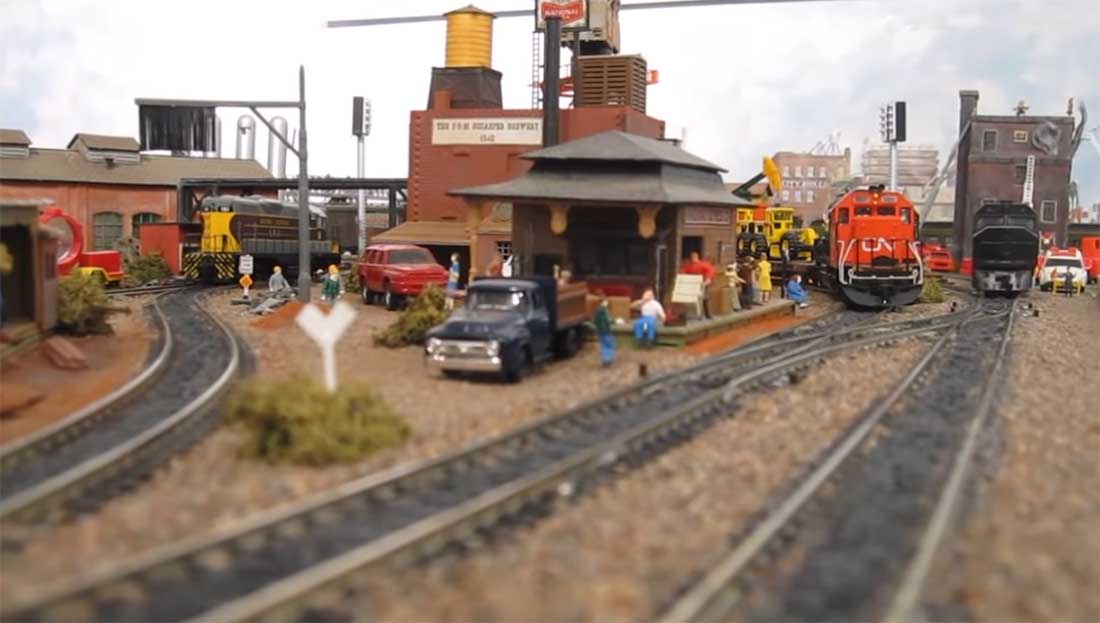
Jim from Buffalo NY again, with an update on the Starrpoint Railroad!
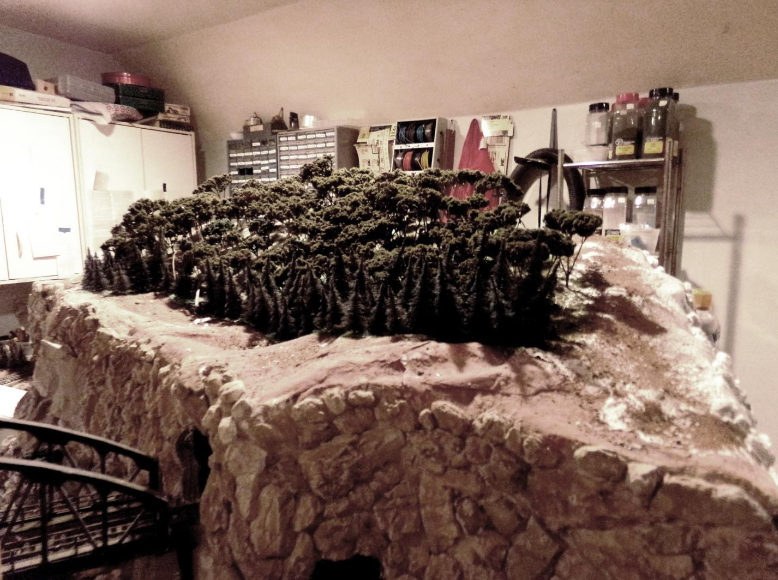
The Mountain is now almost complete. It contains 500 rock castings, and approx 200 trees. I used a combination of Sedam plants and scale pine trees as well. It took some time to get the Sedam trees completed. Here are some pictures of the mountain and scenic area.
On the west end of the mountain there is a scenic area that is almost complete.
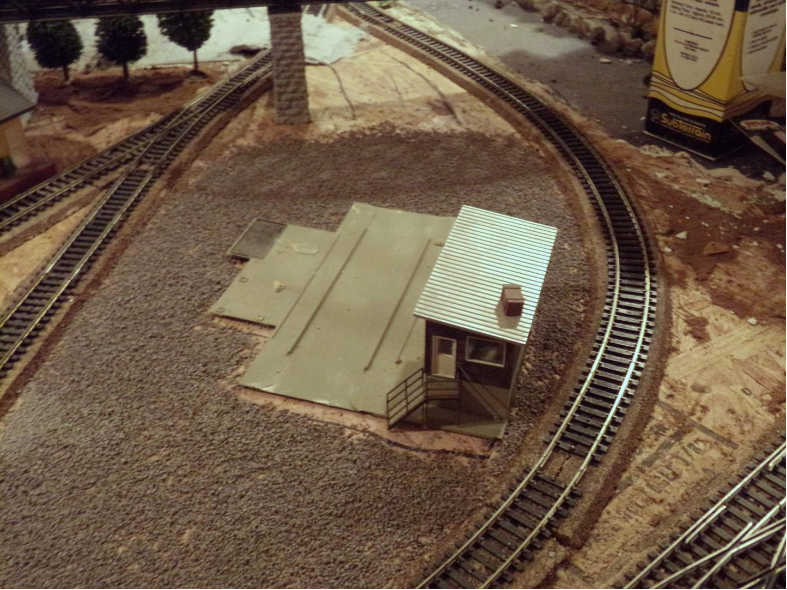
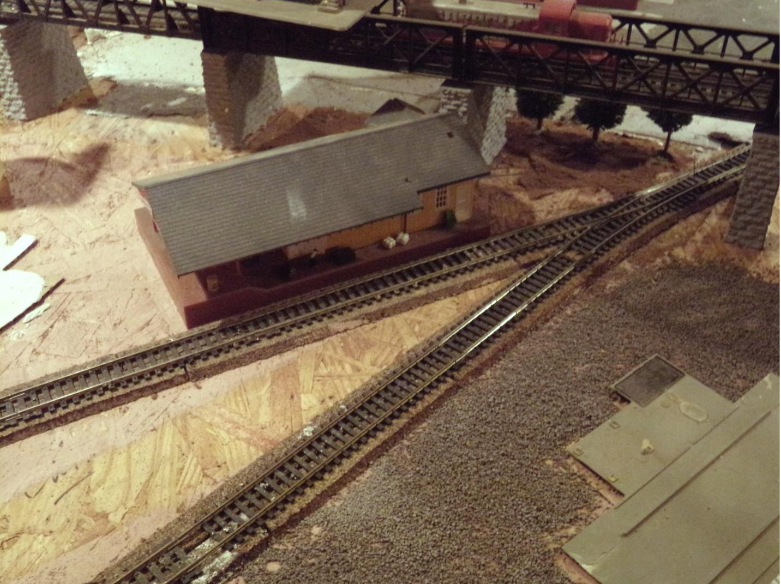
A change in plans was made. The saw mill and outbuildings were removed and the cement factory placed instead. The area is still under construction

There will also be a freight building in the same area as shown. This is also still under construction.
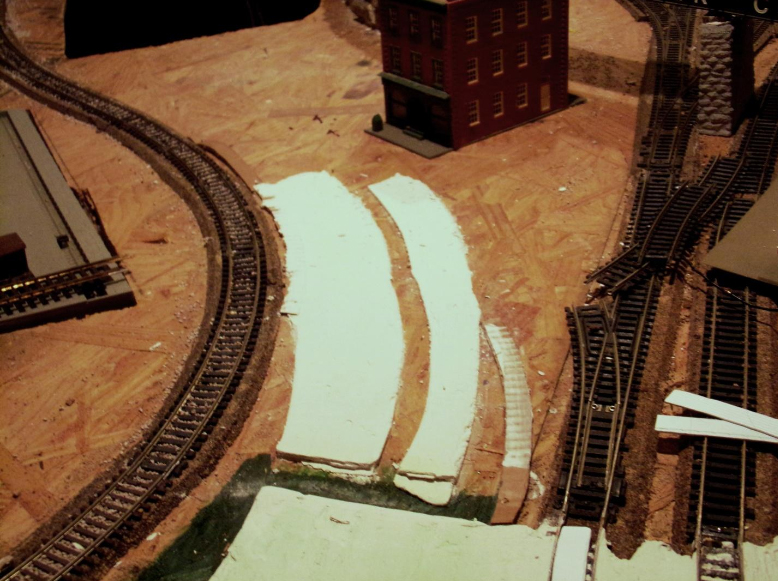
Roads are being added for realism. I am using a combination of Joint Compound and Smooth-it.
I am using thin corrugated cardboard for this purpose. It is the right thickness for what I need. I cut the pieces with the help of curved track to simulate the curves in the road. I cut the cardboard to ½ wide pieces for this. I also keep a squirt bottle of water handy to help with the spreading of the material. I nail the cardboard in place and spread the mixture between the pieces.
For the road pieces between the rails, I tried the compound mixture but found while cutting the material away for flange clearance, the material broke up. So to eliminate the problem I now am using a piece of styrene cut to fit between the rails. I place track nails on the four corners of the styrene to make sure there is clearance for the wheel flanges. Once all the roads are completed a coat of Pavement paint will be applied, along with lane lines.
As you see in the following picture, I apply the road surface in stages. The centre part of the picture below shows the cardboard removed leaving an area to be filled. The cardboard on the right side is there to be filled in for the transition from the crossing to the road area for the rest of the town
I will be sending a progress update on the roads, cement factory, and town. I will also share one of my other adventures in Model Railroading, Electronics.
Until then
Jim Volmer Sr
Starrpoint RR”
A huge thanks to Jim. His layout is really coming along now – I can’t wait to see the next update.
A big thanks too for the other Jim for sharing his HO scale wooden trestle bridge.
That’s all for today folks.
Please do keep ’em coming.
And if today is the day you get started on your layout, the Beginner’s Guide is here.
Best
Al
PS More HO scale train layouts here if that’s your thing.
Need buildings for your layout? Have a look at the Silly Discount bundle.

Looks fantastic! Keep up the good work!
regards,
Dirty Dave
Would love to see a video when the trains are running…..
Thanks for the tips. I really love the look of the rock castings, great detail. Cheers! NJ Mark
Great start! There’s a really neat shop nearby, Aurora Rails on Blakely Rd. East Aurora, near me in Holland, NY. worth the short drive from Buffalo
A lot of painstaking hard work. Keep it up.
looks good
Very Nice
Looks really good Jim, I can’t wait to really get mine going. Everyone is an iinspiration. Thanks everyone
SDG. St.Petersburg Fl USA
Wonderful, I like to read what others use for material. I am about to begin my scenery. But, I am thinking we all make our roads too wide. If one inch equals 8 feet.
The trestle is awesome!!!
to Jim from Cape Breton; Fantabulous bridge .Did you scratch build ?
Amazing
The Critic
Jim from Cape Breton
A super job on your layout and especially the trestle. You have a great talent. I enjoyed the video and look forward to more of them. The night seen was also realistic. Keep up the good work.
Jim from Buffalo NY
Great job on the mountain and the trees. Very realistic. Where do you find the Sedam plants ?
Jim from Cape Breton
Beautiful layout. Very realistic. Your trestle is fantastic. That is a lot of detail work to do. I loved the video and look forward to seeing more of them
Thanks for sharing.
Jim from Buffalo NY, nice work so far, like the mountain and trees, great tips. I’m also from Buffalo, just starting out, only have benchwork so far. Love the pics, and videos from other model railroaders.
Love the trestle excellent job!!
Great looking trestle!
always loved the bridge work. looks great.
Bridges R great unless u got small rivers, creeks to cross & then there to big for the area. like for me my widest creek is in layman terms only a 1/2 inch wide at the service & about 1/4 at the base & by bridge is 9 inches long Any suggestions.
I also got a question for the group. Is a timetable hecessary for a Short Line Railroad or not????
Another example of why someone invented the word “Craftsmanship”
Jim from Cape Breton, Canada: That bridge is awesome. I built a curved Tressel bridge myself so I understand the amount of work – and time – you must have put it to that project. Wonderful job, it really looks awesome!
Jim from Buffalo NY: I love the mountains you created, great work! Can’t wait to see your next update.
great trestle it took a lot of slow work on that one
Super job on your trestle bridge. A lot of work went into that – and it surely shows! Congrats on a job well done!
Wow! Jim from Cape Breton, Awesome.
Andrew in Oz
This really looks great. What are the total dimensions of this layout? Will it fit in an 8′ X 10′ room?