Jim’s been in touch – he’s shared his model railroad mountains ‘how to’ on getting those rocks just right.
“Greetings, Al.
I’ve viewing your site for some time and I truly find it simply great. Every one has something to contribute to help others model layouts and to help keep interest in this hobby.
My Dad started model railroading with Lionel and the moved on to HO. As a young adult, I started modeling off and on for several years but never finished. Who really does or wants to. So since being retired recently, I thought I’d start again.
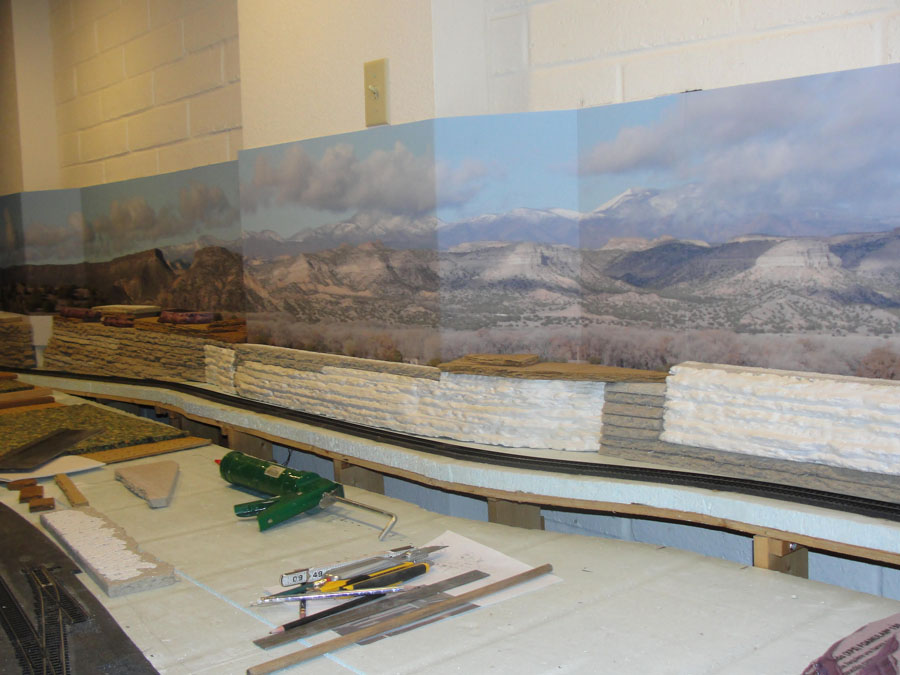
However, I now longer have space as I once did now living is Southern AZ. Here, we have no basements or attics. So, my one option was the garage. The layout dimensions are four feet by fourteen feet and the scale is HO.
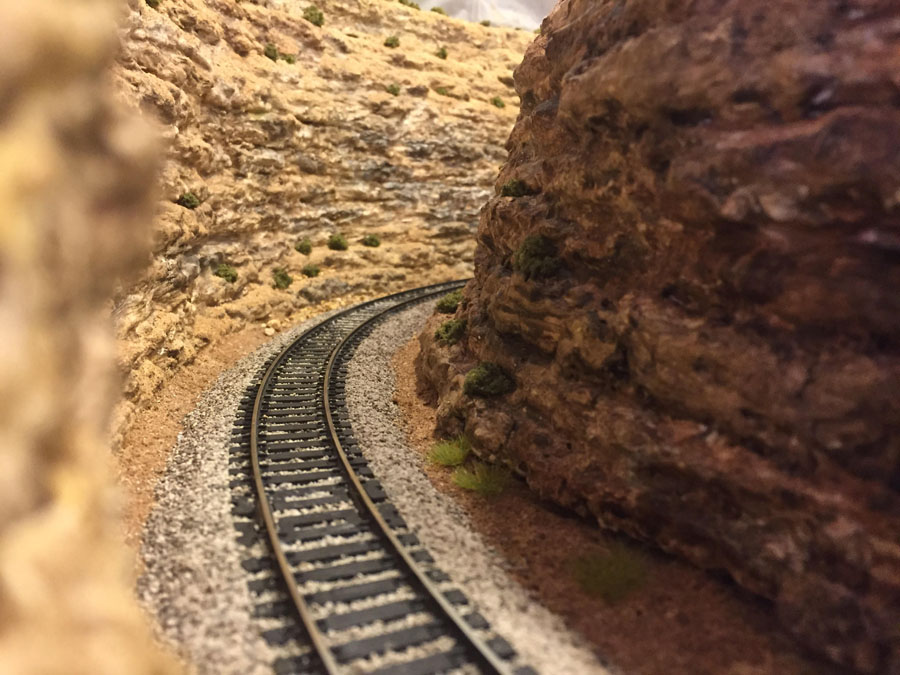
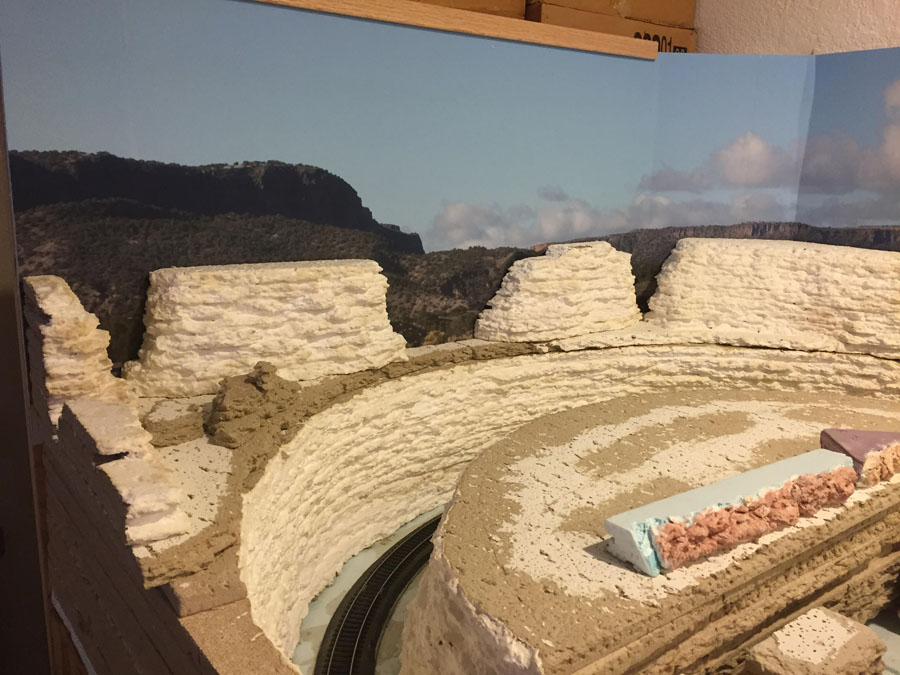
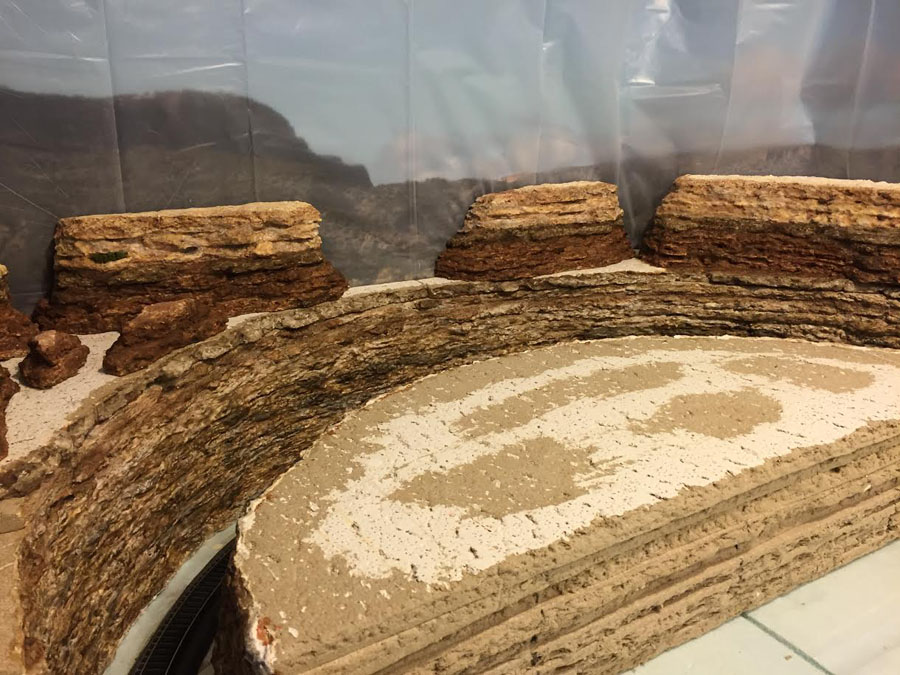
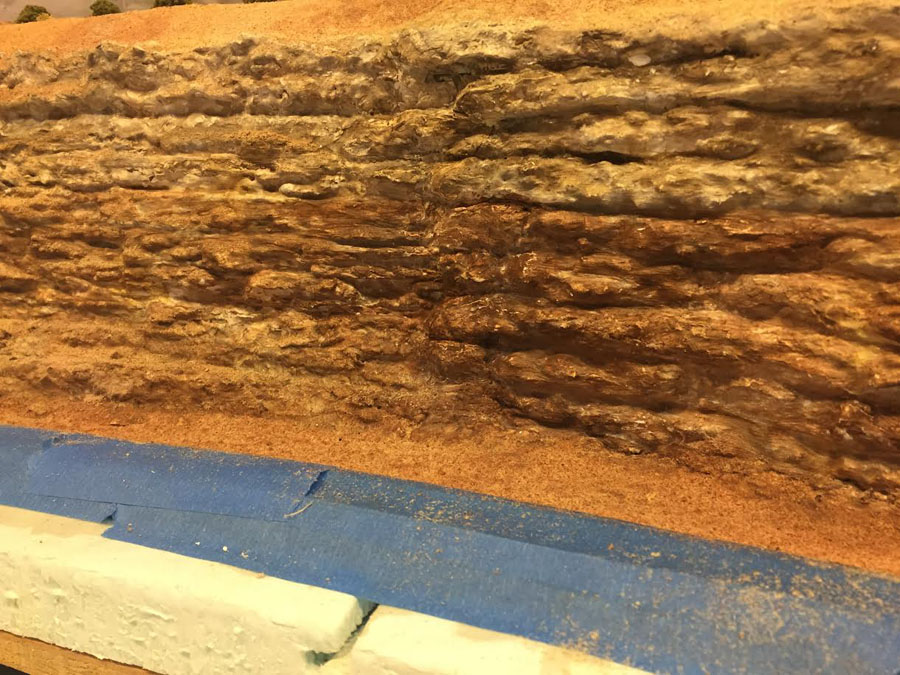
Recently someone referenced using ceiling tile as a hardscape for rocks/mountains. I’ve had great success with this process.
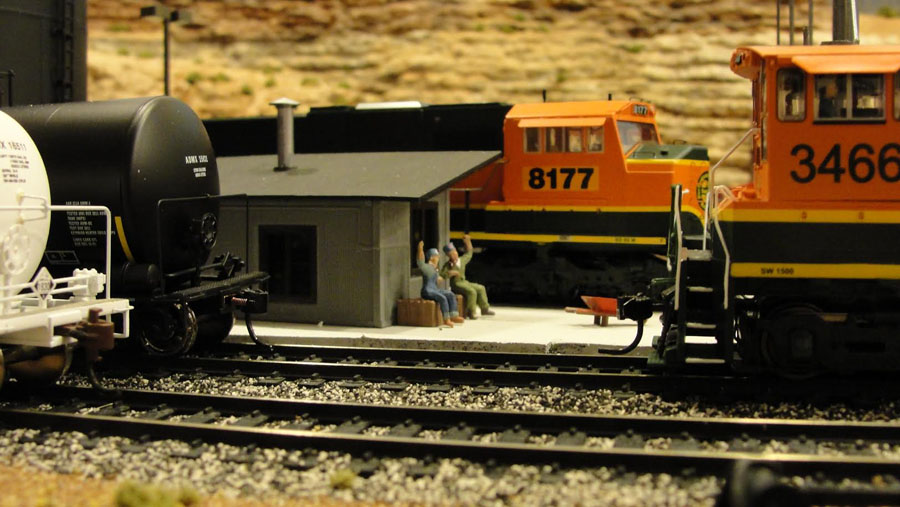
I made formations trying to achieve a strata effect found here in the Southwest. I then applied hydrocal, then washes of woodlands products and dusted with scenic express products.
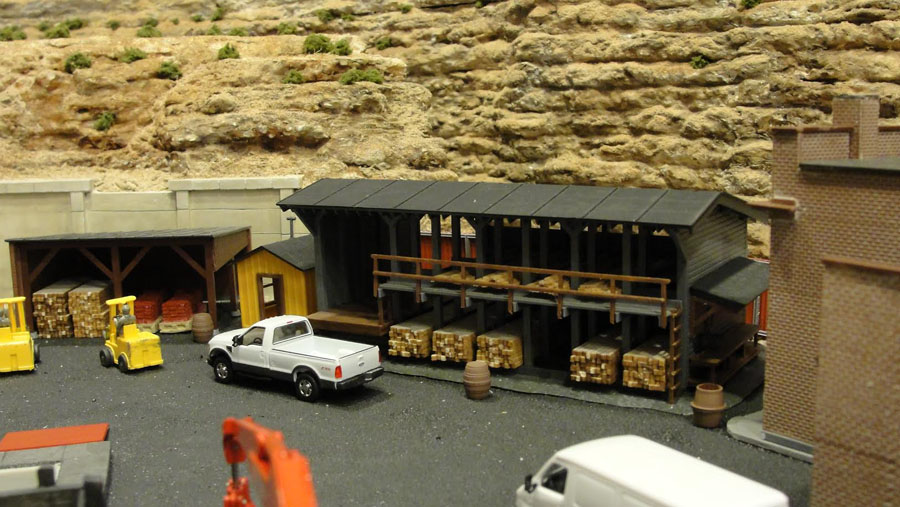
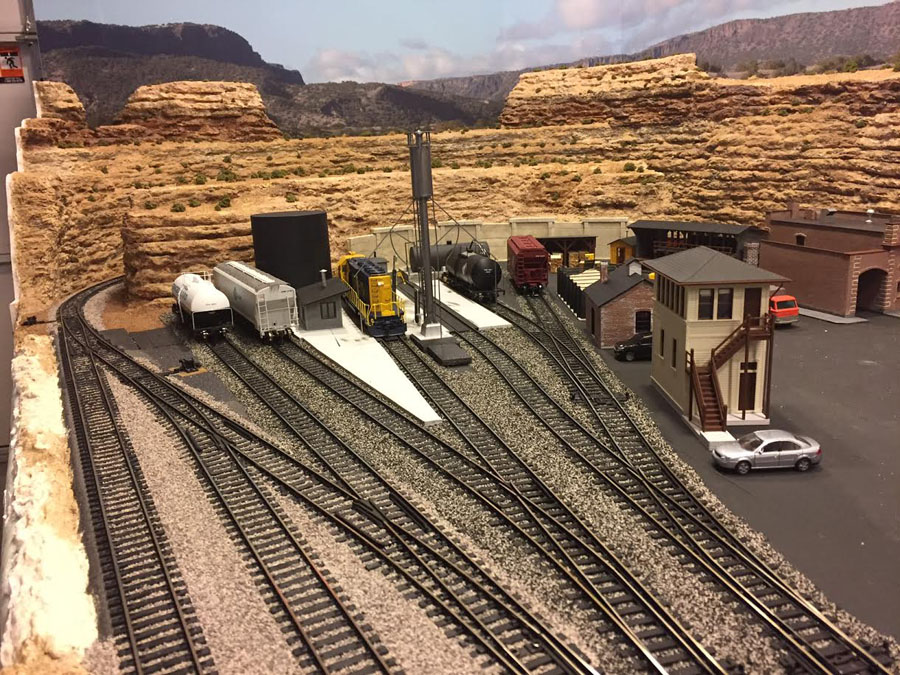
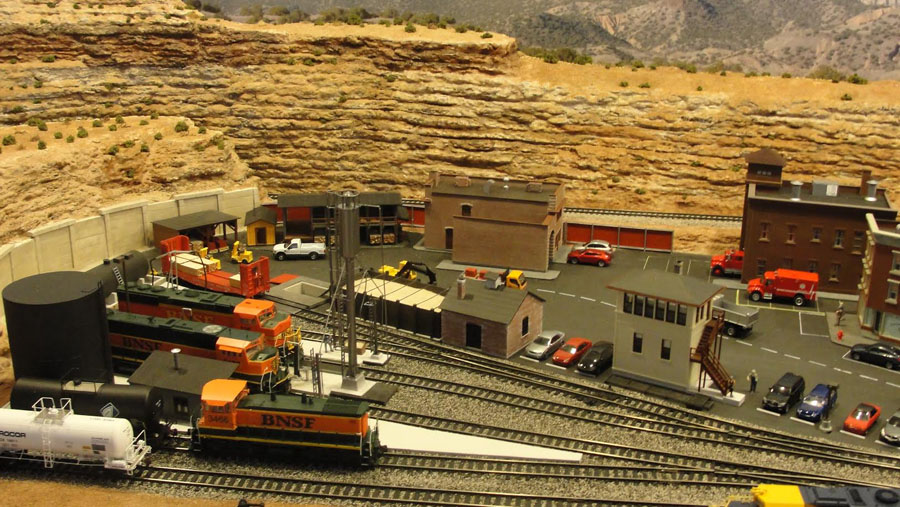
Color to me is everything. I then added some shrubs and rocks well that’s about it. I’m working on a caboose bed and breakfast/excursion area, a small town and some small yard for staging cars etc.
Again, thanks for the site.
Jim”


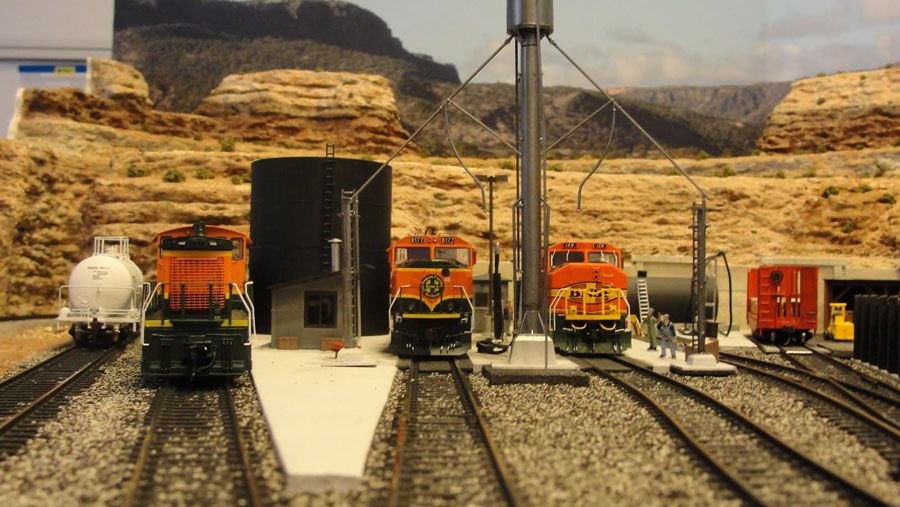
Just stunning stuff from Jim. A huge thanks to him for sharing his model railroad mountains ‘how to’.
Please do leave a comment below, and if you have any questions I’m sure Jim will help!
The effect Jim has achieved – so simple and cheaply – reminded me of this stunning layout too.
It’s a another cracking ‘how to’, which with Jim’s permission, I’ll add to the Beginner’s Guide which is now stuffed full of good stuff (and also keeps this site going, by the way).
That’s all this time, folks. Please do keep ’em coming.
Best
Al


Natural material… can’t get closer to real than using the real stuff 🙂
Excellent scenics Jim, the colours & effects are very realistic. I think I may have a go with the ceiling tiles it works very well. Nice layout also, one of my layouts is a US theme here in UK. Regards, Dave B.
AMAZING !!! GOOD JOB.
BILL
That’s a grand canyon you’ve got there mate! Well done.
Rod
We have been fortunate enough to be in the SW. Your creation of the strata and its color are perfect. And as I recall very desolute of vegitation.
Hi Jim, the rock and colouration effect is excellent – it’s almost worth moving my railroad to use the same process!! Kind regards Dean
Nice layout Jim, the strata is excellent. Brian – RSA
All I said when I saw this was WOW!!! Thanks for sharing, and like you mentioned, since we NEVER finish, I see myself taking a crack at this method as well.
Unbelievable it has a blasted rock look. We have a lot of this kind of strata in the north country.
Domie
Brilliant job Jim, very lifelike. Steve R UK
For one who has restarted his love of model railroading and is looking for ideas to follow. I must say Jim…thank you for the inspiration, keep up the amazing work and I thank you….
Bobby
It’s amazing what us modelers find a use for. Easy to cut and shape yet very light.
Great job Jim, nicely shaped and very realistic colouring.
Regards,
Laurence
That was a fabulous layout. I am somewhat of a novice modeling in N scale and am doing a mountain railroad on 4×8 table. A lot of what you have in this display gives me some good ideas as my layout is about 80% complete but I have an undeveloped section that I haven’t decided what to do -probably a coal yard or a gravel pit -not sure but your layout has provided some inspiration.
Thank you,
I am new to al’s site and Jim has done a fantastic job modeling strata from the western U.S. . Just one point of info:u could place some of ur tiles a little crooked as when the earth uplifts in certain areas and the striations tend to fold under and over each other.
On to the question I have. I am doing a mountain sene such as u might find in the taller mountains of Europe. Has anyone have a interesting and easy way to model those type of mountains ? I am currently using wall board paste (mud) over chicken wire covered with newspaper soaked in diluted paste, so I will have to be an artist to pull off a realistic look. Suggestions appreciated.
Gene
Great work! Awesome. I’ll be ‘borrowing’ some of your ideas.
wotta great idea…..using natural products
and the detail is perfect
good layout dude
keep em runnin fellas
stjohn in long beach calif
Brilliant job Jim.Like the use of ceiling tiles must try them.
Keep up the good work and thanks for sharing.
Dave R
Hi Jim. How did you cut the ceiling tiles to make them so realistic.
Brilliant job.
Dave R
Hi
Great job on the rock strata; I have used the ceiling tile before and they do work great but you took it to the next level. As far as a caboose bed and breakfast, you might want to goggle Red Caboose Motel in Strasburg, PA. It has been there forever and they used all types of cabooses and have changed the interiors to accommodate sleeping arranngements and such. Really a neat place to go sometime if you are ever in Lancaster County Pennsylvania.
Absolutely fantastic scenery Jim! It’s amazing what ordinary materials can be used on layouts. I have used ceiling tiles for track road beds in the past. They are easy to cut and file the angles on either side of the ties. Now I will have to check them out for rock formations! Thanks for idea Jim.
I live in Law Vegas. Jim you got it down. Thanks for sharing nice lumber mill to.
Looks great Jim. It’s amazing what you can do with building materials. Would like to see more pictures of the layout.
Joe (NJ)
WOW. Great work.
Jim, Very nice job on your layout, I really like the track design. walt
I am totally amazed by the great stuff people come up with here. Just hope when I get mine started it looks half as good.
Hi Dave R. You can lightly score/scribe a curve or straight line on the face of the tile for the desired effect and snap and pull apart. Glue them together for the height and depth apply hydrocal.
Then you can color/texture with thin washes for your desired effect.
Jim
Great job Jim! One warning some older ceiling tiles were made with asbestos and should not be used! Some have fiberglass or other fine particles so I would recommend always using a dust mask when working with them.
Thank you for sharing with us Jim. Some great ideas there and food for thought.
great job looks so real.
I like the way jim did that. i’m modeling an area in cen. wis., in the US. my area is flat as a pancake. i’ll need to invent a reason for modeling cliffs.
Jim,
Nice job, great imagination with the use of materials.
Love to see more!
Les
THIS WAS VERY GOOD.
You’ve got some really great ideas that turned into great landscapes.thank you for sharing
Thanks for the scenery ideas and the pictures. Excellent work
Wonderful job on the cliffs! Its great to see some of the buildings,, and other structures, in a layout that I have had for 25 years or more just waiting to be put to use. Thanks for the tips.
The track is very well done. The technique for the rugged rock faces is also well done. I find the scale of the cliffs and the engineering of them way over-sized and half of the rock face material could be removed to a stunning effect.
…just sayin’…
Very nice
A scenic “Tour-de Force”
Impressive!
Love the way Jim did that cut behind the freight yard.
Hi Jim, a very nice effect. I am doing something similar at the moment and was wondering if you could tell us what colours you used and how you built them up as the final result is spectacular.
Ray………
Great job Jim!! The use of ceiling tiles is a wonderful material when modeling stratified rock formations. Makes the detailing of rock a simple task rather than trying to hand carve such intricate natural rock detail in plaster or extruded foam board! You’ve done a bang-up job with this medium.
I recently visited the Grand Canyon in your ‘backyard’ of AZ. I was thinking about how stupendous a vista would look using early steam along the Colorado River and an emulation of the West Rim of the Canyon. The near mile high stratified walls (using ceiling tiles) with the great tall pines flanking the shores of the river would make the task a more do-able project.
Thanks again for sharing your beautiful work. — Arnie, Staten Island, NY
Looks great Jim keep up the great work.
Nice Jim. Bet you wish for more room. The Cajon Pass is a long run. I used to work as a train man for the SP out of Glendale. Finished another career of 27 years in Anaheim. Moved to Idaho and am building a retirement layout. Isn’t it fun to finally have the time to do this!!
Jim,
Ceiling tiles are “homosote” available in sheets at the lumber yard too. Gives a great shale look. I notice your ballast and yard gravel…what are you using for this and where do you shop for it?
Bob
Excellent you hit it right on. Thanks Ron from Flordia
Absolutely great effect. Won’t work on my layout but is still stunning. I am curious about your wall background. Are those photos? Ties in nicely. Great work over all.
Very nicely Jim, it looks real keep the good work.
Hi Jim, great idea with the ceiling tiles. I’ll try that on my layout. I was trying to figure out what I was going to use fo my rock face. Thanks again for the great tip.
Charlie
VERY NICE !! WELL DONE.
AWESOME!!
Jim, really liked your lumber yard. Not many of those around any more what with Home depot and Lowes.
Great job, overall!!
Great job, Jim. You have captured the dry southwest beautifully! And the lumber yard is a nice touch. Work smarter (ceiling tiles), not harder is my motto.
Jim, I love your layout! I too have used ceiling tiles on my layout. So easy to use and looks great. I wondered if I should cover with plaster before applying color. Now you have answered my question. I haven’t colored mine yet. Your formations look great! So realistic.
Chuck
Hi jim
Gorgeous pics. Glad to have seen first hand. Perfect detailing and coloring.
Bruce
Jim, Great job on the layout! Nice set of photos describing your southwest scenery technique. I like the lumber yard too — it’s a lot like the True Value lumber yard in Kanab, Utah. My only suggestion would be to tilt some of the ceiling tiles at an angle from the horizontal because very little of the southwestern U.S. rocks are perfectly horizontal due to the geologic forces that split and tilt the overlying limestone and sandstone rocks. The colors you’ve chosen are spot on as well as the sparseness of the vegetation. Pelle Sjoeborg of Model Railroader Magazine had an excellent article a few years ago on creating desert landscapes. Thanks for sharing your wonderful layout pics.
Very Nice!!
Look pretty kool.!!!!!
Your layout, gasp, ROCKS!
I too use ceiling tile to make rock/landscape formations, I also break them into smaller pieces and make rubble and as irregular landforms. I have even put it in a blender with water and made a sort of slurry
Jim, et al,
I can’t help but draw a similarity between model railroaders and Einstein. Einstein seemed to be able to teach the seemingly unteachable to simpletons like myself and because of it I can calculate the length of a flash of light of any power and duration if I were able to catch up to it and trim my speed to the speed of light! Crazy complex, but explained so brilliantly! I truly gaze with amazement at so much of the many talents so many of you share whilst keeping it simple enough for me to see the process. I’m still amazed but gain confidence through osmosis! Thank you all for your time and dedication to the art of realistic art balanced with history.
I am planning to start an HO layout in the basement this spring. Pretty excited about it. Fortunately my brother up 8n Wisconsin has volunteered to come to my house and wire the layout. He has a big layout in his basement near Wausau Wisconsin. I have to decide to use DCC or standard wireing.
Another Southwesterner here. Great desert landscape, and a curve in a basin instead of a tunnel. I wonder if ceiling tiles can be warped in some way to represent uplifted strata. Any suggestions?
Jim where are u located in AZ? Do u work on the layouts in the train park in Scottsdale. I want to get to the train layout int the park. Keep putting it off. No excuses. Bob C
Hi Jim
I am constructing a moutainous layout and yours is a great inspiration for me. I will share photos in the coming months. Thank you for the inspiration.
Dave S
well done
Yes, great job!
I thought it looked familiar. When I saw the engine yard I recognized it from previous posts.
The town and caboose b and b are nice as well.