“Alastair…
Thank you again for your wonderful site…
I have started on a new layout (another micro)…
Lately I have been averaging about one per year…
This one I call my “No-Excuses layout” — I have tentatively named it “Terrapin Sidings”
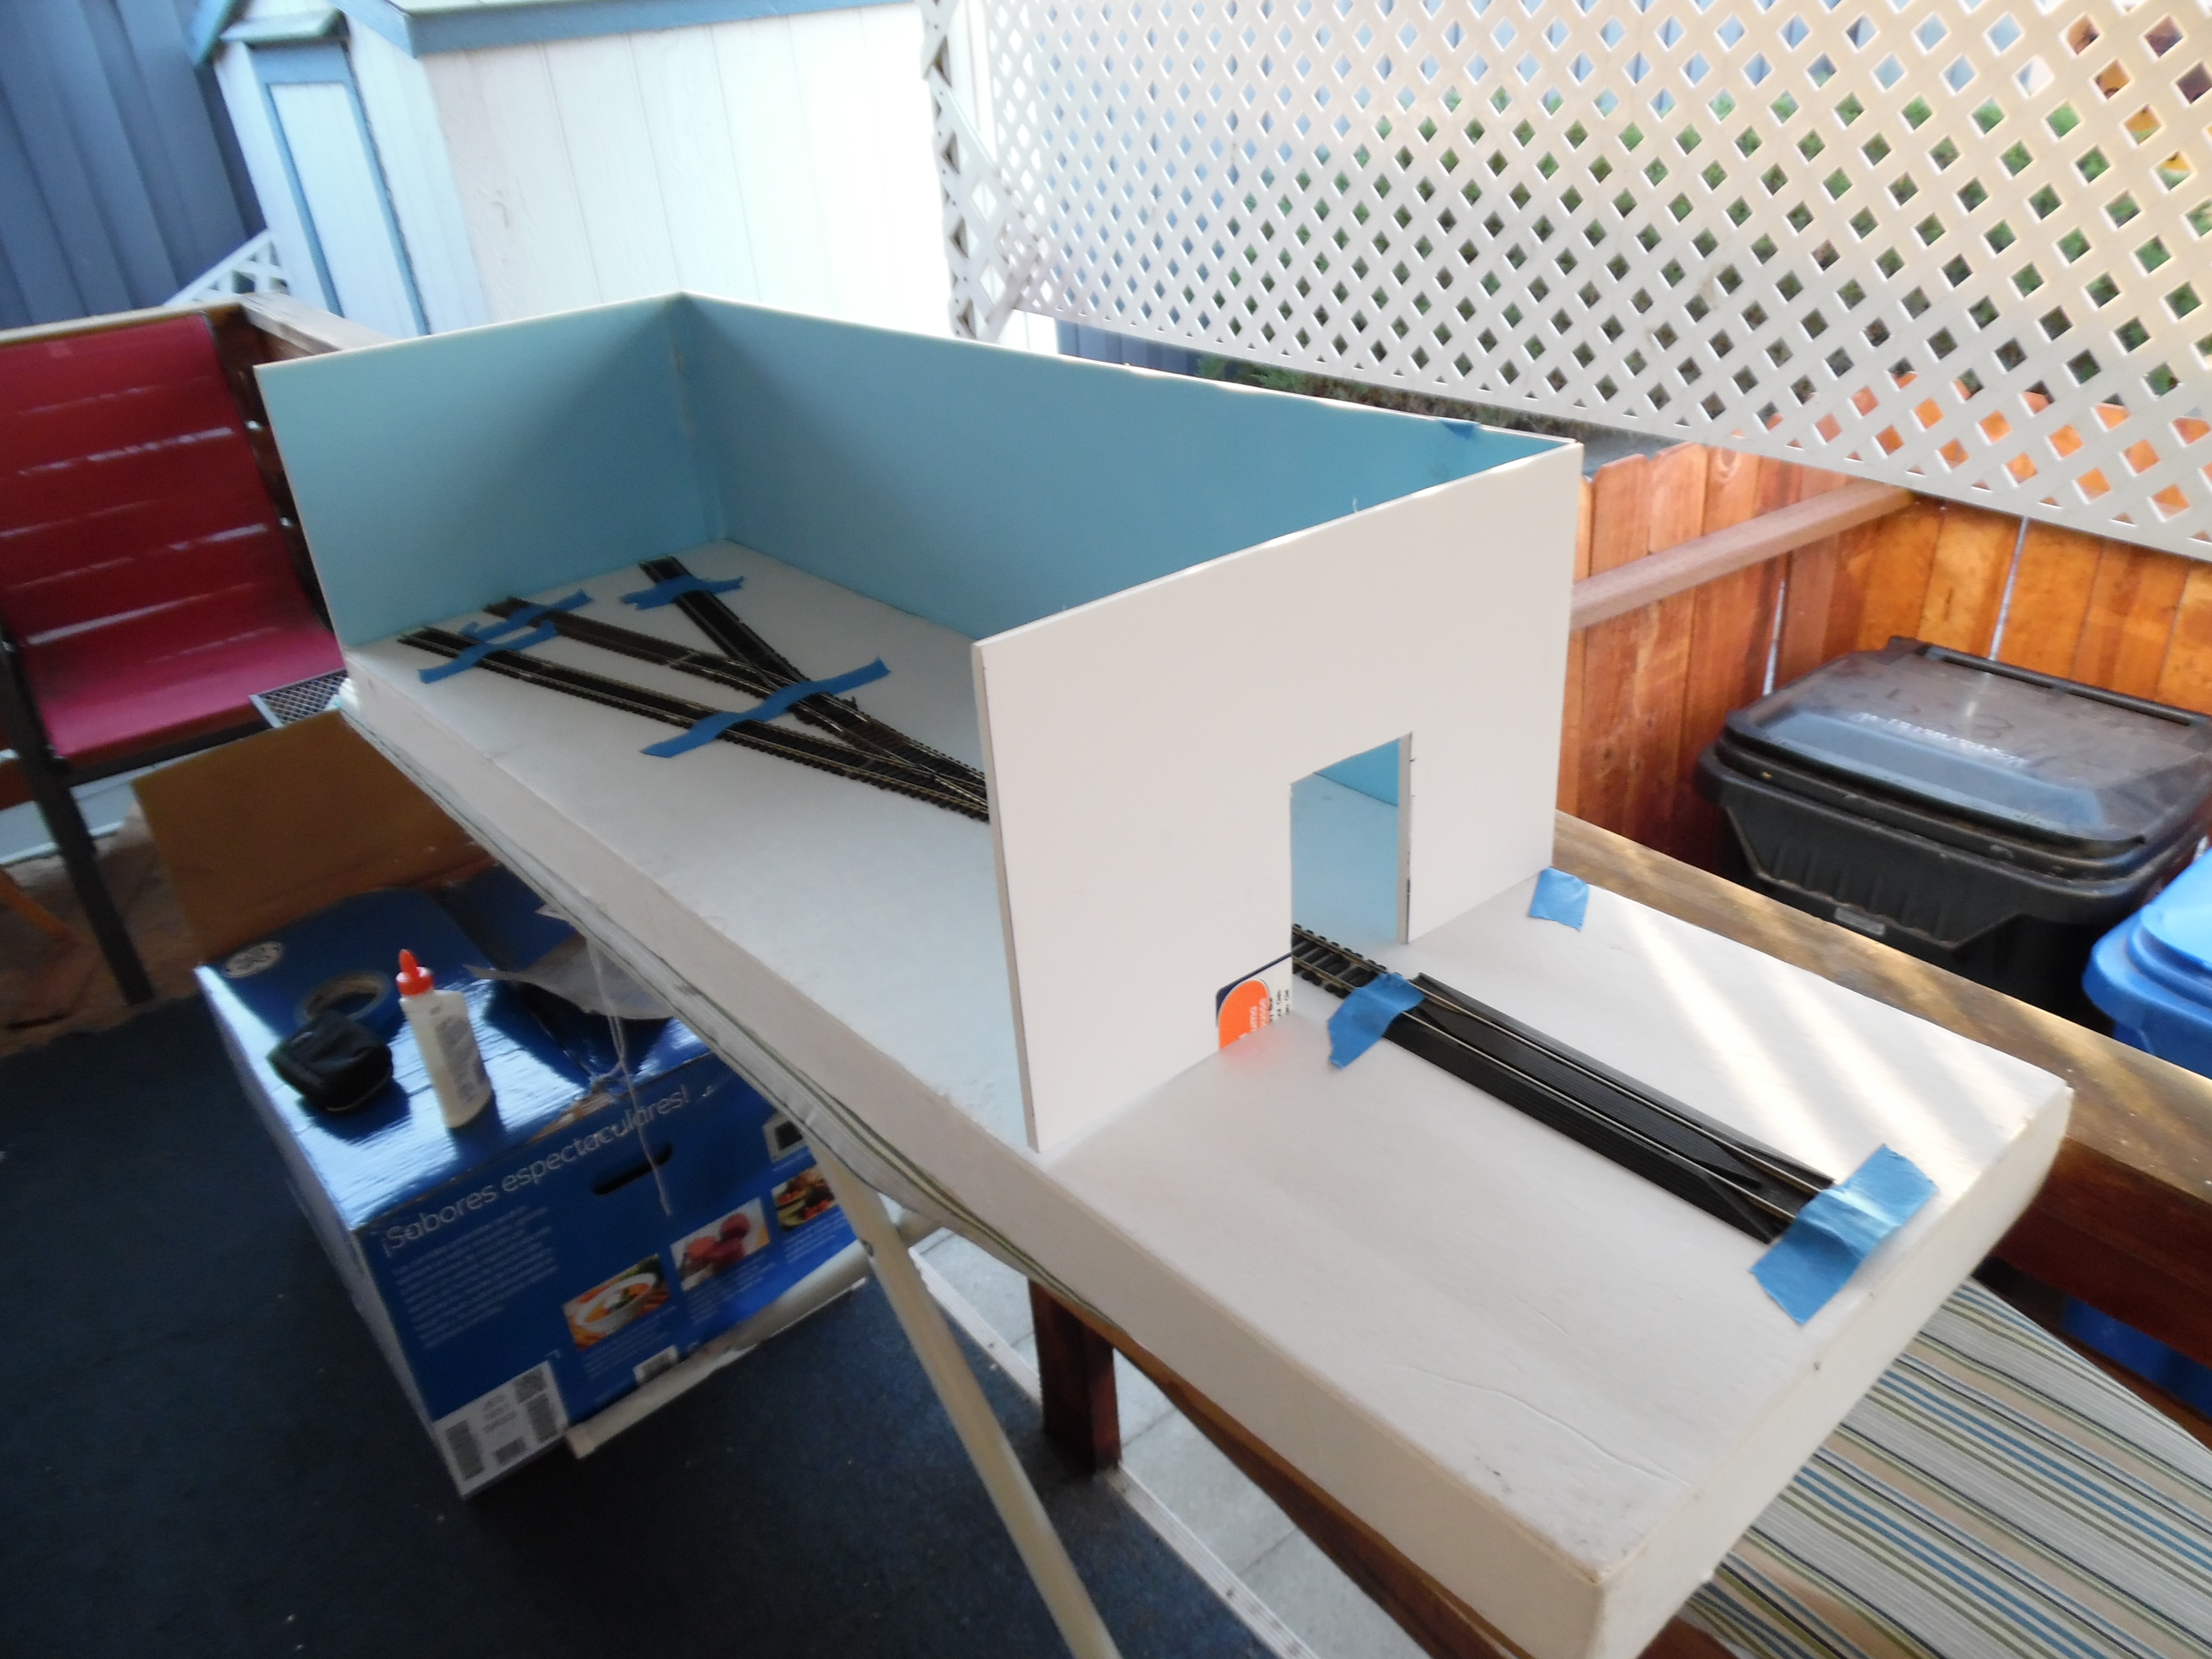
The scale will be On30 and the baseboard is 12″ by 41″
It should fit on an Ironing Board… One of the inspirations is a popular British layout called “Ingleton Sidings”
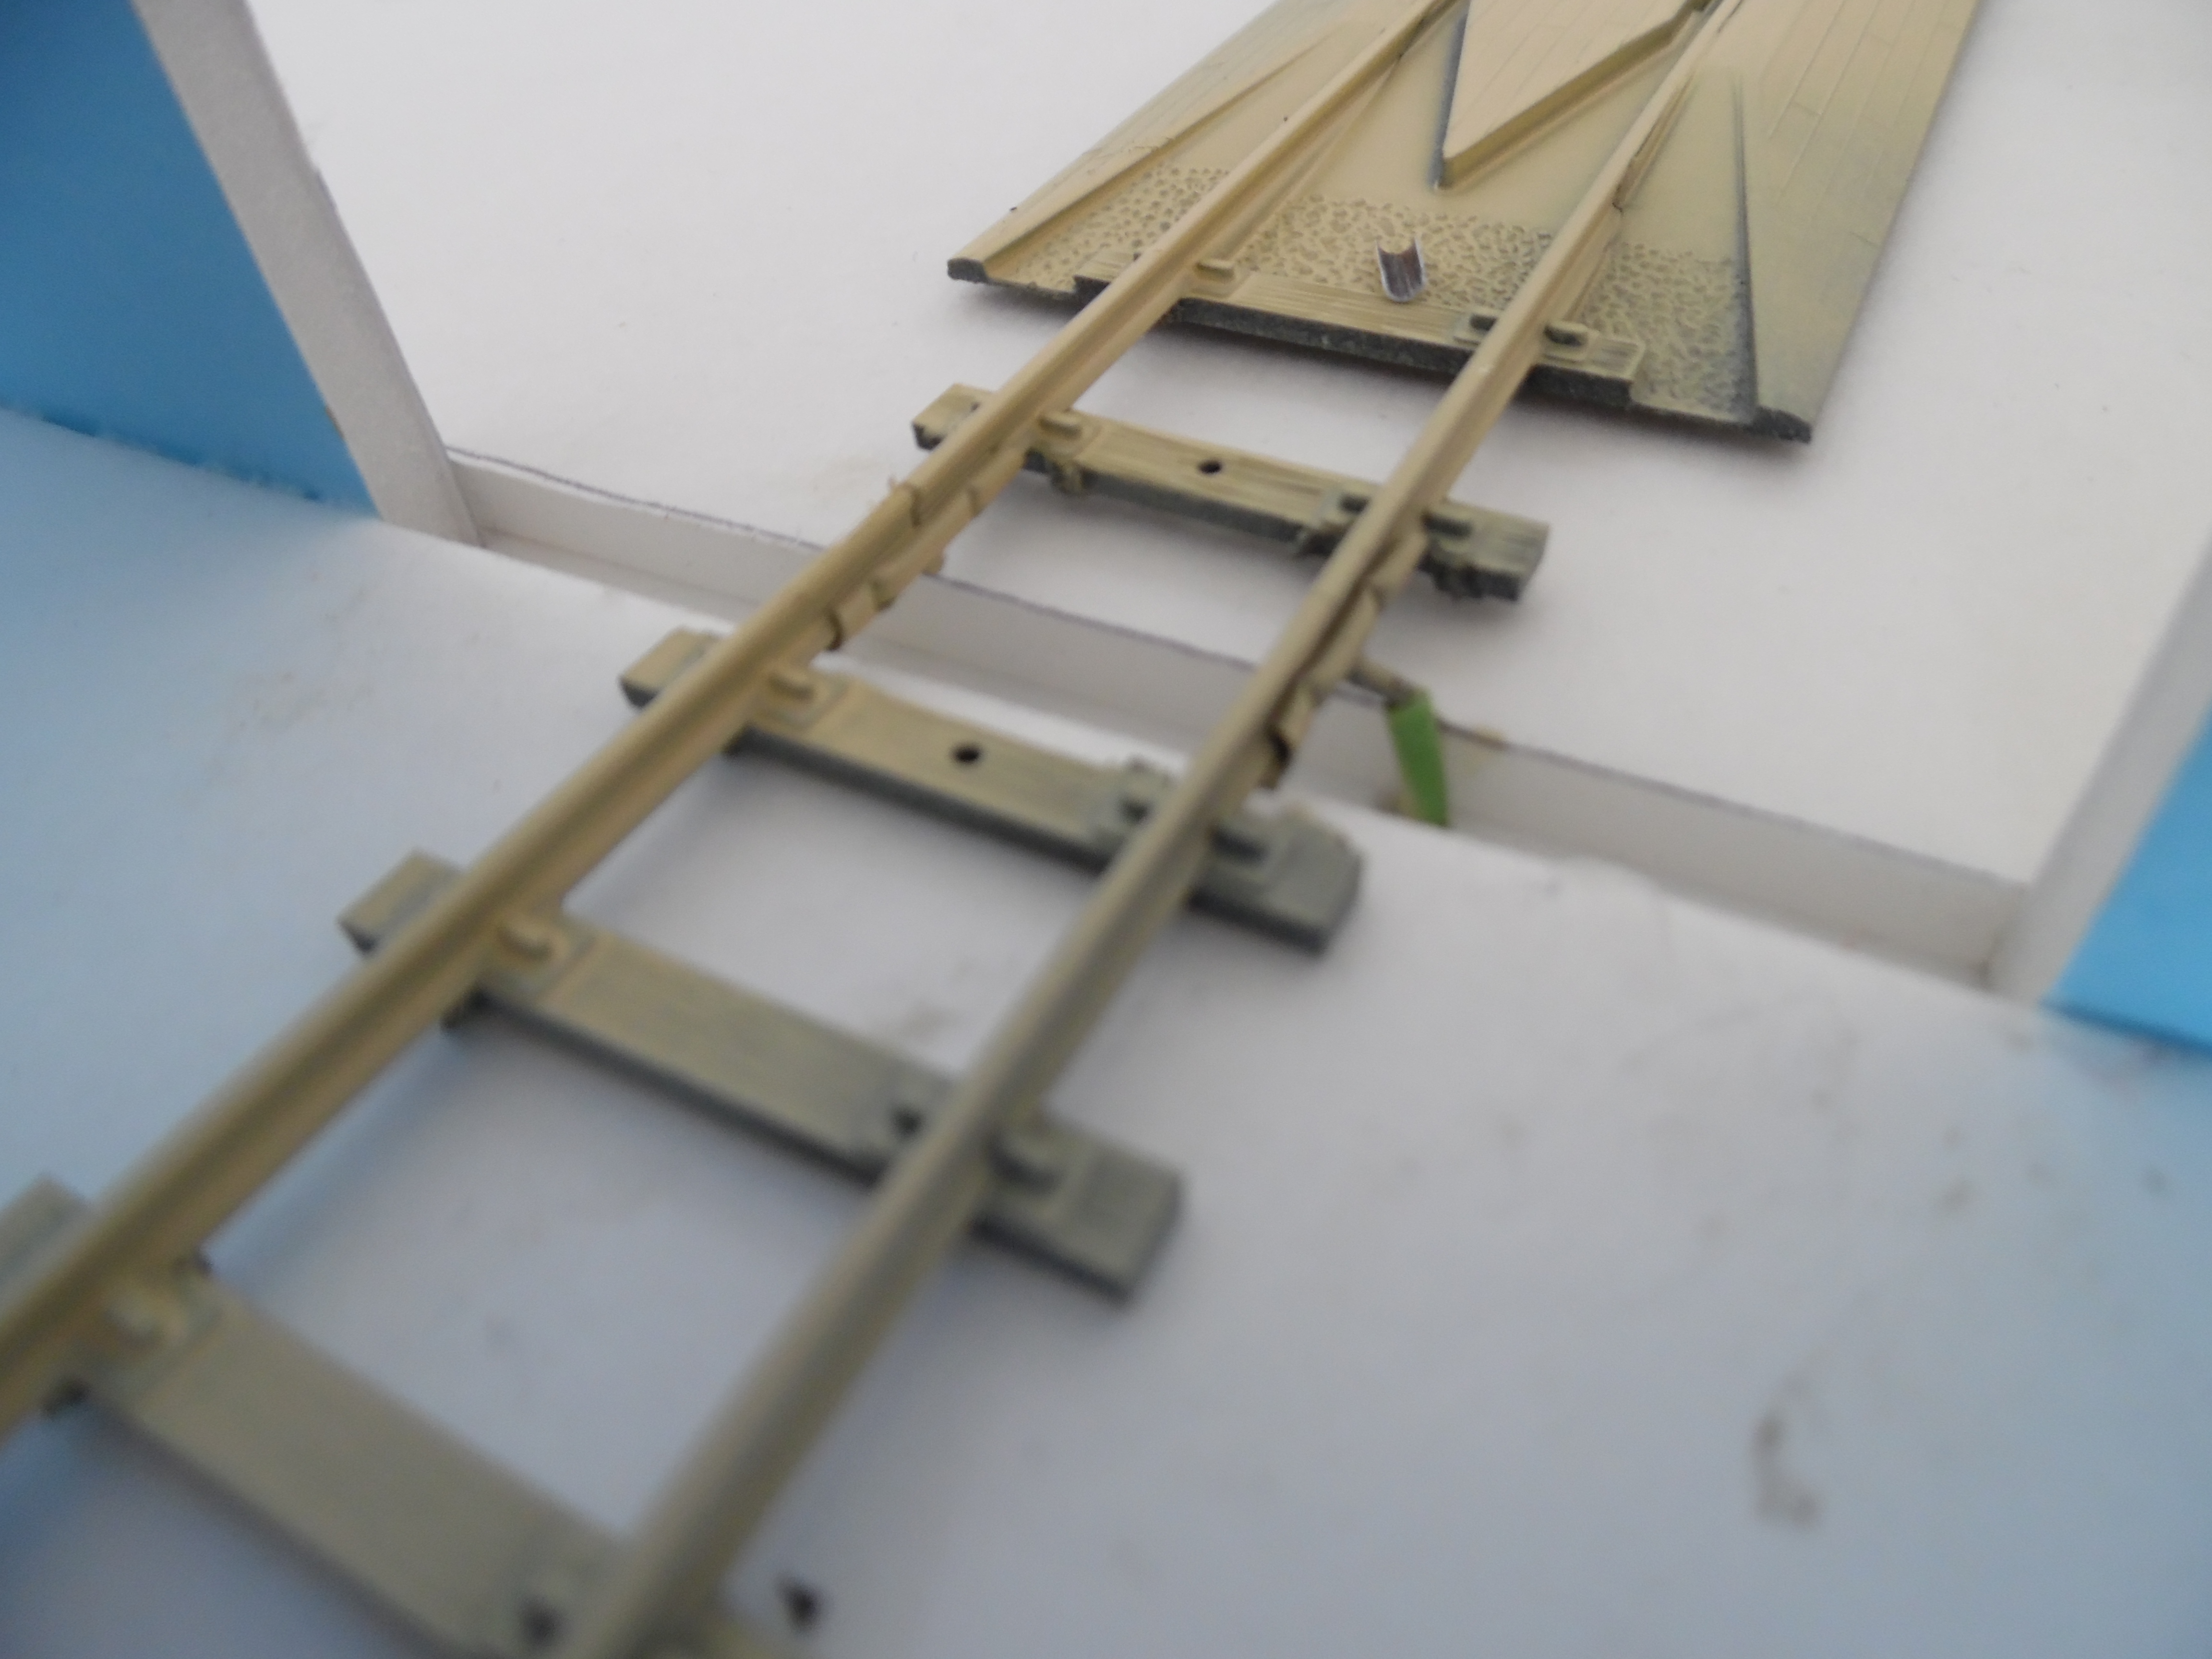
Why is it “No-Excuses”? So far I have less than $10.00 in the baseboard… I expect the total to be less than $20.00 when all is said and done. The track is all brand new Peco and Atlas… So far less than $55.00
The baseboard is Foamcore board… a thin foam sheet that is backed on both sides with heavy paper.
It is easily cut with a straight-edge and a single edge razor blade. The whole thing is clued together with PVA (White Glue). This pretty much wipes out all potential excuses about why one cannot build a layout to run their trains on….

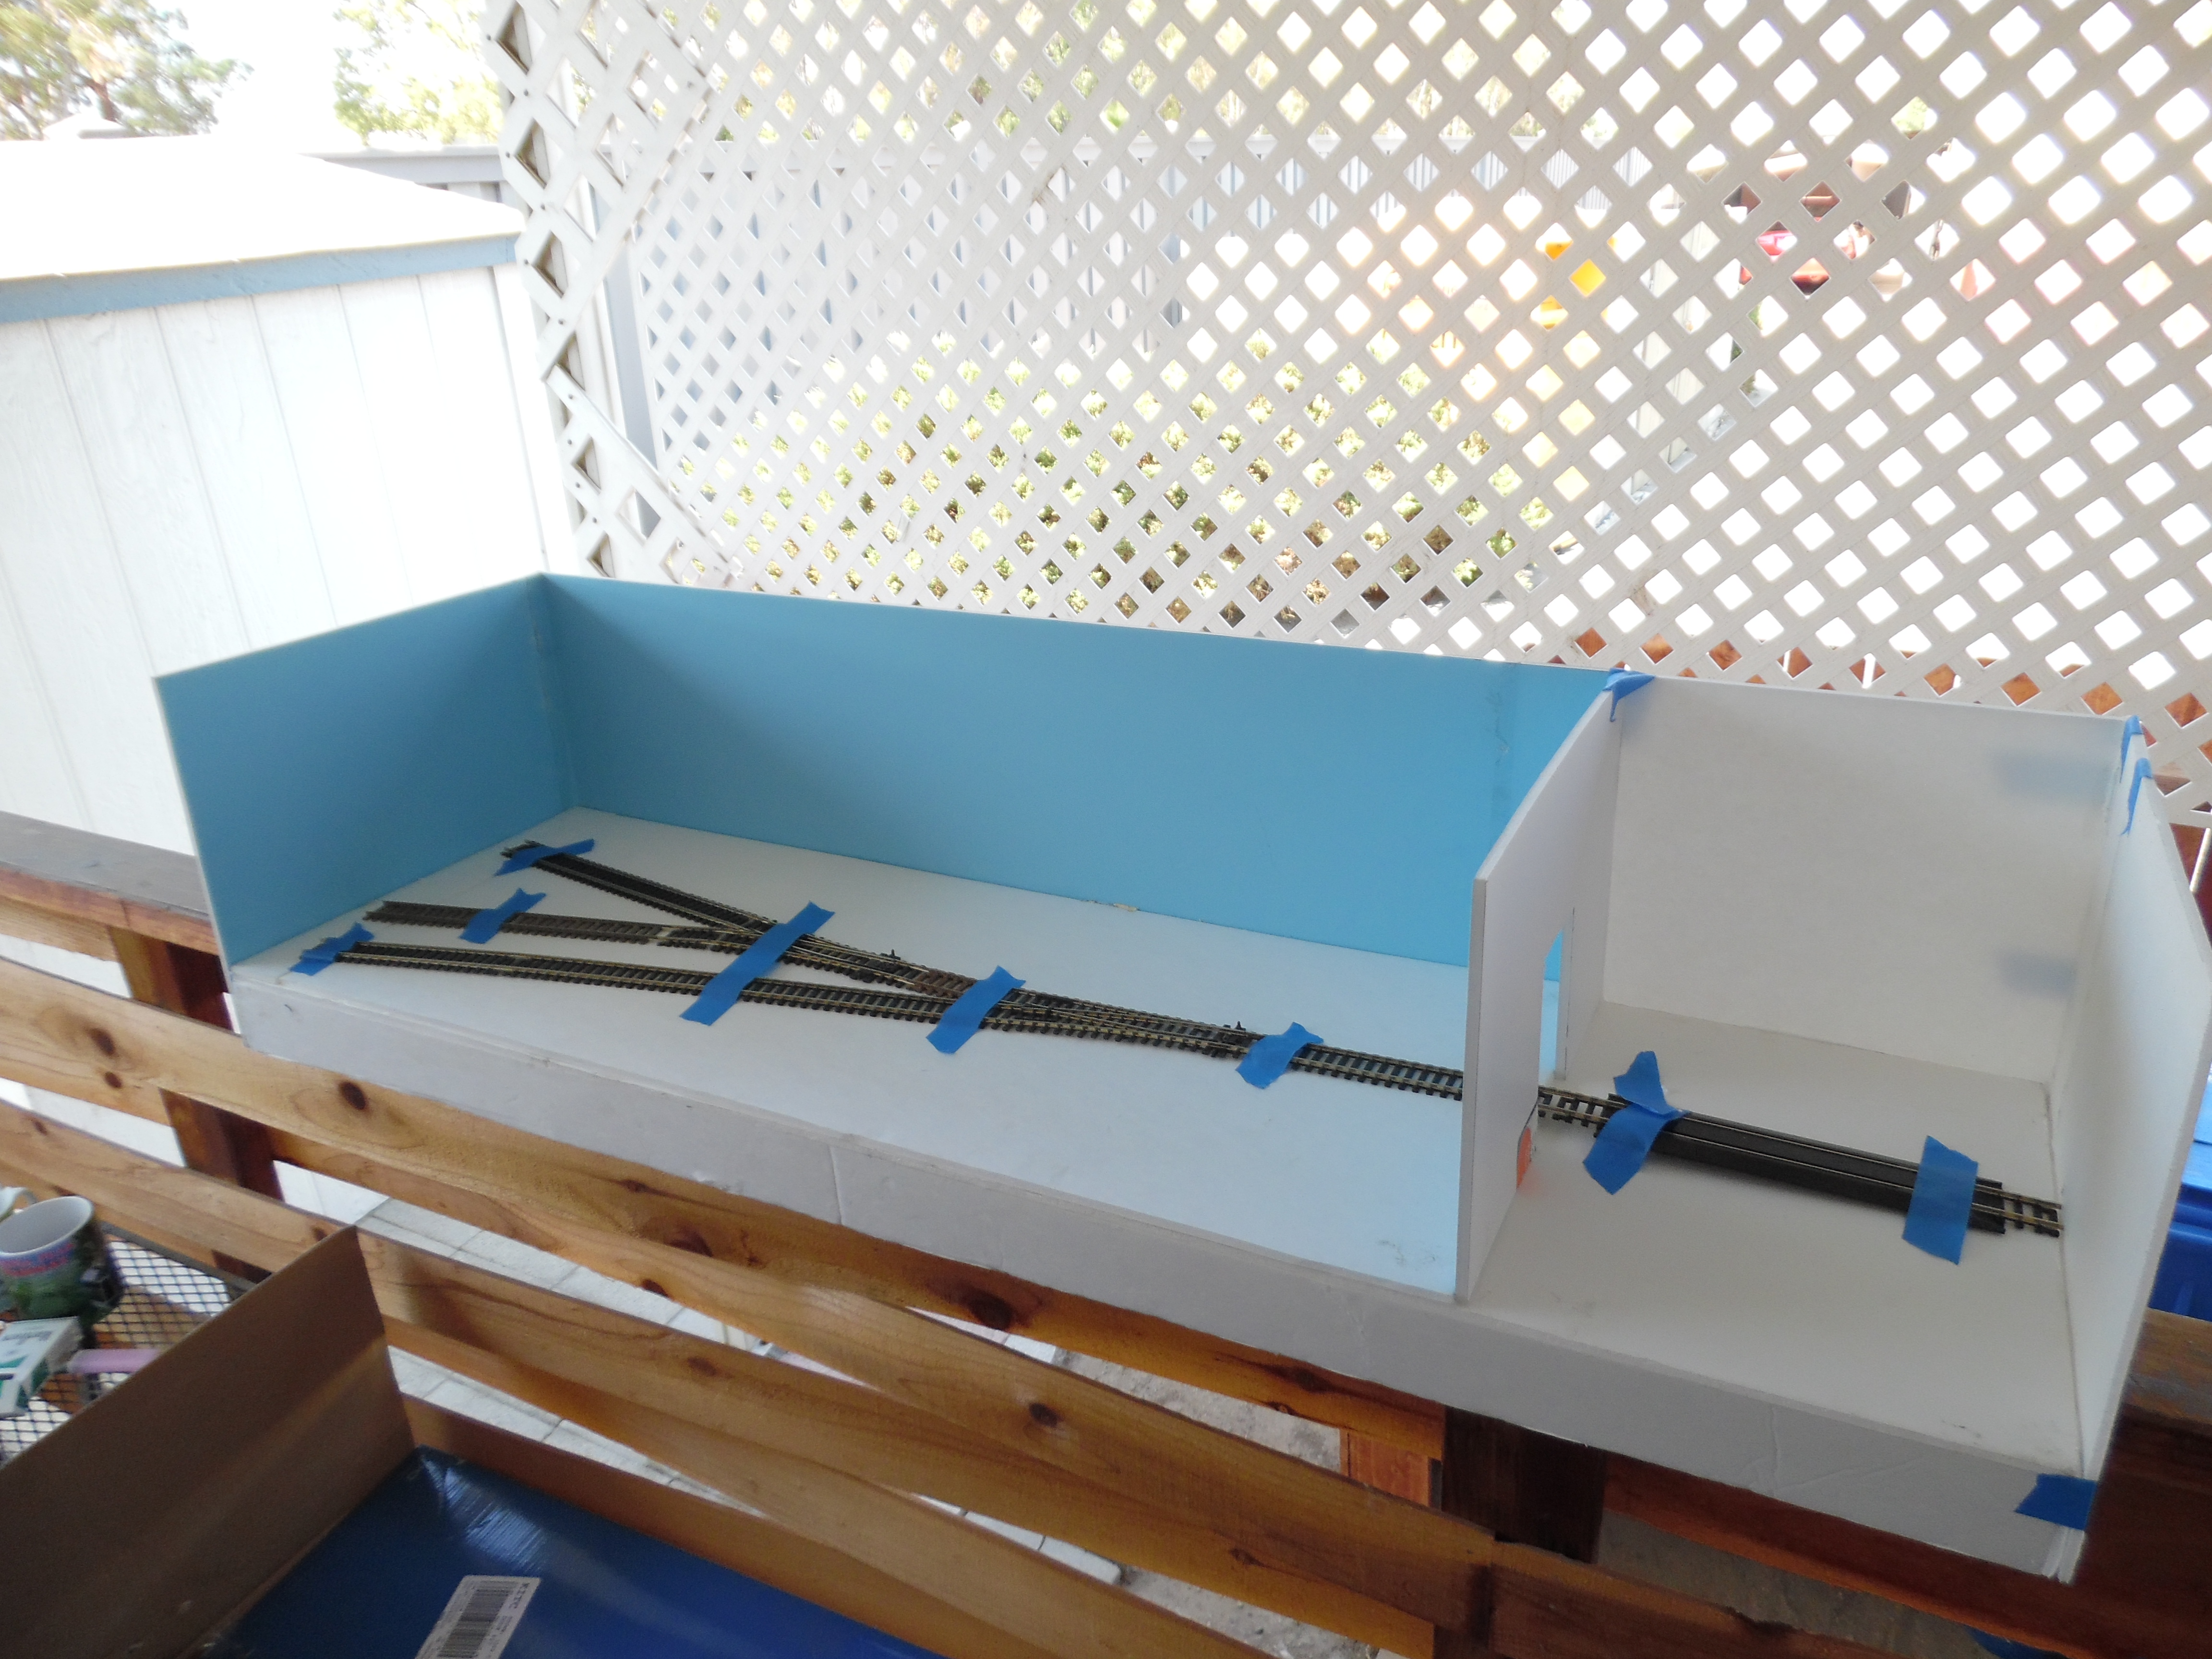
A little more progress..
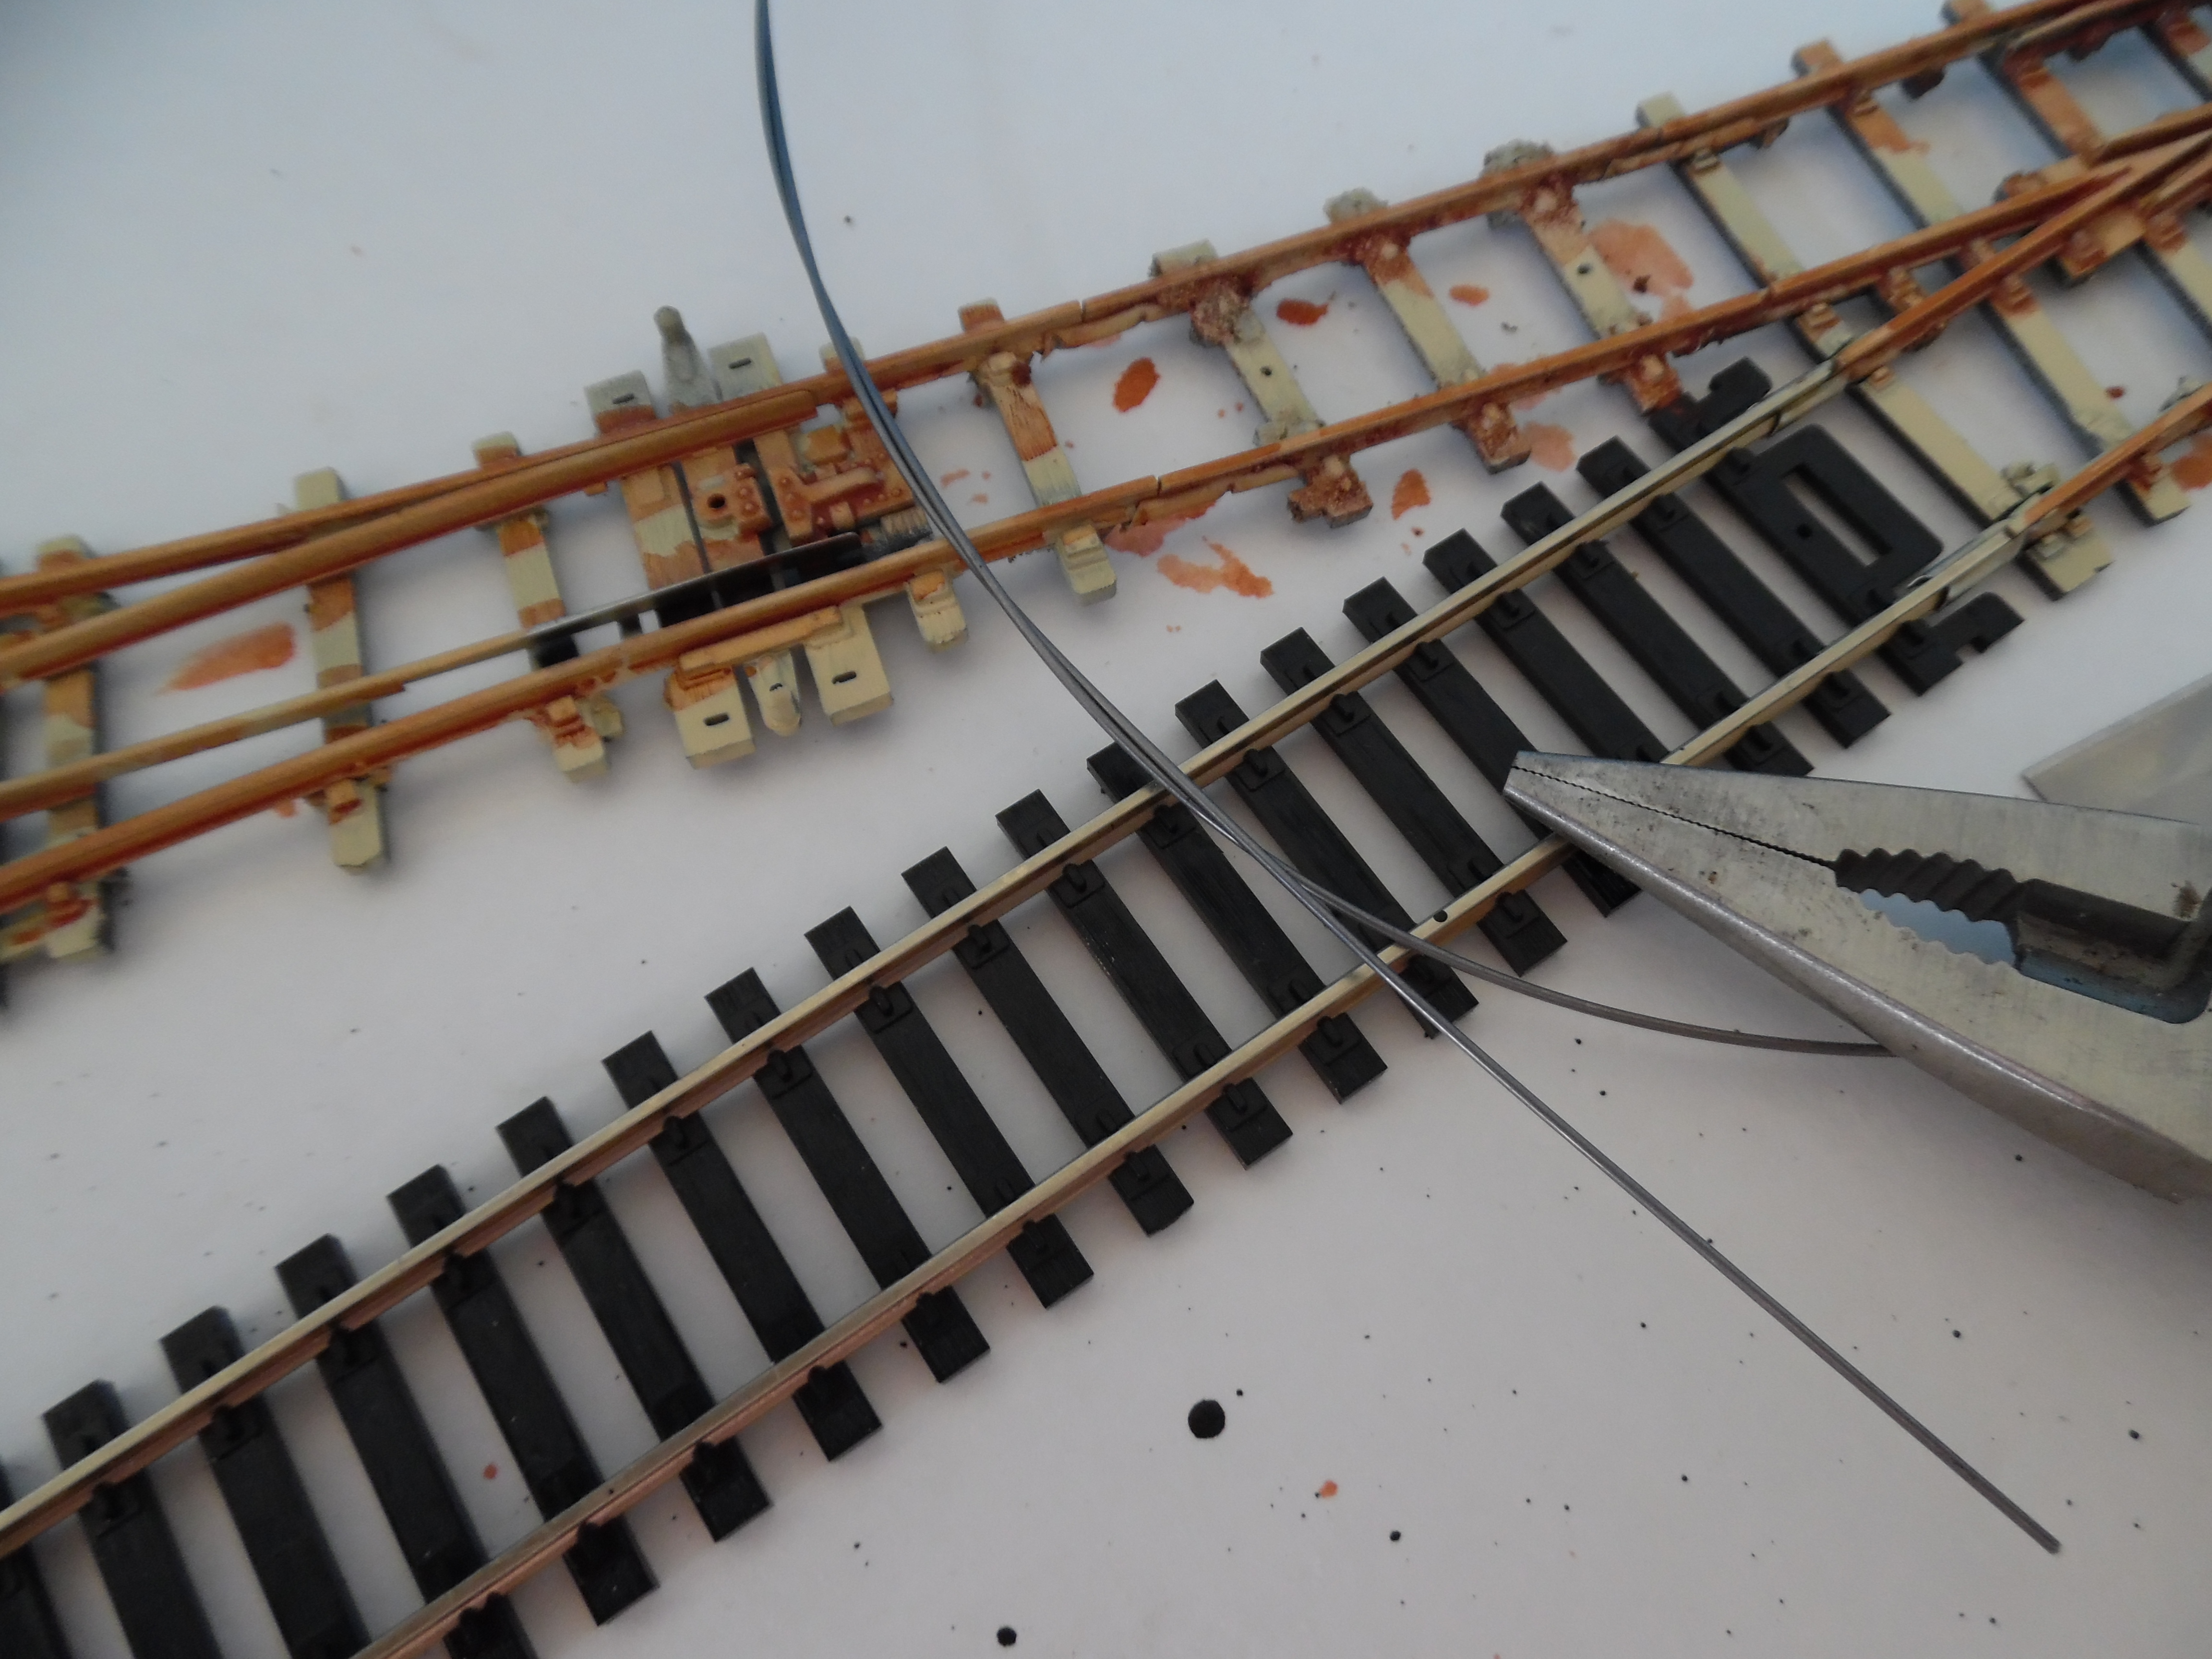
The “Sleeper Thief” has been in action… The goal being to offer a kind of industrial tramway look to it.
I thought of sending the picture with this caption “The Notorious Sleeper Thief, Sir Charles Bullhead, has struck at Terrapin Yard”.
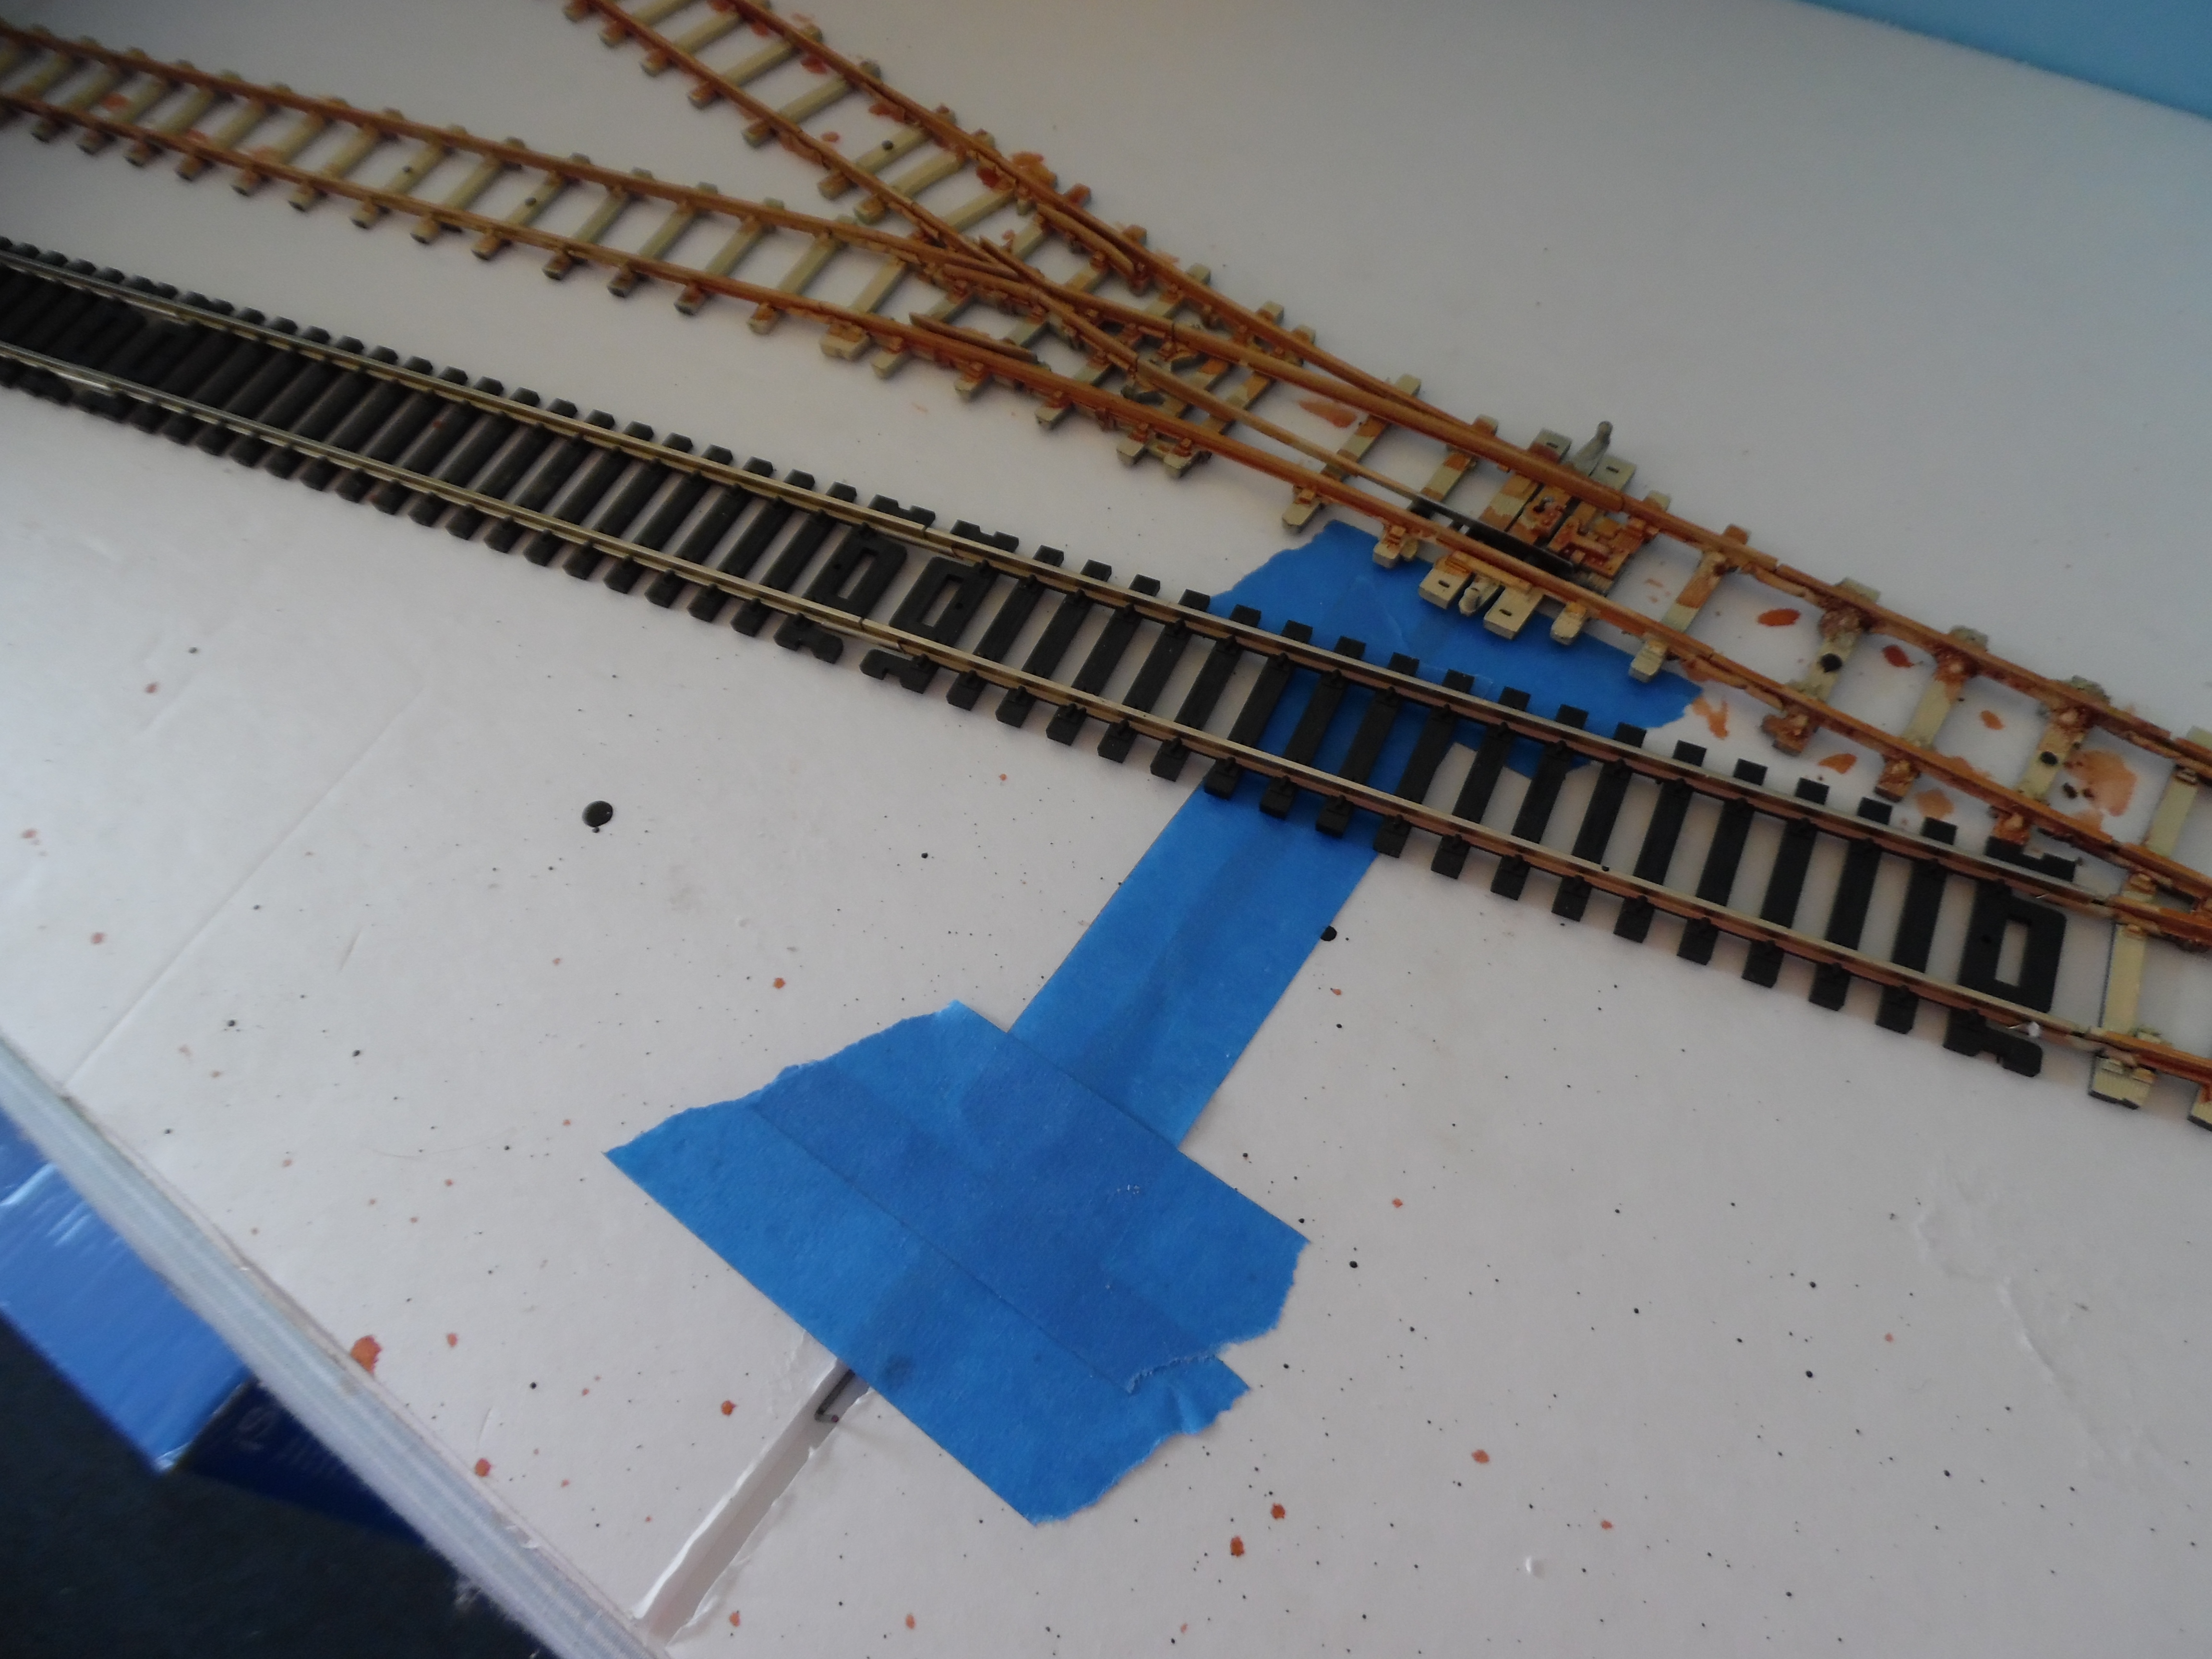
Also, here are a couple of photos concerning the wiring… Simplicity plus with the power soldered to the rail joiners and running through a pair of holes poked in the baseboard with a coat hanger.
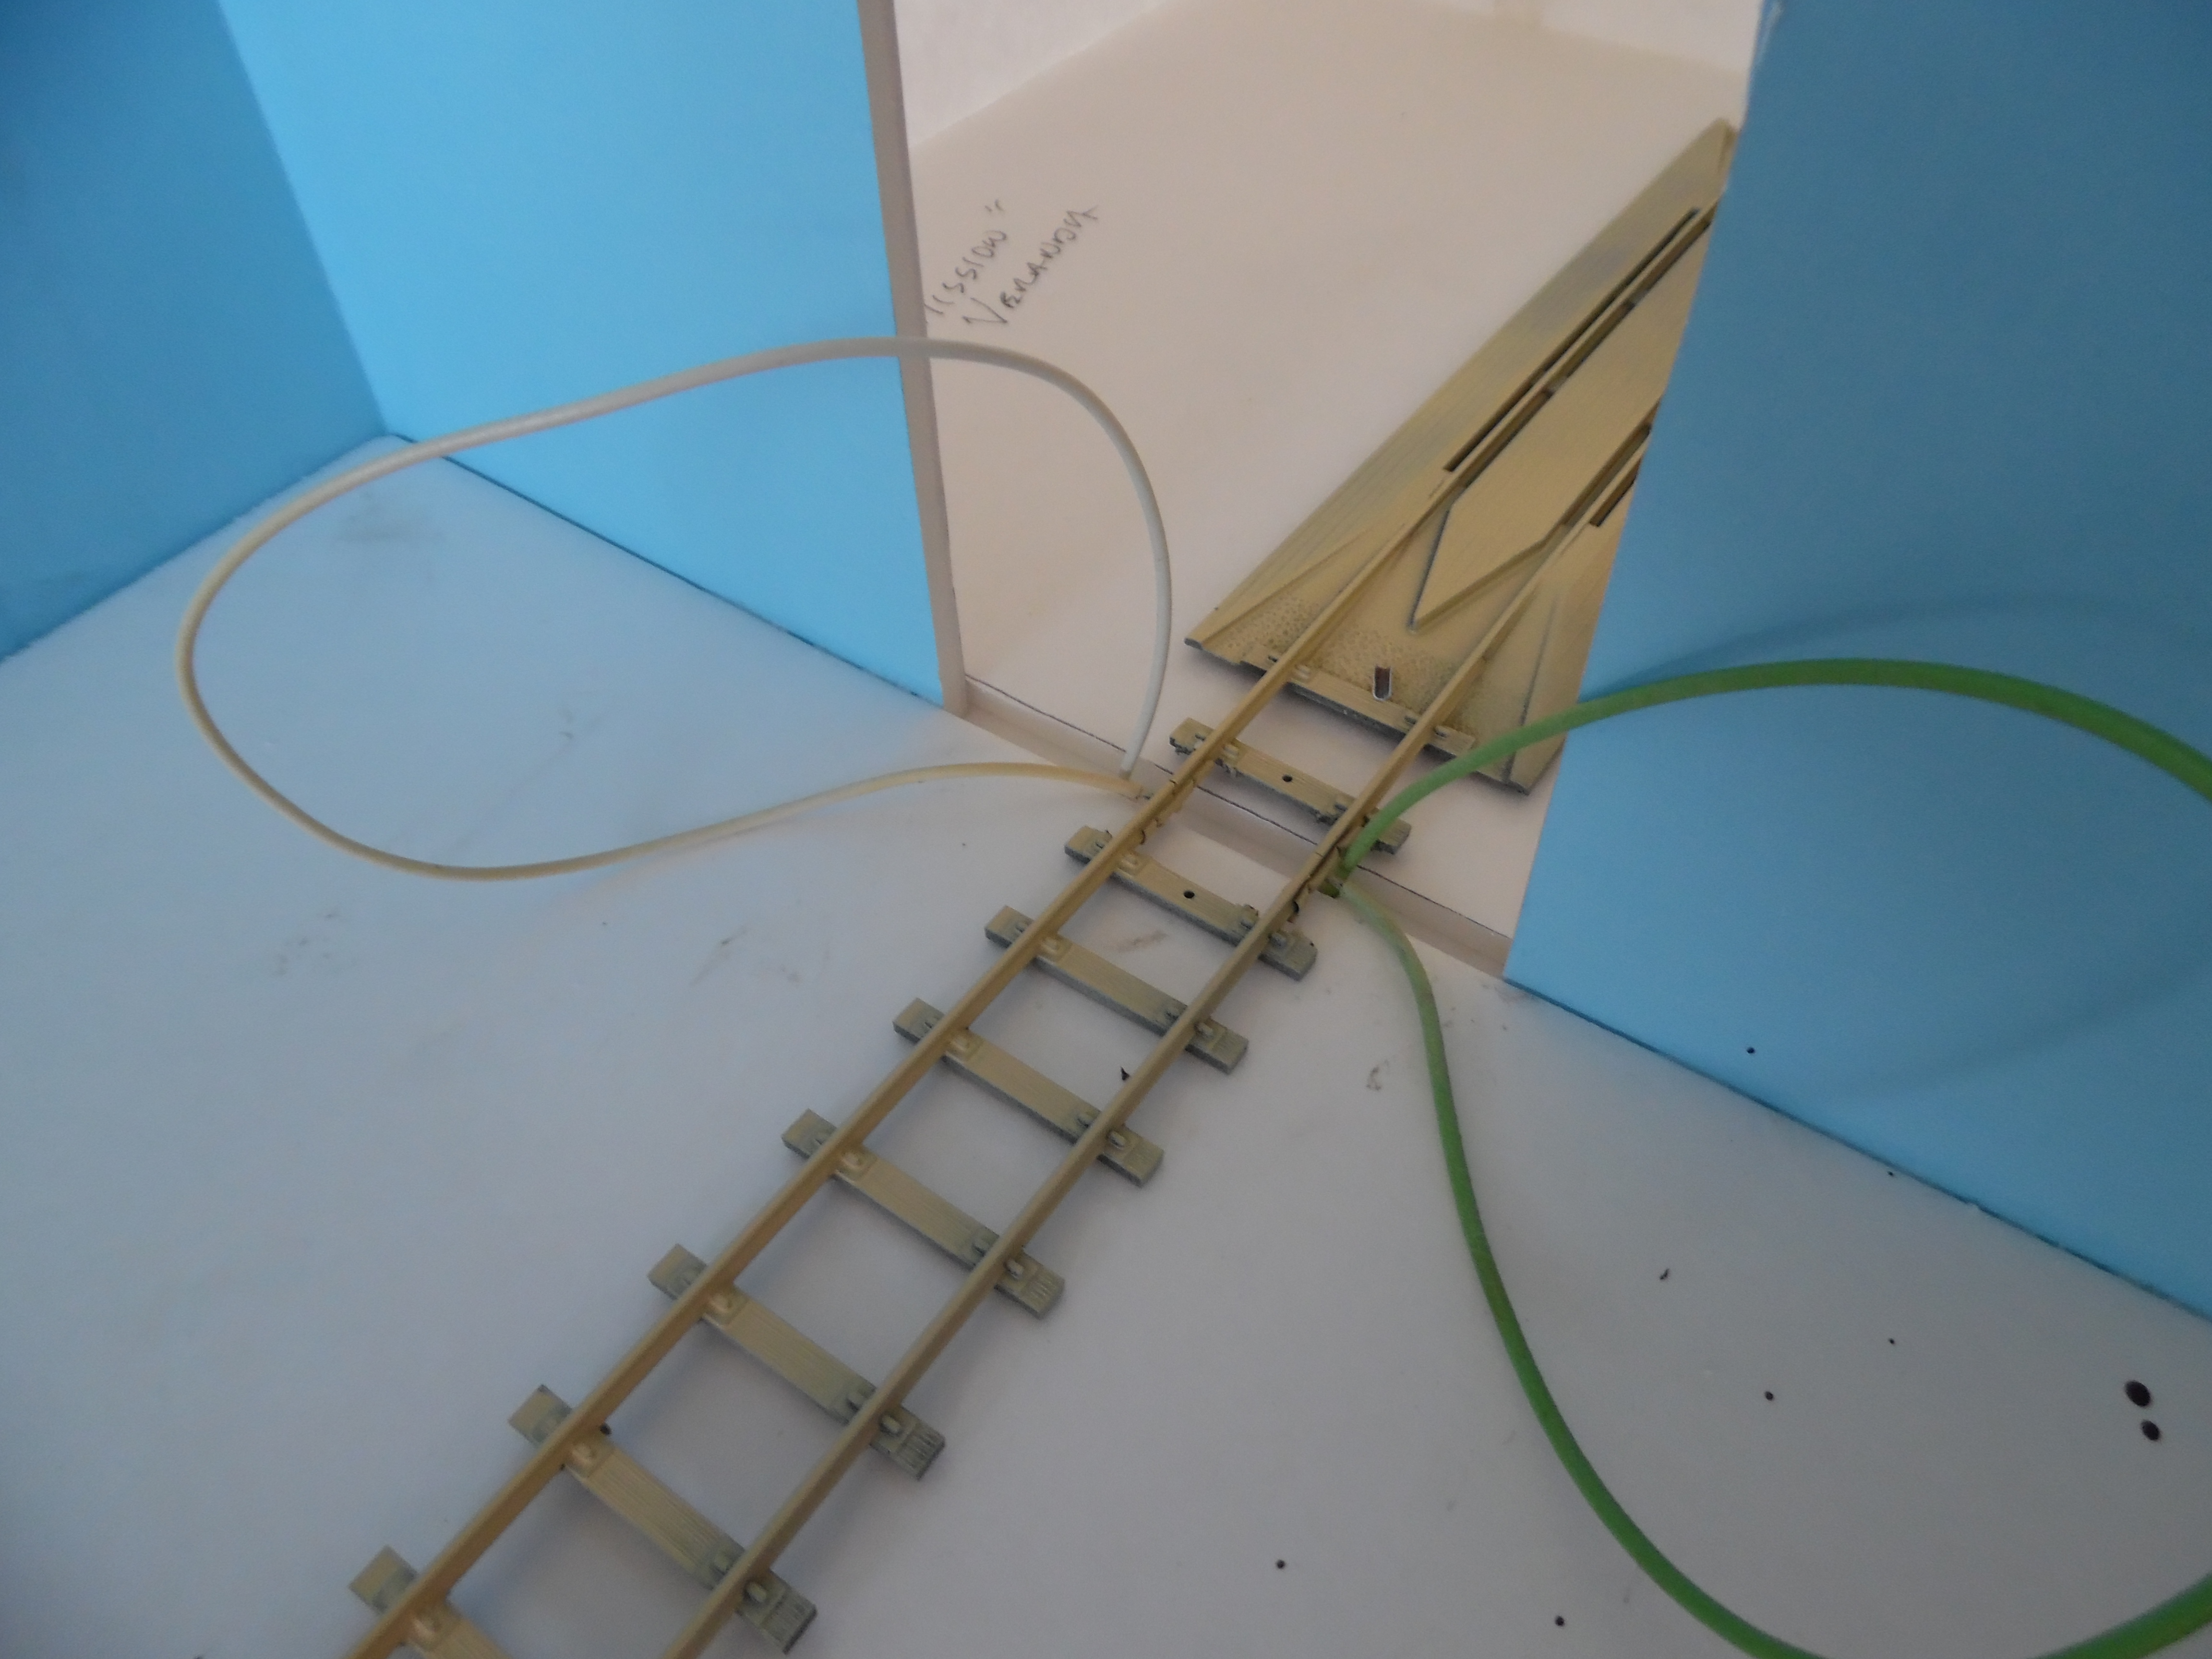
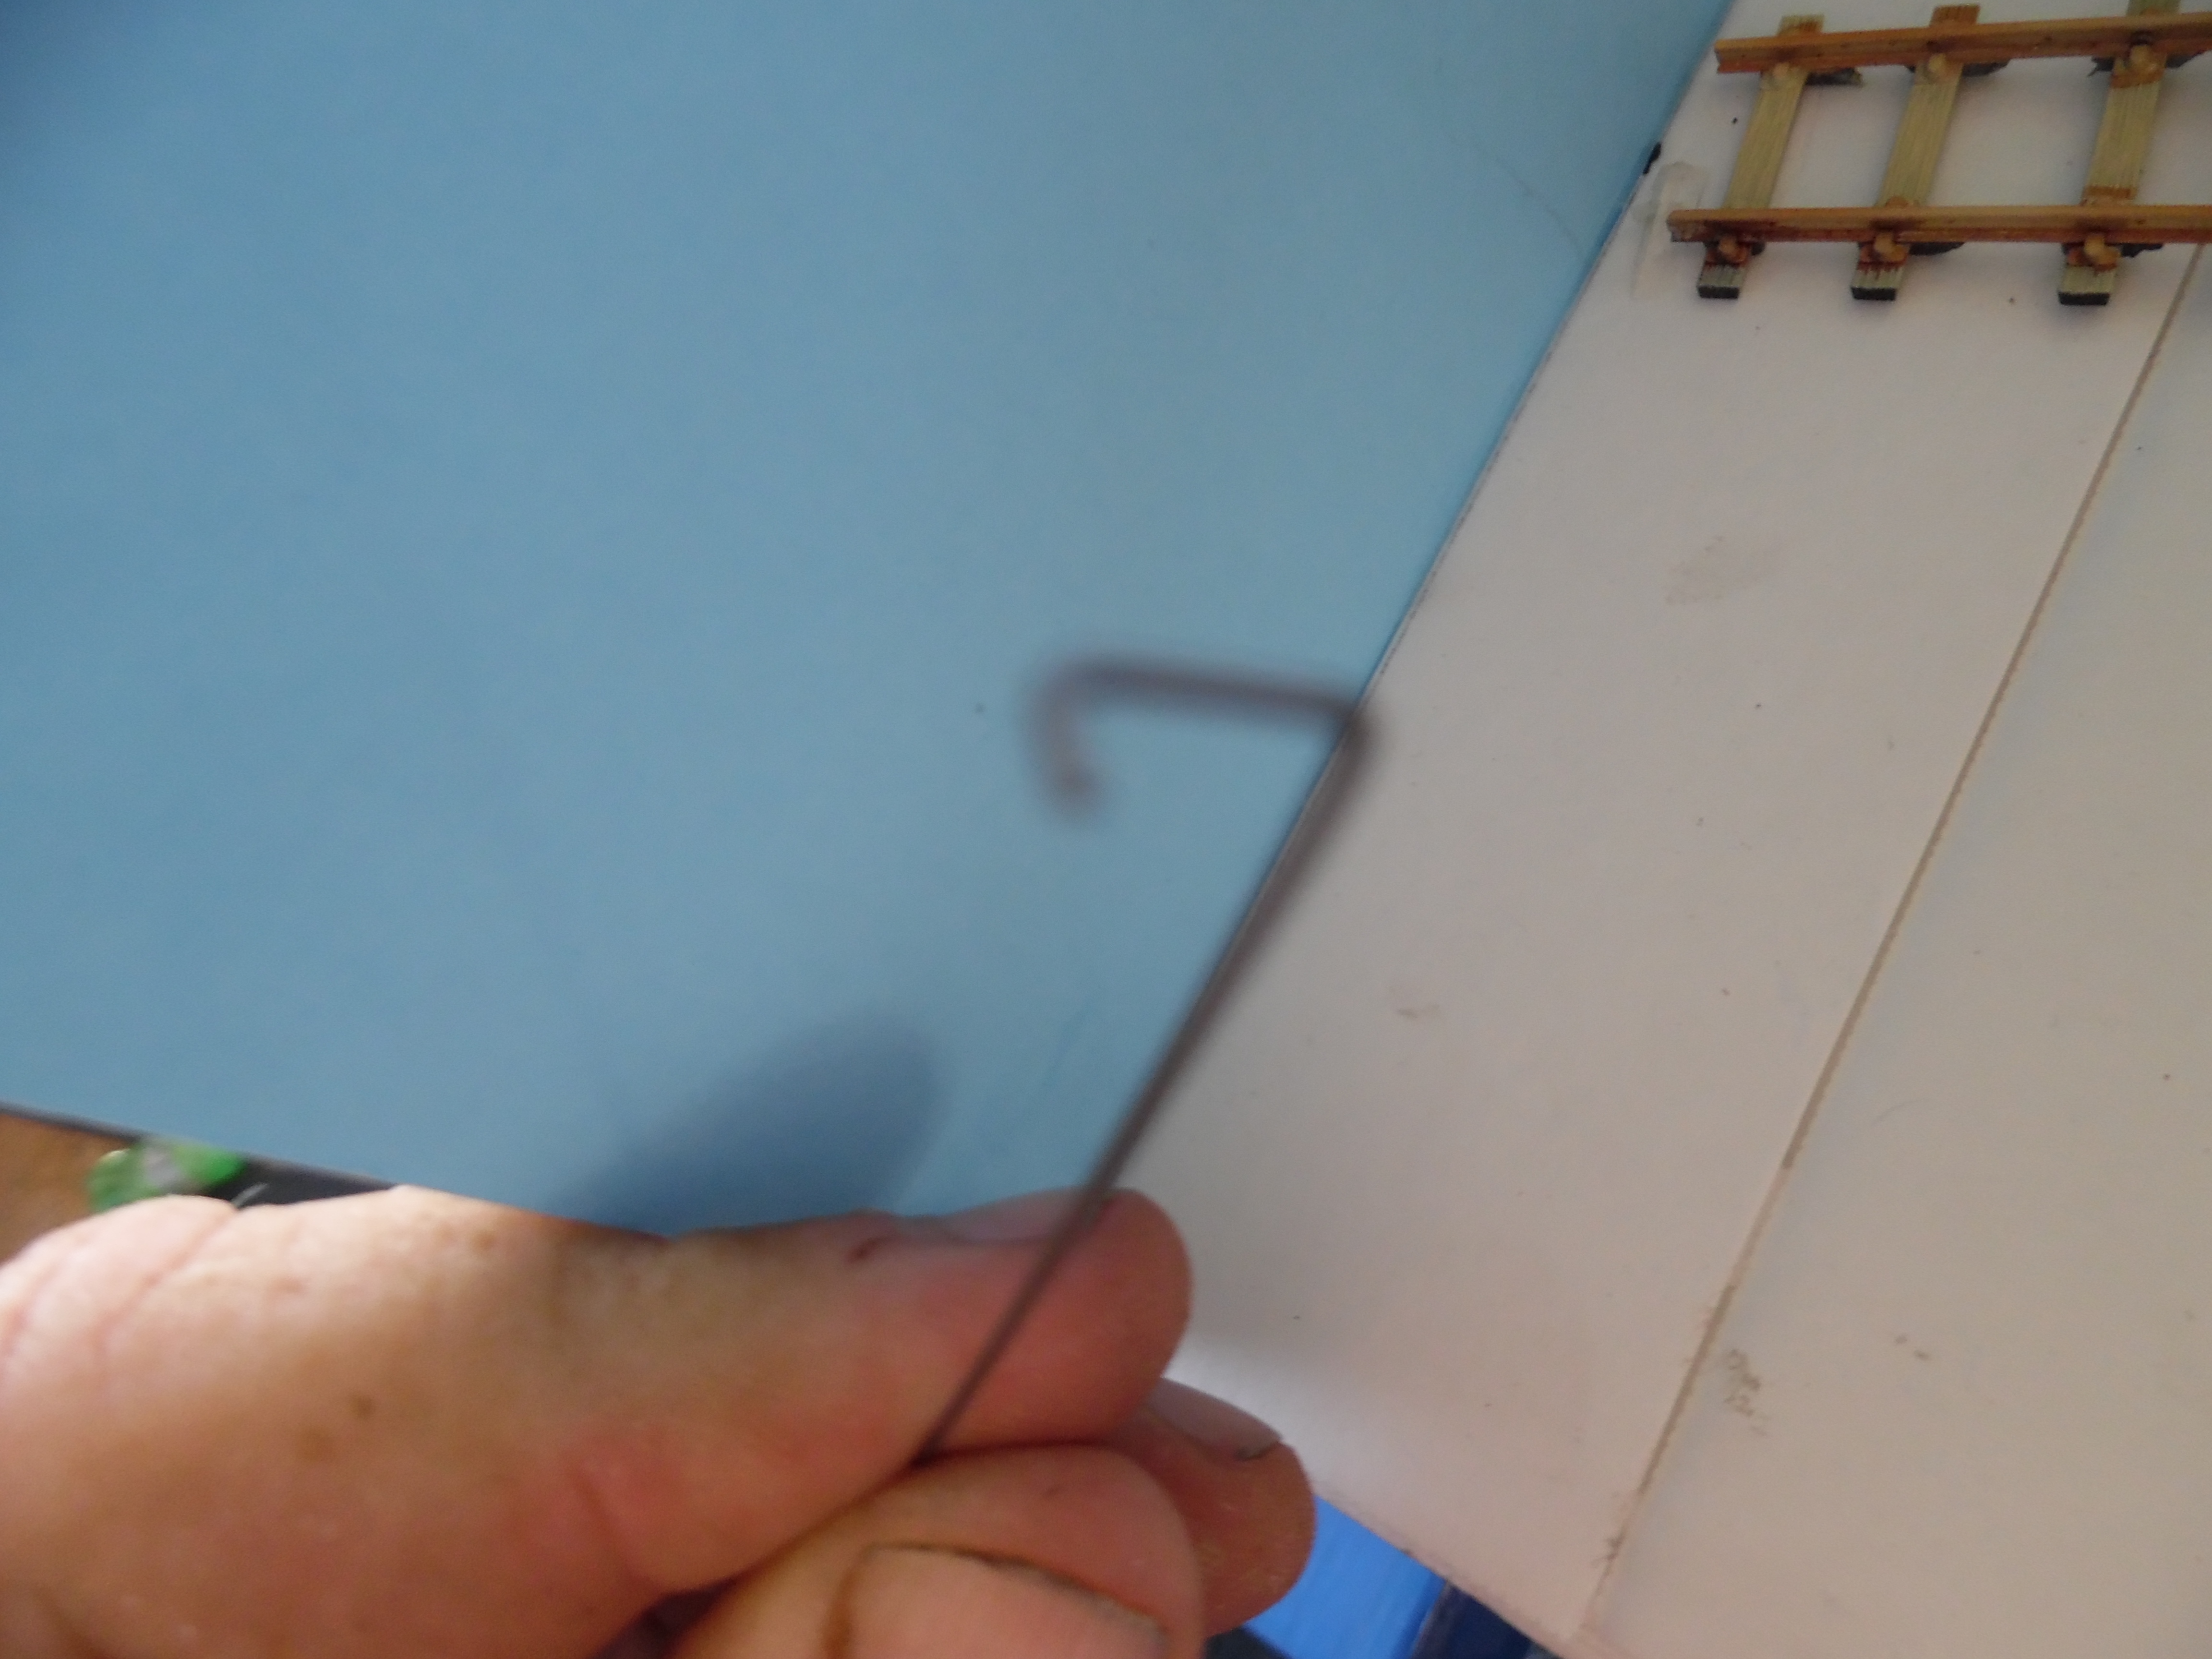
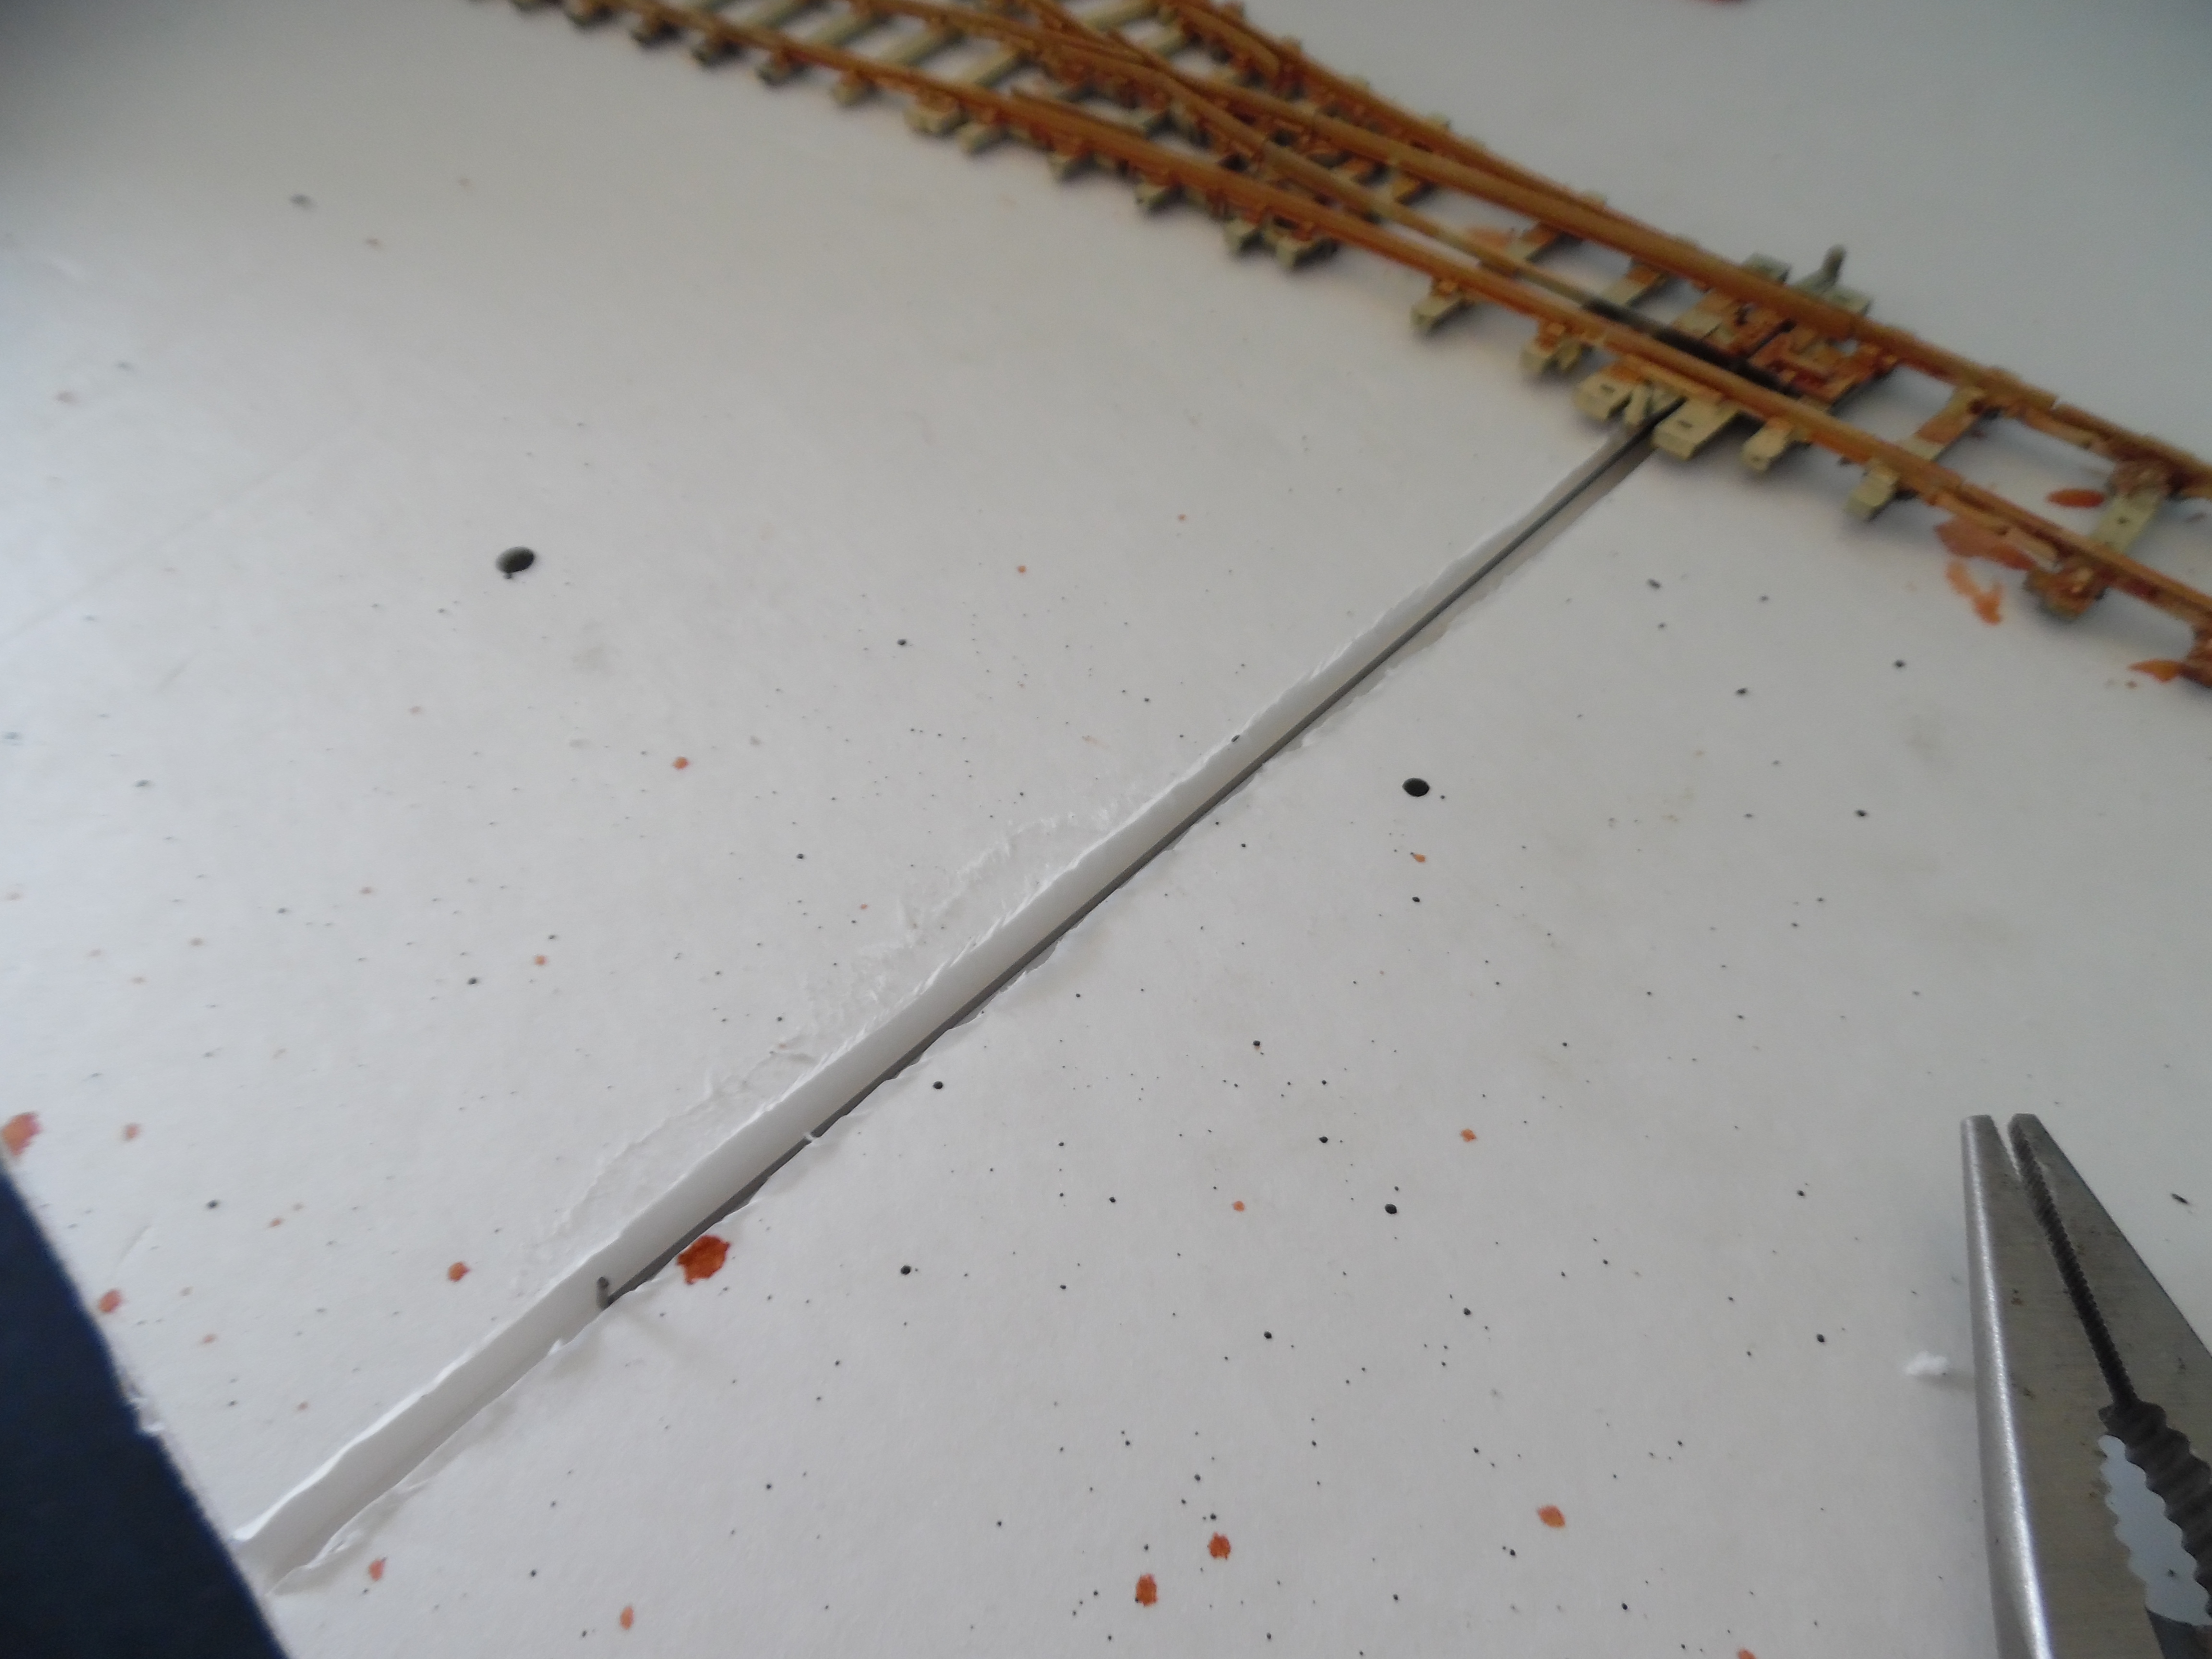
Here are a few more photos on how I operate my turnouts (switches).
I use piano wire with a small hook at each end. I run the wire through a small channel cut in the baseboard and I cover the channel with tape.
Most of the track has now been pinned to the baseboard now.

Sincerely,
John”
“Here are some things that I use:
1) Grape Myrtle ends after the blossoms die make great trees. I then add lichen painted different shades of green.
2) Get dried blocks of clay and crumble for use as real dirt.
3) I collect different sizes of saw dust and can use food coloring to make grass or other items
4) From Home Depot I got returned cans of Venetian Plaster to use to make and cover hills and stone walls make from chicken wire and newspapers with wall paper paste.
5) Go to the fabric store and look at felt to use for grass, gray for around track and brown for dirt.
6) I save any wire I get my hands on (telco, low voltage, old lamp cord, etc.)
7) I look for moss and when dried paint different color green or brown as needed.
Larry”
Thanks to John and Larry! Please do keep ’em coming.
Here’s some more train layout builds if that’s your thing: Model train layout builds.
That’s all for today folks – please do keep ’em coming.
And if today is the big day when you get started on your layout, the Beginner’s Guide is here.
Best
Al


Well done both John and Larry
Dear Al,
I want to thank you for all the interesting messages you have been sending me about various aspects of model railroading.
This post by John about his new layout has inspired me to start, or at least think of starting, work on a first layout of my own since I last had one in Washington DC in 1958, based on a 4ftx8ft 3/4 inch thick plywood board, using Lionel 027 track. I was first given a Lionel 027 train set by my mother ( who was then employed with the Embassy of India in Washington D.C.) for Christmas of 1953, when I was 7 years old
I returned to India ( where I am originally from ) in August 1958, at the age of 12 and was able to take my collection of three trains and accessories etc with me but could never set up a layout because we lived in a tiny apartment with hardly enough room for ourselves. Over the years the material deteriorated and some of it was even stolen.
I returned to the US in August 1993 with my wife and two sons for good as an immigrant and have been living in Kensington, Maryland ( 10 minutes drive North of Washington DC ) ever since, and all of us have also become US Citizens.
In November 2011, after I had developed a reasonable degree of financial stability, I got into a buying spree of various model trains and accessories, etc including G Scale, HO and N. However, some ups and downs in my subsequent career made me concentrate on stabilizing my career and now that that has become more or less stable I will be going ahead with the N Scale first. I have a 16ftx30 ft basement ( enough for anything I would want to do in N or HO. I also have an 80ftx60ft backyard, enough for anything I would want to do in garden railways with G Scale, but regrettably I am now 68 years old and overweight and not as physically fit as I once was so I may give the G Scale activity a pass especially since it involves work in the garden, and content myself with whatever I can achieve indoors.
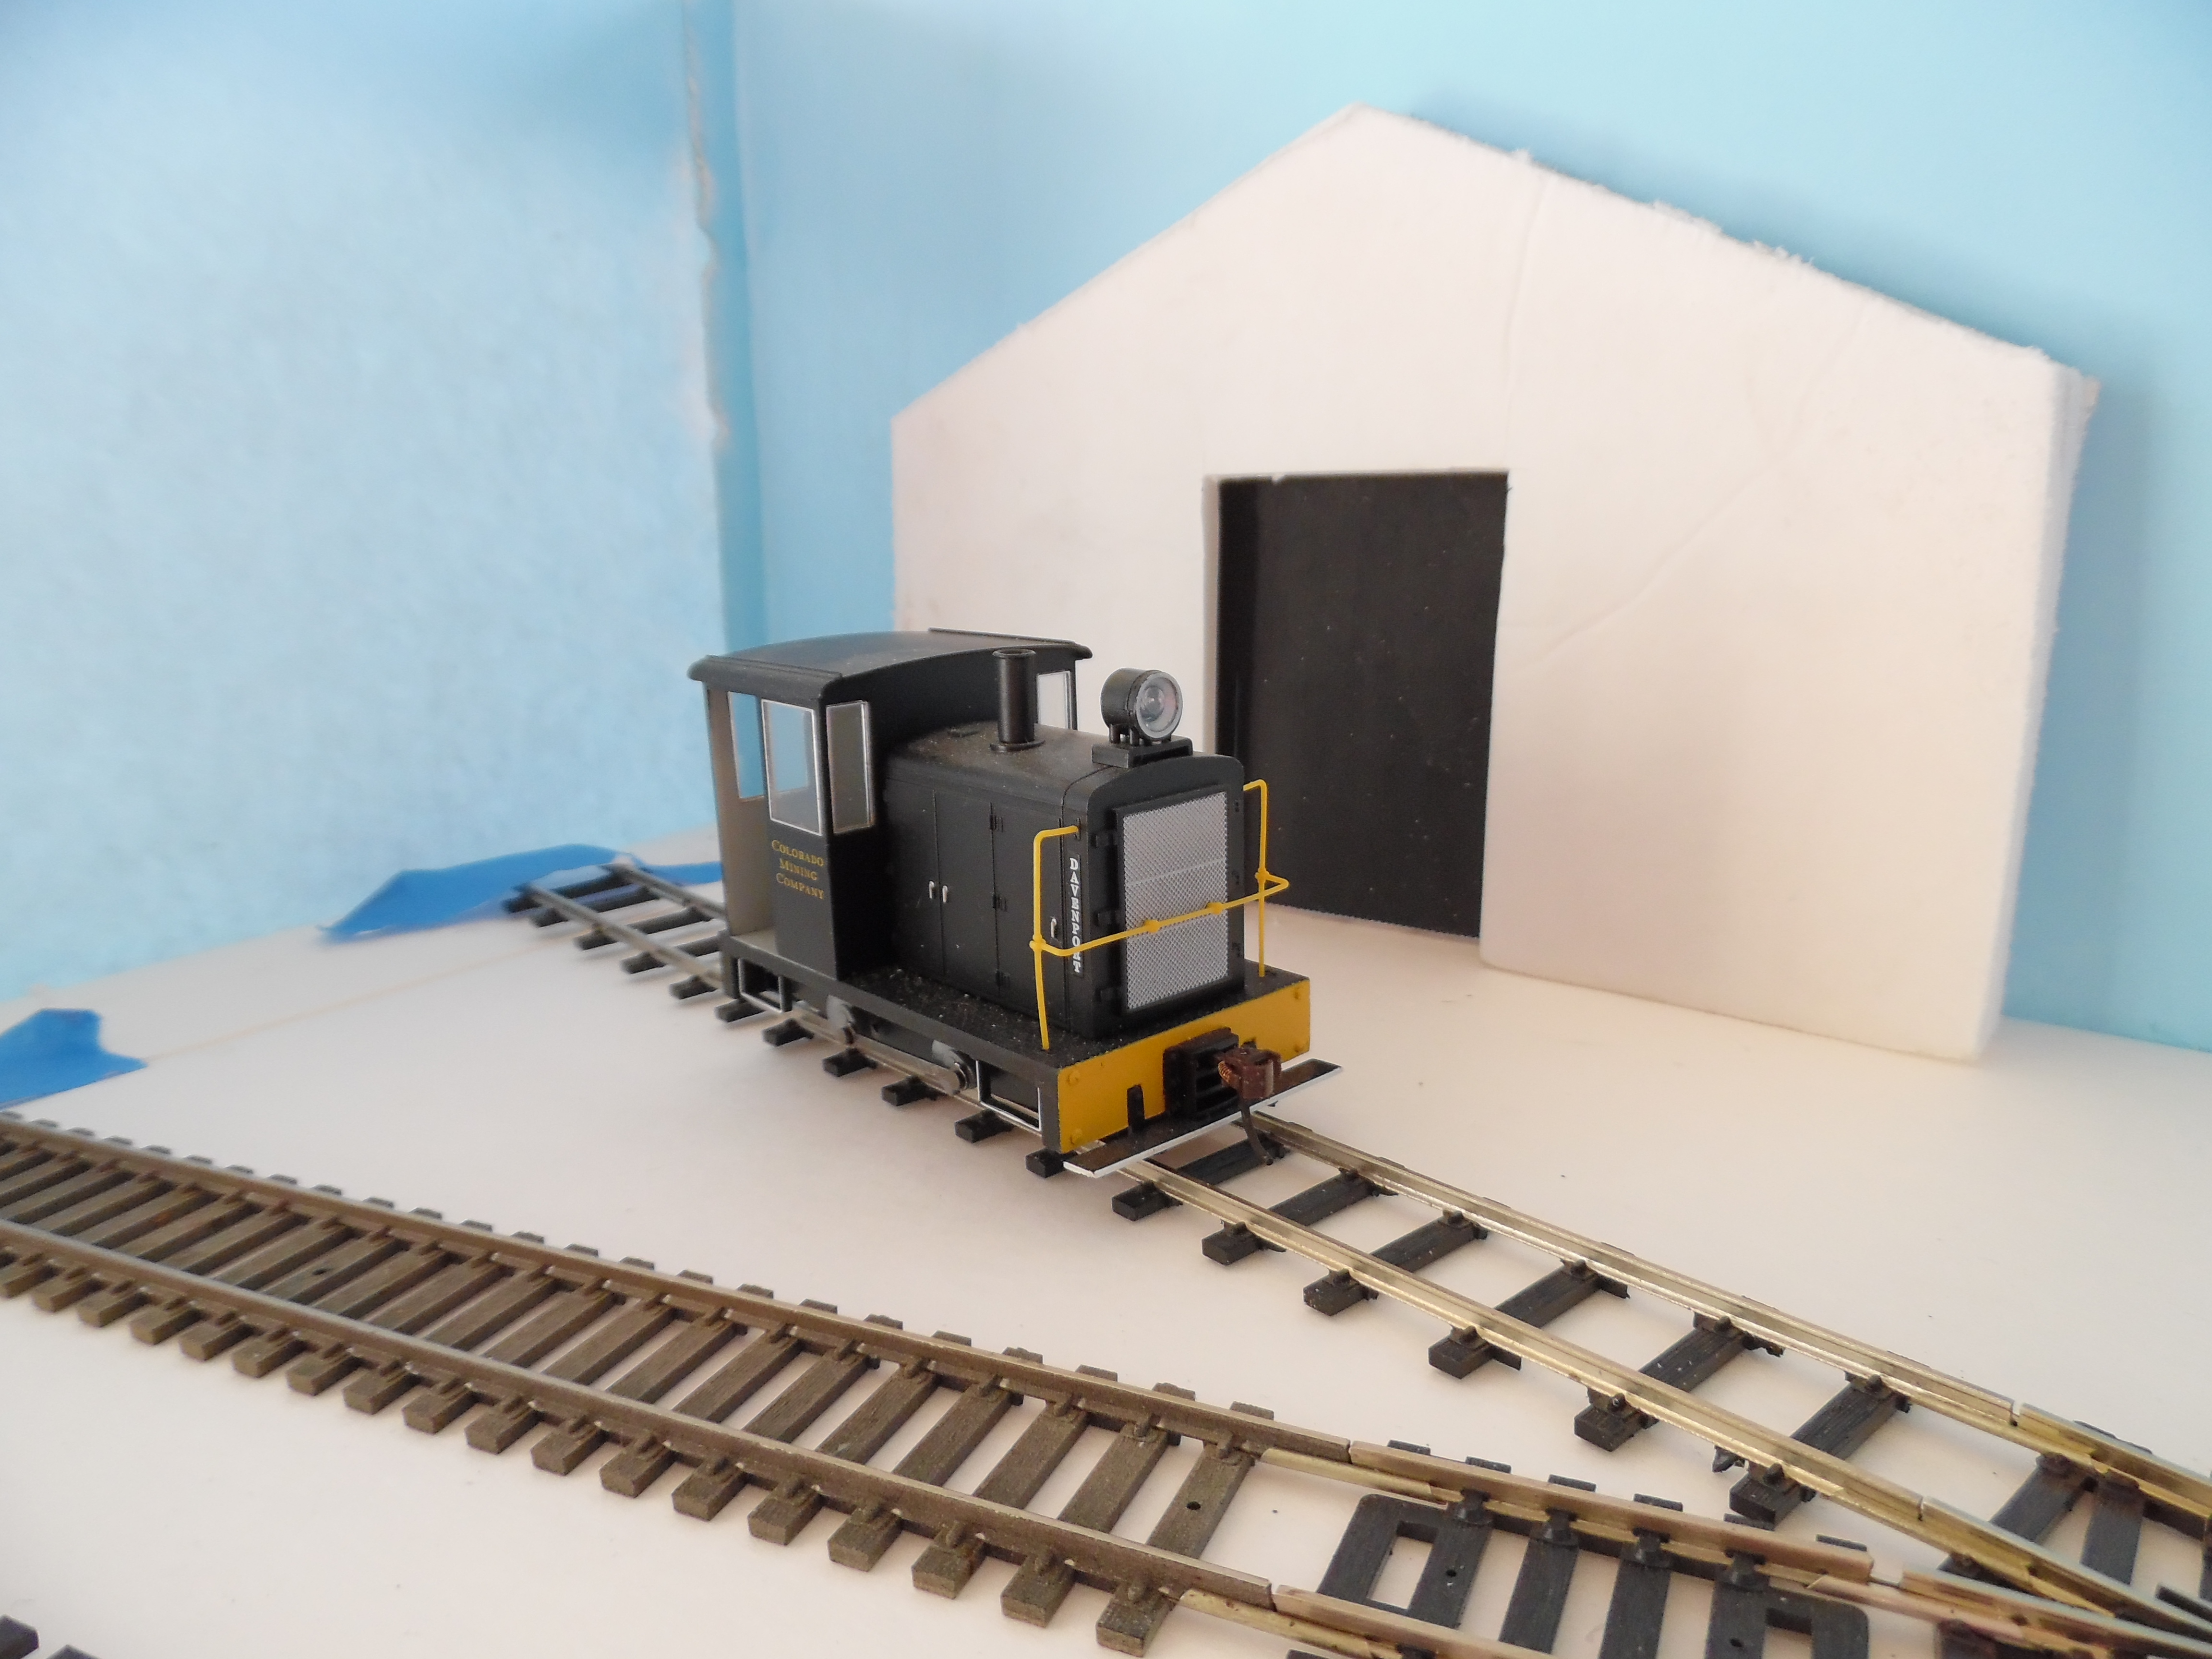
I have only one question regarding John’s layout: The photograph showing the switcher loco and the track gives me the impression that it is G Scale, but given the size of the baseboard mentioned, John’s layout must be N Scale. Please clarify.
Thanks
Vijay
Hi, Vijay’s email prompts me to ask for advice on building an HO garden layout. I have some Peco track and some old rolling stock and an old tank engine doing nothing. ( I usually work in N gge). I thought of running it along the side of a hedge row on an elevated track base to keep it clear of the grass ( and weeds) etc.
Any advice would be appreciated. D/
Nice work John. Looks like good inspiration from the microscale layouts of Carl Arendt’s site that his son is keeping going. Isn’t that switching called “Inglenook” layouts I think? This is a great example of taking away any exuses for building a layout in any space and on any budget and one that is operational as well as highly detailed.
Vijay, we hope to see some pictures along the way with your project. John’s layout is O scale running on HO track using Bachmann’s On30 equipment. That little critter is also sold in G scale and with what looks like every other tie gone under John’s HO track it really does look like G scale.
Lots of inspiration to be found here in John’s project.
Dick
how interesting that it is constructed out of foam-core…I have been contemplating an ho layout with the ‘skeleton’ base scenery supports and trackways using foamcore. now Im even more interested in giving it a try…!!
I want to see more of what John does with this project
Vijay, Johns layout is On30 That is O scale equipment narrow gauge running on HO scale track. There are some On30 track pieces available that have the wider tie spacing and bigger ties to look more like O scale narrow gauge track.
Minor correction – the British shunting layout is “Inglenook sidings” – the Inglenook being an old word for the alcove next to a fireplace (i.e. the gap between the chimney and the next wall).
I’m inspired. Thanks!
Great little layout John. I have wondered how good it would be to remove every second sleeper for narrow gauge track, now your pictures confirm that it is very effective. Another way to operate points is to use model ‘plane control rods, these are plastic rods inside a blue sleeve and are very effective where you need to turn corners. They cost about AU$11.50 a length and piano wire can be wedged in each end to operate points and connect levers.
Hi,
I am running some old Hornby Dublo 3 rail locos and because they are so old the third rail pickups are severely worn. These pickups are extremely difficult to obtain and I was wondering if anyone has any ideas on how to restore them. i thought of using solder but I am worried that it might be too soft
Ian
Hi!
How did you made painted railroad tracks?
Are they from wood or plastic?
A VERY NICE LAYOUT.
The track has plastic ties (sleepers). The track was painted with craft paint (acrylics). The layout was started in September after the very talented Dave decided to completely rebuild his amazing railroad. I had the layout completed in the middle of November…
Since that time I have been hard at work on another layout… I find building rather therapeutic. The current one is a return to HO scale. I have chosen again the Inglenook Sidings plan following Little Bezely…. This one has been a real push for thrifty modeling… The baseboard has been made of cardboard, track has been recycled, the trees are scratchbuilt “old school” from wire, and the industry has been scratched from cardstock. That industry has swallowed more time than the entirely of the rest of the layout!
John
HappyEaster. Ed ,you and yours
The beef I have with end to end layouts is that though they are fun to build, they are very boring to operate. Give me continuous run every time.
Great to hear of someone else using/making their own foliage etc. I told my wife when I started this hobby again that I would do that and only have to find money for track/rolling stock etc. I dry my dyed sawdust on the wood heater while it is winter, and have the various sawdusts sorted by coarseness. Food colouring works great, but I find it tends to fade if sunlight gets it. I also use brick colour for colouring sawdust as dirt, cinders,etc.
Wow!
“Terrapin Sidings” Was completed a while ago…
A very fun layout. And it still exists although I am thinking on rebuilding it.
(Updating with 10 years experience)
I have built many small layouts since then and have one under construction now.. (They are a great way to build modeling skills).
Alan Wright’s “Inglenook Sidings” is a classic — And a plan I use often.
There are many variations and “Ingleton Sidings” was one of them (and the one that inspired me to build this layout). — I do not remember if it was “Ingleton Sidings” or “Ironton Sidings” that introduced me to the idea of using an ironing board as a support for my layout.
Very interesting layout. I’ve seen similar ones done by English modelers where space is a challenge. Many of their layouts are constructed as “Switching Layouts”. Vijay Tonse sounds a bit confused about the scale of John’s layout. John’s layout is constructed as an On30 scale layout. On30 is O scale, (like his original Lionel trains), but instead of having a third rail, and a 1 1/2 inch space between its outer rails to replicate the actual 4 ‘- 8 1/2 inch space between prototype USA rails, it uses HO track to imitate a narrow gauge railroad with 0′-30″ between their rails. There were many such actual narrow gauge railroads in the US in the early years of American railroads. They were cheaper and faster to construct than the standard gauge railroads, which use the standard, wider width between the rails everywhere in the US after the Civil War. Nowadays, narrow gauge railroads in the US are limited to tourist and historical roads with the occasional amusement park. On30 layouts use typical O scaled figures, vehicles and structures as the scale of them is 1/4″=1’-0″.
Welcome to what we jokingly refer to on this side of the pond as the “dark side”. On30 is a great scale to work with, as there are a lot of great offerings available from Bachmann, just to name one. It’s really nice for those of us with aging eyes and hands, too. The 1/8″ compromise is acceptable to many of us modeling Maine 2-foot railroads (1/8″ too wide) or the 3-footers of East Broad Top, White Pass or Colorado (1/8″ too skinny). With On30 you can use any HO mechanism you might have already and build/modify the body to suit your needs. You can even cheat a bit and use HO track, just cut out every other tie. Sky’s the limit! Best of luck.
Mr. Curtis, cut a piece of shim brass to the size of the pickup shoe and solder that on.