I have some fine scratch building and model making for you today.
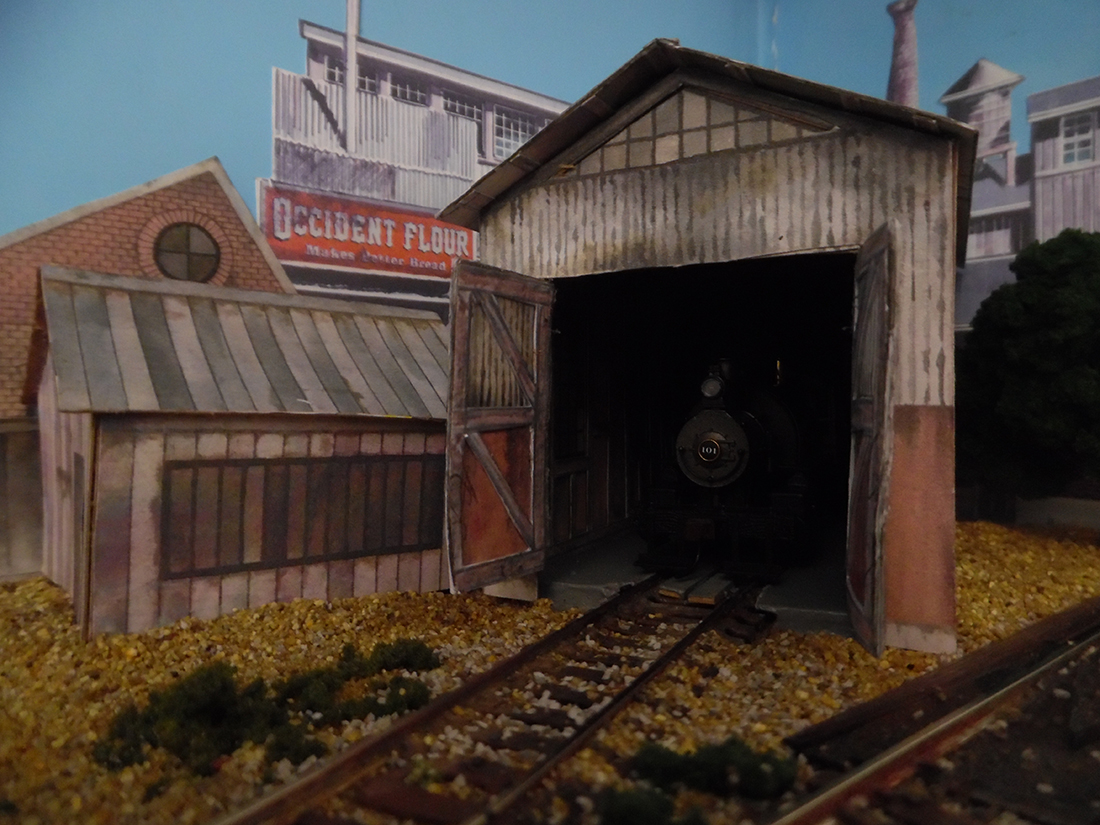
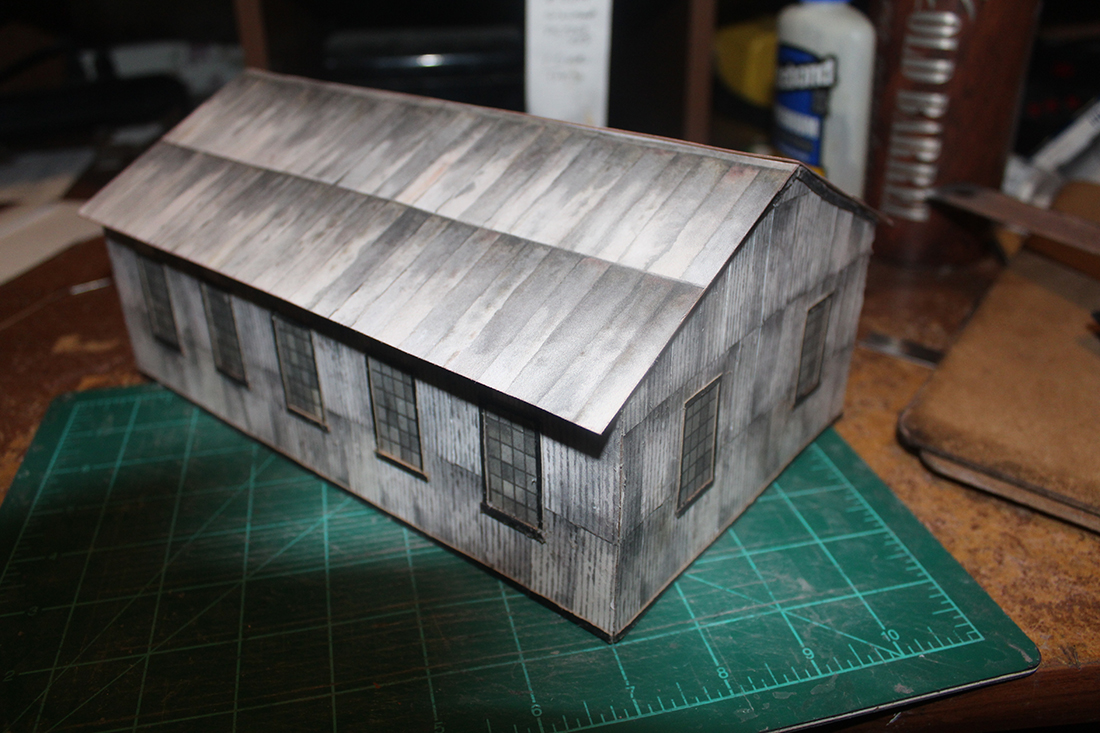
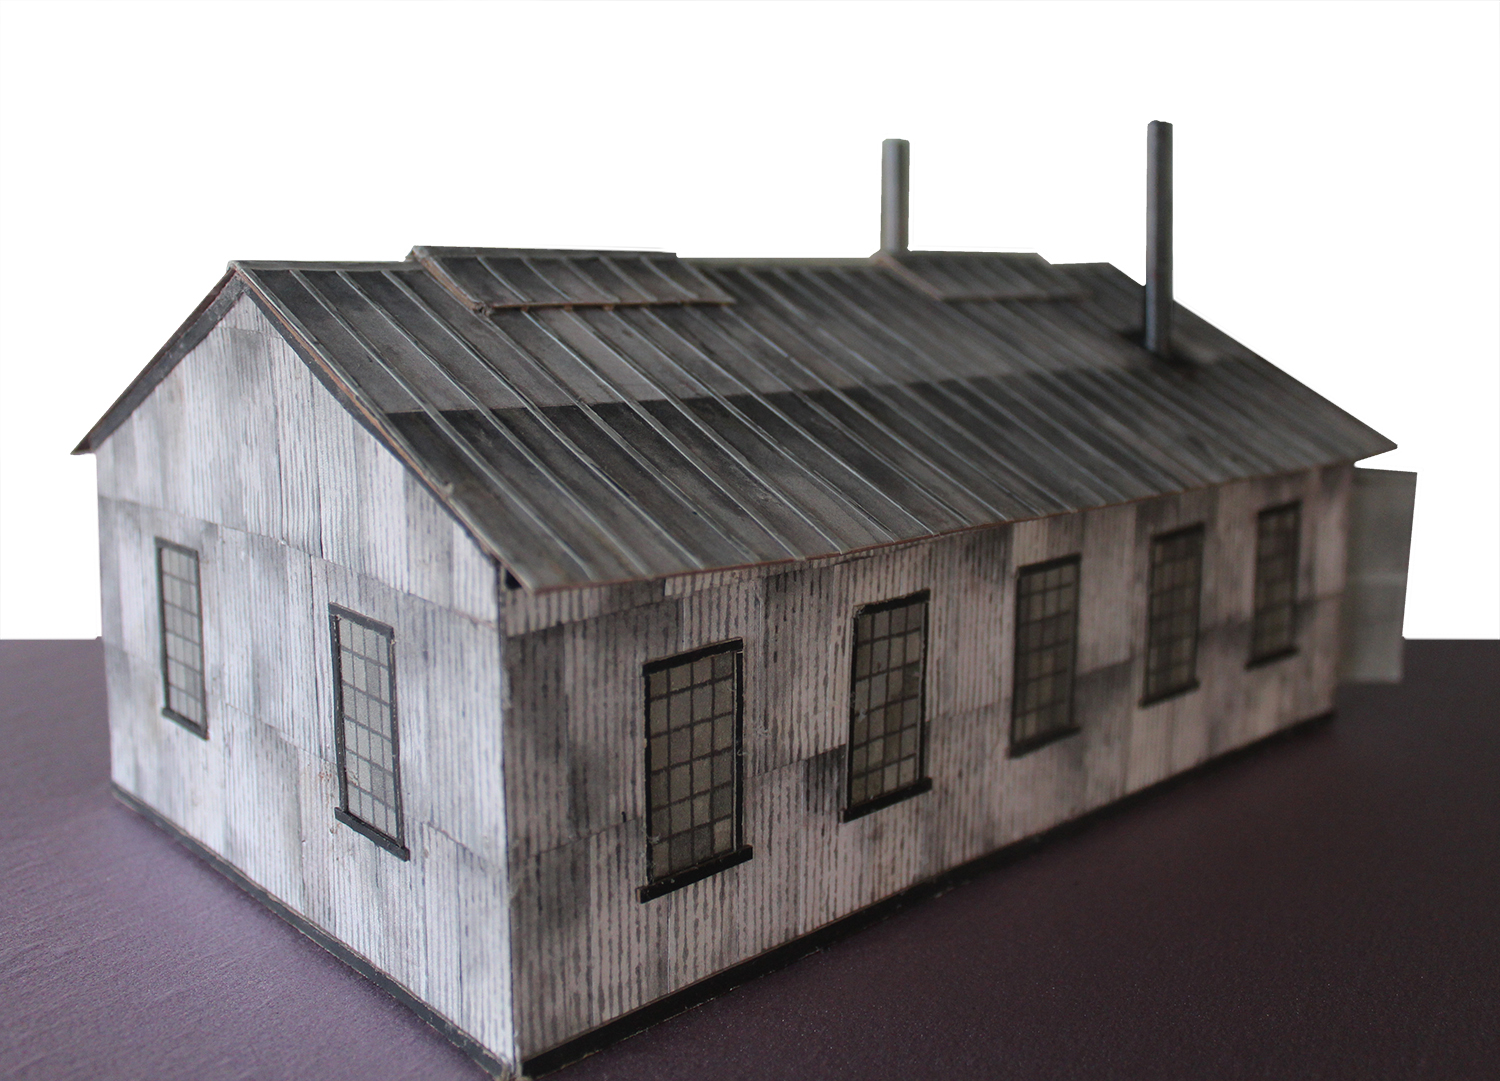
John has scratch built the below engine shed, just using the printable buildings that come with the Beginner’s Guide.
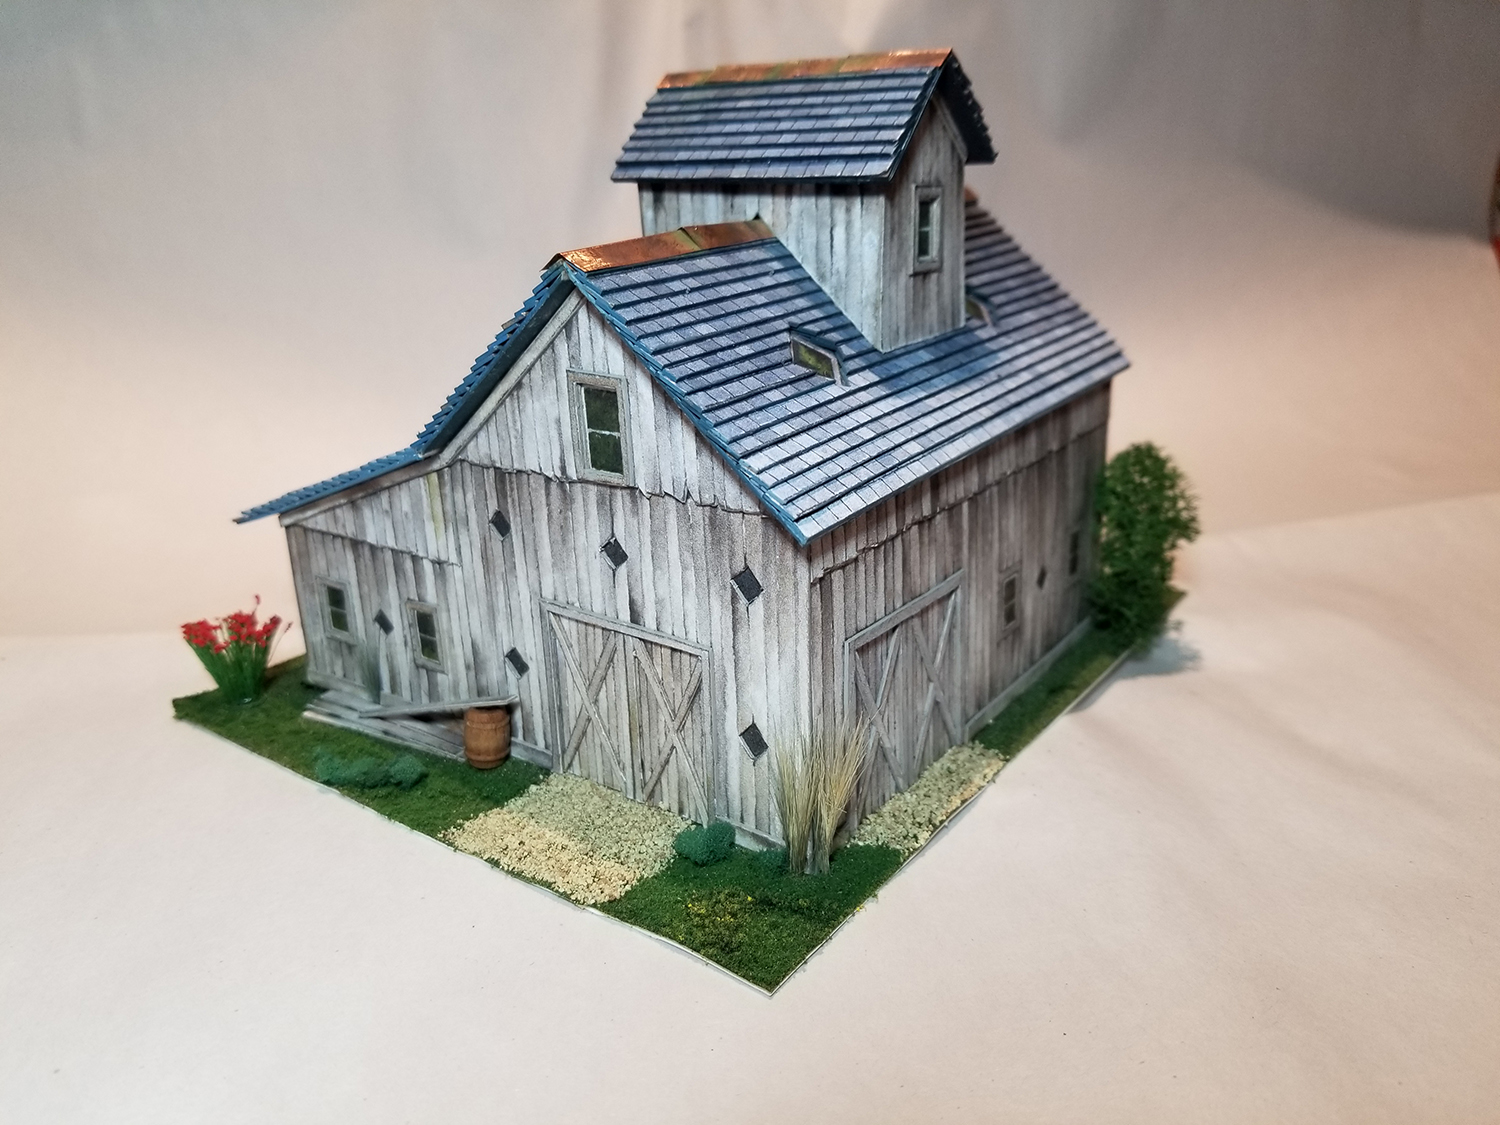
And Charles has built a barn – straight from the print (but look at it, it’s a work of art).
Both of them are free with the Beginner’s Guide.
I wanted to have a sale just to say thank you to each and everyone of you.
I had some turbulent times with blog over the years (particularly last year), but thanks to you lovely lot, I’ve muddled through.
So thank you. Really.
Now on to John and his wonderful scratch build:
“For those who have never built one of Al’s wonderful paper print out kits, may I not so subtly suggest a small investment.
I have been a model railroader over 50 years now and nothing has helped me improve my modeling skills like Al’s print out kits have.
It was about 8 years ago that I built my first one of his kits. I was building a small layout and I needed an enginehouse. There were not any commercial kits that fit the space I had available.
As luck would have it, I fell across Al’s site and he was having one of his “Silly Sales”. I made a purchase of his engine sheds… And one fit my space with only a small adjustment in length.
My first effort was a disaster but I reprinted the model (you can print as often as you want) and my second effort was a success – one that Al shared on his site.
Since that point I do not believe I have built any plastic kits. Recently I decided to return to that first build and see what I could do with the same kit again.
Here are photos of my first effort and my most recent one.

Al seems to get complaints that his kits do not come with instructions. There may be some very good reasons for that. Way back in the 1950’s there were few model kits available. Every layout seemed to use the same kits in the same way.
There were a few exceptions, individuals who saw the kits as a collection of parts. And an opportunity to build their own unique structures. It became a bit of a joke that when I would build the models that I built from Al’s kits. I would always tease him by saying that I followed the instructions to the letter. One of these days I may actually build one of his kits as he designed it…
As to myself… What I do, anyone can. I do not make videos because I have a face for radio and a voice for silent movies.
My fingers are about the size of breakfast sausages and just about as dexterous. A lack of fine motor skills plagued me for years in both music and sports. If I were to choose an actor to play me in a movie of my life it would be Buster Keaton.
All that said… The best modeling tip that I ever got came from the inscription in a calculus text by Silvanious P Thompson:
“What one fool can do, so can another.” Ancient Simian Proverb..
Here is a bit of a “How To” on how I built my latest shed.
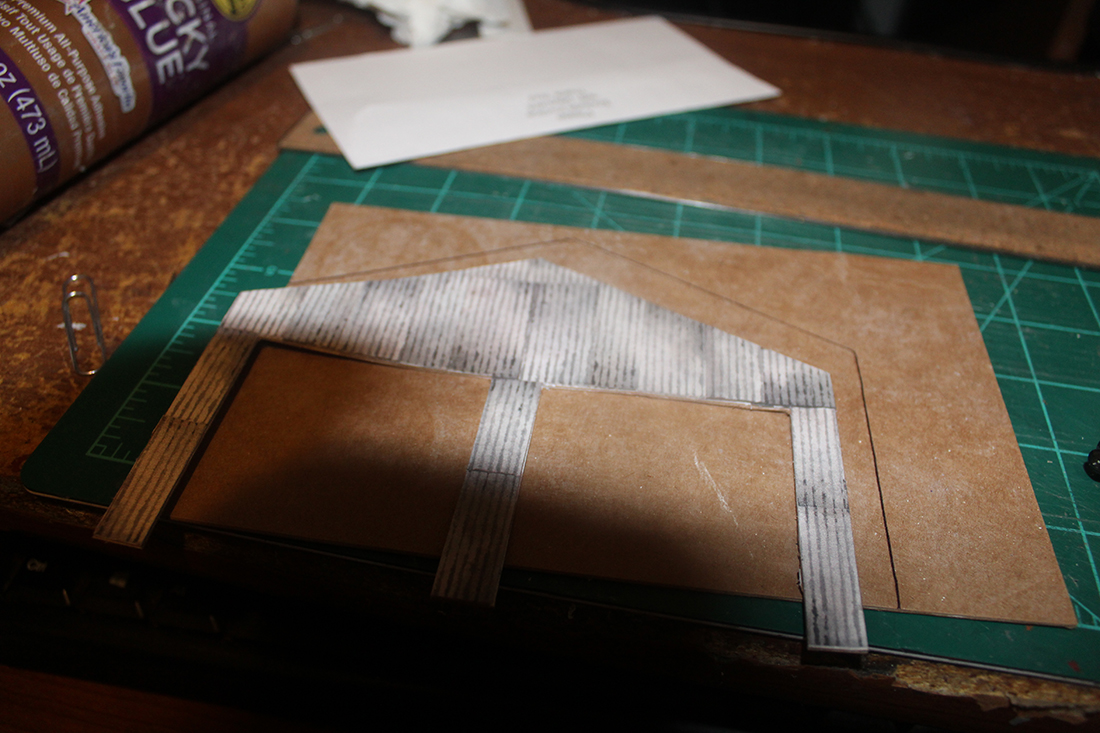
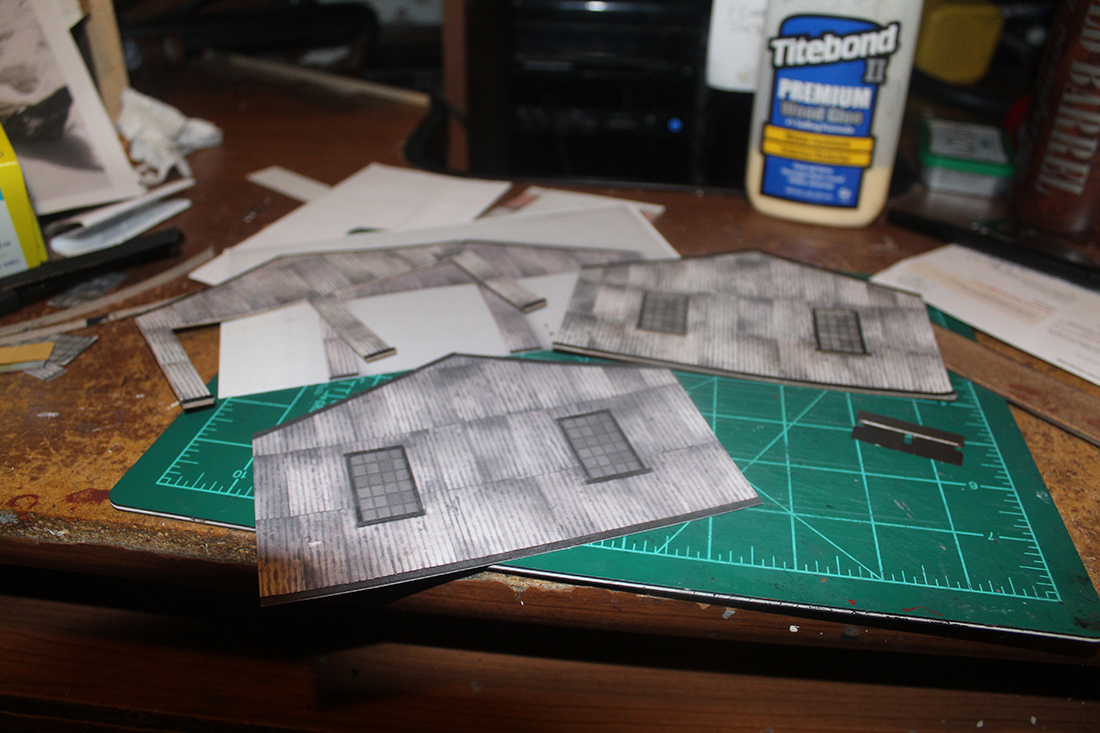
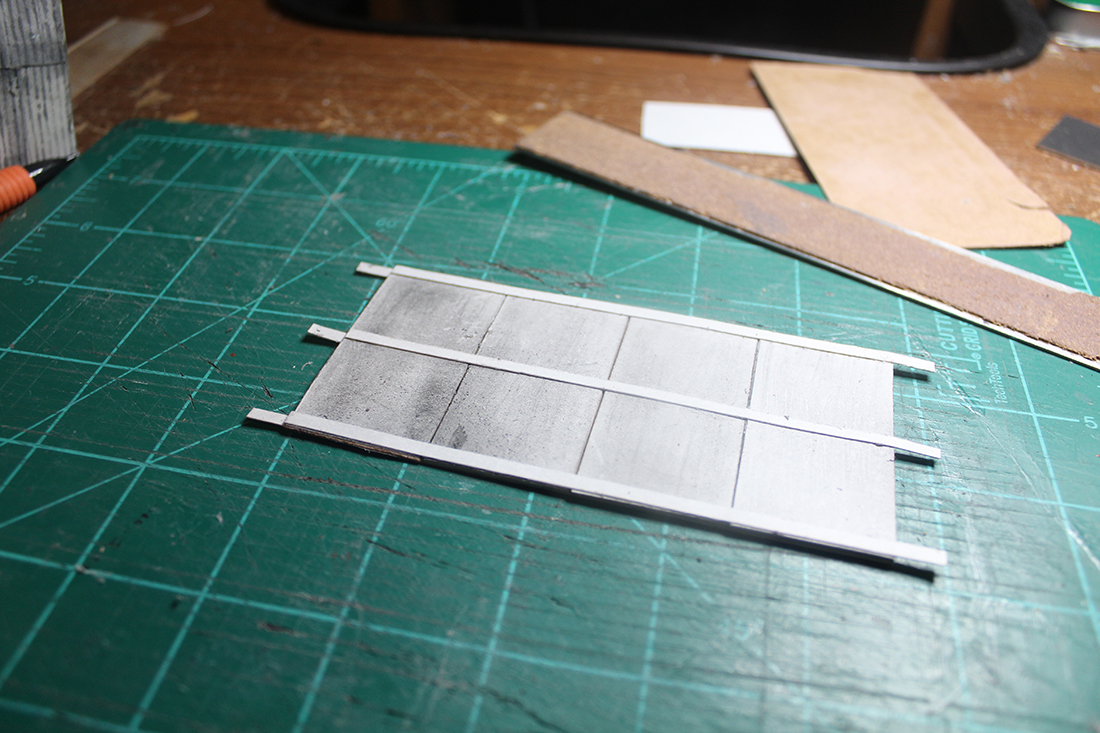
I began with the front wall. The kit is for a one road shed but I wanted a two track shed.
A little creativity with a razor blade and a straight edge and I had by new wall.
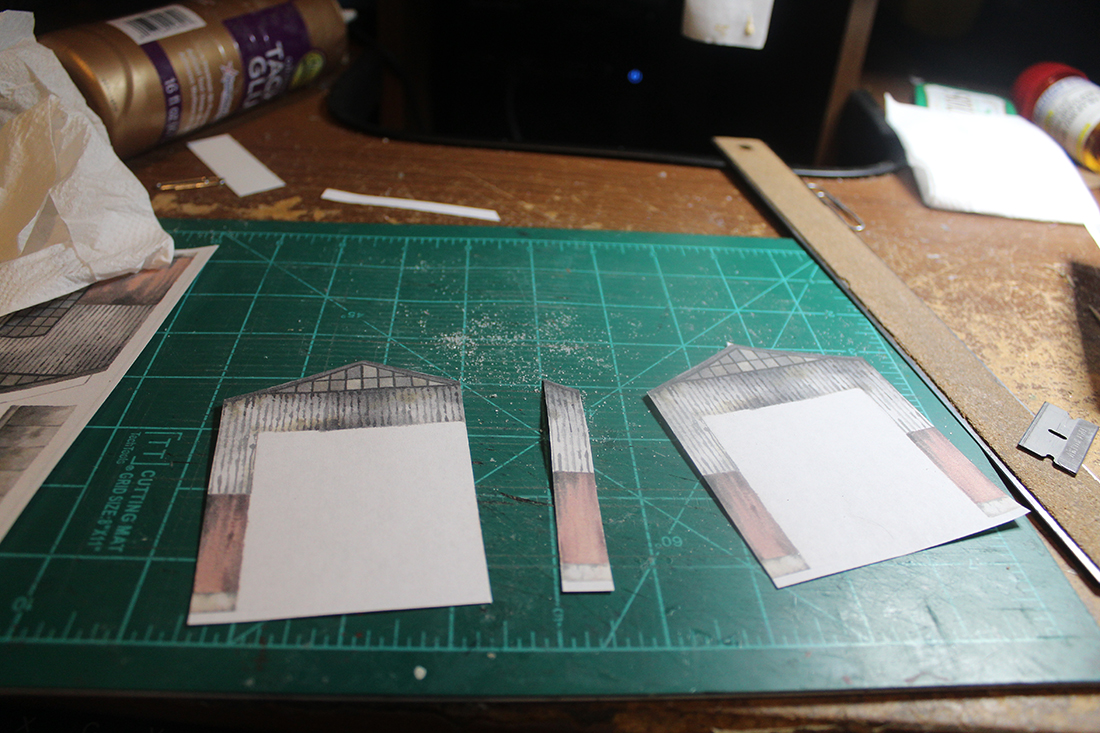
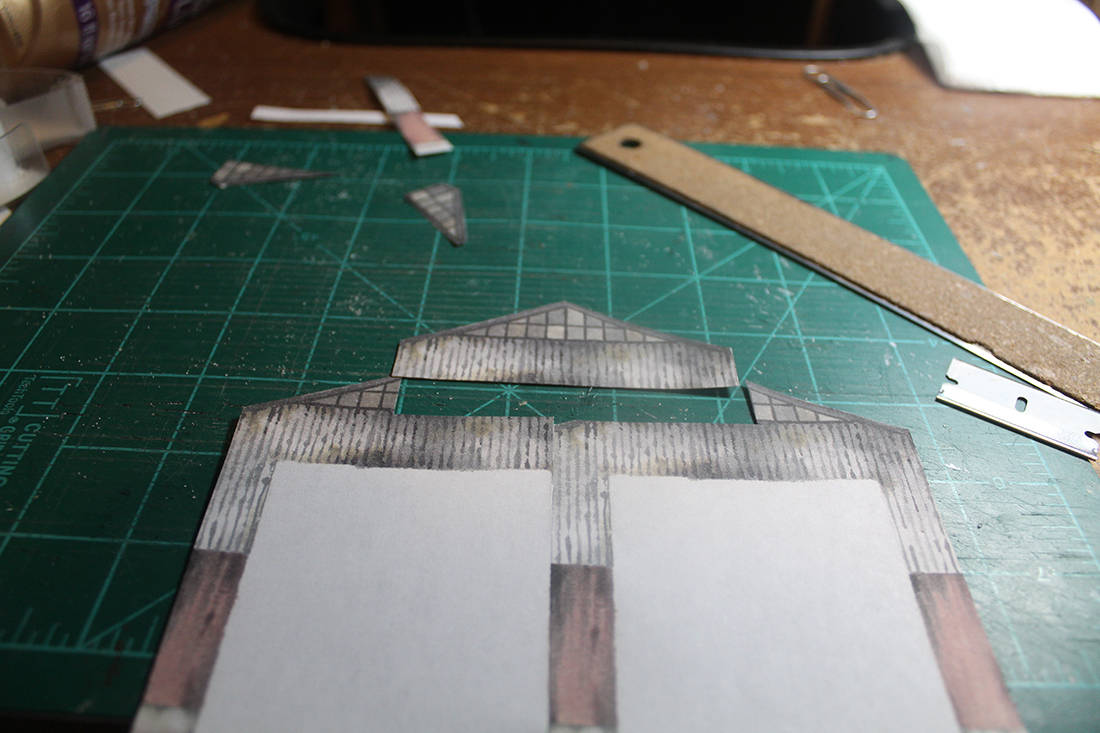
Once I had the basics of the front wall formed, I needed to clean things up. As part of the process I would remove some of the more British design elements and give it more of an American industrial look.
Engine houses like this one were common in the later part of the steam era. This was especially true in the post World War 1 era.
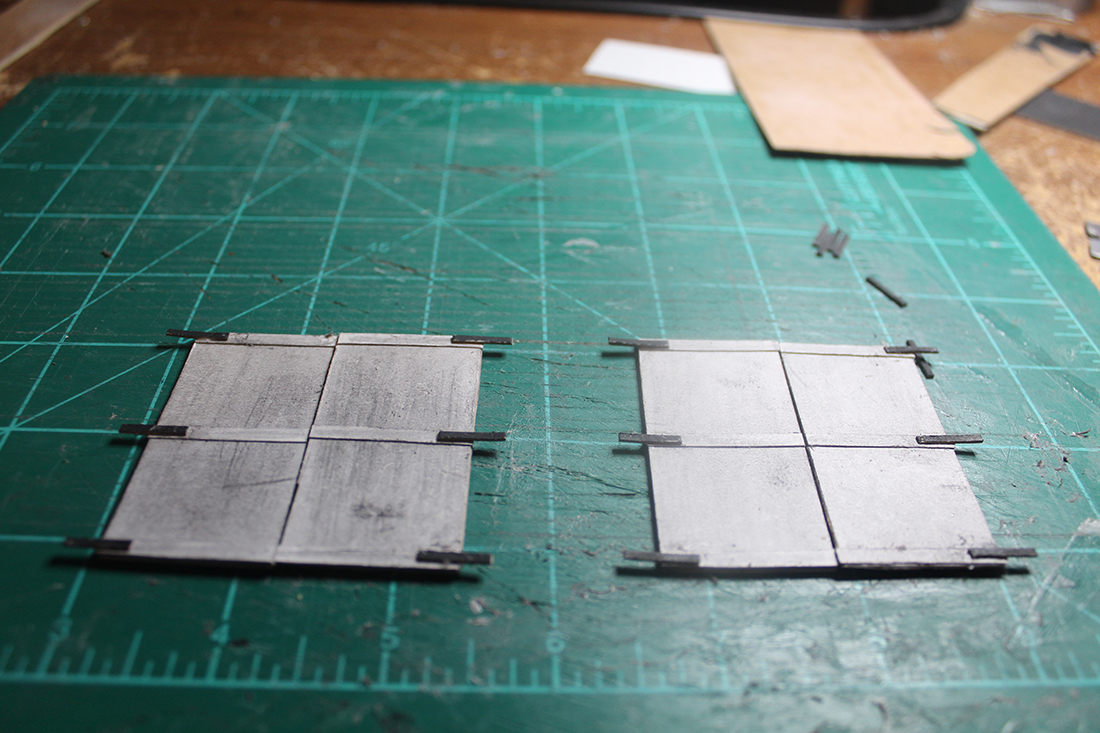
To clean up the wall I cut the pieces that I wanted from a couple of prints. I only wanted the “corrugated metal” parts. And I wanted to cut them to simulate real sheets of corrugated iron.
Layering also gives more dimension to the model. It helps get rid of that flat printed look.
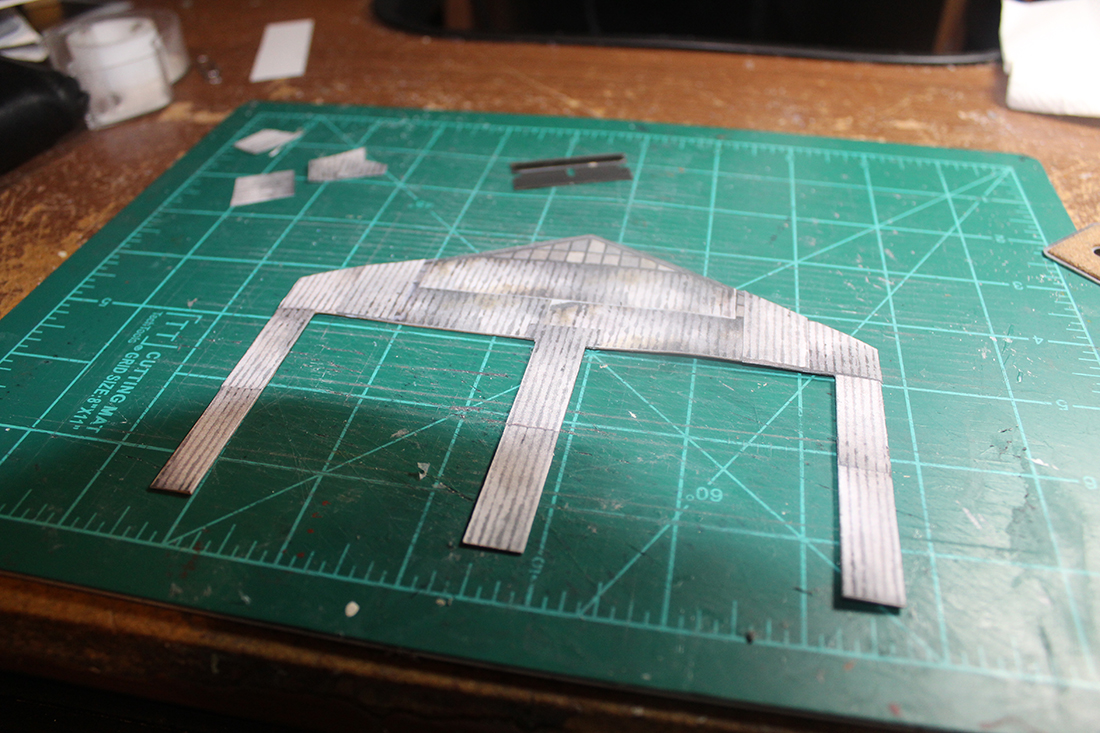
With the front wall basically done, it is time to progress to the back wall. I used the completed front was to make a pattern for the back one. Then I made the necessary “adjustments” to the kit walls.
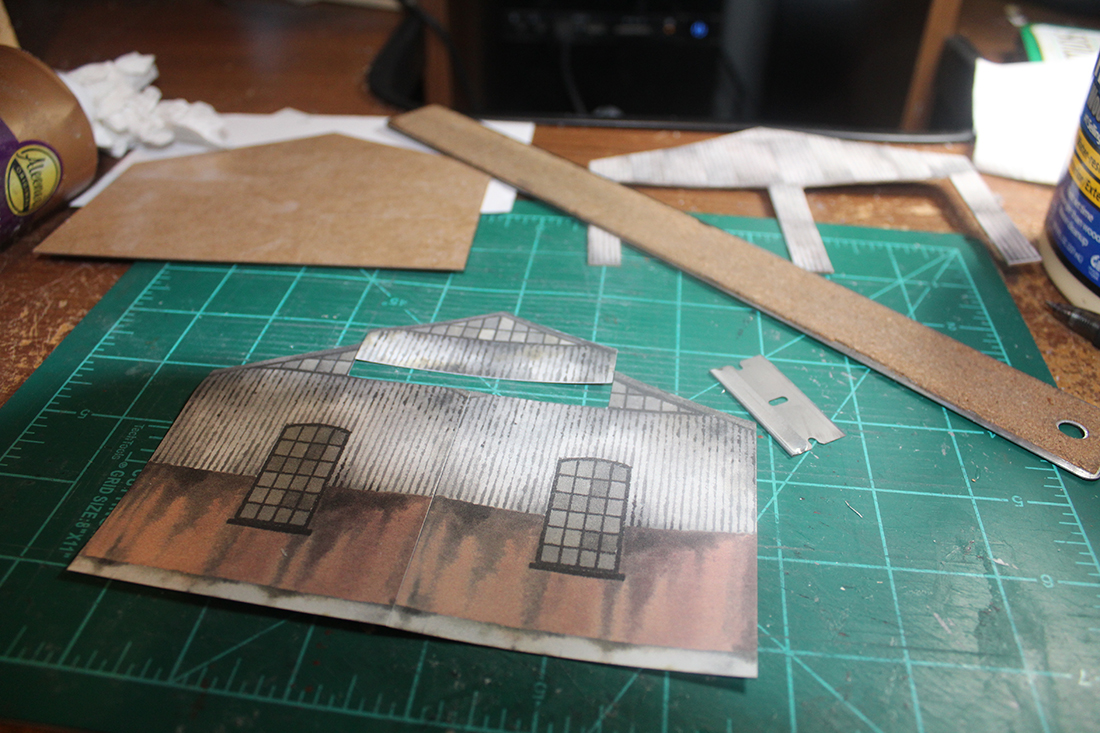
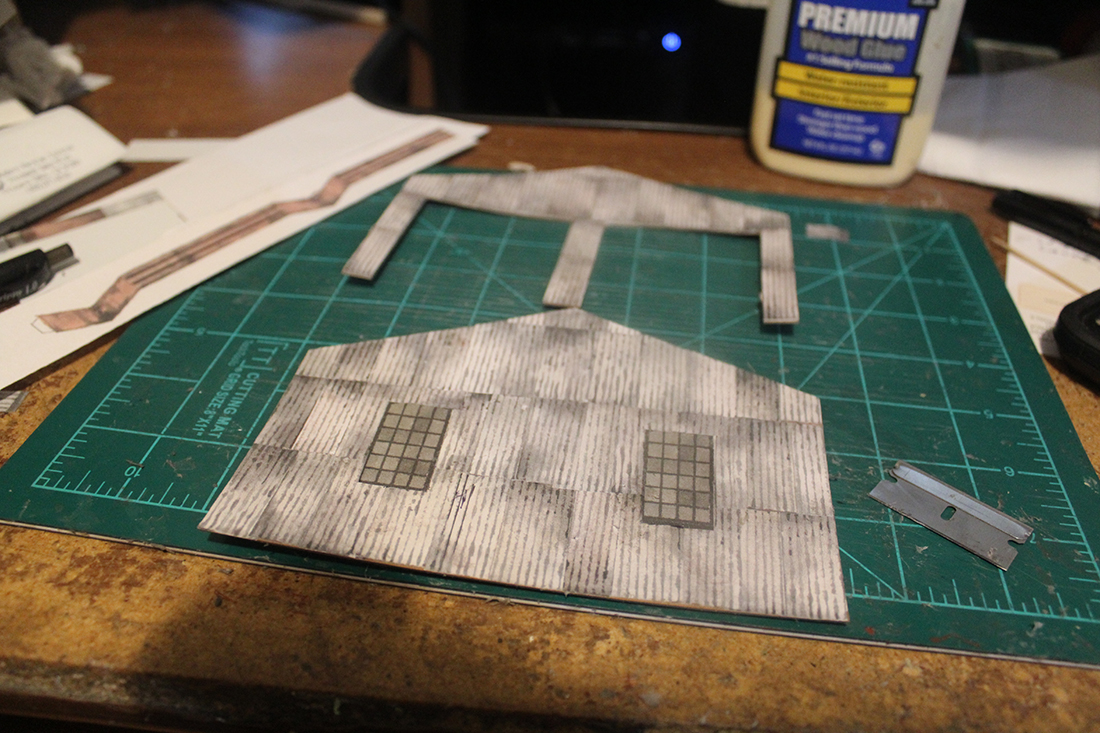
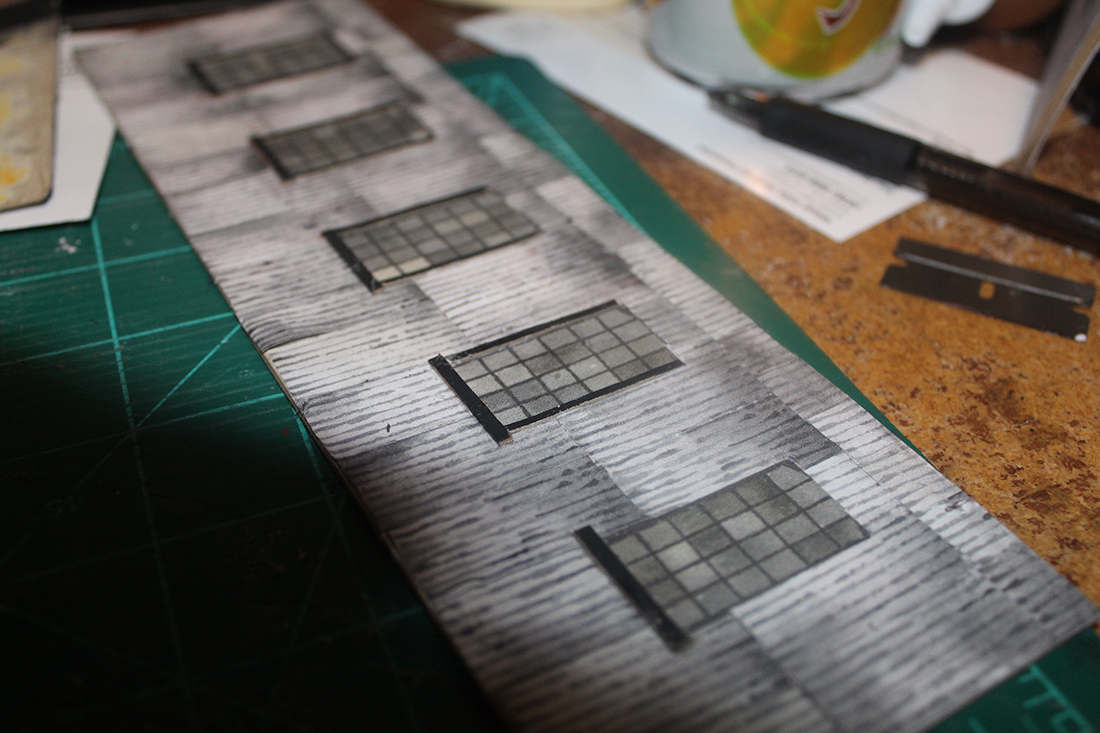
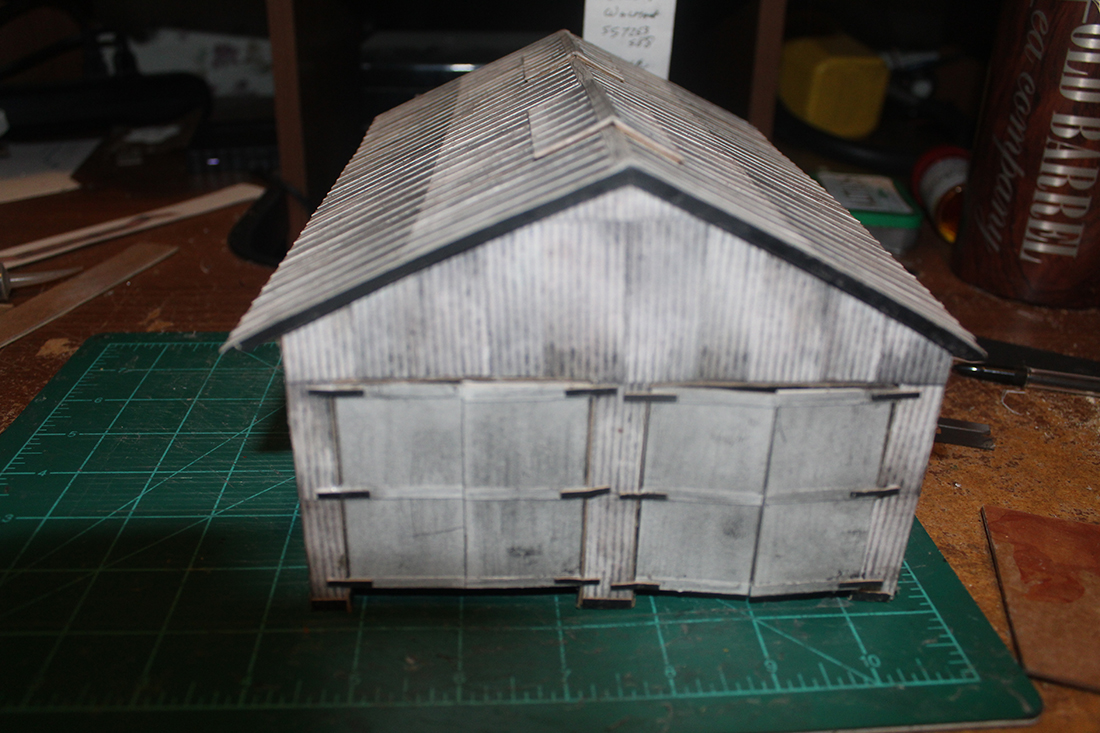
As I shingled the walls with my little corrugated pieces, I squared the windows as well.
American windows do not generally have the arched top that British and European windows seem to have. We like rectangular pieces of glass… Easier to cut and easier
to replace!
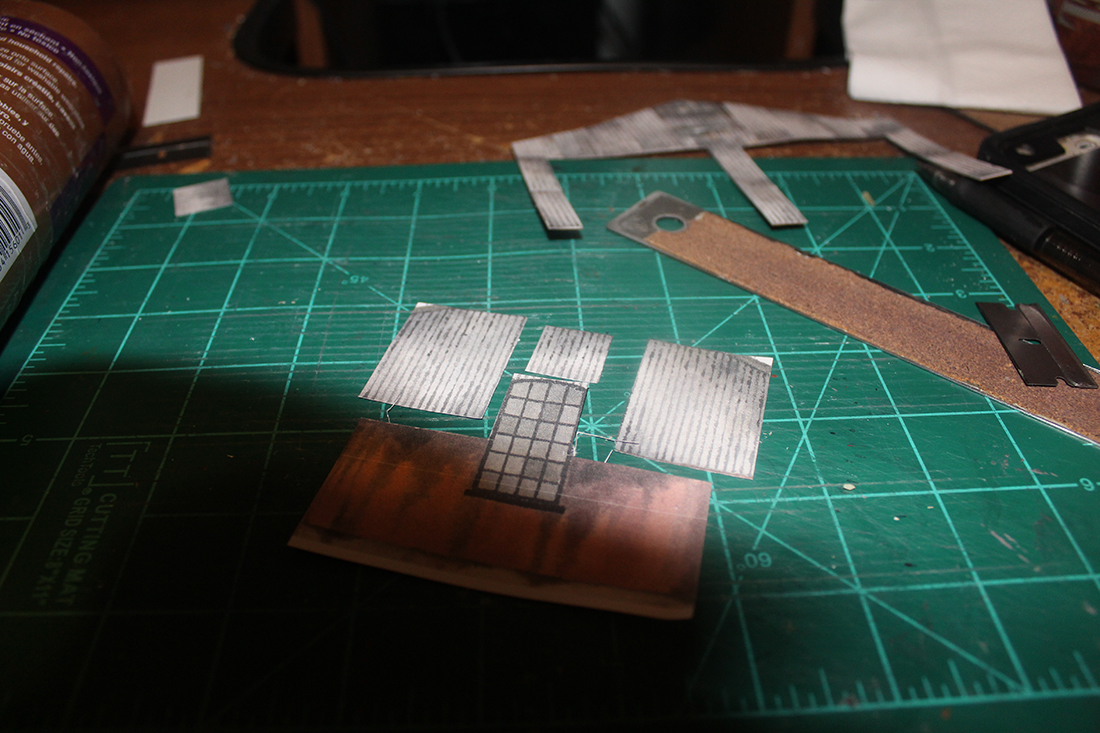
I also “framed” the windows to clean them up. This took a bit of “scratchbuilding”.
I used card that I painted to make the frames… In the past I would have cut these out using the kit parts… Great if you use an X-acto knife or scalpel… Much more challenging
when using razor blade and straight edge.
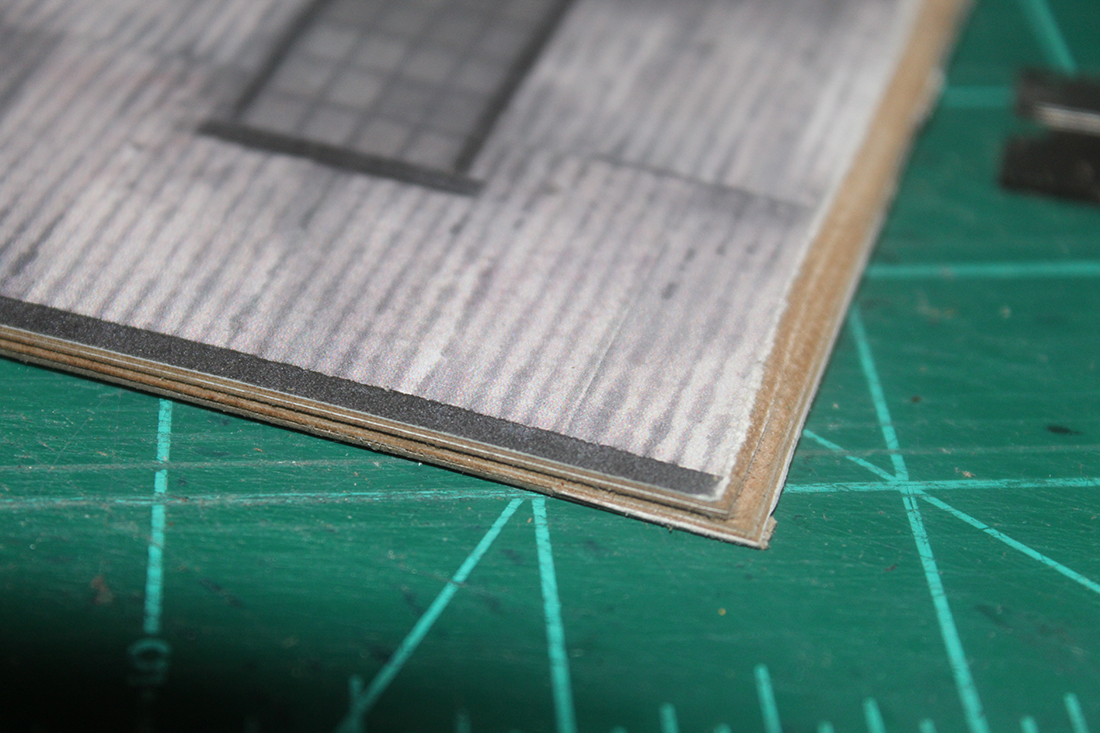
A quick note here on glues… I use Spray 77 to glue the print to the card that I salvage from soda can boxes or other food packaging. I use Aleene’s Tacky Glue for the rest of
the assembly.
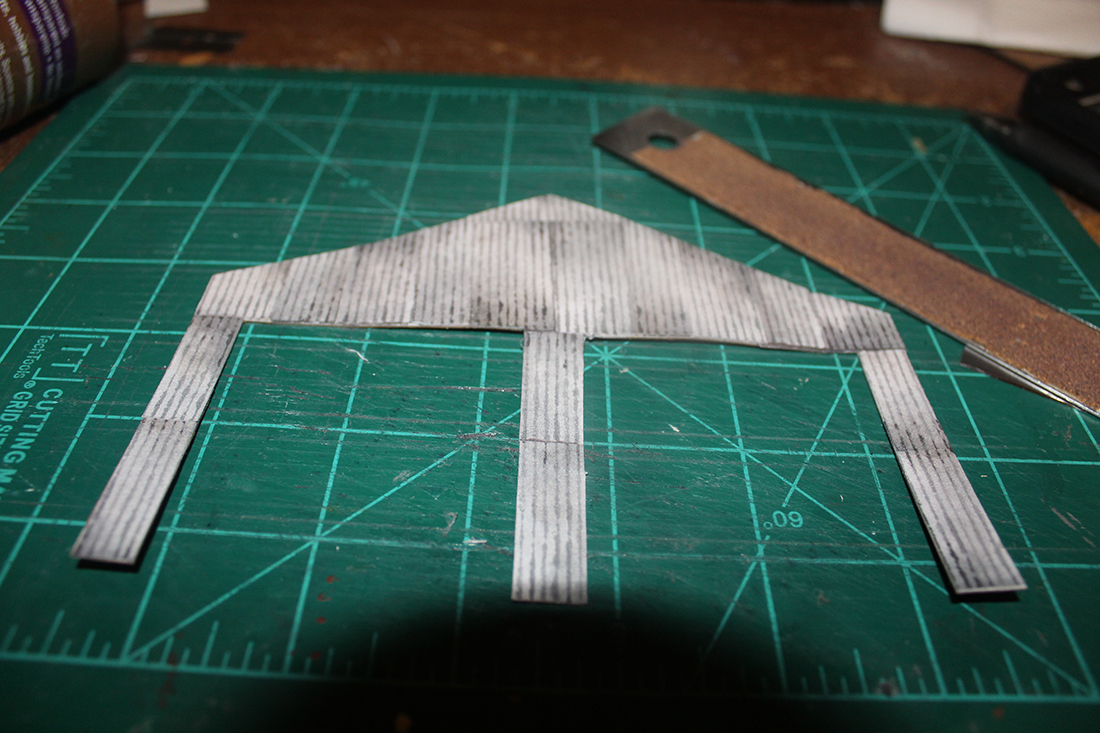
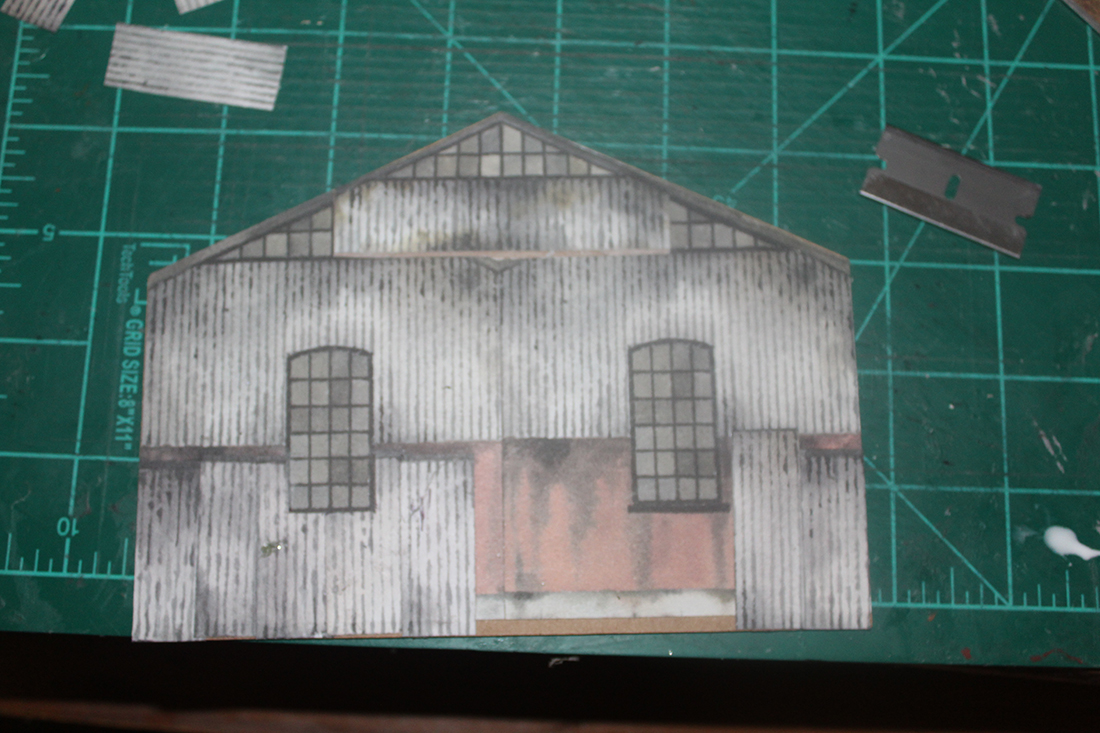
The side walls were pretty easy. I did not have to do any radical adjustments.
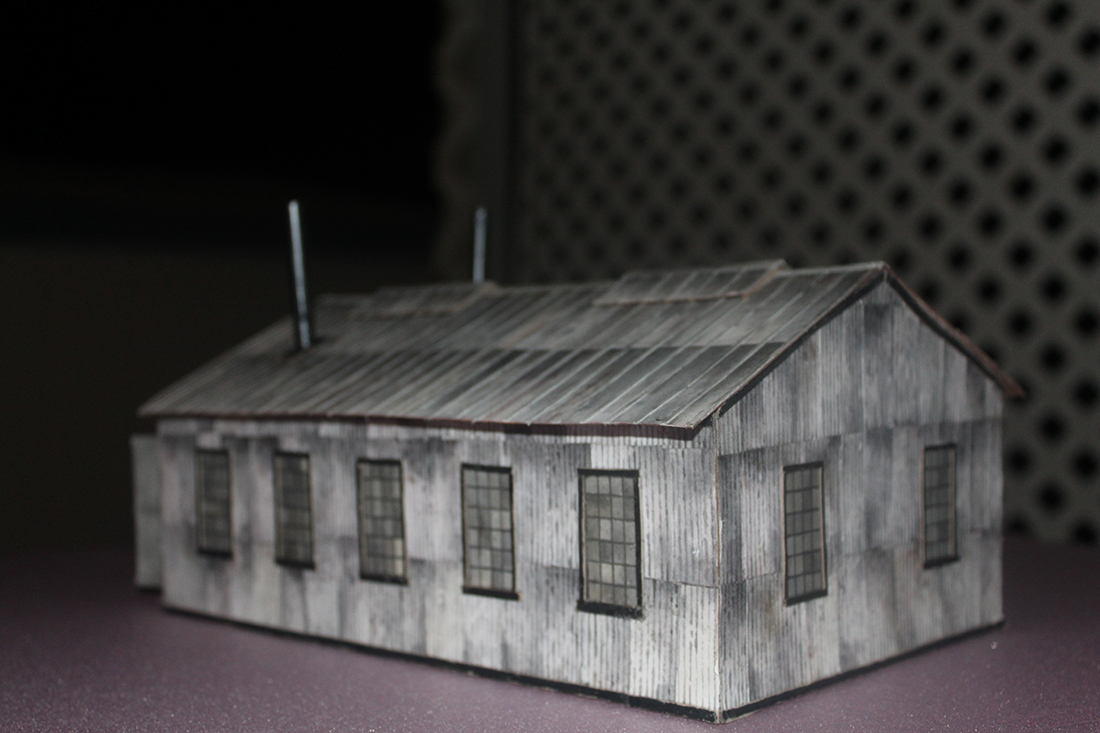
As I built the side walls I shingled them as I did the ends. This process kept a consistent look and squared the windows as well. Again I framed the windows with the scratchbuilt parts for framing. Single thickness of card for the sides and top of the window frame, double thickness for the bottom of the frame.
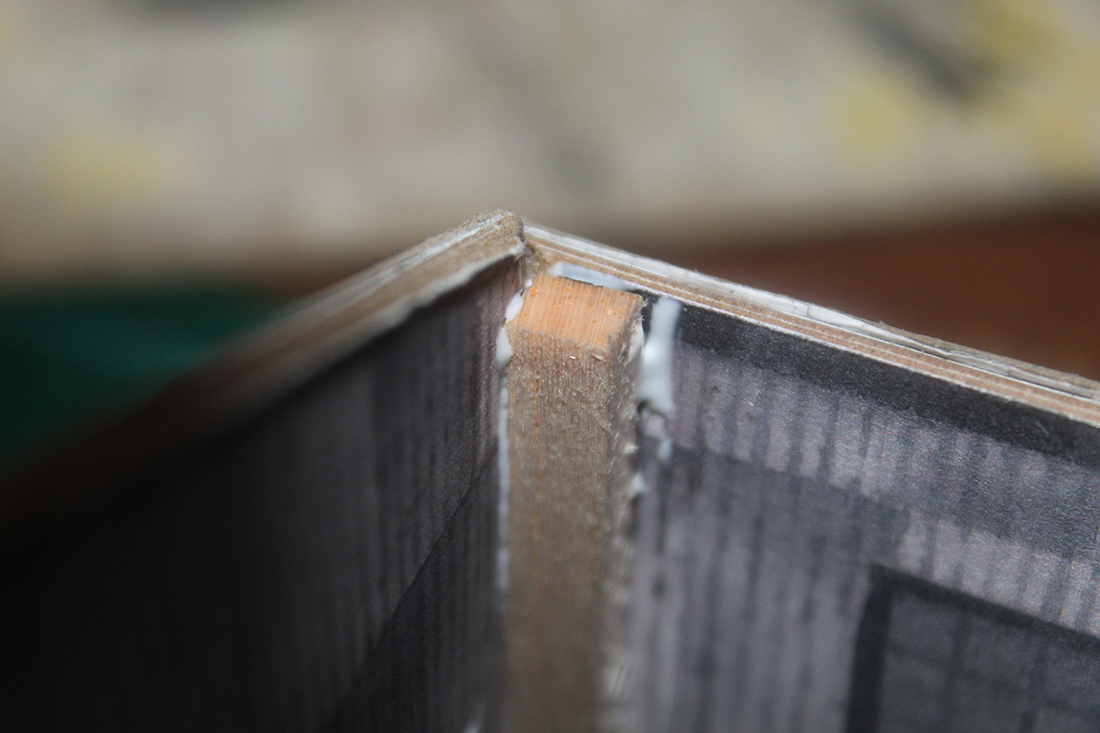
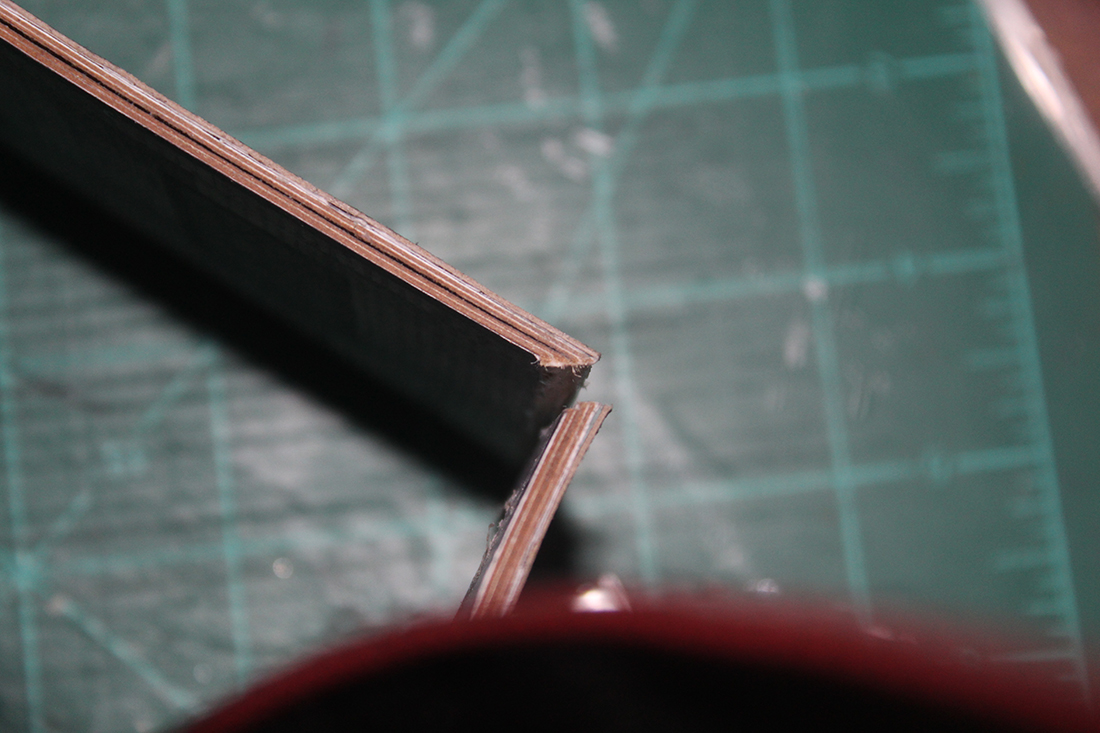
Once all parts were complete, I cut and sanded the corners to something that approximated a 45 degree angle to make for a clean assembly.
I also added a square of basswood to strengthen and square the corner. I would later paint these square stiffeners a light grey to help hide them.
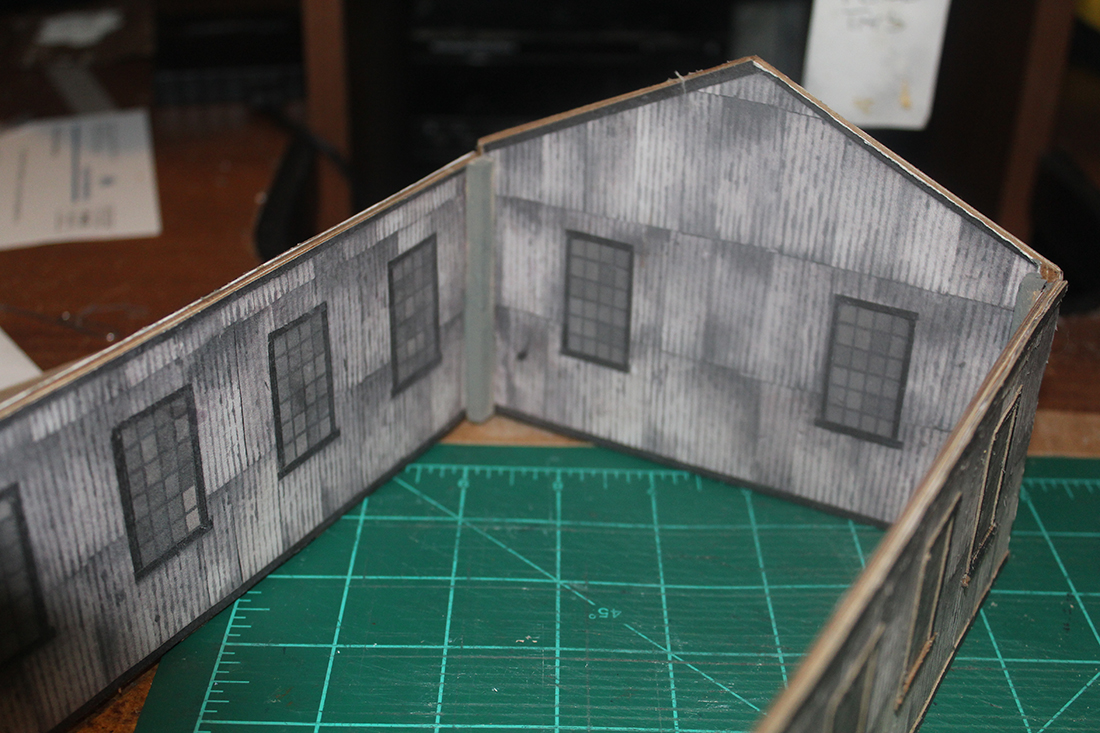
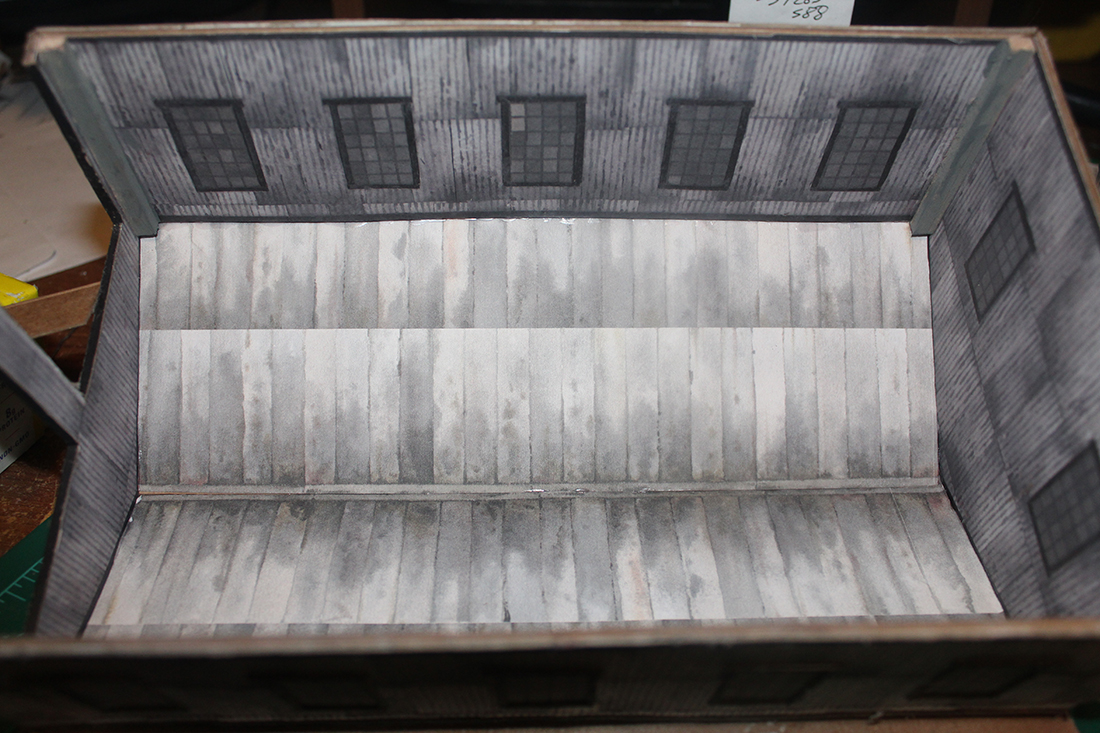
Sharp viewers may note that I also made copies of my walls when I completed them and glued the copies to the inside of the walls to give an interior.
When I built my first model from Al’s kit, the same kit that I used here, I noted the plain cardboard through the large open door of the shed. “No Bueno” (No Good). Seeing the cardboard destroyed the illusion. An interior was essential. And I have added interiors to more and more of my models.
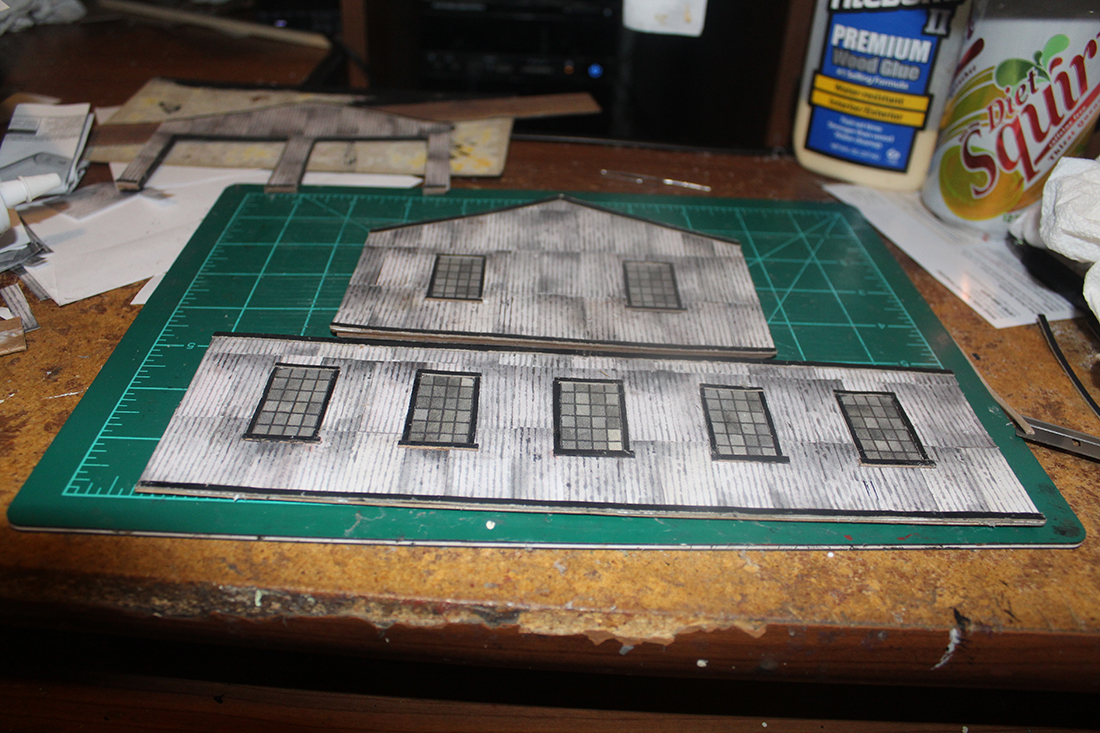
With the basic structure assembled, I added an inner roof.
This inner roof stabilized the structure and allowed a thinner roof on top. The inner roof is two thicknesses of card and the visible roof is only one thickness.
While this is an engine shed… Look closely at the back of the shed. I see an industrial building lacking a shipping door!
The beauty of Al’s kits and the reason they lack instructions is their versatility!
The engine shed kits make great factory and industrial buildings as well.

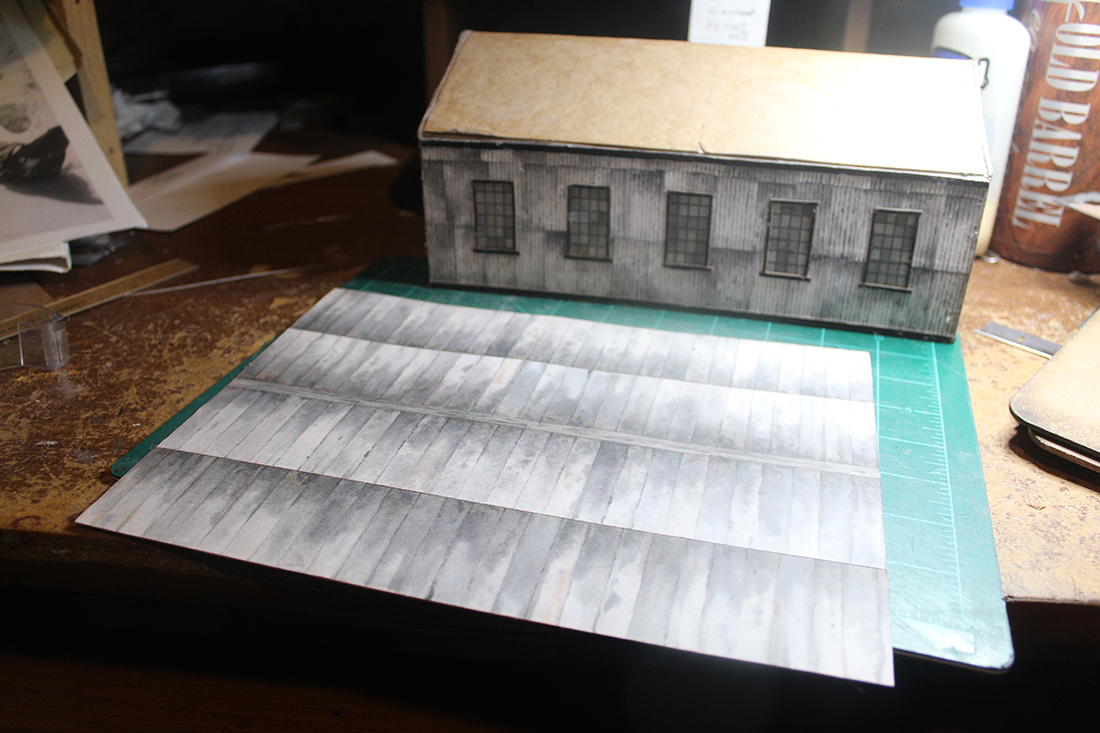
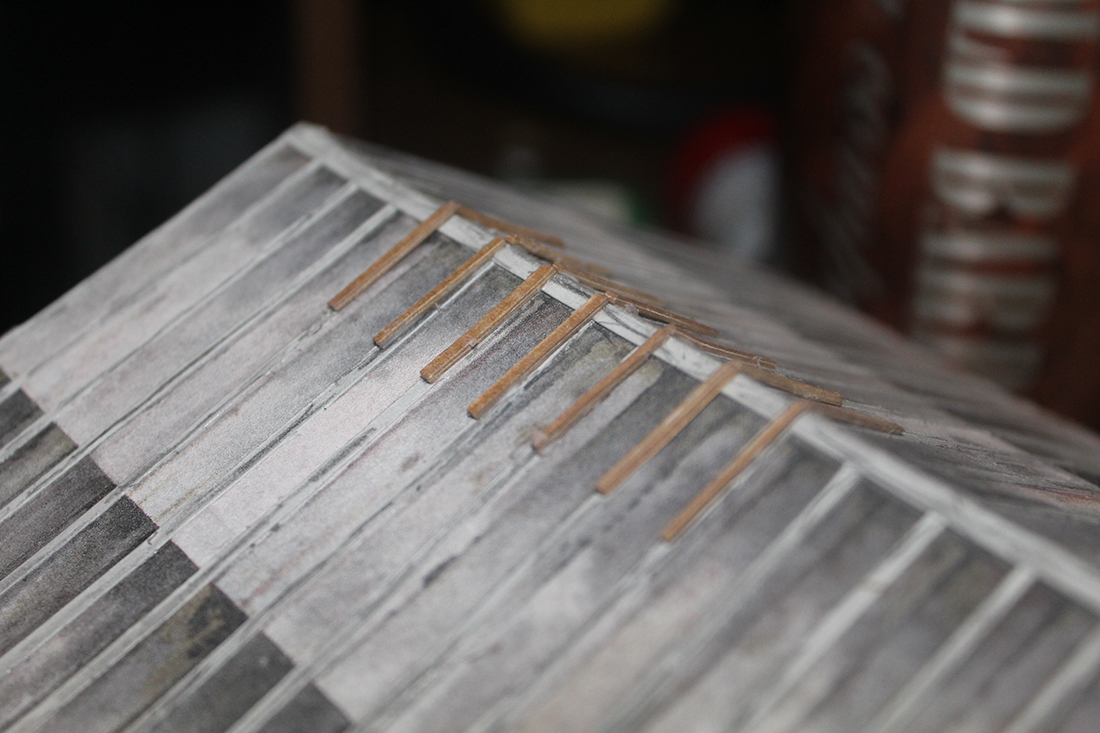
One challenge with the print out models is that they can look “flat”. The more texture that you can work in, the more detail that you add, the more the model “breaks” the wall and creates the illusion of reality.
On this model I began by adding ribs to the roof. These were cut from some grey card stock that I had and then I weathered the card with a soft pencil… rubbing the graphite in with my
fingers.
The addition of roof vents that followed the pattern added even more visual texture.

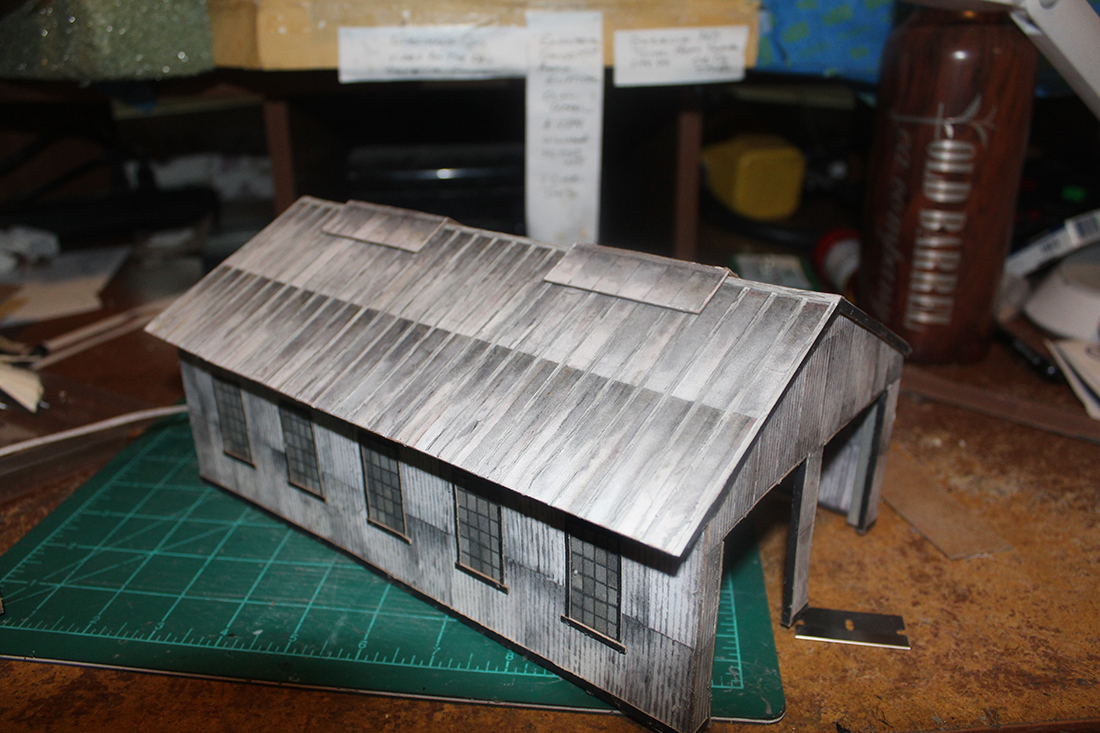
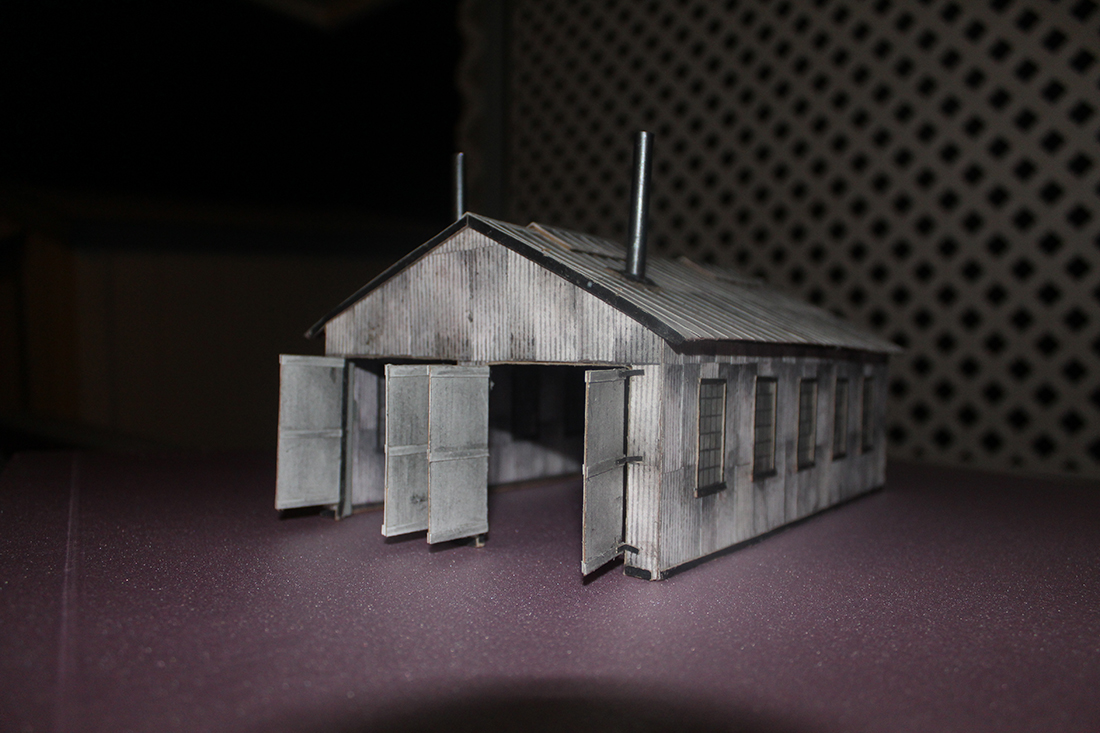
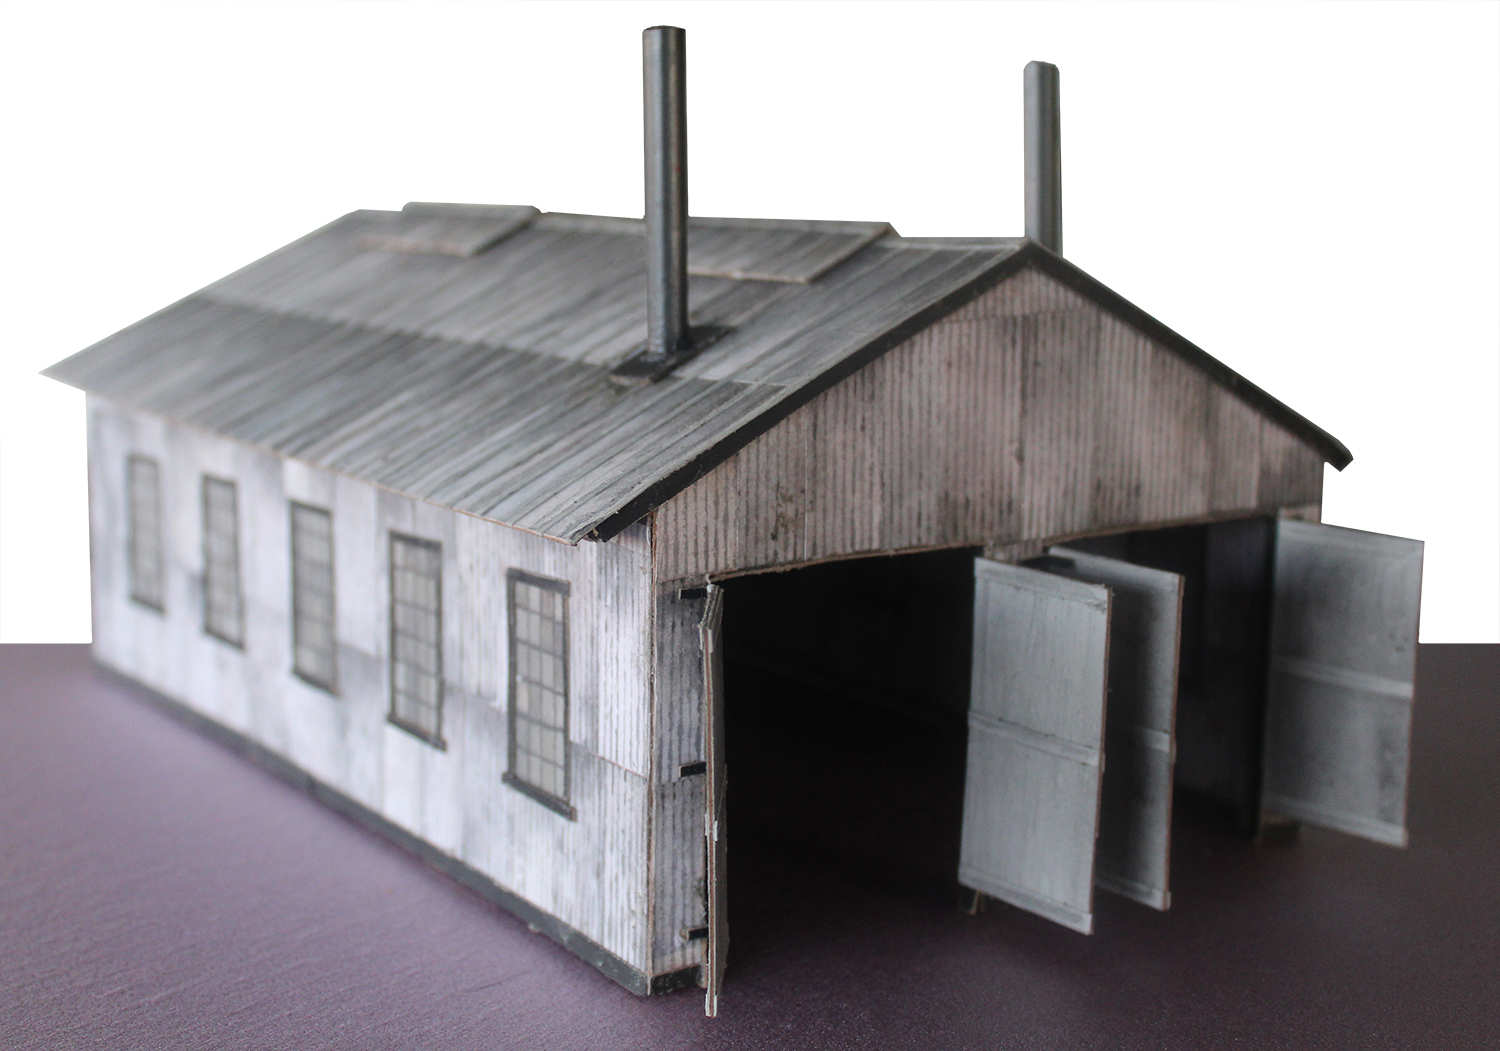
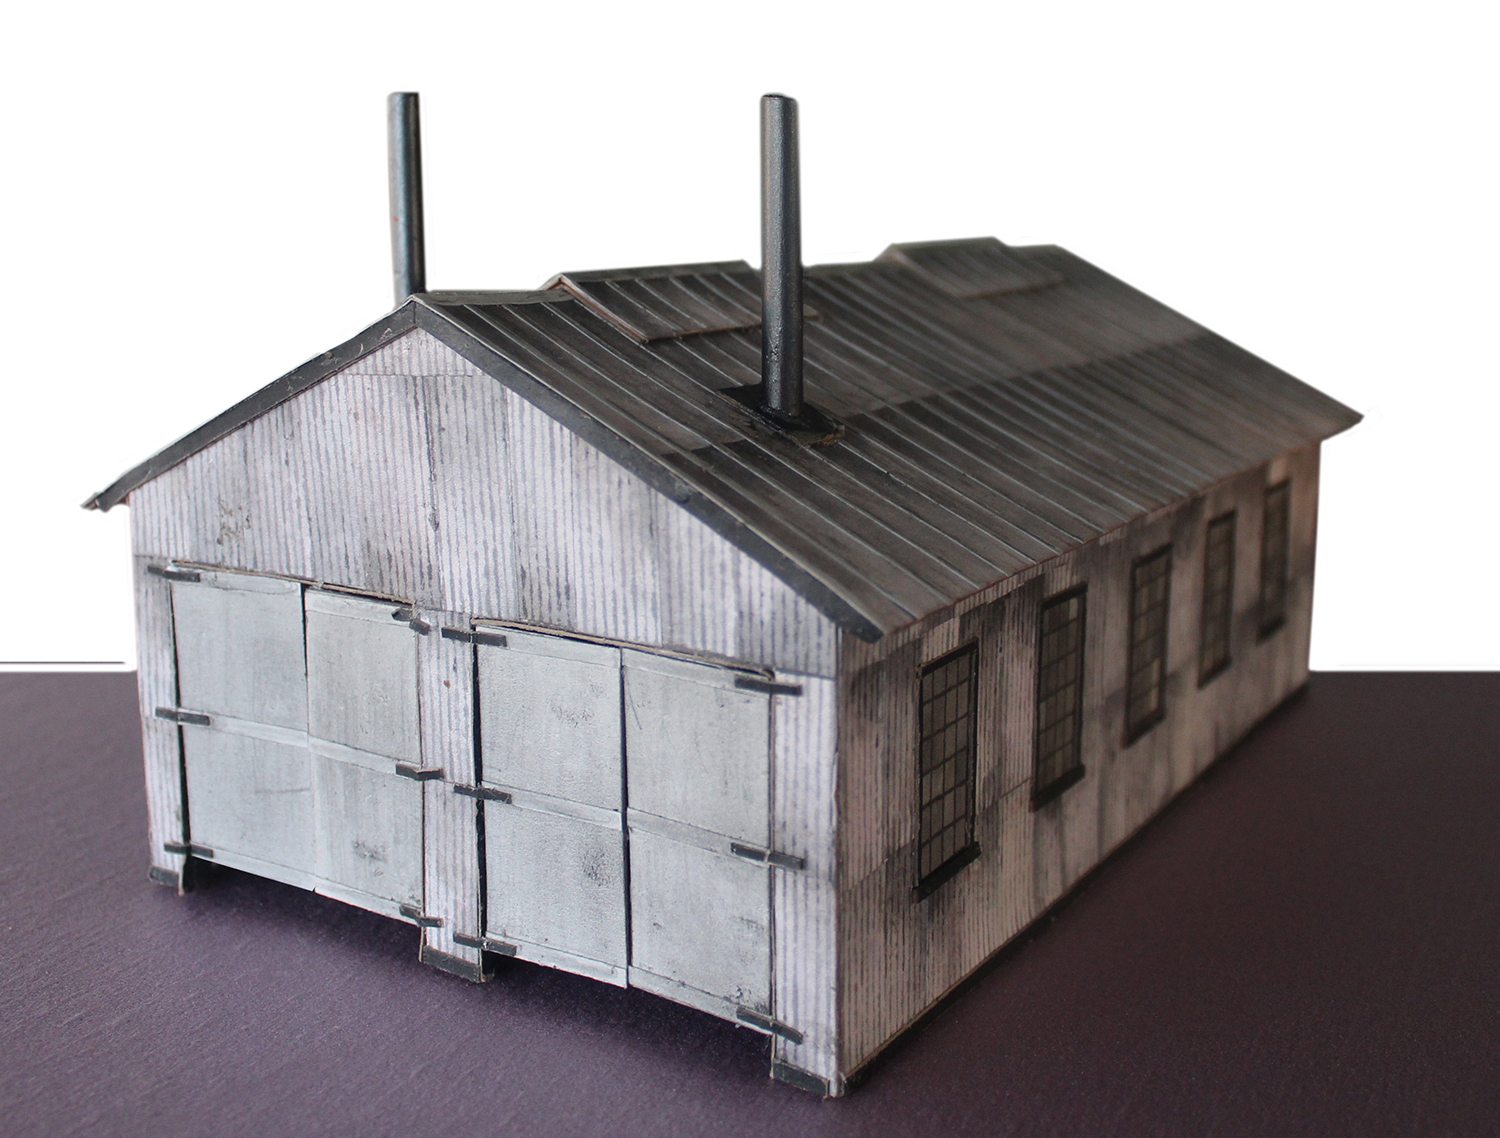
One clear feature of American engine sheds is that they have doors.
Many reasons for this feature. My doors were made simply. Grey card glued to each side of a single thickness of my food box card.
The soft pencil was again used to “weather” the door and give visual interest. The four doors were done at the same time.
A bit of black panted card from the previous detailing (the windows) made the hinges. I have used card for hinges before where the doors are not likely to be moved. Often. It works.#
I do have some new ideas for hinges and windows that I cannot wait to try… But those ideas are things that I will need to practice before I incorporate them into a model.
I am also looking for a way to corrugate the card for the sheets of “metal” to add even more texture to a model like this one.
“Life is a journey, not a destination.” Each completed project gives a new base to move forward from. A new foundation of knowledge and skill to build on.

With the doors added, this shed is perfect for any American railroad using diesels.
From the 1950’s until the early 2000’s. The use of these sheds has seemed to decline over the past two decades. Buildings are a maintenance item that eats money. They now seem to be used where no alternative exists.
My goal was a steam era building. For a steam era building I need smoke stacks. I made my stacks from a painted soda straw.
Structures do not need to be expensive. I built this model over about a week. An hour or two each night. It has been a lot of entertainment, a lot of pleasure, all at a very small level of capital investment.
“Al,
Great project and a lot of fun.
The barn is on it’s way to the Railroad Club.
Charles”
(Click to enlarge pics).
A huge thanks to John and Charles.
What I like most about the print out scenery is how one comment in particular always surfaces: they are fun to build!
They created at HO scale. For N scale reduce the print size to 54%.
If you fancy trying your hand at one of the models, now is the time to have a go.
The engine shed above, and the barn, are free with the Beginner’s Guide.
Course, I’m biased, but the Beginner’s Guide on its own is a steal. But with these free buildings it really is a silly deal.
And best of all, with the buildings, you have enough walls, windows and textures to have a lot of fun scratch building too.
You can seem more of the printable buildings here.
That’s all for today, folks.
Please do keep ’em coming.
Best
Al
PS One last thing – please do leave a comment below if you’ve made any of the print out models before, or you enjoyed the Beginner’s Guide. I’d really love to hear what you think.
PPS Yes, the prints can be enlarged to any scale, but anything bigger than HO and you’ll need to take them to a print/office shop, as a normal home printer isn’t big enough.

excellent “show me” now I got it !!! your “step by step” makes any future “construction” very straightforward…. thanks a bunch.
Greetings from Sonoma Valley, CA.
The engine shed from the print out buildings of Al’s is absolutely fantastic. Great job there John. I had to look very closely to see that it was a print out. A job well done.
From a scratch builder Brian – the HOn3 guy Knysna RSA 🇿🇦
Al
I am in the process of building buildings for my O scale layout. I am only using your printouts and John’s ideas. I will be sending in a few pictures when I have finished the building. I have twelve finished and not even half way done yet. The O scale extension will not have any plasticville buildings.
Coffee cup sleeves make nice corrugated material.
Some additional notes…
Over the past few years I have built fewer and fewer plastic kits.
There are several reasons this has become the case…
My first print-out was because I could not find a plastic kit that I could modify to fit the space that I had available on my layout. The layout had been built for exhibition at a local hobby shop When I chose Al’s engine house, there was much trepidation… But funds were few and the price was right so I took the plunge.
My fears were based on a model my father had made in 1954 (I still have that model). My first build was “underwhelming” BUT Al had a video and I watched the video… A couple of small changes and I had my enginehouse (engine shed).
I also began to get interested in On30 (O scale narrow gauge that runs on HO gauge track) Structure kits are few in O scale and those that exist tend to be expen$$$ive…Al’s print-outs came to the rescue… The more I built, the more skills I developed. I learned to scratch-build from card and other “found” items. I am now working on a new idea I hope to share… An Idea that began with things I learned while building the engine shed that Al featured in today’s post.
Great Idea’s in scratch building and the barn is absolutely awesome. Well done guys!!!
Great job…….. love the weathering.
Gorgeous work!
Nice. The finished structure is truly remarkable and quite realistic. Thanks for sharing.
Jim AZ
Great tutorial John, and so well done. I will make a point on who should star you in a movie. Buster Keaton was very agile and coordinated , just watch him in the silent movie The General. No special effects here, a lot on one take. Sausage fingers not withstanding, your models are “fab”.
.Mn Dan
Excellent tutorial particularly for a novice like myself. It is posts like yours that gives encouragement to get out there and “Just Do It”
Dan Hulitt…
My favorite Buster Keaton movie is “Our Hospitality”
The train sequence is absolutely hilarious…
Just as fun but more contemporary is “The Railrodder”
Keaton late in life but “the Great Stone Face” had not lost one ounce of his talent.
All great info…how about some details on the barn…the roof material and copper ridge cap are just great! Would love to know what you used.
Thanks,
I agree with John, the more of Al’s buildings you constructs, the greater the level of expertise you gain. If you are lucky enough to get one of Al’s sales, you can build an entire city and rural village for a few dollars. The web links and the ‘How To’ videos will show all the steps to create wonderful models from the simple to the sublime and subscriber ideas like these are inspirational. Thank you everyone from Andrew Down Under
John, Great tutorial on building with Al’s printed structures. What glue / cement do you use to laminate the various layers of card stock? I saw some Titebond wood glue in the background of one of the photos. Is that what you use? Thanks for sharing your methods and wisdom with us novices. You may just inspire me to try one of Al’s buildings when I get some card stock to print on.
Charles, Beautiful job on the barn. We’d love to see more photos of it.
Very fine article. I have used similar techniques in the past. Am now starting a model of Pasco Fence Factory based on the memories of a friend of mine.
Problem is that due to COVID19 it is very hard to find scratchbuilding supplies here in the States. The only difference between scratchbuilding and kit assembly in terms of difficulty is that in scratchbuilding you build the kit, then assemble it. True creativity.
An excellent demonstration of what can be achieved using the printed buildings.