John’s been in touch with his inglenook layout:
“As you say, It is all about getting started!
There are some common complaints about this wonderful hobby we share…
1) It is too expensive…
2) No space for a layout
3) No time to build a layout
4) Do not know where to begin.
All four of these common complaints can be answered with a small shunting layout.
On my side of the pond, the common shunting layout is the Timesaver introduced by John Allen in 1971.
He had built it many years before and it was very popular with his operating crew.
Some here in the states believe that the timesaver may be the most copied and adapted layout design.
Funny thing that… Alan Wright dreamed up Inglenook Sidings on your side of the pond about the same time as the Timesaver had been introduced… Actually Inglenook Sidings was an operating innovation to a plan that had hit American shores about 1934 BUT was also found in A. R. Walkely’s “Suitcase layout ” of 1926!
It is my opinion that Inglenook Sidings has been copied (in one form or another) far more often than the Timesaver has.
My current layout project is my ninth or tenth “Inglenook” copy.
I built my first Inglenook as a folding layout that I could take to my local hobby shop for operations on “exhibition day” that they had each month. That one was six feet long in its open form and it folded into a space that was only 8 inches wide and 36 inches long. I ended up giving it to a teacher for use in his classroom.
My second was my take on Simplex by Chris Ellis who used to be the editor of Scale Model Trains and later Model Trains International. (I have now built several copies of Simplex to try different ideas.)
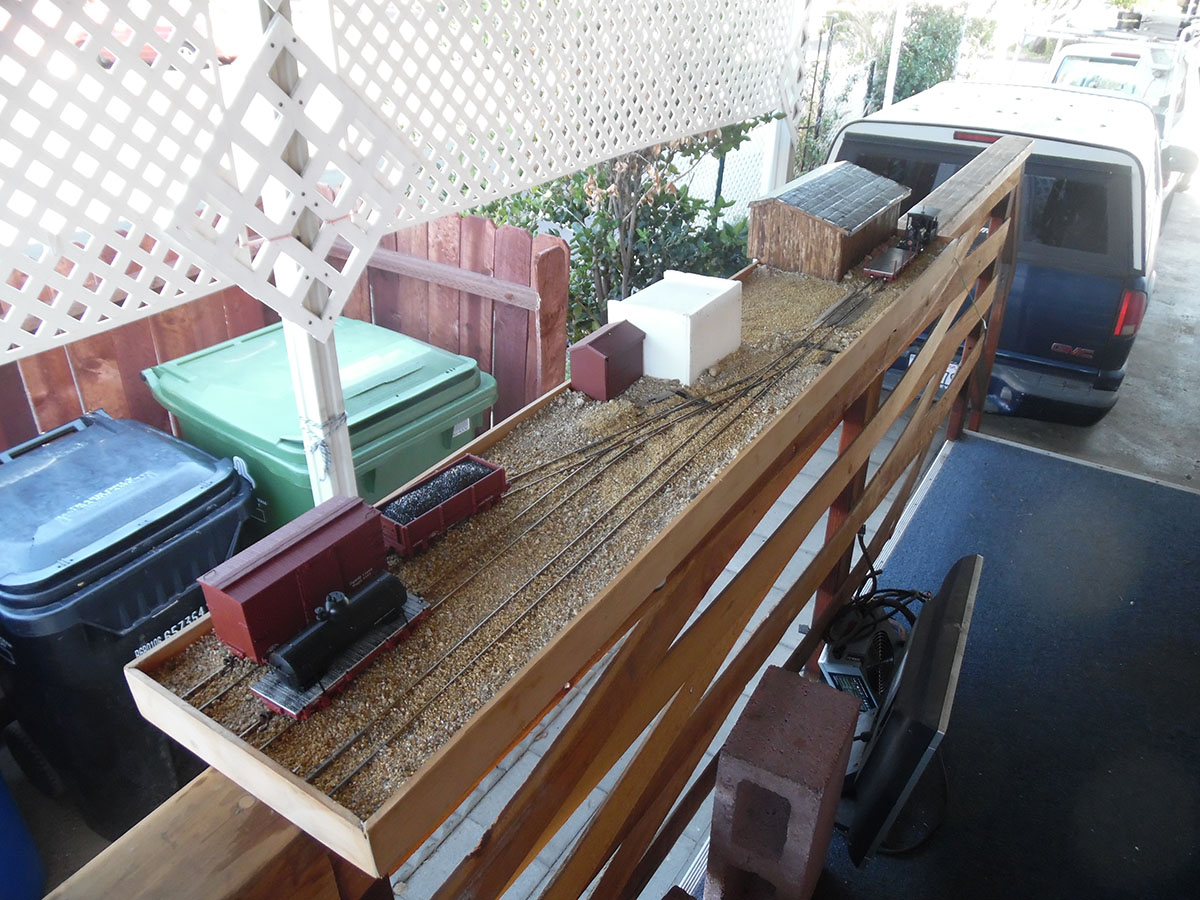
The current project is yet another Inglenook — An Inglenook built specifically to be part of a sectional layout that will be easy to take to “model train shows” — Exhibitions — and show what can be done in a small space.
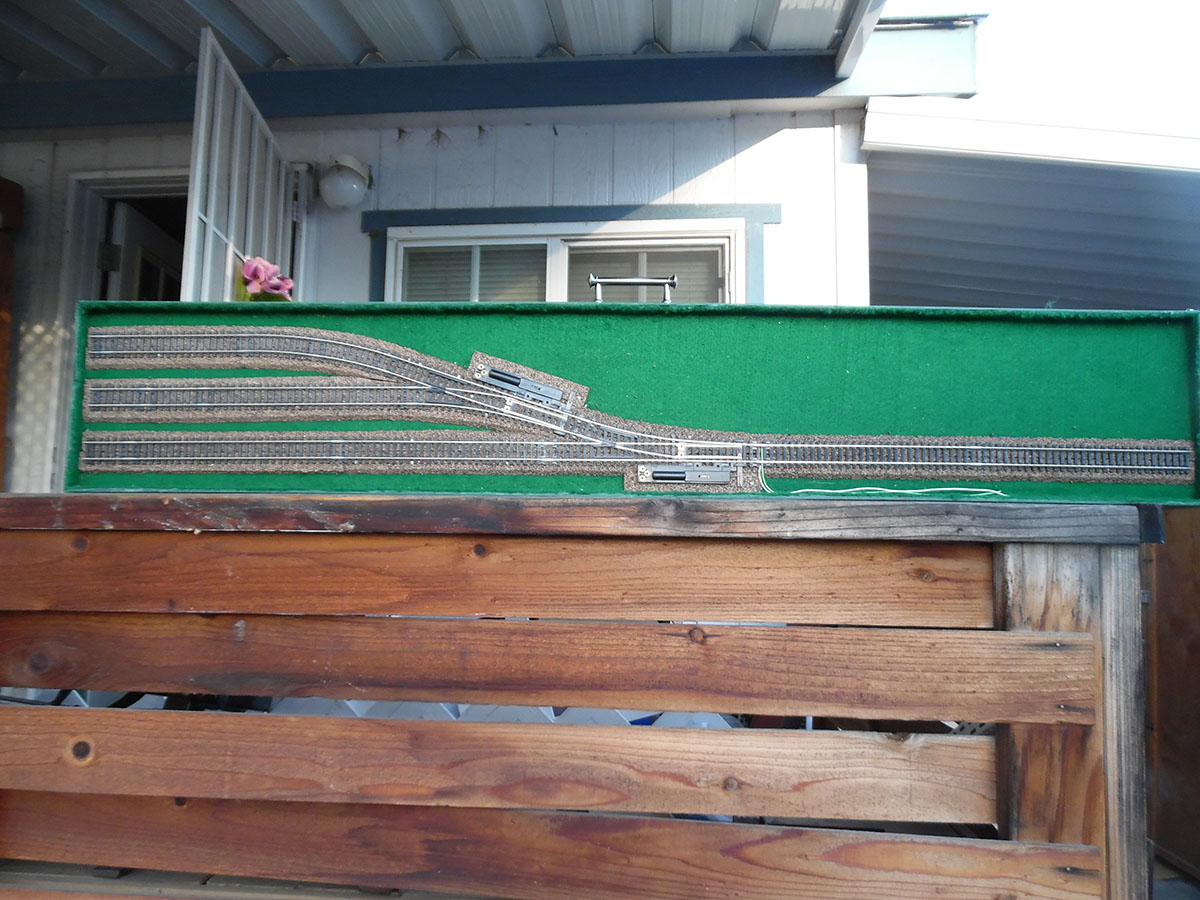
For those who wonder how much fun can be had on a very small layout with only two sets of points (turnouts, switches) and no “runaround”; There is a free phone/tablet AP in the Google Play Store called Inglenook Sidings. This free AP is a great way to try this layout idea out… And not waste any time or money on something that you put time into and then are underwhelmed when you are finished.
My Little Layout happens to match the Phone AP Inglenook exactly. This was a “happy little accident” to quote the late Bob Ross.
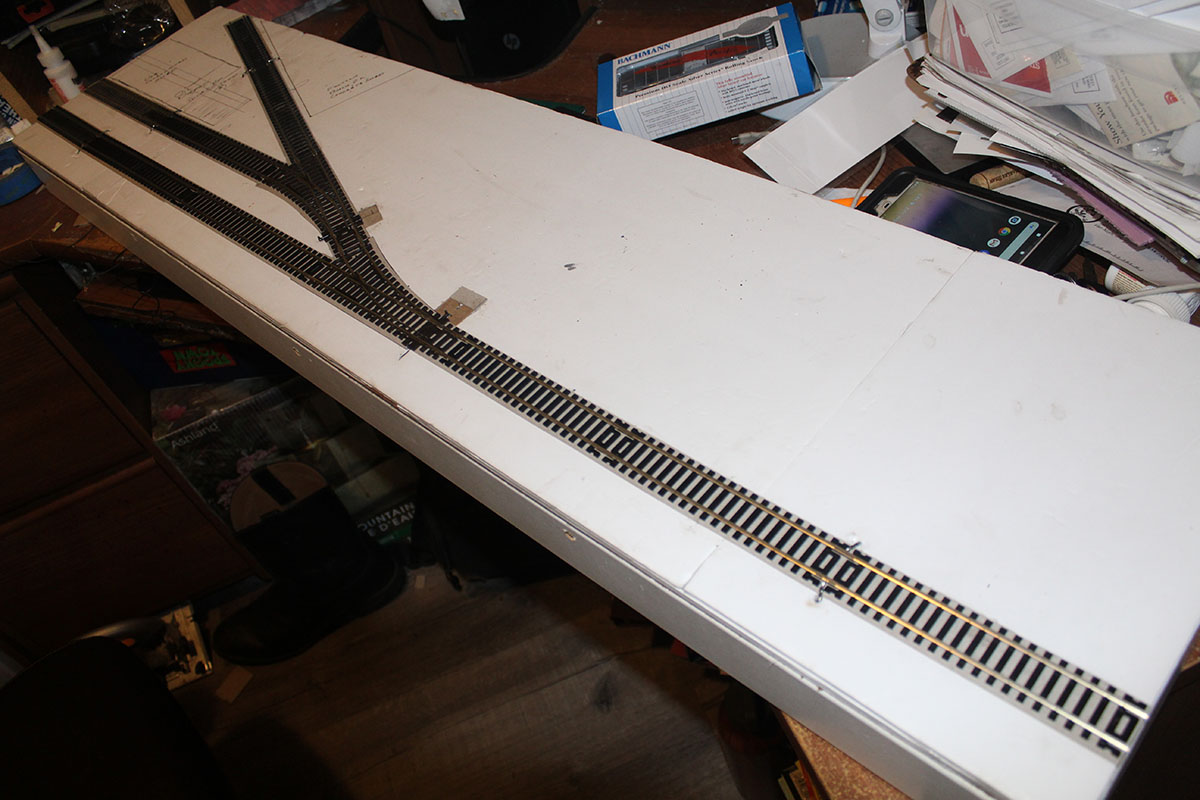
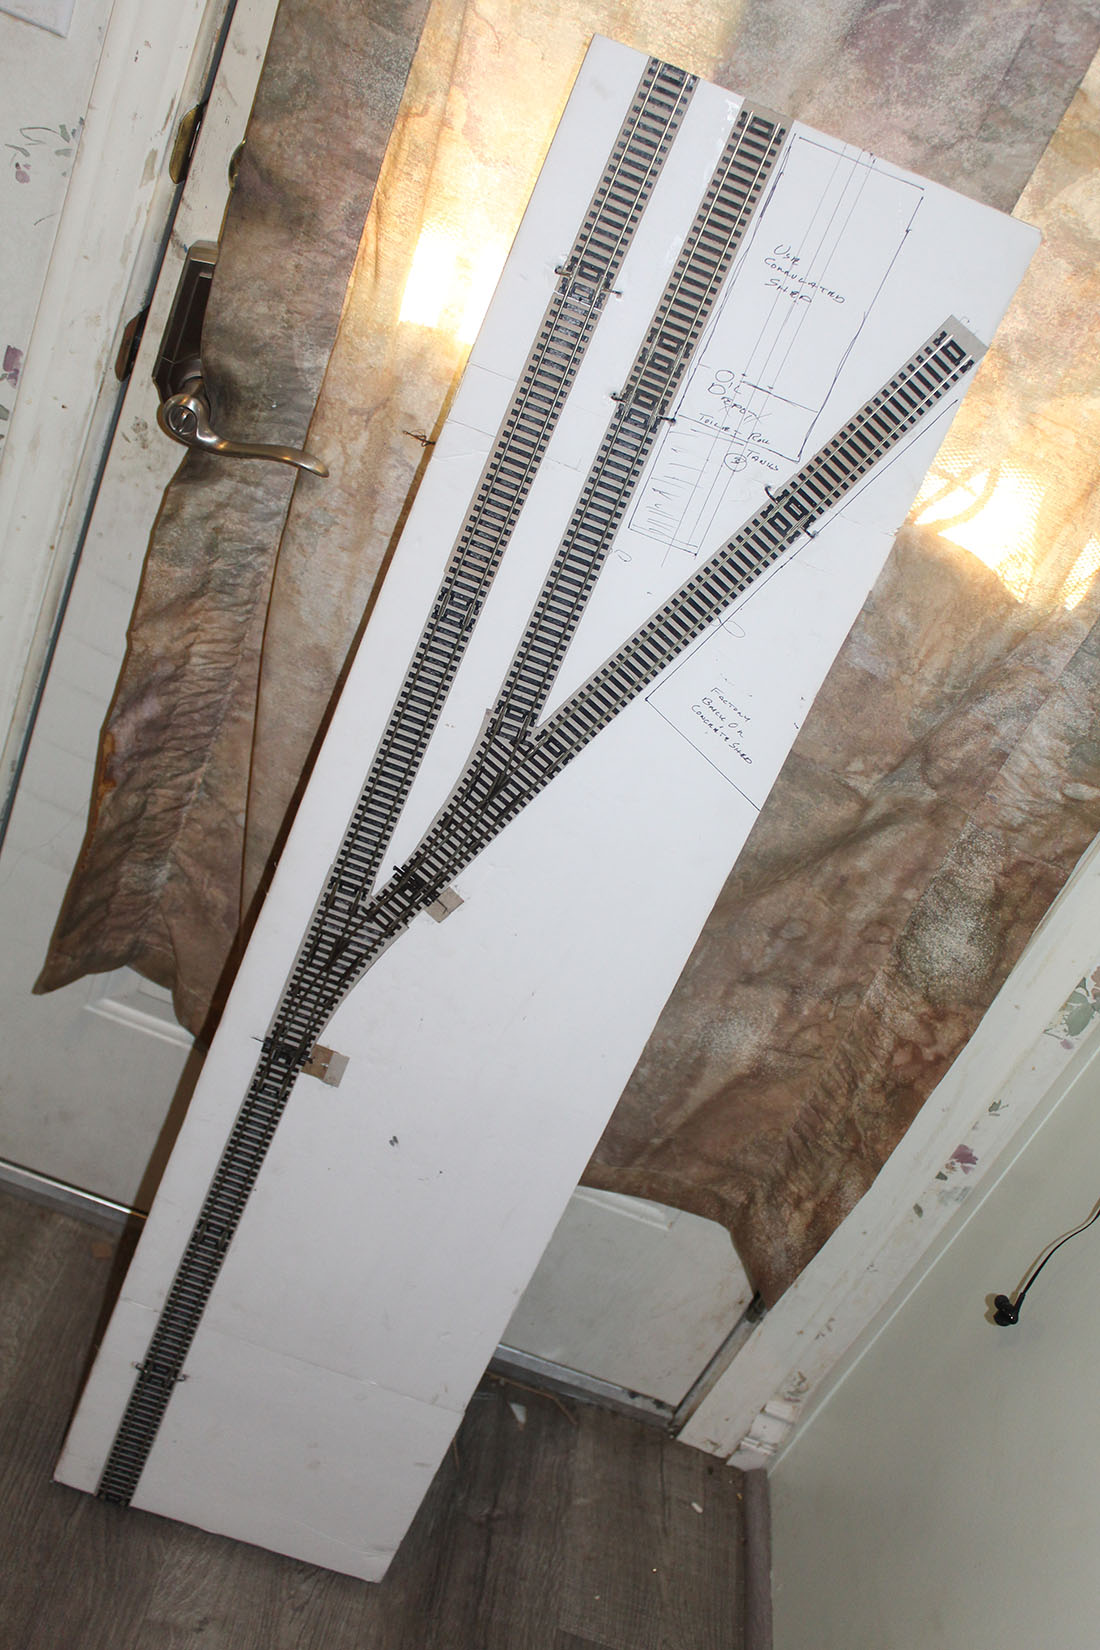
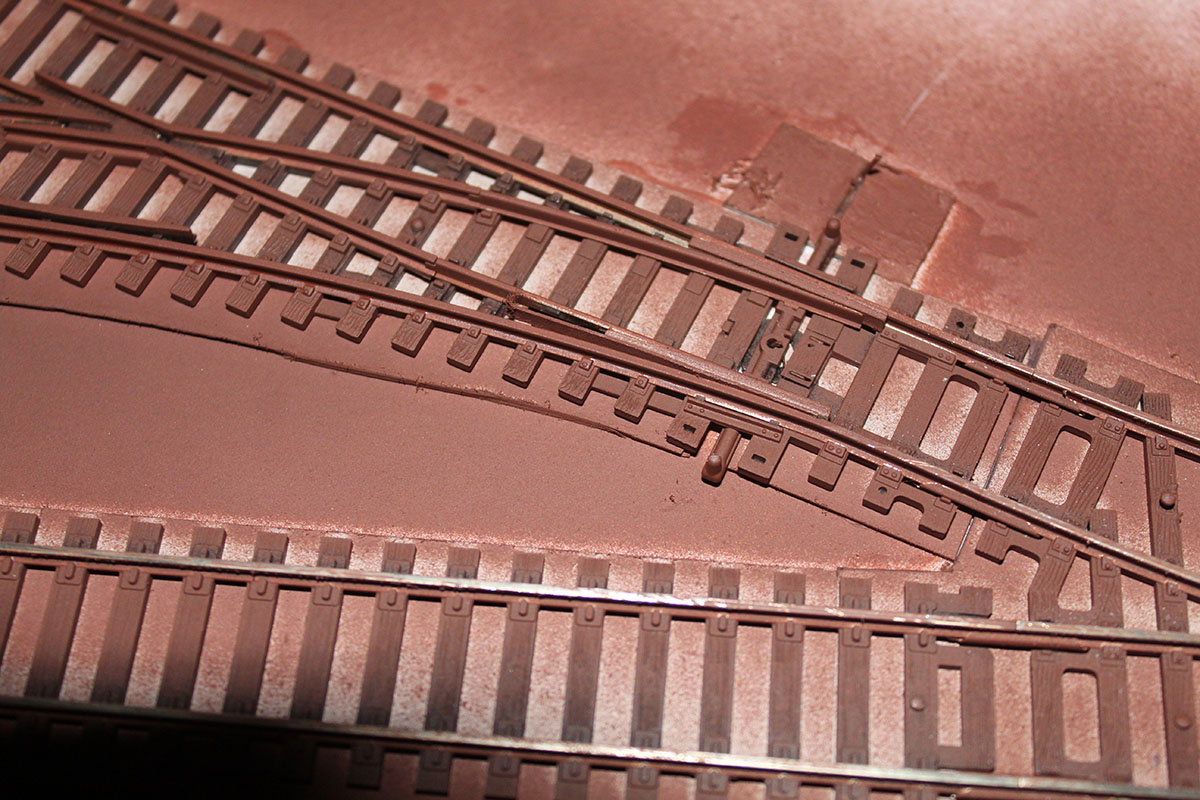
For this particular layout I chose to use Peco Setrack points (Switches/Turnouts). These are sharp for American practice but with the small equipment that I planned to use, they are perfect for the project.
I will be using older style equipment that would have been common on American railroads through the 1960’s. If I were to be planning on using more modern equipment, the layout would need to be larger.
If I were to be using equipment that would be common for the 1980’s and into the 1990’s, Peco Streamline Small Radius points could be used and the layout would need to be at least six inches longer if not a foot.
Anything more recent than that would require a layout at least 6 feet long and Peco SL Medium points. Note: It is my preference to use Peco products for my turnouts (Points). I find them to be more reliable than the Atlas switches (points) available here in America… Snap-Track Atlas switches work for anything up to 50 scale foot cars… Anything longer and you want to use #4 or #6 switches…
This Little Layout fits in a space that is 4 feet long and 1 foot wide. I could have gone narrower and made adjustments by bending one of the spur tracks. Again, the longer the equipment, the longer the layout needs to be.
One can make it so that it folds if storage space is an issue. A different solution is to make it so that there are two pieces that bolt together. Here are some examples from other layouts that I have built… Simplex, Little Walkeley, Sandy Flats, and my first Inglenook.
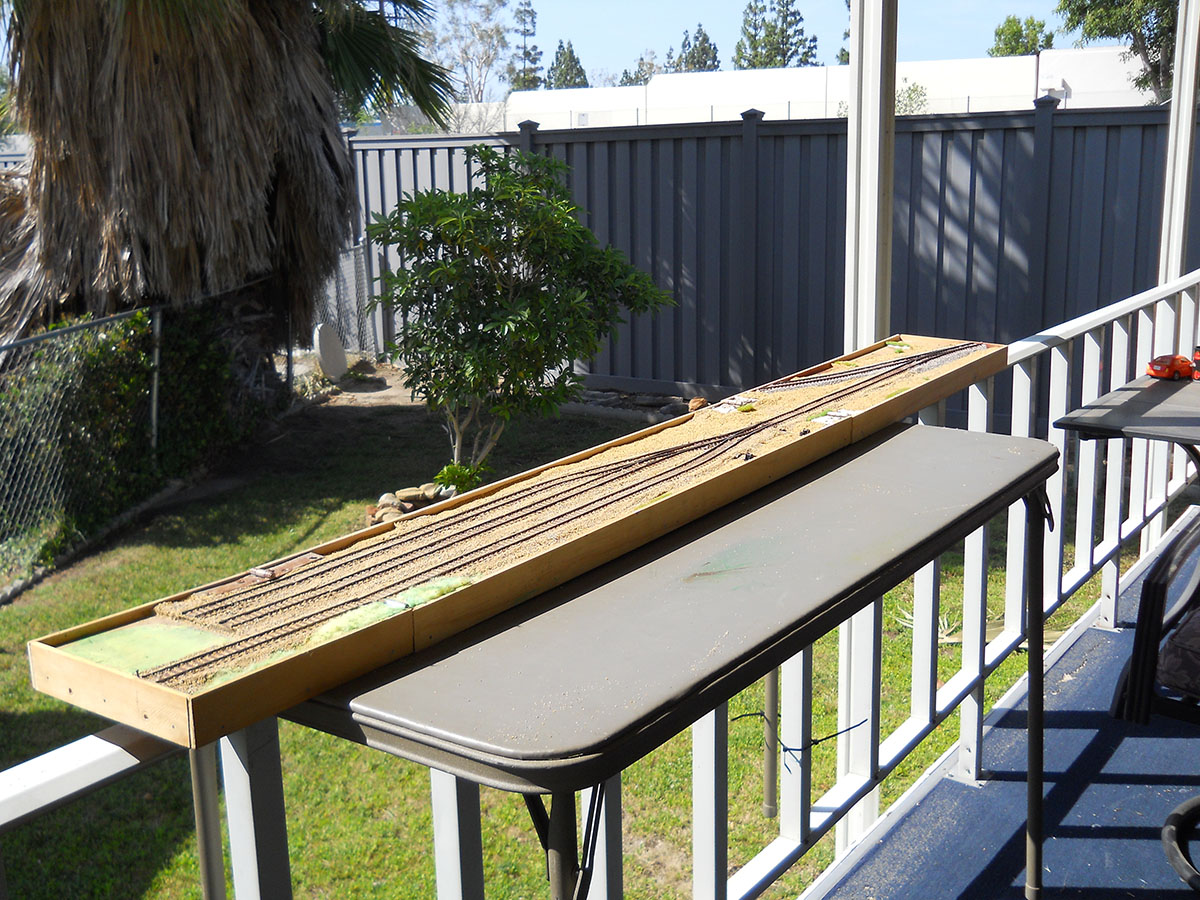
So that one knows what the eventual goal is, I am planning a layout in at least 6 modules that can be assembled into a layout 3 feet wide and 7 feet long.
The inglenook and another “Micro-Layout” based on a Jack Trollope design known as Microbe Yard will be the two largest pieces at 1 foot by 4 foot each.
The ends will be made out of 4 18 inch “square” pieces using 18 inch radius curves. The intention is to interest people in the idea that one does not need either a basement or “Brewster’s Millions” to have an operating layout!
A second goal in my plan is to use Al’s print-out kits for as many of my structures as possible. Paper craft structures are not as common in the United States as they seem to be “across-the-pond”.
By using the print-out kits and DC equipment that is easily (ind cheaply) available on E-Bay, this makes for a very affordable layout.
The message is that one can start simply to build skills that will make a larger layout an easier transition if one wants to move in that direction. I once wanted a large layout… In time I found that “smaller” is easier to maintain.
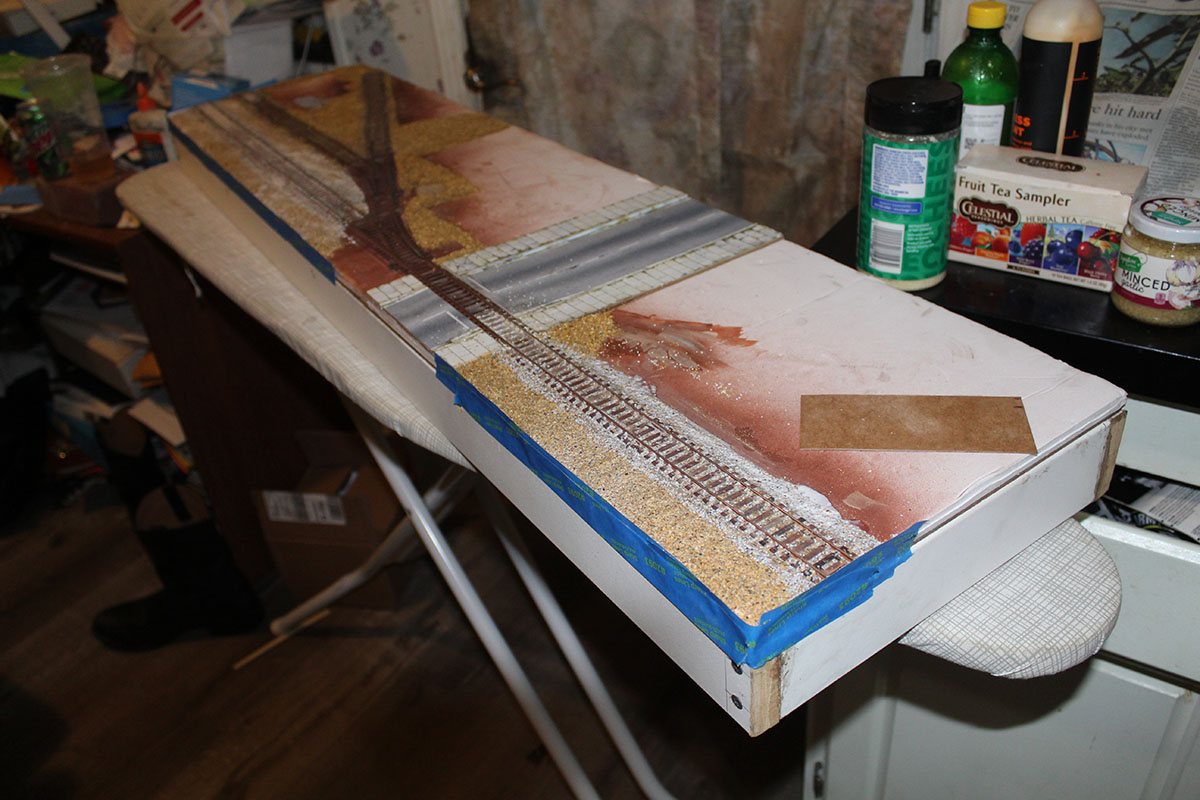
The foundation of any layout is the baseboard… The better the work, the better the foundation. The baseboard for my “Little Layout” is a bit overbuilt because of the expectation that it will see at least as much abuse as use. Remember, this is built to be moved frequently! Every board is glued together and screwed with drywall screws for extra strength.
The next most important item is the track. What your trains run on needs as much attention as the base you put or track on. I mentioned that I am using Peco and not Atlas… I am also using code 100 rail rather than something with a more scale appearance. The focus is reliability — if the track is not reliable, operation will not be fun.
A big advantage of Peco points is the over-center (over-centre?) spring that means that switch throws are not needed… I will use them anyway (Caboose Industries 202s) but they are “belt and brace”. I do use a small piano wire in a trough between my switch trows and the points themselves. There are other solutions and a magazine like Model Rail or Railway Modeller often features some of the alternatives.
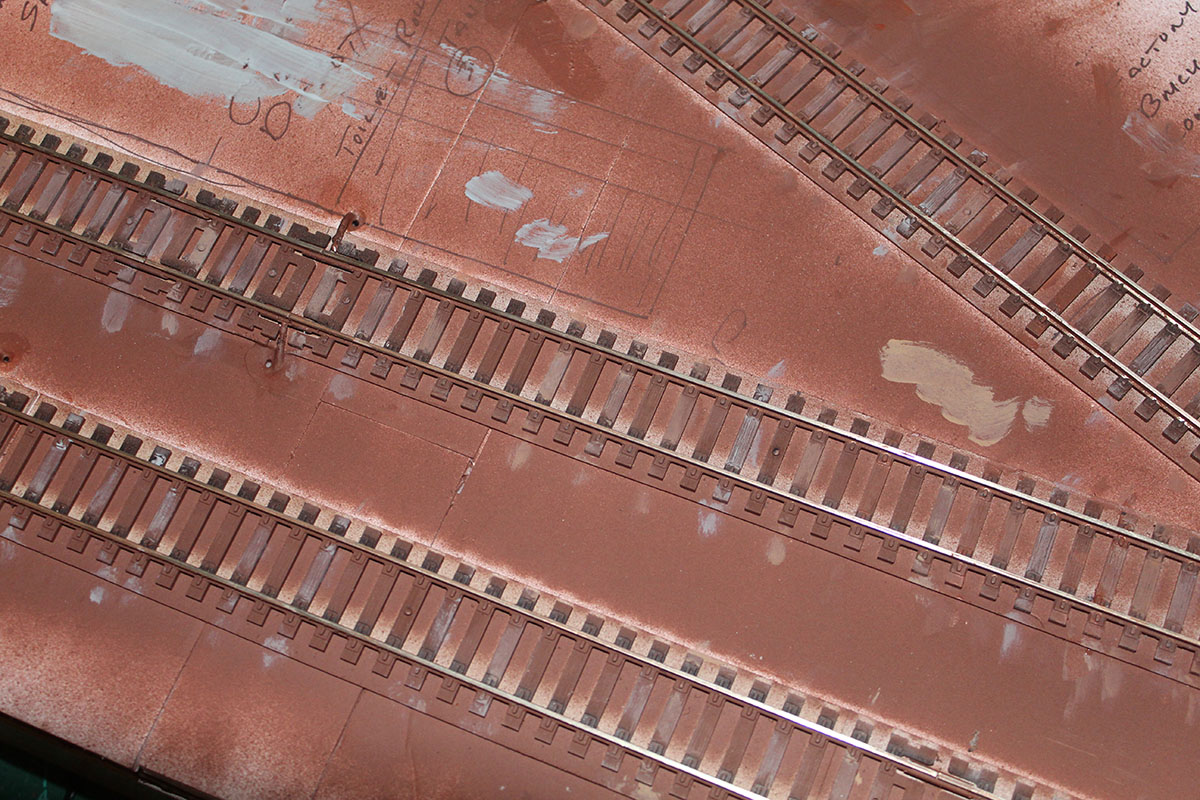
With the high rail (code 100), track detail becomes important. I spray my track (protecting the points) with a darker brown to hide the height of the rail (optical illusion). Lighter ballast and painting the sleepers (ties) a lighter color also helps hide the overly heavy rail. (A trick I learned reading Continental Modeller many years ago).

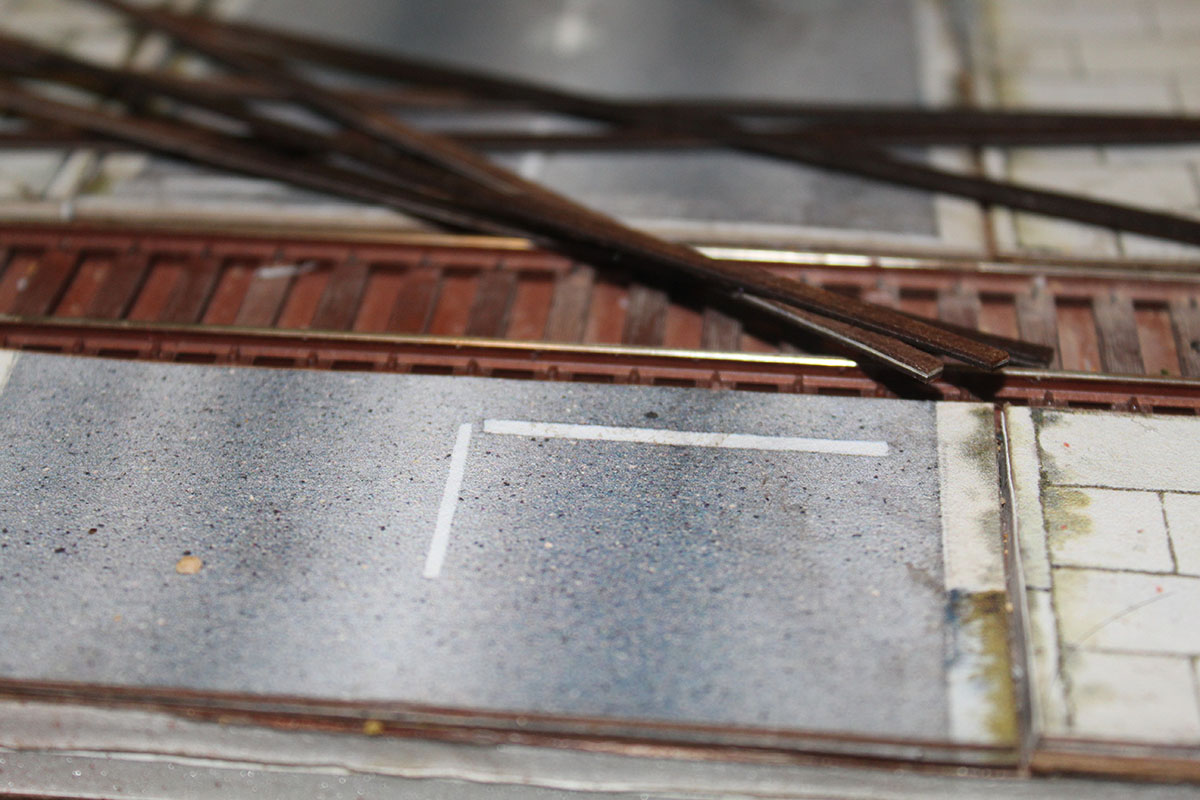
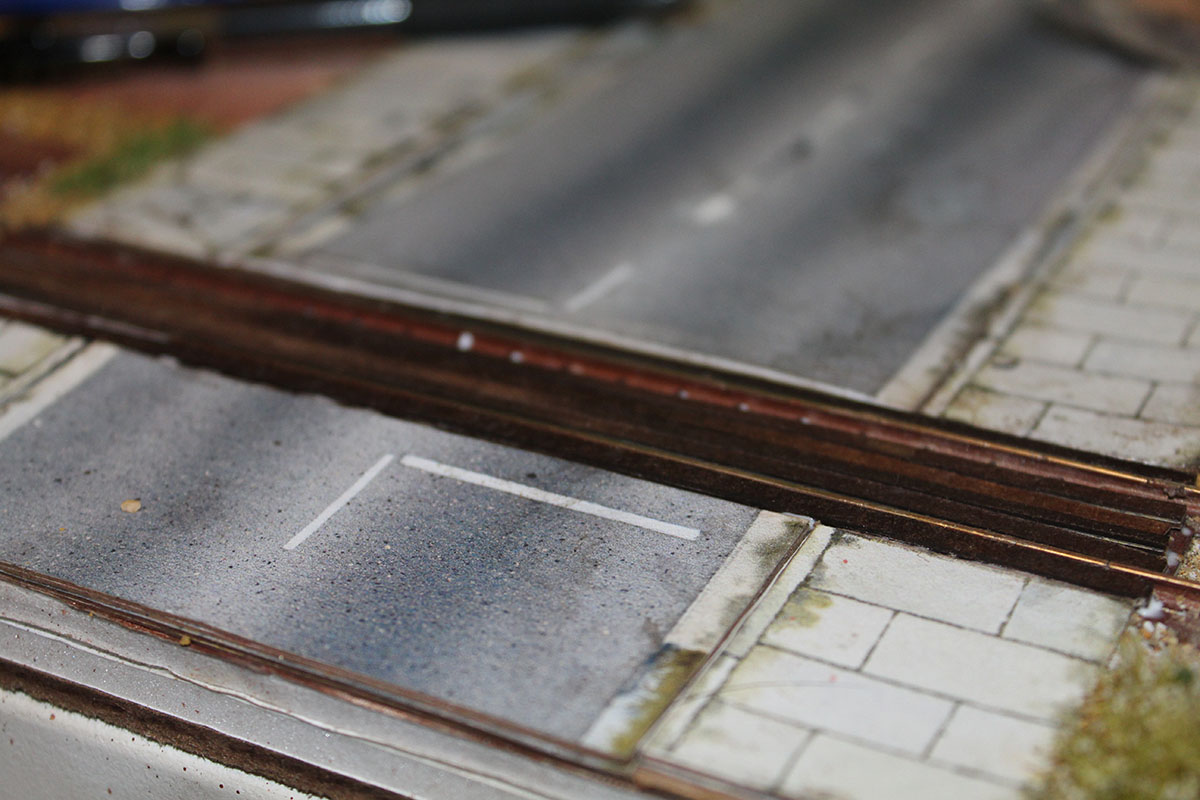
With track in place and ballast down, I wanted to add a road. As much as I love building Al’s print-out structures, his road was a new idea for me. I had always used old fashioned techniques before.
The road print is very believable as are the sidewalks. I added a level crossing with some card that I had stained with wood stain. (Here in the States we would call it a road crossing).
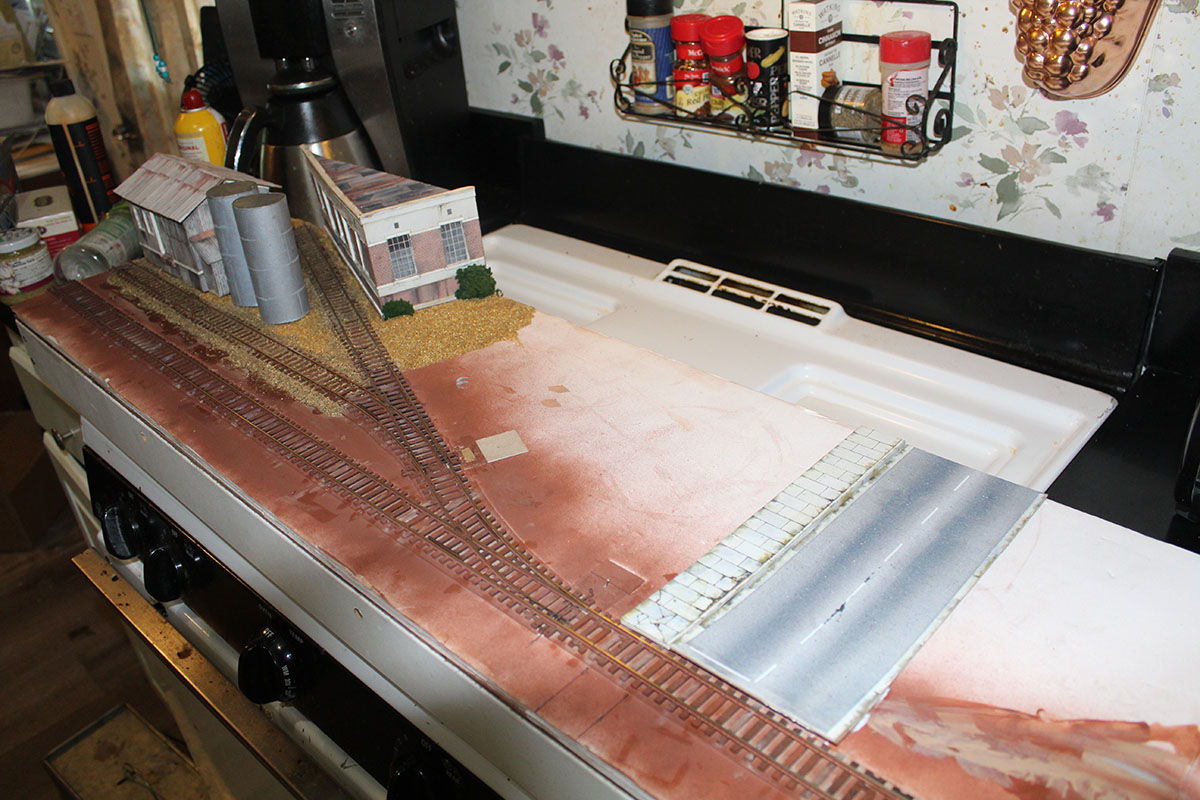
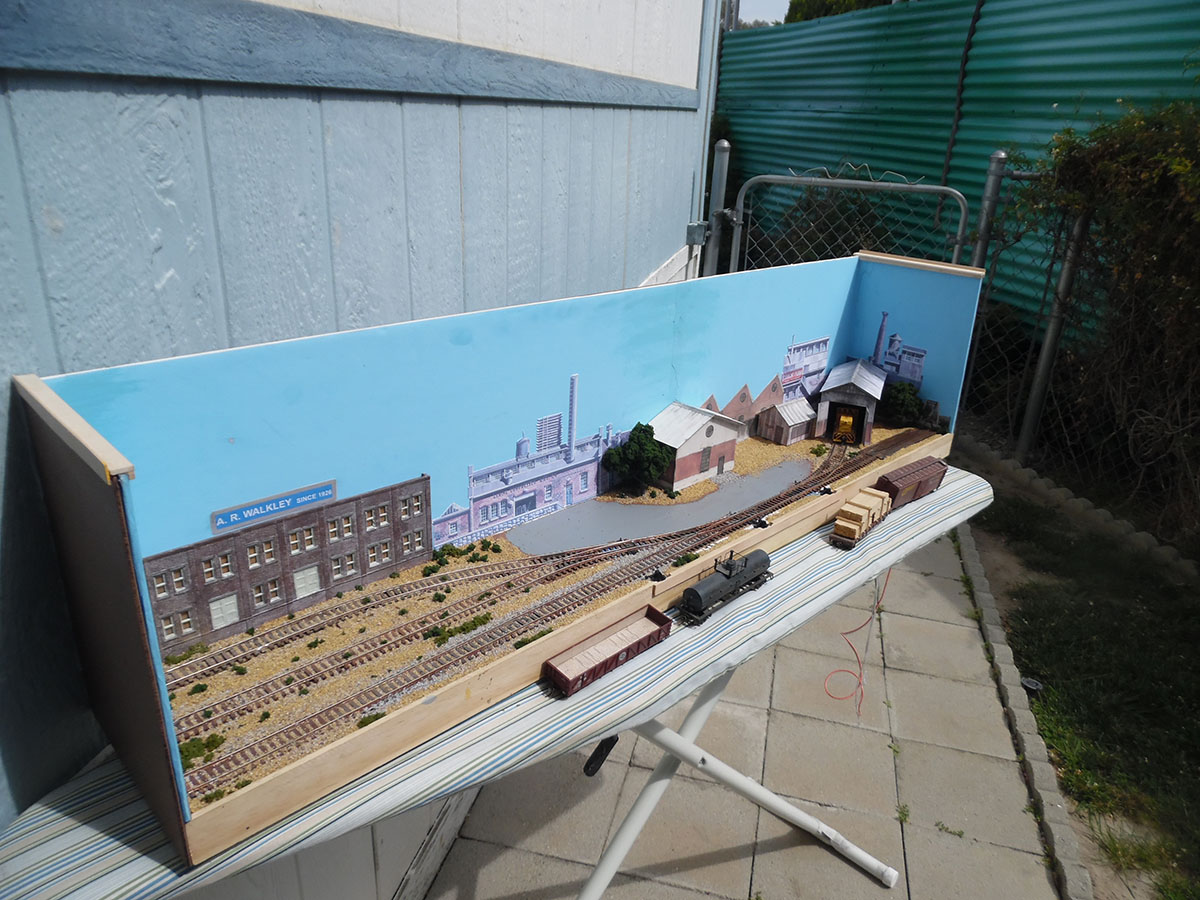
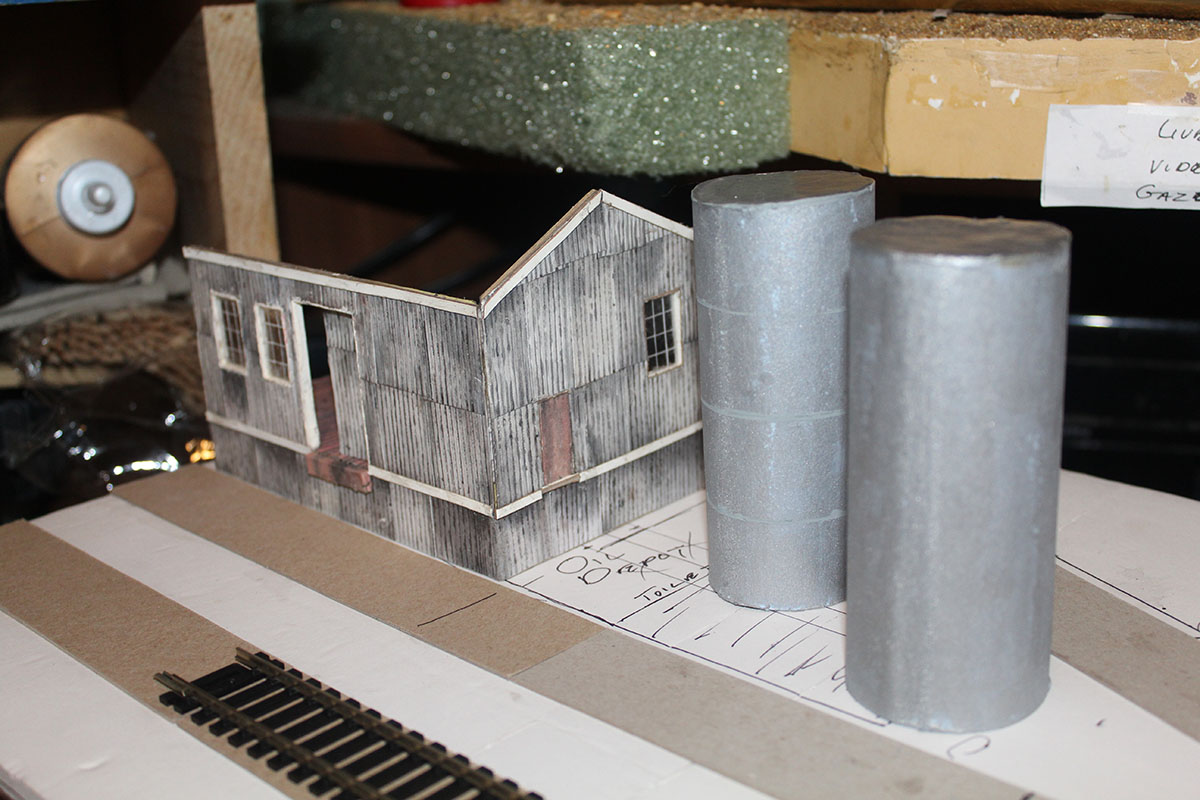
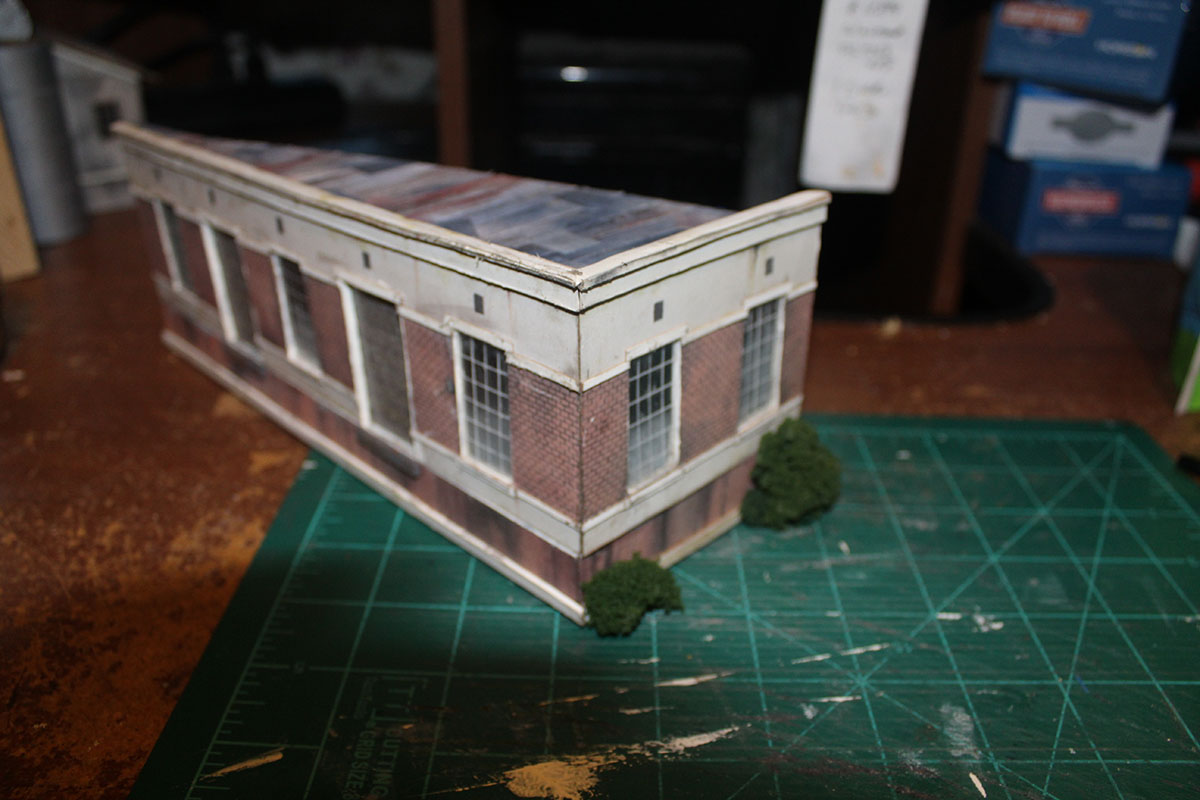
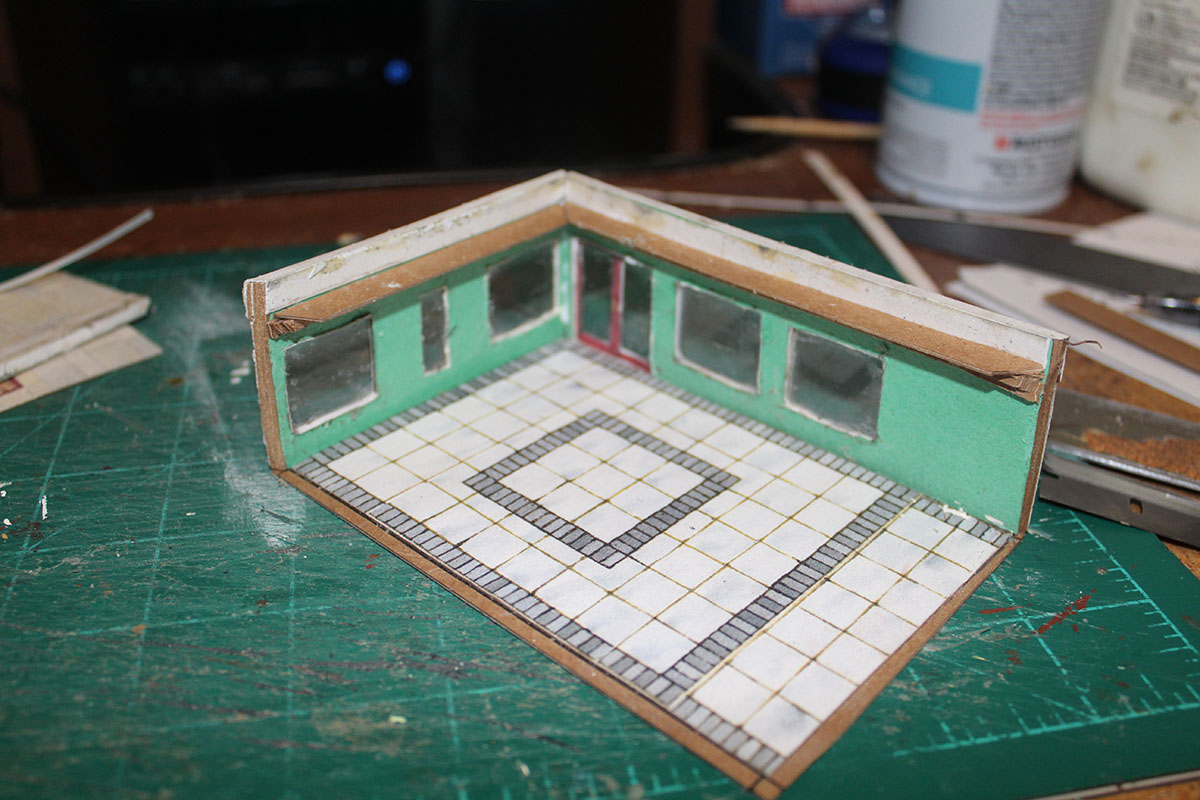
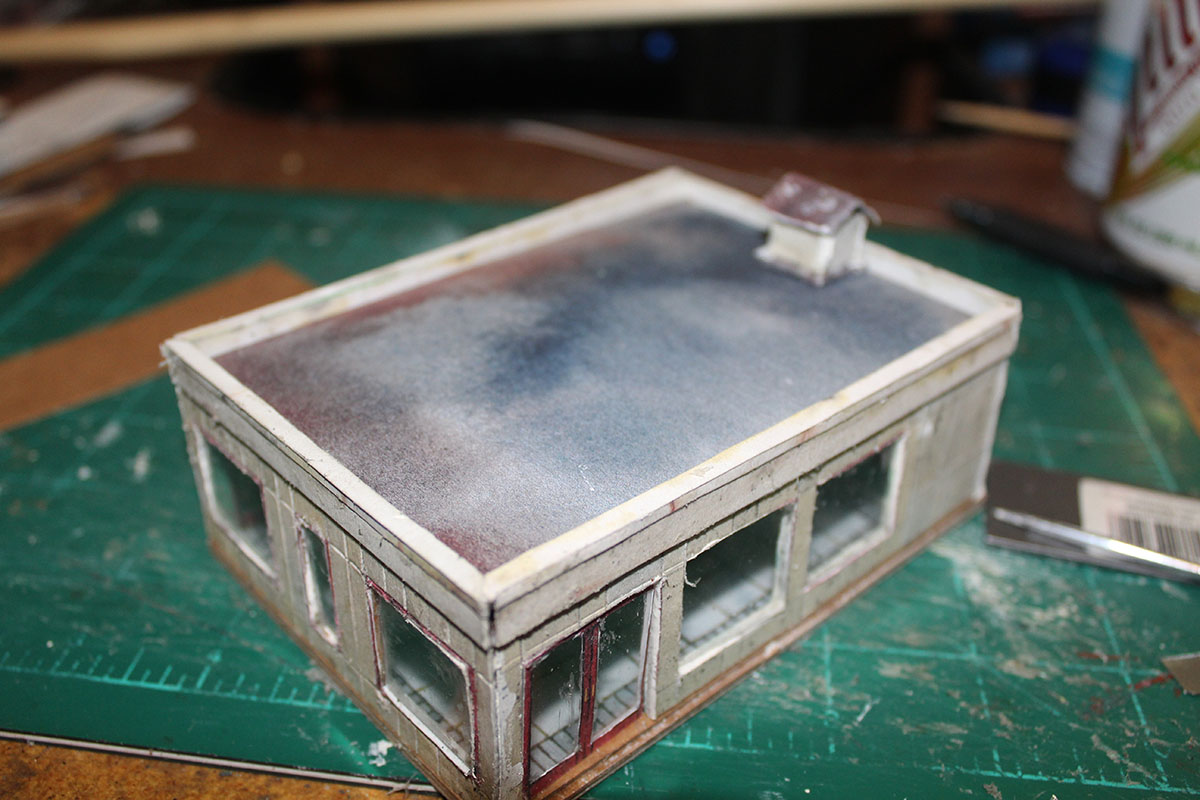
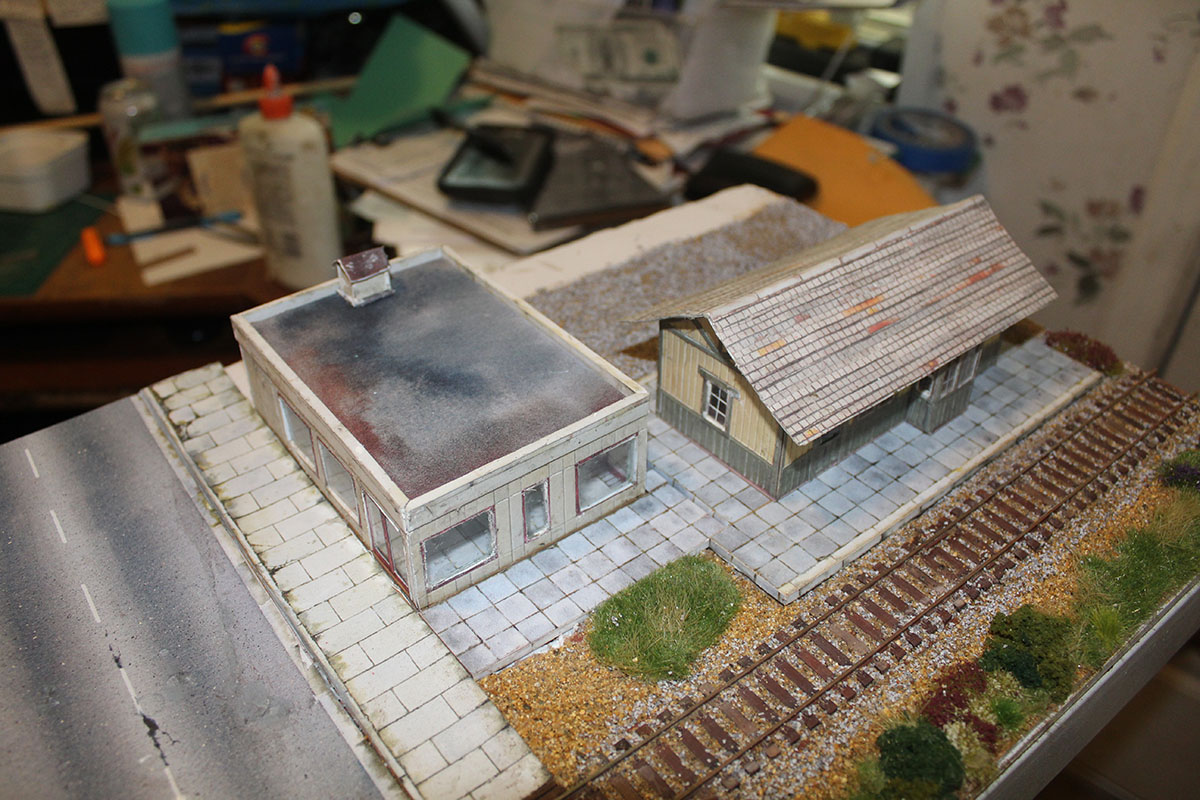
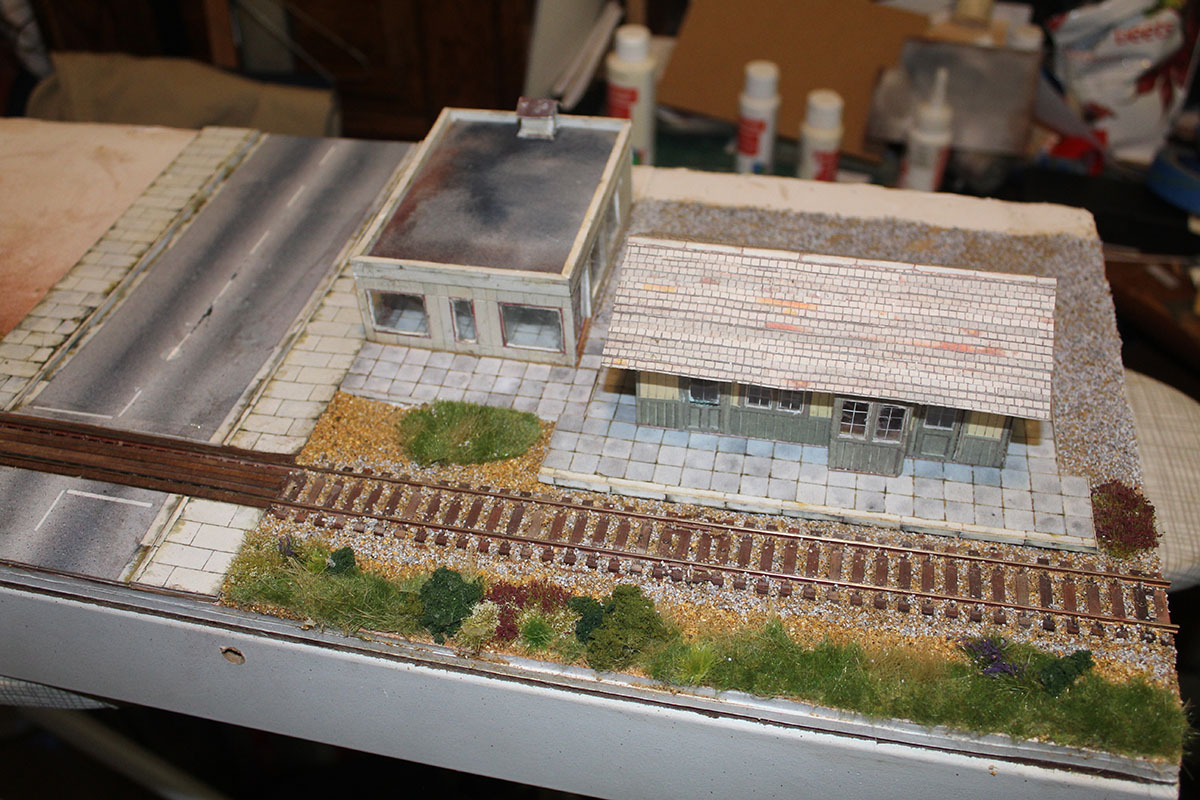
Once a layout has track, the scenery tells the story. My little layout is set around a small town with a couple of industries. At the moment this represents the “End of track”. One industry is a petroleum products distributor… The second is either a manufacturing building or a food products plant (I have not made up my mind yet!
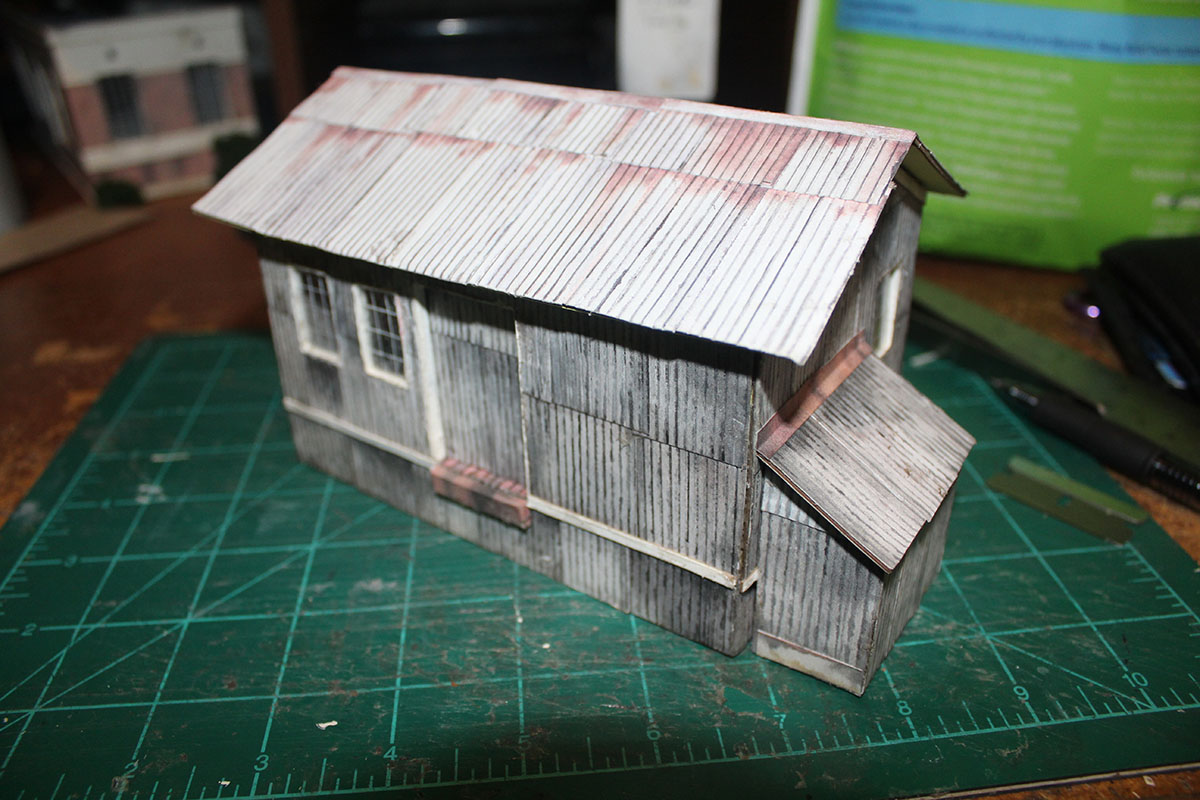
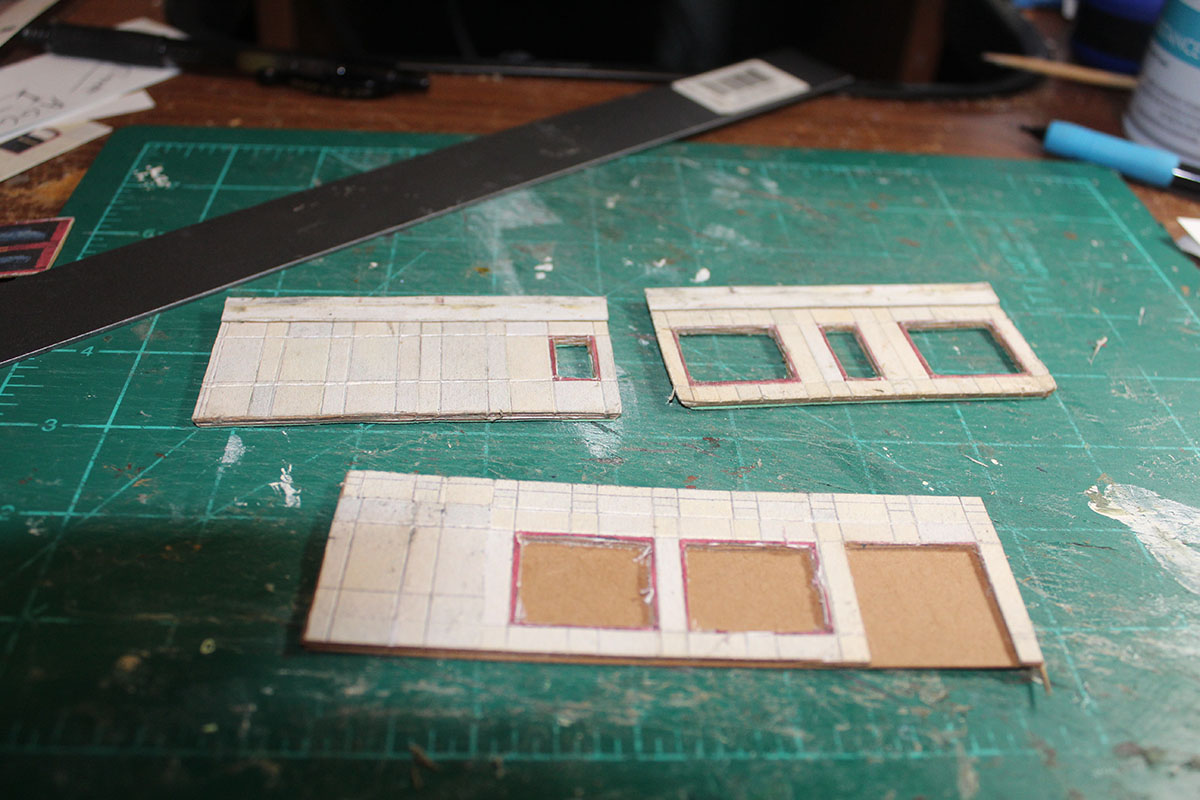
My Petroleum Products distributor was built using Al’s print-out enginehouse… The one that looks like corrugated metal. The oil tanks are made from a pair of the tubes that are the core of a couple of loo paper rolls (Toilet Paper rolls here in the States)

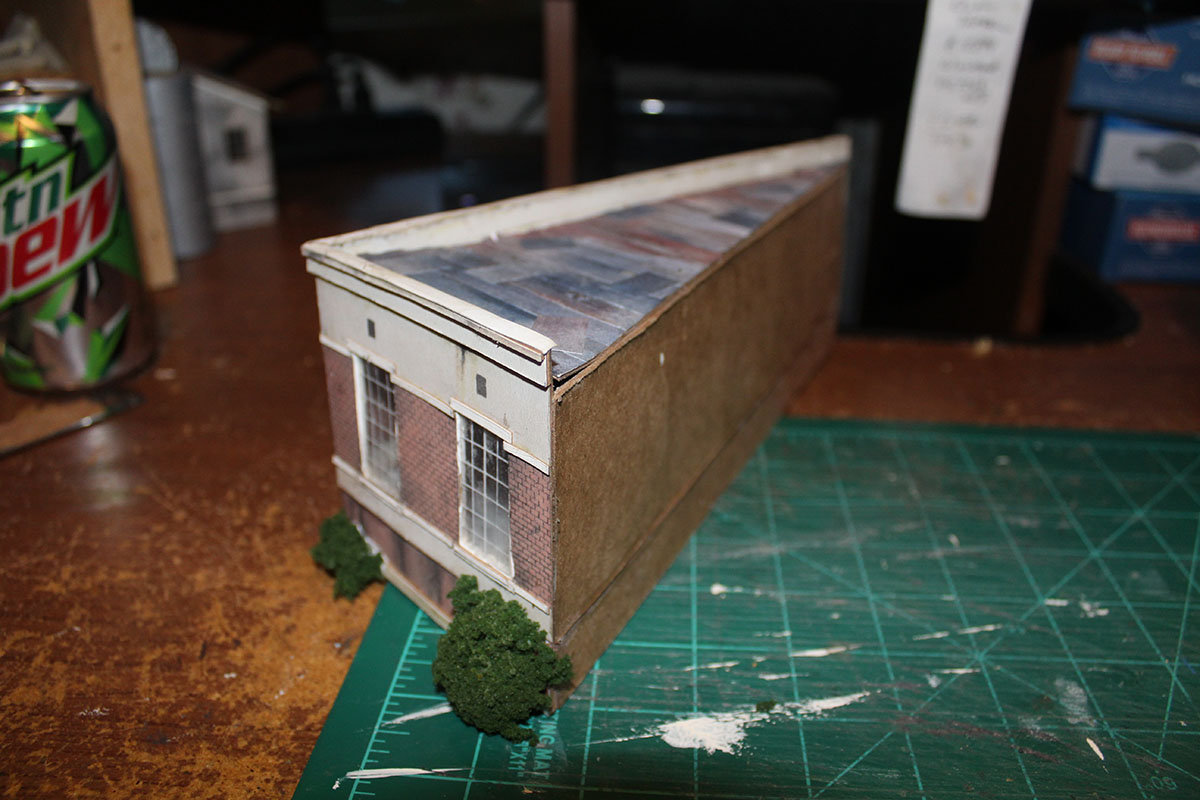
The second industry was to be a machine shop BUT in the interest of being able to have a greater diversity of cars visiting it, it may become a food distributor or cannery… In America we produce a lot of food and we eat what we can, what we can’t, we can! (I believe across the pond you would say that we “tin”).
I call this “the Triangle building” because of the space it fits in…
It is made from another of Al’s print-out engine house kits…
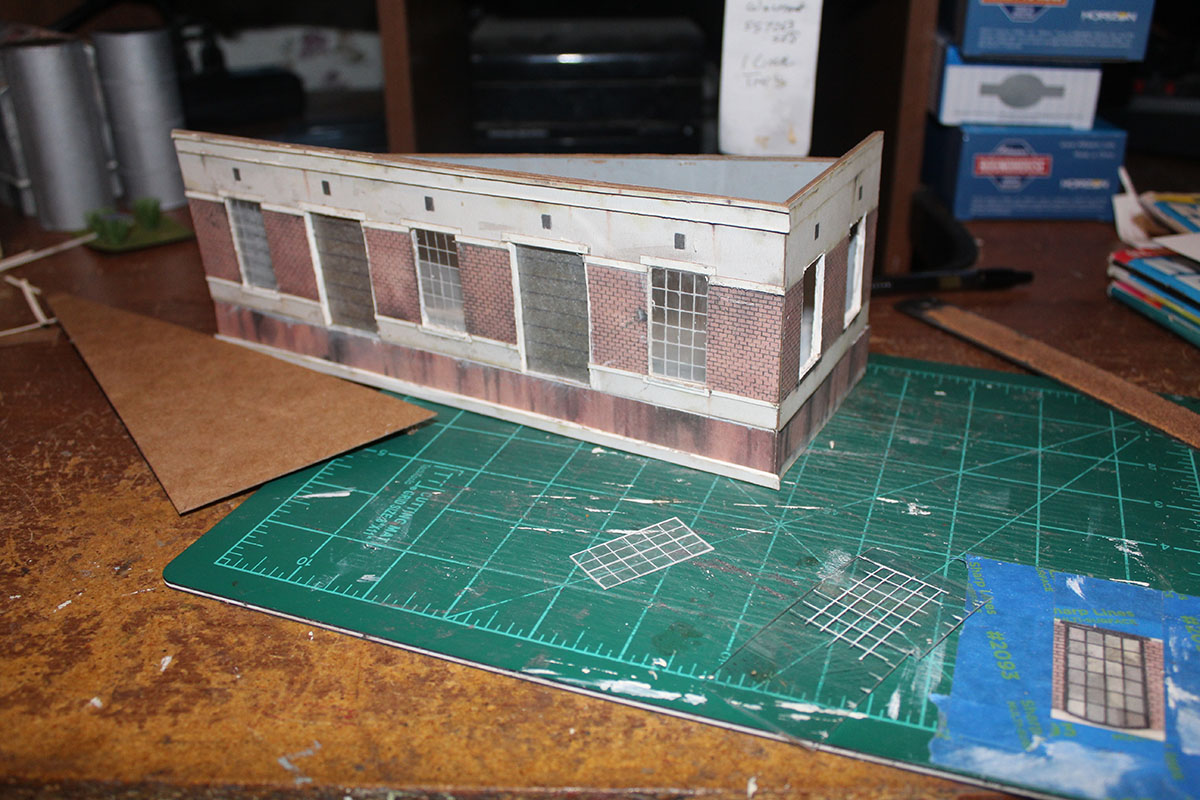
I just finished a diner…. Have fun figuring out the kits I used.
Yes, every building you see is from one of Al’s printable buildings kits….
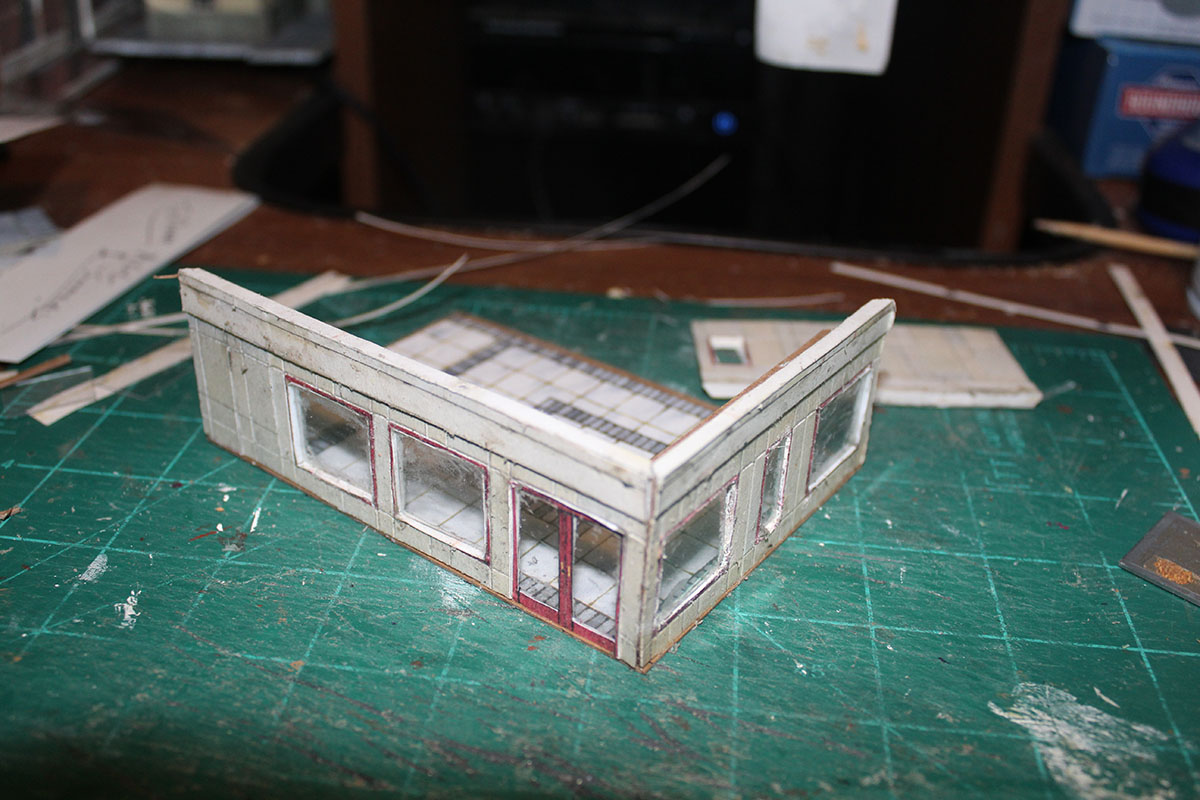
Here it is along with the station.
All my structures are removable from the layout…

Sincerely,
John
California USA”
A huge thank you to John for sharing his inglenook layout – what a post, and what a project.
Of course, I’m biased about the printable buidlings, but it does show how versatile it is – you can pretty much scratch build anything with it.
Whenever a timesaver layout is mentioned, I always think of Brian’s post:
That’s all for today folks.
Please do keep ’em coming.
And if today is the day you get started on your layout, the Beginner’s Guide is here.
Best
Al
PS Latest ebay cheat sheet is here.


As shown having a small shunting layout can be just as much fun , and helps keep the costs down ..Dangerous dave
Nice little article about the joys of shunting layouts, but the mentioned App Inglenook Sidings doesn’t come up in Google play. Any other name it might be under?
Cheers Mike S
As I was designing my Howard Street traction layout, I tried to fit a Timesaver into it. No way! So I tried an Inglenook. Tried bending it around corner too. I just couldn’t get it to work out. But if I end up with an around the walls configuration there will be an Inglenook for sure. Call it the North Shore version.
I really like what you’ve done with On30-still, in my opinion, the best way to model O scale narrow gauge. Keep up the great work.
Really like the print out scenery! What suggestions do you have to adopt it to O scale? Doubling the size makes it to big to fit on the paper?
Pretty Neat Layout.
EXPAND PAPER BUILDINGS TO O SCALE & BEYOND
Bob, take your building files on a USB drive to an office supply store. In the States that would be Staples, Office Depot, etc. They have the large format printers and paper to output the enlarged files to about any model scale. Cost per sheet is manageable. ~ Cheers, yet another “JOHN”
This is a great post. Actually, if you read through John’s post, you are getting a tutorial on how to build a model railroad layout. Even though this Inglenook Sidings
layout is a small shunting layout, John goes through and explains in detail the major components of building a layout (any size layout); the baseboard, track, switches (turnouts), scenery, buildings, roads, crossings. All key components of a layout. Fantastic post. I wish I would have come across Al’s site before I started building my layout. It would have made things so much easier. Happy Model Railroading to all.
For the phone ap, it is Shunting by Jeppa Teensma
good article
I am sorry to say that I don’t see the fun in hitting the forward/reverse switch 200 times in a row just to switch the train from one short track onto another. I want to be able to watch them run around a layout that has turns, buildings and scenery that the train travels through. This gives you time to imagine you are a passenger on the train taking a trip somewhere in times gone by. Just my opinion!
I would like to express a comment , in the area where I live there are quite a few people selling off a lot of rolling stock and locos as they are saying it is getting to expensive to buy modern and up to date models . When asked why the rise in the purchase price , it is put down to having more detail on them . Personally I think ir’s profiteering at the hobbies expense .
So John, are you going to tell us how you made the diner? Looks like a building I could use.
All, I have the app on my phone. It is a great puzzle game to keep the mind sharp. Try it using 8 wagons/cars. I thought that might not be possible. But I was able to do it. Its a free game, so what have you got to lose?
Ray Davies — enough scale people in various poses to fill scenes also costs far more than it takes to produce them. A true ripoff. 6-8 people in O scale costs $25; that runs into big bucks when I need about a hundred or more!