John’s been back in touch. This time he talks us though wiring your layout for DC control:
“Hi Al,
Thought I’d send an update on the wiring of the WV Energy coal mining railroad.
I’ve decided that the railroad will have 3 DC power blocks, 2 will run most of the trains.
The first will be to run the trains around the weird-shaped loops, the second will be for the track going to the coal mines, and the 3rd will be for making up trains behind the scenes on the storage tracks under the mountains.
As I got down to wiring, I remembered various devices and LEDs required several different voltages, as does the lighting on the layout. This then required either a separate stand-alone power supply for each voltage, or some sort of board with various voltages available. I decided on the latter.
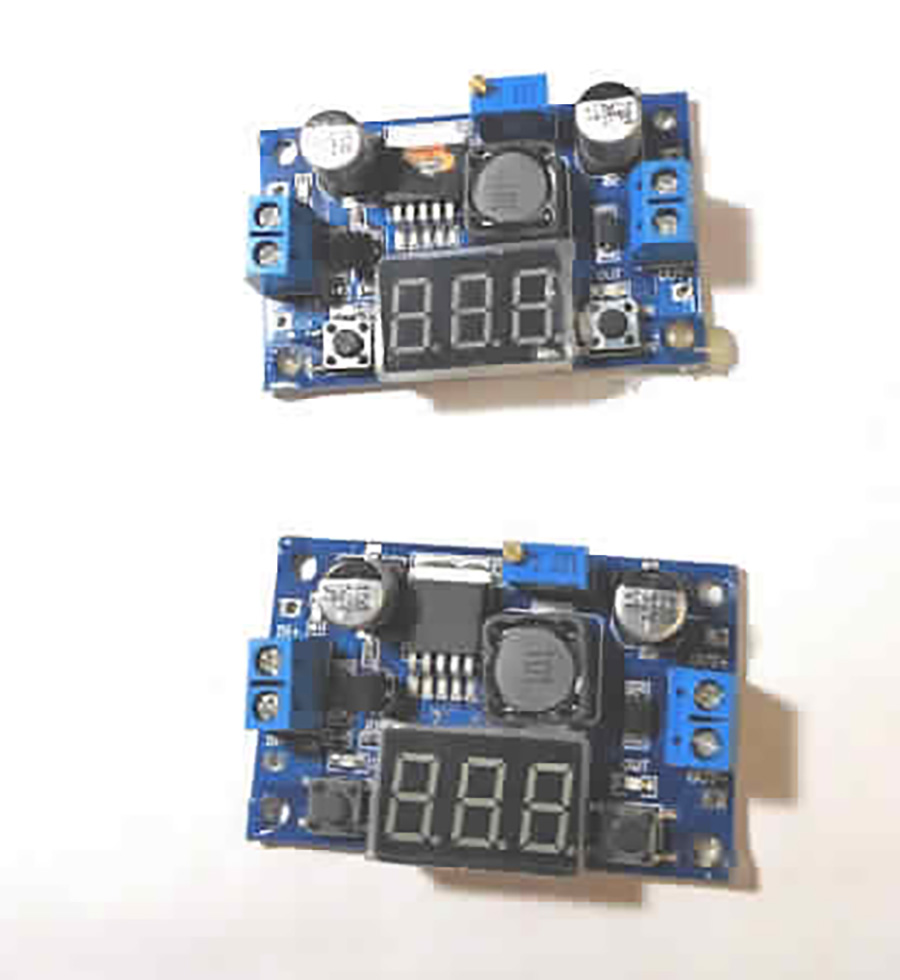
I bought a 15amp 24 volt DC supply, and have several DC to DC reducers that are adjustable. One is set at 12VDC, another at 3.5 for my motor driven switch machines and the LED’s associated with them (600 ohm resistor on those), and another for 2VDC for LEDs.
These little DC not DC boards are pretty cheap from Ebay, cheap enough that I don’t cry too much when I blow one up – which I have done to a few. I also found that the Atlas type switch machines like around 14V AC, so I added a transformer for that.
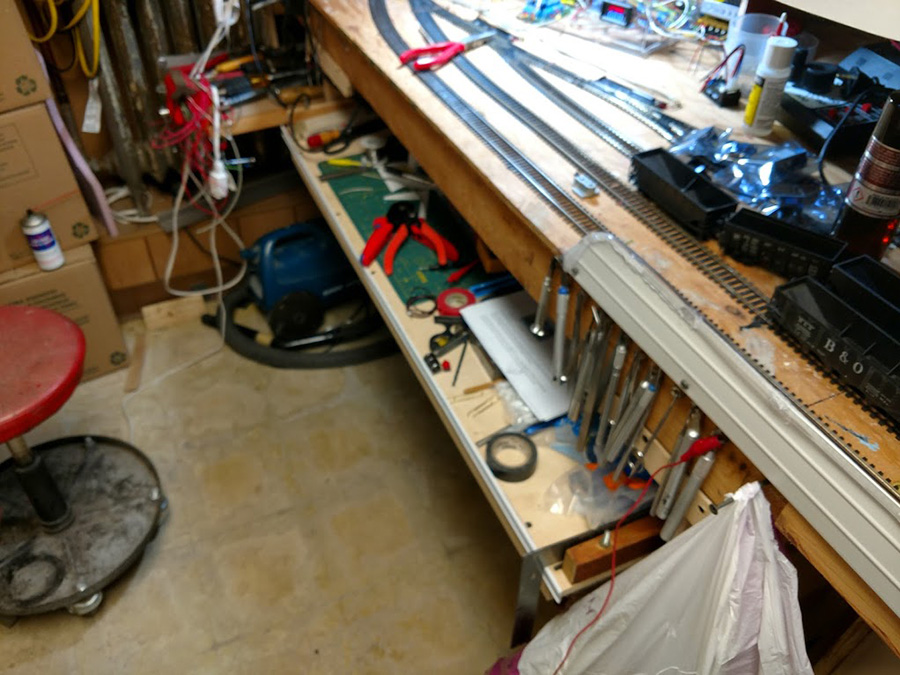
The main board and stuff is also under the mountain.

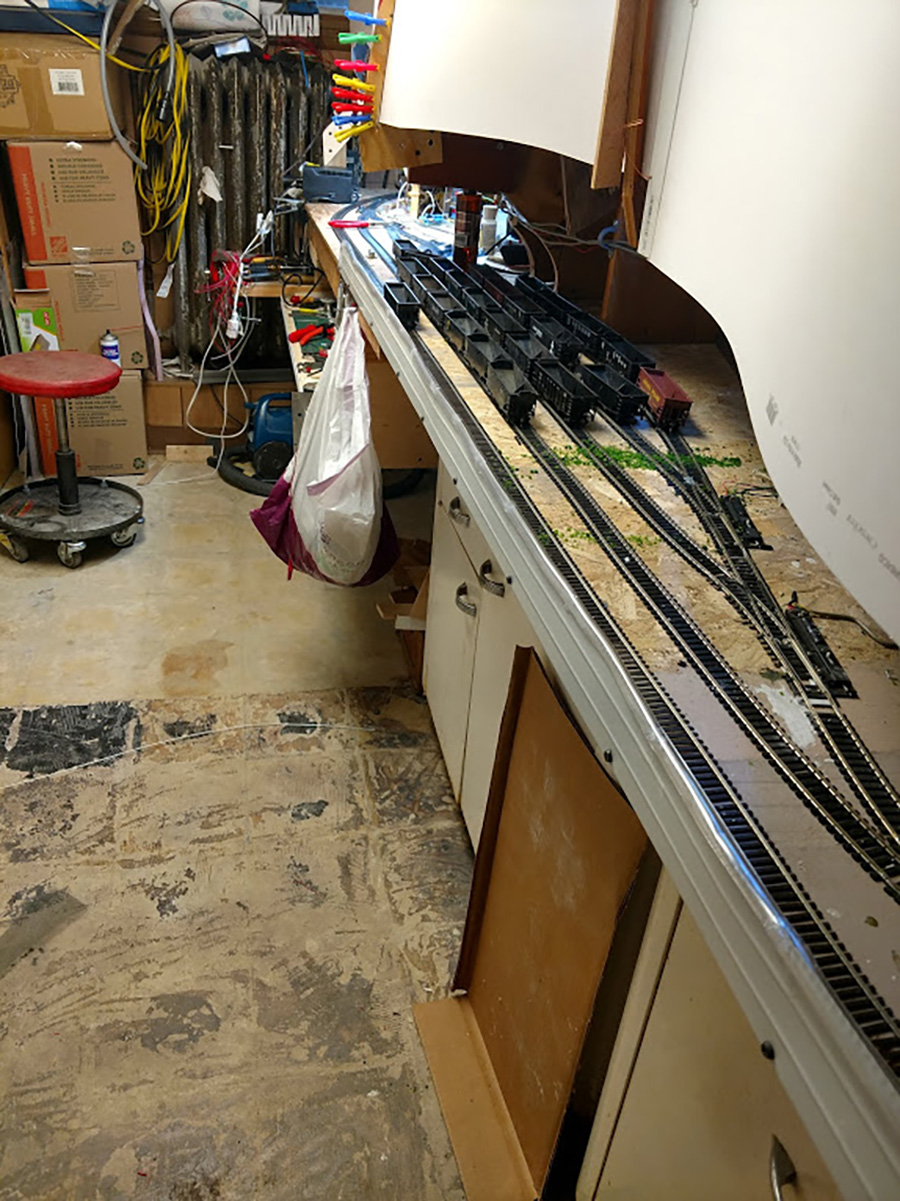
I found that I needed a place to work, so I built a work space and put it on drawer slides, that way I can still get around the back of the layout, and pull out the drawer for as much work table top as I need, since I had plenty of room under the layout, I made it 48” wide and 36” deep.
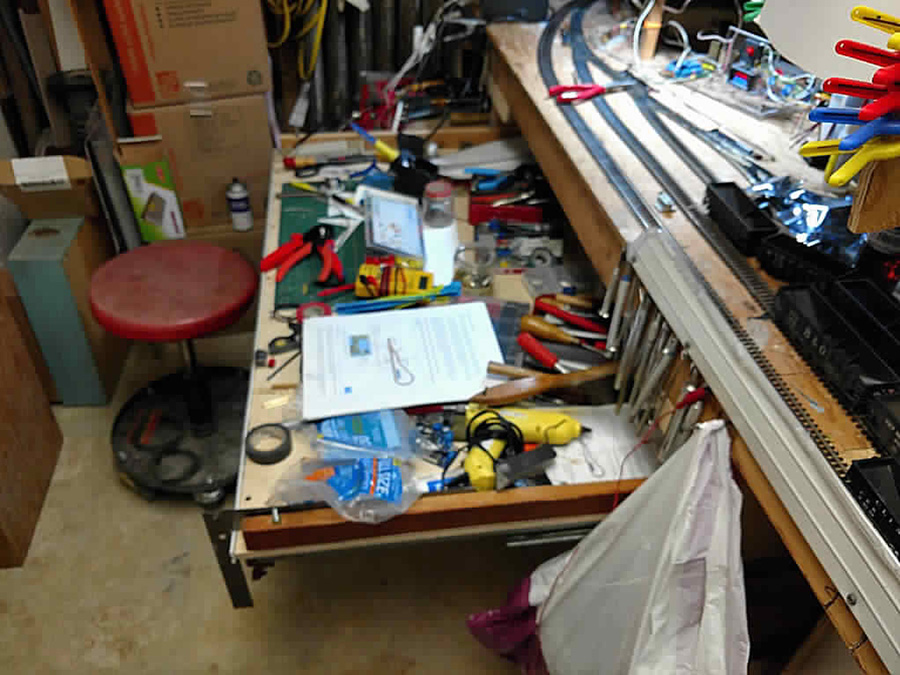
After things get running and my focus moves away from scenery and wiring, I’m going to make a railcar weathering, decaling, and adjustments area with all the stuff on the work-space to do those tasks. I also will be setting up locomotive maintenance, oiling, wheel cleaning, and if I ever decide to add sound to my loco’s, a place to put in the decoders for that.
My track plan has the mines as a 1 track entering, and a loop. I bought a auto-polarity reversing circuit from a company over on your island, they make some really trick stuff and are reasonably priced, fast shipment too! I may experiment with their signal controllers if I get trains running. Anyway, I will update on how the loop track works in the future.
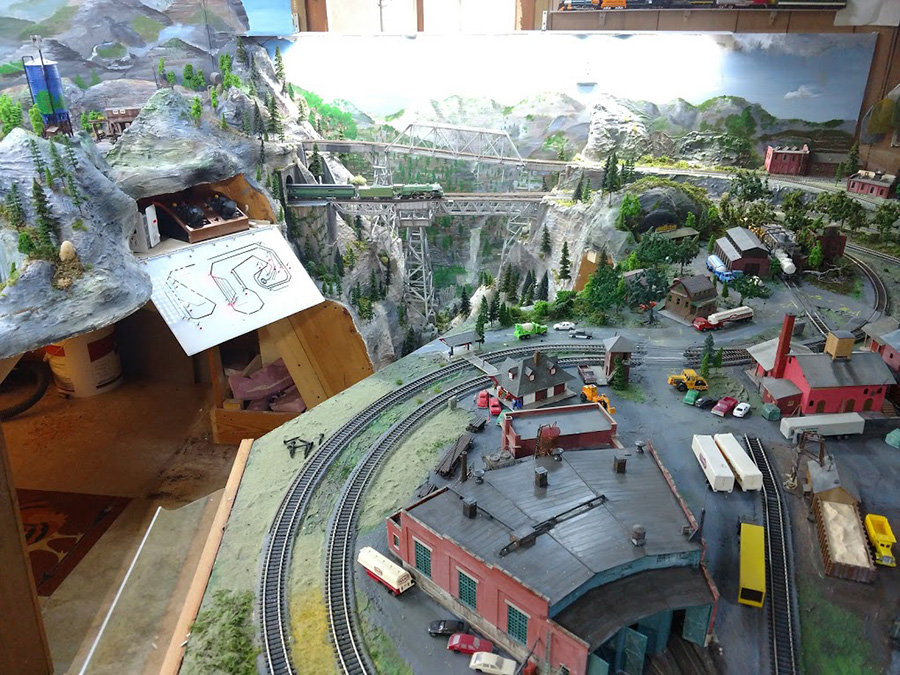
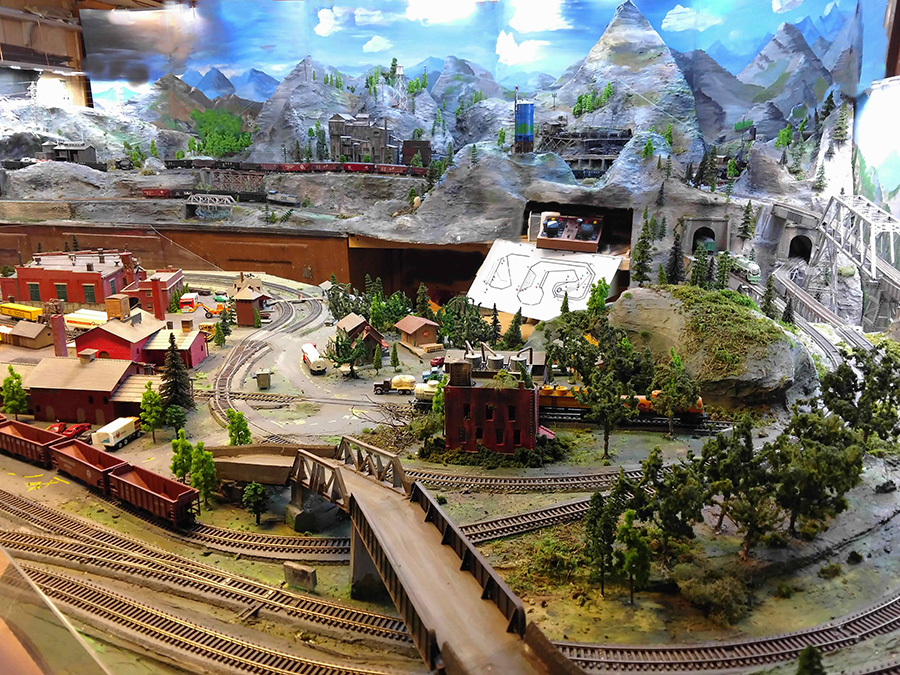
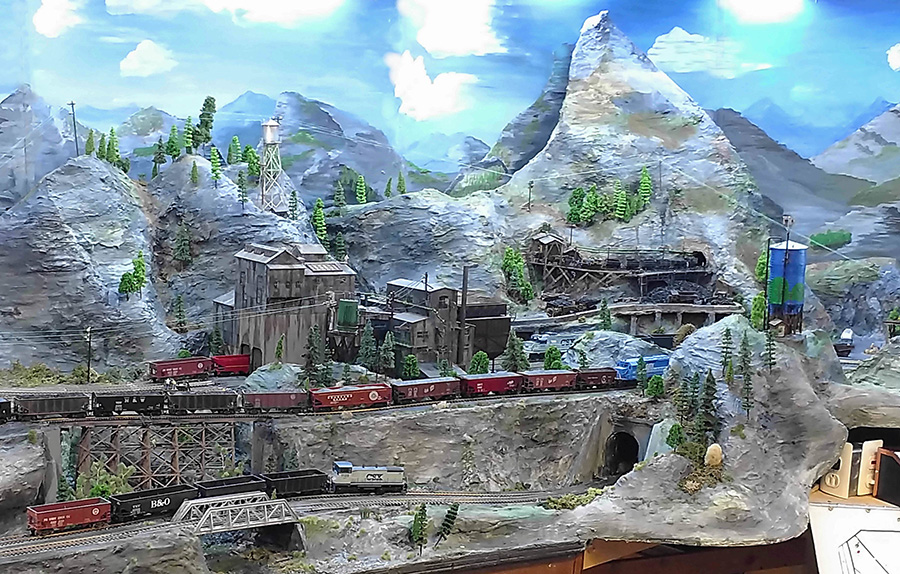
Lastly for this note is that I’ve nearly finished the backdrops for the mine section of the layout. I bought light, nearly white yellow colored “mat” cardboard that is used to cut out for the framing of artwork and pictures under the glass, most I used are 32” X 40”. They are very smooth and quite ridged, and take the acrylic paint I use well. I found some plastic joining trim used for thin plastic sheeting, like is used on a bathtub surrounding wall, we call it FRP – fiberglass reinforced panels, and the trim fits the card stock pretty well. I chose the card stock because as can be seen in the picture “behind the scenes” the card stock is bent to follow the mountains. I think the backdrops came out pretty good, they were fun to do as well!
As always, thanks Al for your hard work on the website, and for all you do.
John From Baltimore”
A huge thanks to John for talking us through wiring your layout for dc control – some very clever stuff going on there. Can’t wait to see it all in action. If you missed John’s last post, it’s here.
That’s all for today folks.
Please do keep ’em coming. And if you’d like to start on your very own layout, the Beginner’s Guide is here.
Best
Al
PS Have you had a look at the latest ebay cheat sheet yet?.
PPS More HO scale train layouts here if that’s your thing.


I would like to have seen the “Roundhouse” setup. The wiring for that is of great interest to me.
Hi John….. great job…..I like the idea of different power sources. I have two DC power sources for my layout ( which is not complete yet); one for my trains and tracks and another for my lighting and scenery. I also have a separate DC power supply for my Tortoise switches. I am thinking of adding a second DC power supply for my tracks and trains. I am going to look into those DC voltage regulators. How did you resolve the polarity for the different DC power sources? Do your trains run through the whole layout or do they just stay within their own block?
Great looking scenery back drop.
It was a pleasure seeing something like this of the “behind the scenes” work efforts of what a model railroader does rather than the old daily routine of viewing “just the layout itself”. Thank You. Keep up the good work.
These few photos clearly do not do justice all John’s work.
Just a note that there is a PC power supply voltage breakout board available on Ebay,
“24/20pin ATX Computer PC Power Supply Breakout Board Adapter Extension Module YG”, for the grand amount of $3.79 (US) with free shipping. Might be a better solution that what John did.
John, Firstly, nice layout!. I love the huge mountains and nice backdrops. One silly question, maybe I missed it in the text, but what scale?
Harry from California
Crazy but I love the mine portion. Keep up the good work
Gary,
My trains will pretty well stay in their blocks. Even in HO scale the space doesn’t lend itself to numerous trains running at the same time. The polarity issue is going to be taken care of where the blocks meet by a diode LED matrix with red on, as an example the right rail and green on the other. If the rail polarity is fidderent, I’ll get a red green across the block, if the same a green green or red red and a train will pass over the block connection without a short or stalling. Still figuring how those will work. My little DC to DC converters are $1.98 in lots of 10, so pretty cheap.
Can you tell me who the AutoReversing Polarity Device is from that youmentioned?
John,
A pleasure to see your layout. Thanks for sharing.
Beautiful layout! Great job! I particularly enjoy the integration of the mountain scenery into the layout. Did you paint it as well?
And how large is the room?
Great mine, great RR. A lot of info including in the comments.
Well John, all I can say is your layout and wiring is super. You have really put in a lot of work and time on it. Thanks so much for sharing.
LED’s need 3 volts DC +or- to produce light and never over max current. Over current or reverse voltage is the main reason LED burn out. Any dc voltage will work just regulate the current 1ma low light max current max light. LEDs are current devices, 12 volts 1K current limit resistor to LED good light, 3 volts 1K low light different current each case. Always use a current limiting resistor to all LEDs regardless of the voltage supply. Use Ohms law to find the right resistor for different power supply voltages.
LED’s are current driven devices. You should never try to drive them with a voltage, look at the datasheet forvthe device. There is usually a plot for current vs voltage. Method: 1. Select the current you want to use to drive the LED with. That results in a voltage that the LED will drop at that current. 2. Select the drive voltage you want to use. I use 5 Volts. 3. Calculate the resistor value. ( (Voltage Power Supply) -(Voltage LED (from data sheet))/(LED current) = (resistor value)
Example data sheet states LED test voltage is 10 ma, and LED will drop 2.2 Volts at that current.
Resistor value is ((5 V – 2.2 V)/10 ma ) = 280 Ohms
Now, THAT is the nicest coal mine I have ever seen. So much planning – and the d e t a i l really speaks of your labor of love. Did you ever operate a mining train? I always thought a clever idea would be to use ORE CARS in N-SCALE to move that upper level set of cars into the mine. And, come out adjacent. just two short 3′ at most to go in. Then an identical train to come out. Maybe use gondolas with miners riding?
You have a lot going on there john .,Love your trestle work. but I think that warren truss bridge is a bit heavy for going over such a high gorge. The open trestle in foreground is more favoring for less added weight.
The locomotives are heavy enough as it is .
John
Your artwork and perception are masterful. Wonderfully done and I hope you get a kick out of running those beauties on those rails. Your planning & execution is what separates the common folk from the Masters so light that artwork up, take some more pics and show them off.
Cant wait to see some more and thanks so much for the work to show us your stuff.
Big Al- Mucho Gracias.
Great work.
I particularly like the use of small adjustable power boards. My wall warts are adding up to a make a lot of clutter.
The slide out tool bench is s great solution to an eternal challenge for more workspace