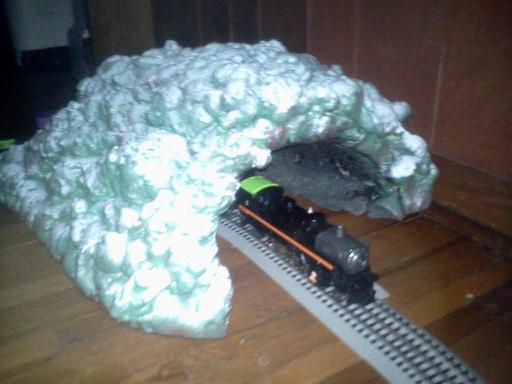
“Not much of an idea but it works well.
Take 2′ piece of 6″ smoke pipe not seamed and bend it out to what may look like a tunnel.
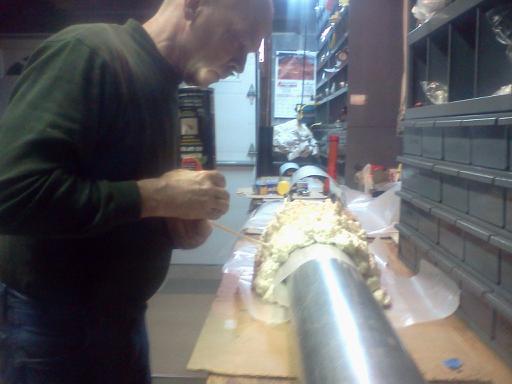
Cover it with wax paper, and wax paper a huge piece of cardboard underneath it and spray foam seal on it in a thin coat or base as i would describe it.
Give it a day to cure it will keep growing for at least 24 hrs.
It will expand right off the mold but thats ok, apply your next can of foam sealant to get the mountain look over the tunnel.
Again this will expand beyond what you may think, but now only on the out side, so prepare your self.
Make sure you give this 48 hours in house temp because it will continue to expand.
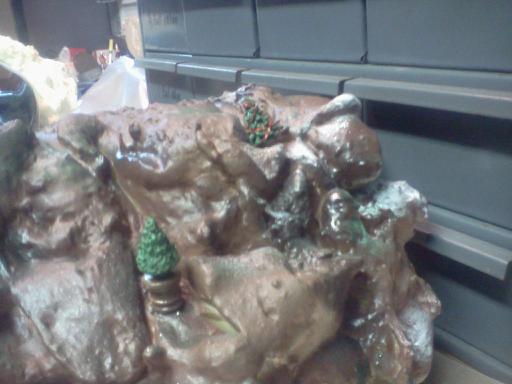
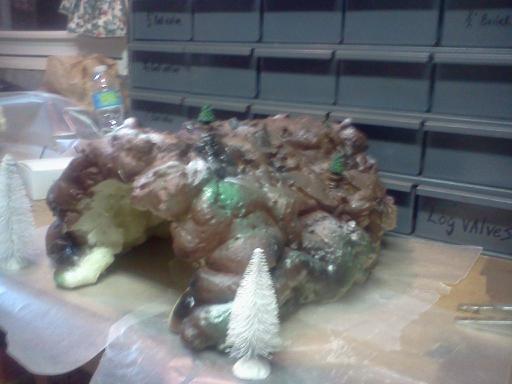
When dry you can take a hole saw bit to trim out the inside of the tunnel then take a huge magic marker, lay it flat on the work table and work it along the base level cutting of at the mark till you get the base level and to height desired.
Brown base paint, green scatter paint looks awesome.
If you want winter look, hold the white spray paint can from above like snow would fall……….its just so easy and so cool.
If you want to do it for HO use 4″ smoke pipe to start.
Keith”
And Tony’s been kind enough to send in these answers (his post is here).
“Hello Al. This is Tony again.
I sent in the pictures of the toothpick trestle. I see you have several people with wiring questions.
I have experience wiring on multiple club layouts as well as the four layouts in my basement.
The most complex of these is a 5000 square foot layout with over 600 blocks.
It has five large yards with a total of eight dispatcher/yardmaster panels and 16 cab control all performed in standard dc.
The information in this how to will work for any scale dc layout. It is diferent for dcc and for ac layouts.
I use fixed 20v power supply for turnout control and four variable voltage power suplies for train control. I will start very basic and hoefuly this helps someone.
The first thing to know is a block is an elrictical isolation of one section of track from the rest of the layout.
For relism of operation i ussualy break these on both legs of every turnout and occasionaly on long straight runs of track. When you break a block you only need to cut through one rail. I leave one rail completely uncut all the way around the layout.
The other rail I break up for blocks. This changes when I get to ocupancy detection.
Track work is really important. I operate trains with an average length of seventy to eighty cars but on ocasion I go over one hundred.
The longest I have run was one hudred thirty-five with four engines and two pushing helpers.
I lay my turnouts first and work from there out to ensure the track lines up perfecly.
I use flex track and on the loose rail I cut half of the first one out. This alows me to slide the loose rail of the second piece in and ensures that my joints are never right beside each othe. I then go through and solder every other joint on both rails every solder joint gets a wire soldered to it for track power.
I then go through and make my block cuts. I drop black wires on the “inside” rail and red on the “outside”. It is importantthat these are the same all the around the layout.
Next is conecting into power. I run one wire from each power supply including the twenty volt dc supply to a bus bar. The other wire from each variable power supply will go to a single pull double throw toggle. Then from the toggle to the outside rail of the block. The inside rail will tie entirely back to the bus bar all the way around.
The next time I will share wiring the turnouts in and discuss reverse loops!!!!!
I have pictures I will send you to go with this but I still have some editing to do.
Thank you,
Tony”
Big thanks to Tony!
That’s all for today folks.
Please do keep ’em coming.
Don’t forget, the Beginner’s Guide is here if you wan to roll your sleeves up and have a go.
Best
Al
PS Latest ebay cheat sheet is here. Still updated daily.


This is one of the best ideas I have seen. The foam creates a natural surface and can be used for several plans. Great job Keith. Keep them coming. Brian
looks great. sounds fun. what is smoke pipe? when the tunnel/mt is completed, is the pipe still in it of do you remove it when the foam is completely hard?
It would be nice if Tony can provide a schematic of what he is explaining here. It’s difficult for a non-electrically-minded person like me follow what he is saying. I can understand something better graphically.
Thanks.
Thanks for sharing Tony, I always break/insulate both rails for each block separation. Either method works. I run the feed wires it all the way back to a double pole double throw center off block control switch and run both positive and negative control wires to each switch. I feel this allows for better DCC circuit breaker protection and block detection. I also feel it is necessary for DC operation when reversing one transformer and not the other. I also like to use a third old big amp transformer to run my lights. It gives me a dimmer feature which allows grain of wheat bulbs to run cooler and last longer. LED bulbs work well too as most operate from 5 to 12 volts.
very nice tunnel
Keith, I want to thank yo for this idea it is a great idea and I will use this, again, thanks this is a really good idea.
Great tunnel idea! I also would like schematics from Tony as iyt sounds great.
Great job on tunnel now I want to try it. Don’t understand elect but that is me not you.
Great minds think alike. I model in HO scale, and used a piece of 3″ flexible plastic drain pipe. I cut the ends off, and bent it to the curve shape I needed. I also used the spray foam. What’s nice about this, is the foam doesn’t stick to the plastic. After the foam is set, just twist out the pipe. It leaves a nice molded shape inside the tunnel as well. You can use EZ-track to insert into the tunnel since EZ-track snaps together, and the connection is more reliable.
Enjoy!
Nice tip on the foam. That product has had lots of improvements along the way, as sometimes it damaged windows because it expanded too much. Don’t ask me how I know that. So now there are several types with varied expansion rates.
Mn Dan
If you really want to mold use rubber Gloves while it forming and you can shape . I used Instapack . put veg oil on your gloves and it does not stick..
Great stuff Tony!!!! The only complication with “When you break a block you only need to cut through one rail. I leave one rail completely uncut all the way around the layout. ” is when there are reversing sections and you want smooth [DC] train operation without continually flipping switches. For example my tiny layout (under 50 square feet – but nScale) has 5 distinct reversing sections (i.e. polarity of track at one end of the block is the opposite at the other),,, Fortunately I switched to DCC and some electronics, so now I can just “throttle through”
Both useful sets of information.
On the use of foam, I too have done this and will do so in the future as it can be extremely useful in other aspects of secure hills and mountains in ‘awkward’ places.
I would have never thought of that, good idea!!!!!! I have some of that foam I am going to try it. KUDOS!!!!!!!!!!!!!!!!!!
Have used this stuff, works great! Can do anything with it, carve it to make it look rocky.