We’re starting with Ken today who had made good use of some model train risers to make sure his incline will not be too steep:
“Hi Alastair,
Greetings to you and all your readers.
I have been reading your blog regularly and always look forward to what everyone has to say.
I have seen so many good ideas along the way that I will be using on my layout.
I started a new layout in December of and have been making slow progress. I thought I would send a few pictures and maybe get some comments from some of your good readers.
The layout will be mountainous with tunnels and bridges.
It is of no particular place only to say that it is a fictitious town in the northern mountains of Pennsylvania USA because we have a cabin there.
The railroad used to run behind our cabin and one could hear the triple diesels coming from a long way off as they pulled a long line of coal cars up the incline.
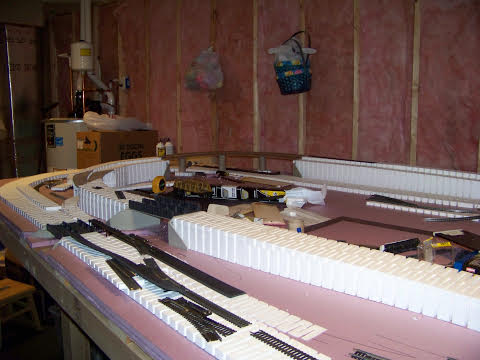
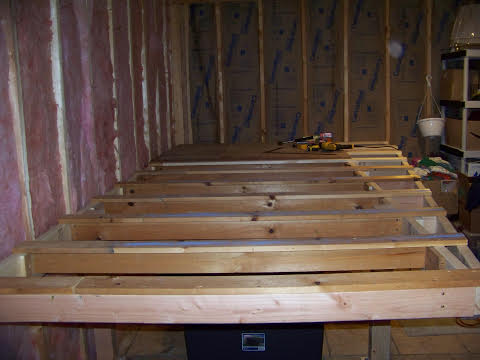
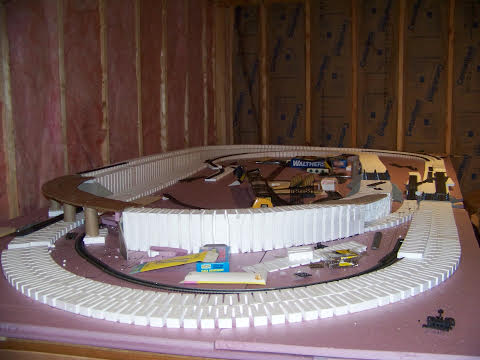
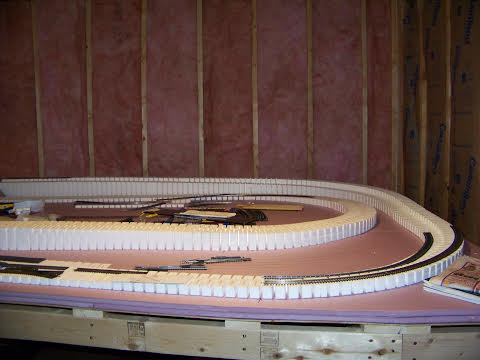
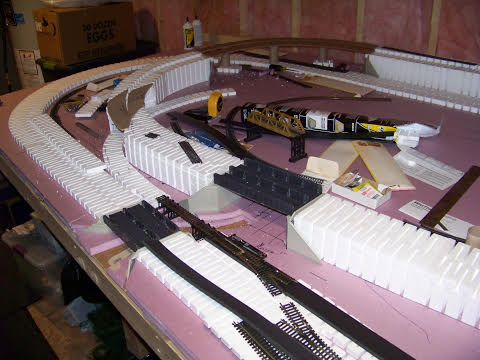
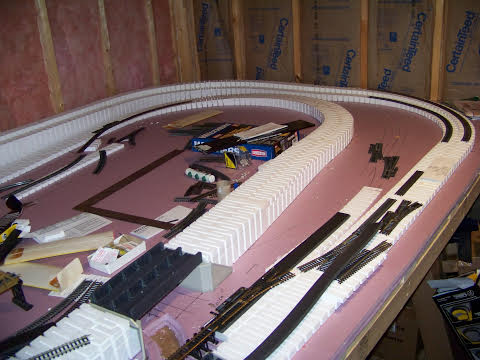
Below are some pictures of the progress. The first picture is of the bench work.
The rest of the pictures are of the sub terrain and bridges. The template for the curved bridge is laid in place to give an idea of what it might look like.
Keep in mind that mountains and tunnels will follow after track is laid.
Ken from Pa USA”
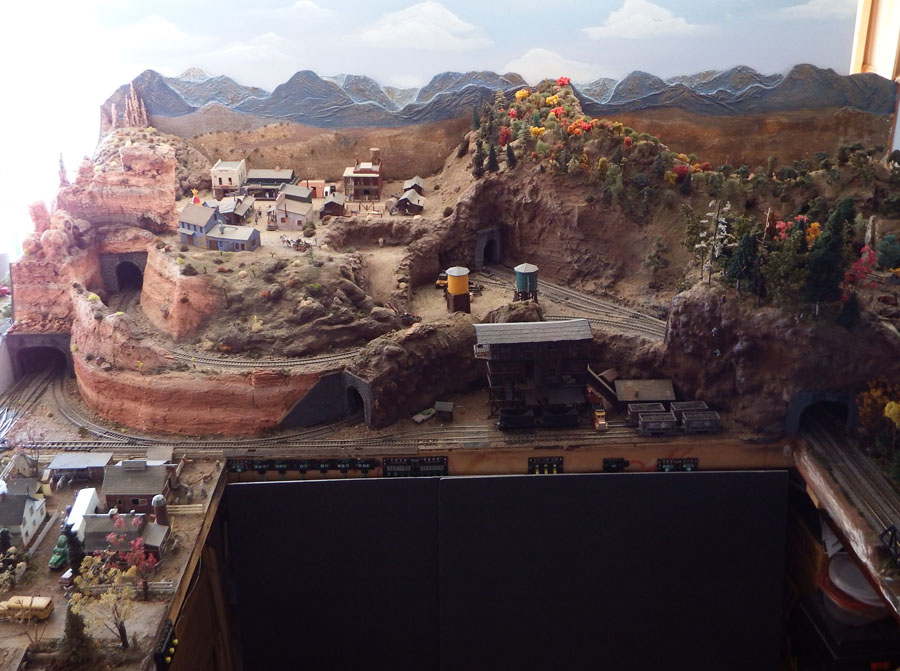
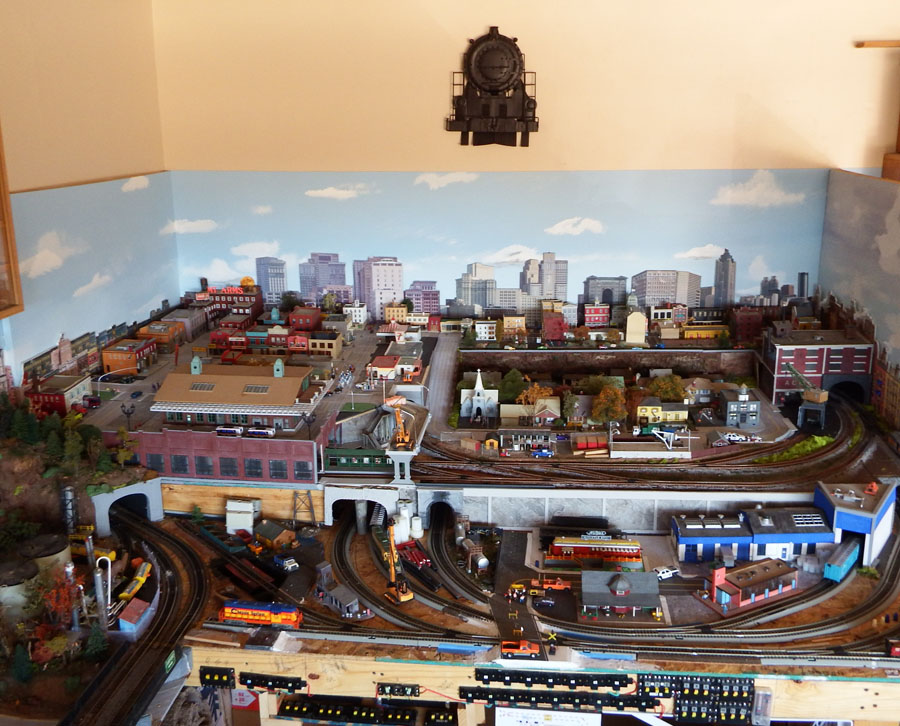
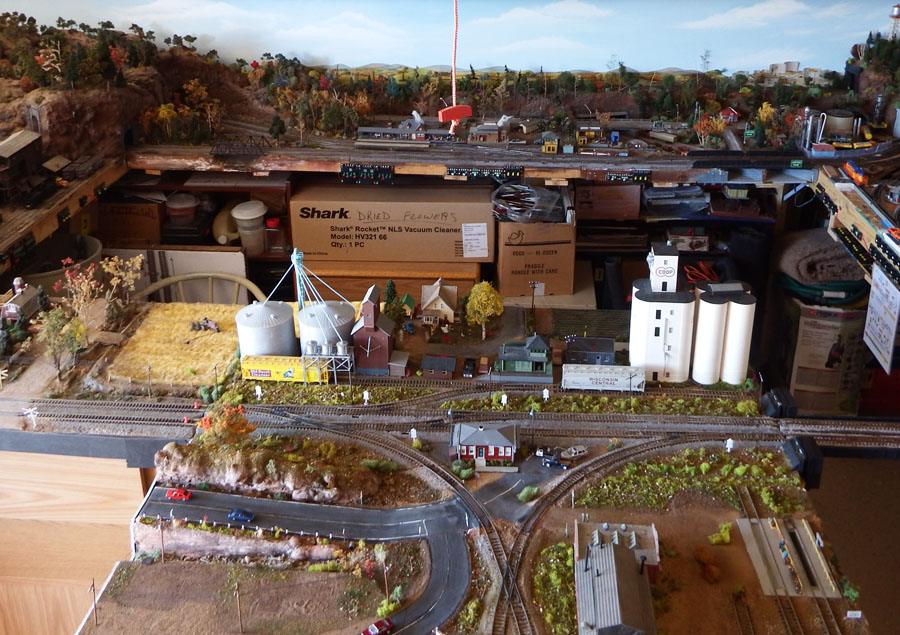
“I am a modeler in Arizona, USA .
My layout is based on running two trains in opposite directions at once, but I can run multiple trains because of the block system that I have built in. Each section (4×8) or modules have their own transformers and power supplies, so I can stop and start trains on different parts of the layout.
The layout isn’t for any specific time period, location or railroad, but I like BNSF locomotives and have older and newer diesels running at the same time.
I enjoy building scenery and try to have interesting scenes in different locations such as a traffic accident, old west town, fishermen and bird watchers and a parade down main street.
I will sent more detailed photos of different locations and scenes when I photograph them or pick them out of my collection of pictures.
Bob”

A big thanks to Bob and to Ken for sharing how he’s using his model train risers.
Two things stuck out for me: Ken’s layout shows in spades it’s all about making a start.
Slow progress is no barrier at all – tinkering and pottering is half the fun, as Bob shows, just enjoy it.
That’s all today – but don’t forget the Beginner’s Guide if your starting to feel left out.
Best
Al
PS Latest ebay cheat sheet is here.


Bob – Great layout! So many tunnels! I see a lot of comments here about making such things removable, so if there is ever a problem inside the tunnel, the trains can be retrieved and the problem fixed. Do you ever have any such issues? Are these tunnels removable? Thanks for sharing.
I truly enjoyed the pictures. They show a lot of thought and planning and artistry. Thanks for sharing, gentlemen. Cheers! NJ Mark
Ken- Great layout. Can’t wait to see it with the terrain built. I would make one recommendation though that you cover the pink fiberglass insulation with plastic. The fibers will constantly be raining down on your layout being a constant source of dust. Its not good to breathe that stuff all the time either. The wall with the brown paper side out is OK.
Bob- love the layout, lots going on.
Bob from NY
Love these layouts, when I lived in Manhattan, I created a layout that I could pull to the ceiling to avoid clutter. I used marklin from Germany – I had a TEE set for the outer ring!
Very nice good work, just a question is the white styrofoam? Where did you get it?, also where did you get the background. You can probably tell I am a newly to all this.
Ken, one mention suggests installing plastic over the wall batts. That’s a necessity. You could also consider using landscape fabrics. Readily available from HomeDepot and others in four foot widths and lengths up to over 100 feet. Just use a heavy stapler and fold edges, or overlap, and staple. A friend did this to his basement ceiling and it works very well. I’ll use the heavier type and black color. Anything to keep all the glass dust and fibers at bay.
I have to do same on ceiling in unfinished basement room in our new home.
Yep, means new layout.
Bob, Very nice and appears to be a fun layout.
Bruce in SC USA
Hello, Ken, it’s a great looking start! You’re a lot further along than I am. I have the same question about the Styrofoam. Are there sources for it in various thicknesses, and where did you find it? Obviously you have modified it for your layout. Keep up the great work! Warren in Alabama, modeling the L&N steam era and still restoring old steam locomotives instead of laying track like I should be.
I also wondered where you got the white styrofoam material for grading etc. Looks like something I’d like to use!
Many thanks to Bob and Ken for great inspirational layouts. And thank you Al for keeping the posts coming as they are what jump started me to begin planning my layout last year and build start last month.
Cary B
Installing plastic sheeting over insulation may solve the problem of dust and fibers; but create another worse one. It will all depend on each particular situation and with not be a one answer fits all. If there is a heated area on the other side, water vapor may pass through and if the pink side is an unheated area, the vapor may condense and water will run down inside the plastic. We don’t want to even get into the problems that will cause. Bruce (previous comment above) suggested landscape fabric. That will breath. If you don’t want the black, you may go with tyvek house wrap which is a shade of white. Since tyvek is a trade name, will probably be called same in the UK, but since we use different terminology, may be referred by different term.
Tom USA
To the person who asked about the white styrofoam materials for grades… I’m fairly certain that material is from Woodland Scenics “Sub Terrain” system… they have a video on YouTube on how to use it…
I suggest a vapor barrier and dri-wall over the framing. Paint it sky blue, add some background scenery. It will keep the area clean, insulated and help with sound. Shouldn’t cost that much to do. You can even use 3/8″ thick.
You can even decorate the train room with posters and other printed stuff.
It will be more difficult to do that later after the layout is fully built.
The rear wall of my layout room is painted cement block. I now wish that I had framed, insulated and installed dry-wall.
Jim NJ/USA
Thanks for all the kind comments and suggestions. For those who asked, the white Styrofoam comes from woodland scenic. It is there subterrain road bed. It comes in various thickness for risers and also comes in 2, 3 and 4 % grading. It will be covered with plaster clothe before installing road bed.
Bob, what a great layout. I can only hope mine will look half as good when landscaped.
OK, I do not know what is on the other side of Ken’s wall, however I would not use plastic for any thing. Tyvek and landscape things will work. I would stop, move the layout table, put ( looks to me like 16″ oc framing) any thickness of dry-wall material on it, at least on the walls. As far as the ceiling, well can’t see that in the picture so if not dry-walled, use 5/8″ dry-wall. Do it ONCE, DO it CORRECT. This is just IMHO, only been in the trades for 40 odd years.
NV Bob
As someone else mentioned…
The white styrofoam is in fact Woodland Scenics and is part of their “Sub-Terrain” system…. The grades are available in several different percentages and can be a great help….
It is the “zig-zag” pattern that is the “give away” makes it very flexible…
John CA USA
Looks good Ken keep up the great work
Before you go any further, I agree with the above comment about putting plastic on the walls. It’s called a “Vapor Barrier”. Then I would drywall over that and either do your own background painting or buy on of the many available.
ALSO, in case there is a track issue or other problem, make your layout moveable so you can get in behind it to fix problems you can’t reach or are covered by scenery. make the back of the scenery open.
DO NOT attach it permanently to the wall! I placed 2 “anchor bolts” in the wall that stick out 2 ½” with nuts to secure the layout but are easily removed to move it.
I would suggest putting casters on the legs so it rolls out easily for maintenance.
Looks Great!!
Ken, a great start with lots of promising activity. Bob, truly a wonderful job. It looks like your background mountains are layers of boards. I have not noticed that before and it does give a nice look of relief or depth. As Al’s partner in crime, Crazy John the carboard builder king says, “relief, relief, relief”!
Well done. Ken, could those engines been from the D&H. They ran a lot of coal in the NE PA mountains.
MN Dan
Ken, I agree with other comments that you should cover all that exposed pink insulation ASAP. Several people have suggested making the layout more portable with casters on the legs and not affixing it to the walls.
The way I handled this for my practice layout was with 4″ door hinges attached to the layout frame and to a 1×4 board screwed horizontally into the wall behind the layout. The hinges allow me to tilt the whole layout up at an angle to get underneath it for wiring, etc. I also put casters on the legs so I can pull the hinge pins and roll the whole 4×8 layout away from the wall.
Bob, Very nice layout! I especially like your western town in amongst the mountains. My only other observation is that the closed in city part of the layout in the third photo looks like it would be hard to reach a derailed train unless you have a lift-out section somewhere in that section of the layout. It looks like a fun layout to operate.
Looks pretty neat.!!!!!!!!!!!